Make your own Wooden Screws - The Threadbox & Tap
I’m tall and my bench is low. The first time I saw a moxon vice, I wanted one. I finally built one and my back has thanked me for it, and its all thanks to my thread boxes.
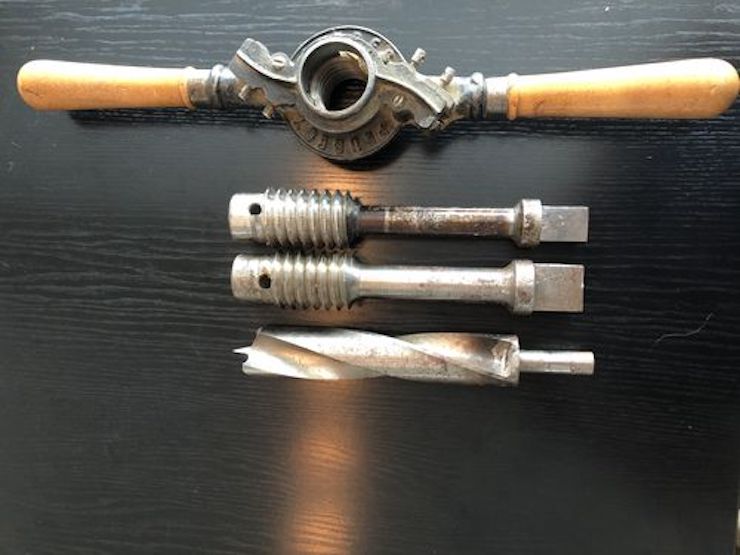
The threadbox and tap is the eqiuvalent of the die and tap for threading metal rods. The thread box takes in a dowel and cuts the thread on to it, making a wooden screw. The tap goes into a pre-drilled hole and cuts the threads, making the mating part, the equivalent of a bolt.
I’ll be going on holiday soon, so I’ve decided to make a mini moxon vice so I can practice my dovetailing while I’m away. Two clamps and any table will become my woodworking bench. But as I got ready to make the screws, I remembered a lot of the pain I’ve gone through with these tools in the past, and decided to put them down here to helpfully save others some aggravation.
Thread boxes are not just for making a moxon. If you want to make your own clamps, vices, nut crackers, presses, plough planes or marking gauges, these are handy tools to have around.
Modern thread boxes seem to only come in two forms. Mass produced and relatively cheap, available in sizes up to 1 1/2 inches / 6tpi. The stories I have heard about these are very mixed. Sometimes they seem to work well, sometimes the cutters are poor and fall apart. Some report the taps and threadboxes being mismatched. They seem like a bit of a dice roll. Other users seem perfectly happy with them. They are affordable, so perhaps you might like to take a chance. The alternative are very high quality german made thread boxes. Available in sizes from 3/8 of an inch to 2 1/2 inches. The price on these goes from €165 for the smallest, to gulp €1216 for the 2 1/2 inch model. Unless you are planning on producing a large number of wooden screws. Probably best not to go for these.
The last option is to buy vintage threadboxes and taps. This is possibly even more of a gamble than buying cheap but new. The cutter is unlikely to be sharp. The parts of the body that hold the cutter may be worn and require shimming. The internal threads may be too worn to work effectively. Here is my guide for what to look out for, and how to try and rehab a vintage threadbox.
-
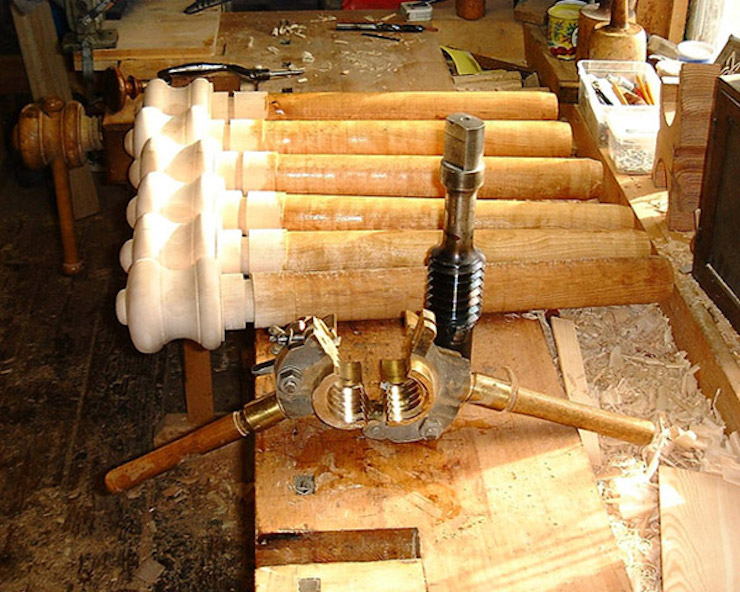
Think about where you are going to get your dowel stock to make your screws. You can make your own with a rounding plane. Buying pre-made dowels is far from ideal. You want the grain in your dowels to be as straight as possible. The dowels in your local home center are unlikely to work well. Either be prepared to sort through them looking for very straight grain, or make a plan to create your own. I used a stail engine to make mine. The diameter does not need to be too exact. A little bit of unevenness is not going to affect the functionality of the screw that much. If you have a lathe and know how to use it, happy days.
-
If possible use dowels that are a tiny bit undersized. Makes it easier to run them through.
-
Hard wood works a lot better than soft wood. I’ve successfully made screws out of pine, but your cutter needs to be ultra sharp. Hard maple has made the best screws for me, but your cutter needs to be in good shape to cope with it.
-
Bevel the end of your dowel slightly (A Spoke Pointer is a great tool to have for this). It makes starting the cut and centering the dowel easier.
-
I’ve had mixed results soaking the dowels in oil before cutting. It seems to depend on the wood. On some its turns the wood to mush, and your cutter tears away great big clumps. On others it softens a very tough wood and makes a hard job easier. My advice would be to try without soaking, and then try with soaking. I do however, always lightly oil the dowel with white spirits before starting. Its seems to help a lot.
-
Find a solid way to hold the tap. For the larger size taps, a big enough tap wrench can be hard to find. You want some kind of t-handle set up, or with larger taps it will be very challenging to keep the tap vertical.
-
If your theadbox seems to be cutting at about half the tpi you expect, then the cutter is misaligned, or the internal threads are very worn. You can check the cutter alignment by inserting the tap into the bottom of your threadbox and slowly and carefully backing it up into the threadbox (slow and careful, you don’t want to damage it, going in from the bottom prevents a mistake destroying the existing threads). When the tap gets to the cutter you can look inside and see how closely it is aligned to the geometry of the tap and then adjust its position to match. If the internal threads are worn, Its never going to be a great threadbox, but you can sometimes compensate by applying heavy pressure down as you start until you get to intact threads.
-
You probably want some sort of handle at the end of your screw. Once you have cut the majority of the screw, the threadbox is going to get in the way of you bring the thread all the way to the handle. Back the box off and take it apart. You only need the top half to cut threads, the bottom half serves as a guide. Carefully thread the top half back on, and now you should be able to thread all hte way down to where you handle begins.
-
When drilling a hole to tap to receive the screw , you want the diameter of the hole to be the same as the inner diameter to the tap. If you make it much smaller than that, you will have a very hard time getting the tap to start.
-
Some vintages thread boxes have built in T handles. For larger sizes that don’t feature this. I’ve found a bar clamp attached to the body length wise makes a good alternative.
-
Get the cutter good and sharp. I’ve had my best success treating it like a v-tool. Here is Mary May’s guide to sharpening them. https://www.youtube.com/watch?v=3Y4Cfsfhobs . If you cant make a clean cut cross grain with the cutter, its not sharp enough.
-
When tapping, chamfer the edges of both ends of the hole before beginning, otherwise the tap tends to tear out the edges of the hole.
-
If working with smaller sizes (5/8 and down), if the box begins to jam, back up. You can easily twist and tear the dowel at these sizes, and if it does that inside the threadbox, particularly with softer woods, its going to be a nightmare to get out. You may have to drill through the center and then pick the remainder out with an awl, followed by cleaning with the tap. A nightmare job. Better to back the entire screw out, check for debris in the threads, and check the diameter of the dowel.
Happy screwing to all. See below for some pictures of the mini moxon.
Some useful links
The Woodwrights shop on Making a thread box
https://www.pbs.org/video/woodwrights-shop-screw-box-wooden-threads/
Making a bench screw from scratch - Little Forest (This series is the best I have ever seen on the topic)
https://www.youtube.com/watch?v=juSqS8qsyHw
Pask Makes a threadbox and tap https://www.youtube.com/watch?v=mTnVDl6Y6u4
Swedish Student Essay on Screw Making with Thread Boxes - Maria Grönberg
I don’t speak Swedish, and google translate is not much good on this document. The pictures alone are fantastic. If any kind Swedish speaker out there cares to translate I will be forever grateful.
https://gupea.ub.gu.se/bitstream/handle/2077/30068/gupea_2077_30068_1.pdf?sequence=1&isAllowed=y
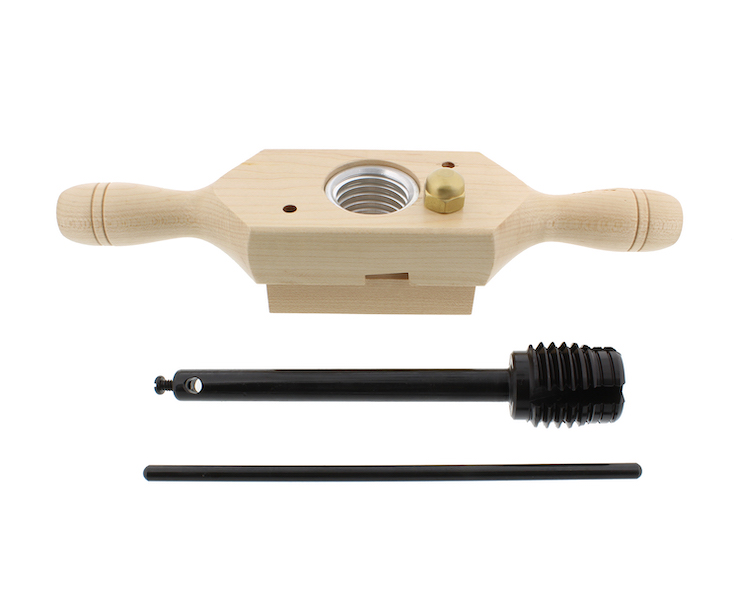
A modern and commonly available wood threading kit. I’ve heard many mixed reviews and don’t own one.
A large thread box from the Dominy workshop at Winterthur. Not the metal lining for the threads, and 2 separate cutters for making very large screws. The first cutter takes a light pass with the second excavating the remainder of the thread.

High quality modern German thread box. These are available from https://www.fine-tools.com
Vintage Peugeot Freres threadbox and tap. I own one in 22mm. The only vintage set I’ve owned that required zero setup, just worked on arrival. Also the only mass produced vintage model that I’m aware of that was cast rather than wooden. As they are French, they come in metric sizes. But that let that put you off, the closest size of imperial dowel stock will usually work. I made very nice threads with this 22mm box using 21mm stock.
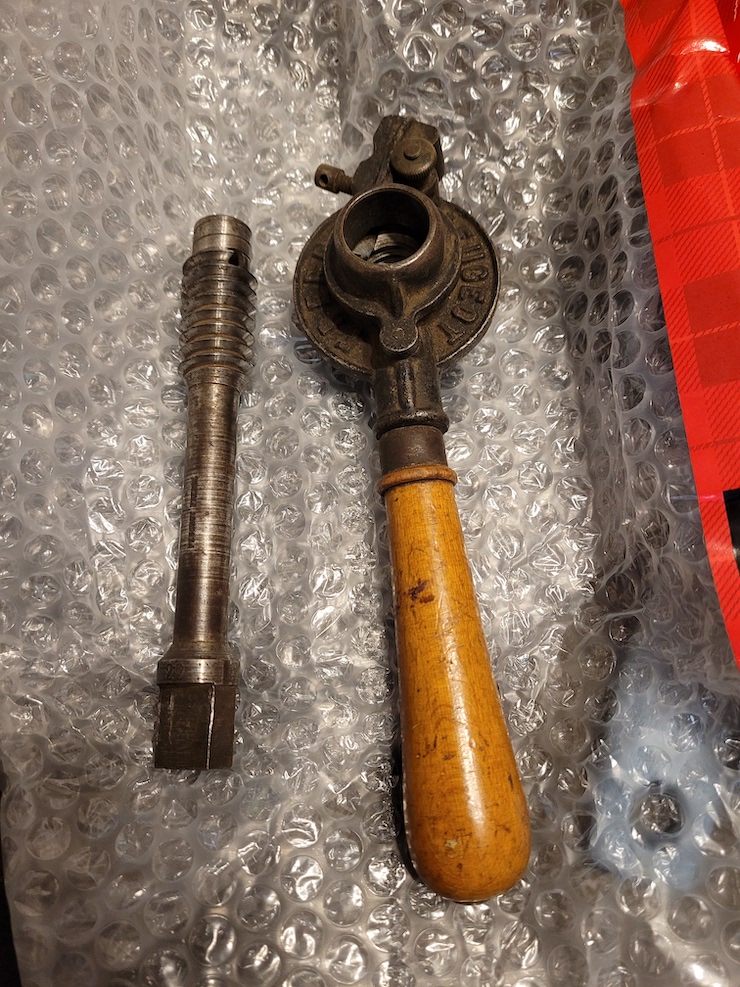
A vintage Sarjent 1 inch threadbox and tap.
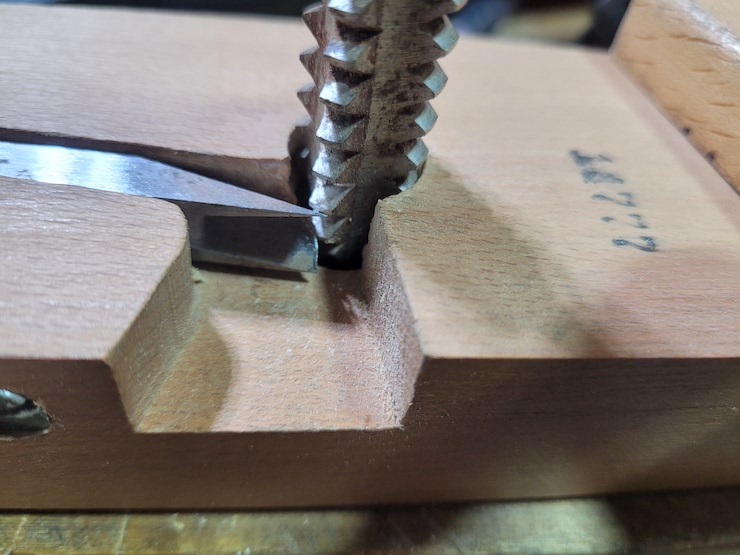
The two screws here are adjusters for the cutter, they raise either end of the cutter allowing its position to be aligned with the threads.
Underneath the cutter are the two screws we just saw, one at each end. This cutter is out on alignment, and its also making way too deep a cut. You can see how far past the thread its extending.
This screw on the side controls the cutting depth. It runs into the end of the cutter.
Original Manual for the Sargent thread box.
Instructions for use. How I wish I could use the order form at the bottom.

Before and after tuning this 5/8 inch box. Alignment had to be fixed, depth of cut reduced. Cutter sharpened and internal threads cleaned out with the tap. It needed the works.
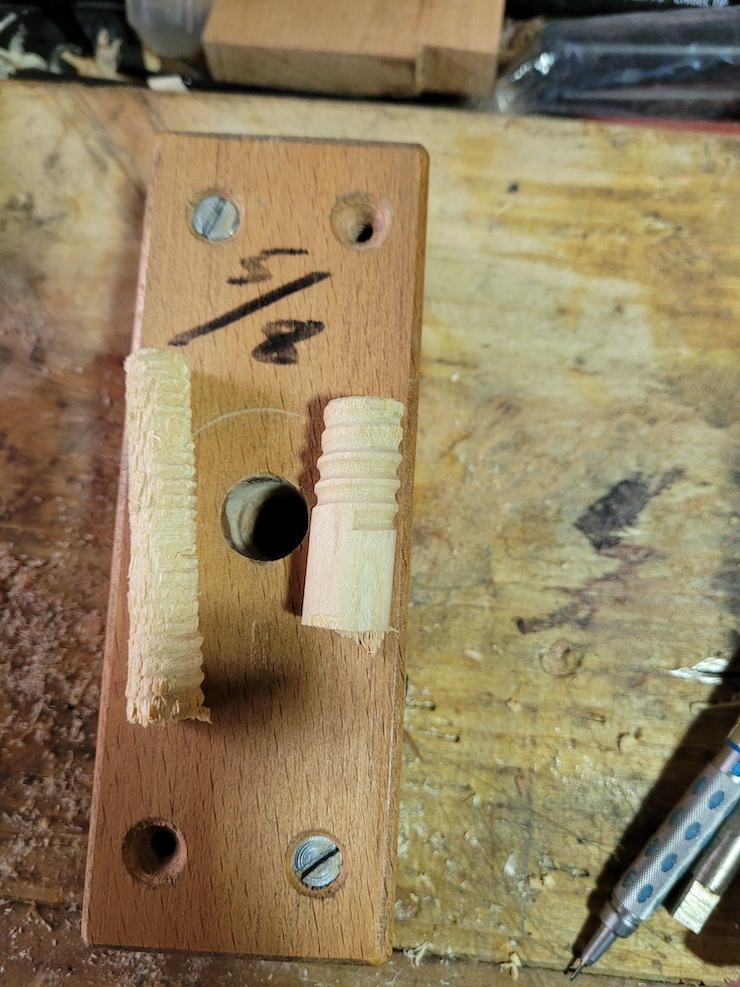
Making dowel with a dowel plate. My least favorite way of making any significant amount. If you use a short dowel, it may be warped when you are done. If I’m going to make a screw, I use a very large dowel so the mallet impact tends not to warp that production end. That said, wooden screws can be well out of straight and still function.
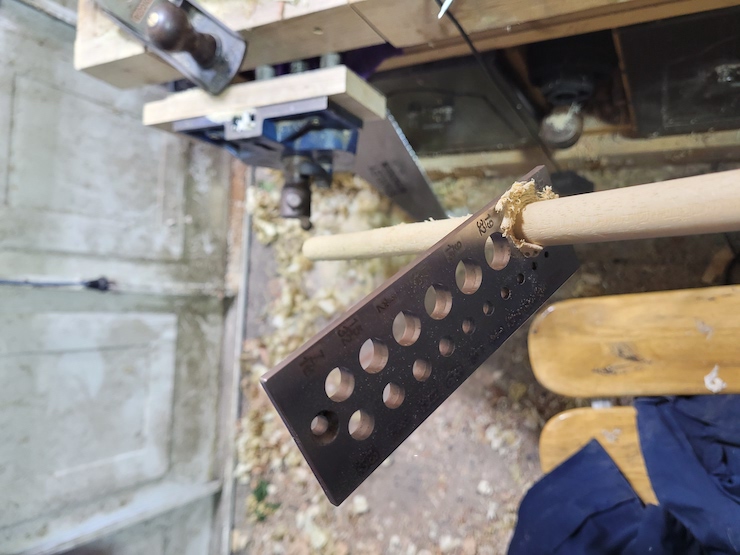
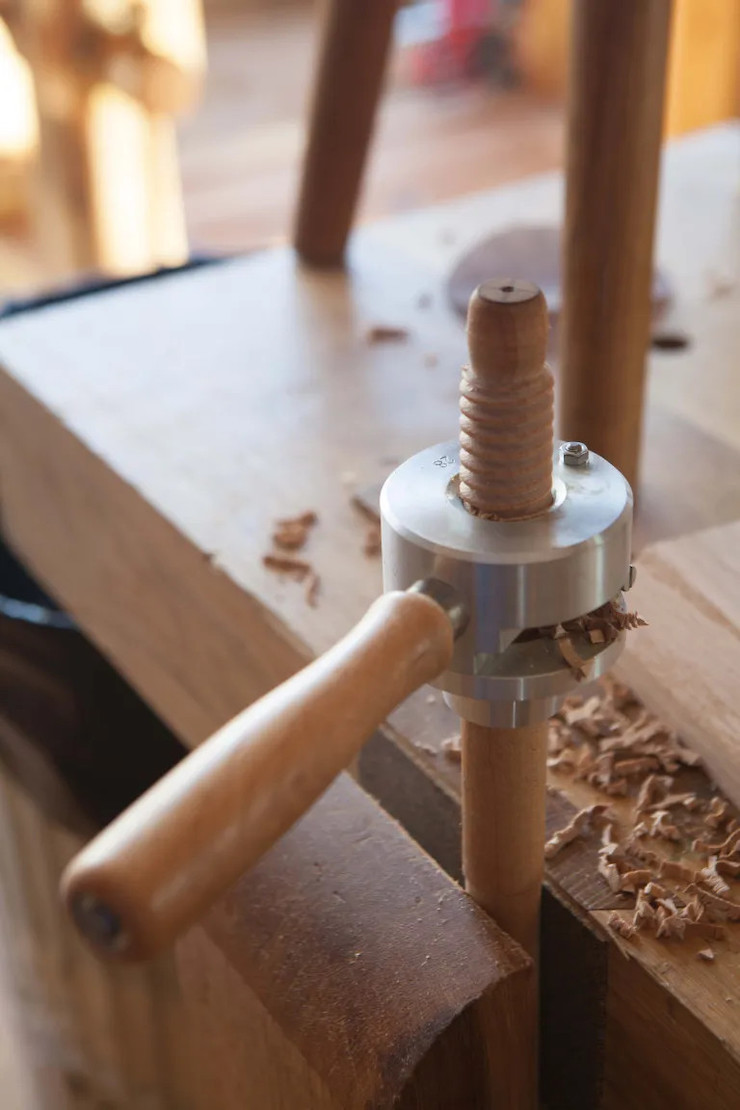
The tap fed into the thread box so I can check the cutter alignment against it. It should just barely contact. You should be able to turn backwards with the tap in.
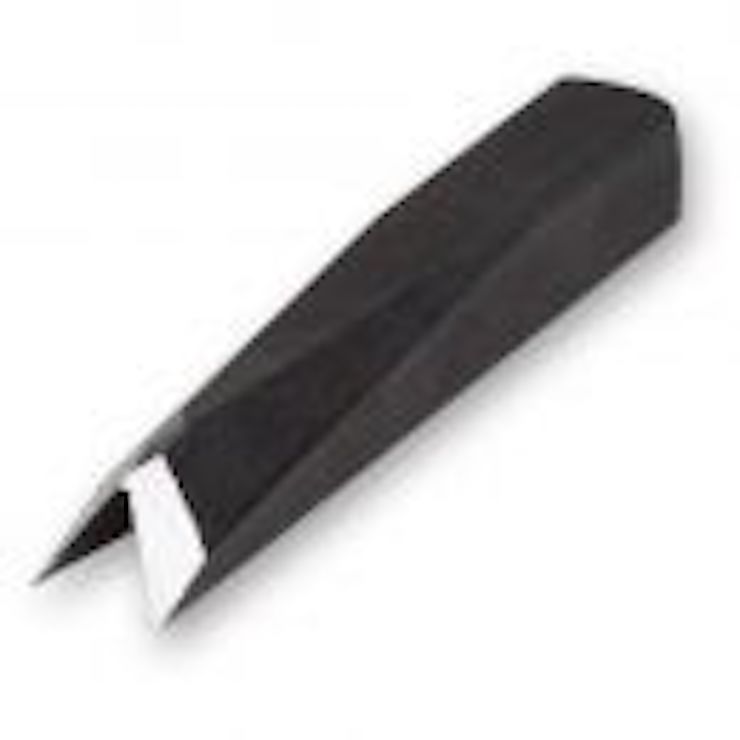
A typical cutter.
The other side, notice the similarity with a v tool.
A large Peugeot thread box. Twin cutters and twin handles.
A massive thread box for making bench vice screws.
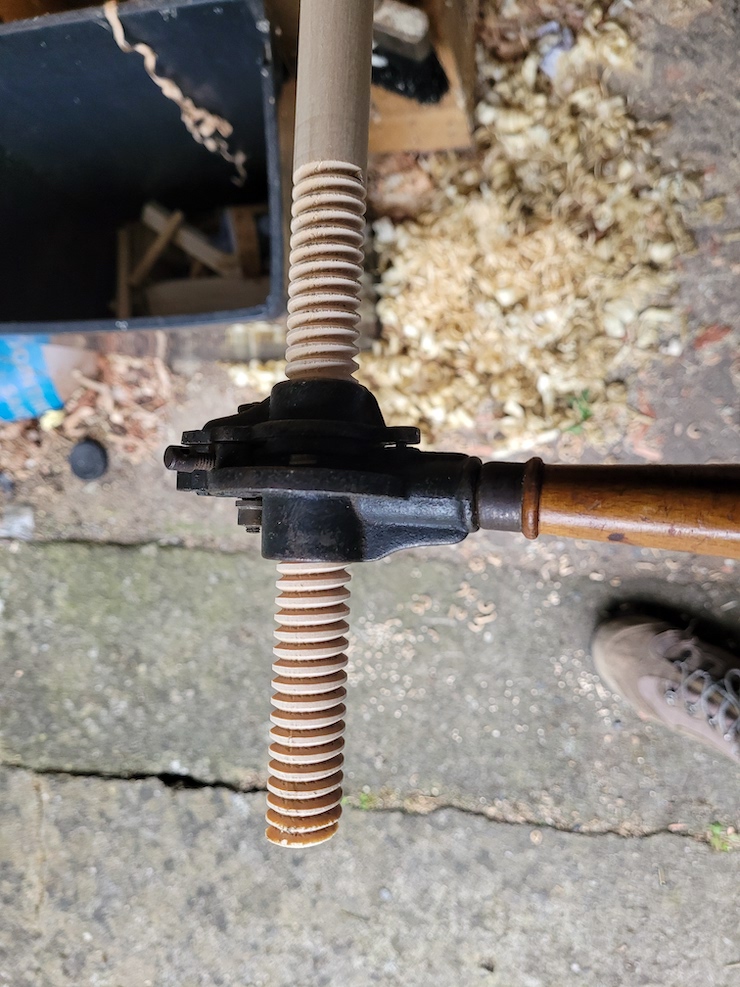
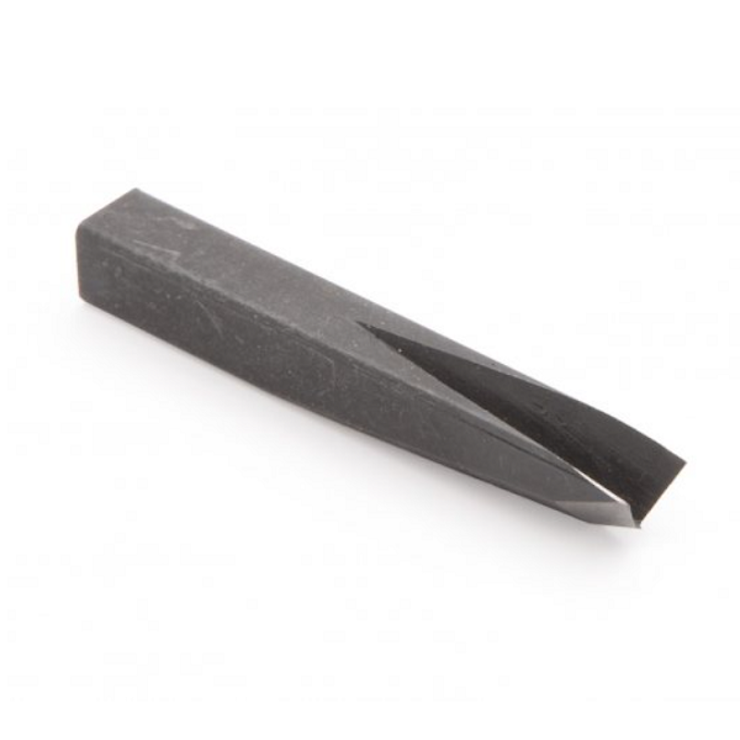
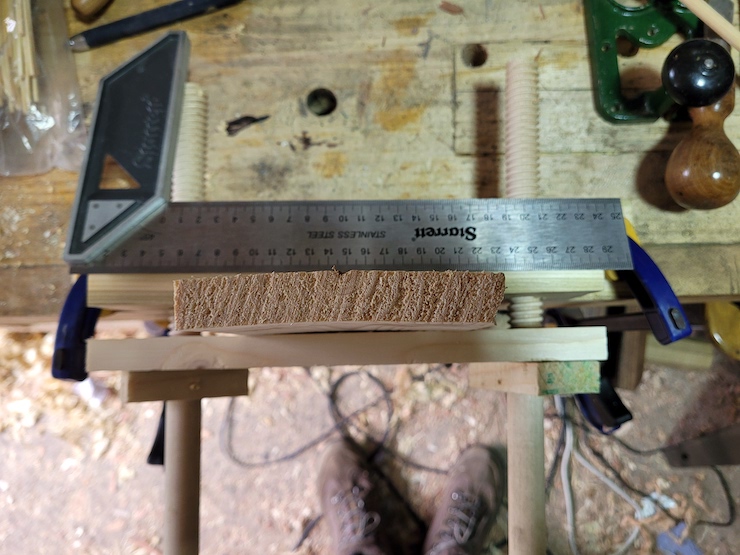
Making 22 mm screws for my mini Moxon. This is in fact home center pine. Its not that you cant make screws with it, its just far more challenging.
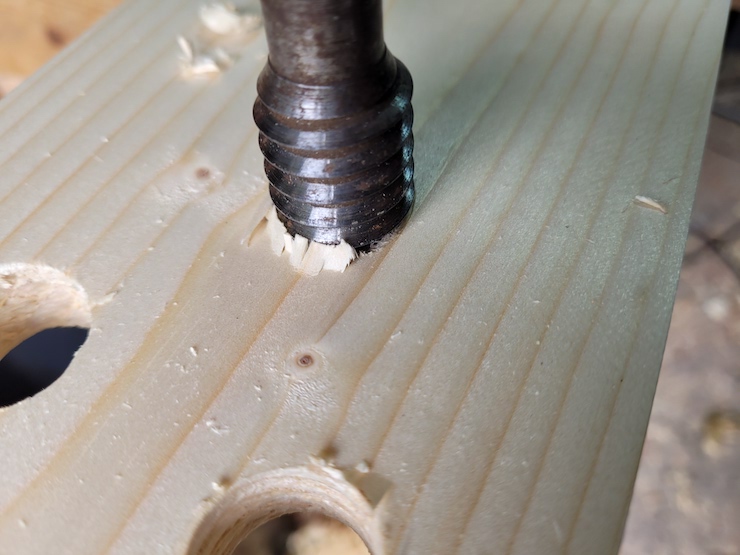
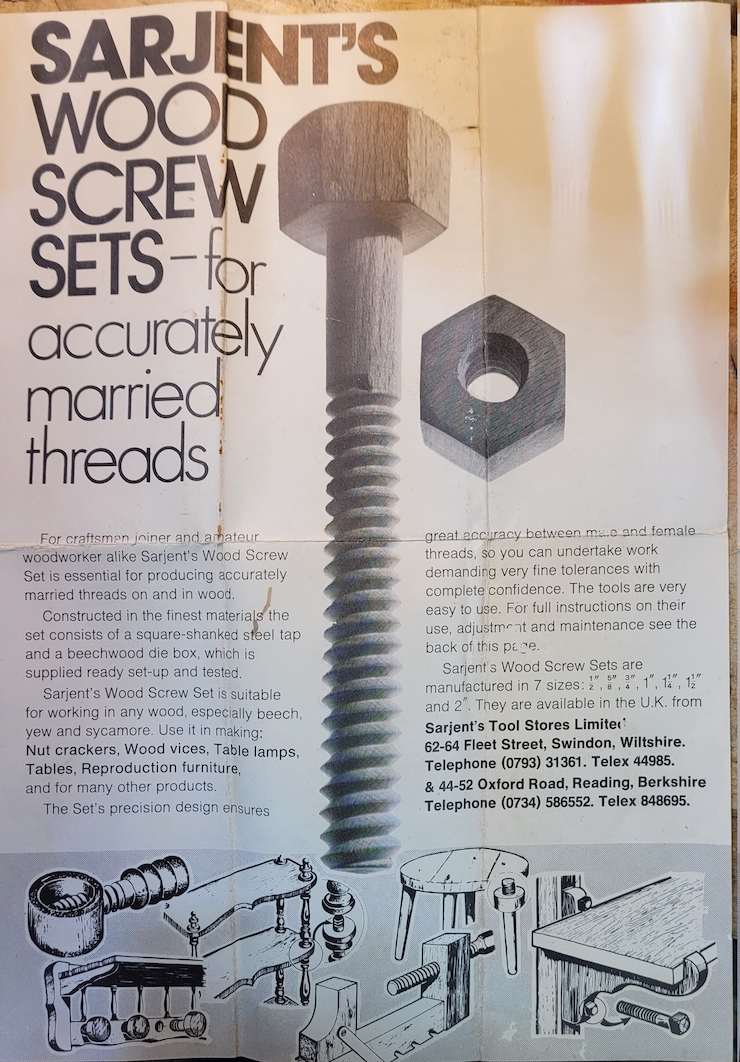
If you try and tap without chamfering the edges of the hole with a file or rap, this is what happens. It tears out.
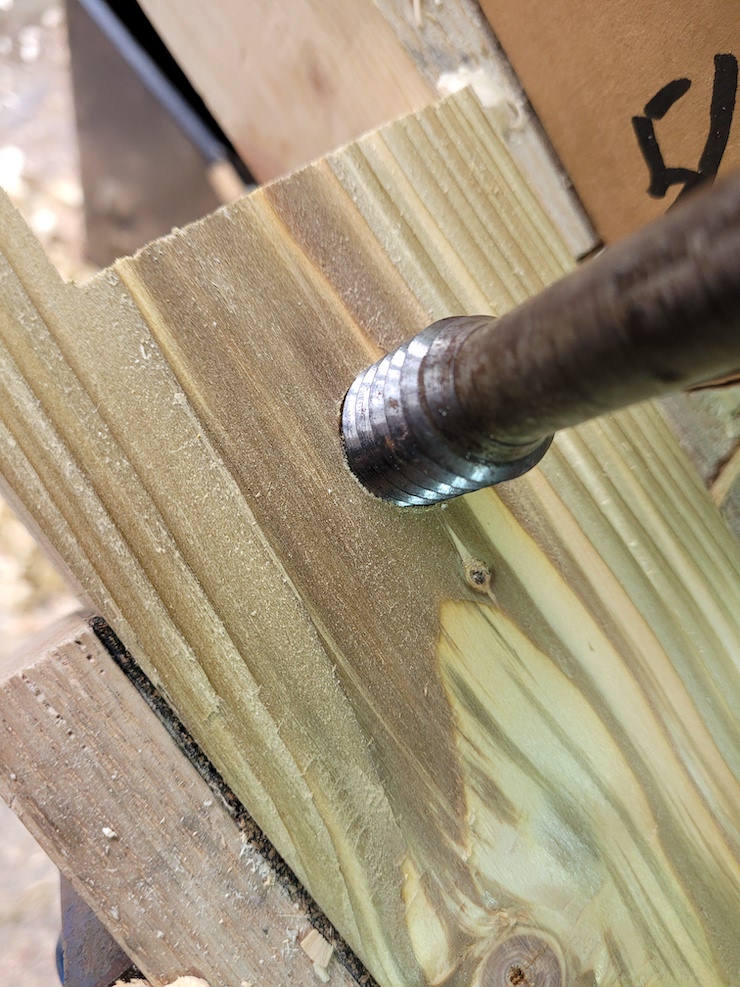
Exactly the same tap, this time with a chamfered hole.
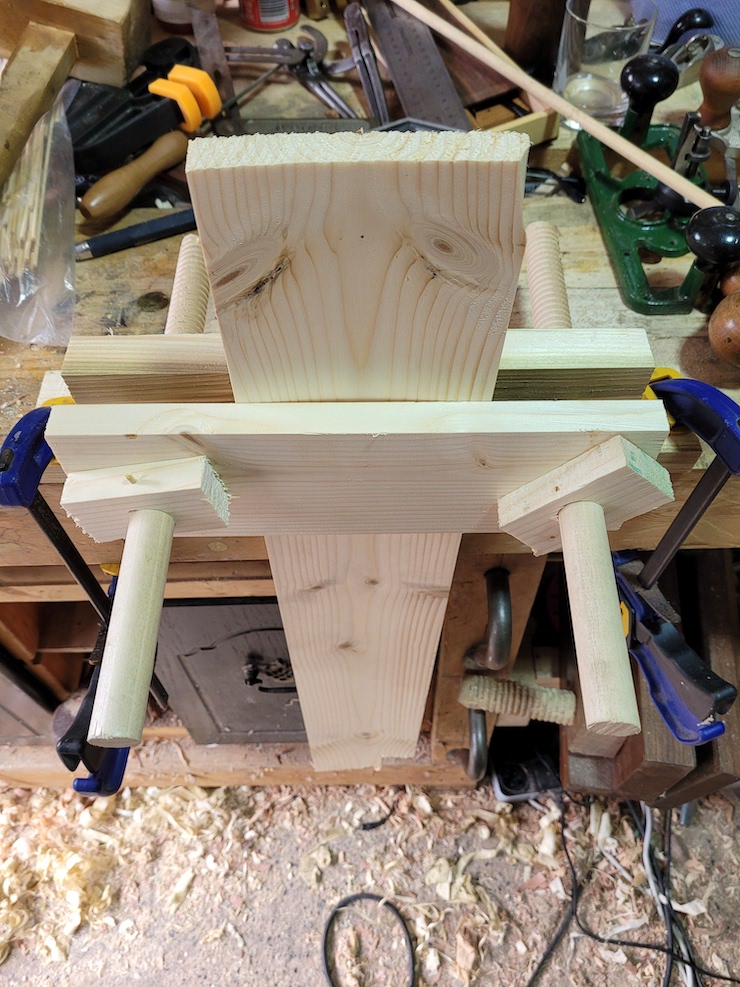
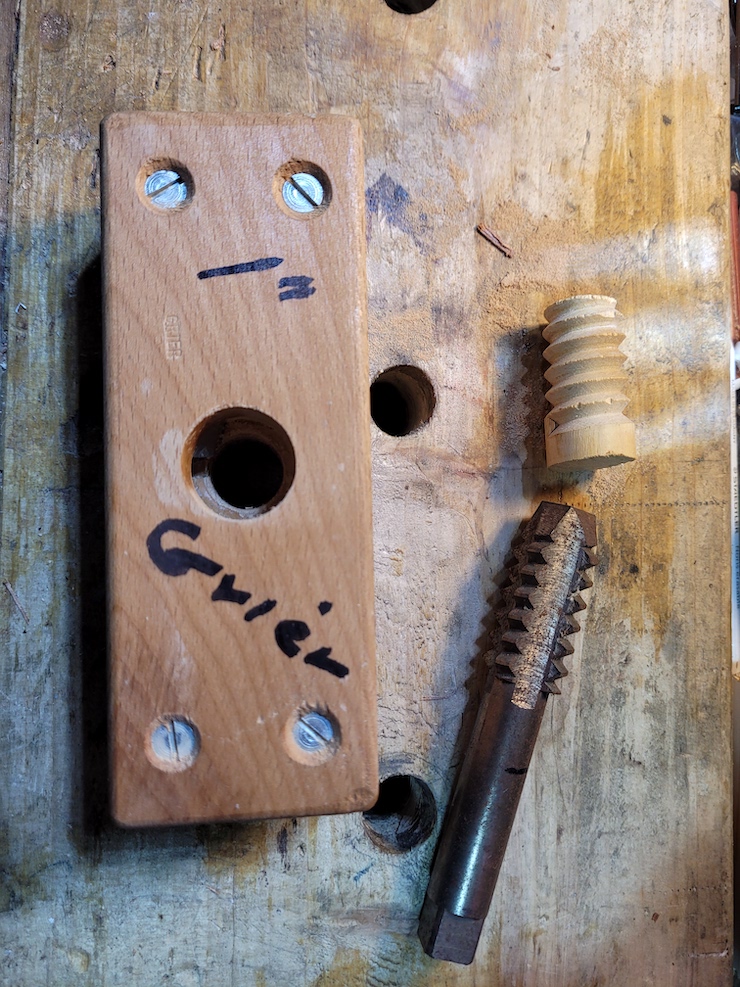
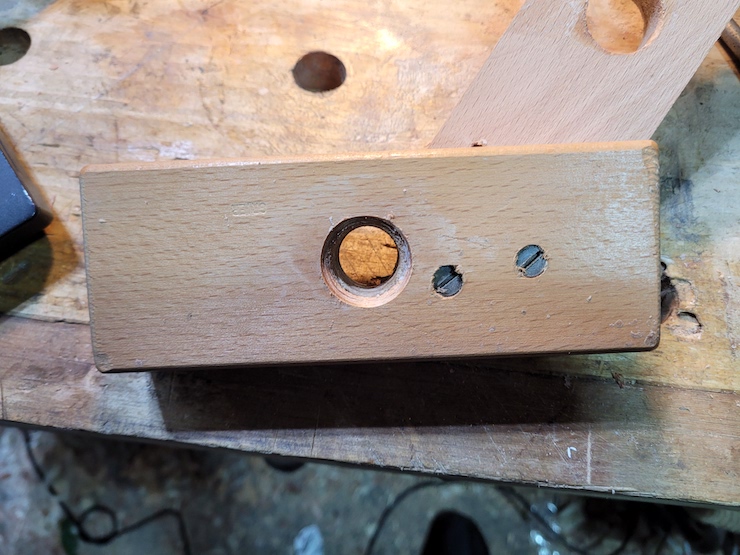
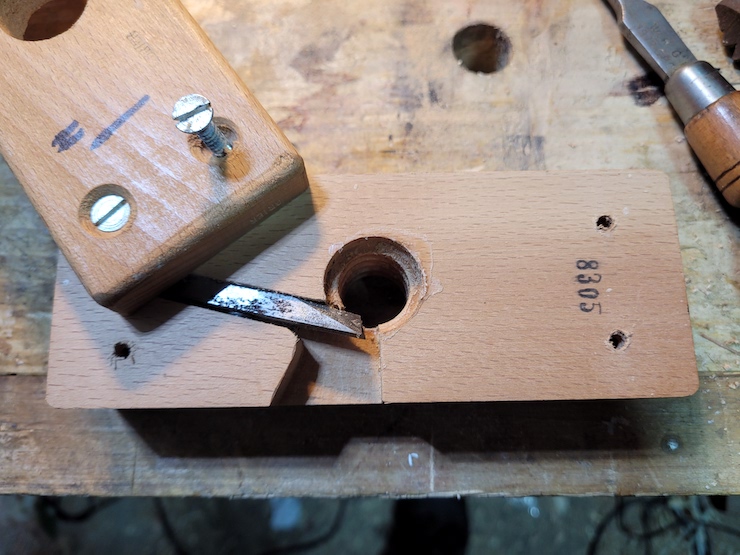
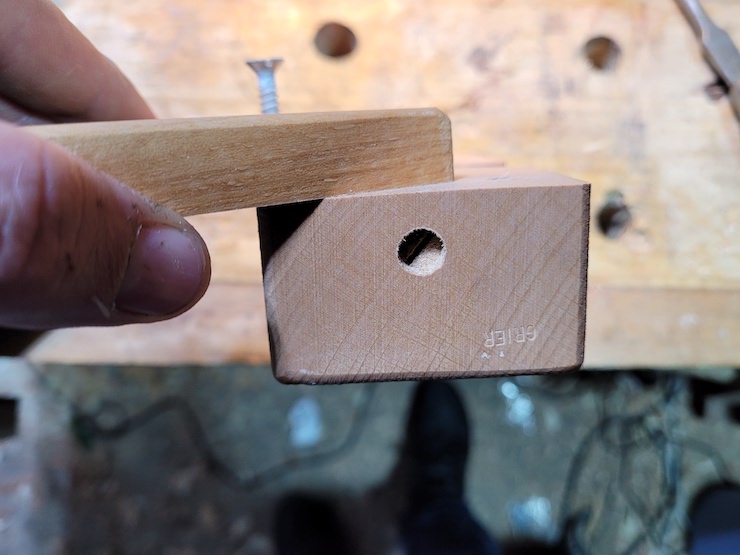
The mini Moxon. Put together in an evening with scrap from my workshop. Two clamps and any surface is ready for dovetailing practice. About a foot long, and breaks into 4 pieces for easy packing.
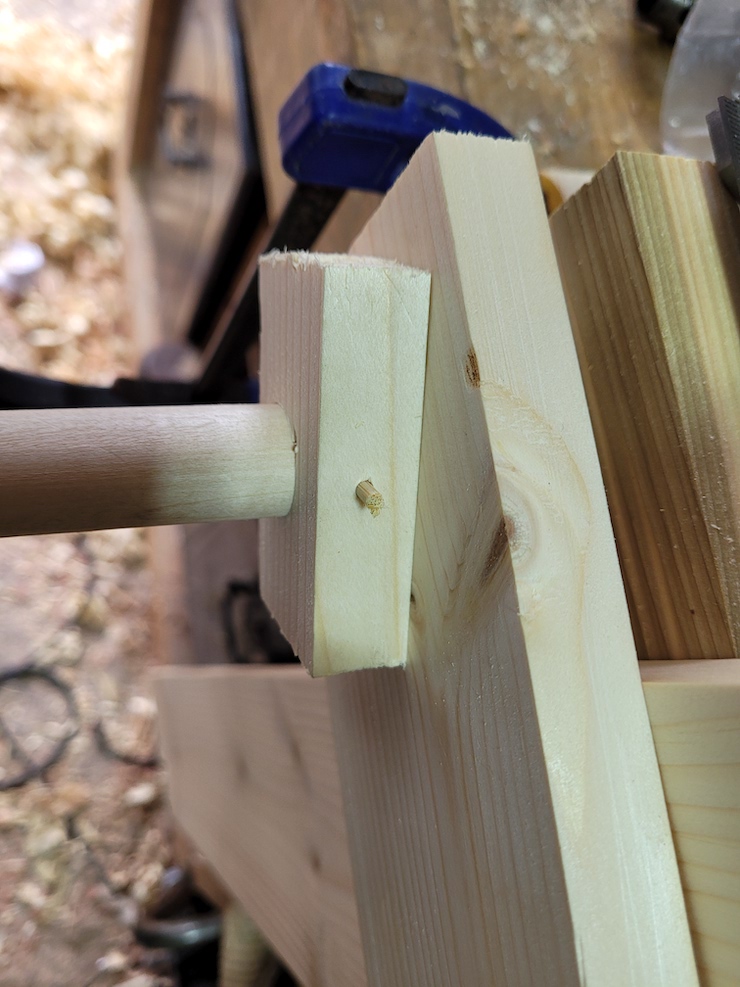
One problem with not having a lathe. How to put a handle on the screw? I use some variation of this technique, pinning a larger handle to the screw. This allows easier, more powerful turning, and stops the screw from just passing through the face of the vice. Normally I make something a bit prettier, but this is a rush job. For this 7/8th screw I used kebab sticks for the pins.