Dovetails & Holidays
I’ve just had a rather lovely 2 week holiday in Donegal, in the North West of Ireland. Being a tool addict, I could not just go, relax, and enjoy the scenery. Nope, I packed a small set of tools, and spent my evenings working on my dovetails.
Just in case anyone has mistaken me for a skilled craftsman, the photos below will set you straight. My dovetails are not great. My last attempt at a dovetailed box could have doubled as a sieve. With no access to my workshop and my bench for a while, I thought I would indulge in a little deliberate practice. For those of you, who like me, can enjoy scenery through the gaps in our dovetails, I’ll show a few tips and techniques that definitely improved mine during my holiday. For anyone thinking of bringing a few tools on a trip, you can see my setup.
The first challenge was the absence of a bench or a vice. Scratch that. My first challenge is that my 3 children think “holiday” is code for “Stuff every toy you own in the car”. Space would be at a premium, but daddy was going to bring some toys too this time.
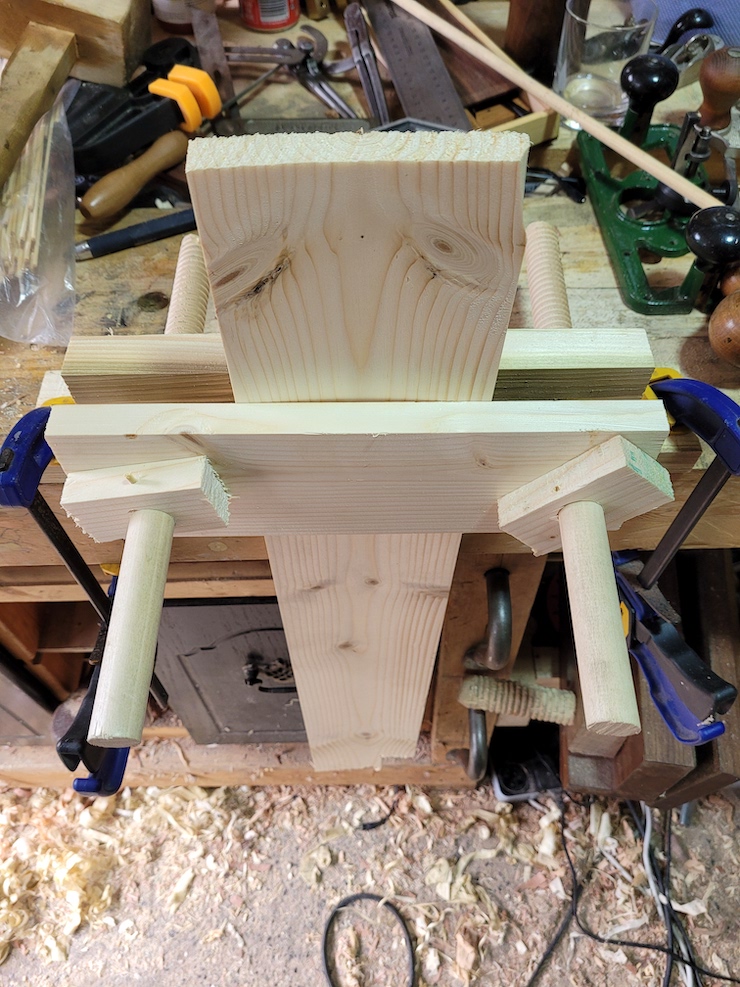
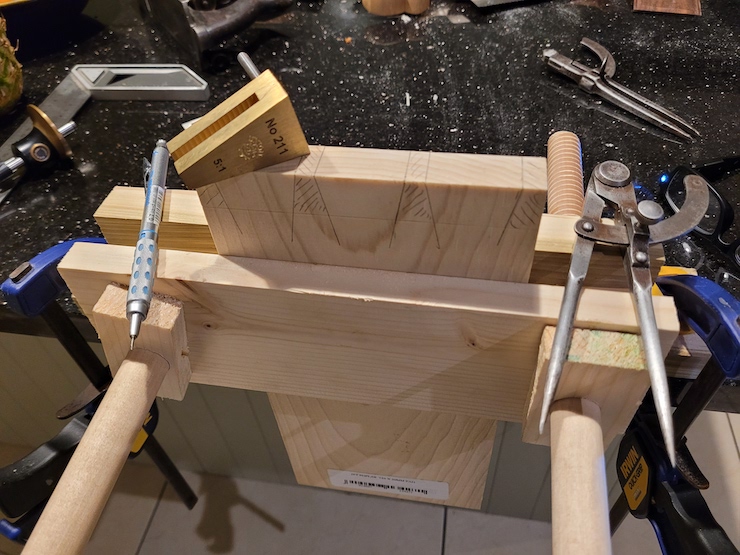
With limited packing space in mind, I needed something to hold my work. I grabbed a few scraps and made myself a very small, very crude Moxon vice. That plus 2 quick clamps and I had a work holding solution. (This is the kind of project that makes having a few wood threading tools around worthwhile). I probably made it a little too small. Its perfect for dovetailing, but its a little short to hold the work-piece sideways to make the crosscuts on either side of the tail board. Otherwise a small Moxon and 2 quick clamps is a great solution. Any table could become my work bench. It disassembles easily and packs up very small. This mini Moxon was a single night project, using mostly pine scraps. Cheap and effective.
Second, I knew I was going to be doing a certain amount of stock prep. I had a nice square board of poplar to bring with me to practice on. But as soon as the first set of practice dovetails was cut, I would need to cut them off for the next. At that point I would need a straight square edge. If you are dovetailing, and you are not checking that your stock is dead square, that’s probably a source of some of your problems. If the back of your board is higher than the front, you are going to scribe different depth baselines for a start. Do yourself a favour, square your stock before you start. I brought a 15 cm Starret try square to check my boards.
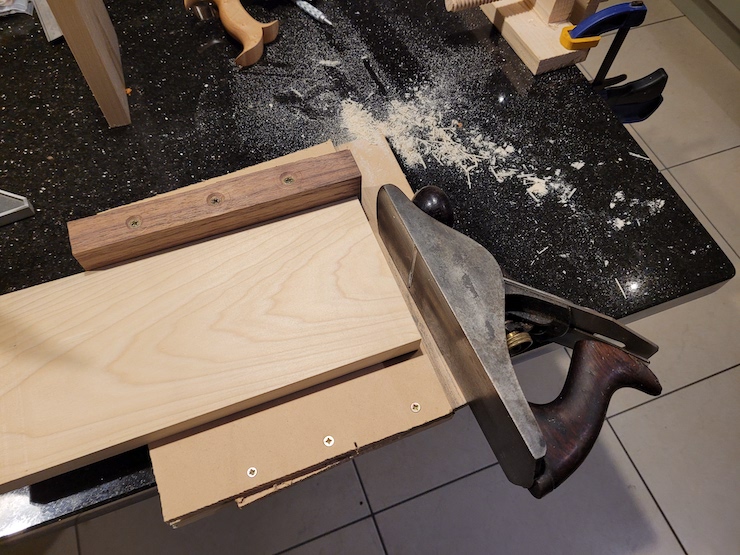
To speed squaring stock I built a small shooting board, probably a little too small for the stock, but it got the job done. I made as good a crosscut as I could and then cleaned it up quickly on the shooting board. The planed surface also makes it easier to mark your layout. The shooting board doubled as a bench hook for making crosscuts when it was time to start afresh , and a chopping board, so I didn’t trash whatever table I was working on when chopping waste. When I initially made my list, this was not on it. Shrenik Savla-Shah suggested it, and I initially poo-pooed the idea. It grew on me and was a big time saver. Thanks Shrenik!
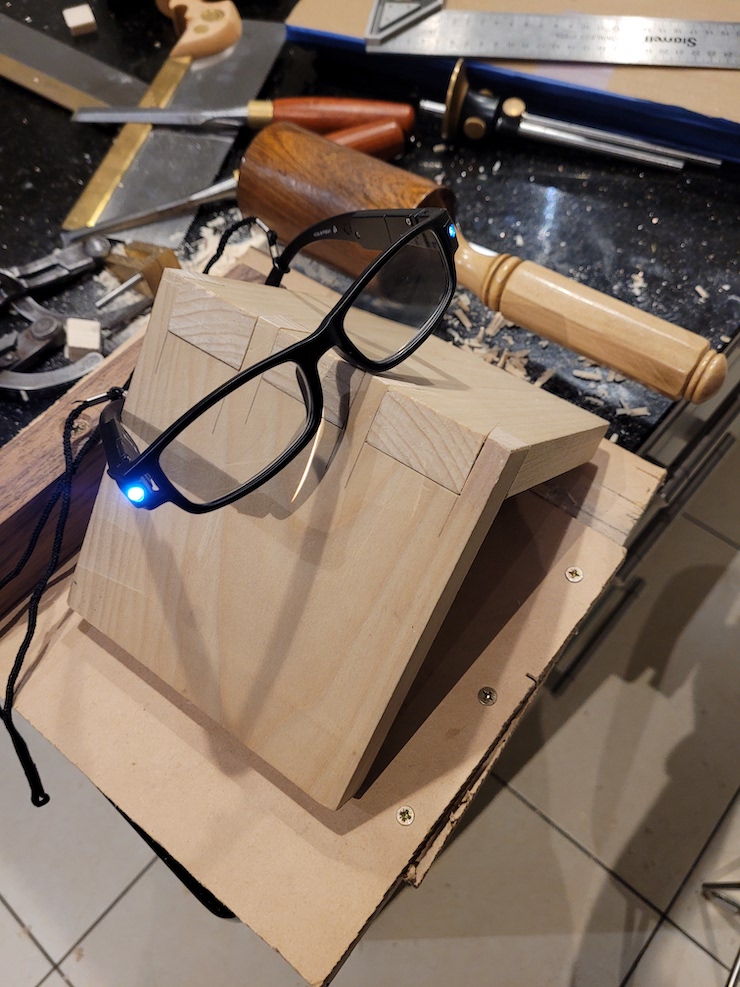
The next challenge. The lighting anywhere I set up was unlikely to be anywhere near as good as my workshop. Nothing spells doom faster than not being able to see your layout lines in the shadow of your saw. In addition, age seems to be catching up with my eyes a little. I killed 2 birds with one stone. A cheap pair of 2x reading glasses with built in led lights. With the glasses providing their own light source, If I’m looking at it, its lit, and it’s big and clear and visible. If you are struggling with seeing your knife lines in wood, pick up a cheap pair of 2x reading glasses and give them a try, even if you don’t have any problems with your sight in normal day to day life. I think I picked mine up at Aldi or Lidl, its a cheap buy.
With all that set up I set about cutting some dovetails. The first set where predictably gappy. I started taking photos at various stages and soon was able to spot where the problems where creeping in. It was 90% down to not cutting in quite the right spot when cutting my pins. I could either cut too loose and gappy, or too tight and spend forever fitting them.
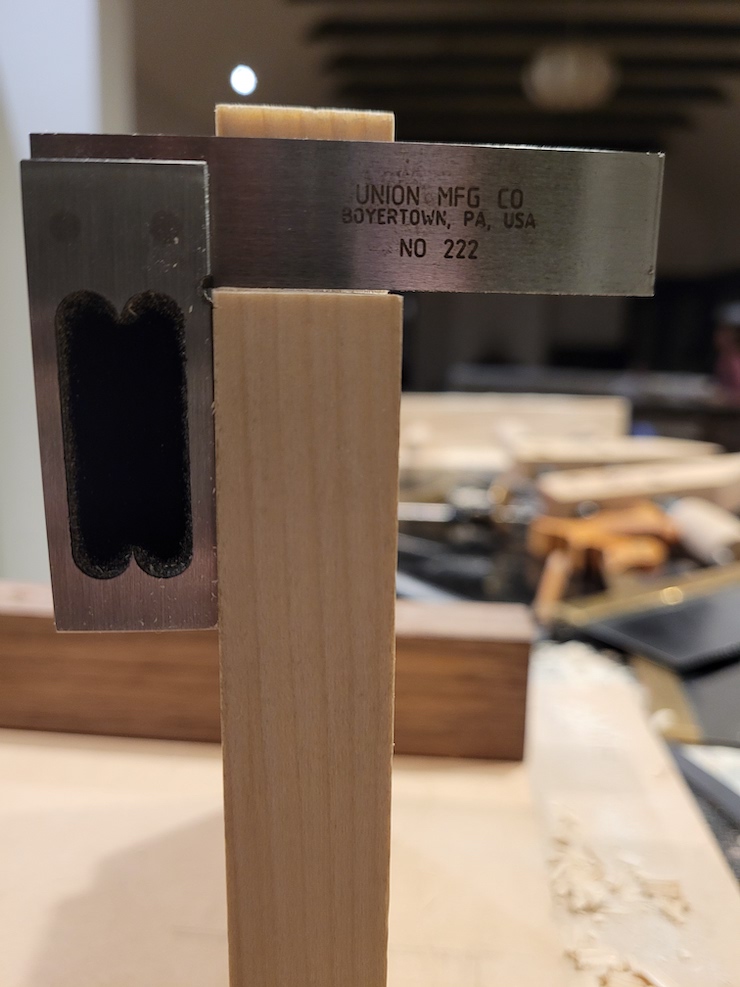
I made a huge amount of use of my 2 inch square. I found the real key to improvement was “stop believing my lying eyes”. I’m right handed and left eye dominant. What looks straight/square/plumb to me, rarely is. I started checking my saw cuts for square when I was done. I almost always cut to the right going from front to back. I started checking my saw position with a small square before I started the cut. Over time, I started to drift less and less. The wonderful Scott Anderson recommended getting my chin right over the middle of the saw before starting a cut. That has not been a cure all, but it helps. Slowly over the course of the week, using Scott’s sighting advice, and constantly checking with a square, I steadily improved. My practice stock is about 3/4 inch thick, relatively small deviations from square can make your dovetails nearly impossible to fit.
Another lesson. Make your baselines deep, really deep. If you don’t like to leave the lines behind, you can just mark the waste sections of the show faces. But you really want to be able to feel your chisel click into these lines when you make the final waste removing chop. If they are really deep, and you undercut, your clean-up planing is not going to reveal unsightly gaps. As the undercut begins deeper beneath the surface. I took the time to sharpening the wheel on my marking gauge before starting and I’m glad I did. Those nice deep lines are also easier to see when you are trying not to saw over your base lines. I’m currently using a wheel gauge, its tricking to just mark the waste with it. I think I’ll find something with more of a knife point in the near future.
Before you start removing waste, take a moment to really examine your waste marks. On 2 out of the 5 dovetails I made an initial stroke of the coping saw before realizing I was about to cut a “shovetail”. On the very first night. I did indeed cut a lovely shovetail, right down to clearing the waste. Its so easy to do if you don’t cut dovetails regularly. Before clearing waste, make sure its waste.
When it comes to chopping. I yet again, cannot trust my lying eyes. What my eyes claim is straight, is not straight when checked by bumping my 2 inch square up to the chisel. I repeatedly checked my angle with it before starting chopping, and by the time the 2 weeks where up, I was very close to actually holding it plumb naturally. Unfortunately for me, my default seems to be to hold the chisel at an angle which will guarantee a hump in the middle of the dovetail. That’s a nightmare to fix. If you are not reliably chopping the waste out and getting a flat bottom. Check your perception of plumb when holding the chisel.
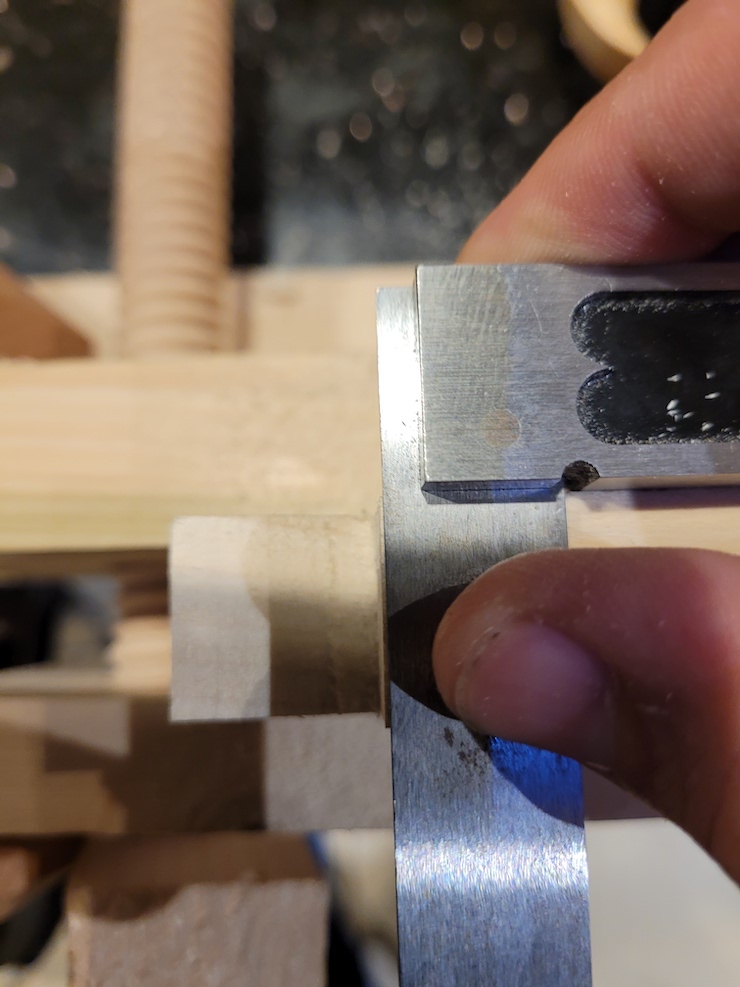
Next, you really do want only a tiny bit of waste when you make the final chop. I found about 0.5 mm to be the sweet spot. Again, reading glasses helped me refine this. Taking off too much on that last chop results in a ragged waste line.
After you have cut your tails, check for square, check it every where. These are the template for cutting your pins. Check the shoulders for square. If they are higher at the back than the front, they will never seat.
Check the sides of your tails at the top. If they are bigger at the back than the front. You will mark out a pin that is smaller than the front opening and will leave gaps at the front. If they are bigger at the front than the back, you will cut a tail that will be a good fit for the front, but cant fit through the back. Check the base of the tails. If a square referenced against the back is not making contact with the baseline at the front, its not going to seat. If it cant be slid from side to side, you have some crud somewhere on the base, that again, is going to stop it from seating.
On day 3, one of the handles of my Moxon failed. I had pinned them with kebab sticks. Not big enough/strong enough it turns out. On day 4 the other handle failed the same way. Thankfully as I was looking around my shop before I left, thinking of what to bring, my eyes landed on my hand screw clamps. Like Luke hearing a vision from Obi-Wan, I heard Ric Archibald’s voice in my head saying “Whenever I have a problem in my shop, I ask myself can I solve it with hand screws”. Given I was going to be working out of my shop, and I couldn’t foresee the problems I would encounter, I packed 2. I’m glad I did, when the handles on the screws failed, the screws became guide bars. I was able to use the hand screw clamps to still use my Moxon. New rule for me, if packing a travel kit, definitely bring the hand screws. Thanks Rick.
I found the key to improving over the holiday was photographs. Take a photo of the top and front of your tails after you have sawn them, but before you remove the waste. As you are fitting your dovetails, mark any part that was very hard to fit. When done, and you are looking at your gaps, compare to that photo, see if you can tell why.
Looking at those photos pretty much zeroed in 90% of my problems to not starting the cut in quite the right spot, or sawing a little off plumb. I was marking my knife lines on top of the pins with a 0.7mm mechanical pencil, an old habit from having a hard time making out knife lines on some woods. I switched to a 0.3, then given I now had reading glasses, got rid of the pencil completely and just used the knife lines. I still have a little work to do here, but the improvement was very noticeable. I’ve been alternating between slightly too gappy and slightly too much work to fit. I’m confident I’ll hone in on exactly what I need soon. After removing the waste from your pins, use the body of your small square to check the side walls. If you cant slide it across the base and make contact at the top of the pins, then you are going to have a gap. Use it as a guide to correct and clean-up. Just like with the tails, you can use the square to check the base. With the greater room between the pins. I like to use the body of the square to check. If I cant slide it back and forth, look for the crud that’s interfering and correct the problem. If its rocking, you have an actual hump to remove.
If you are trying to fit your dovetails, and you cannot figure out why they are stuck, take em apart and put pencil all over the sides of the pins, then try again. Take em apart and inspect the tails. Anywhere you see pencil transferred to the tails, you are making contact, and you probably need to do a little tuning. The graphite can also act as a lubricant, once or twice I’ve used this trick and had the graphite fix the problem.
And that’s it for my tips. I wish I had brought some slightly larger chisels, other than that my working tool set was great. If you are struggling with dovetails, or trying to plan a travel tool set for dovetailing. I hope this helped. See the photos below for me details.
A crude small moxon I knocked together in an evening. The pins in the handles are too small, need to be larger to stand up to the force of the 7/8 inch screws. Having a screwbox and tap around means you can create tools like this very easily.
A small shooting board made from mdf scraps and a walnut offcut. This is too small for my practice stock, not enough run up with the plane, but it got the job done. A cleat on the underside means it does not need to be clamped down to be used. This also doubled as my bench hook and chopping board.
My secret weapon. A cheap pair of 2x reading glasses with built in led lights. The lights are not very powerful, but there is just enough that I could always get enough light to see my knife lines in the shadow of my saw. Given I’m not in my workshop, the random lighting I encountered would not have been enough without these. A travel woodworkers must have. I bought these from Aldi or Lidl, they do no cost much. Also check out the gorgeous mallet by Enda Ward in the background. Missing from the next photo, but a wonderful mallet I love to use.
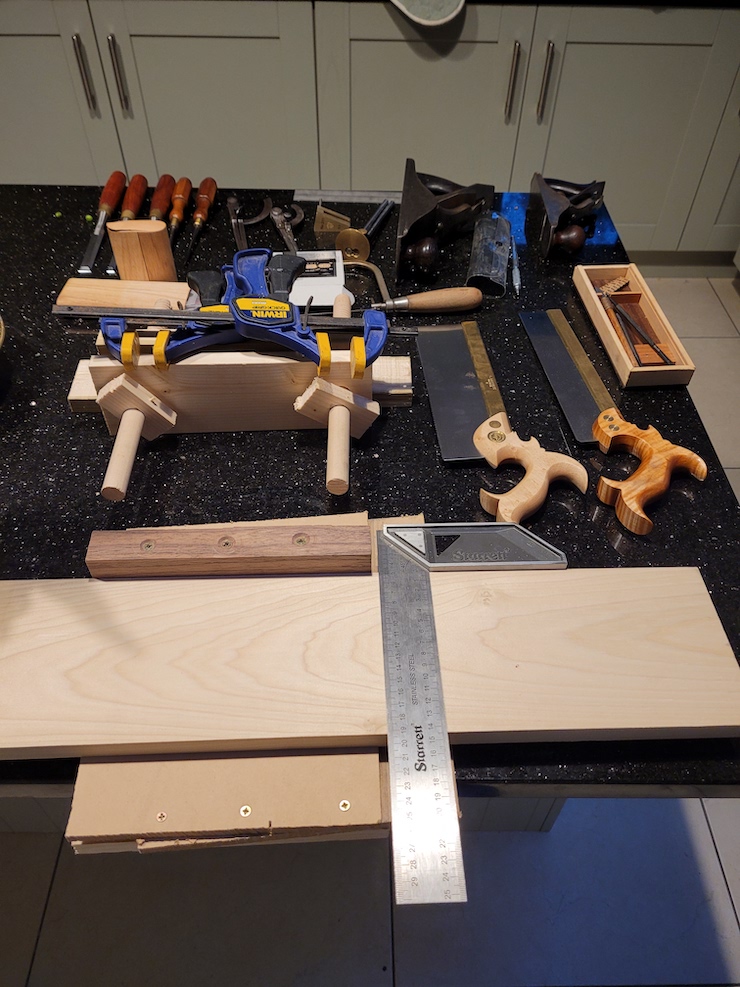
My Bench and toolset for the holidays. I worked off a kitchen island. These things look solid until you try to use them as a bench. But good enough. From back to front. A selection of chisels, dividers, dovetail marker, marking gauge. No 4 1/2 plane, pencils, reading glasses. No 2 plane. The wooden container is full of spare coping saw blades. Coping saw. Union no 222 2 inch precision square (you will see a lot of this). Quick clamps, Mini Moxon, Charlie Earnest crosscut saw, Lie Nielsen dovetail saw. Marking knives & box courtesy of Ryan Powell. Starret try square, small shooting board & my practice poplar board.
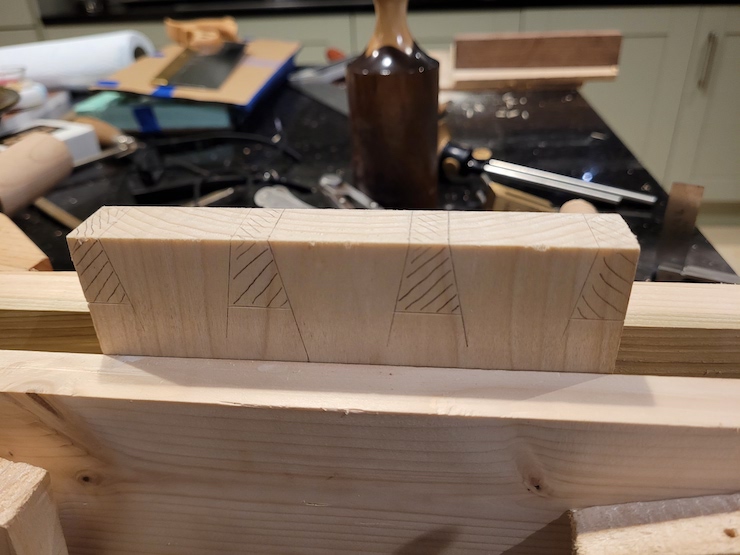
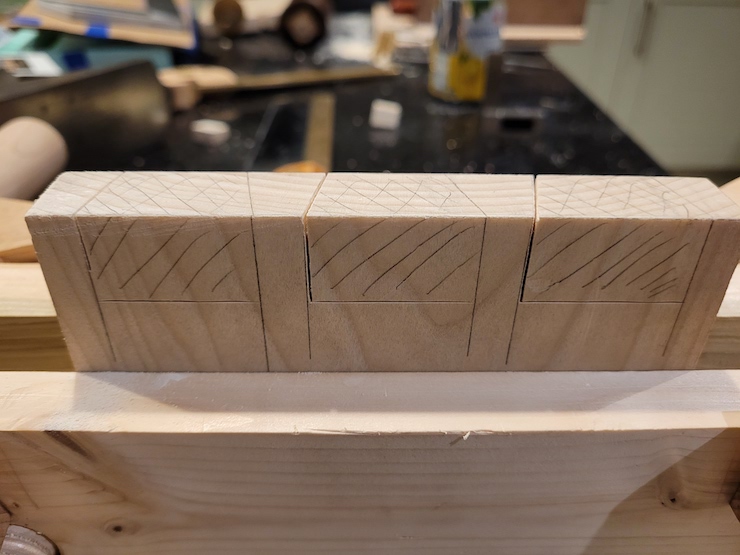
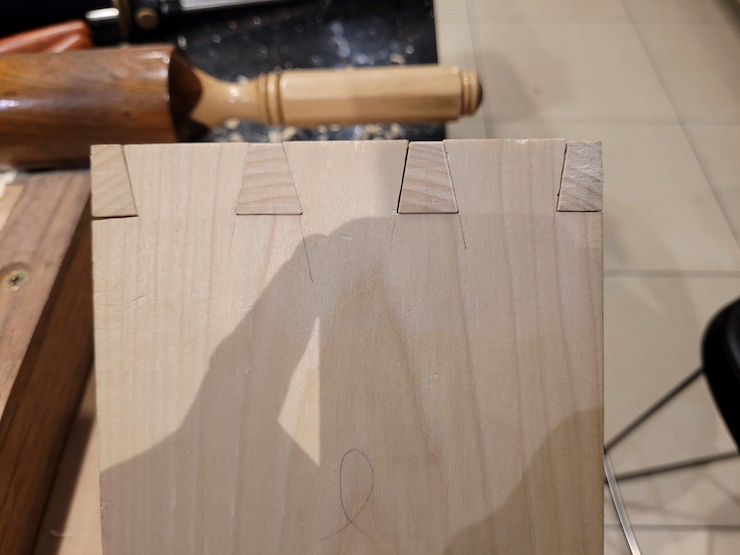
Laying out in the moxon. I’ve grown quite fond of my pinch dovetail markers. Lets me mark both sides in one operation, which allows me to eyeball how far off my sawcuts are going. I mark my waste every time, does not always stop me from cutting a shovetail…
My lying eyes insisted this was a square cut. I have to check with a square every time. As is, if you mark out the pins with this tail there is no way the front of the tail will fit.
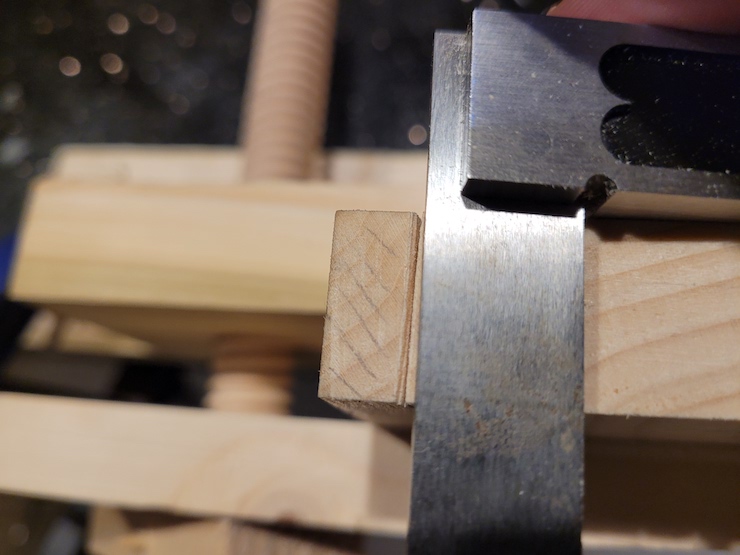
Much better. Your tail is your template. The exact angle, spacing, etc do not matter. a square side, really really, matters.
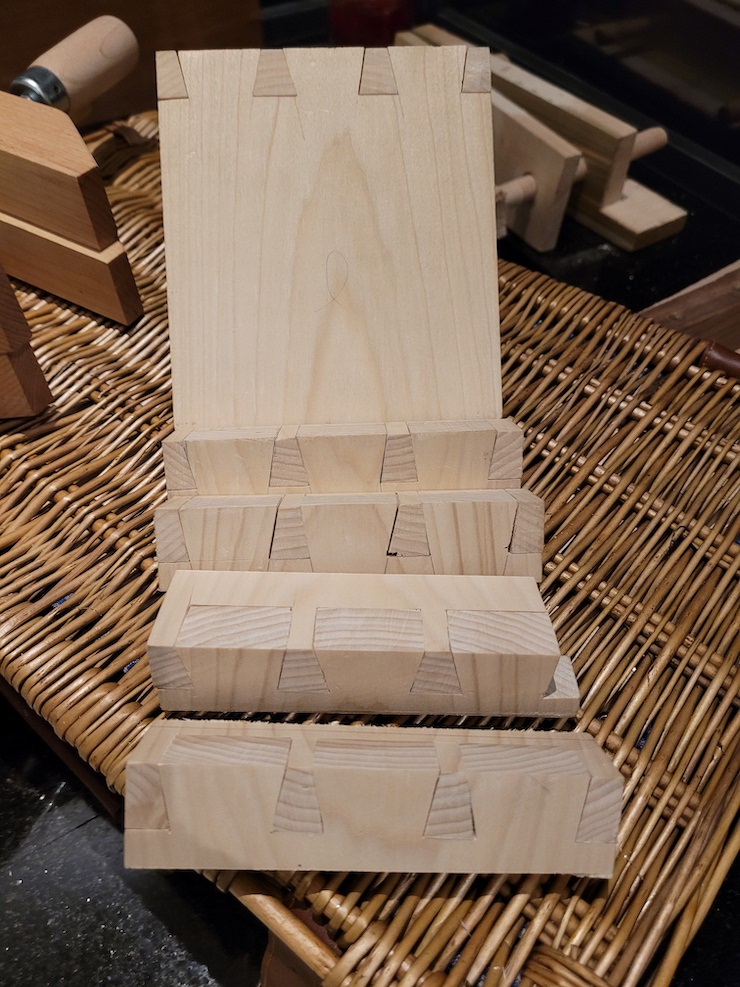
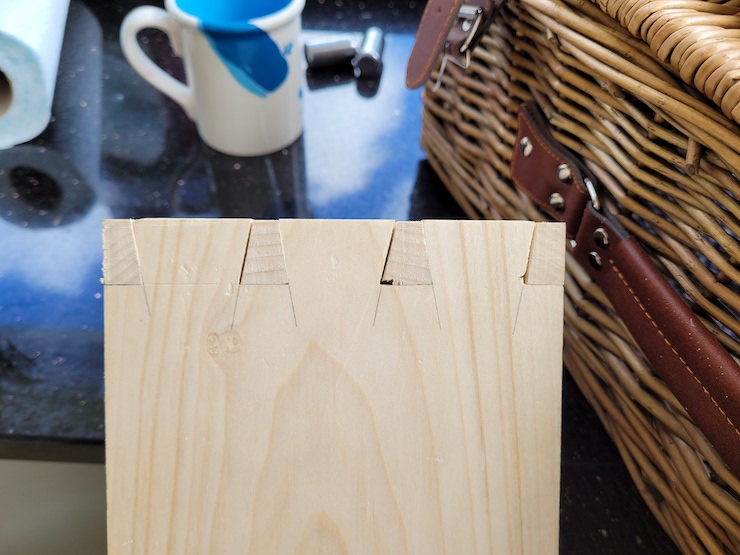
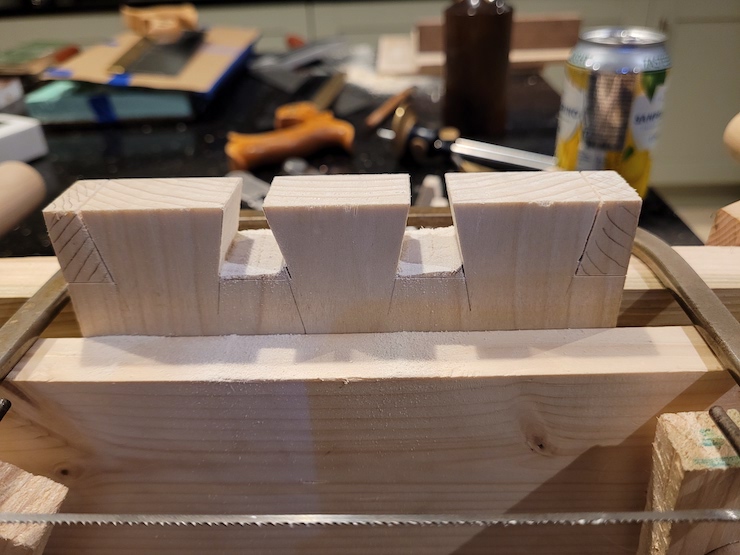
The first attempt. Inconsistent, and the rightmost full pin is very gappy.
The other side of the first attempt. This would probably look great after planing and gluing. The right most base line is ragged. I didnt mark my baseline well enough and my chisel slipped duing a chop.
Second practice.
Much better, sawing and gluing would take care of everything but the right pin. But this took forever to fit. Off the saw it had no chance of fitting. I dont mind a little tuning, but I spent well over an hour getting these to slide home. A lot of this week was spent alternating from too loose to too tight and I tuned my process. I dont just want to be able to cut a dovetail, I want to be able to do it in an efficent amount of time.
Again, will probably be good enough after planing except for the far right. A lot of small damage from repeated assembly and dissassembly. Another reason not to want to spend too much time fitting. The gap on the far right is from a less than plumb saw cut.
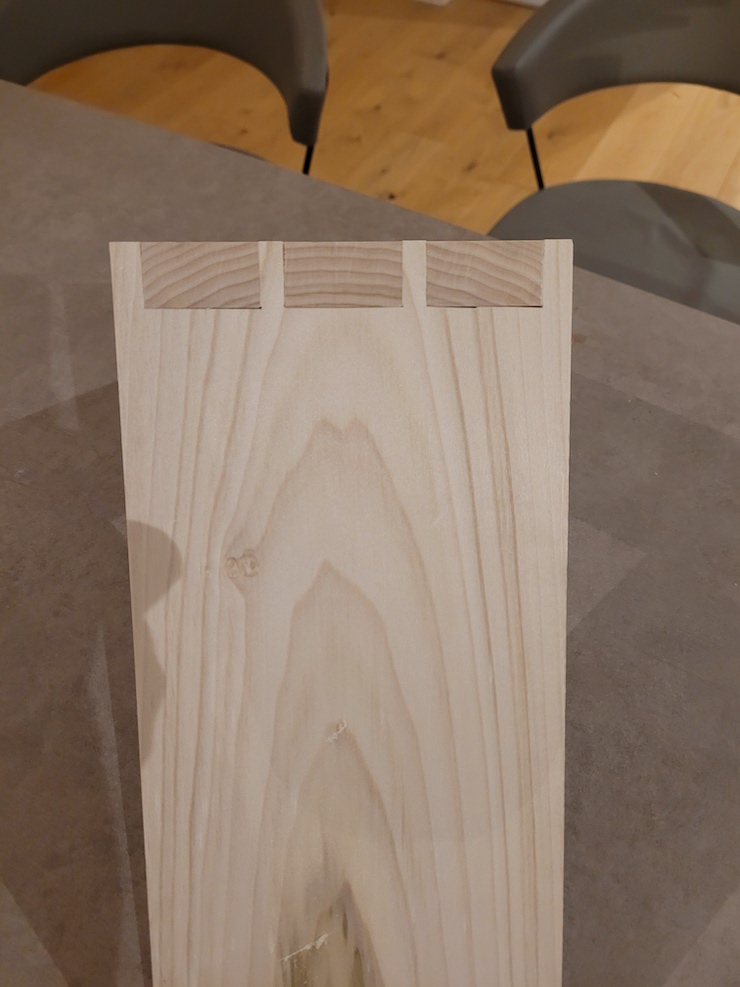
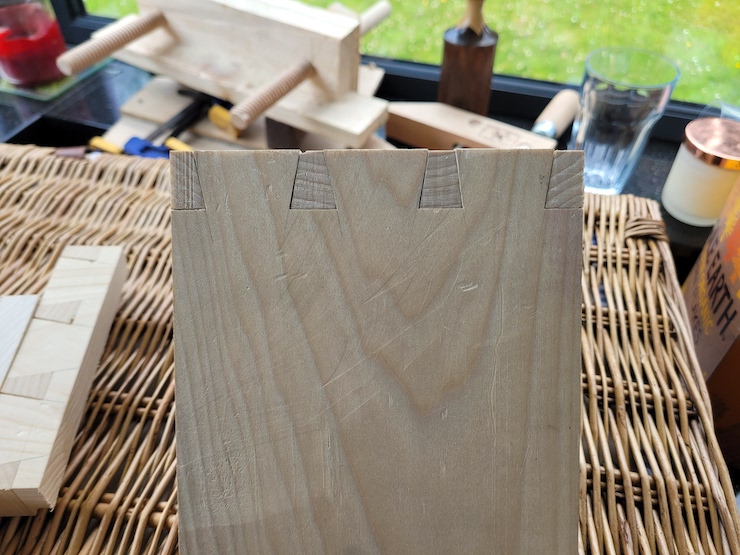
Third practice. This I was delighted with. Yes its gappy, but its consistently gappy, left right hand side of each tail has a gap, and each gap is exactly the same size. That suggests a little more work on my sawing and I will be good. This also assembled very quicly with only a little tuning. Also, on the right hand tail, despite marking the waste, you can see where I started to cut a shovetail with the coping saw.
You can see the consistent gaps again toward the top, otherwise I’m delighted.

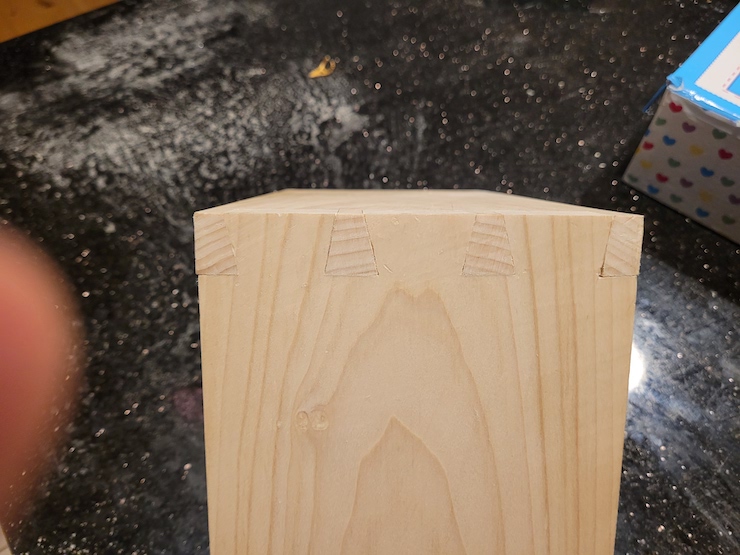
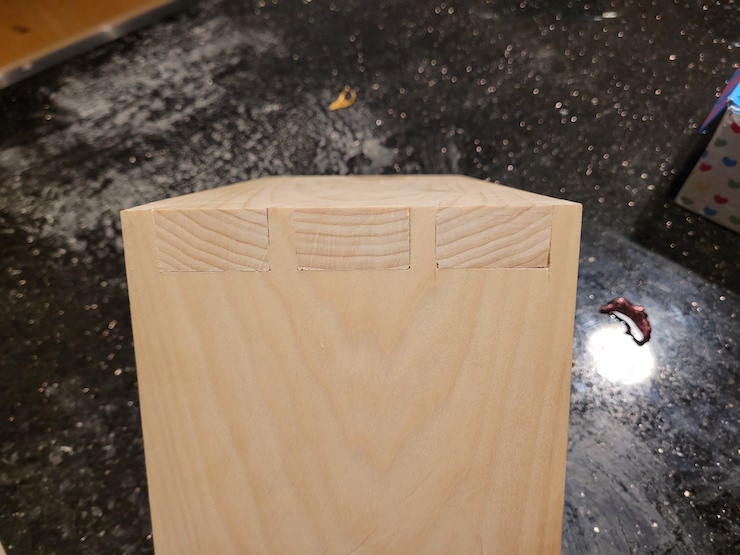
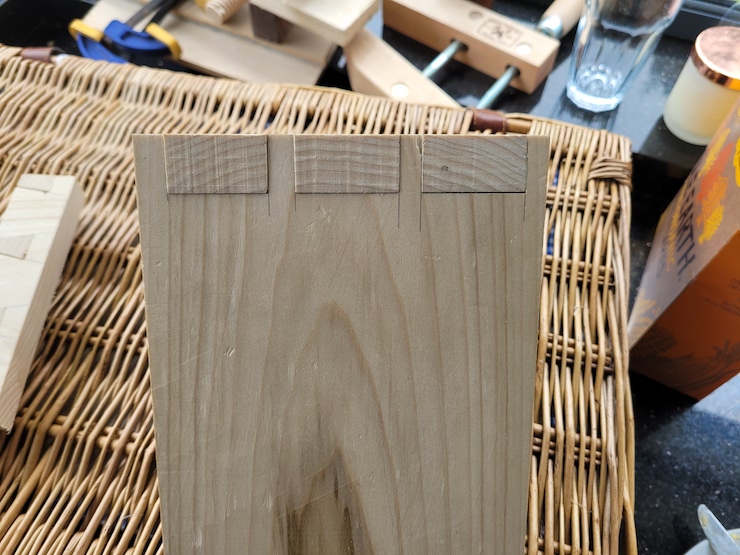
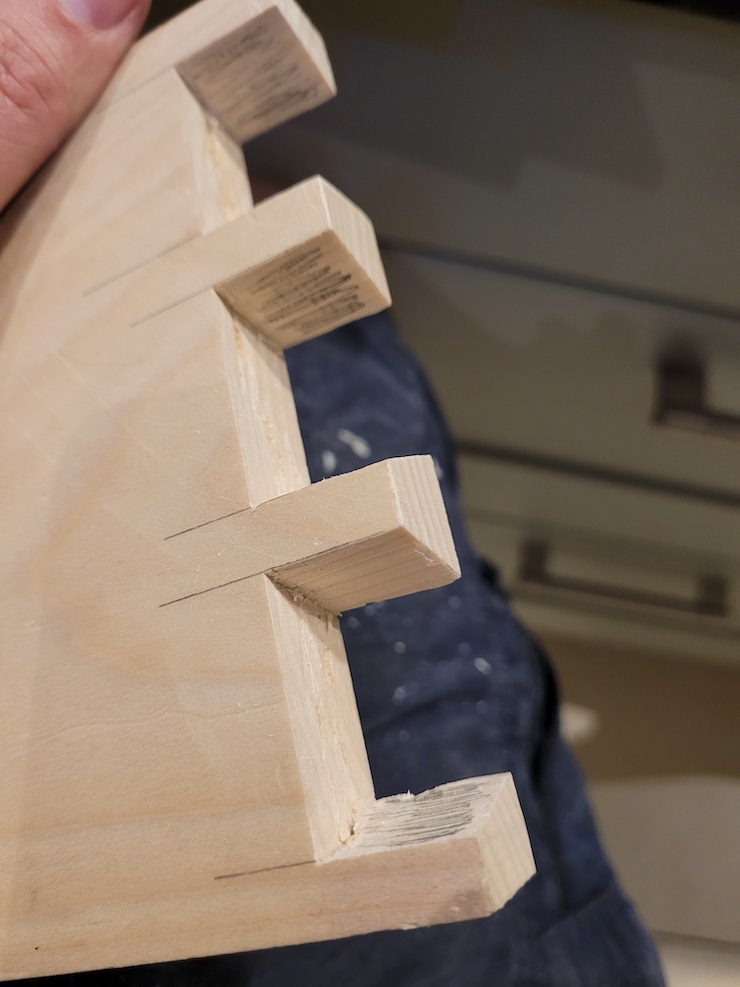
4th practice. Pretty good, but again, too much work to fit. Lots of small dings from assembly and dissassembly while figuring out the fit.
Right most tail never seated all the way, and I lost a chunk of its pin somewhere in the process. Too much work fitting is a bad thing.
I don’t like to leave layout lines on my dovetails. Totally personal choice. Those of you who do, more power to you! As a result, I like to just mark the waste on the face of my board. I love wheel gauges, but they are less than ideal for this job. I’m keeping my eye out for something with more of a spear point. Easier to be precise about where you start/stop. This is not something you have to worry about on the non show faces. When the joint comes together the lines will be hidden.
Mark those lines deep! Easy to register your chisel for chopping, and if you undercut, the undercut starts deep enough that clean-up planing will not reveal it.I sharpened the wheel on my gauge at this start of this week and it is well worth it.
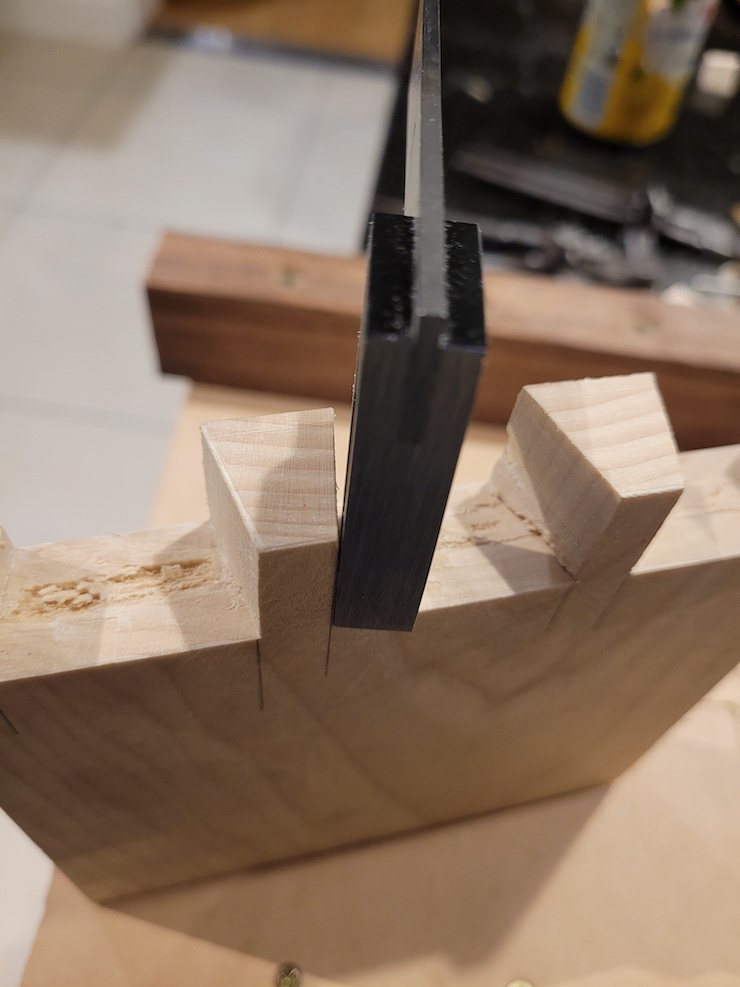
Removing waste with a coping saw. You can see on the right, where I started to cut a shovetail and stopped myself.
Dealing with my lying eyes again. I’ve found that when I line up the chisel for a plumb cut, what my eyes see as plub, is not. Worse, I tend to lean the chisel back to the left, which will leave a hump. So I’m now in the habit of checking for plumb with my square before I begin to chop. In practice I aim to lean the chisel just a tiny bit to the right and undercut slightly.
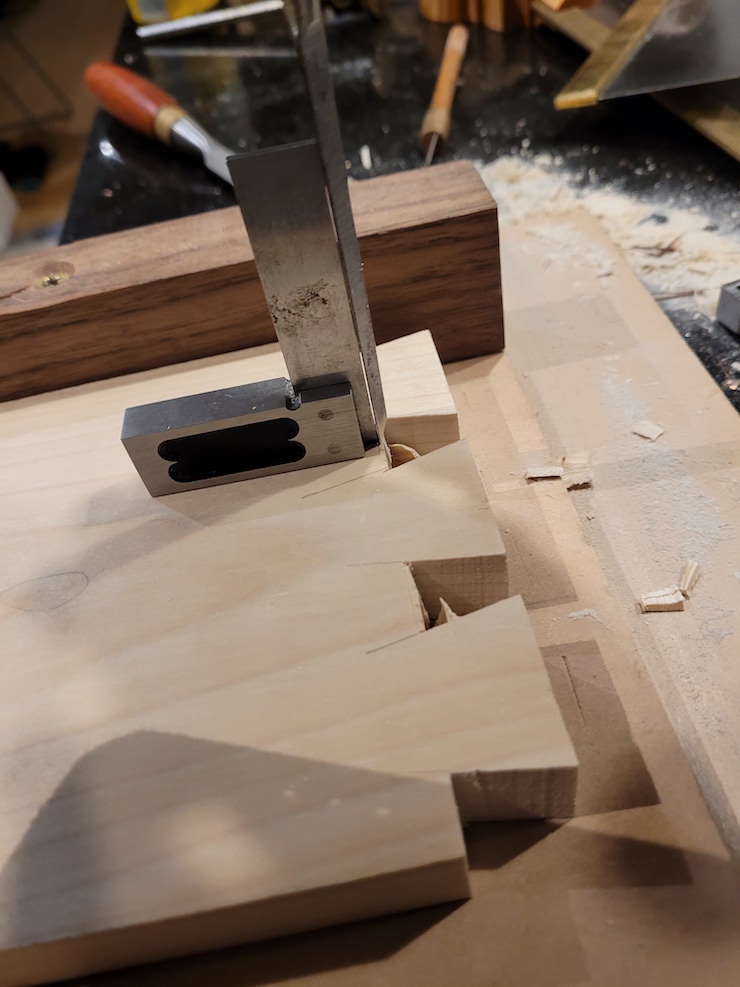
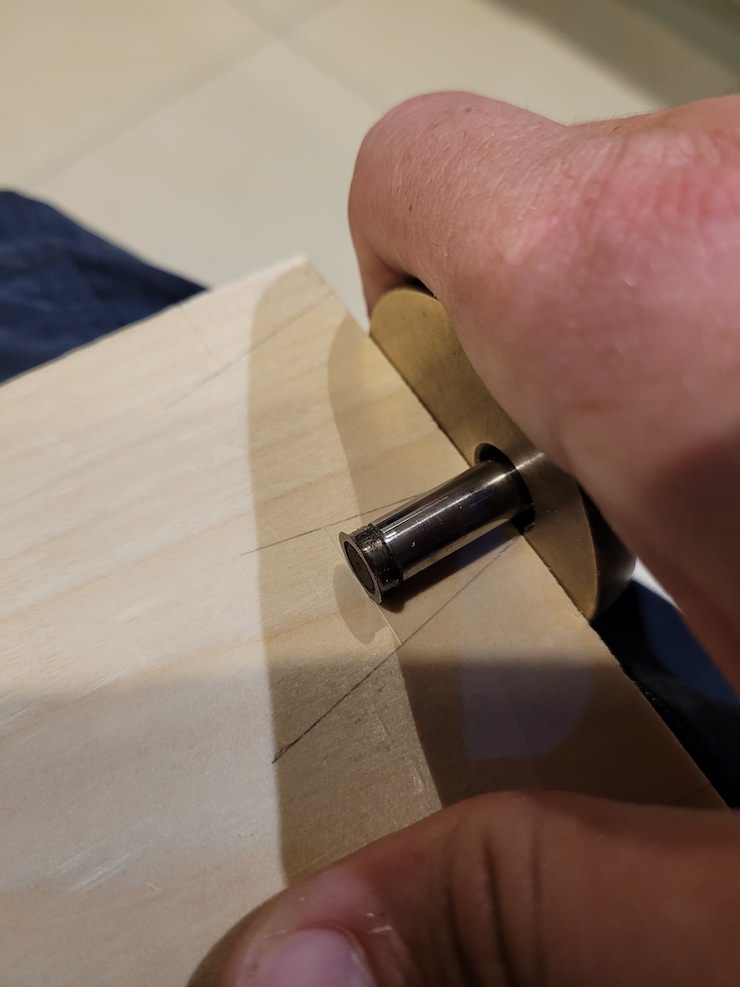
If you leave too much material when you are making the final chop, it forces the chisel back into your baseline, making it ragged and unsightly. Trhough trial and error I’ve settled on about 0.5 mm of waste left for the final chop as shown where the waste meets the ruler here. Again, reading glasses have made getting this down a lot easier.

Checking the shoulder for square. The front of this shoulder is noticably lower than the rear. This needs to be corrected, there is no way the joint can seat, or if it will, you are gauranteed a gap.
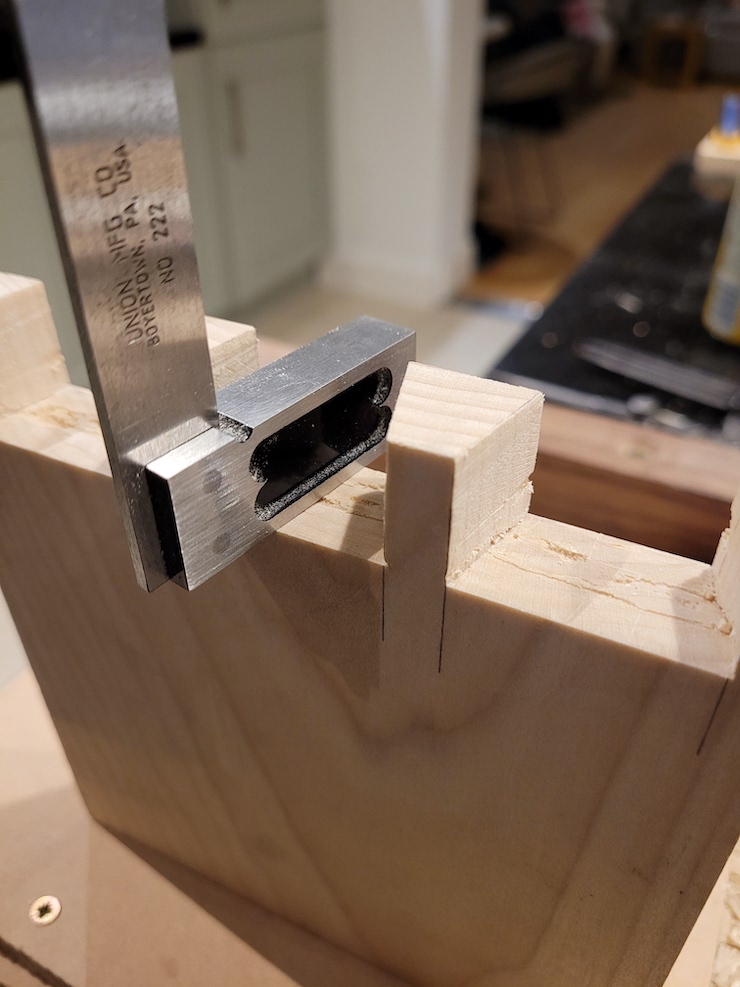
Checking the socket for square. If a square referenced against the back of the piece does not contact the base at the front, that will be a gap.
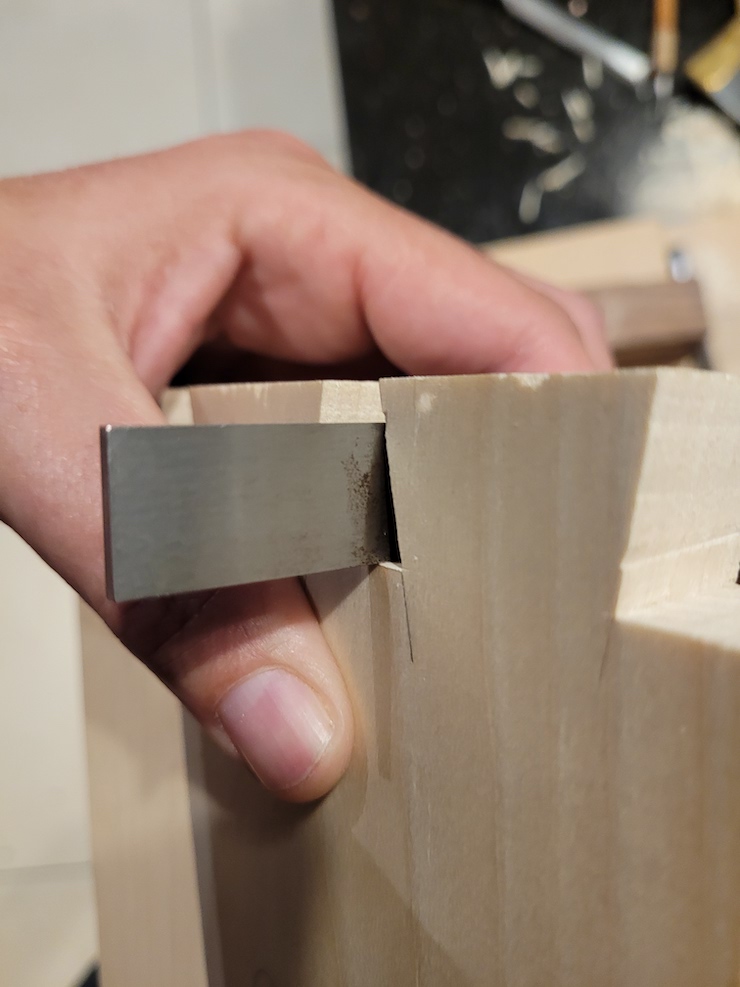
Aligning the board with the side of my chisel before transferring the tails to the pinboard. You can see the handscrew clamp being used to rescue my moxon vice here. Thanks again Rick.
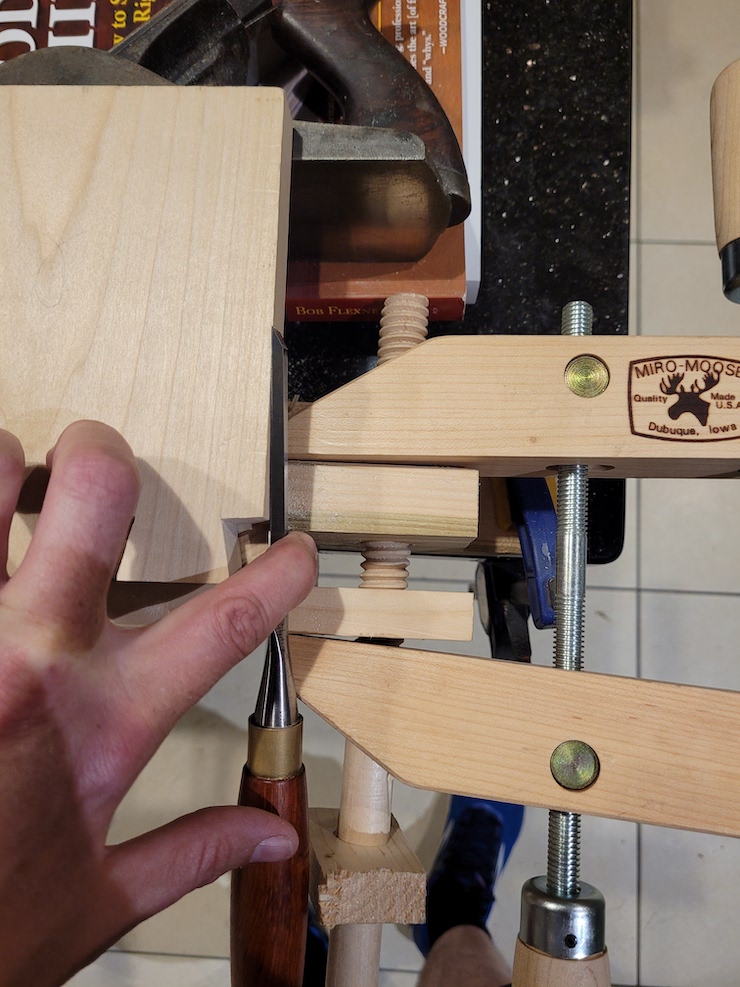
Ryan’s beautiful marking knife comes into play. You really cant put enough effort into lining the boards up correctly here. Any error will be very obvious in the final result. When they are lined up, you need a good sharp marking knife, and reading glasses with a light help again. You can really see what the tip of your knife is doing in there. A light pass, a medium pass and a heavy pass and you should have nice clean knife lines to saw to. Keep pressure on the boards at all times. If the board slips while you are marking it out, its going to be hell, if not impossible to line them up exactly the same way again. One thing I did not take into account in my travel toolkit was what to rest the tailboard on while conducting this operation. I wound up stacking books and anything else reasonably flat that was to hand under my bench plane to get a support.
Taking photos like this one was key to improving. Once finished a joint. I would look at the gaps, then look at these photos.It quickly became clear where sawing errors where leading to gaps, or difficult to fit joints. Look at the center waste here. The cut on the left is not plumb. Predictably, as it narrows toward the bottom, more material had to be removed with a chisel before the tail would seat here. The cut on the right hand side is not close enough to the line, similar problems. If the cuts had eradicated the lines, I would know I had removed to much and would expect a gap.
The same cuts seen from above. On the right the extra material is clear again. OThe center cut is pretty good. The left hand cut leans a little to the right ( a common problem in my sawing). Probably good enough, but might require a little paring to fit.

Checking the sides of tails. If the body of the small square does not slide up to the tail and then make contact at the top. You will have a gap. You will need to pare material until it does.
With the space the tail sockets provide, it easy to check the bases with the body of the small square as well. If I can slide the body smoothly from side to side, I’m good. If I can rock the body, I have a hump to deal with.
Applying pencil to the tails to try and figure out a problematic fit.
Try to fit, then remove, anywhere the pencil transferred is a place where the two pieces are rubbing, and a guide for paring.
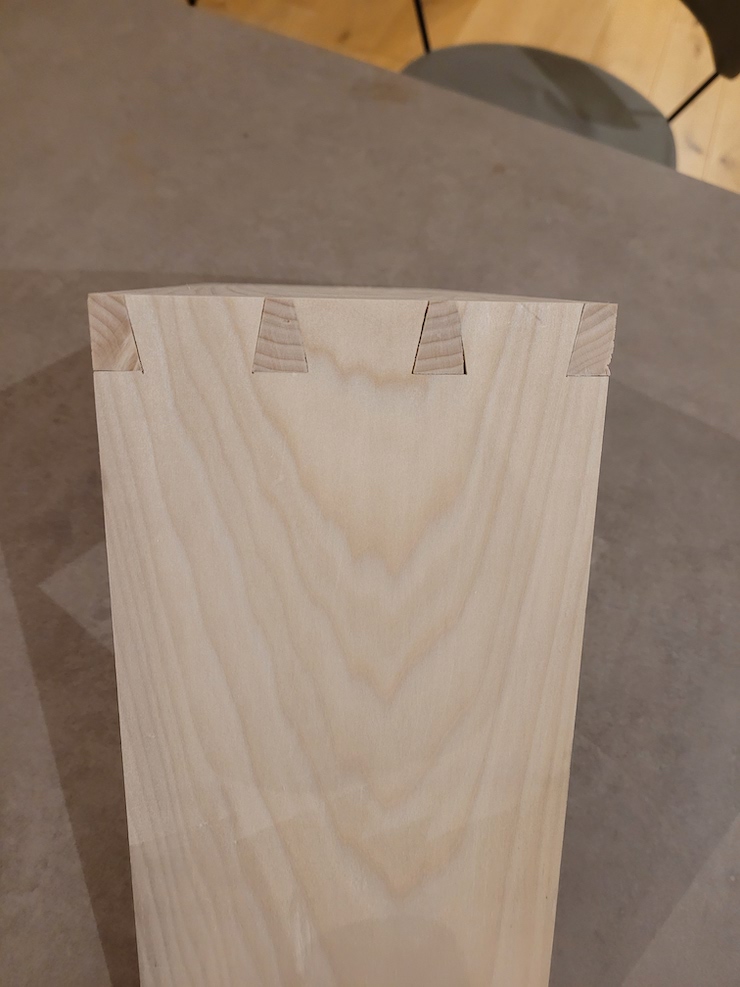
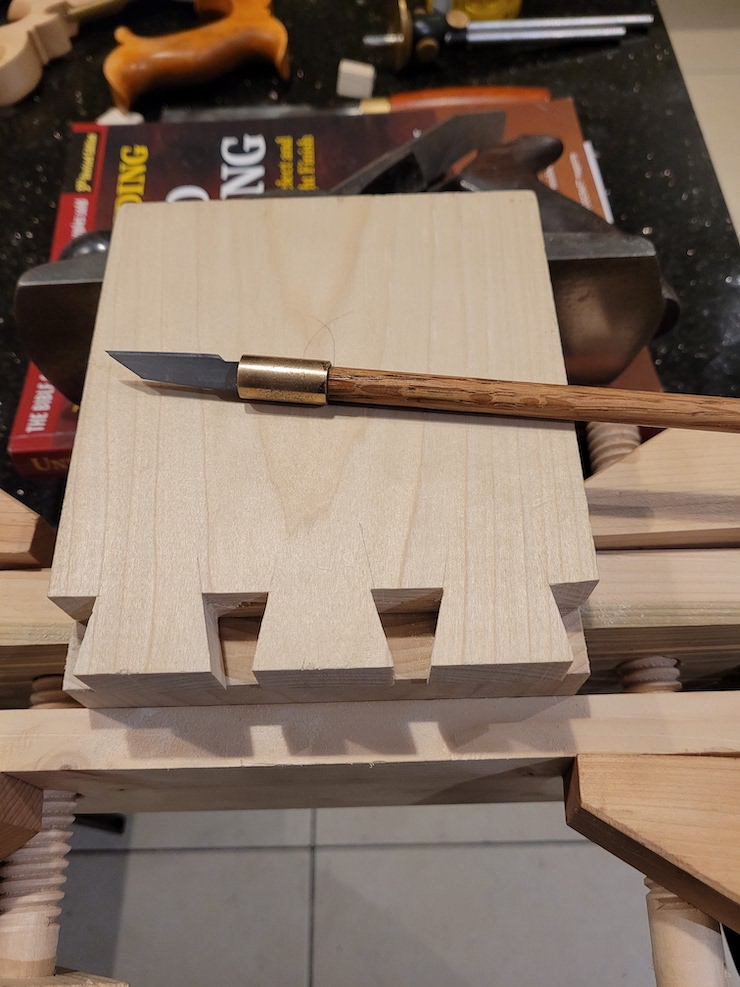
The last set of practice dovetails. The shoulders are not great. The moxon was too narrow to securely hold the board for cross cutting, so sawing shoulders was generally a problem. If I use the travel moxon again, I’ll probably saw well away from the lines and chisel to finish. Hindsight is great. Nex tpin in is just about perfect, I was very happy with it. Next pin has a gap on the left. The same error as the previous set, but only once this time. Right shoulder is pretty much the same as the left. All in all a lot learned during my holiday. I’ll look forward to cutting a few more practice sets when I get home and have a bench, vice and proper lighting.
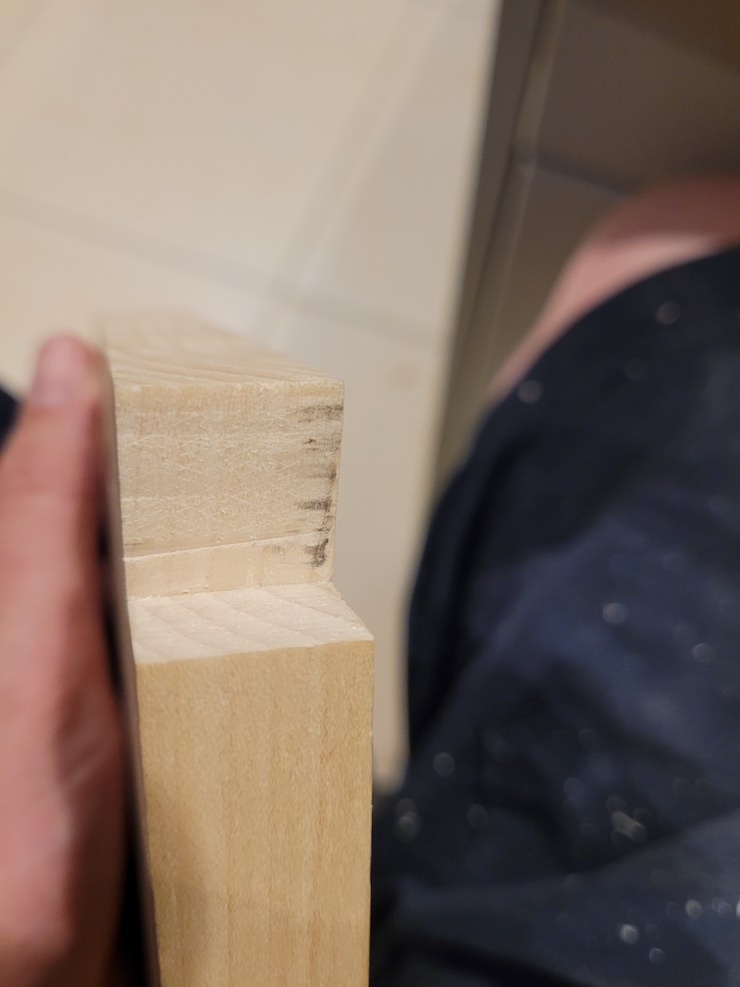
A bit of a gap from an off plumb saw cut, otherwise great.

A holidays worth of dovetails. I’m glad I took the time to do this. Not working on a piece you plan to turn into something frees you up to relax, experiment and learn. I’m definitely planning on practicing and improving a bit more.