Saw Making 101
So you want to make a handsaw, you have a curiosity for how they are made, or maybe you are one to work with your hands. Or even yet one that likes to make your own tools. You have an appreciation for the old and new makers and wonder how they are made; it can’t be that hard. You have taken the time to look though a plethora of patterns and profiles of makers and have decided on your choice of timber you will use…now what?
I was asked to write an article for the team on what it takes to make a handsaw. In full disclosure I’m by no means an expert on the topic nor do I claim to be, I am but a mere informed amateur that aspires to become a proficient novice. That aside, I want to go through an overview on what is involved in making your own saw. I would recommend to the first-time maker that you will want to start with a smaller saw like a dovetail saw and would not go longer than 12”. This is to make the process quicker and for you to have greater success.
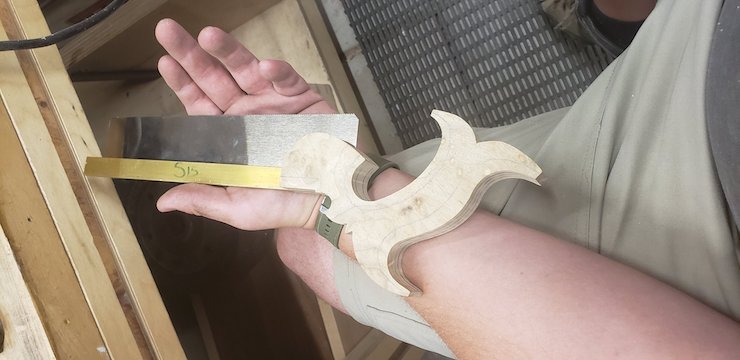
You are going to want to start with sourcing materials for your build. There are a few places that you can get a saw kit, one being Blackburn Tool and another being Sierra Nevada Tool (the author’s own store)… both make great kits. Typically in this kit you have a back hardware and the plate. If you’re going to do your own, I would recommend that you use hardened shim stock for your plate. The reason I would point you into starting with a kit is it takes out about half of the hard steps in making a saw and you don’t have to hold on to the scrap materials.
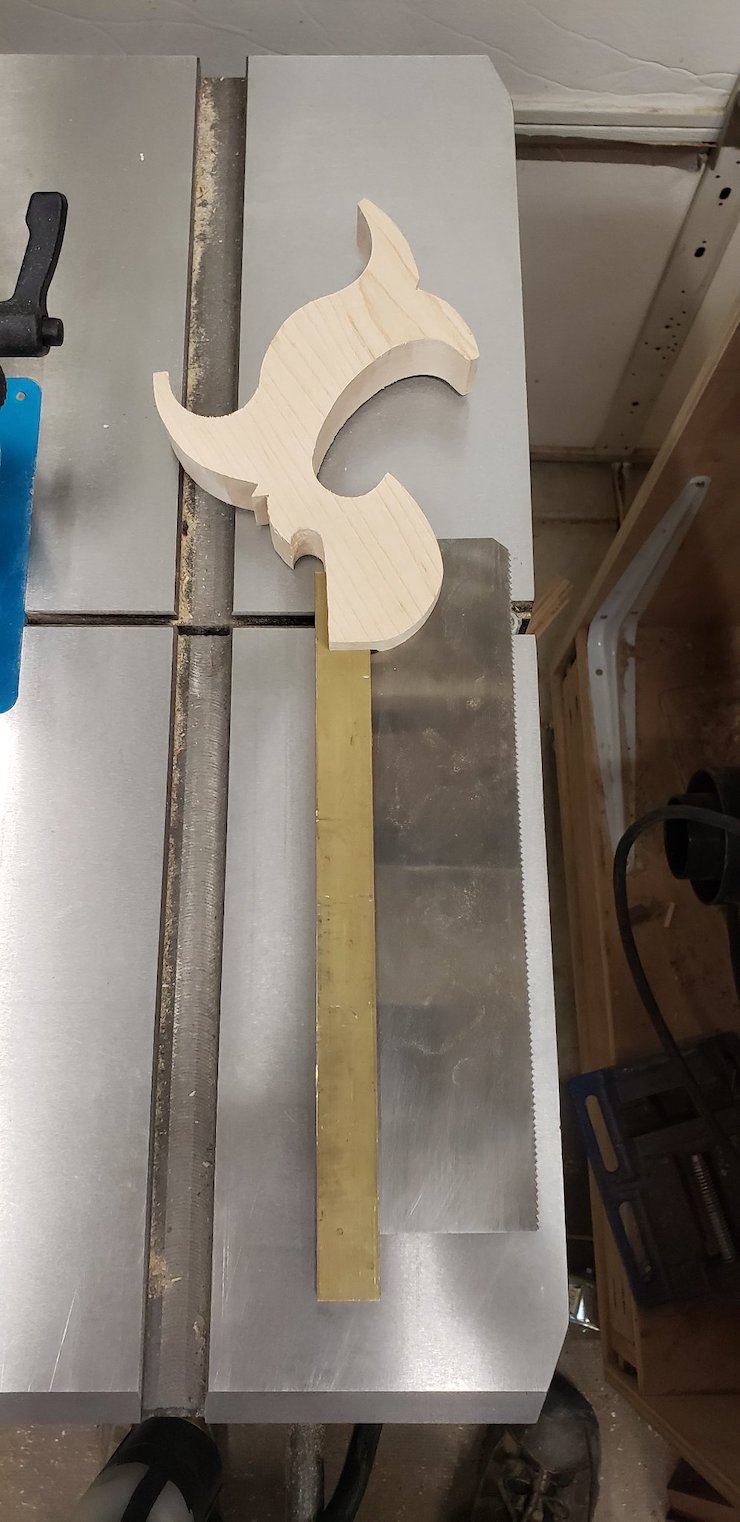
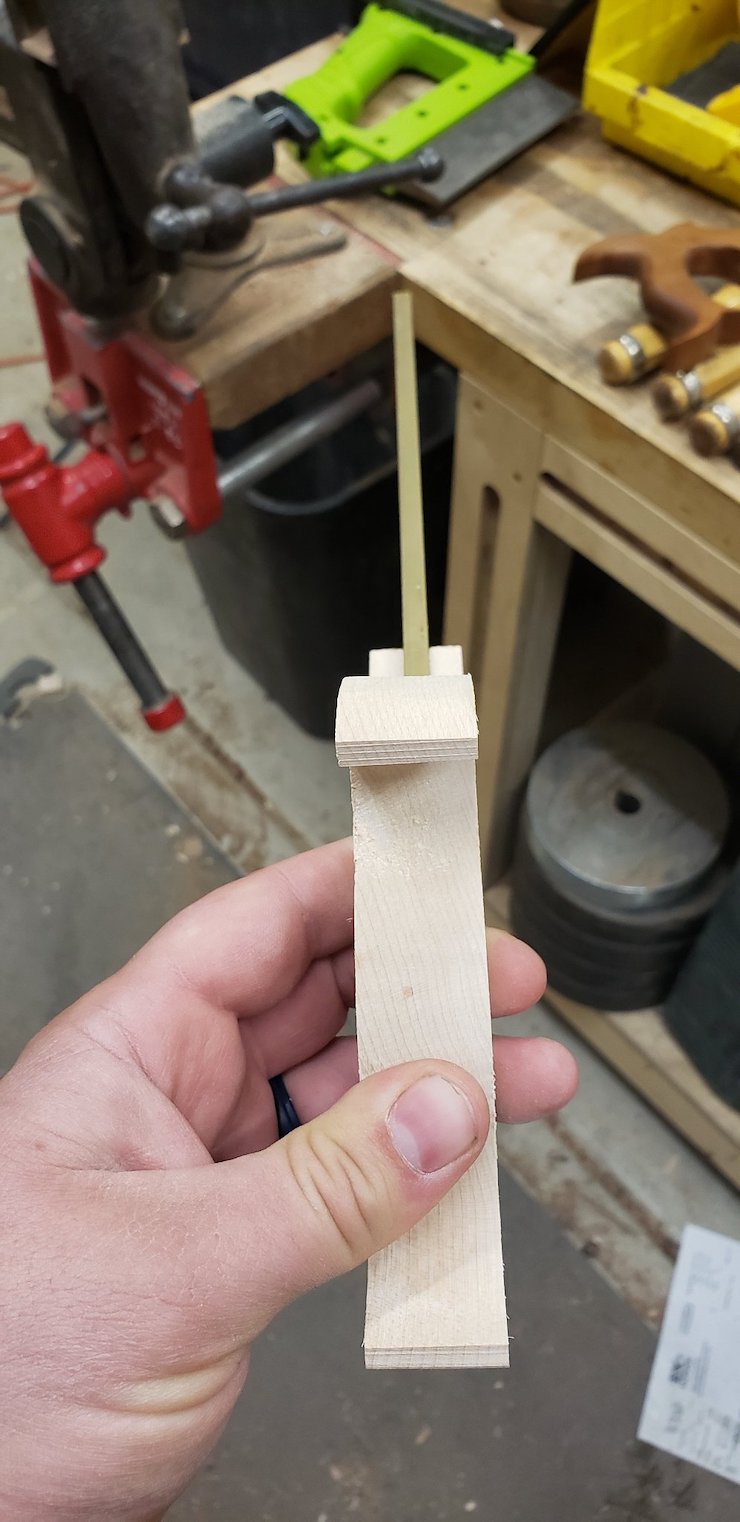
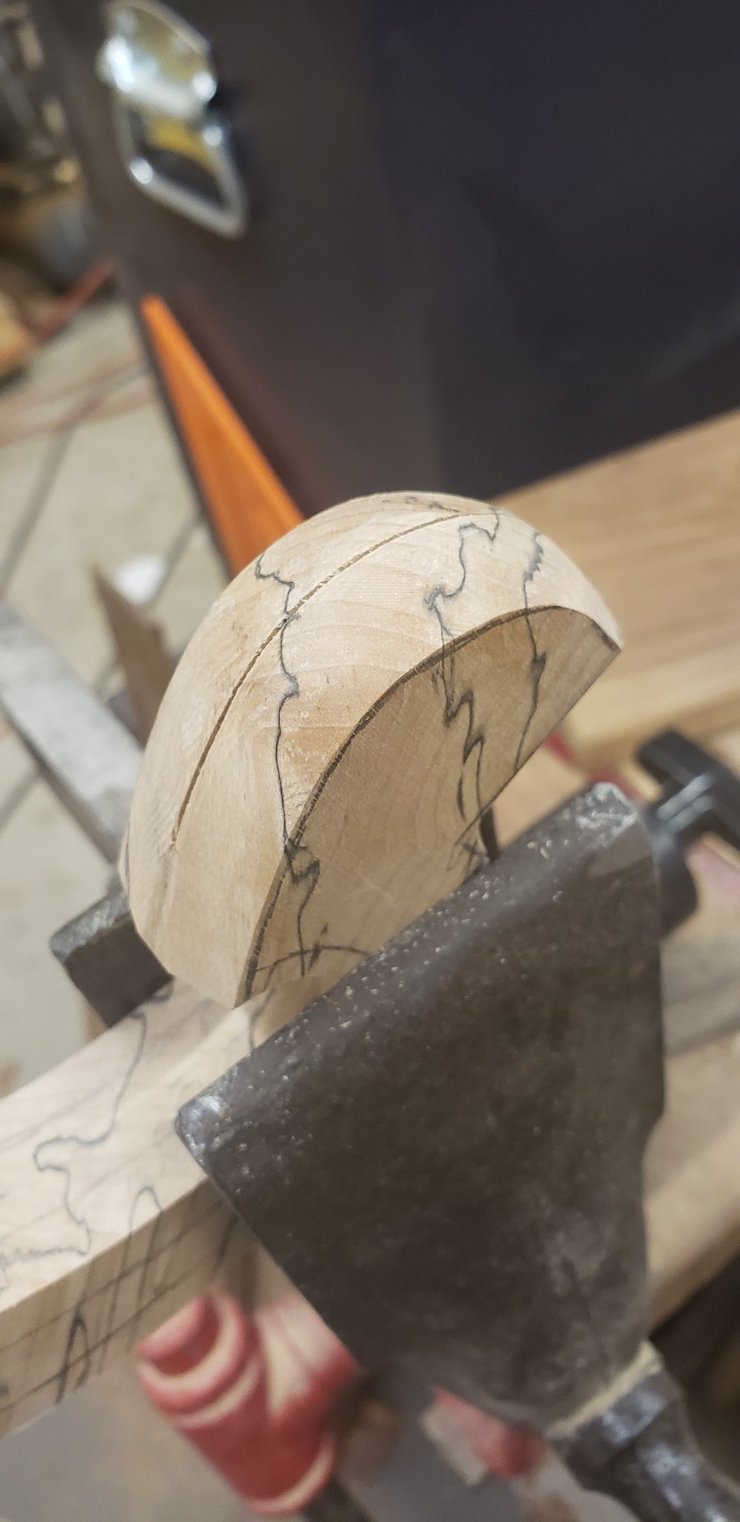
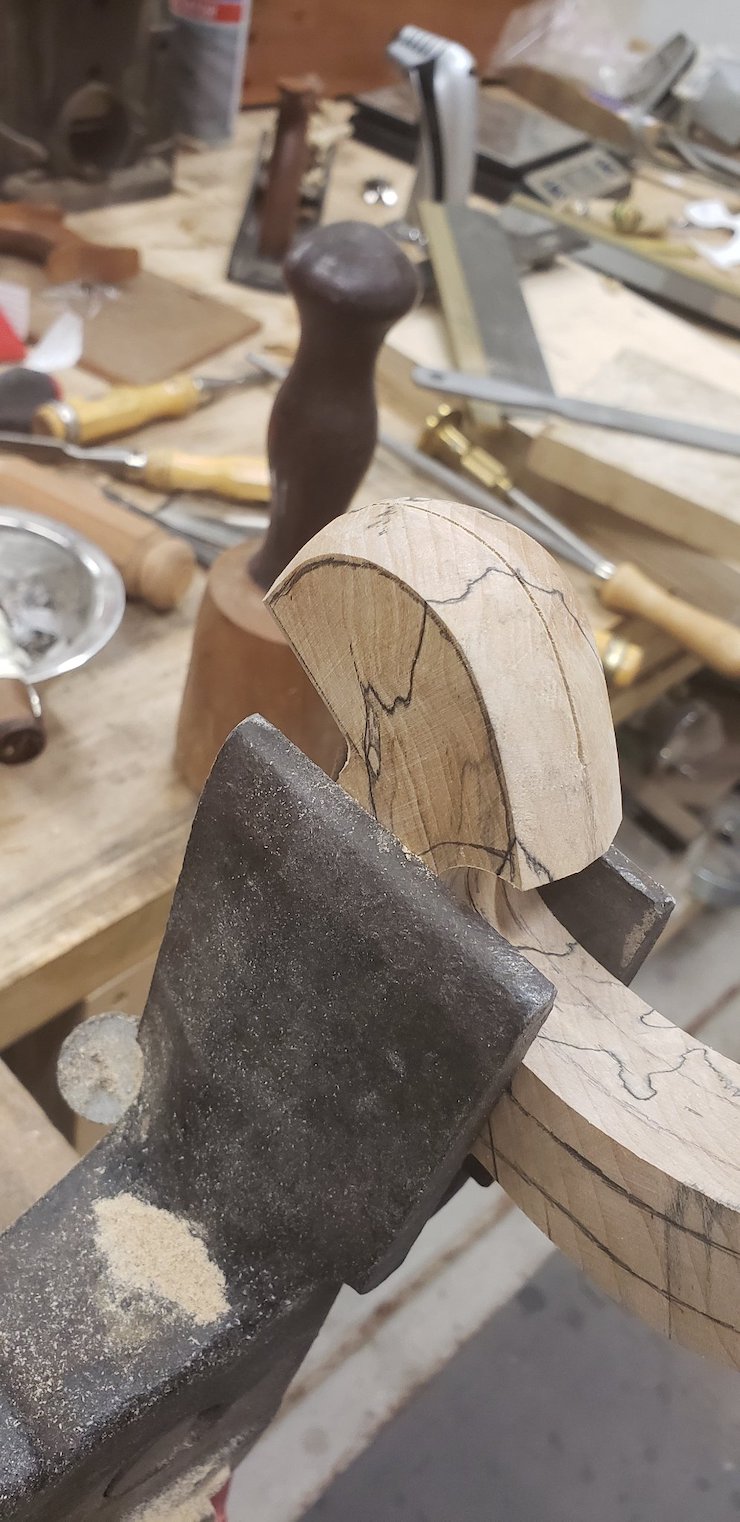
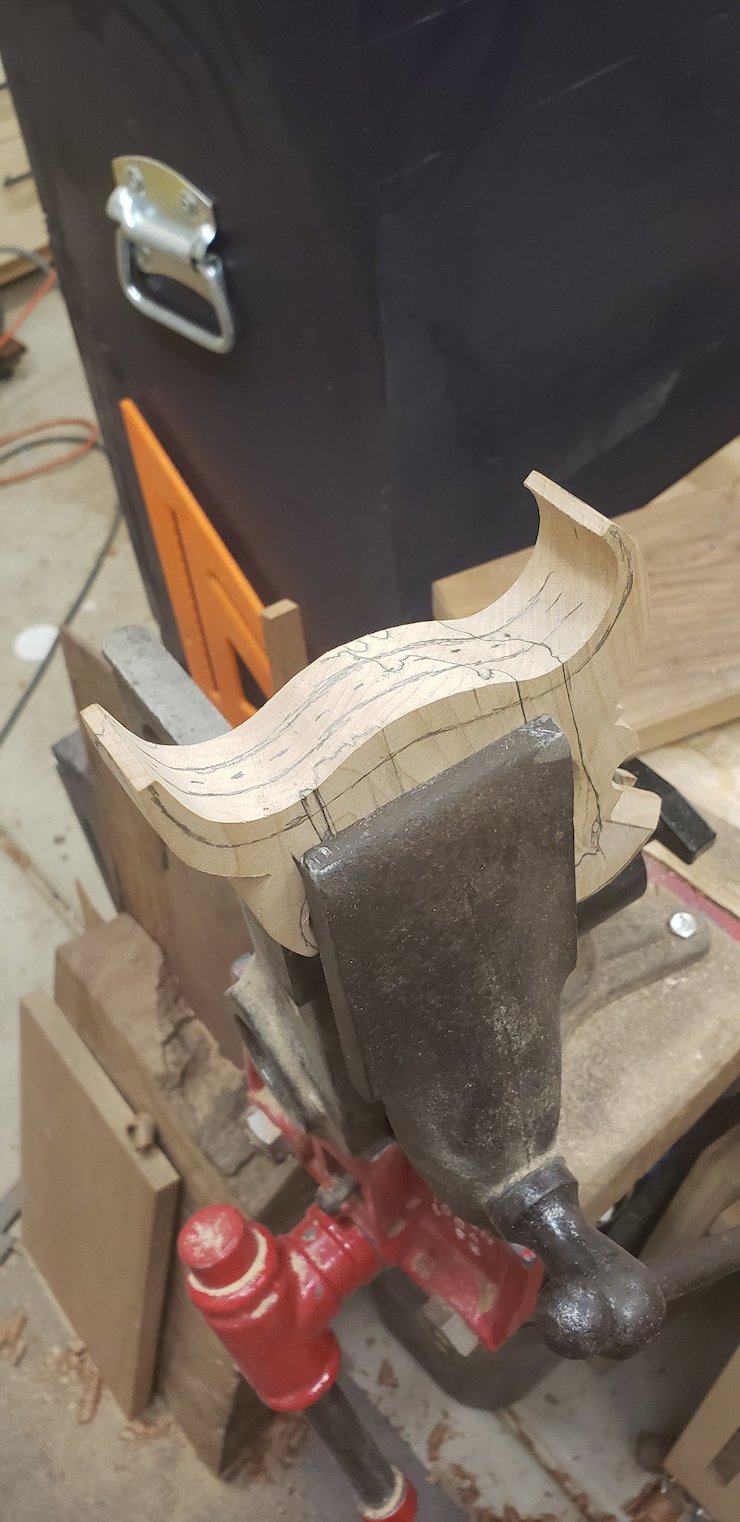
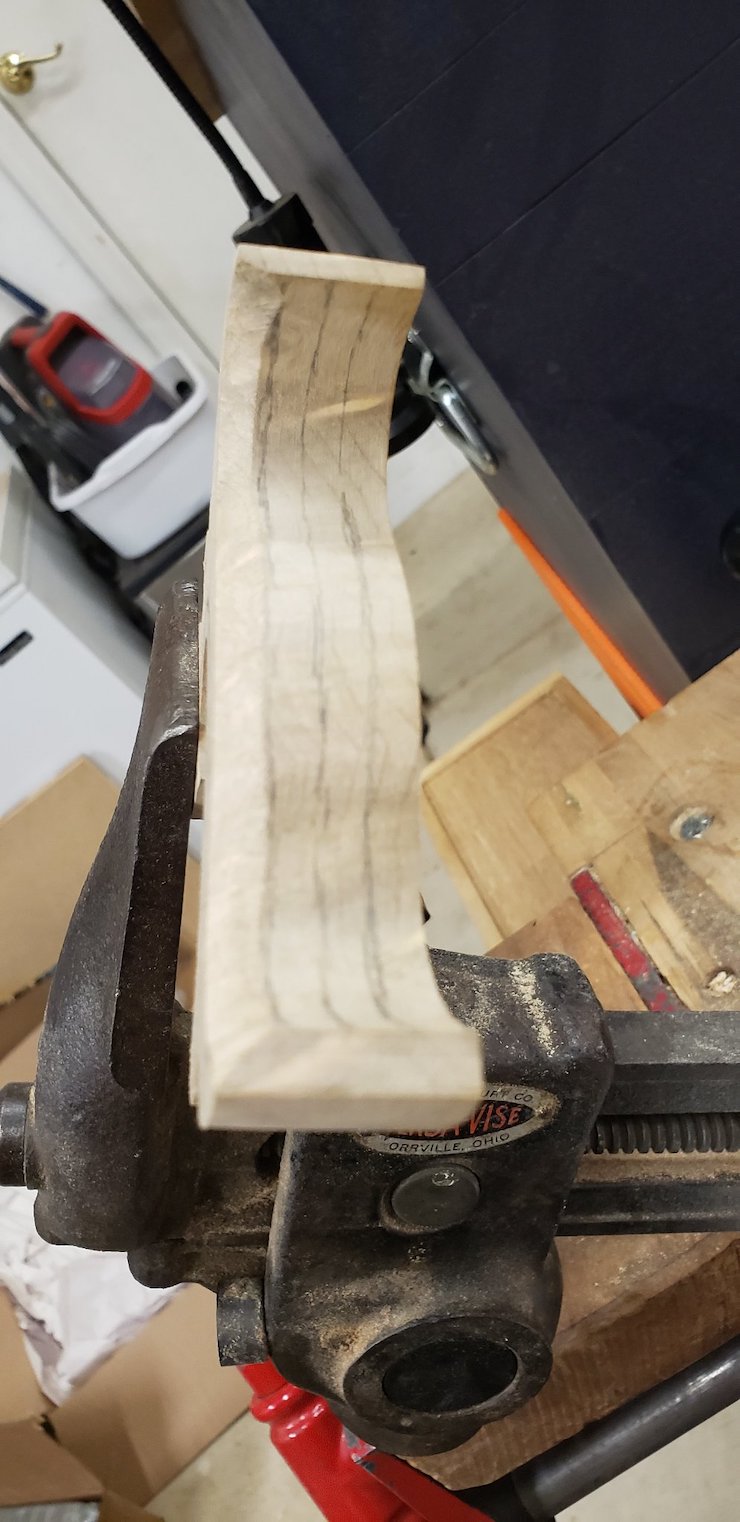
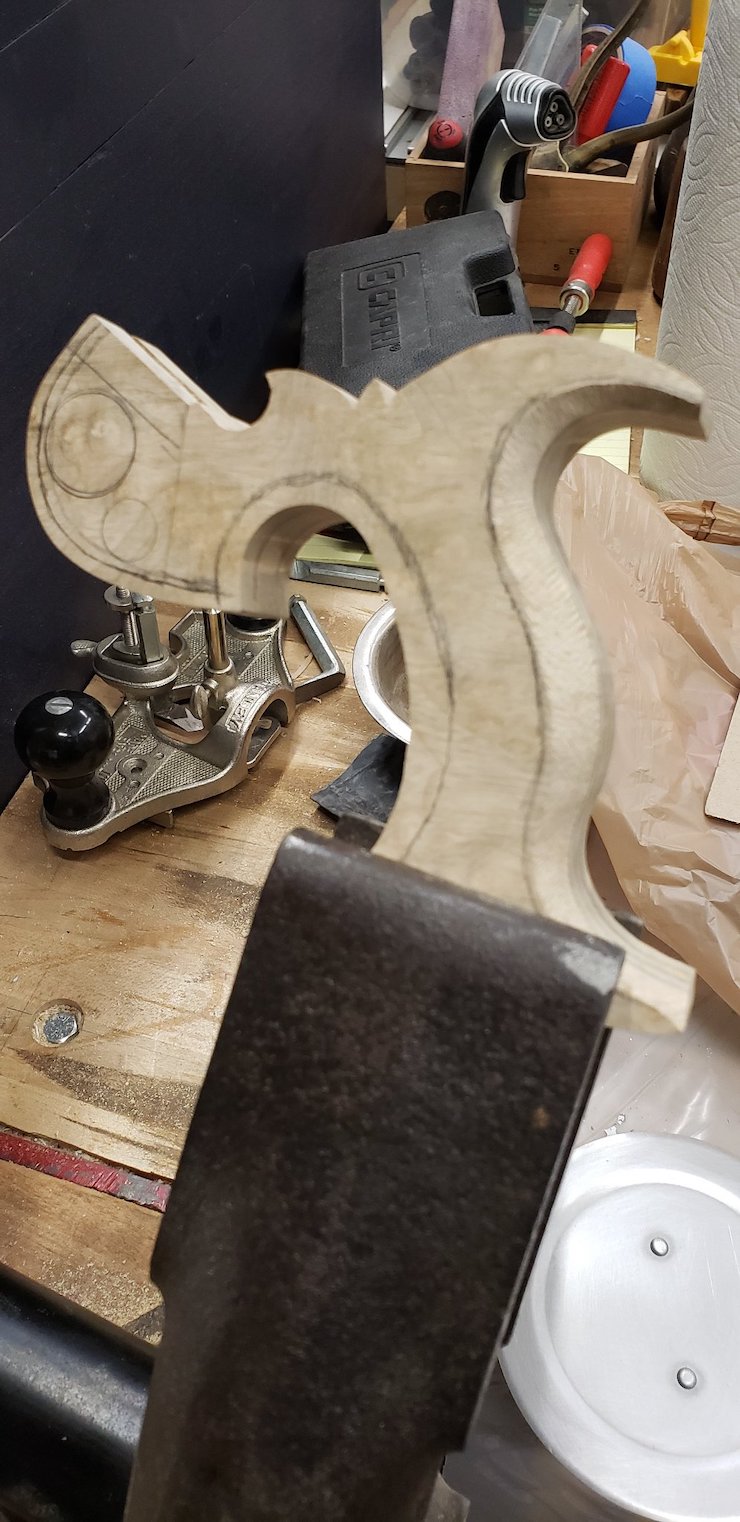
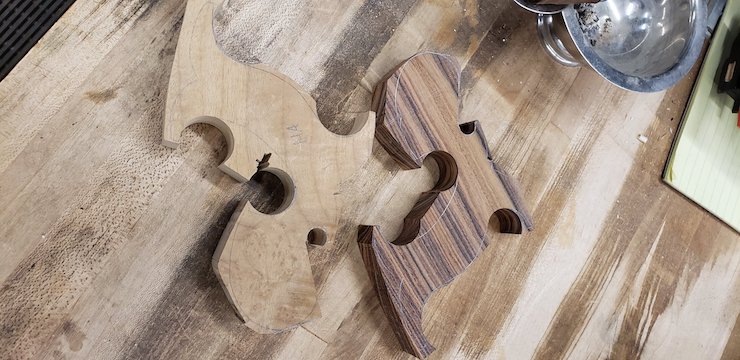
Now that you have your kit let’s start with the handle. This piece of wood should be hardwood with a straight grain. I would suggest that you start with a common wood that is not difficult to shape, I like walnut and maple for this. The second note on the wood is to cut out several blanks. This was one of my first mistakes that I made when I started… you will see shortly. Now that we have our pieces of wood you will want to layout a template; this can be done in a few way. You can find a template online that you like or copy an old handle that you have laying around or even better, you could design your own! The best way I have found in laying out the template is to glue it on with stick glue or 3M Super 77. It is important that you pay attention to the grain direction and that it is moving straight through the hand. As for the cutting it out, I use a drill press and a bandsaw to do the majority of the work. Once you have the handle in the rough 2D shape next is to start the mortice, not the shaping, hold your horses we will get there!
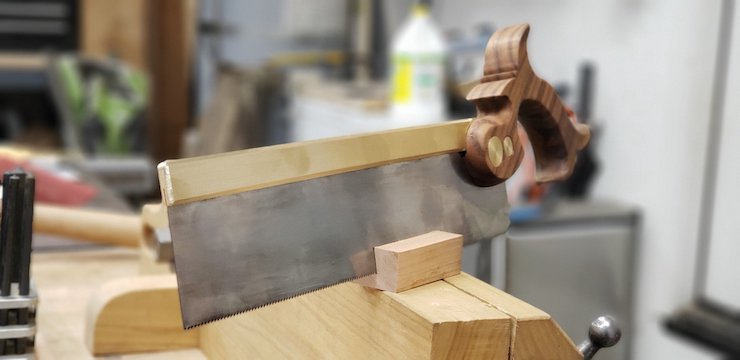
We start the mortice on top for the saw back because it is crucial that this be straight in line with the handle and plate. If this is not straight, then there is no use in shaping the saw handle because it will not perform in the manner that you wish it to. I do this by laying out where I want it to be on the outside of the blank and carry the lines over to the other side. If you have cut mortices before this will not be a big deal other than it is small and in a tight place. Make sure that your back sits level with the top of your saw whether it is supposed to sit flush or just proud make sure its level.
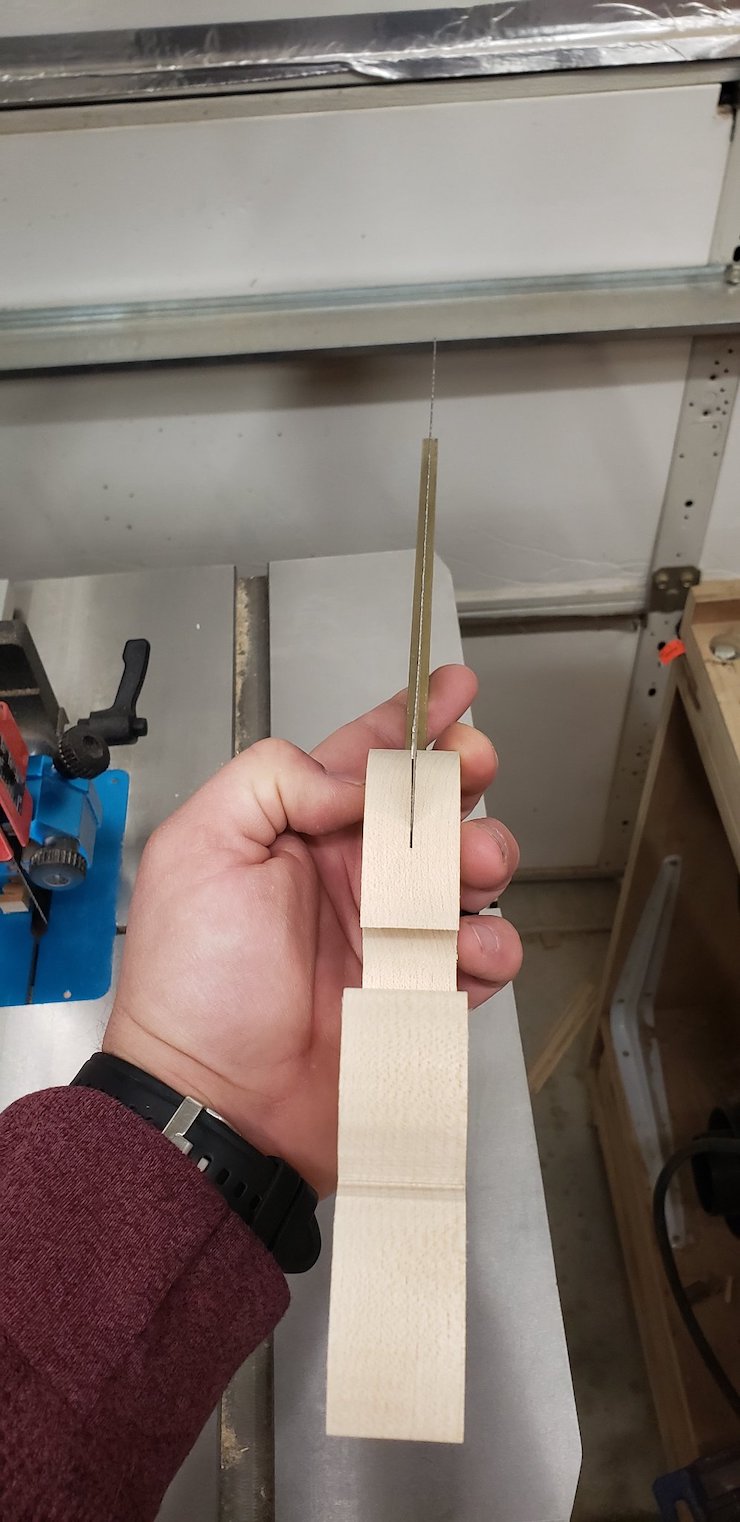
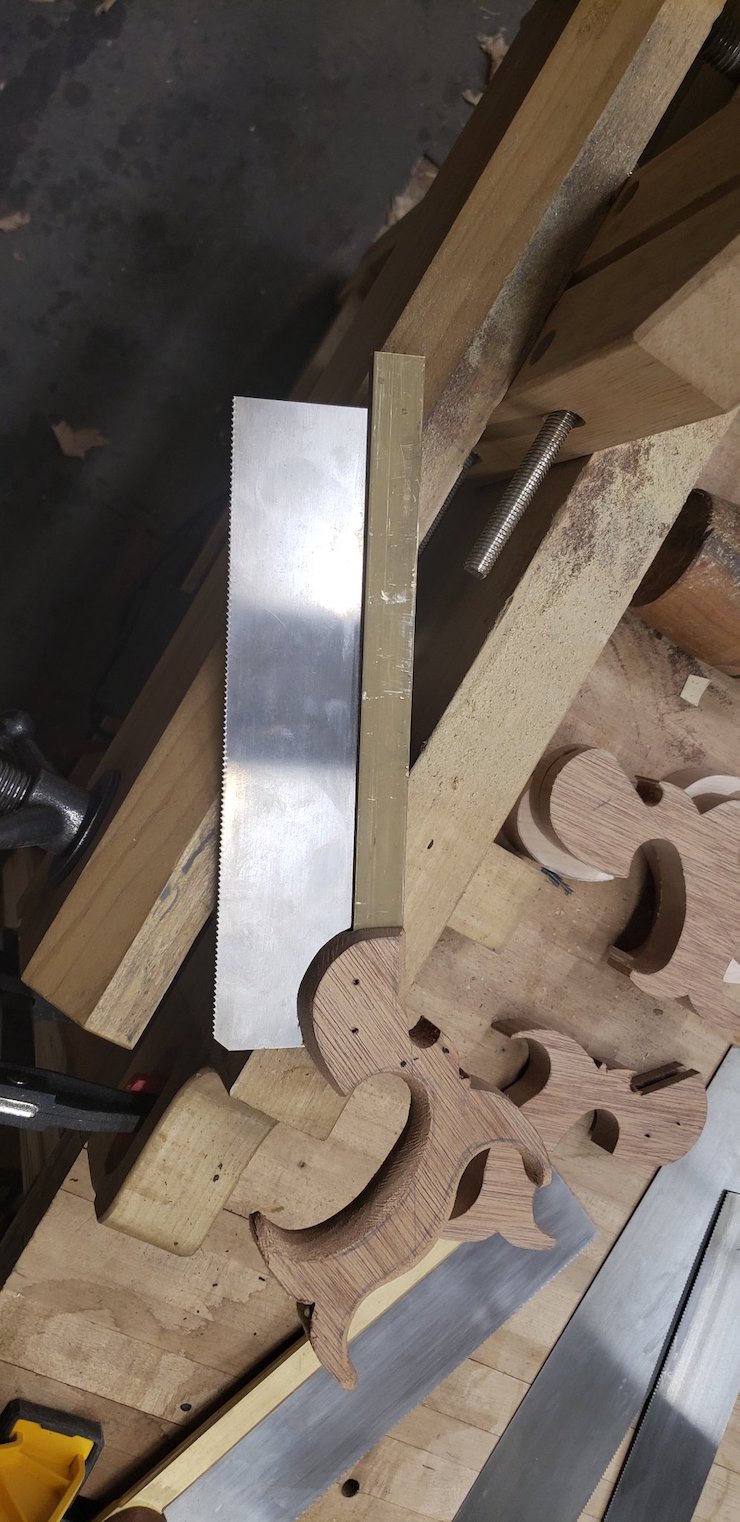
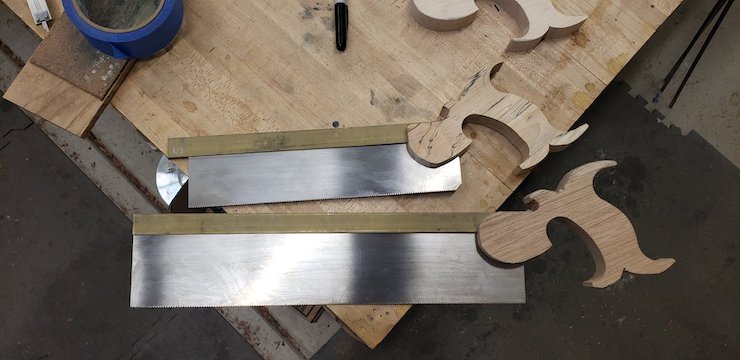
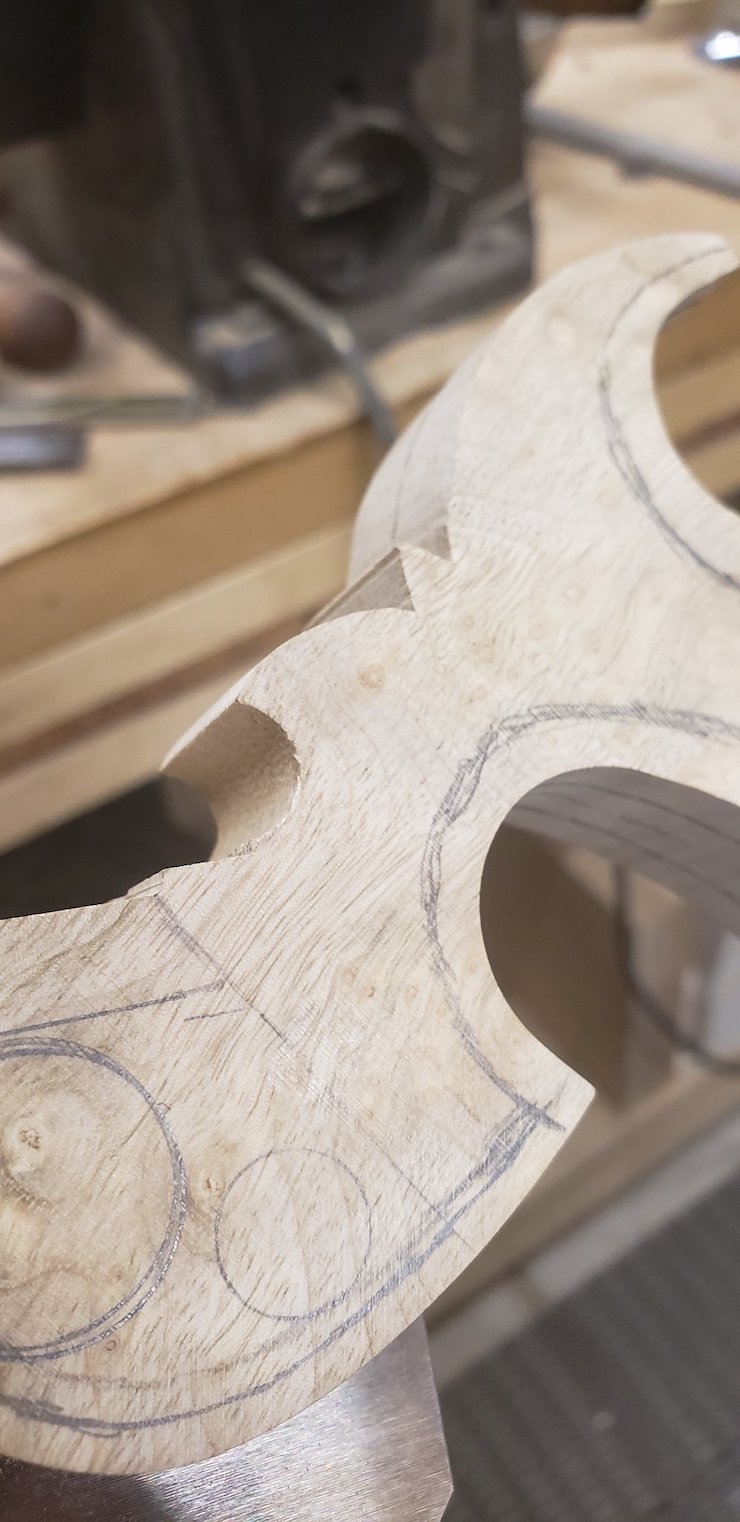
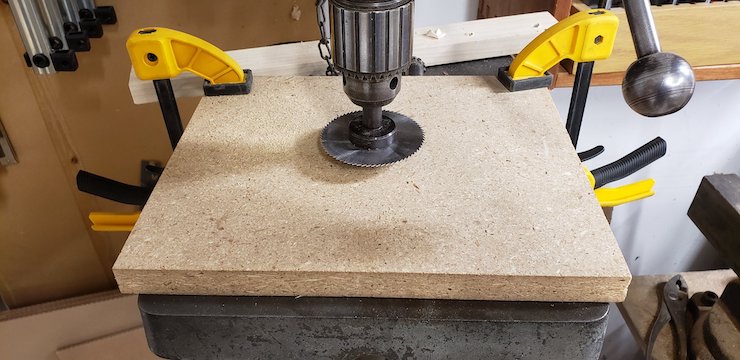
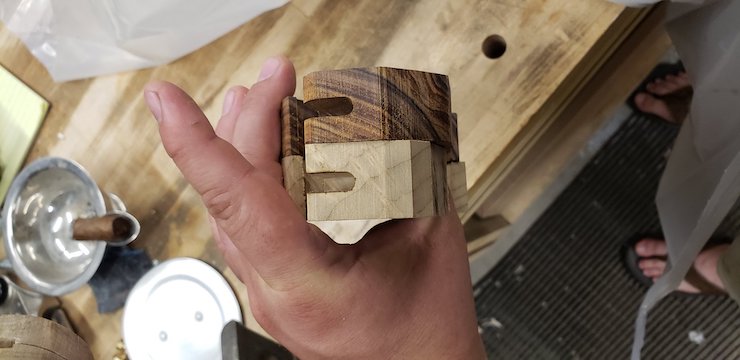
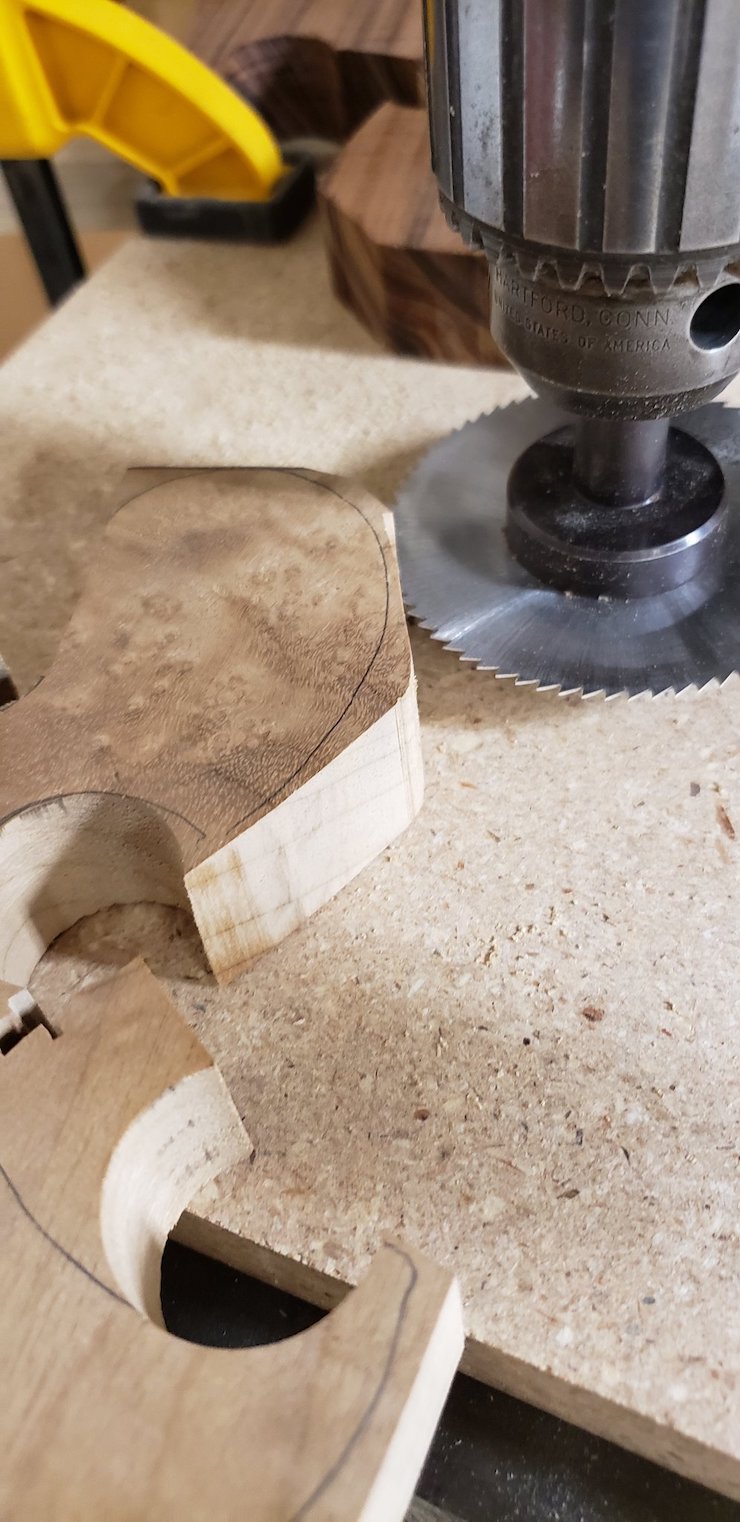
Next, we need to cut the slot for the plate, his can be accomplished several ways. One, you can sharpen the plate you will be using by securing it to a blank and use that to make and cut the slot. This is a method that is low cost but can take some time to get the kerf started. You can use a similar saw even if the kerf is .005” or .010” wider it is okay and will work well to cut the slot, like a dovetail saw. I always ask then how did they make the first one if they didn’t have a saw to start with? And last, you can risk your fingers and buy an arbor and a slitting saw to put in your drill press to start the kerf. In any of these methods it is helpful to have another saw that you can finish the kerf with. It is important that you have a straight slot for the plate and one for the back. IF you don’t have these then start over as there is no use in continuing with that blank.
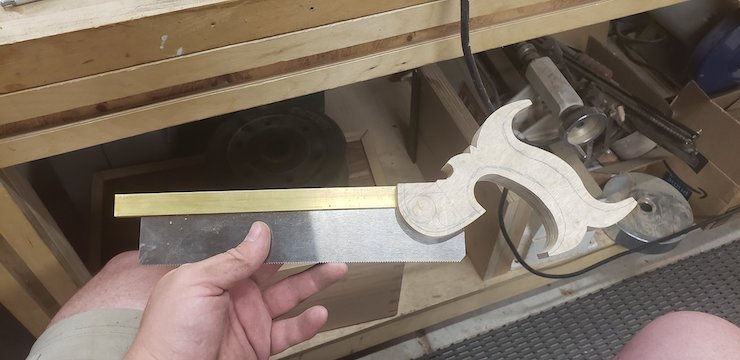
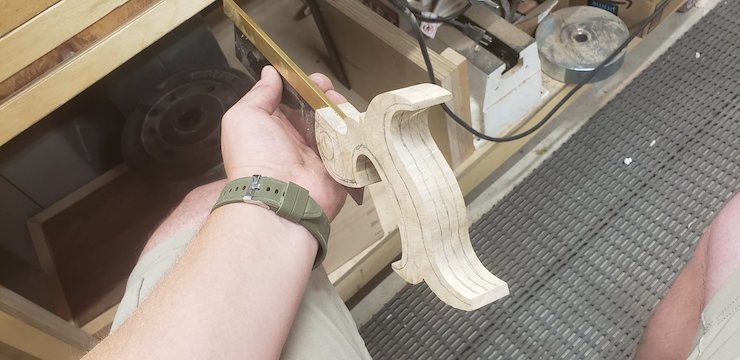
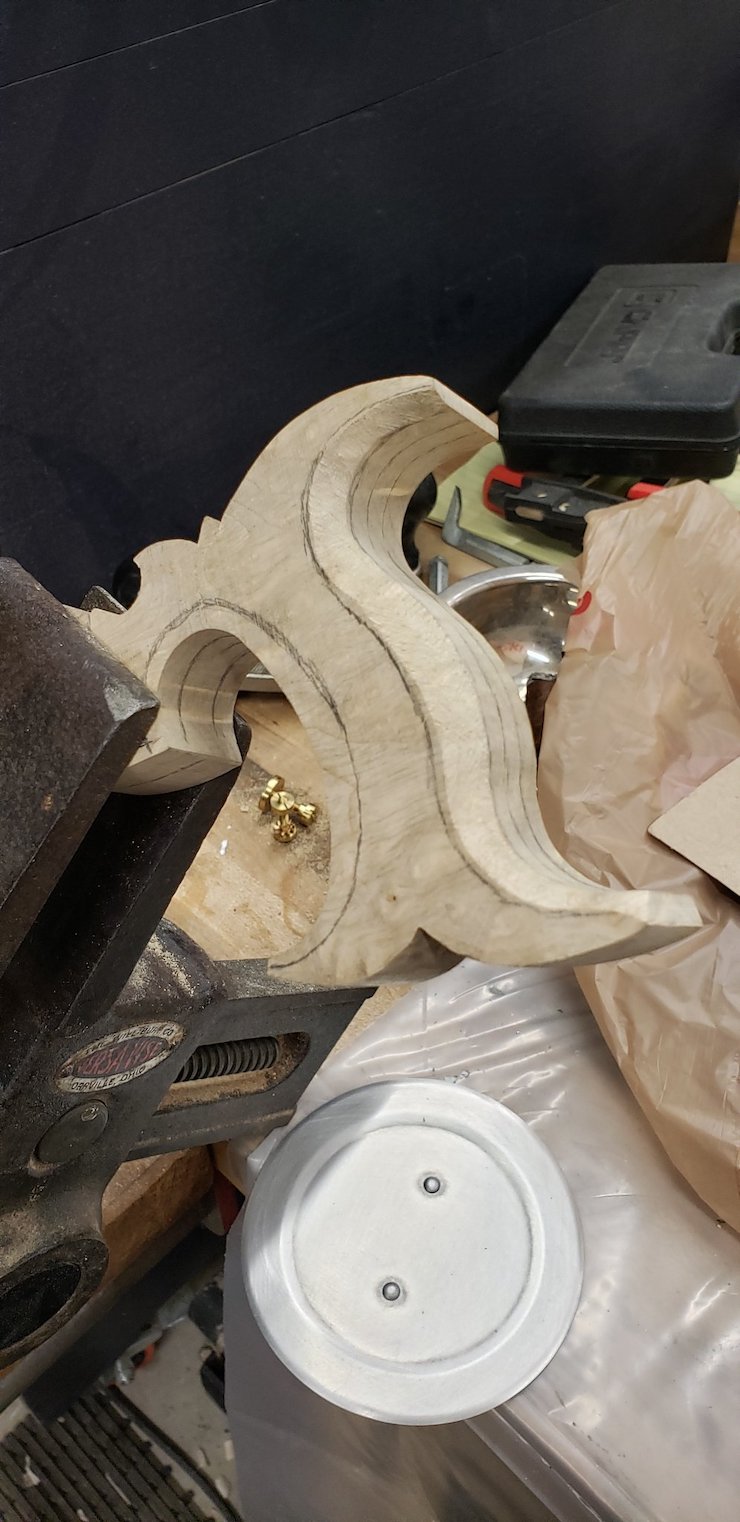
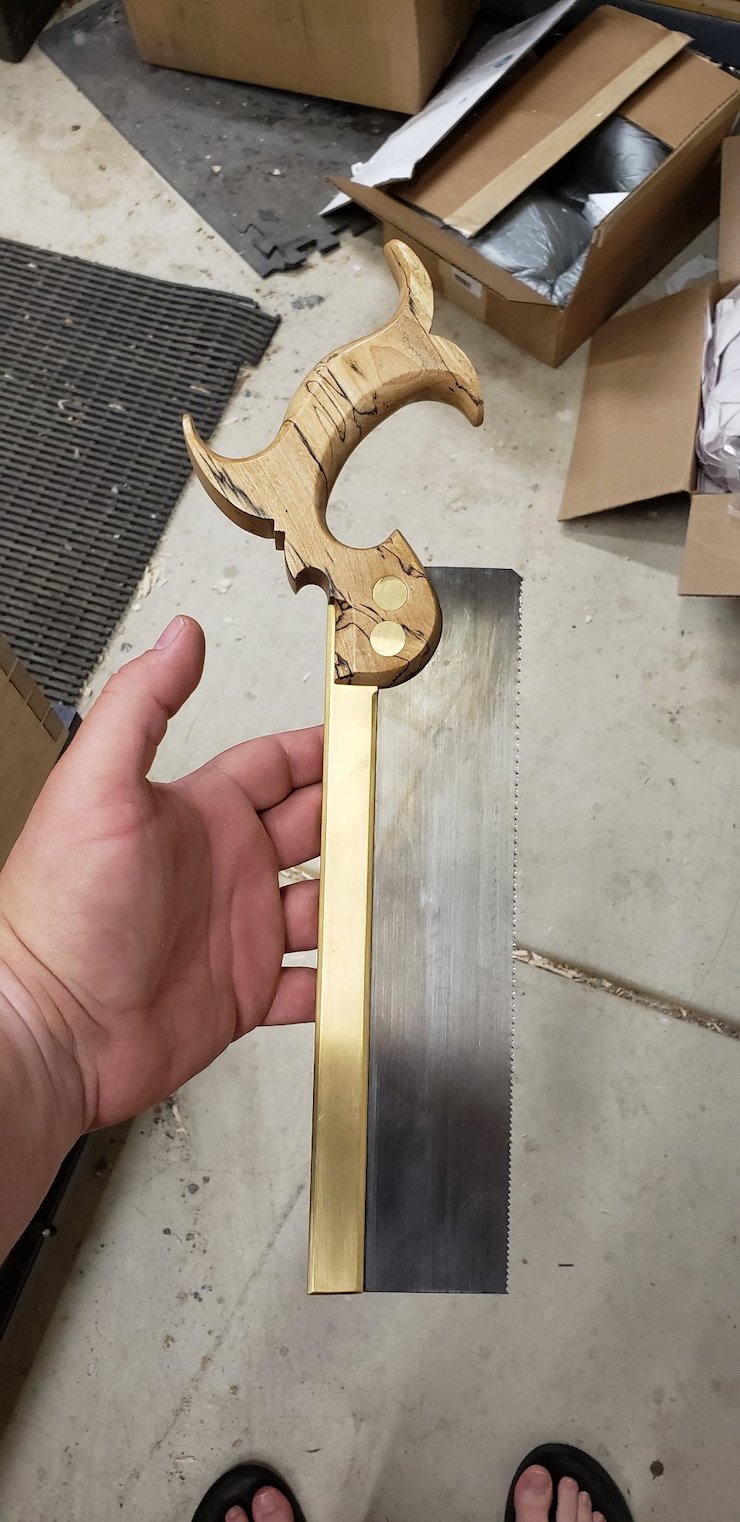
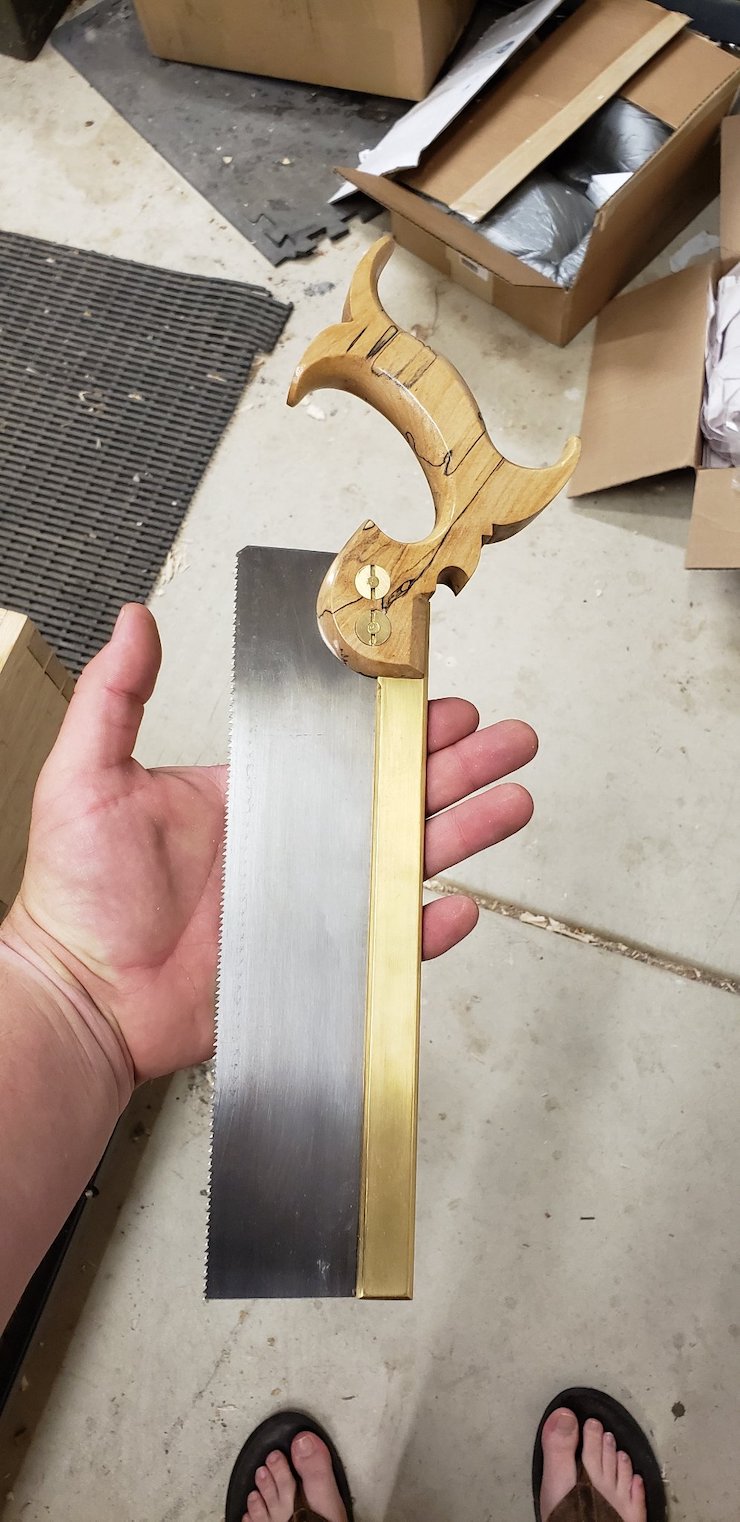
Now on to the fun part, shaping. Shaping the handle is the best part, it’s the most creative part in the process and one where you get to feel how the saw is coming together. Now there are some specialty tools for shaping handle, but you don’t have to have them. Grab a set of three rasps for cabinet making and you’re good to go. If you want quicker results, you can use a router with a round over bit…that works also. Take your time in this step and sand the profile smooth. It will show in the end the time that you have taken.
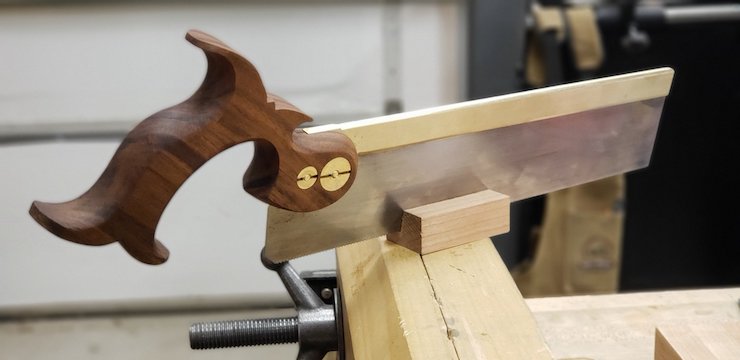
Now is the time for you to add your embellishments like a bevel to all four sides or round overs to your saw back. After shaping or not on the back we should have a shaped handle that is fitted to a plate and back. This is when I “close up” my back with a vise or a press. It is important to make sure that you will have even pressure along the back to hold the plate. You don’t have to press it on…there are many makers that will pin the back or glue them in with lock tight. Pressing them closed is just the traditional way to go about it. If you are pressing, we are not trying to get the gap to close completely, if you have a set of feller gauges this will serve you well. If you back slot is .020” and the plate is .020” then we want to close it up by .005” that’s it. The feller gauge should have a little drag when closing the back. This will make for a tight fit that you will use a batten to install on the back.
We are close to the final step; at this point you should have a saw that sits in front of you that looks and feels like a saw but there is no hardware! This next step is fitting the hardware. I like to have flush hardware on my saw, but as you might imagine it can be difficult to line up the two faces with a flush nut and bolt. I locate where I want my hardware and drill a small pilot hole through the blank. This pilot hole will help in lining up the forstner bit on both sides so its not a 1/8” drill bit! The drill bit I use I believe is 1/32” and this is enough for the tip of the forstner to follow. Only drill as much as you need to so that the nut and the head of the bolt are flush. Next drill the hole for the shank of the bolt. For drilling the plate, I would recommend using a spade carbide bit for drilling or if you have a metal punch use that.
Once you have drilled your holes you should have a completed saw. Congratulations! At this point choose your favorite finish, mine is shellac, and apply and polish. If you have not sharpened the saw, it is time to do so. I prefer to sharpen the plate and have a set started while the finish is drying. I know people that will sharpen and set the saw first then do their finish on the wood, it is up to you.
I hope this will give you a brief idea on what goes into making a saw and will inspire you to look at taking on a project or two.
~ Ian
Addendum by Charlie Earnest
I would add a couple things that might help people as well.
The wood blank should be quarter sawn or rift sawn at the least. Flat sawn stock might seem like it works at first but the likelihood of the handle warping is high and eventually it will take the plate out of true.
Make sure your brass for the spine is dead flat on a reference surface before you start shaping it or fitting it to the handle. Brass with a bend or multiple bends will lead to trouble down the road.
Make sure your spring steel is as flat as possible. Some of the deformation may be removed when you’re done with the friction fit but in a lot of cases not all of it will be.
Folded backs are traditional. Milled backs of the type Blackburn and Sierra Nevada sell are a much more recent innovation. There are many ways to fit plate to spine. The method Ian talks about is called a friction fit and something Isaac Smith covers extensively on his website blackburntools.com. He covered the entire saw making process in depth as well as a host of other topics in his blog.
I may have missed it but I didn’t actually see the part about how to install the plate into the spine.
Kerfing the handle using a slitting saw arbor on a drill press works- make sure your table is square to the arbor. Slitting saws are thin and warp very easily. You might not see the damage it does when this happens but I can’t tell you it’s there. Once a slitting saw has been run too hot and heavy through a handle the edge heats up and eventually the saw blade is no good. The edges have become loose and your slot will vary in thickness or worse. It’s not always noticeable. Go slow. Don’t cut real deep. The larger the diameter of the saw blade the more chance you will have of it heating up when it’s run in too deep.
It doesn’t take much to turn a lot of work into scrap. Issues with the slot in the brass, a slightly wandering slot for the blade in the handle, the blade slot centered while the slot in the brass is not, etc. Go slow, take your time and check everything twice before you mate all the pieces.
~ Charlie
Images