Adventures in Stool Making
I recently handed over a stool I’ve been working on to my 4 year old son. You may laugh, but I’ve been working on it on and off for 2 years. More accurately, I’ve been working on 3 stools, that’s just the first one that’s come all the way to completion. My inner perfectionist got away from me a bit on this project. I’ve spent more time fettling tools and experimenting with them than actually working on the stools. I thought I would walk you through my process, and impart some lessons learned along the way.
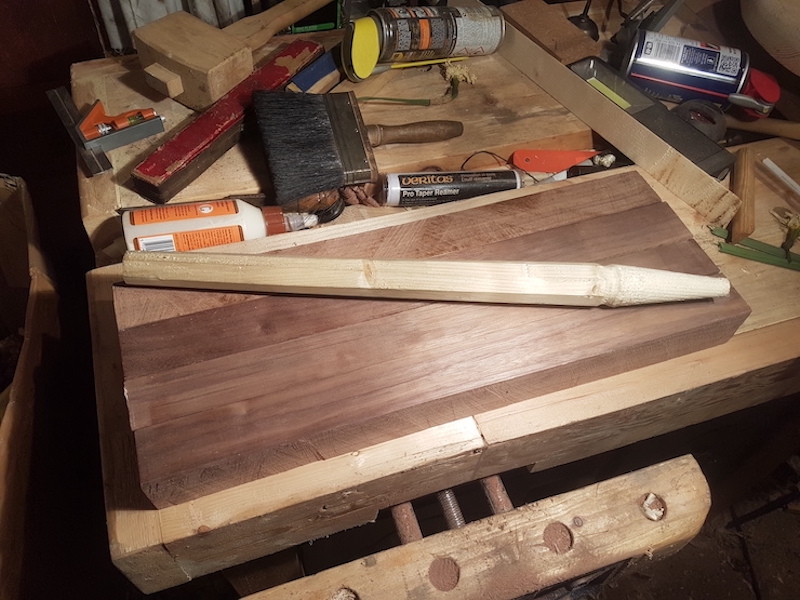
First off, the legs are tapered octagonal legs with a curved transition to a tapered tenon. The first set of legs were sawn from 2 inch thick walnut stock. Ripping through that much walnut is hard work. Midway through the legs for the second stool I switched to riving. I tried a Froe, but found it very hard to get started in the dry wood I was using. A hatchet and a mallet did better work on dried stock. Riving is a little scary. If the stock is expensive, and you are inexperienced, its hard to be really sure of whats going to happen. But it is fast, crazy fast. A couple of wallops with the mallet and a minute or two with a scrub plane and you are done. If you are going to rive, you probably want a scrub plane to clean it up afterwards, or at least a very heavy cutting jack plane with a very cambered iron.
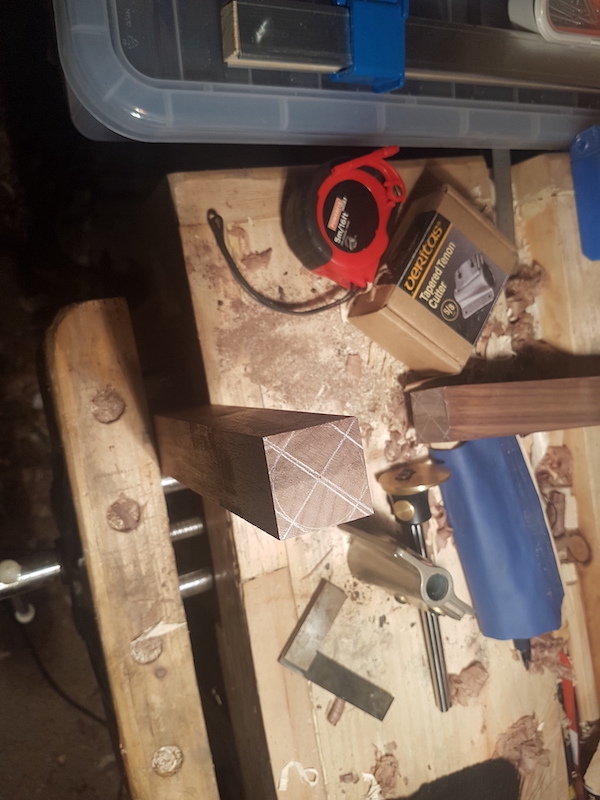
Next comes the tapering. You need to mark all of your layout on the leg before you start, including the position and length of the tenons, before you start. Once the leg is a tapered octagon, reference surfaces are hard to come by. I marked out the start and end of the tapers on the tenon portion, and bottom of the leg as well, as once you have tapered one side, some of your layout marks for the other are likely to be gone, and you will need to re-establish them. I never succeeded in creating a perfect octagon. Always a little off. That said, when the human eye looks at the finished stool, its very hard to tell. Perfection is not needed here.
Once you have tapered the first two sides, you will run into work holding problems. A tapered piece will not be held very solidly in a normal vice. I built a Moxon with oval holes for the handles so it could handle tapered work.
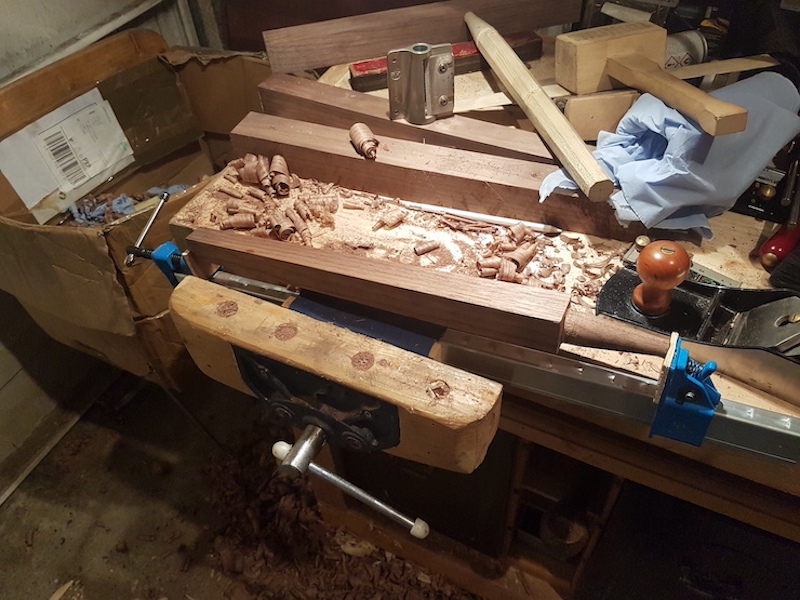
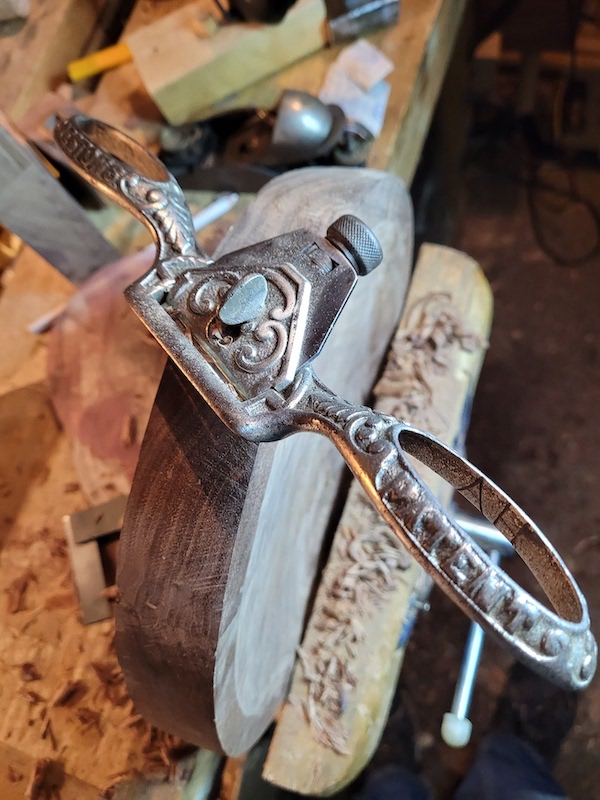
On to tenon cutting. I marked out a 1 inch circle on the end of the stock, and sawed off most of the waste around it. Then used a spoke pointer to put a point on the end (not completely, still flat at the top, just enough to make the next step easy. Then I used a brace and a tenon cutter to turn that into a 1 inch cylinder. Again, it can be tricky to get this straight and perfect.
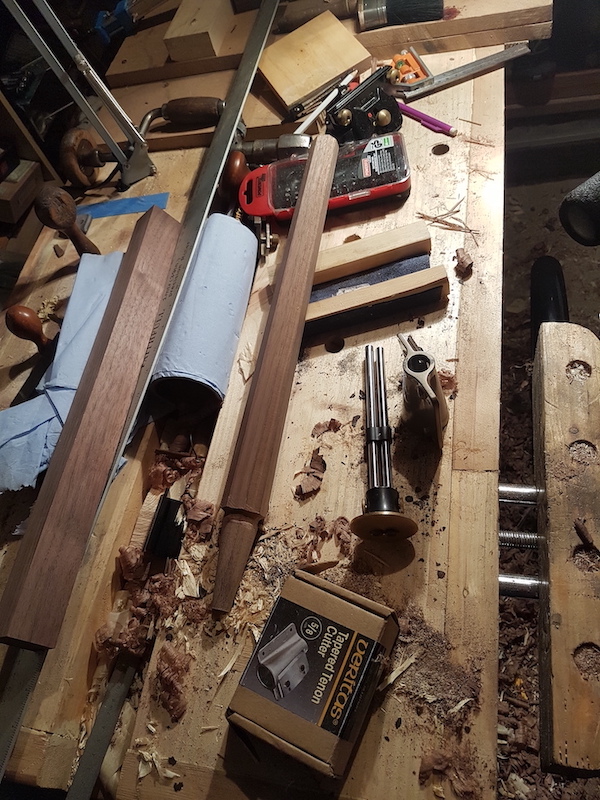
There are two ways to compensate for mistakes. 1. When you turn the tenon into a tapered tenon, you can exert some force to correct (I use a Veritas tapered tenon cutter for that). 2. Even if its a little off center after that, you can plane the legs a little more to make it more central. The very first one, I rough shaped with a spokeshave. It took a lot more time and was more fiddly than the tenon cutter. The main drawback of the tenon cutter, is that they can jam or lose their depth setting in hard wood. I would do about an inch, then take it off and check everything was still good before continuing. I also used a 14 inch brace, its hard work, you will be glad of a big brace.
With the tapered tenon in place, its time to the create the transition. This would be simple work on a lathe. I do not have a lathe. I tried using rasps, files, gouges and sandpaper wrapped around dowels. No matter what you use, its slow, painful work. In the end I settled on using 2 Auriou modeling rasps. A fine and a coarse. The curve of the rasp is the curve for the transition. The coarse rap does a good job of establishing the shape, and the fine leaves only a moderate amount of work left for sandpaper. These rasps don’t have safe edges, so as you get close to the tenon you need to pay a lot of attention or you are going to have a lot of cleanup work to do. Then its fine sandpaper rolled up into little sticks to finish it off. Small card scrapers came in handy for deep scratches now and again.
I do the finish planing on the legs after all of that. I line the 3 legs up, eyeball them to see they are roughly the same size, and plane a little more off the biggest ones if they are obviously not to the same size.
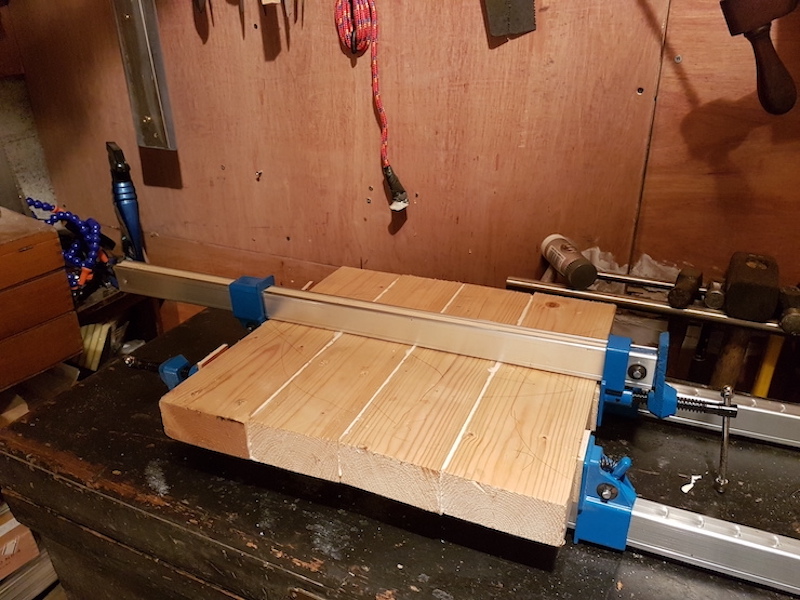
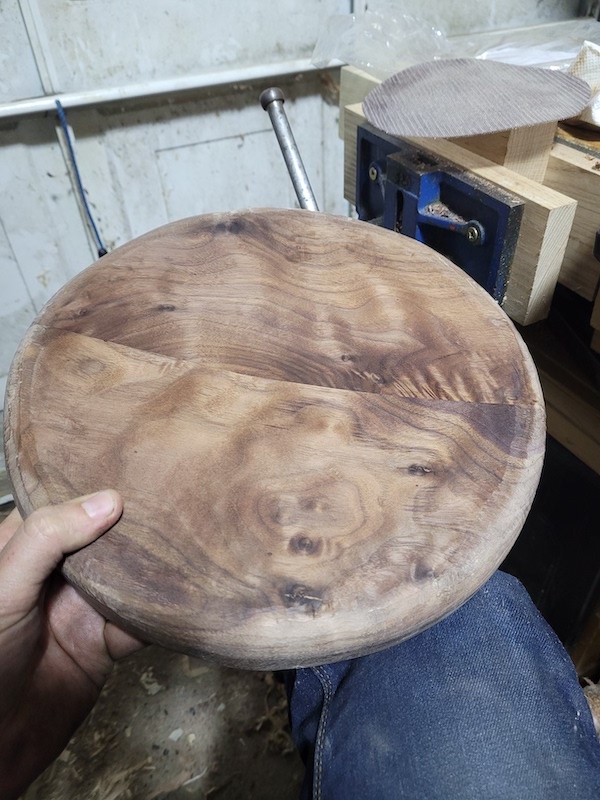
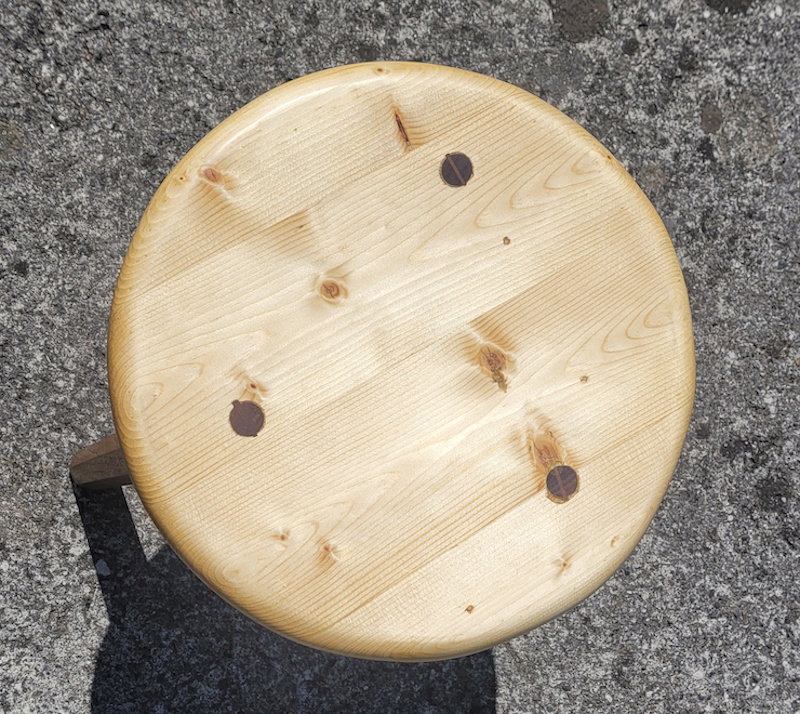
I now move on to making the seats. I made life hard for myself here. One is pine riddled with knots in a 4 piece glue up. You really do not want to saddle a seat with lots of big knots. One is straight grained maple, other than being hard, this was the most pleasant to work with. One is a 2 piece walnut glue up with insane grain. Its going to be very pretty when complete, but shaping and saddling is a nightmare, I don’t recommend fancy grain or hardwood in your first stool’s seat.
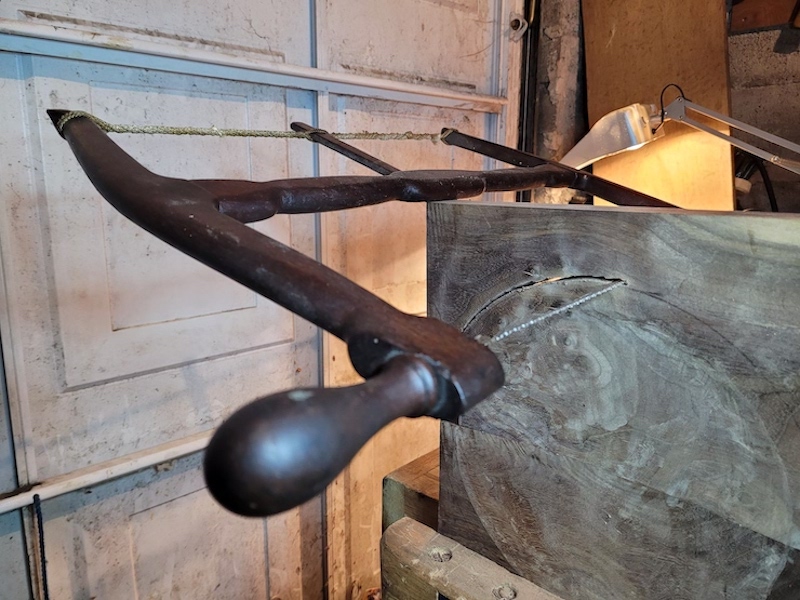
I glued up the blanks, laid out the shape with trammel points, and then sawed them to rough shape with a large Bowsaw. I tried using a draw knife to bring them down to final shape, but my draw knife could use some work, and I never felt like I had enough control. Spokeshaves it was. Spokeshaving a circular blank is a great teacher in reading grain. As you move from board to board in the glue-up and long grain to end grain as you work around, the grain direction can change on you every time you move an inch. If you like using spokeshaves, its fun work though.
At this point, I should have drilled the leg holes. I didn’t, I went on to saddle the seats and carve the round over. This meant I had to re-find the center later, and drill from the bottom of the seat which was still flat, up into the now curved/saddled seat while trying to avoid tear out. This was a challenge. You don’t want to ream the leg holes at this point, but you do want to drill them.
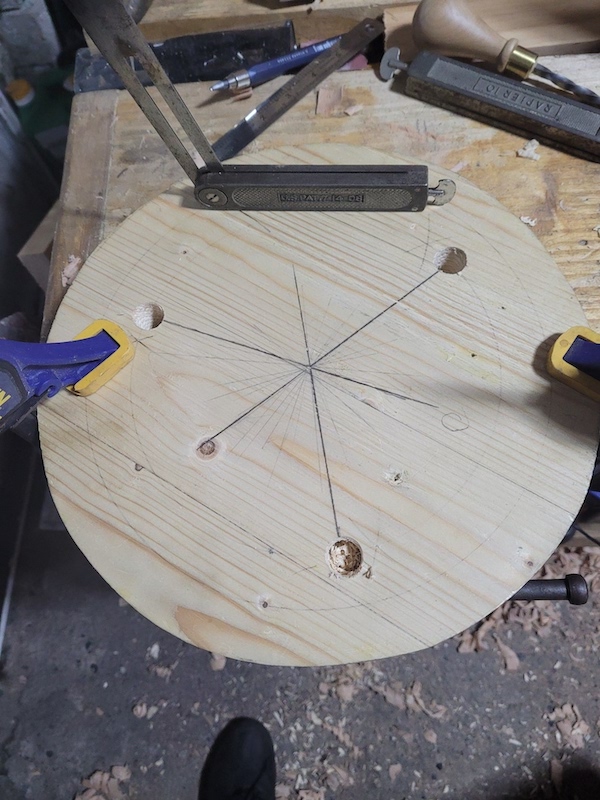
Next is figuring out where to drill your leg holes. This is what I do. The center of my tenons are about 2 inches from the rim of the seat. I use my trammel points to mark that circle. Set a dividers to the radius, then step them around the circle. Every second mark is a leg position. You want to avoid your leg hole being on a knot, or where two boards in the glue up meet. A knot will make it hard to drill. The tapered tenon acts a bit like a wedge and could pop your glue up apart if you drive it in there.
Set a bevel gauge to your desired leg angle. I think mine is about 12 degrees, but I really just held the legs up against the seat and stared at them a lot before setting the bevel to the angle that pleased my eye the most. I draw a straight line from the mark for the tenon hole to the center of the seat. Then with a 5/8 auger and a brace I drill. I line up the bit with the line to the center of the seat, then slide my bevel up beside the bit, and drill slowly, regularly stopping to check my drilling angle against the angle of the bevel. Small errors here can be corrected when reaming. I stop when the snail emerges of the far side of the seat, then drill in from the other side. Again using the bevel to try and match the angle. A little tear out here is not a big deal, as we will be saddling the seat later.
Now its on to saddling. My seats are pretty heavily saddled. About a half inch deep in the centre. You don’t need a lot of fancy tools for saddling, but oh my they help. You could get away with a gouge and sandpaper if you had to, but its slow going.
My final process after trying out an insane amount of tools…
I lay out a circle 1/2 inch from the edge of the seat. Then I drill a almost 1/2 inch deep hole in the center of the seat with a small Forstner bit. Then I move out a bit from the center and drill a slightly shallower ring of holes. Proceeding all the way to very shallow holes an inch from the perimeter. These are my depth guides and making getting even saddling easier.
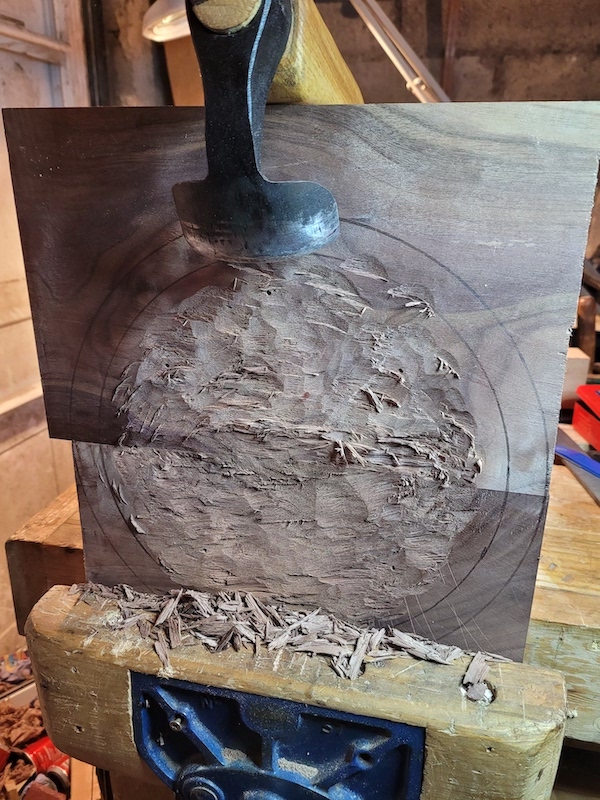
On hard woods like the maple and walnut I now move to my adze. You don’t really need this with pine. With the harder woods it saves a lot of time. I chop out a lot of the waste with it. I’m not trying to get rid of my drill holes, just have them all quite shallow.
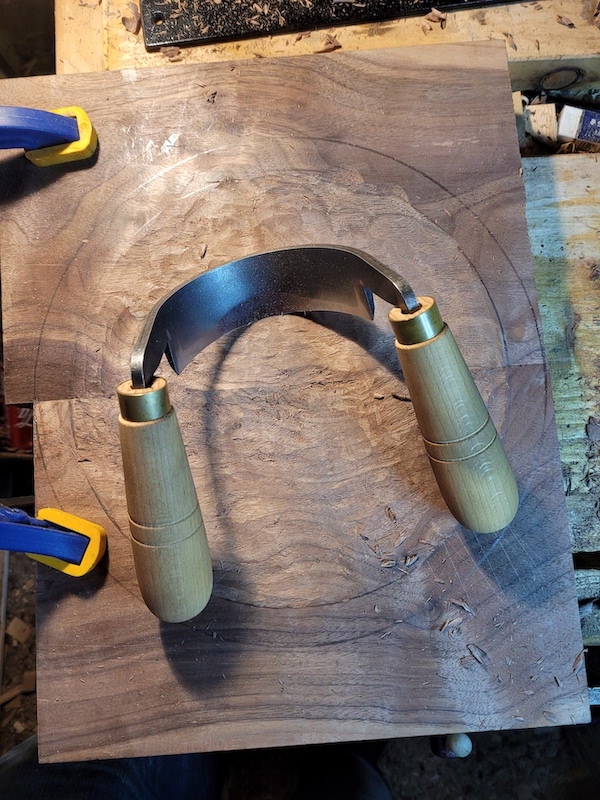
Next I break out the Scorp. If you are not using an Adze, this would probably be your first step, although on pine you can do the entire job with a Travisher. The Scorp I use like a jack plane, its job is to smooth out the very rough surface left my the adze. That’s a fairly quick job.
Next up, the Travisher. This is like a large spokeshave with a curved iron and sole. You could do the entire job with this tool, its just slower. The Travisher can leave a nearly finish ready surface. Its a tricky tool to get the hang of, as the position you hold it in can have it take an almost smoothing plane thin shaving or a fat thick jack plane like shaving. Now I’m refining the final surface. The last of the drill holes should disappear and I start to alternate between this tool and a cabinet scraper. I try to get to a finish ready surface with these tools, but so far sandpaper has always come into the mix as well.
The next step is the round over. I have some curved spokeshaves, but I found that they could not cope with the ever changing grain. I tried Drawknives and even a Scandinavian Skavel and various other tools, but always came back to a flat bottomed spokeshave. I mark a line 1/2 inch below the top of the seat all the way around (I have a handy marking gauge that follows curves well for this and holds a pencil).
Then another line 1/2 inch into the seat, then I create a bevel between the two. I stop when the bevel is the same size as the unbeveled top and bottom. Then I repeat the process on each edge, Creating smaller and smaller bevels until its not practical to go any smaller. Then I just finish the rounding by eye. All of this is done with the spokeshave.
Now its time to time to ream for the legs. On the first stool I beveled the underside of the stool before I did this, which was a mistake. The holes on the underside of the stool and going to enlarge when you ream them, so its hard to be sure where to end the under bevel. I take a specific leg, put a piece of masking tape on it and mark it “A” and then put a corresponding piece on the underside of the stool and mark it the same. This lets me put the same leg back in this hole during final assembly. If my tenon is a little off angle I can correct with the reamer and get the right leg in the right place during glue-up. The tape goes on the inside of the leg, and the tape on the stool underside goes on the layout line I used to sight when drilling.
This means I can get the right orientation later when I am going to glue up. Before I ream I decide which side of the leg faces out (the prettiest one). You also need to consider grain direction. You want the grain at the top of the tenon to be in line with the grain of the seat, so it does not split it when you drive it home. So you only have 2 options for positioning.
I use a Veritas reamer in a brace. I use my bevel and the same sight line as before (careful where you keep your bevel, if you lose your setting at any point its a major pain). And slowly begin to ream. Once I’m in a little, I insert the leg and check the angle against the bevel. I can do half turns of the reamer to adjust the angle and position. I keep going until the 5/8th inch portion at the top of the tenon emerges through the seat and there is little to no gap between the tenon and the hole. On subsequent legs I’ll try and make sure the height from the leg shoulder to the seat is the same as the first leg.
The legs get put aside and its time to add the under bevel to the stool seat. I like making this as large as possible. It makes the stool look a lot slimmer than it is. I start it right below the curve on the upper side of the seat and like to get within about 1/2 inch from the leg holes.
I’ve tried lots of tools on this operation as well. I still have not got a solution I love. The best I have found so far is to scrub plane a lot of the waste off and then finish with a spokeshave. I’m debating trying to saw a lot of the waste out with my Bowsaw next time. In theory this is perfect work for a Drawknife. Maybe I need to have another go at fettling mine.
With the seat beveled its time to glue up. I saw out wedges from offcuts aiming for about 2 degrees off 90. I insert the legs into the reamed hole, and mark where they emerge from the top with a pencil. Then I withdraw slightly and mark the bottom of the tenon in the mortice. I saw a kerf about 2/3 of the way down. Making sure to saw it across the grain to avoid splitting.
Glue goes on the tenon and in the mortise. The leg goes in and is driven home with a mallet (remember to get your grain direction right or you might split the seat. Glue goes on the wedge, then its driven into the kerf on the other side. Repeat for the other 2 legs. Let it dry.
We need to level the stool. The top of my bench is not level. So I take a large piece of plywood and use wedges to level that. Then the stool goes on top. I place a level on top of the stool and start leveling the top by inserting wedges under the feet. I chase my tail for a bit, changing up the position the level is sitting on a lot, as my hand shaped stool does not have a perfectly even rim. Once I’m happy its not going to get any more level. I find an offcut to rest a pencil on at the desired final leg height and slide it around the leg marking with a pencil. Take the stool down and saw off the unwanted length following the lines. Then the stool goes back up to check level again. My sawing is usually off a bit. I use a fine rasp to tune the ends of the leg (working from the outside in). Until the ends of the legs are all in contact with the plywood and the level says its level.
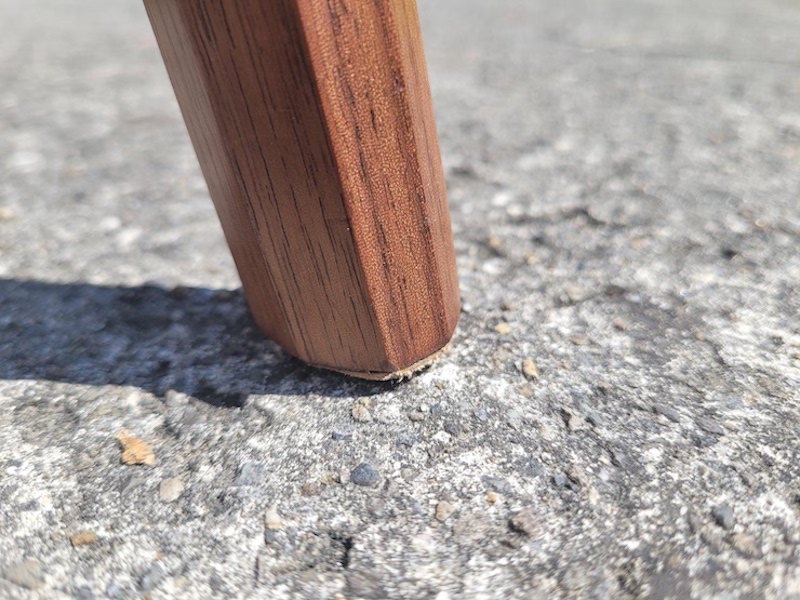
There are a few little details to take care of. I put a chamfer all around the ends of the feet. I cut some little pieces of leather and glue them (glue goes on the rough side) to the ends of the feet, and trim them. On the wood floors in my house it gives them a little grip. I check all the surfaces of the stool for dings and try and get it as finish ready as I can.
I finished this stool with a shellac and walnut sealing coat on the legs. Then Peacock oil followed by Alfie Shine wax, and I’m very happy with it.
I hope that’s of some interest. You can make a stool with far fewer tools and a far simpler design very quickly. I recommend Chris Schwarz’s “Anarchist Design Book” for a good introduction to staked furniture, and his “Stick Chair” book for a good guide on carrying out most of these steps with a small toolset.
Gluing up my first seat blank. This was pine fished out of a skip. Wish I had been a bit choosier. The knots where an issue, as where the undetected screw holes I later had to fill with kebab sticks.
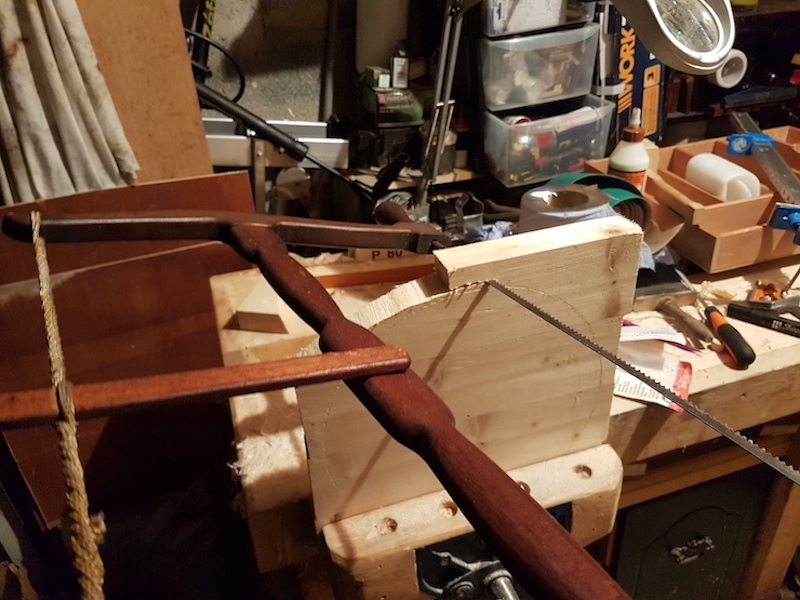
Once the glue was dry and I flattened the board. I used this big ole bow saw to cut the rough shape.
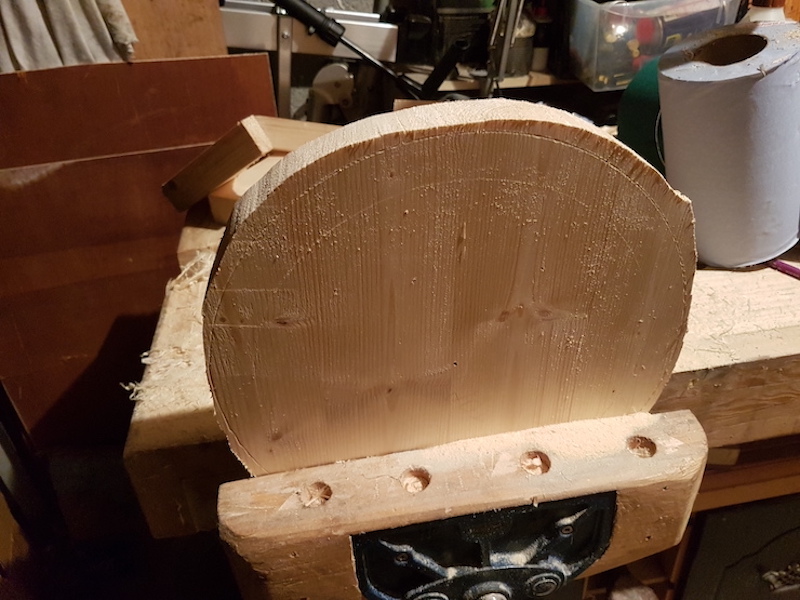
This is how close to the line I got on my first attempt. Yip, I was nervous, later stools I was within a few mm of the line once I had a bit of confidence.
I tried this and a wooden low angle concave spokeshave the simplify the roundover. Neither worked well, they could not cope with the constantly changing grain. A standard flat soled spokeshave did the job.
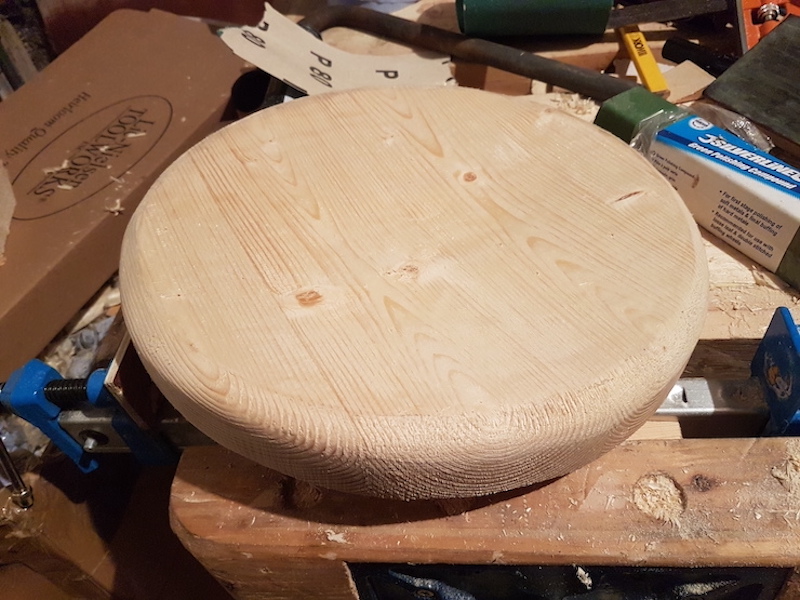
The seat after initial saddling and rounding over.
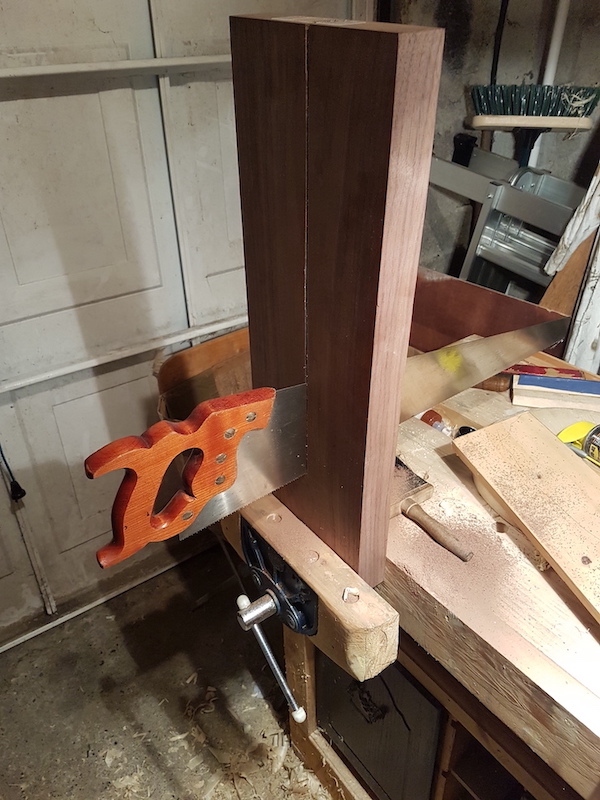
Ripping walnut legs. Good exercise.
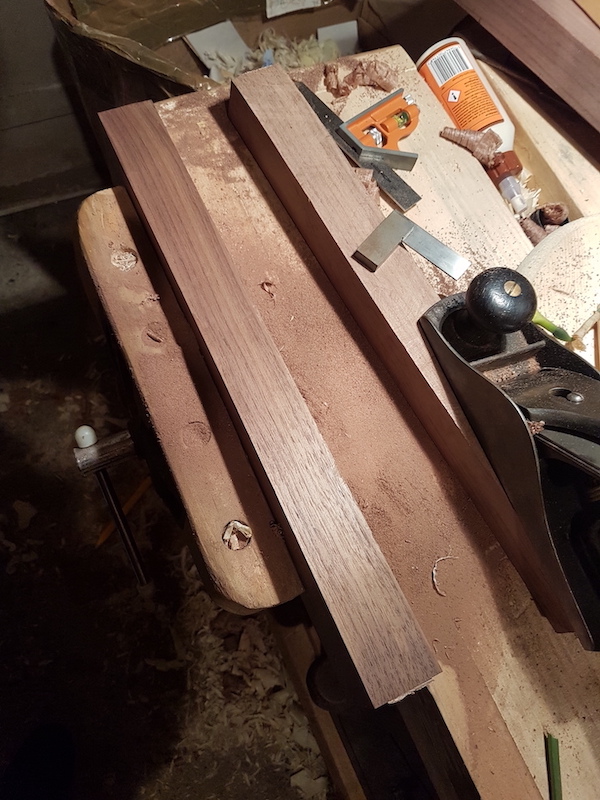
Planing the leg blanks square. You really want them square, or your layout is not going to work.
Sitting on top of the prepared blanks is a test leg I made in pine. I sed this as a reference when making all the other legs.
Initial tapering on 4 sides. I started off using a Paul sellers style clamp in my vice to hold the leg. But it left me frustrated. Time consuming to rotate the leg, and the leg could bow under the weight of the plane making it challenging to get the lines straight. My inside vice jaw is inline with the edge of the bench. to use the sellers technique I made two blocks of wood glued to a square of leather. The gap between the blocks is just wide enough for the clamp bar. The leather makes it easy to drop over the clamp bar, and then lower it into the vice to clamp it in place. If you have your vice in line with the bench front, the clamp wont work without this, the side of the bench will stop it from operating.
A tapered octagonal leg. You can see the Veritas tenon cutter I used to its left, as well as the little vice clamping jig.
Laying out an octagon. I carried the corners all the way down the portaion of the leg that would be the tenon, easy to lose these marks otherwise.
My eventual clamping solution. I made a moxon vice where the front jaws have oval holes. It can cope with very tapered pieces easily.
My Alan Williams travisher. A fine tool and a joy to use. This is used to really tune in the shape of the seat saddling.
Underside of the travisher
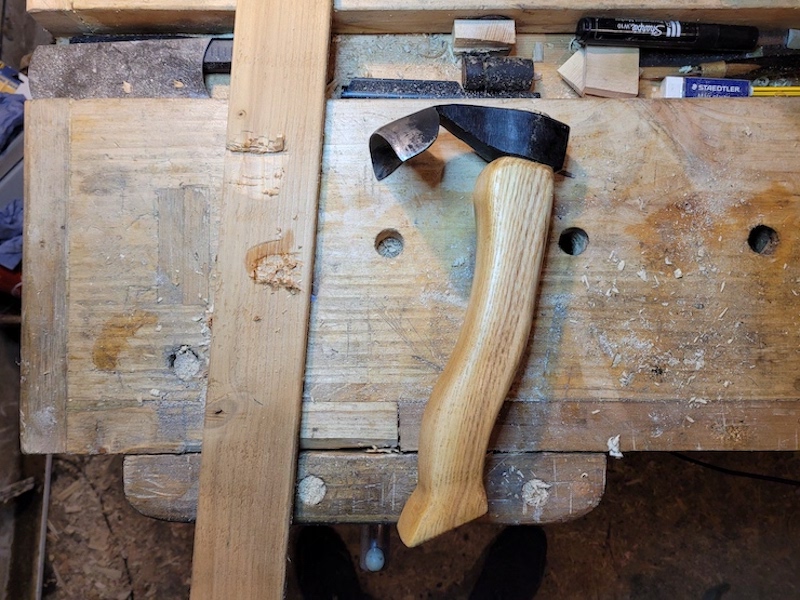
My Adze, I bought a vintage german adze head and sharpened it, and made my own handle. The handle is very chunky, I initialy hada slimmer design in mind, but when I got to this point I really like the feel in my hand and decided to stop. Between pauses to make moxons, adze handles, and general tool fettling you can begin to see how this project took me so long.
Chopping out waste from the walnut blank with the Adze.
The same blank after being refined with the Scorp. This is a Ray Isles.
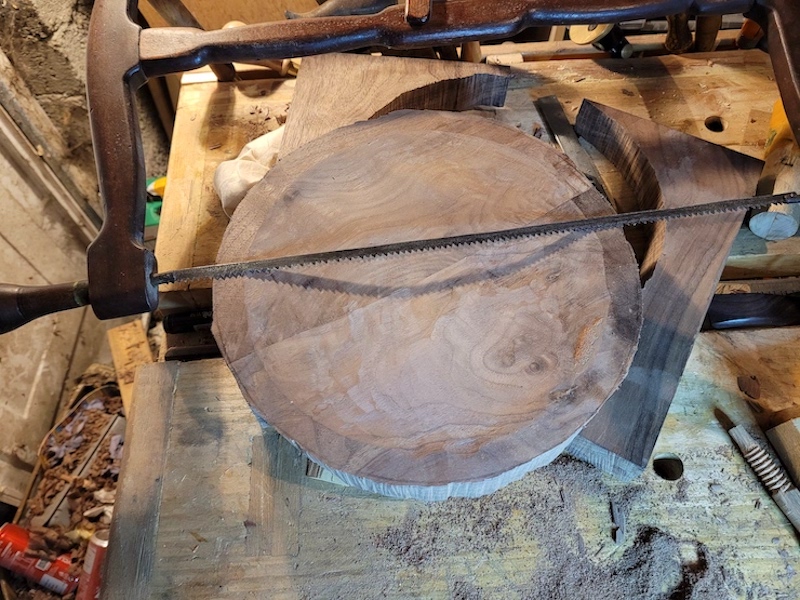
Out comes the bowsaw again, a lot closer to the line this time.
The walnut blank after sawing.
Cleaning up the perimiter with a flat bottomed spokeshave.
Scrub planing a riven leg.
The walnut seat after initial saddling and rounding. I do not recommend wood with this kind of figure for a seat….
A nearly finished leg (tenon needs some finishing work).

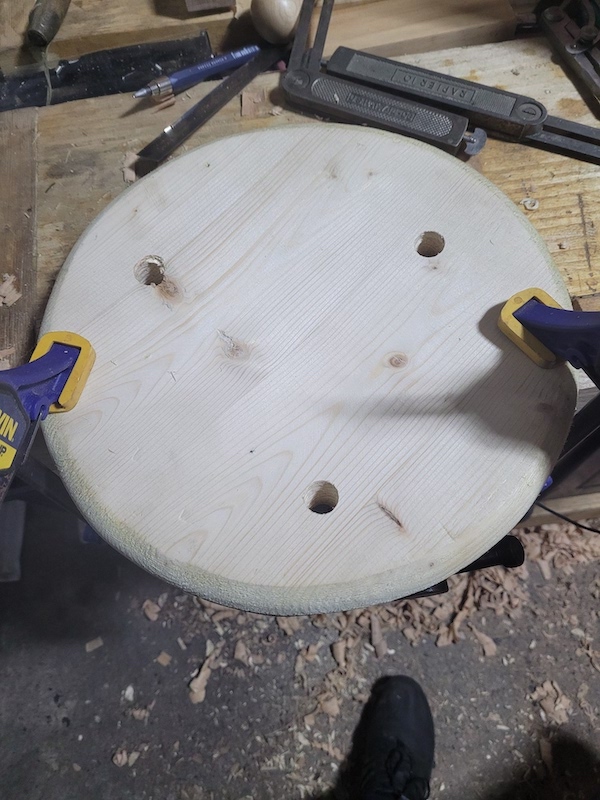
A drilled seat. You can see my layout marks and sight lines. The many faint lines running the the center are where I lost my center mark and used a center finder to pick a new one (the seat is not perfectly circular, so I struck many lines to pick the center).
The top of the pine seat after drilling. Note the somewhat messy hole on the top left. I didnt check the far side of the board for knots when I picked my drilling spots, and when drilling in from this side the knot deflected my drill bit. I learn things the hard way….
Beveling the underside. The pine seat was the only one where the draw knife was at all useful. Otherwise I resorted to scrub planing a lot of waste off and then refining with the spokeshave.
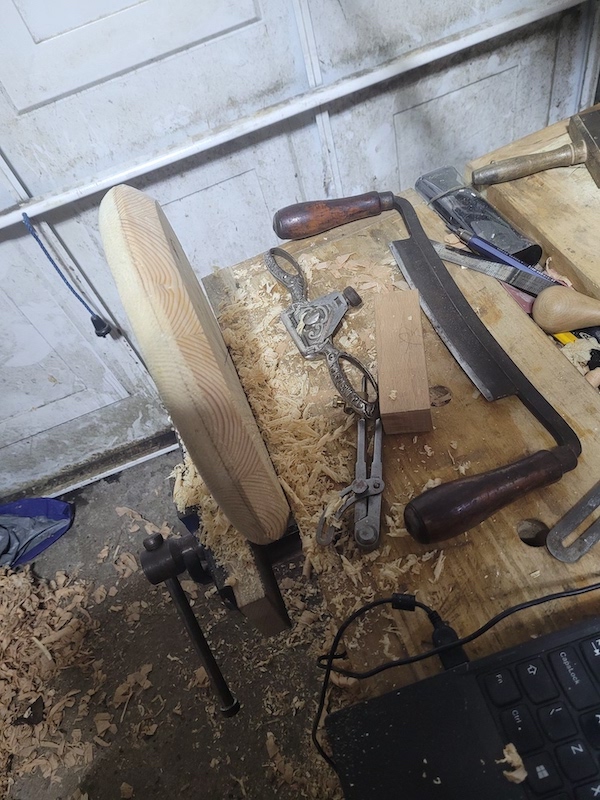
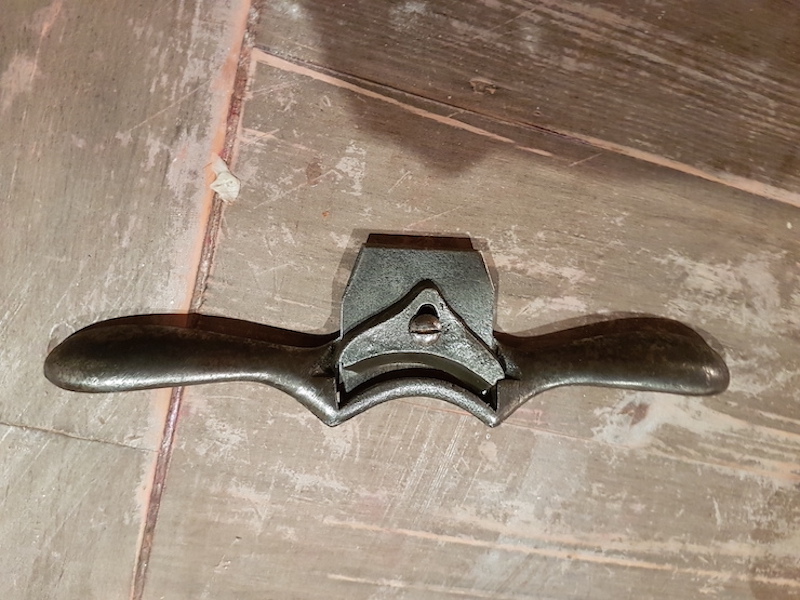
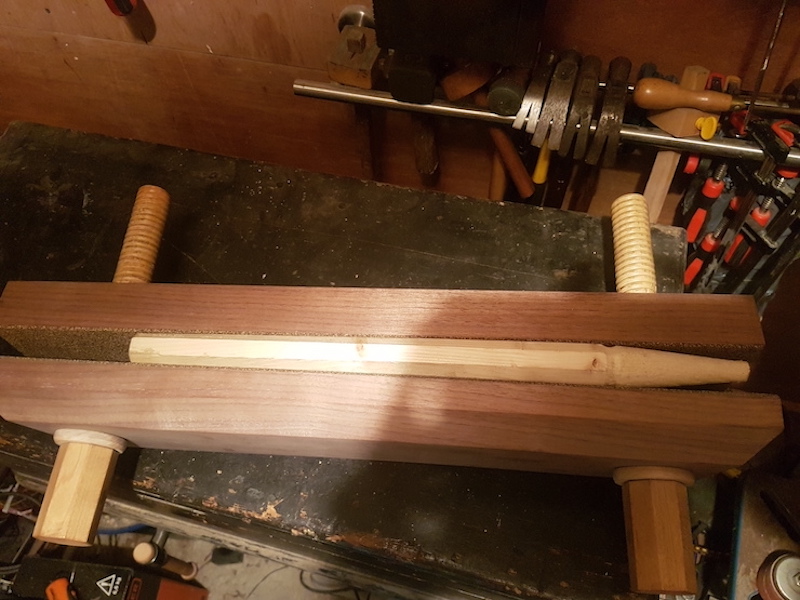
The fine modelers rasp I used on the leg to tenon transition
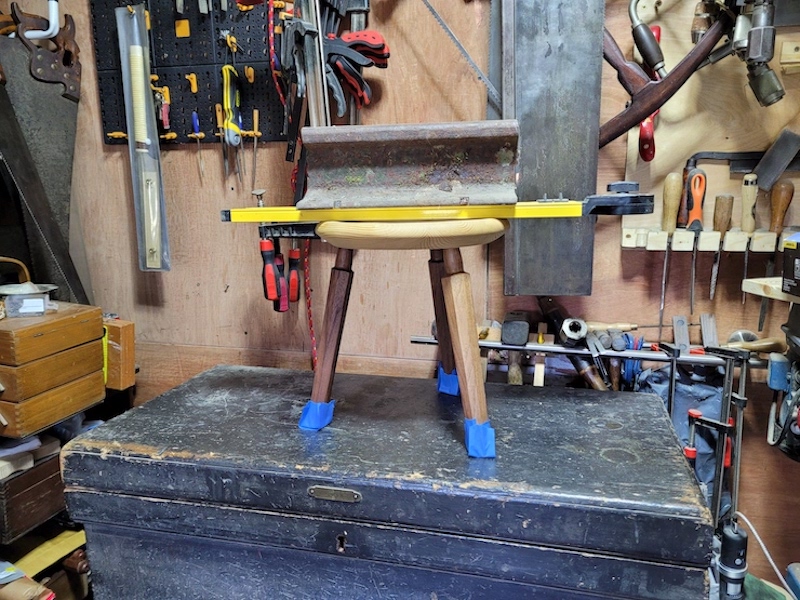
My reaming set up. Patience is key here. Ream a little, check, ream a little check. You can do repeated half turns in the direction you need the leg to move to correct. You can see the blue tape I used to make sure I put the right leg back in the right hole (and facing in the right direction).

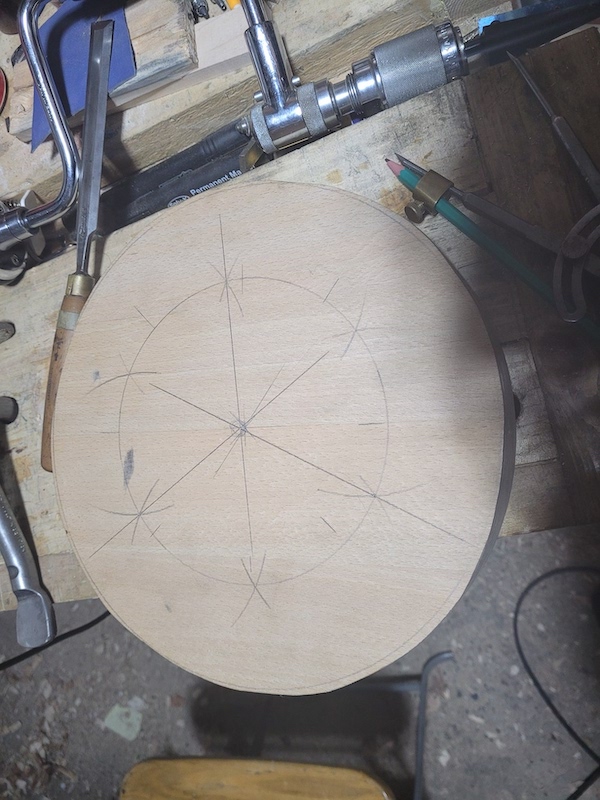
Layout marks for drilling on the maple seat.
The first wedge goes in. You can see I’ve moved my blue tape markers for the legs to the top, as I cleaned up the bottom with a plane before gluing the legs in. Its kinda tricky to clean up once the legs are there….

The ginal glue up. I used my tail track anvil to provide a little weight, its sitting on the level to prevent crud from the anvil from getting on the seat. The blue tape at the bottom is holding the leather foot covers in place.
The finished stool. I’m reliably informed by every skilled chair making that sees it that it could do with stretchers. They are probably right. It takes my weight standing on it, its survived a 4 year old for over a month now. But at one point my son wanted to show the stool to his uncle after it was glued up, but before finishing. I got it back in 2 pieces with the seat split in two. Stretchers probably would have prevented that. I’m pretty happy with my repair though.
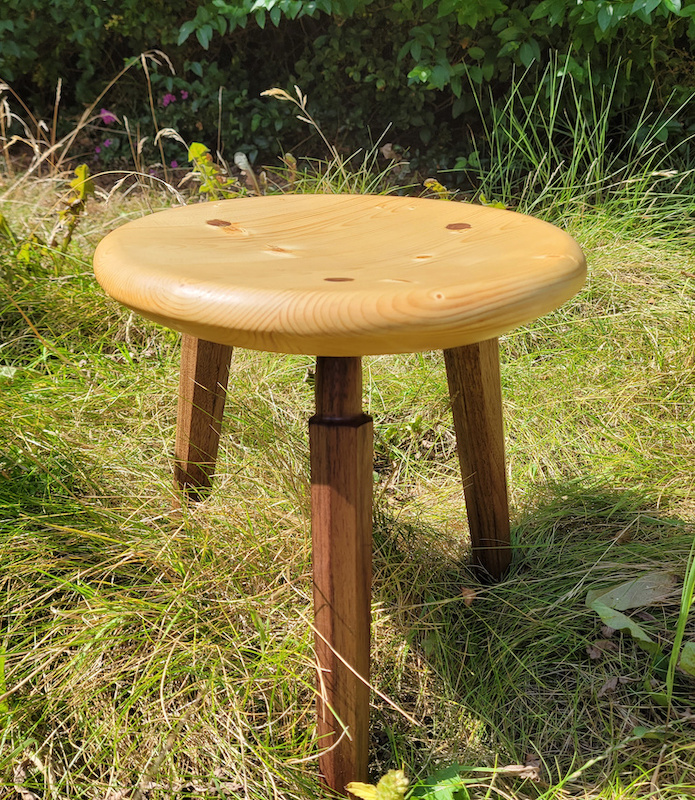
Finished stool
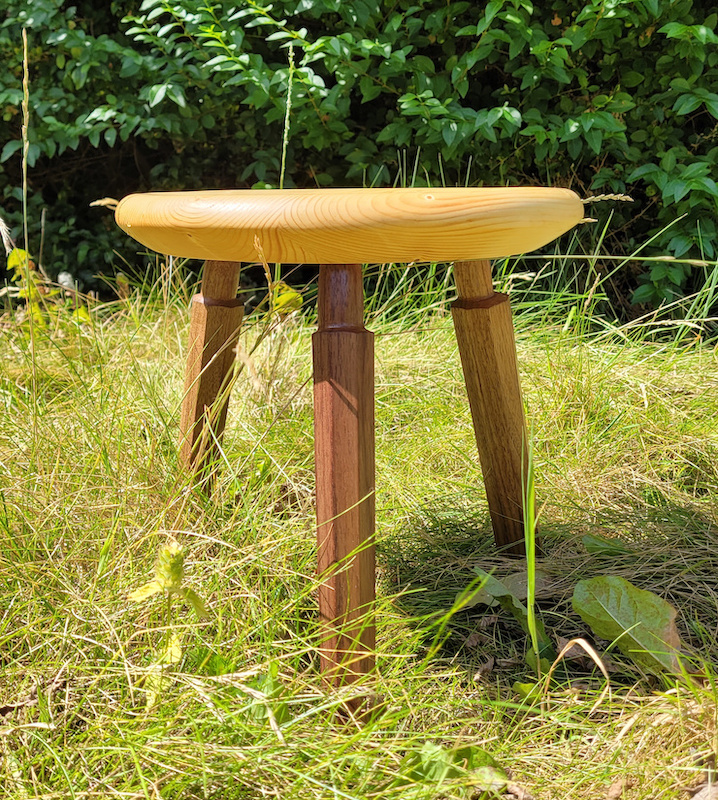
Close up of the leg transition and roundover
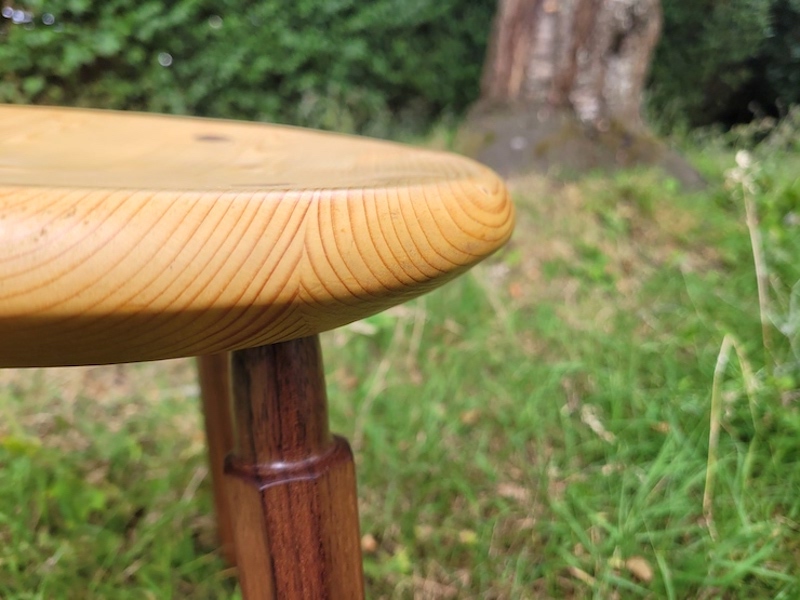
The seat
Leather pads on the end of the legs give it a better grip on our homes wooden floors.