Bevel Angles
I’ve had a few conversations with people recently where I realised they didn’t really know why they had certain bevel angles on certain tools. They just followed a recipe that worked for them (and more power to them). Being an insufferable bore, I thought I would explain the why here for anyone else who is mystified by primary vs secondary angles and high angle vs low angle planes.
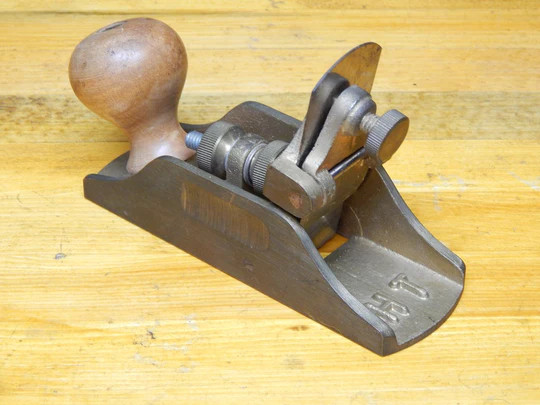
First off, lets look at a cutaway of a standard Stanley bench plane (there are a bunch of these images at timetestedtools.net for the curious).
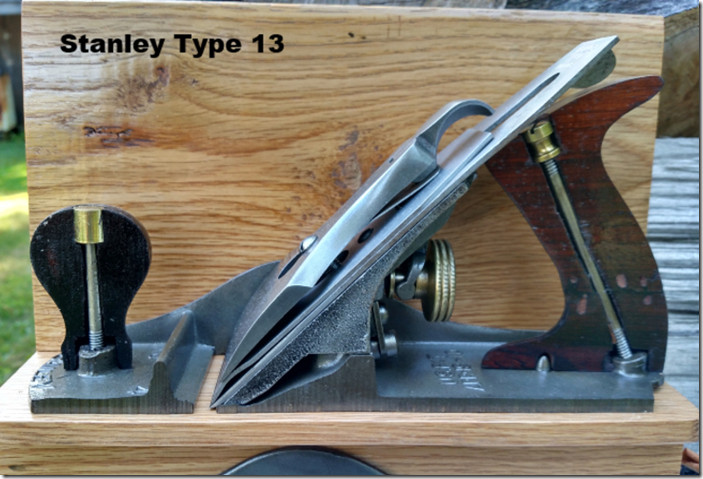
The important thing here is the angle of the frog.
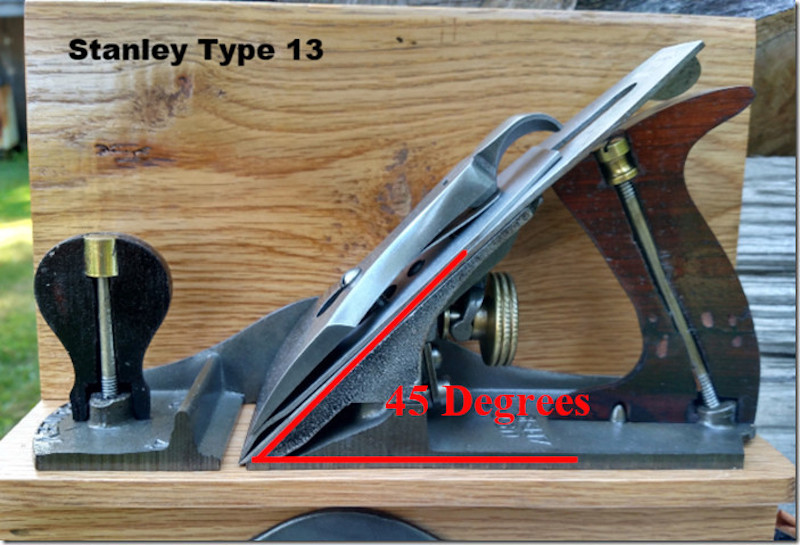
Its almost always 45 degrees on Bailey style bench planes. This is important, as on a bevel down plane, No matter what bevel angle you put on the iron, The effective cutting angle will always be 45 degrees.
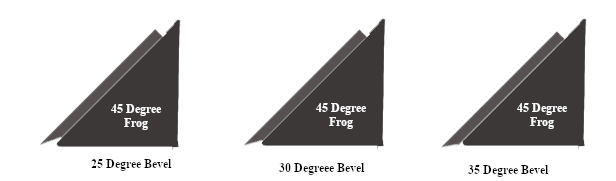
On the 3 simplified frogs above, The irons have 25, 30 and 35 degree bevels, but the angle presented to the wood is decided by the frog. No matter what angle you put on the primary bevel of the plane iron. You are still presenting the cutting edge to the wood at 45 degrees.
So does it matter what angle bevel you put on the iron? A bit, but its not going to make any difference on planing difficult grain, and its not going to reduce the effort you need to put into planing. What it will do is reduce the chances of your iron chipping, and lengthen the amount of time your edge lasts.
Look at the 25 degree bevel above, there is not much metal behind the tip of the iron. If you hit a hard knot, the small amount of material supporting the tip makes it much more likely that material can break away. Now look at the 35 degree bevel above. You have far more material backing up the edge, that edge is going to have more support and break and chip less easily.
Personally I tend to put a 25 degree primary bevel on my bench planes, and a 30 or 35 degree secondary. I don’t worry too much about the exact degree (24 or 26 is fine). As I’ll free hand sharpen until the bevel is too messed up and then regrind. So if its exact to start with, it wont stay that way long.
There are planes where the bevel angle matters a lot. Bevel up bench planes. This would include low angle block planes. In these planes the bevel angle does change the angle that the cutting edge is presented to the wood at. Lets take a look at this illustration from Veritas.
As you can see here, the effective cutting angle of a bevel up plane, is the angle of the bed, plus the angle of the bevel on the iron. The illustration above uses a plane with a 12 degree bed. So in the top left, we have a 25 degree bevel, plus a 12 degree bed, making for a 37 degree effective angle. That’s a far lower effective angle than a standard bench plane. Its going to be easier to push, and do a great job on end grain.
In The bottom right, we see an iron with a 50 degree bevel, 50 + 12 = 62 degree effective angle. This will be hard work to push, but do a great job on tricky grain. This is why bevel up plane owners sometimes have a selection of irons for one plane. they can pick the right iron for the job.
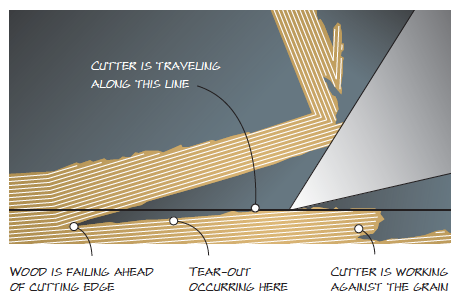
Why does a low angle work great on end grain, and a high angle work well on tricky grain?
Think about how you could use a chisel to pare a little off the end grain of a board. You would hold it very at a very low angle. If you imagine holding a chisel at 60 degrees to do the job it would take a lot more force to sever the fibres. When you are planing long grain, that same low angle will make it a lot less work to push, but its more likely to lift the fibres ahead of the cutting edge “tearing out” the wood before the iron gets a chance to cut it neatly.
So a very low angle is best for end grain work, and a very high angle for tricky grain prone to tear out. The 45 degree angle of the standard bench plane is a good general purpose angle.
Take a look at the angle of a scraper plane.
They tend to be 80 degrees plus, as these planes are reserved for final smoothing of the trickiest of woods.
Now we have figured out angles for our bench planes, lets talk a little about chisels. Just like a bench plane, you want to fit your effective angle to the work, and its a compromise between effort required to cut, and durability of the edge.
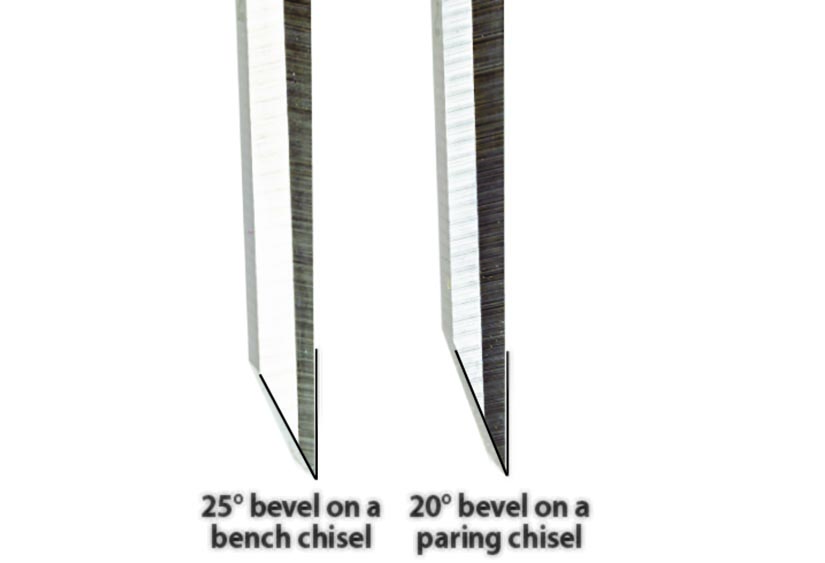
A typical bench chisel will have about a 25 degree bevel. This is a good general purpose angle. Not too fragile to chop with, not too steep to making paring operations a pain. There are chisels that call for different angles.
Paring chisels are reserved for paring operations. They tend to have very shallow bevel angles, 20 degrees or less. But this in turn makes them fragile. Use your paring chisel with a 20 degree bevel to chop a mortise, and you will have a mangled edge in seconds.
I tend to have my paring chisels at about a 20 degree angle, with a 21 degree micro bevel. My bench chisels are set up similarly, 25 degrees with a 26 degree secondary.
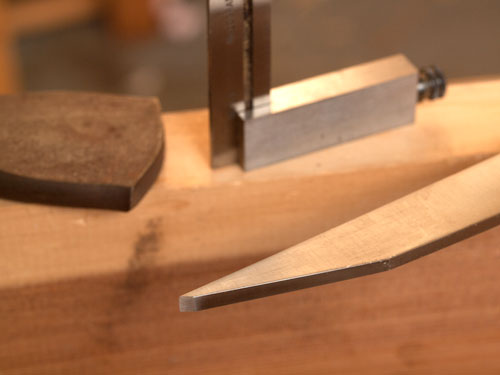
Lets talk mortise chisels. Designed for being beaten with a mallet and chopping straight down into material, these need a steeper bevel angle. The main bevel angle on mine is still 25 degree, but I keep the secondary at 35 to give it the durability to stand up to chopping and levering. Take a look at the steep secondary on the mortise chisel below.
Finally, for anyone who is confused by my talk of primary and secondary bevels…
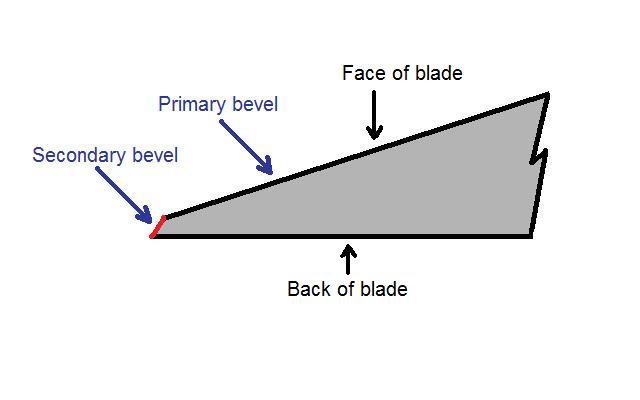
I tend to grind my primary bevel on a bench grinder, then set my initial very small bevel using a honing guide. From then on I freehand sharpen until either the secondary bevel is too messed up to free hand sharpen, or its so large its taking to much time to sharpen. Then back to the grinder it goes. Many people prefer a single primary bevel, and it works well for them. So using one is a matter of taste.
I hope that helped some of you out with figuring out your bevel angles. If you consider the type of work other tools you have are supposed to do, you can probably figure out a good bevel angle for them on your own if you followed the material above.