Nail Disaster & Lessons Learned
I was feeling pretty good about my initial use of the tapered nails. It perhaps made me a little too comfortable. When it came time to nail on the front on the mini tool chest things went wrong. Very wrong. The good news is that its all recoverable, and given the mini chest will be painted, there should be relatively little evidence of my misadventures when done.
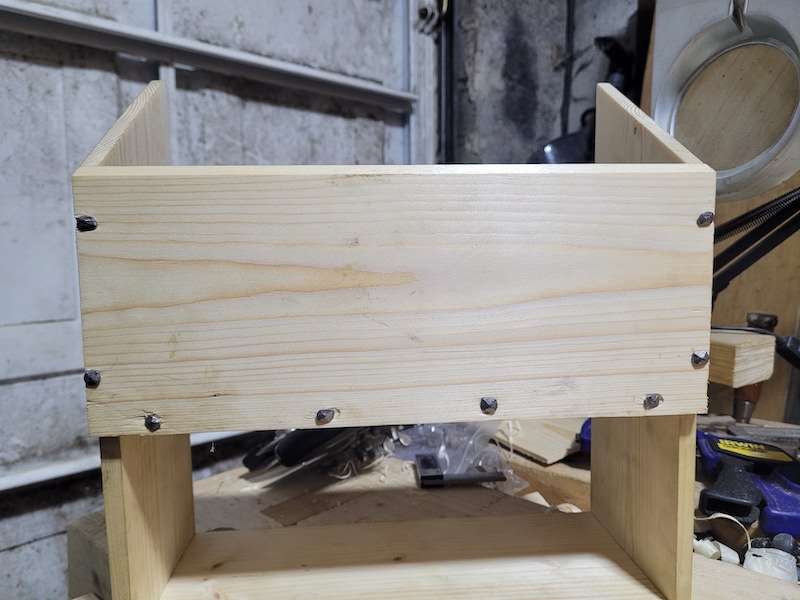
As you can see, there are lots of nice dents and scratches on my front. Let’s dig into what went wrong.
Mistake No 1. When laying out where I wanted my nails on the front of the chest, I thought of nothing but where would they look nice.
What I should have thought about, was the nails already entering this board from the side.
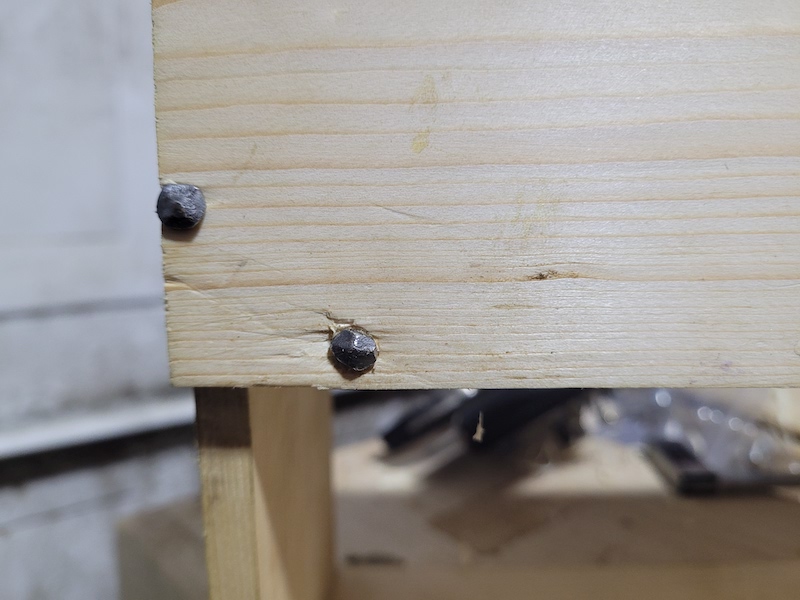
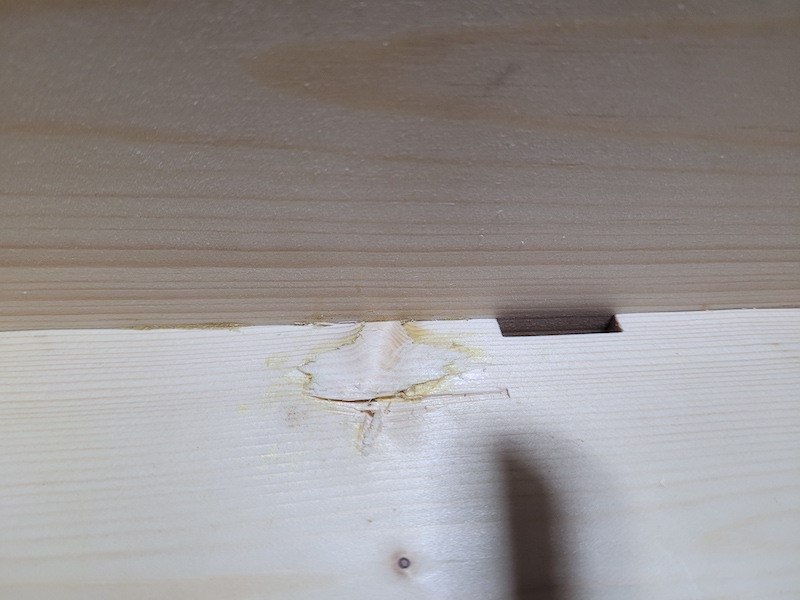
I got away with it just fine on the right hand side. But on the left hand side, the new nail ran into the existing nail, deflected and drove out through the bottom of the board. I’ve already cleaned up some of the damage with a paring chisel here. And at least this will not be a very visible area. I had to pull the nail (and I can tell you these nails have plenty of holding power). Which resulted in damage and scrapes to the front. Then I bent the nail so I could drive it a bit to the right and still have a flush head on the front. I held my breath. Drove it again, and got away with it this time.
Mistake no 2. I didn’t look closely enough at the board I was driving into. There was a spot that was essentially a knot. The core of the knot was not in the board, but a bit of it was. When I drove the nail in, this entire section simply popped up like a cork out of a bottle. I cleaned up the wound, glued the section back and trimmed with a chisel again. Its going to need some filler. On the bright side, this area is not very visible unless you look directly down into the chest, and it should be largely covered by one of the plane holders when I’m finished.

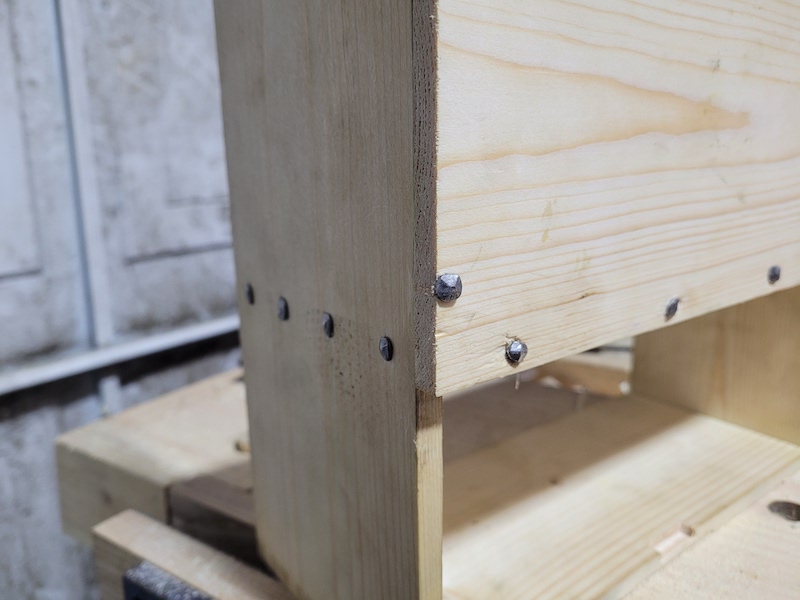
Mistake no. 3. Ultimately this stock is simply too thin for full sized nails. If I ever build something out of 3/8th stock again, I just wont try and use full size nails. What you can see here is end grain breaking out as I drive nails into the sides of the front. (Again, I had already cleaned this up a bit with a chisel before I thought to photograph). There just is not enough space for anything else to happen. The widest portion of the nail has to be aligned horizontally here or it risks splitting the front board. I still have a few nails like this left to drive in this project. I’ll add clamps on the sides to help the wood resist, but I expect to have the same problem again. A little clean-up and some filler and I’ll live with it.
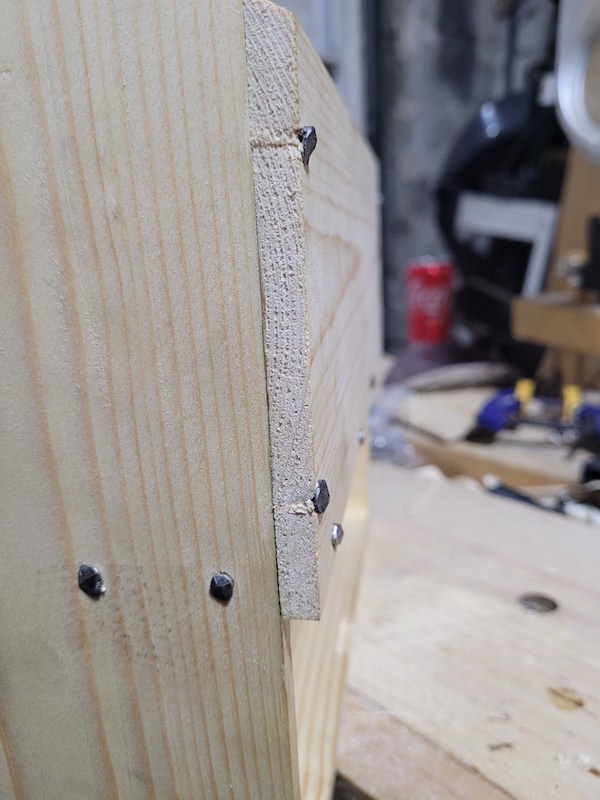
Same problem on the other side.

As you can see, the nail is taking up so much space, that its inevitable some material will be displaced when I drive it in. If I drill the pilot holes any larger, then I get no holding power. I would rather keep the holding power and deal with the defects.
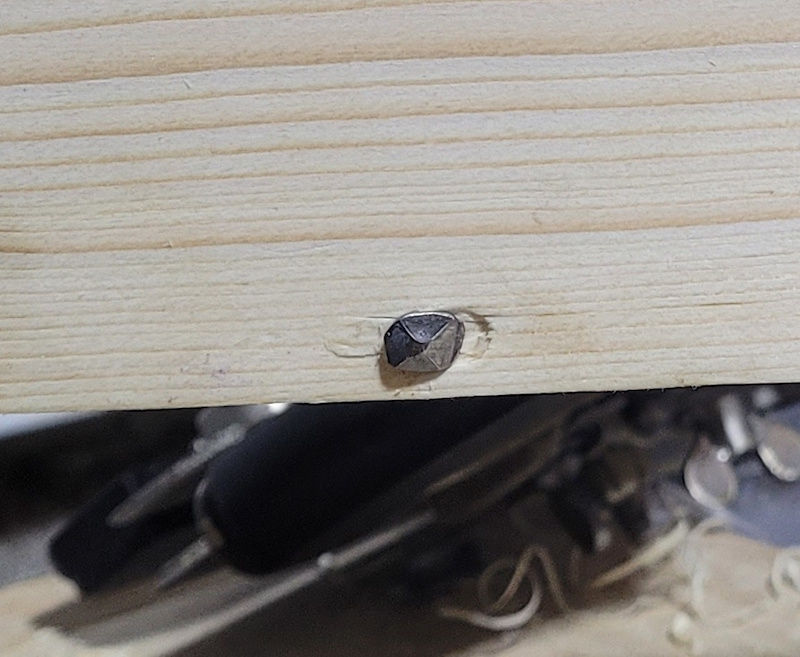
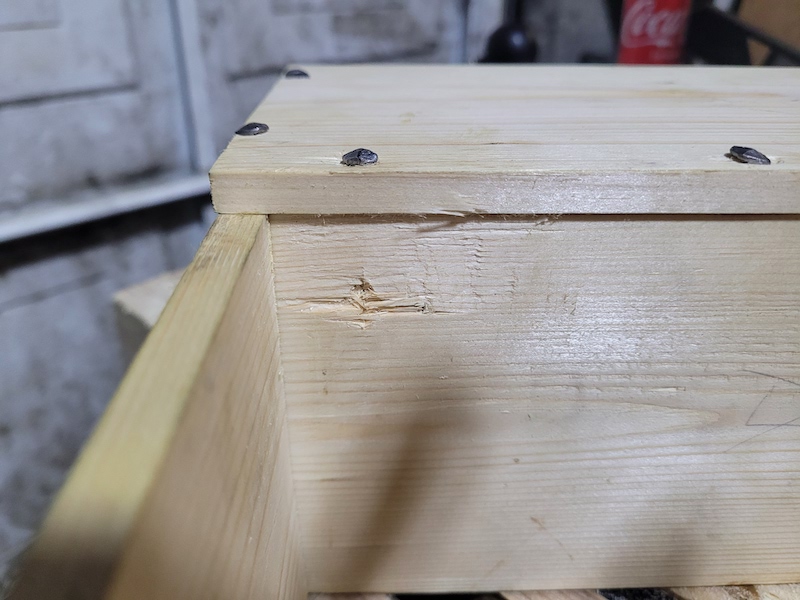
Another ugly spot. so what happened here? This is not my first time working with nails, but it is my first time using nails with a decorative head which is not going to be set.
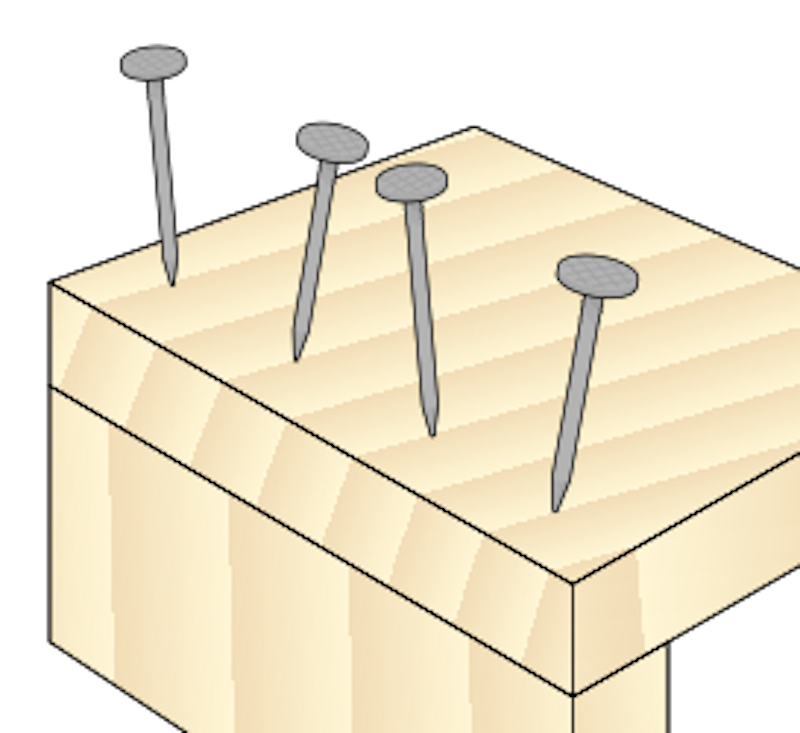
I normally use dovetail nailing where the nails are driven in at alternating angles. It improves hold and strength. When I drilled my pilot holes for this row of front nails, I did what I always do without thinking and drilled at alternating angles. I then set the nails in the pilot holes and worked my way up and down the row driving them home. It was not until the heads reached the surface that I realised my mistake. With large decorative heads like this, they are going to look terrible when driven in at an angle. Either one side of the head is very proud of the wood, or the other side digs in deeply scarring and denting the material beside it. I pulled the nails, and bent them a little so the head would sit flush, and drove them again. The damage is a combination of either initially driving the head below the surface, or caused when pulling it to alter the head angle.
An obvious question here is probably, why not get another front board and start again? I thought about it, but the shelf stock is very thin, and it would be very difficult to drill through the new front in exactly the same places. Given how thin the material is, that could easily go very wrong, or dramatically reduce strength. The project is still salvageable right now, and given its going to be painted, so filler and careful sanding should hide most of the errors.
This little chest has turned into a great learning experience. From here on in, no nailed construction in anything less than 1/2 inch thick for me!