Lapping Plane Irons Flat
As I mentioned last week, I’m thinking of trying out my Stanley 46 for those tricky cross grain rebates. The skewed iron should be a big help. In preparation, I’ve been lapping a few Irons.
I’m not going to go into a big discussion of the ruler trick. It works, it’s a great idea (but not for chisels). That said, I prefer to just lap irons, particularly small ones where keeping it on the ruler is tricky. I’ve had issues with the ruler trick contributing to jammed shavings when a chip breaker is not perfectly set up. All in all I prefer to just do a good job of lapping the iron once and then be done with it. It’s also prettier. If I’m being really honest, I’m mostly doing it for the pretty when it comes to bench plane irons.
With that aside, Here is how I go about lapping plane irons and chisels.
I start on a 400 grit Atoma diamond plate. I have a 120 grit plate, and I don’t bother with it any more. It removes material slower than the 400. I have a few theories on why this is. Maybe the 120 grit diamonds are just too large, and require more pressure to cut effectively. Maybe the density of the 400 grit particles is higher, resulting in more cutting points. Either way, I make progress faster on the 400 grit stone, so the 120 mostly gets used to flatten waterstones now.
On really bad irons with a large belly, I will break out the big guns. 60 grit sand paper and/or a Dremel with a ball shaped grinding bit. With the 60 grit, I stop once I get close to the sides of the iron. I don’t allow the 60 grit to reach it. It tends to round over the sides and make for a lot more work with the stones. If it taking a long time to make progress with the 60 grit, the Dremel comes into play. I take extemely light swipes with the grinding bit only on the high points (the shiny bits), and then switch back and forth from it to the sandpaper. The Dremel really is a tool of last resort. I think I’ve only ever used it on 2 irons.
With irons that are not in such horrific state, starting on the 400 grit stone is just fine. I hold the iron or chisel at an angle (see the photos below). This helps get more of the iron on the plate, and this helps combat accidental tipping of the iron
I work it back and forth until I can no longer see any unscratched portion of the blade. This is easier said than done. I break out reading glasses to check the end, and particularly the corners of the iron. I move it around a lot under light trying to spot an inconsistent patch. If you miss a bit, you will waste time on the next stone, and wind up coming back to the previous grit anyway.
Some people talk about defects coming out on the next grit. I need to find the magical stones these people are using. I have never ever seen a visible defect come out on the next grit in a sane amount of time. In my experience, if you do a good job on the first stone, the majority of the work is now done. Going up the grits will be relatively quick in comparison.
When I first started restoring and setting up planes. I felt like a bit of a miserable failure. I would see people on Youtube prepping a vintage blade in 15 minutes and wonder why I was still working away on mine 5 hours later. The time difference is down to the condition of the Iron , and not that much to do with you. The experienced people on Youtube are not bothering with Iron’s in the terrible shape that your rusted pitted iron isin. An iron that is in really good shape can definitely be done in 15 minutes. I recently put in about 20 hours all told on a particularly bad one. Knowing what to look out for and what you are getting into is a lot of the battle.
If you can see any pitting near your cutting edge. You are in for a long job. Ofthe 3 Stanley 46 Irons I did this week. One had no pitting, and was done quickly. One had very bad pitting, and took about 6 hours. One had light corrosion in one corner, not even really pitting. That was a 3 hour job. Unless you have a lot of time to put aside, Irons with pitting are perfect candidates for the ruler trick.
The really frustrating thing about lapping is that the more progress you make, the slower progress becomes. When you start, you will get large flat areas in a few minutes. Then the rate of visible progress, slows and slows and slows. The more high spots you have, the more metal you need to remove to extend progress. This makes is very hard to tell how long you have to go. It not uncommon to get all but a very small spot flat, and then spend just as long getting that last spot done. It is best to adopt a “Its done when its done” mentality.
If you have a lovely new diamond plate, you should be aware that lapping is hard on diamond plates. It can wear them out. New diamond plates tend to have some diamonds that are slightly higher than the others. As you lap, those tall stones can get knocked out. In most cases they fly off the stone and you never even know it happened. In some cases, the diamond can embed itself in your iron. This is bad news. You can now drag that embedded diamond back and forth across your plate, knocking out other stones that would have stayed otherwise.
If you feel a crunching sensation as you lap on diamonds, stop, wipe off the plate, and wipe off the back of the iron. Run your finger along the back of the iron. If you feel a little spiky bit, that’s a diamond that has lodged. Get a piece of flat steel, another iron is perfect. Run it along the back of the iron you are working and knock it out. A few swipes usually does it. This can happen on an older diamond stone, but its frequent on a brand new stone. Some people take a iron or steel plate and work new diamond stones to knock off all the high diamonds straight away. Another give away that this has happened is if the stone suddenly jams as you are lapping. Again, you probably just hit a high diamond.
I go from the 400 grit stone to a 600. This is very optional. I don’t spend long on it, just a minute or two is enough. If I did not happen to have the 600 grit stone already, I would not be looking to buy one. It saves a little time when moving to the 1200 grit stone, but not a lot.
I go from the 400 to a Atoma 1200. On most Irons 5 minutes will do the job here. Again, get a really good look at the iron and make sure your scratch pattern is consistent before you stop. If you have spent 15 minutes on this grit and still have some inconsistent patches, its probably time to go back a stone.
Until recently this is where I stopped, and its more than good enough. I got 2 Shapton glass waterstones for Christmas, so recent Irons have been getting a little extra.
I go from the 1200 grit diamond stone to the 6000 grit Shapton. About 5 minutes of work here does the job again.
The waterstones are new to me for lapping. I stop and flatten them every 2 minutes or so. I find the 6000 grit stone is annoyingly “sticky”. It grabs onto the iron and does not want to let go. Keeping it wet is not always the solution. I don’t spend very long on this stone, so its not a big deal. But I would probably pick something other than the Shapton glass for my 6000 grit stone if I was buying again. One nice thing about the 6000 Shapton is that it leaves a fairly cloudy finished surface. That makes it easy to measure progress with the next stone.
Then its on to the 16000 grit Shapton stone. This is again, usually only a 5 minute job if I have done a good job with the previous grit. The 16000 is a little sticky, but nothing compared to the 6000, and leaves a wonderful mirror finish.
I originally just had the 16000 grit stone, but the jump from 1200 to 16000 is just too much. It took forever to make progress. The 6000 intermediate stone is necessary.
And that’s it. I will flip the iron over, put on a micro bevel with the 16000 grit stone, do a few more strokes on the back to remove the burr, strop it and use it.
A closing note on choosing stone grits. Think in Microns. I’m going from 40 Micron (Atoma 400) to 29 micron (Atoma 600). Then 13 micron (Atoma 1200), then 2.45 micron (Shapton glass 6000) and finally 0.92 micron (Shapton Glass 16000). Leaps of about 1/3 to 1/4 of the previous micron size seem to be working out well for me. Finally I strop with 0.3 micron compound. Leaps of about 1/3 to 1/4 of the previous micron size are working well for me. I ignore the advertised grit when looking at sharpening stones. Different manufacturers all have different systems for their grit rating. That said, its probably going to be very difficult to get a micron size for natural stones. In particular find out the micron size of your stropping compound, they vary wildly. Shame to sharpen on a 2 micron stone, and then use 6 micron stropping compound…
Take a look at the photos below to see results and time spent on 3 46 Irons, and happy lapping (I tend to get it done while watching a movie). And Eric, I’m still waiting to hear about your speed lapping technique you great bloody tease!
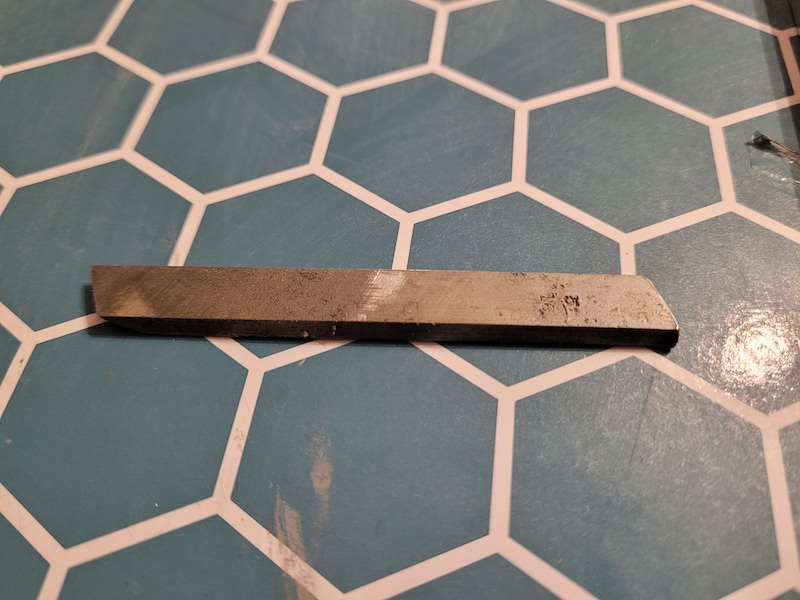
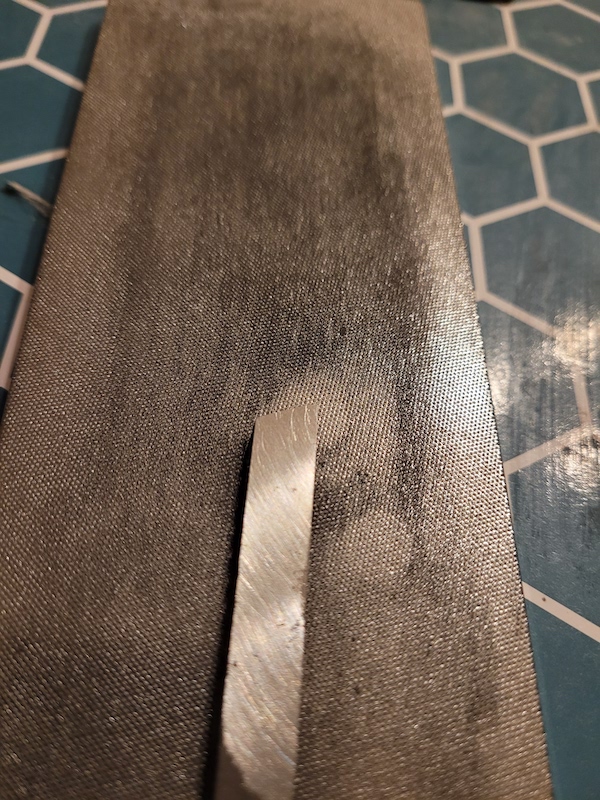
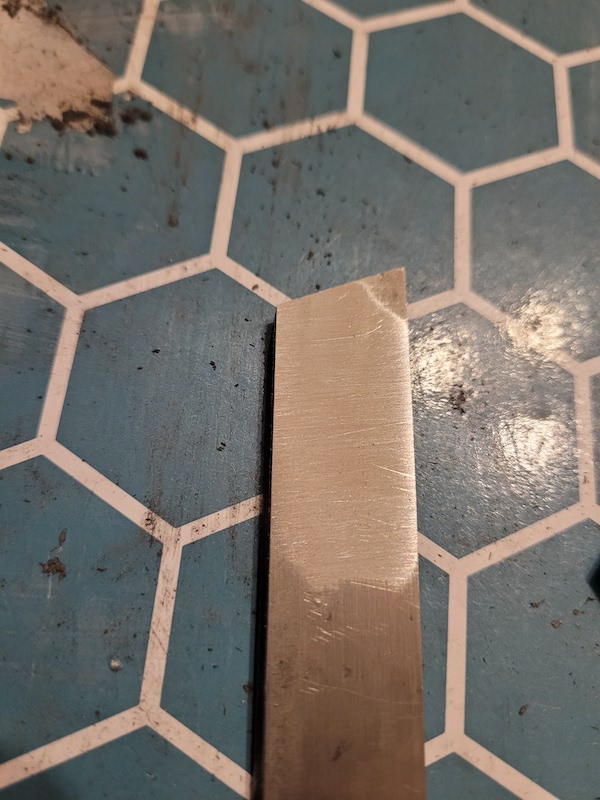
The 5/16 iron I started with. This is in pretty good shape. No visible pitting or corrosion just a bit of dirt.
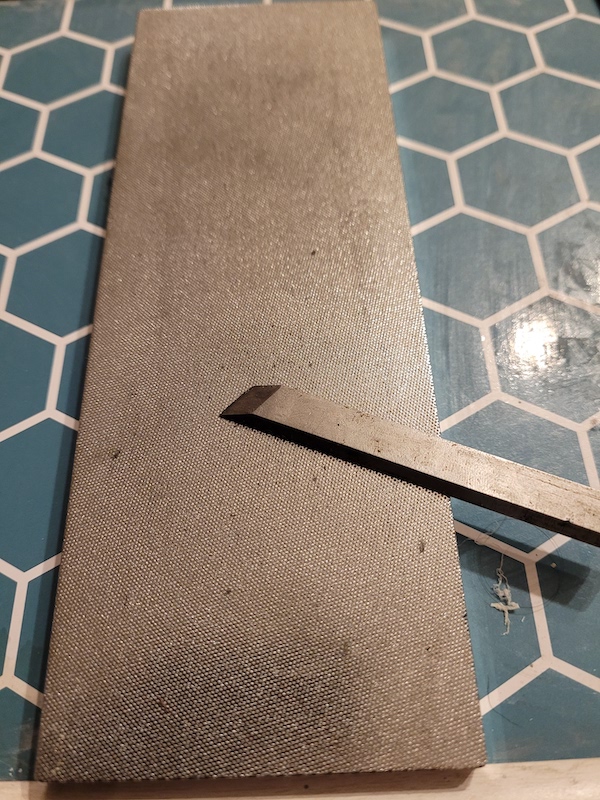
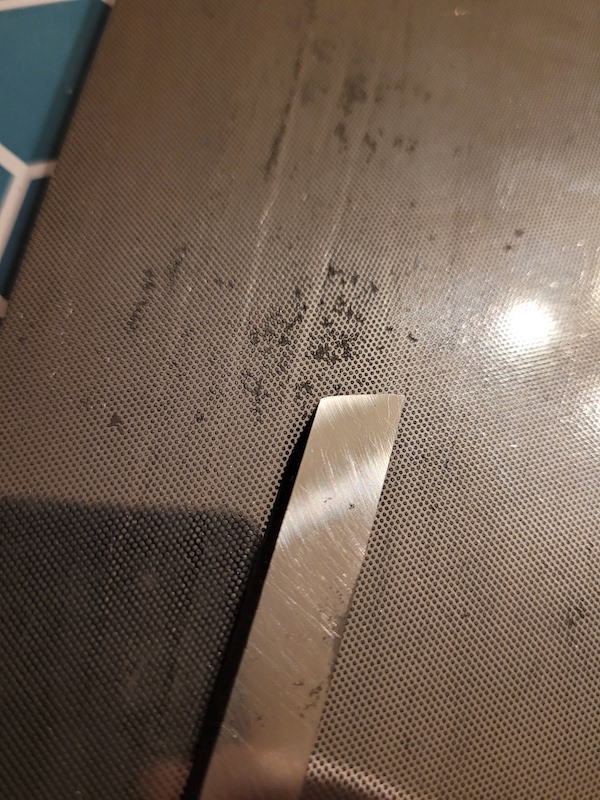
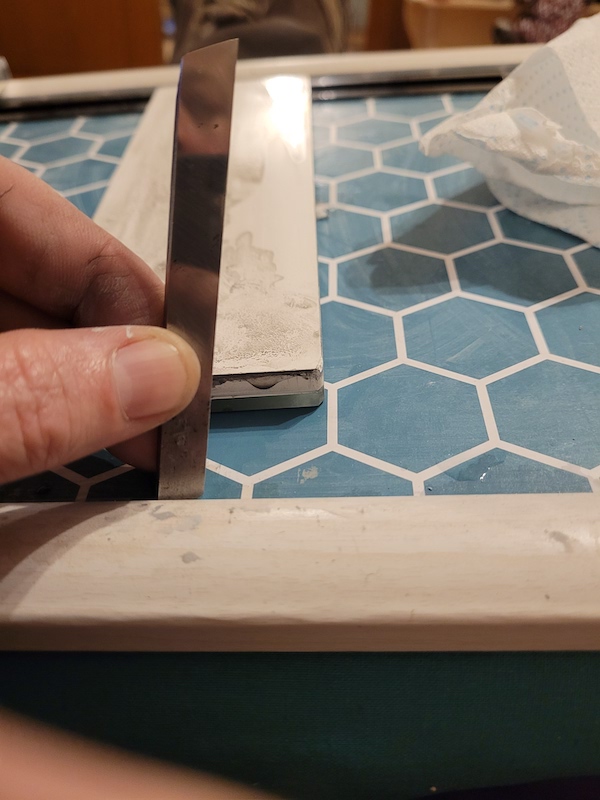
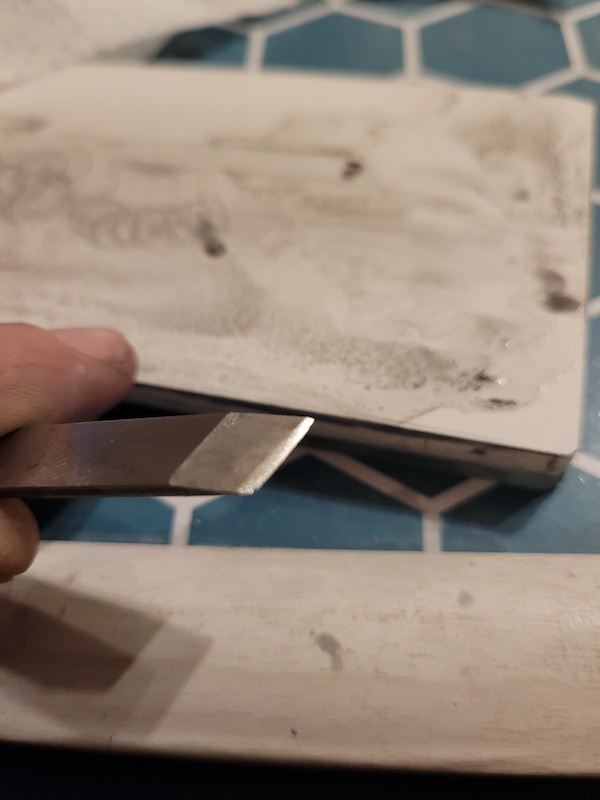
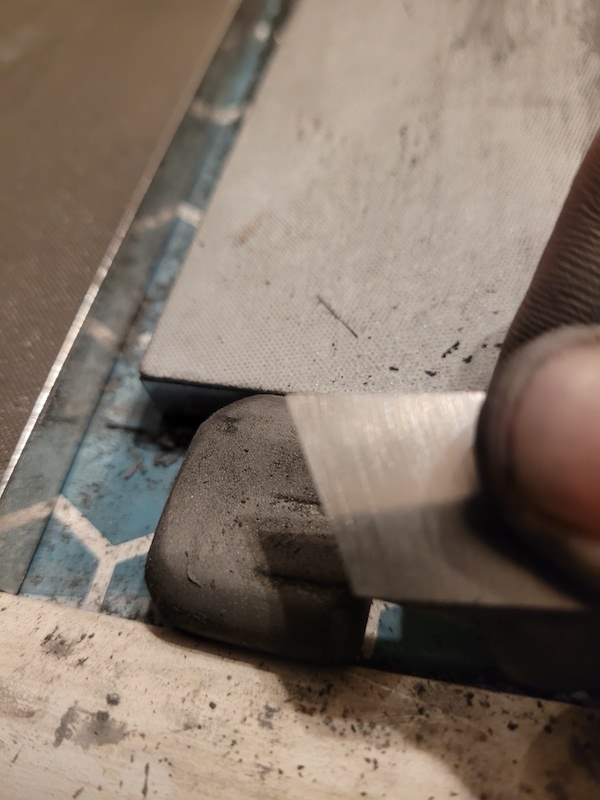
This is roughly the angle I hold it at on the stone. The angle helps get more of the iron on the stone, and helps prevent accidental tipping, particularly on narrower irons.
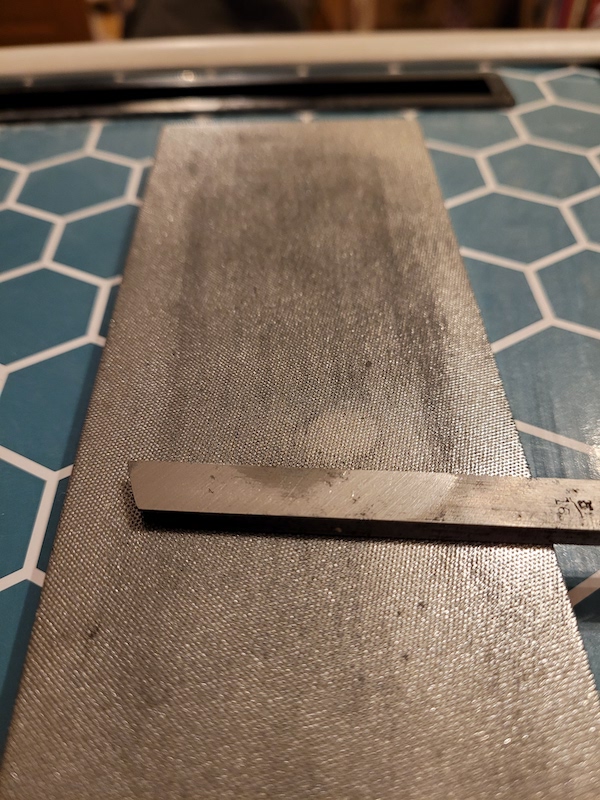
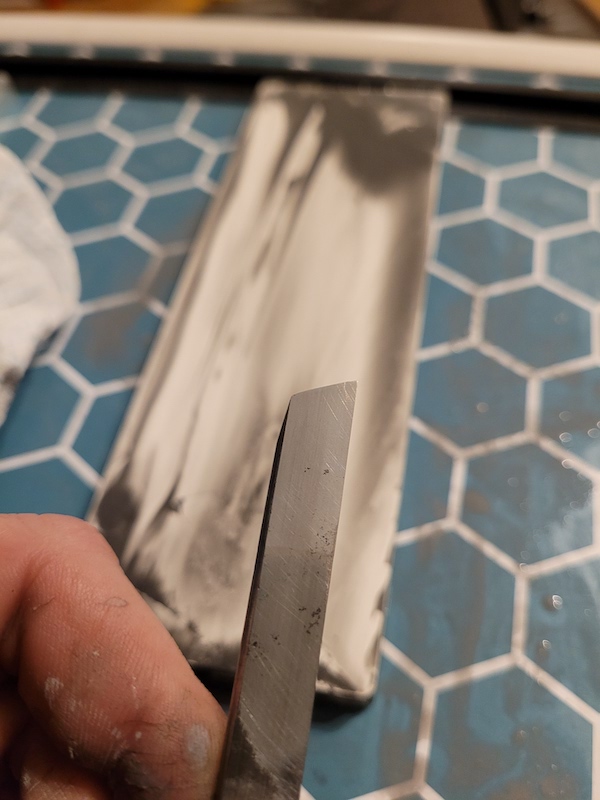
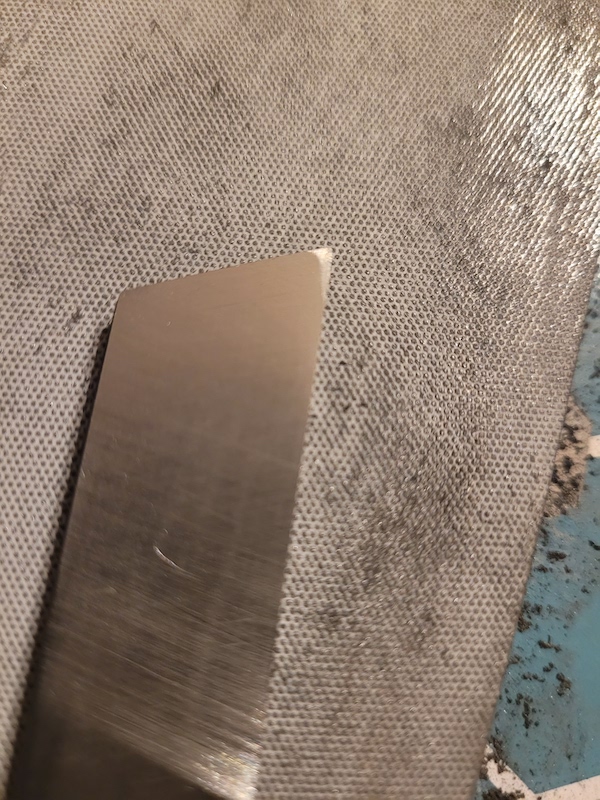
About 5 minutes on the 400 grit stone, and most of the back is flat already. The only bit left I care about here is the little corner by the tip.
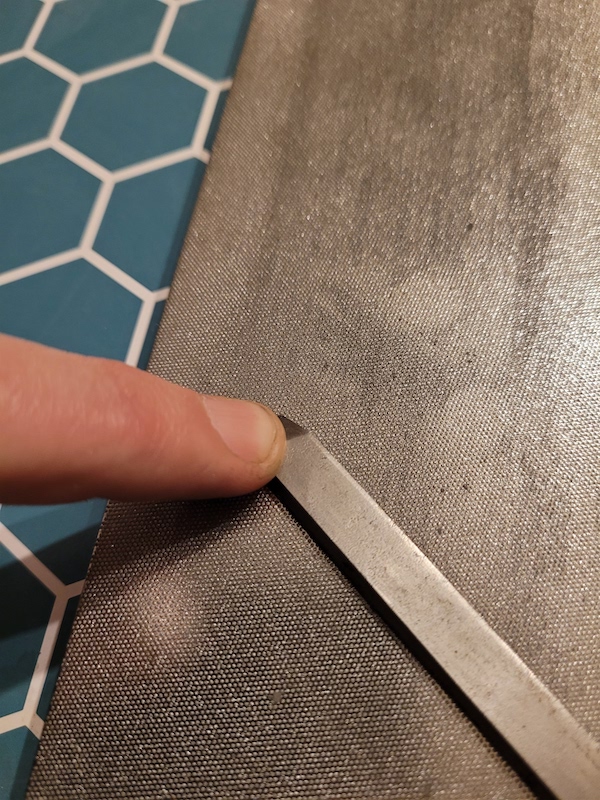
As I lap, I try and apply pressure on the bevel
Another 5 minutes, and I’m done.
I spent about 2 minutes on the 600 grit stone, and then 2 on my 1200 grit.
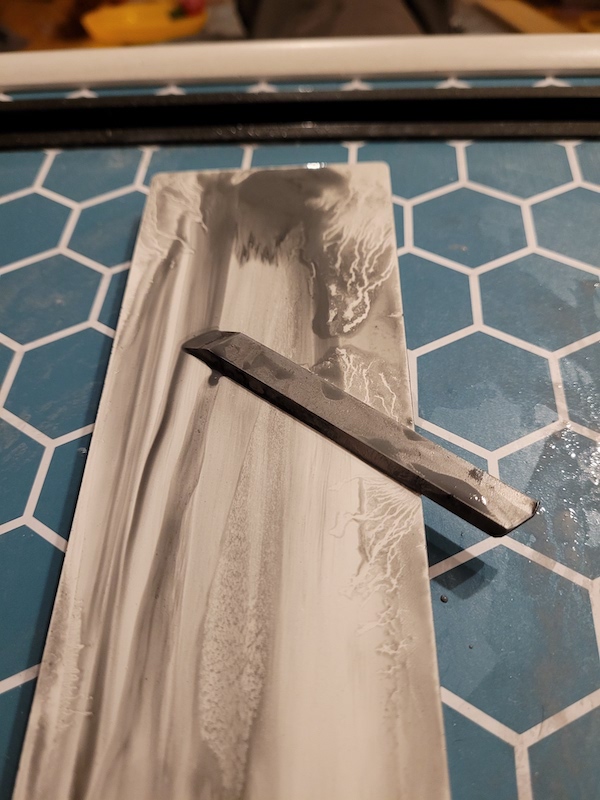
On to the 6000 grit water stone.

The slurry makes it a bit harder to measure progress. You need to have some tissue handy to wipe it down.
The cloudy finish from the 6000 grit after about 2 minutes of work. Still needs a bit more.
The final 6000 grit finish.
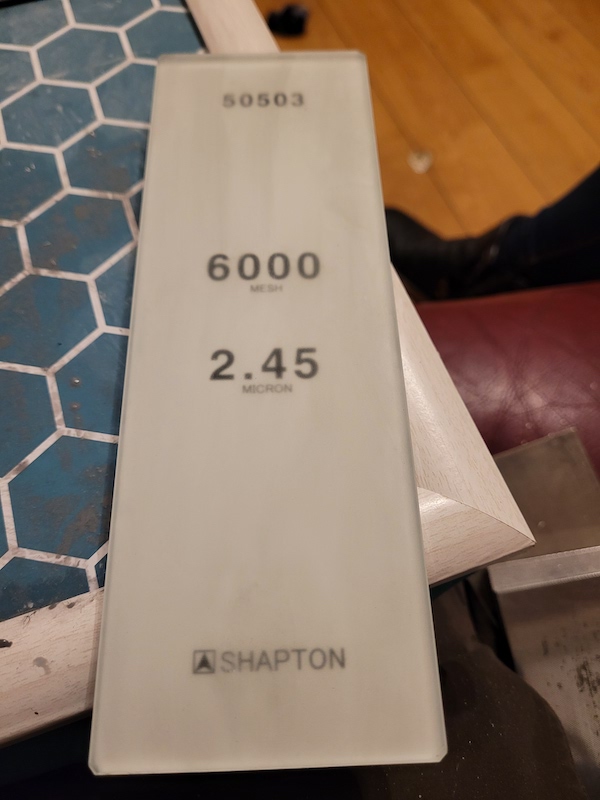
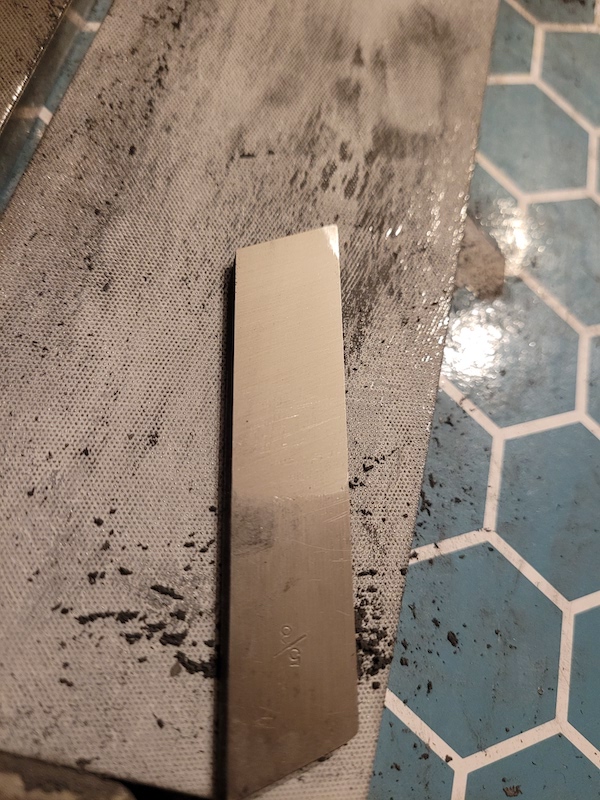
Rather usefully Shapton print the micron size on the back of their glass stone.s
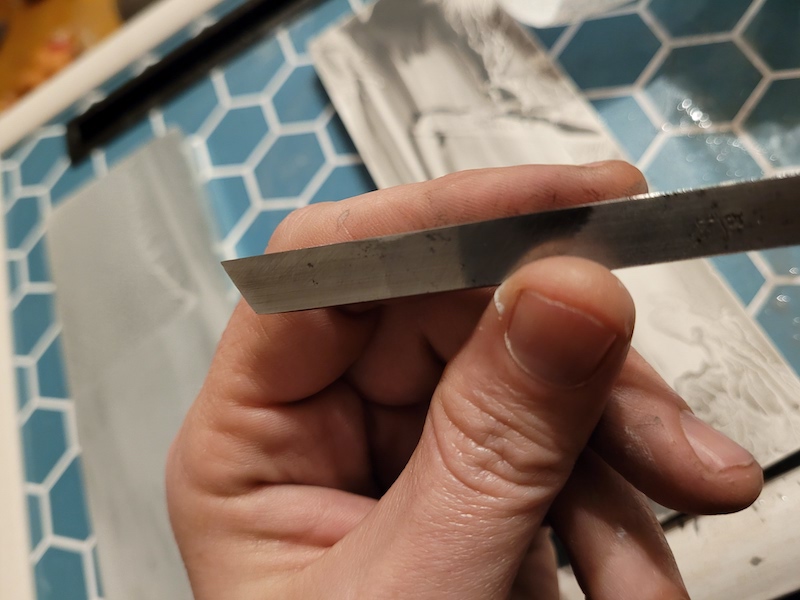
2 minutes on the 16000 grit stone, I can still see a little bit of cloudy finish on the upper right corner. You can see a bit of my face in the reflection. Looking for spots where the quality of the reflection decreases is a great way to spot areas that are not finished properly.
2 more minutes and we are done with the 16000 grit stone.
A quick free hand micro bevel with the 16000
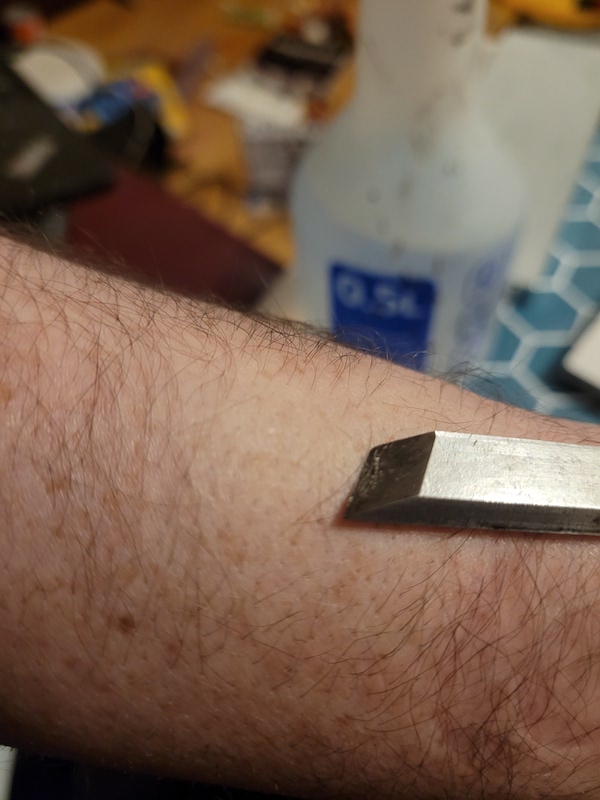
And its shaving like a champ.
This iron had some very minor corrosion in the corner. Lapped to the edge of the corner before taking a photo.
1 hour later on the 400 grit stone.
2 hours
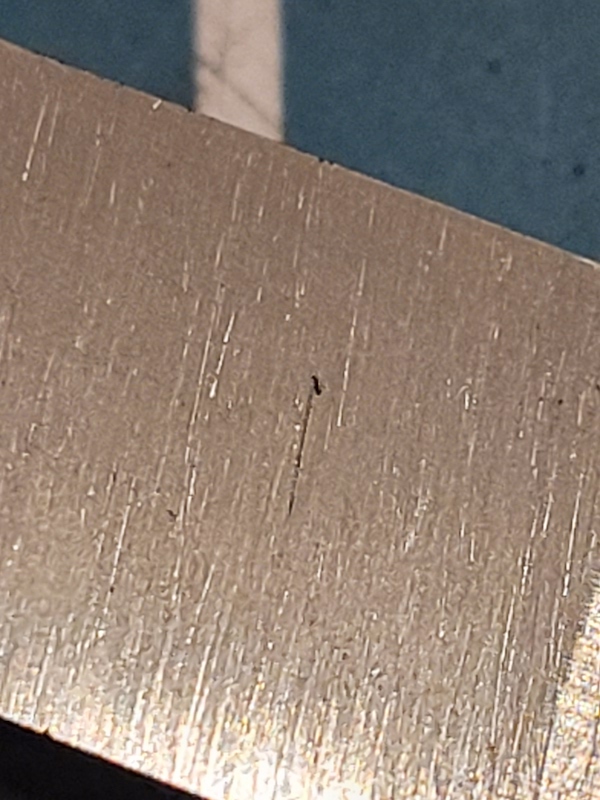
A loose diamond embedded in the iron. See the black dot? You can see a trail beneath it where the diamond worked in, the black is the crater of material it ploughed out. Knocked it out with another iron and back to work. This will get knocked out as you lap if you dont do anything, but its likely to knock off more diamonds before that happens.

At 3 hours I’m down to a tiny corner.
15 minutes later, its a tiny speck.
5 minutes after that its done.
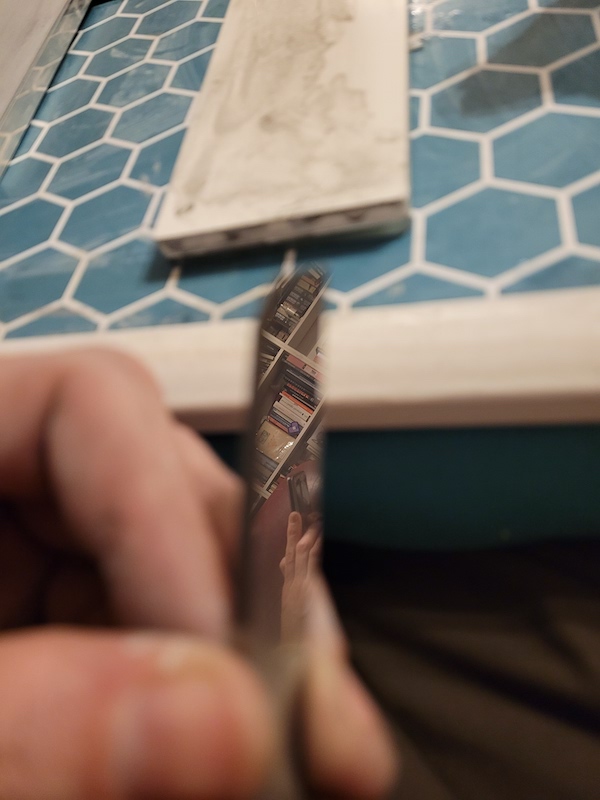
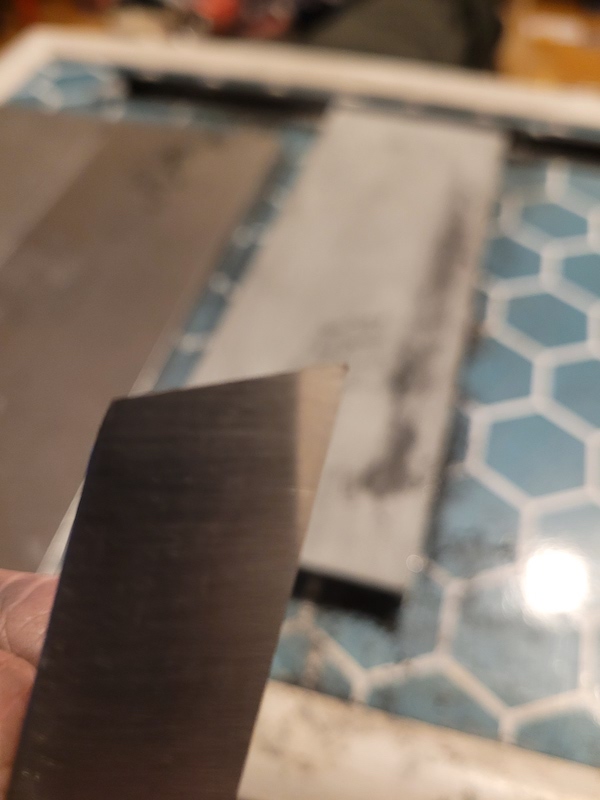
Just before I finished with 1200 grit on that iron. You can see from the reflection of the stitches on the phone case where it needs a little more work. Reflection quality is a great way to tell if you are done or not at higher grits.