A Box for the Record 043
This Record 043 plane is the six million dollar man of hand planes, “We can rebuild him. We have the technology”. This plane has received a new wooden fence, fence screw, blade holder, cutters, and even pair of short rods! I’ve grown quite fond of this little plane, but last week I mailed it off to its new owner in Australia. So, I decided as a finishing touch it needed a nice box to live in.
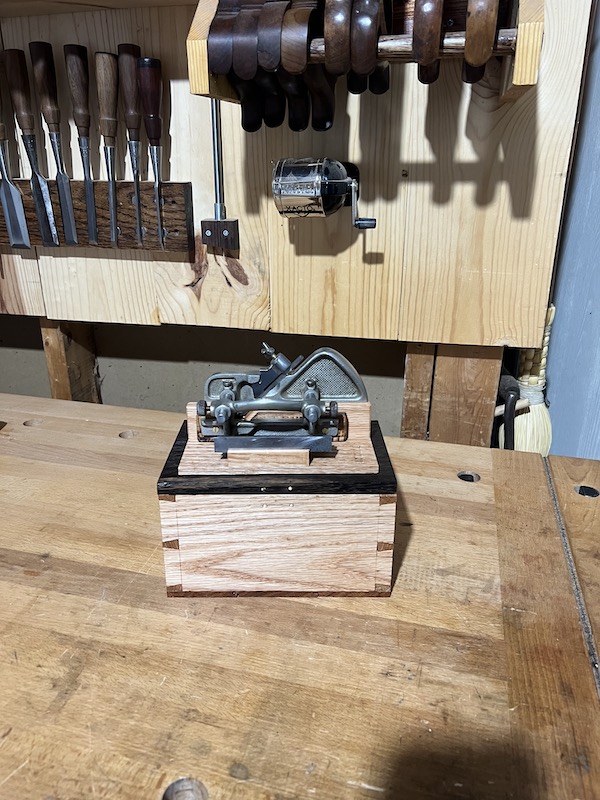
To start with the best part, here’s the final product.

Figuring It Out
When I started planning out a box for the Record 043, I thought of a luxurious interior that fit the assembled plane, and had a nice box to hold the cutters. Originally, I came up with a box that was 8” x 7” x 5” outer dimensions, literally half the size of a shoebox, and 3 times the original box. As a tangent, you can get pretty nice “magnetic gift boxes” that make great plane boxes and just as durable as any cardboard/pasteboard box the tool came in.
Laying out some boards on my bench, and placing a Record 043 inside, it fit, but there was so much empty space! It felt wasteful, looked clumsy, and worst of all it did not display well because the box was just so much bigger than the plane. With all the effort I’ve put into this plane, I wanted to do better. I spent a lot of playing with boards on my bench until I figured that if I shortened the rods (for rebates nad grooving, the fence is rarely more than 1” from the cutter) everything would fit in a 6” x 5” x 3.5” space, which is actually just smaller than the original box that is 6” x 6” x 3”. I liked that.
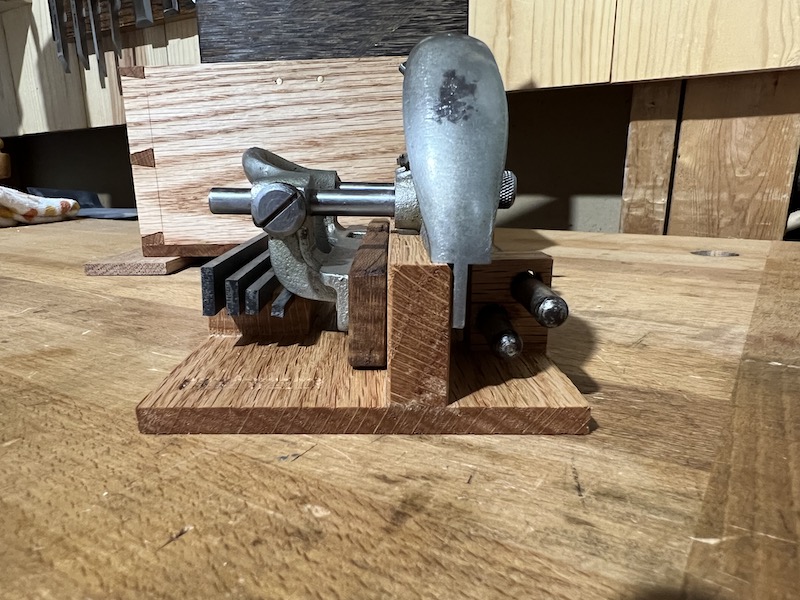
Thinking through how everything is held securely in the box I remembered the removable display a friend did for their larger Record 044. I sent them a note asking for pictures, and suddenly came up with a new internal layout. I thought it’d be cute if the plane could be removed from the box and placed on top to form sort of a stand/display on top of being a nice place to keep everything. Originally the plan was a similar beam with some shaped feet, but that ended up changing later.
So the plan was a 6” x 5” interior, and a removable stand the 043 could be mounted on. Cool!
Fail Until You Succeed
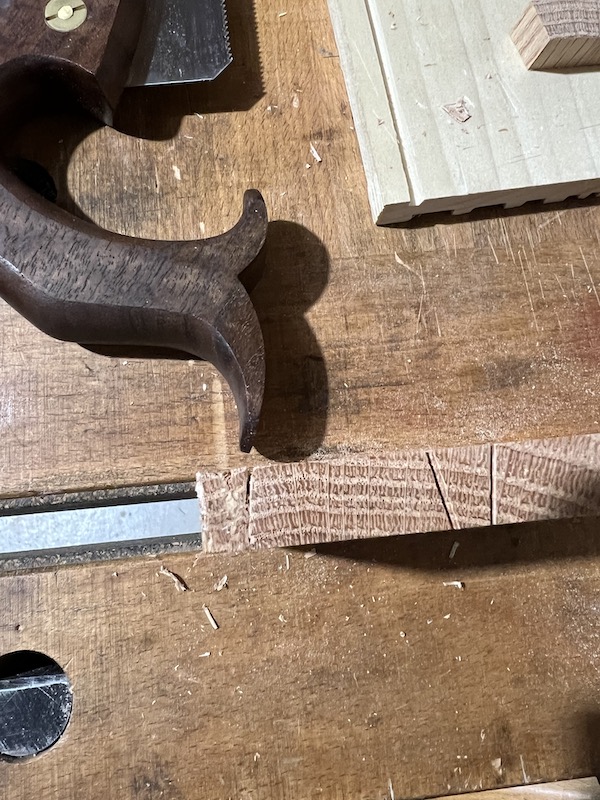
I cut 1/2” thick boards to lengths of 7” and 5.5” planning to do a rabbeted box completely with the 043. Rabbeted boxes are quick and easy, so I thought perfect. I cut the pieces, and then decided to switch to dovetails! It’s been a few months since I did a dovetailed box, so the practice would be good.
Counting for the through-dovetails my planned 6” x 5” inner dimensions shrank to 6” x 4.5”. Not the end of the world, but there now wouldn’t be a lot of room for a fancy cutter box. That seemed okay; at worst I figured I would make a paper/cardboard packet like the original plane.
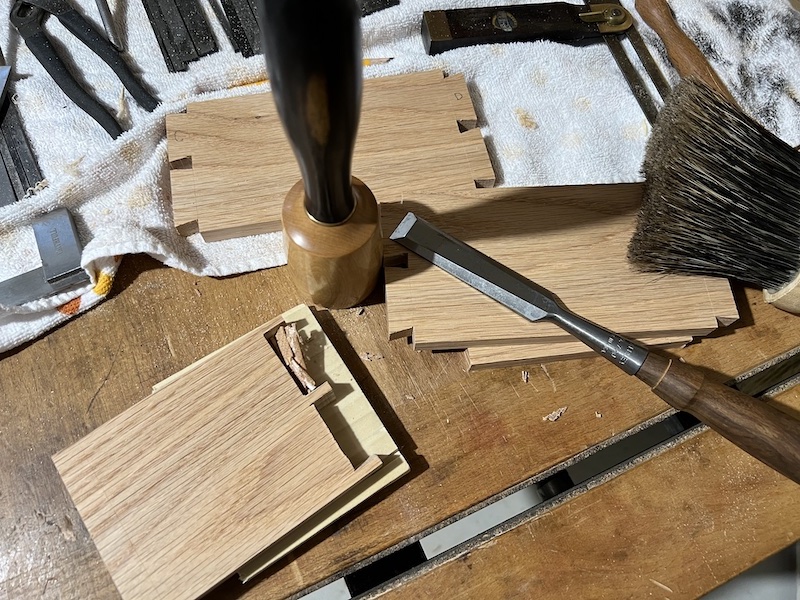
While cutting the dovetails, on the last set of pins I put the board in backwards and marked/cut the first pin in the wrong direction. Oops! Did I mention I needed practice? I used a chisel to split a wedge off waste cutting pins on another board, and then glued the wedge into the saw slot before re-marking and continuing on. Not much later, the frame came together.
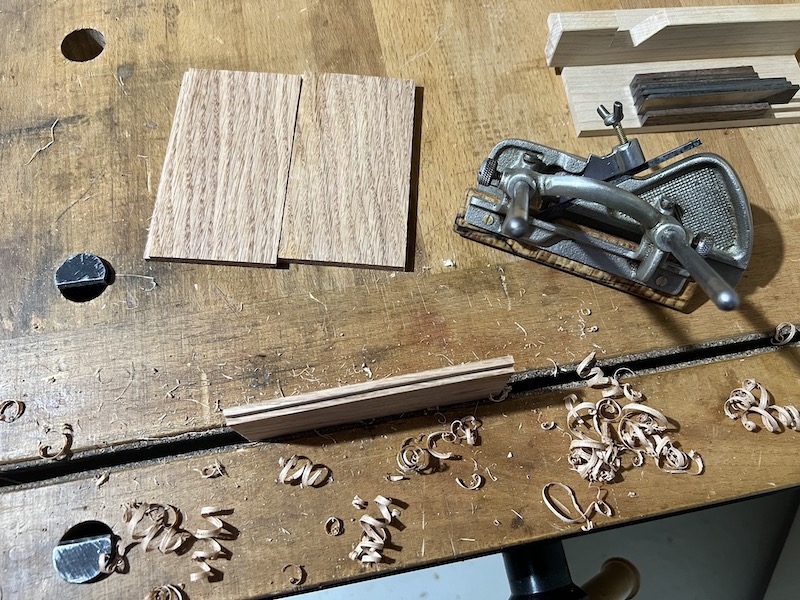
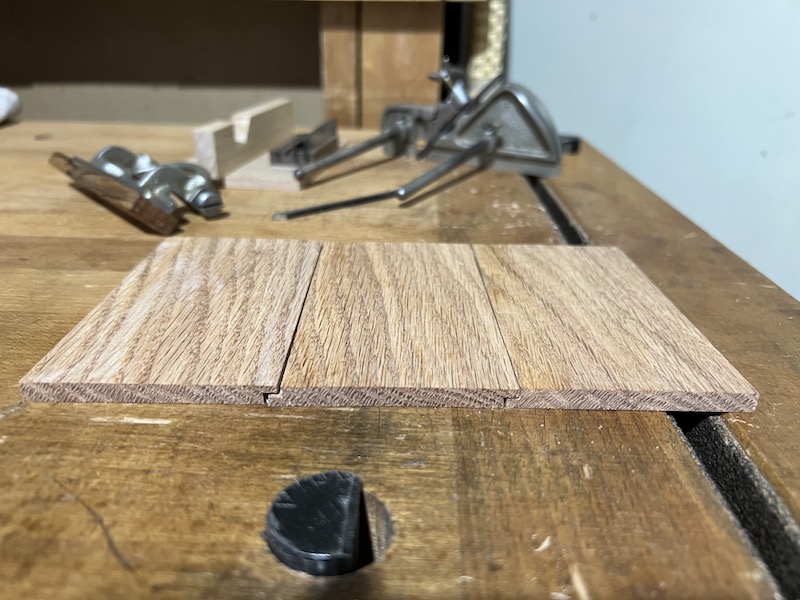
Onto the bottom! Having made pencil boxes before, I was going to just cut one length of 5.5” board and glue the long grain to the long sides of the box. But then I wouldn’t be using the Record 043 to make the box at all… So naturally I further over-complicated the build, making 1/4” thick ship lap and nailing it on.
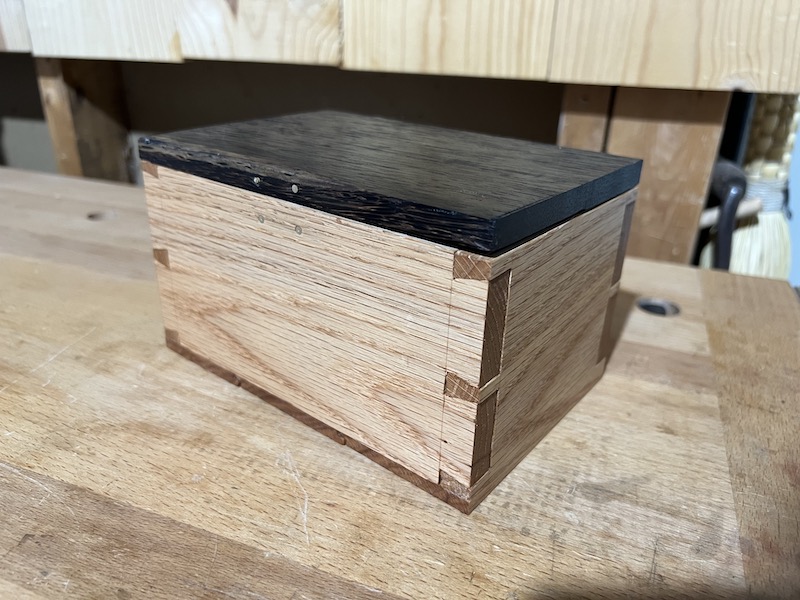
Now I had a bottom, but no lid. I looked around and found a scrap of black palm that was just wider than my box and I thought would be a nice contrast to the oak. I resawed it from 3/4” to about 3/8” thick, but the resaw had a corner closer to 1/4” thick and plenty of saw marks. I planed the top of the board flat while leaving the underside with the resaw marks. With a rabbeted box, the box lid just a solid piece that fits into rabbets. The problem is rabbets have no structural resistance to cupping in a more tropical environment than my shop. I decided hinges and a hasp it would be.
Well the hinges went on easy, but after carefully pre-drilling the holes for the hasp, I snapped the first screw and got it stuck in the lid. Not wanting to make another lid, and having already pre-drilled all four holes, I inserted brass screws into the other holes and then used my flush cut saw to cut them off as an “artistic” detail. I kinda like the look, though if I were to do it again intentionally I’d just do two instead of 4.
Final Touches
I masked the inside of the box with painter’s tape and applied Odie’s Oil for a quick finish (it’s nice that it only takes one coat and you’re done).
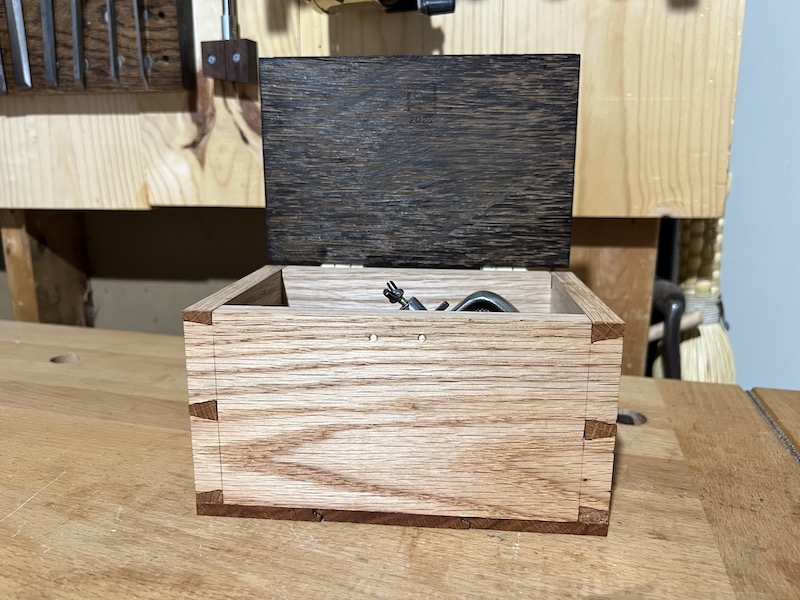
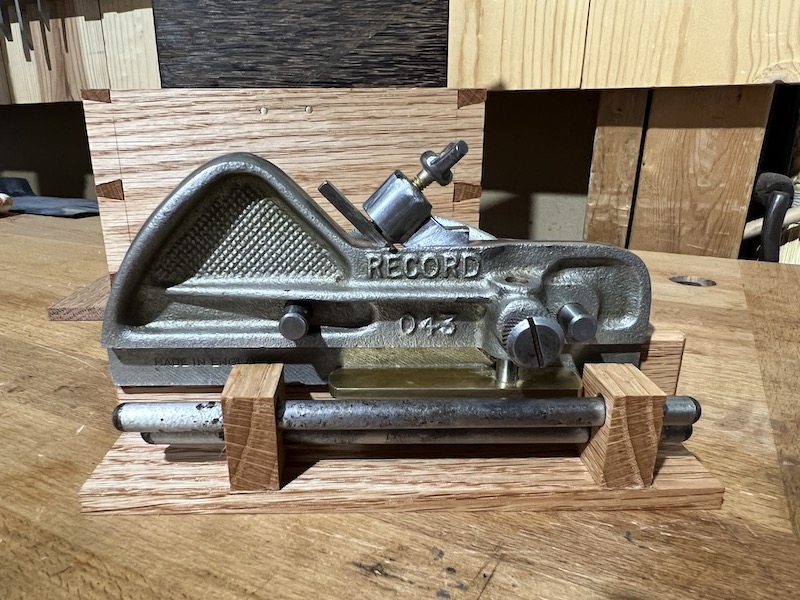
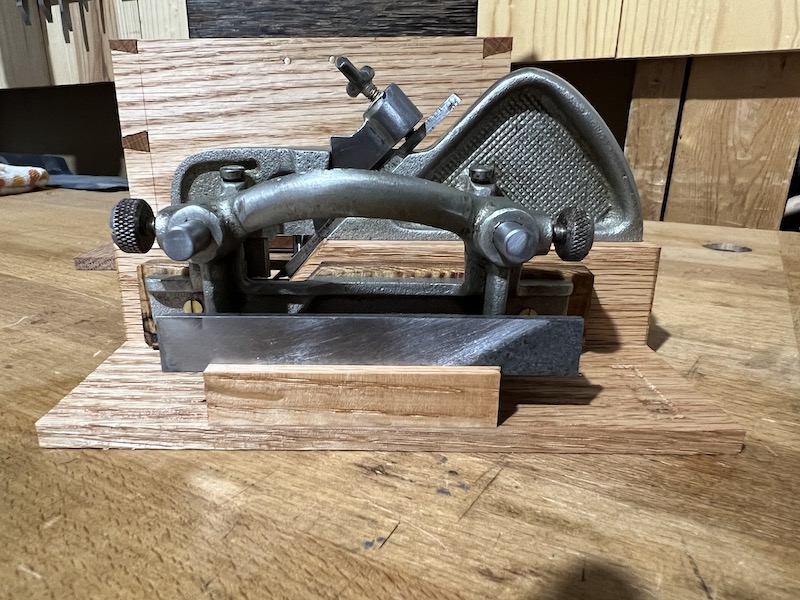
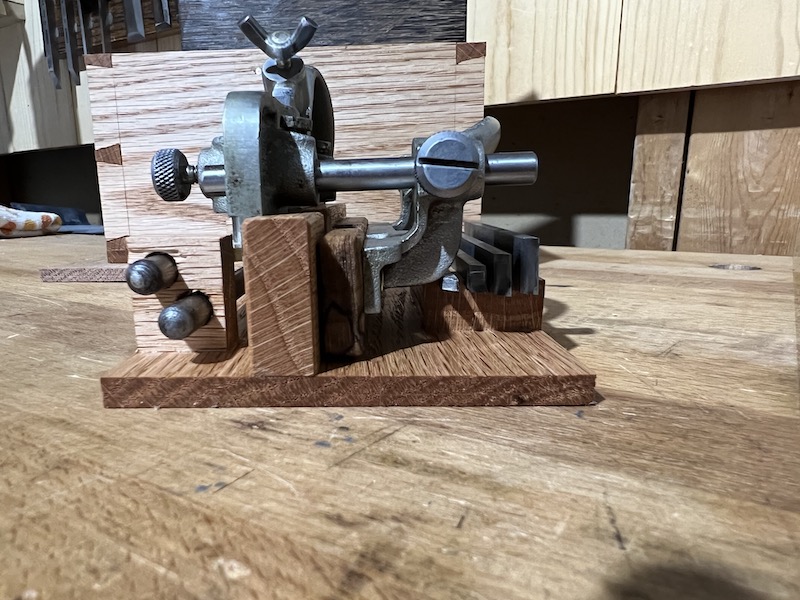
With the box done, I needed to figure out holding the assembled plane, cutters, and long rods. Inspired by another box for a Record 044, I thought a removable base would work well and built a prototype stand out of maple scraps I had. It was a little clunky at first, and while testing the cutters out I came up with a blade storage design.
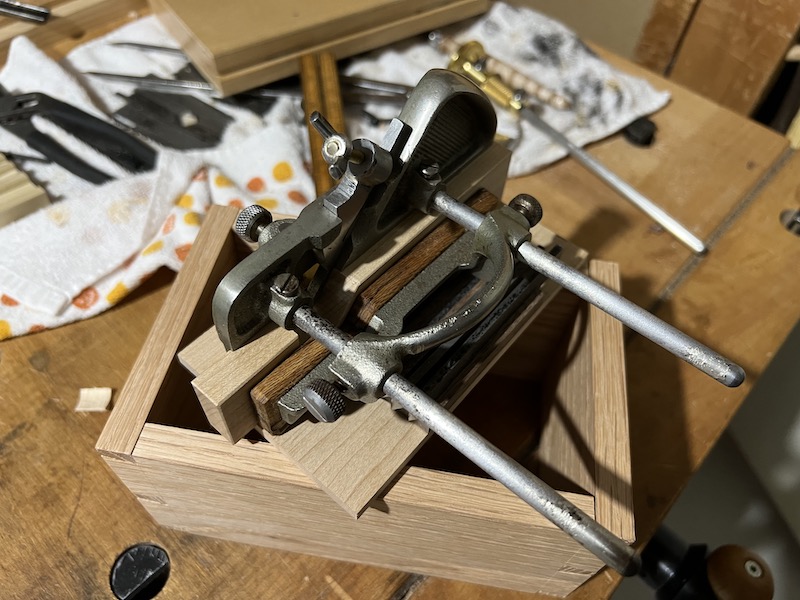
Tossing the prototype aside, I re-made the display/base in oak to match the box, and things were really coming together. I really like how I was able to fit everything into fixtures that prevent them from colliding with each other even if the box is jostled. You could also pull the insert out, set it on top of the box, and use the whole assembly as a mini display stand!
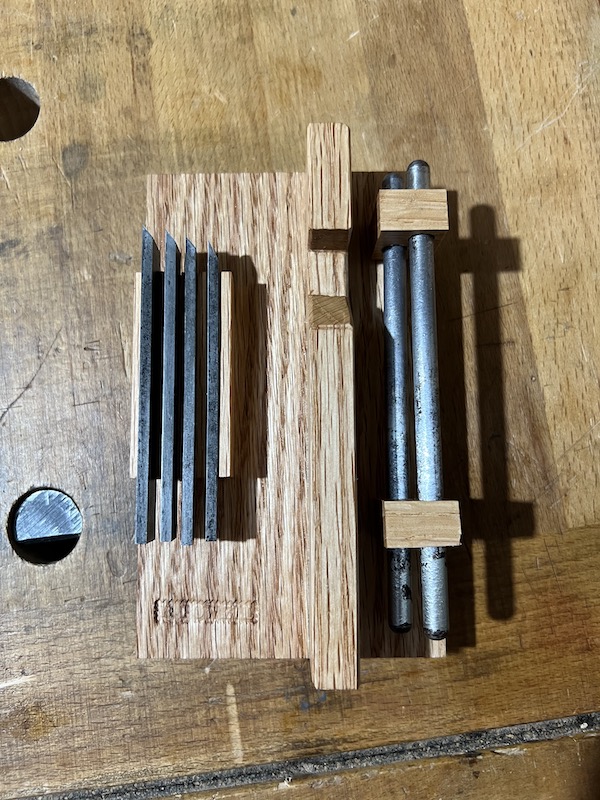
I had a final idea that I should include a small stone for honing the cutters. I purchases a 3 x 1 x 0.25” hard Arkansas pocket stone in a leather pouch. Upon receipt of the stone, I promptly smeared stropping compound all over one side of the stone, now the box included its own sharpening system, too.
Conclusion
I ended up really happy with the final design. Through the mistakes, prototypes, and re-designs I came up with a better solution than I ever could have planned for. Next up, I have a Stanley 55 that needs a home…