Making A Stool Leg Scriber
When you are done making a chair or a stool. At some point you have to level the legs. The odds that you have gotten them all the same length, and angled right at the bottom are zero. Normally, I put the stool on a big piece of flat plywood. Level the plywood with wedges (because I have nothing level to put it on). Then the stool goes on top, I level it with wedges. Then finally go digging for something that I can rest a pencil on that’s just the right height and trace a line all the way around the leg. Saw to that line, and your chair/stool should be level. In practice, its saw, and then tweak with rasps and sandpaper in my case.
It can be a pain to hunt out something the right height, then you have to keep the pencil held down well as you go around. I spotted the Fat Boy Scriber from Tooley Park Furniture a while back https://tooleypark.com/shop/uncategorized/fatboy/), which looks like a perfect solution. The only downside to it is the looks. Bright plastic colors, pressed metal. Not my cup of tea. If you just want something to get the job done , go buy a Fat Boy. It has a lot more features than what I cooked up to boot. If you want to have fun knocking together a similar tool for yourself, read on. It’s a really great project for using small off-cuts up.
I put my tool together in about an hour on a whim, so I don’t have my usually blow by blow photos all the way through, but I have started making a few more I’m going to do a nicer job on, so I have enough photos to show most of my process. Check out the photos below to get the step by step process.
The good news is, it works well, and it made leveling the last stool I made a much quicker more pleasant process.
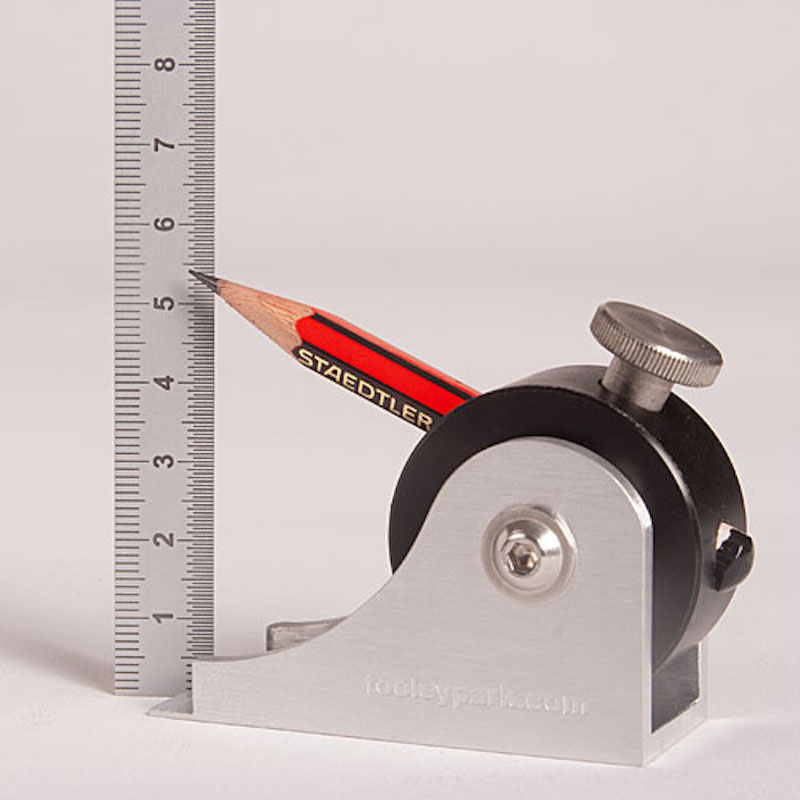
The Fat Boy Scriber from Tooley Park Furniture (https://tooleypark.com/shop/uncategorized/fatboy/), and awesome little tool, which I have shamelessly ripped off.
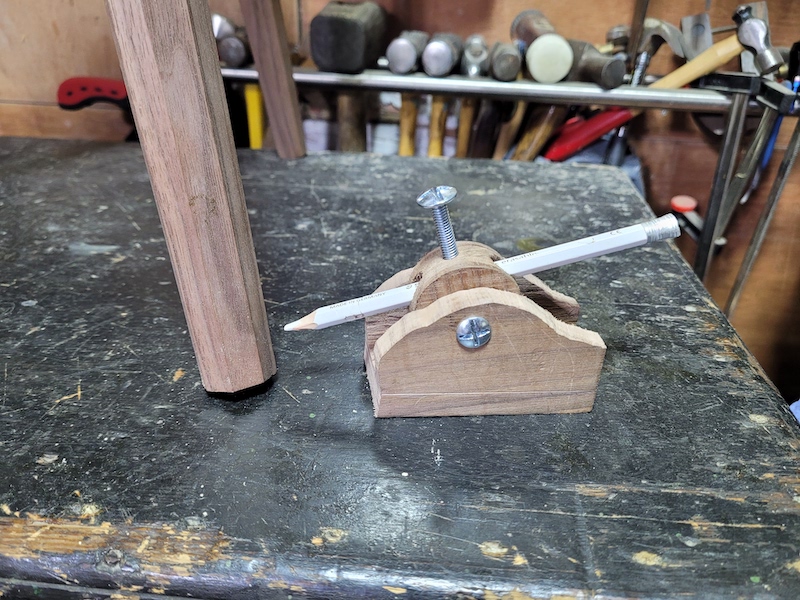
My walnut knock off. It holds a range of pens/pencils very solidly. The part of the design I was not sure of was locking the central wheel. I put this together quickly to find out if tightening the bolt that runs through the walls would exert enough force to bend the walls and lock the wheel in place. It does, it does it really well. I cant move the pencil while really hauling on it when the bolt is well tightened.
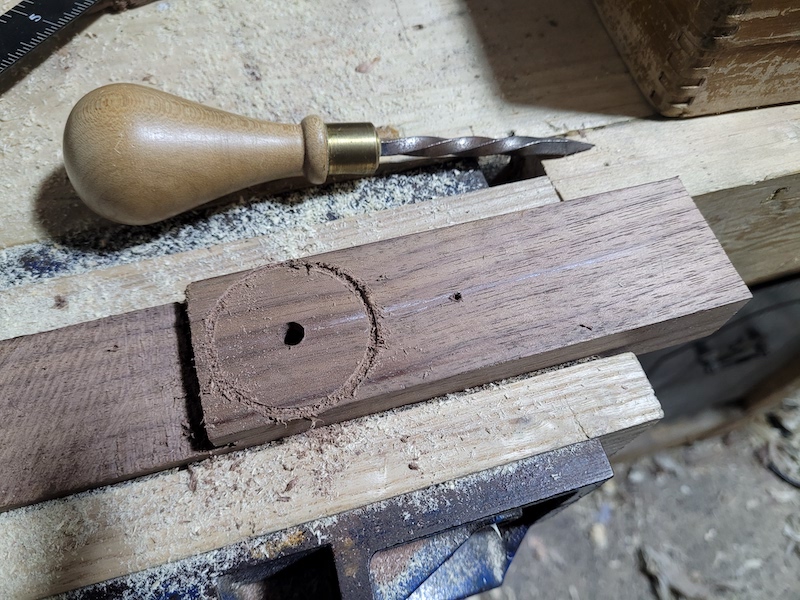
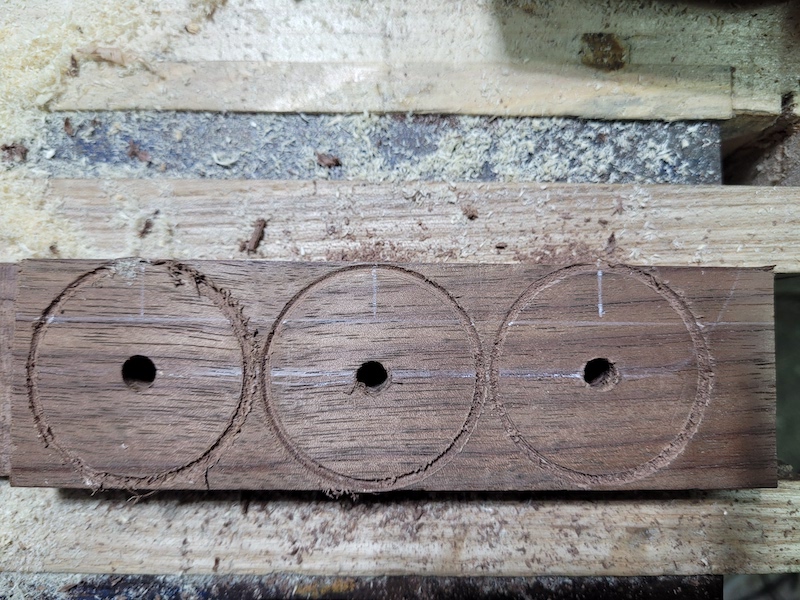
I used a 44mm hole saw to cut out my centre wheels. There is no absolute reason why it has to be round if you don’t have an hole saw. It also does not need to be perfectly round. You could make a square, a triangle, an octagon, any old weird random shape. They will all work. I marked a centre line down the off-cut I used (you can just make out the white pencil here). Marked a spot with an awl.
Then I pre-drilled the centre hole with an auger bit. Pick one that matches the size of the bolt you are going to use, or a little larger. It does not need to be very precise. Drill as straight as you can through, but again, a perfectly straight hole does not matter much. You can be off quite a bit and it will still work. I pre-drill as the drill bit portion of a hole saw is not an ideal wood drill bit, its pretty slow. It also lets me do a bunch of other steps before I need to cut any real depth with the hole saw.
Next I drop the hole saw in and use it just to mark out the circle.
I held an auger up to my commonly used pens and pencils, and then went with a size that was slightly larger than any of them. Then lay it down on the circle to pick where I should drill. You want it far enough above the central hole that it wont interfere with it, but low enough that there is some would left to drill and tap a hole for the bolt that pins the pencil in place. You don’t need a huge amount of wood for that, but you need some.
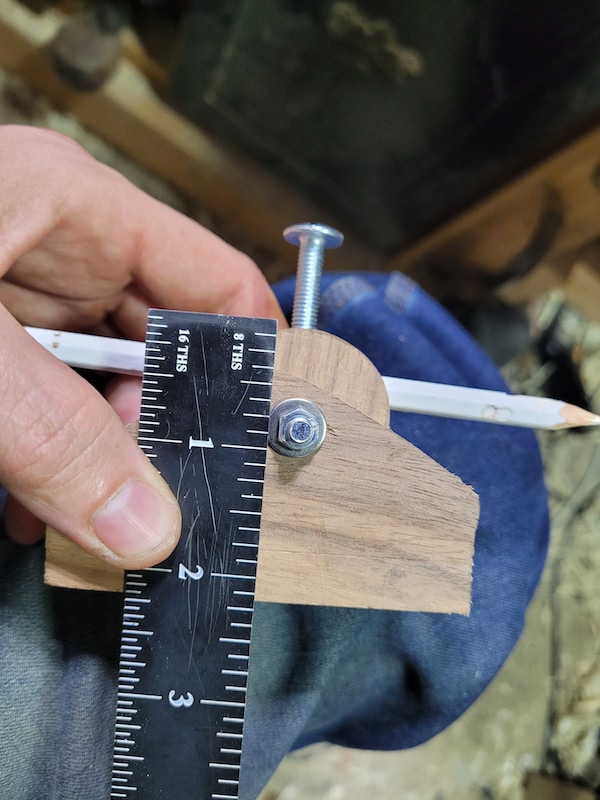
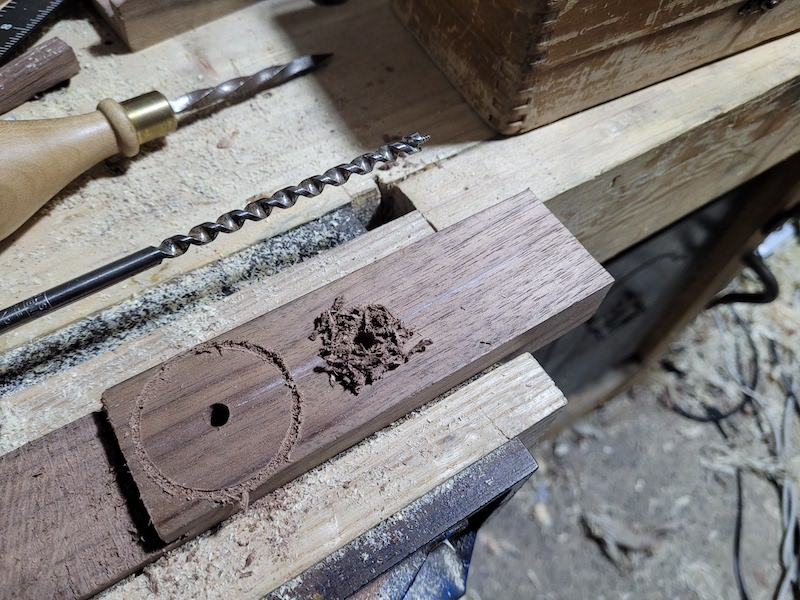
The final layout, the horizontal line for the pencil to pass through. The vertical line for the bolt hold to pin the pencil in place.
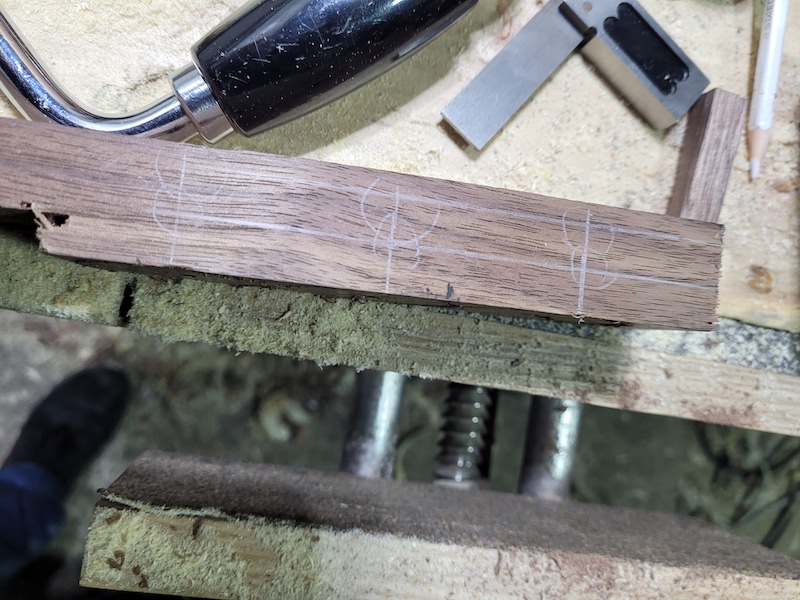
Carry the vertical line up and over the top. Pick the desired width of your disk (you want to have it be wider than your thickest pencil, plus some sidewall for strength). Mark the central line of that and where the vertical line carried over meets the centre line is where you are going to drill your bolt hole. Its nice to have the stock be a bit thicker than the final wheel. Hole saws do not leave nice exit wounds, so being able to rip the stock to extract the wheel is nice. There is a good chance your hole saw will have limited depth as well, so check that out before you start. If you are not using a hole saw, then it does not really matter.
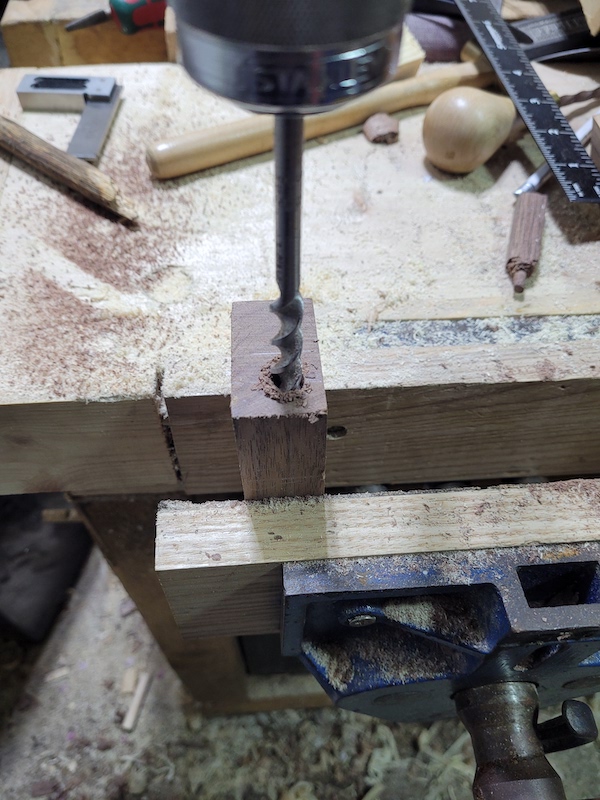
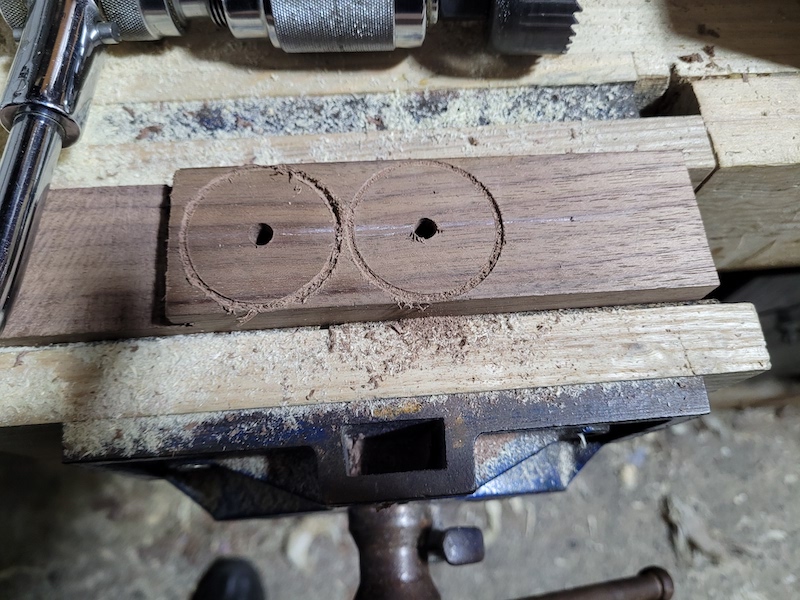
Drilling the pencil hole through 3 disks at once. If you are not used to drilling end grain, make sure your auger is sharp. If you have a Gedge/Cook or Bullnose auger the right size, they will work end grain better than a standard auger. Again, you do not have to be perfectly straight here, everything will still work out. But better to drift toward to the top of the wheel than the centre.
I drilled the hole for the vertical bolt with an egg beater. This hole was then tapped with a cheap set of Aldi taps. I think I used an M4 bolt. The manual for your taps will tell you what size the pilot hole should be. These are metal taps, but they worked just fine in the walnut. I had intended on using a wooden screw, but I do not have a screwbox and tap small enough, and I found the Aldi dies just mangled small walnut dowels. I could not get a usable screw. So I just went with a standard M4 bolt for this prototype. It works great in the tapped wood. Your tap might need to be able to pass deeper than the centre hole of the disk, so no harm drilling into the centre hole and then through. Take a look at your tap, the widest point should pass all the way through the portion you want to tap. That will let you figure out how deep to drill.
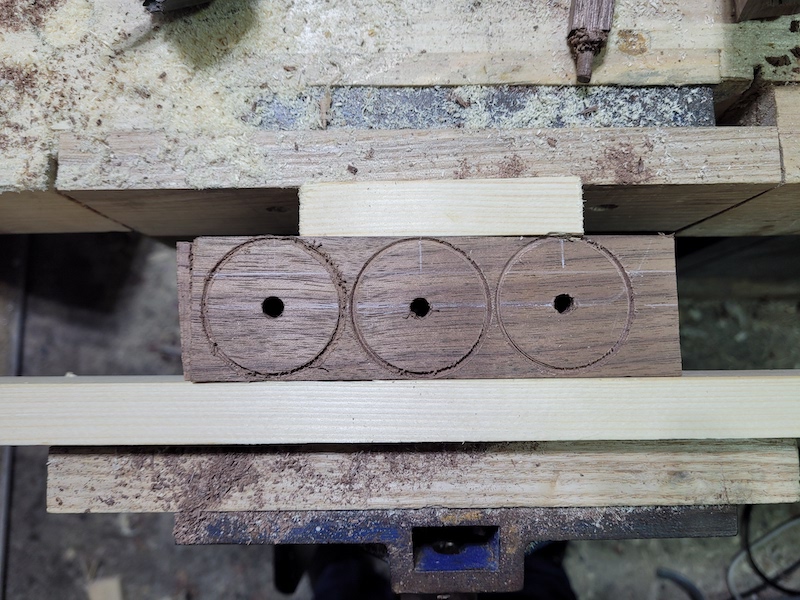
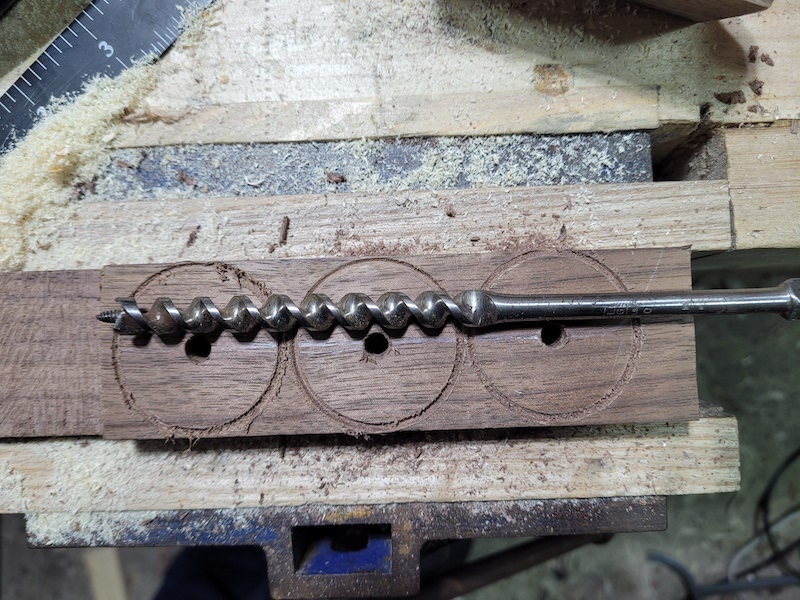
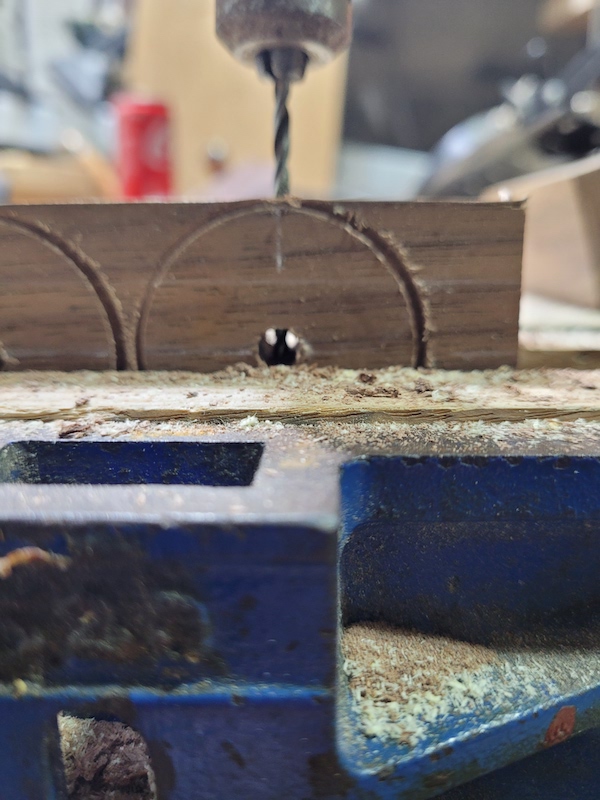
Ready to use the hole saw to take out the wheels. A few notes here. I’ve put some scrap on either side. If you are using offcuts barely the size of the wheels like me, a slight drift with the hole saw bit will really mangle your vice jaws. Second I used a 14 inch brace to turn the hole saw. A 10 inch worked, but it was really hard work, if you have a larger brace you will be glad of it. Lastly, as you get close to passing all the way through, the pressure from the vice will start to cause the bit to jam. You might want to flip the workpiece to be vertical to get the last bit. On my first one I used a cheap holesaw, the kind that comes in a kit with several different sizes. It worked fine for the first wheel, and failed halfway through the second. It stripped and the saw part no longer held. I had to buy a newer, more substantial hole saw bit.
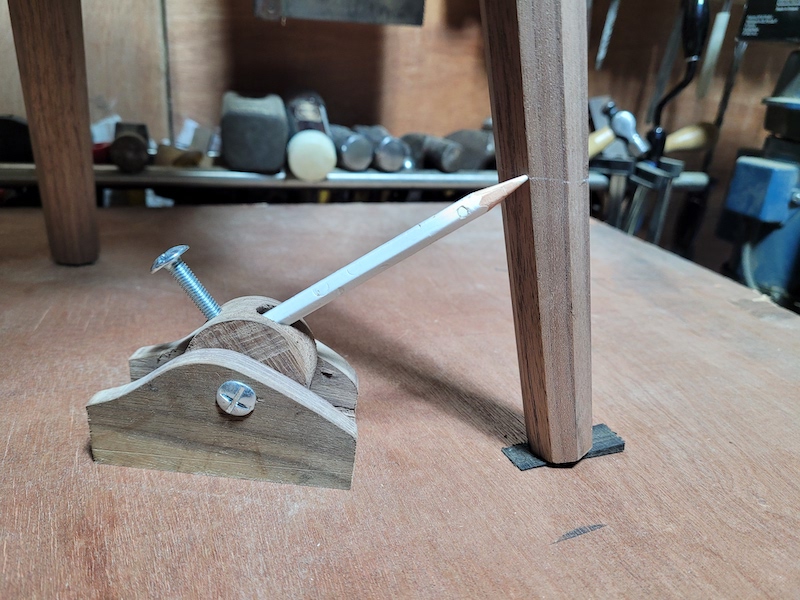
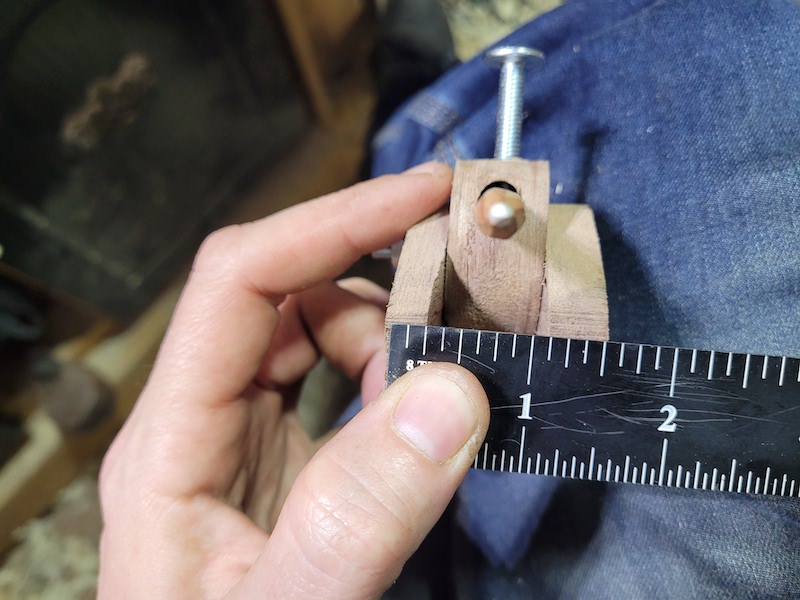
The final scriber in action. I don’t have any photos of making the body yet. In this case, its a solid chunk of walnut. I place the wheel on top of it, marked the width. Sawed 2 kerfs that where slightly too narrow and knocked out the waste with a chisel. The piece you make it from needs to be big enough that you leave a sole for the tool, and a gap between the sole and the bottom of the wheel, while still having a place for the bolt hole. Once The waste was chiseled out I fine tuned the side walls with a wide chisel until I could press the wheel in with a little bit of friction. I put the bolts in, and it just worked!
For the nicer versions I’m working on, I’m considering making the body out of sides dovetailed to the sole, and I’m debating between trying for wooden screws again, or using some brass thumb screws. Ideally I would either tap the side wall of the body to take the centre wheel bolt, or inlay a bolt onto the inside before assembly.
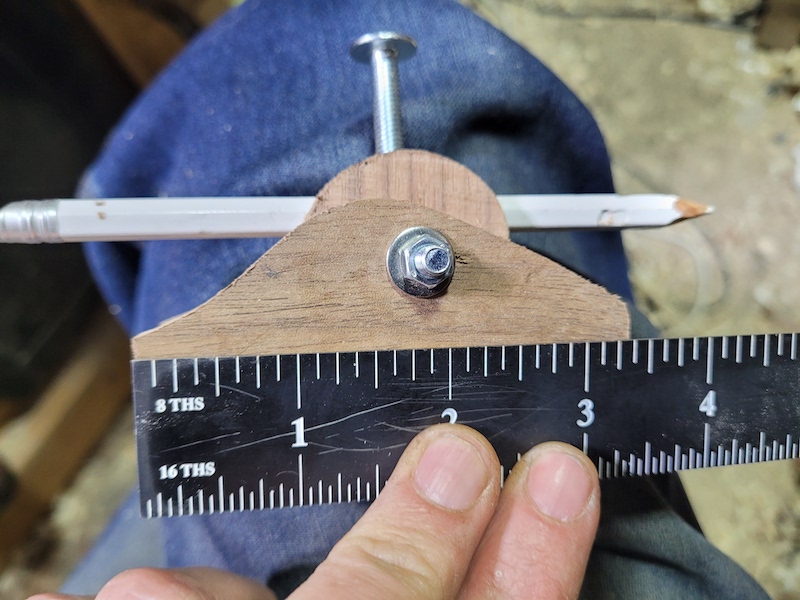
If you are tempted to make your own, here are a few photos that give you an idea of the dimensions.