A Badger Plane
I’m a bit of a newbie to woodworking. I’ve always enjoyed making things, but it’s only really in the last year or so that available time, energy, inclination, and a modest amount of funds have coincided to allow me to have a dabble. I have to say, I’m thoroughly enjoying it in my small single garage workshop space.
Over the course of that time and somewhat fueled by the lovely sellers on this group, I seem to have acquired a small army of hand tools and I have made myself some winding sticks, a couple of router planes and some small pieces of furniture, but having a wooden badger plane (which I love) I’ve always wondered what it would be like to build a plane from scratch. There’s something very satisfying about making things using a tool that you have made.
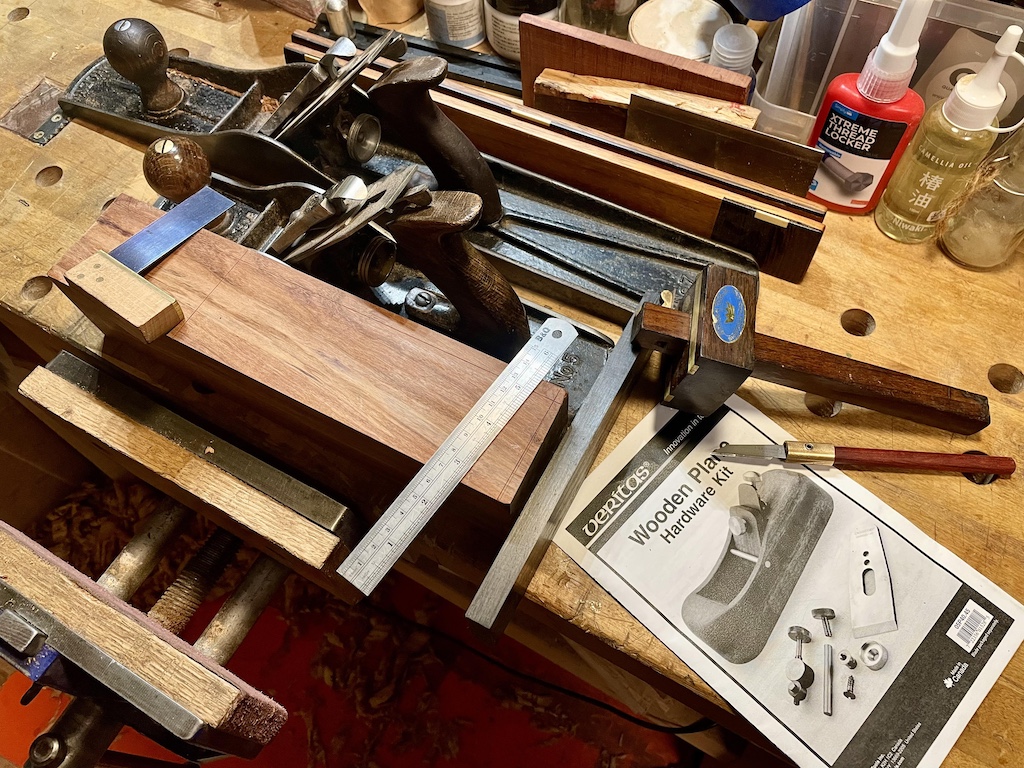
Enter a birthday, just the right side of being 50, a block of Xylia and the Veritas Wooden Plane Hardware Kit. The only power tool that I used in this process was the pillar drill as I tend to be let than accurate with angles on a hand drill.
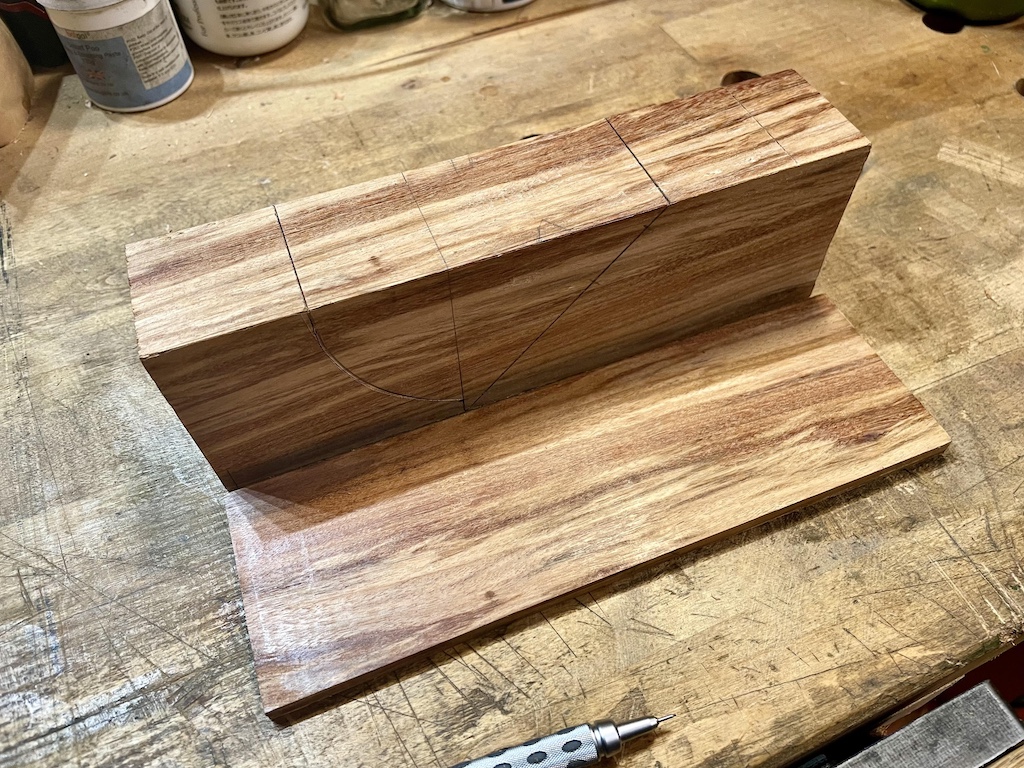
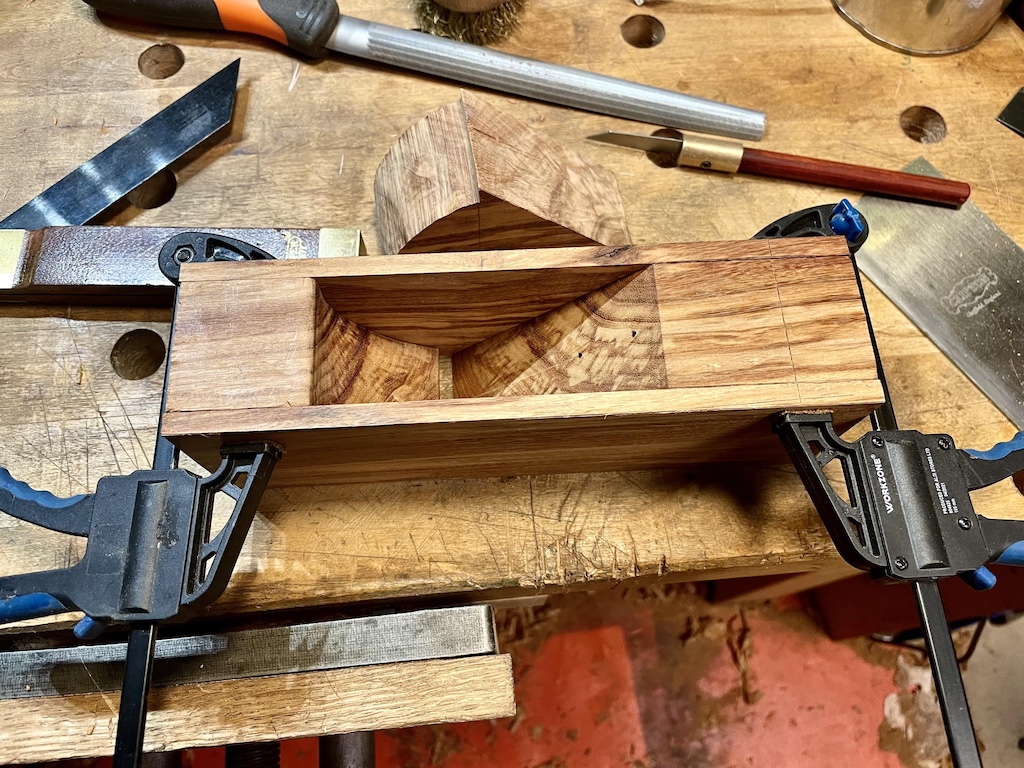
On reading through the instructions, I found that all measurements were in inches, which meant putting my brain in conversion mode being in the UK. But it only took an 90 minutes or so with Japanese ryoba handsaw and a couple of planes to size the block, square it up and cut, square and dimension the cheeks ready for marking the blade bed and escapement. Marking out for the next steps was quick and easy with a sliding bevel set to 45° and a roll of masking tape for the curved escapement. I cut the blade bed with the ryoba, smoothed and squared it with my Stanley no. 5 and then used a coping saw for the rough cut and rasps, files and a card scraper to shape and finish the escapement One rather cunning trick (courtesy of the instructions) was using the waste piece as a 45° jig to bring the bed surface to horizontal ready for drilling out the pocket for the adjuster to sit in and drill a pilot hole for the singular screw that holds the steel pocket in place. With this complete, it was just a case of and adjusting the mouth to fit the thickness of the supplied blade and gluing the cheeks in place to have the bulk of the work done.
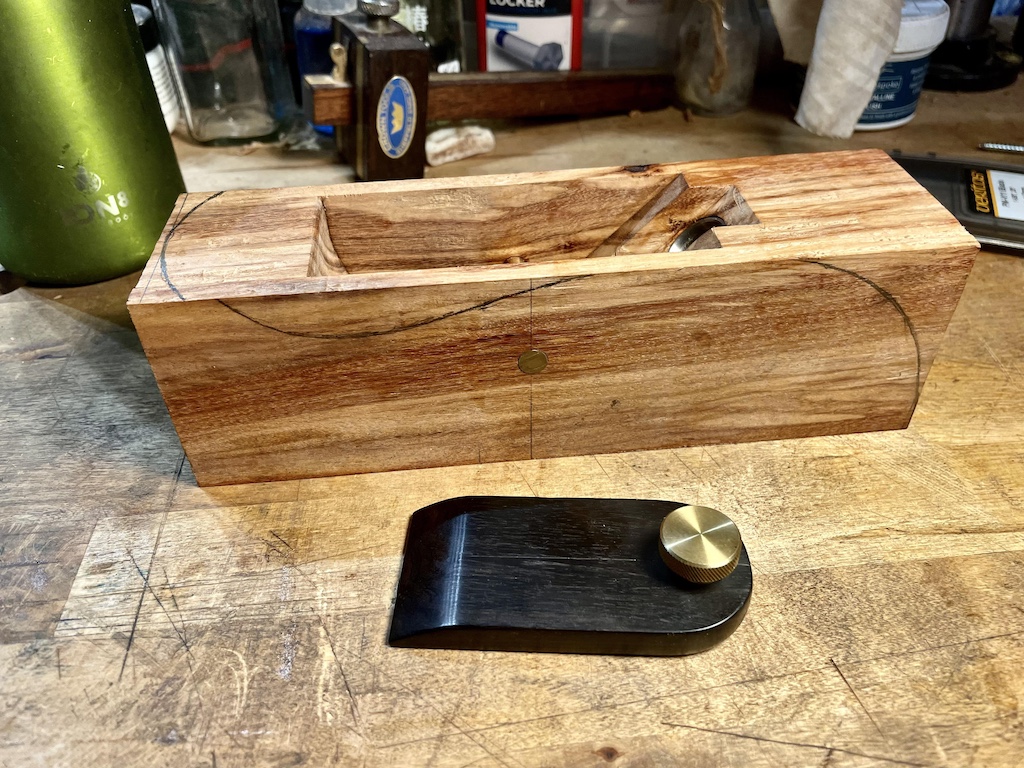
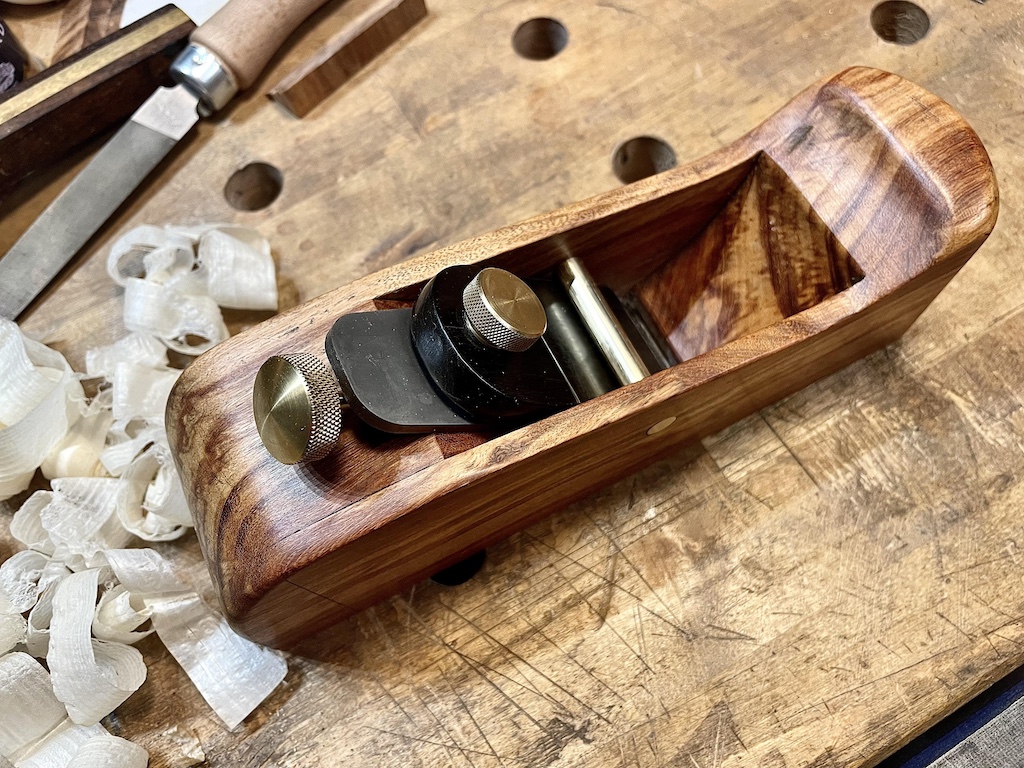
As the glue cured, I set about making the lever cap from an off-cut of African blackwood. And got ready to drill the hole for the cross pin. Before marking the drilling location, I took a few light passes of the plane to properly flatten the sole. Of course, I realised at this point that the brass pin supplied was ¼” diameter and I don’t have a drill in that size. Luckily, I had a piece of 8mm round brass stock so cut a piece of that to length and adjusted the measurements for placement to adjust for the 1.75mm discrepancy in diameter. The pillar drill was again used to make the hole for the cross pin, using the waste block to protect against tear out on the cheeks. Thankfully I managed to get everything set up perpendicular and the cross pin fitted beautifully with no need for glue.
All that remained after that was (a not inconsiderable amount of) shaping using saws, rasps, files and sandpaper to leave a nice, flowing, yet ergonomic shape ready for a micro-crystalline wax finish.
Testing it after a very easy assembly was a joy. The blade was quite frankly, ludicrously sharp after just a quick strop, the adjuster was smooth, very finely adjustable and very easy to set up. Any my word does it cut. Within a couple of minutes, I was taking 0.05mm (approx. 20 thou for those folks across the pond) shavings from black walnut end grain.
So, for the price of a hardware kit and a few hours of fabrication, I now have what has turned out to be my favourite smoothing plane for a reasonably modest cost and with a bunch of learning and satisfaction built in. I may well be making more in the future. I’m thinking of maybe a shooting plane next…