Fret Saws & Jeweller's Saws
I usually use a coping saw to remove the bulk of the waste from my dovetails. I have an old eclipse fret saw and decided to give it a try… it’s pretty much no good for the job. It has completely lost it’s ability to hold tension. The blade flops around and it takes no time to snap one. I know it used to be in better shape. I tried bending the frame out to regain tension. No success. It’s just no good.
Fret saw vs coping saw is a bit of a trade off. Fret saw blades are a lot thinner, making it far easier to put them into the saw kerf. Which in turn means it’s less likely you will marr the side walls of the dovetails, something I have often done with a coping saw. On the other hand, the blades are generally much finer toothed, and as a result cut slower. After spending an evening experimenting. I’m sold on fret saws. Slower, but only a little. Much less fussing to start the cut.
Given my fret saw was a goner, I started looking at options for a new saw. The Knew Concepts and Blue Spruce Toolworks saws are top of the line. They are also very very pricey. If this was a tool that I would use very heavily, maybe they would be in the running, but just for dovetail waste? Way too pricey for me. I started hunting for a more affordable option. Given the Eclipse had not had that long a life span in my hands, I ruled a simple replacement out. Quite a few people I know use relatively inexpensive jeweller’s saws. I hit up a few for recommendations, and they all had a fairly common feature set.
The frame was adjustable in length. So it could be set out as wide as possible before attaching the blade. Frame depth was variable, with most using something around the 3” or 6” depth. The real critical feature was a tensioner that allowed extra tension to be applied after the blade had been attached. I cannot recommend this feature enough. The difference between the saw before using the tensioner and after is huge. A 3” depth might not seem like much if you have a wide board to remove dovetail waste , but you can just twist the blade a little with some pliers and you are good to go. EBay is full of fret saw listings that look identical to mine, but without the tensioner, so be careful.
Most of the saws I saw that people liked seemed to be either the Olson Zona Jewelers Saw, or very close copies of it. You can see it on the Olson website https://www.olsonsaw.net/shop/coping-jewelers-mini-hack-blades-saws/jeweler-s-blades-and-saws/zona-jewelers-saw-2-7-8-cutting-depth/.
I found this seller on EBay, and ordered both the 3” (£10.99) and 6” (£15.99) saws. They arrived in good shape and they work well. They hold excellent tension. In practice I don’t find much difference between the two in terms of handling, so I would probably just go with the 6” if you are in the market.
By Co-incidence, a weird looking vintage saw with a cam tensioner showed up on the Vintage Tool Patch a few days later. I had never seen a vintage model like it. So I bid and won (I’m really sorry, I cant remember who sold it to me, let me Know and I’ll give you a shout out).
It arrived, and by co-incidence, Phil Bristow on BenchTalk 101 produced a near identical saw he had gotten at nearly the same time. Neither saw had any visible makers marks, but Andy Brown thought he recognised it as a Hobbies saw. A little digging on archive.org turned up a Hobbies catalogue, and there it was.
Phil’s saw had a nice little add on mine lacked. A pair of clamps that allow the saw to accept pinned (e.g. coping saw) blades. He had also spotted a feature of the saw that I had not, the handle contained a tensioning screw, and by rotating it you could apply tension after fitting the blade, just like the jeweller’s saw.
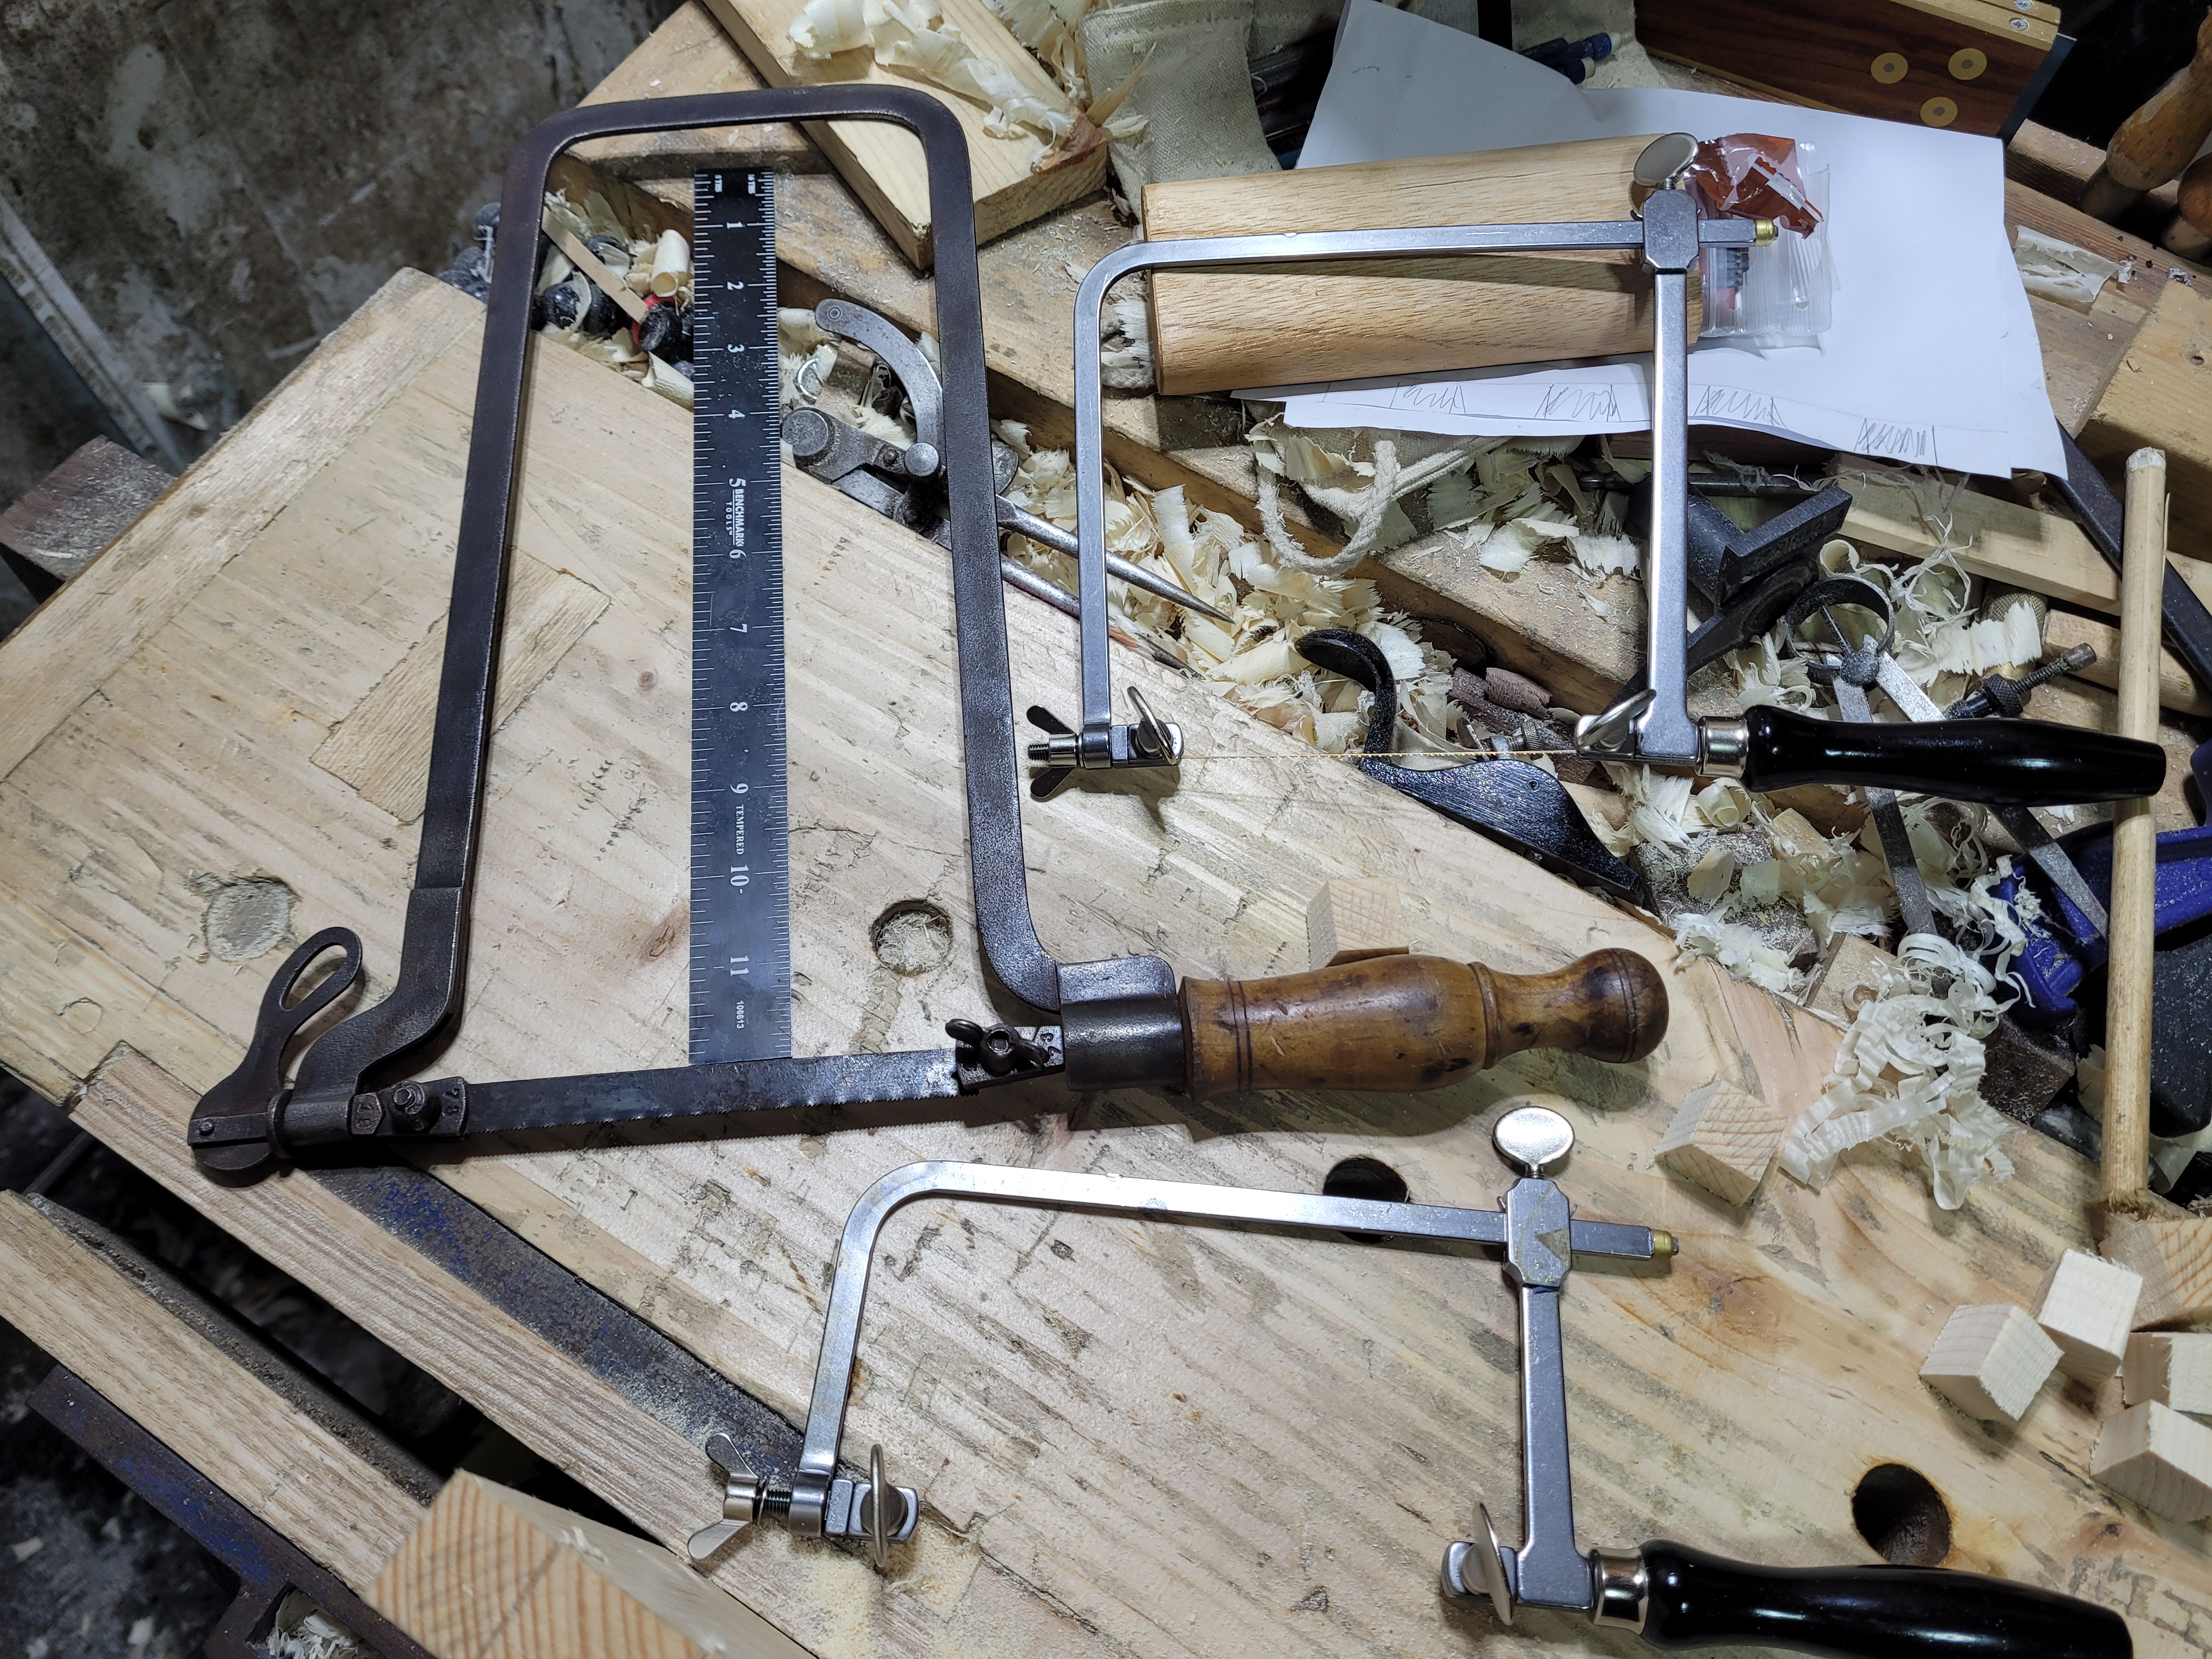
I experimented with all 3 saws, with exactly the same blade in each. The new jeweller’s saws manage to maintain better tension than the vintage Hobbies saw, but only a tiny bit. I seem to be able to cut a straight line with less effort with the Hobbies saw. I’m not sure why. It may be that the very deep frame just provides a reference I’m subconsciously taking advantage of.
All 3 are excellent solutions for removing dovetail waste. If you are new tool guy, you cannot go wrong with the Olson saws. If you prefer a vintage look, then the Hobbies is an excellent choice. I find if I fit the blade, then apply the cam, and then add tension with the screw. When I am done, I can just release the cam and store it, then the next time I want it, I just rotate the cam back into position and it is instantly ready to go. It is a bad idea to store these saws under full tension, doing that a few times by mistake probably finished my old eclipse saw.
I’ve been advised that if you plan to use your fret saw on metal, every little bit of tension counts, and the jeweller’s saws are probably the way to go.
Check out the images below to see the saws various features and results.
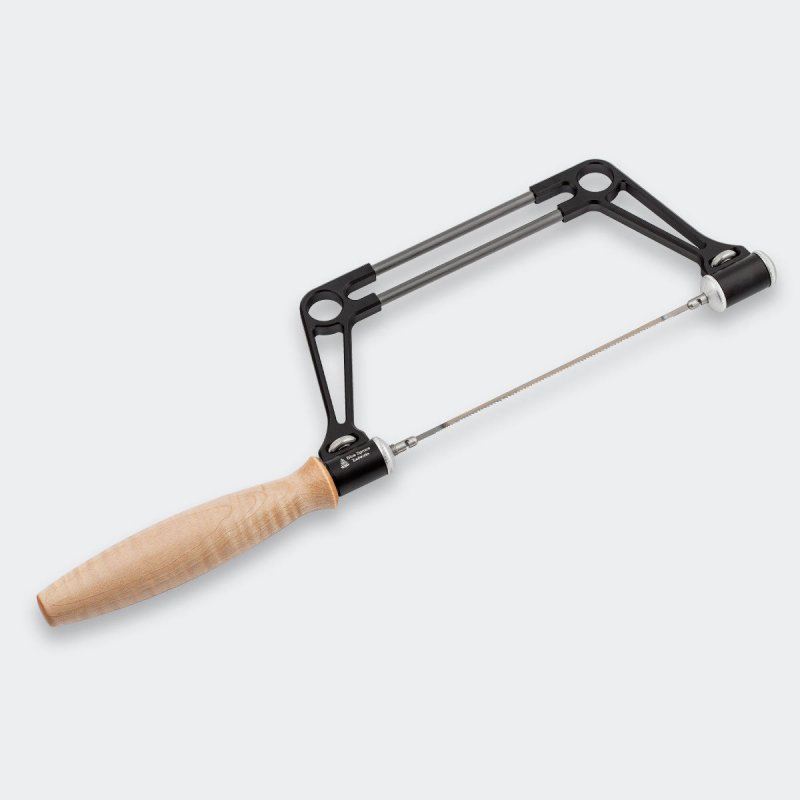
The Blue Spruce Toolworks coping saw, £320 with the fret saw blade adapter in the UK …. Given I can buy about 30+ fret saws for that price, and that I don’t need an incredible amount of precision for dovetail waste… that is not happening.
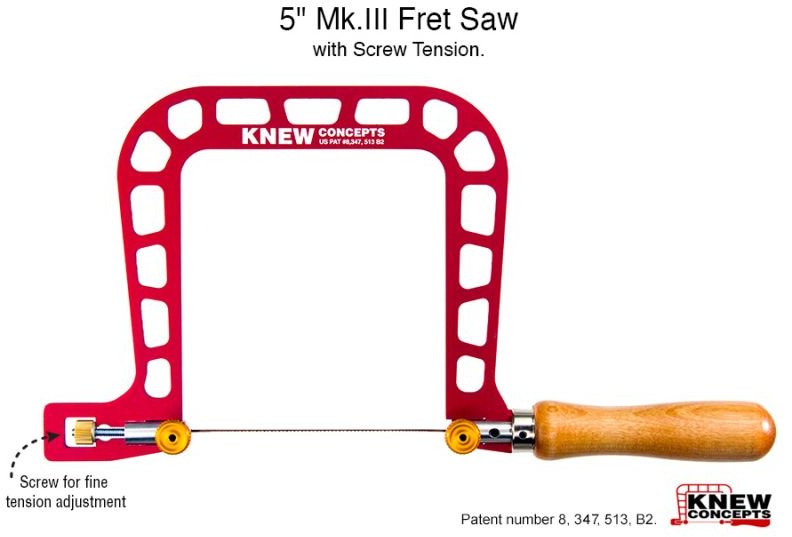
The Knew Concepts 5” fret saw. This is their cheapest model at £72 in the UK. Beginning to get there…. But still vastly more expensive than the other options. And honestly, I do not like the looks of it, or the Blue Spurce. I prefer a more vintage look when possible.
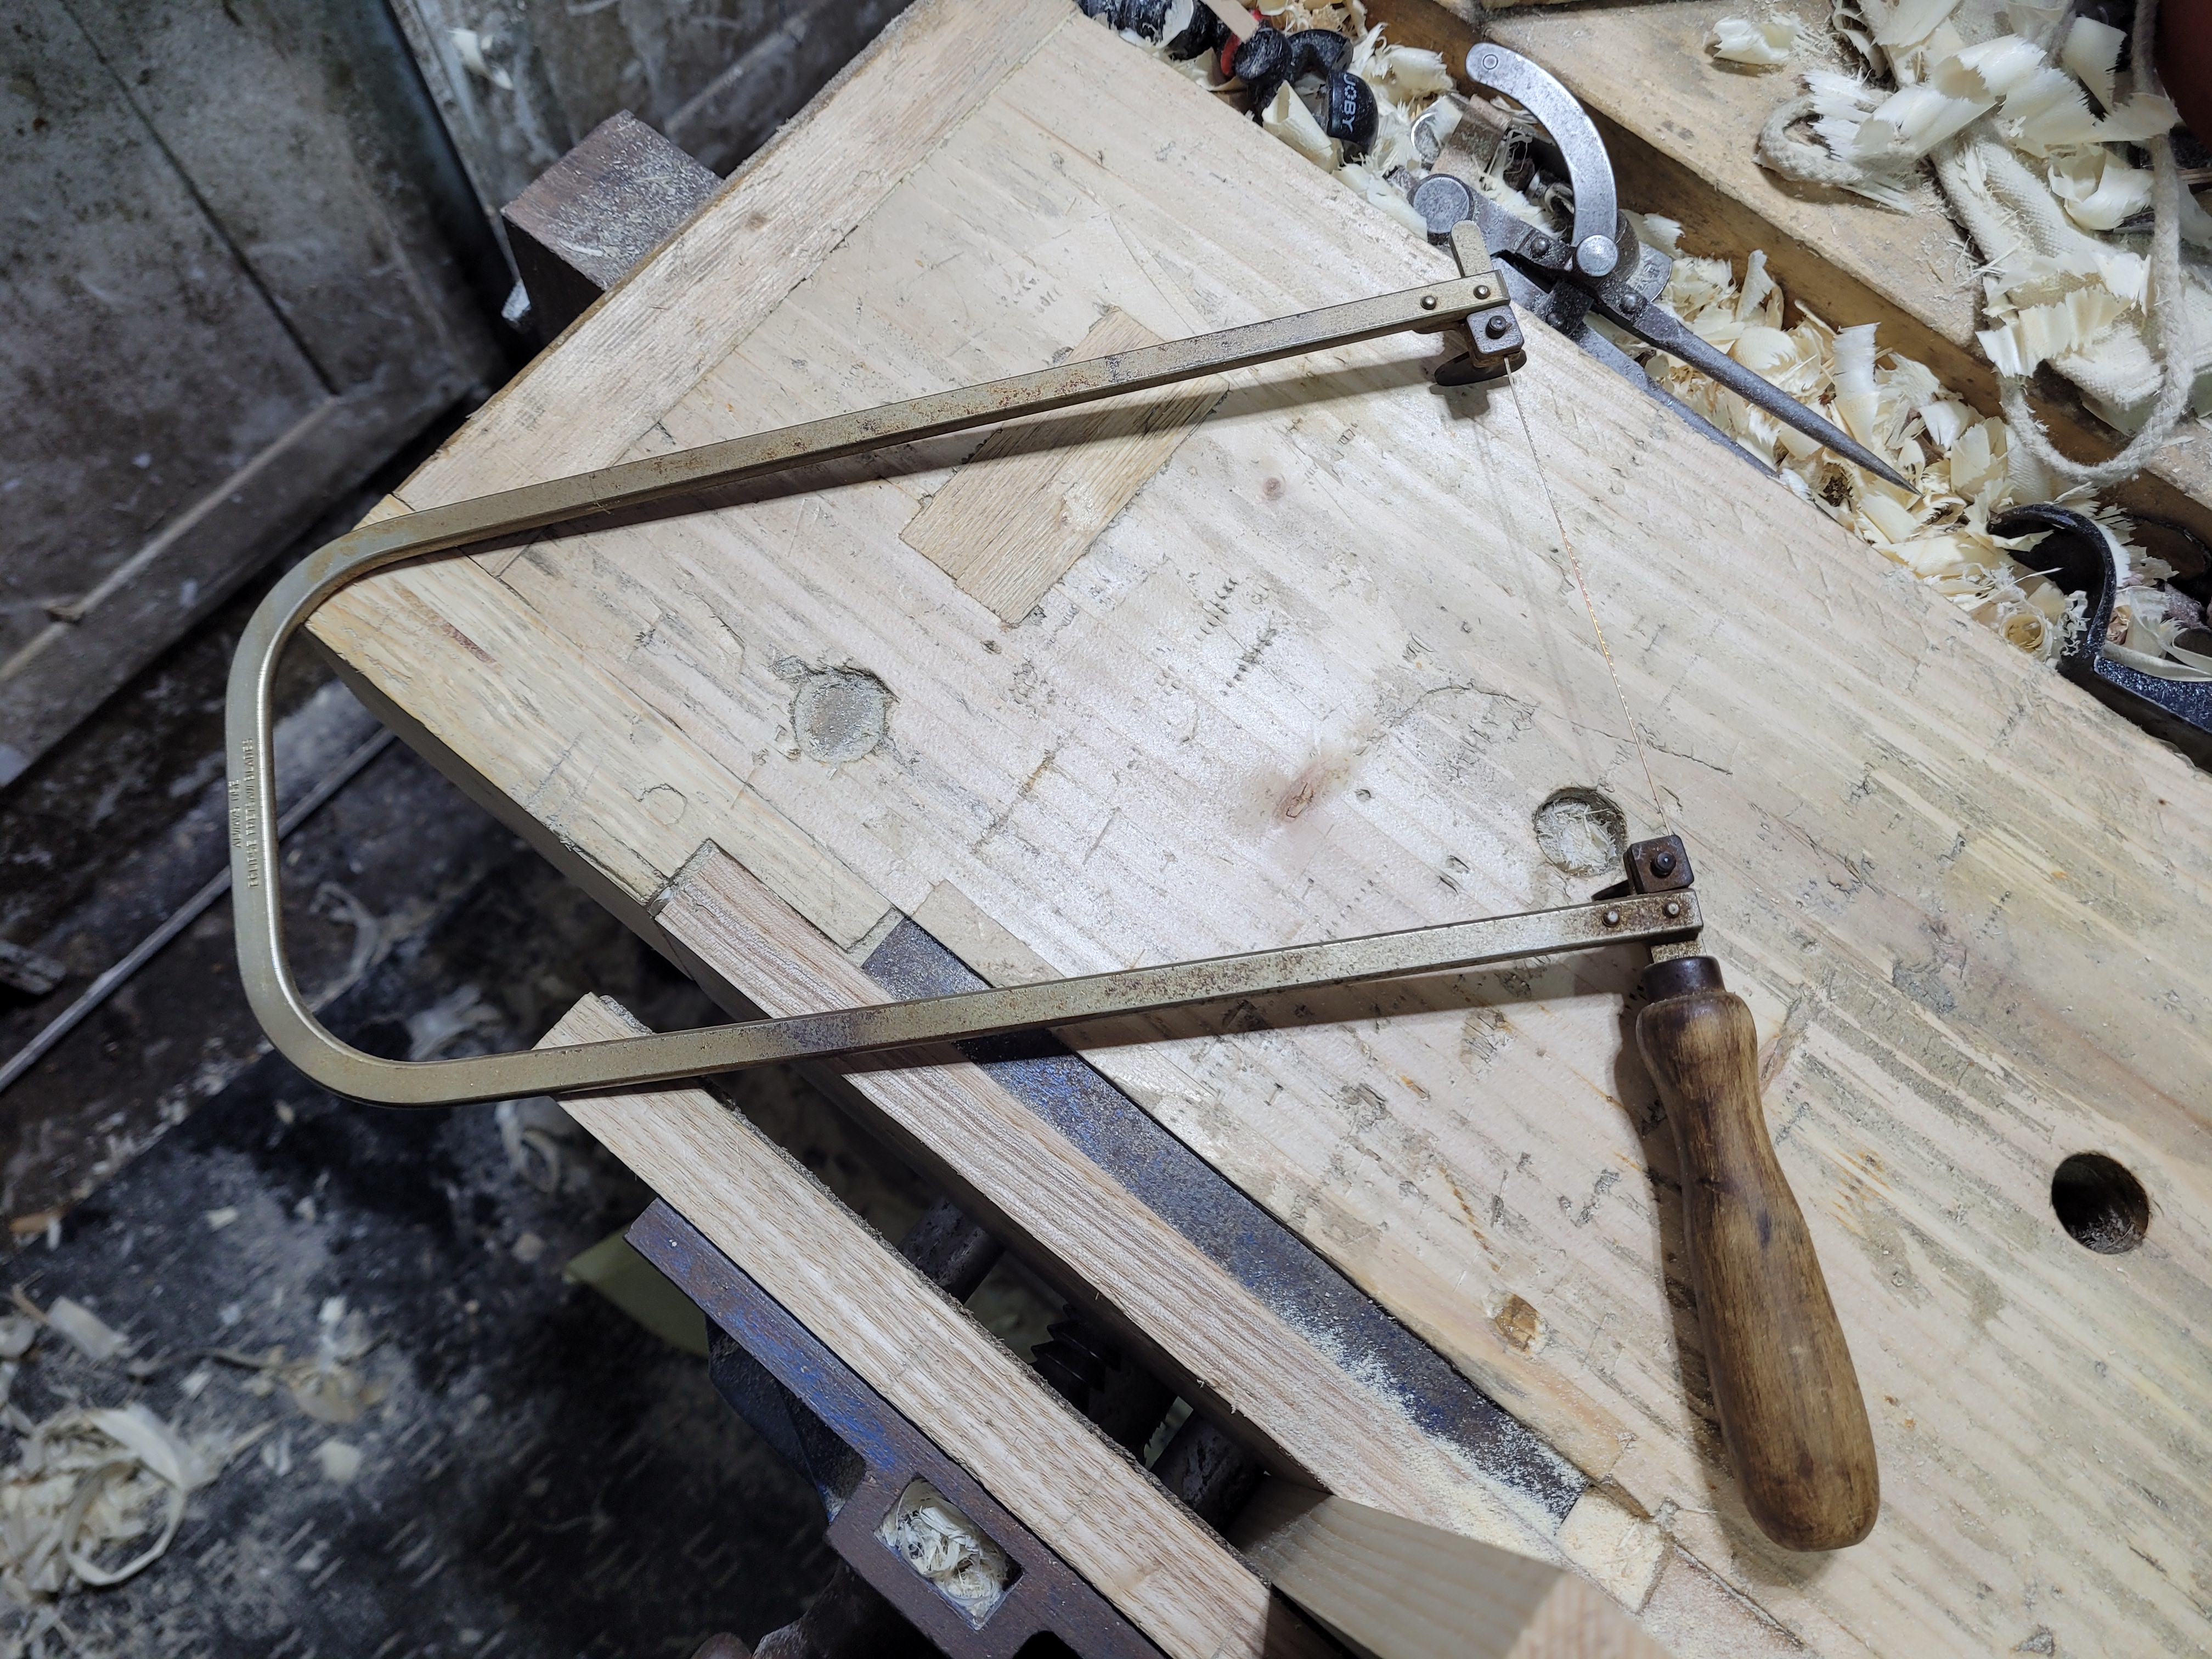
My old eclipse fret saw. Worked fine for quite a while, but lately holds blades with roughly the same tension level as a wet noodle. I tried bending the frame a few times, but it went straight back to wet noodle near instantly.
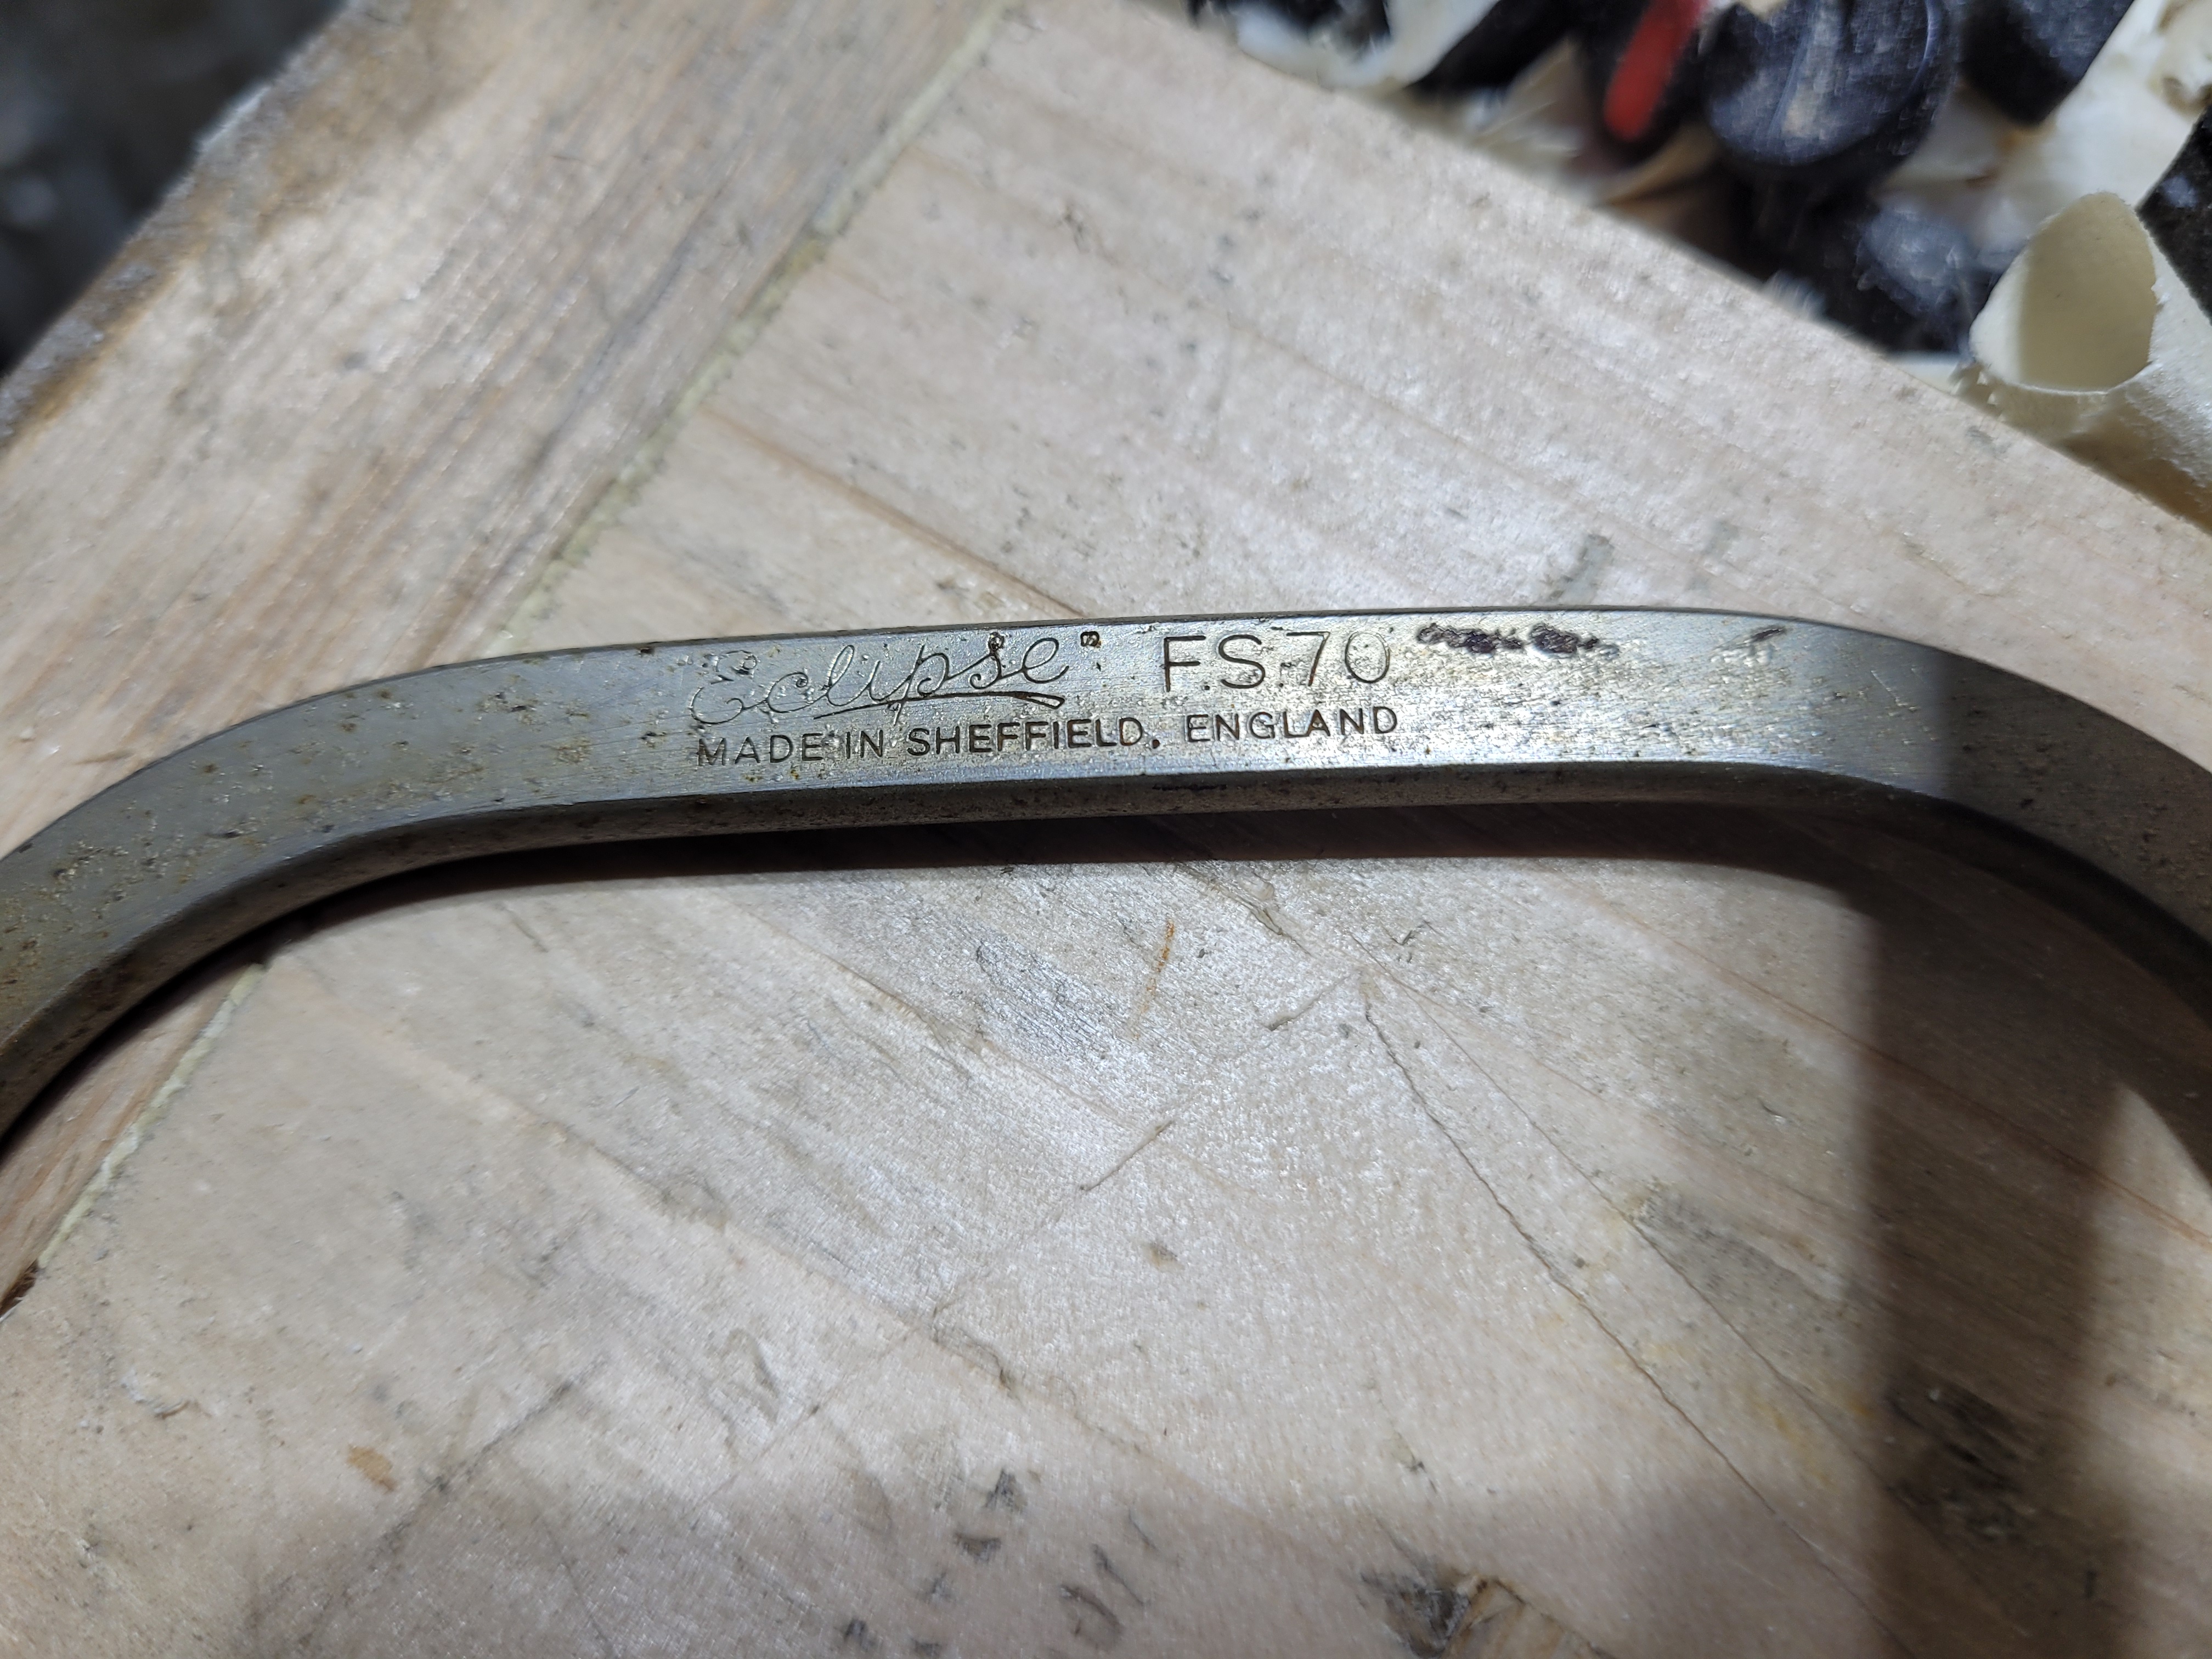
The FS70 model. You can probably get it for £1 in a car boot sale.
I did attempt to test it out along side the others. The blade snapped near instantly. It has gotten that bad.
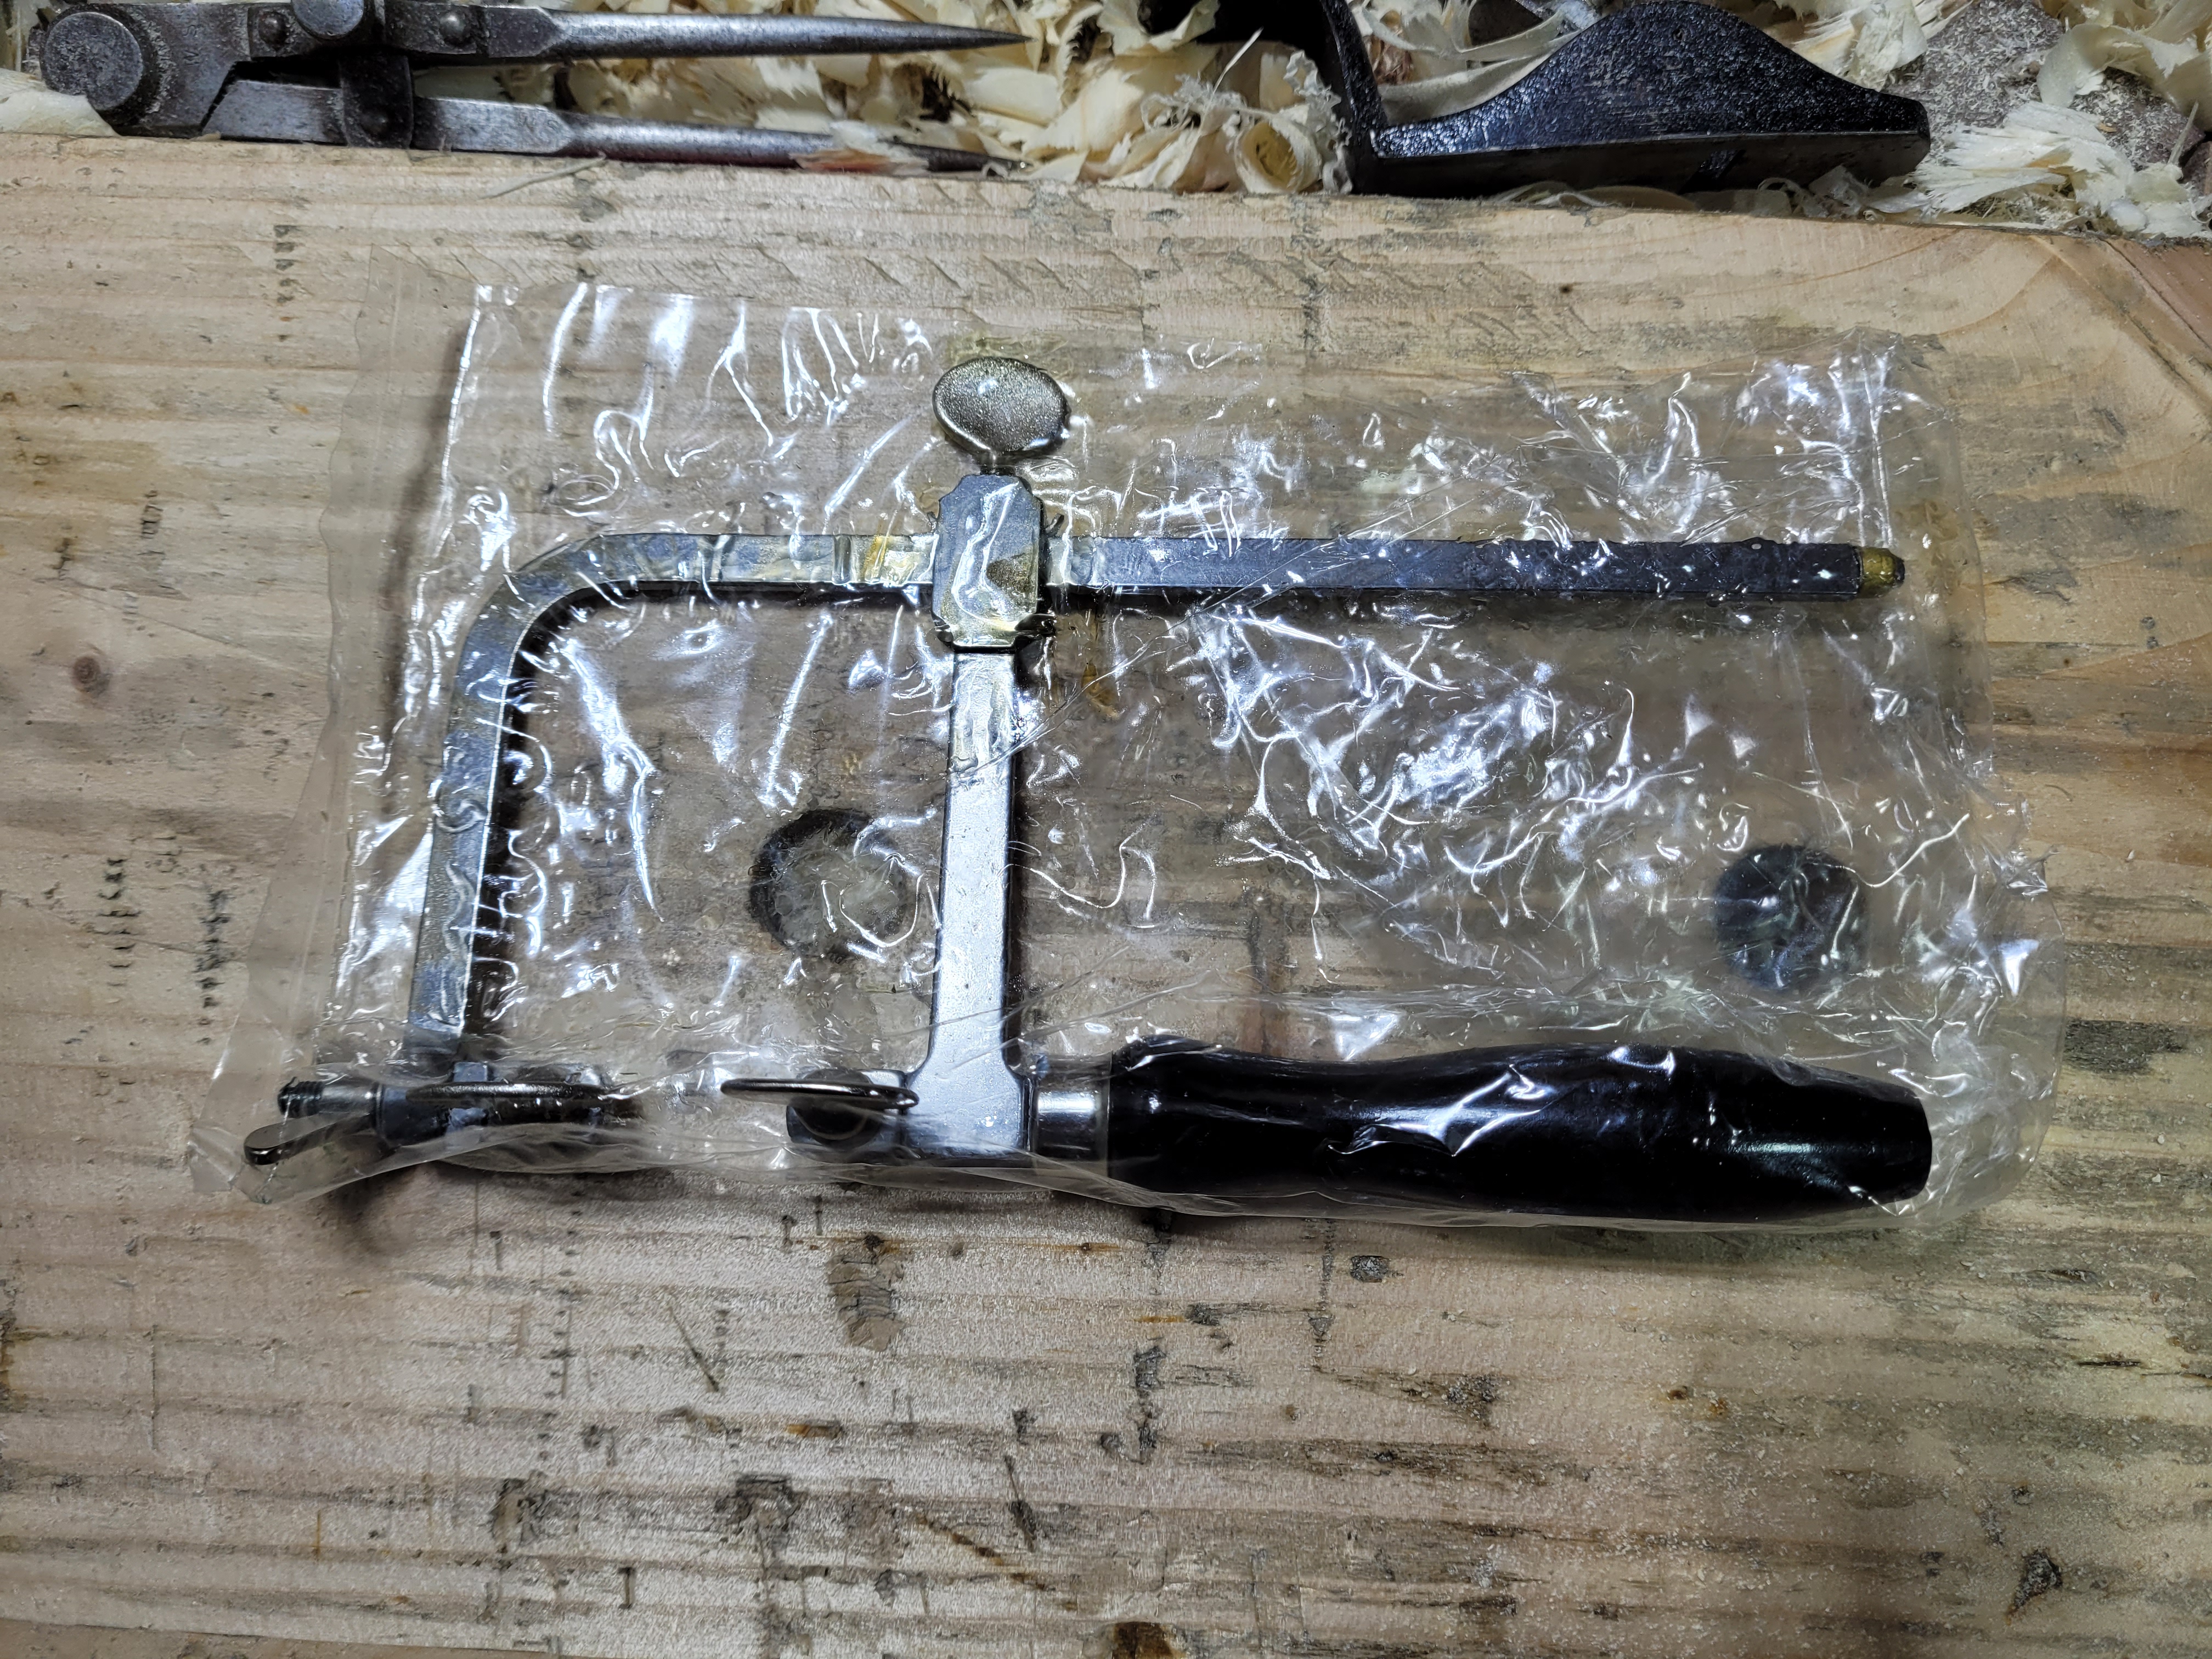
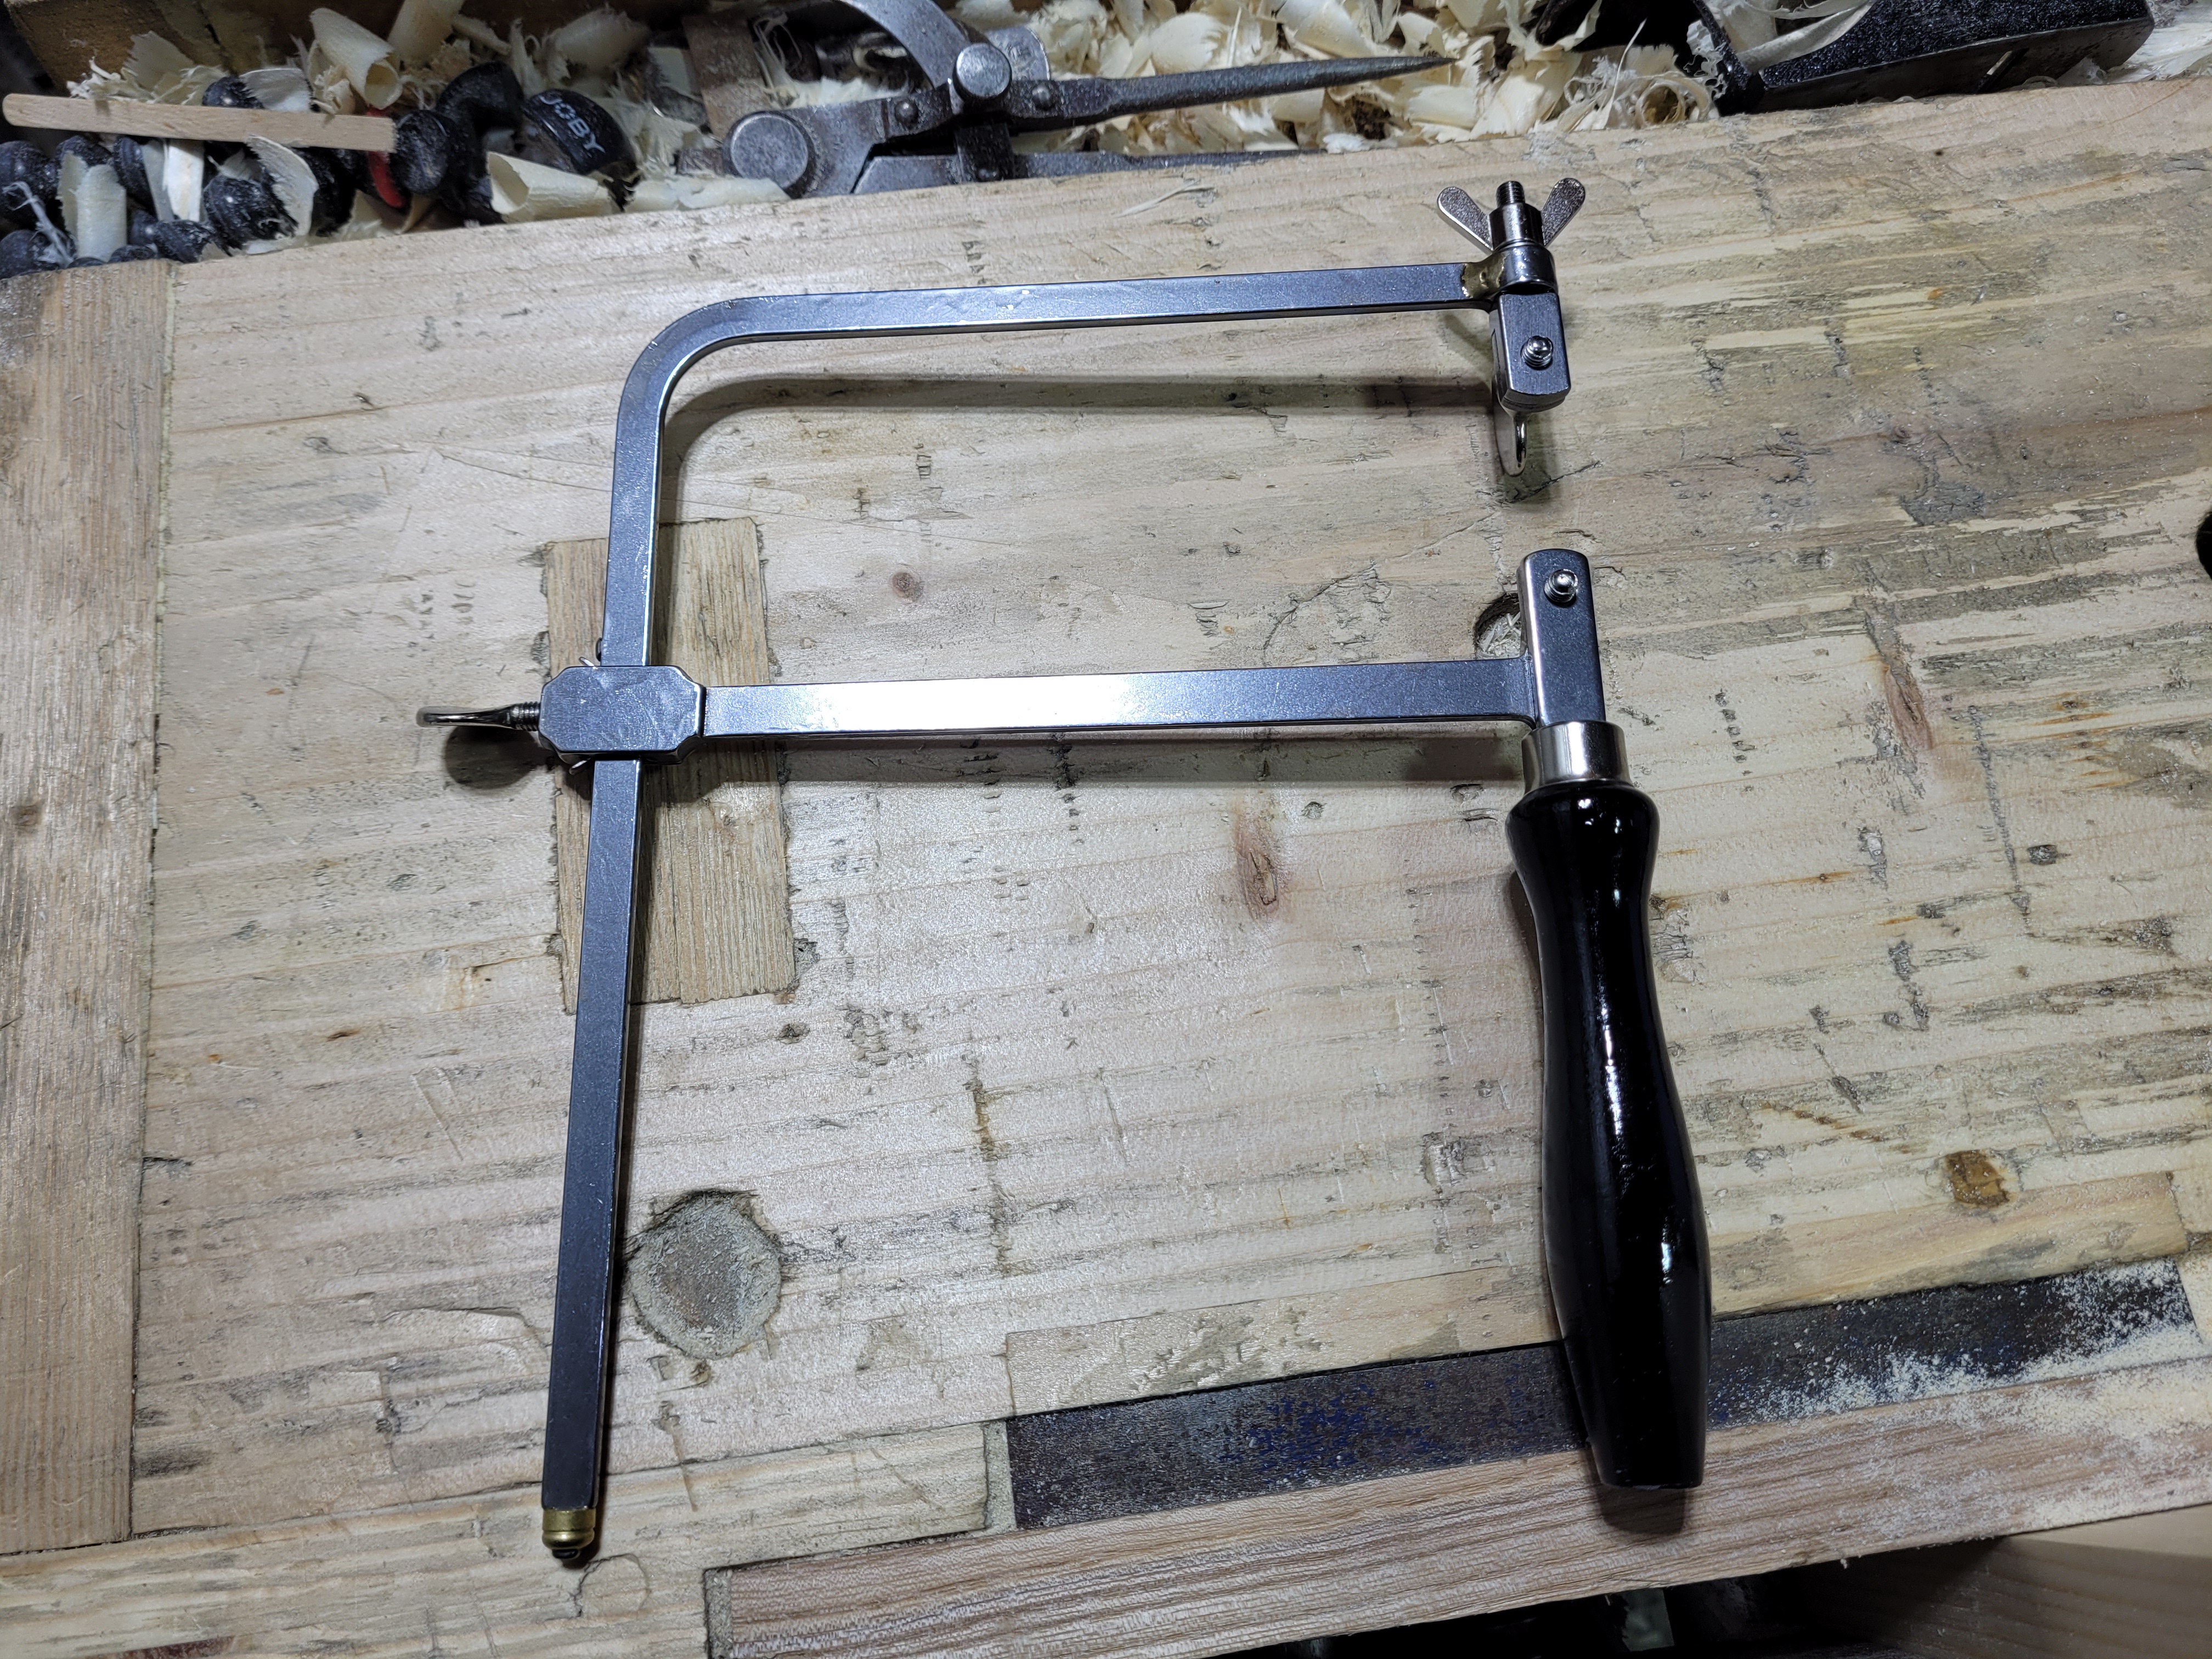
The 3 inch Jeweller’s saw as it arrived. It’s coated in oil, some of which had congealed. Most wiped straight off.
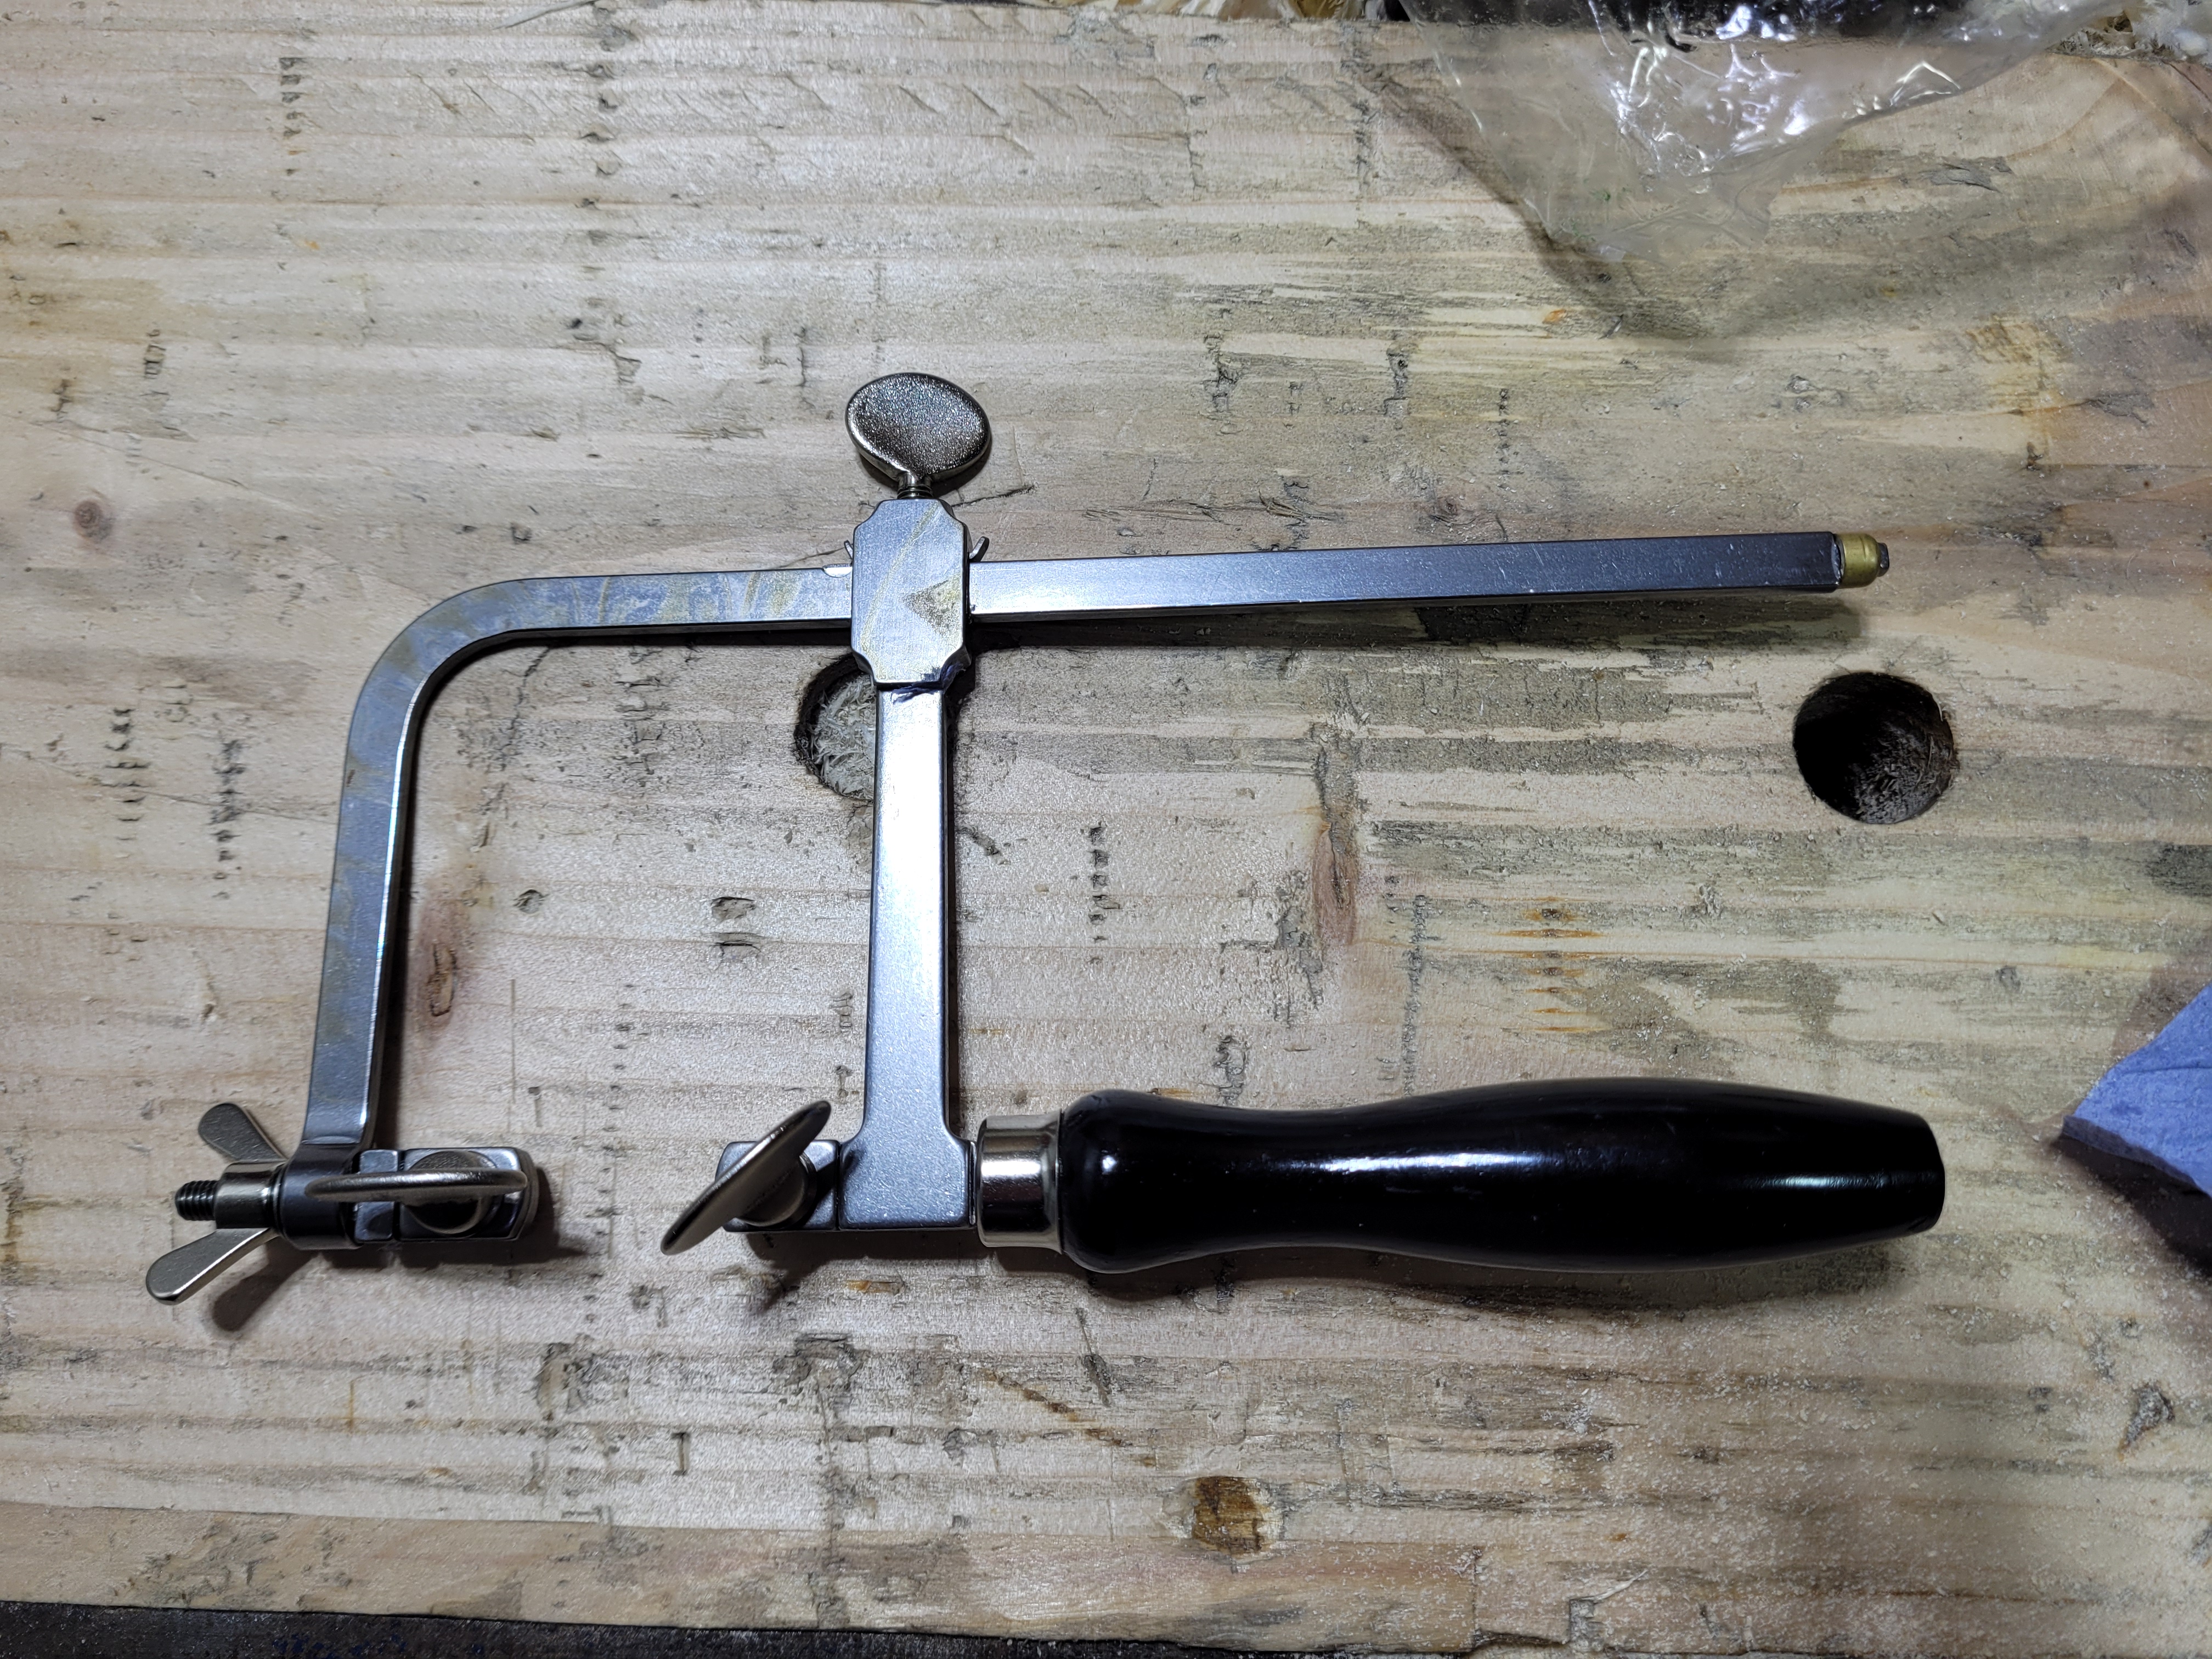
Out of the package and wiped down. Still some hardened oil, a little alcohol will take that right off.
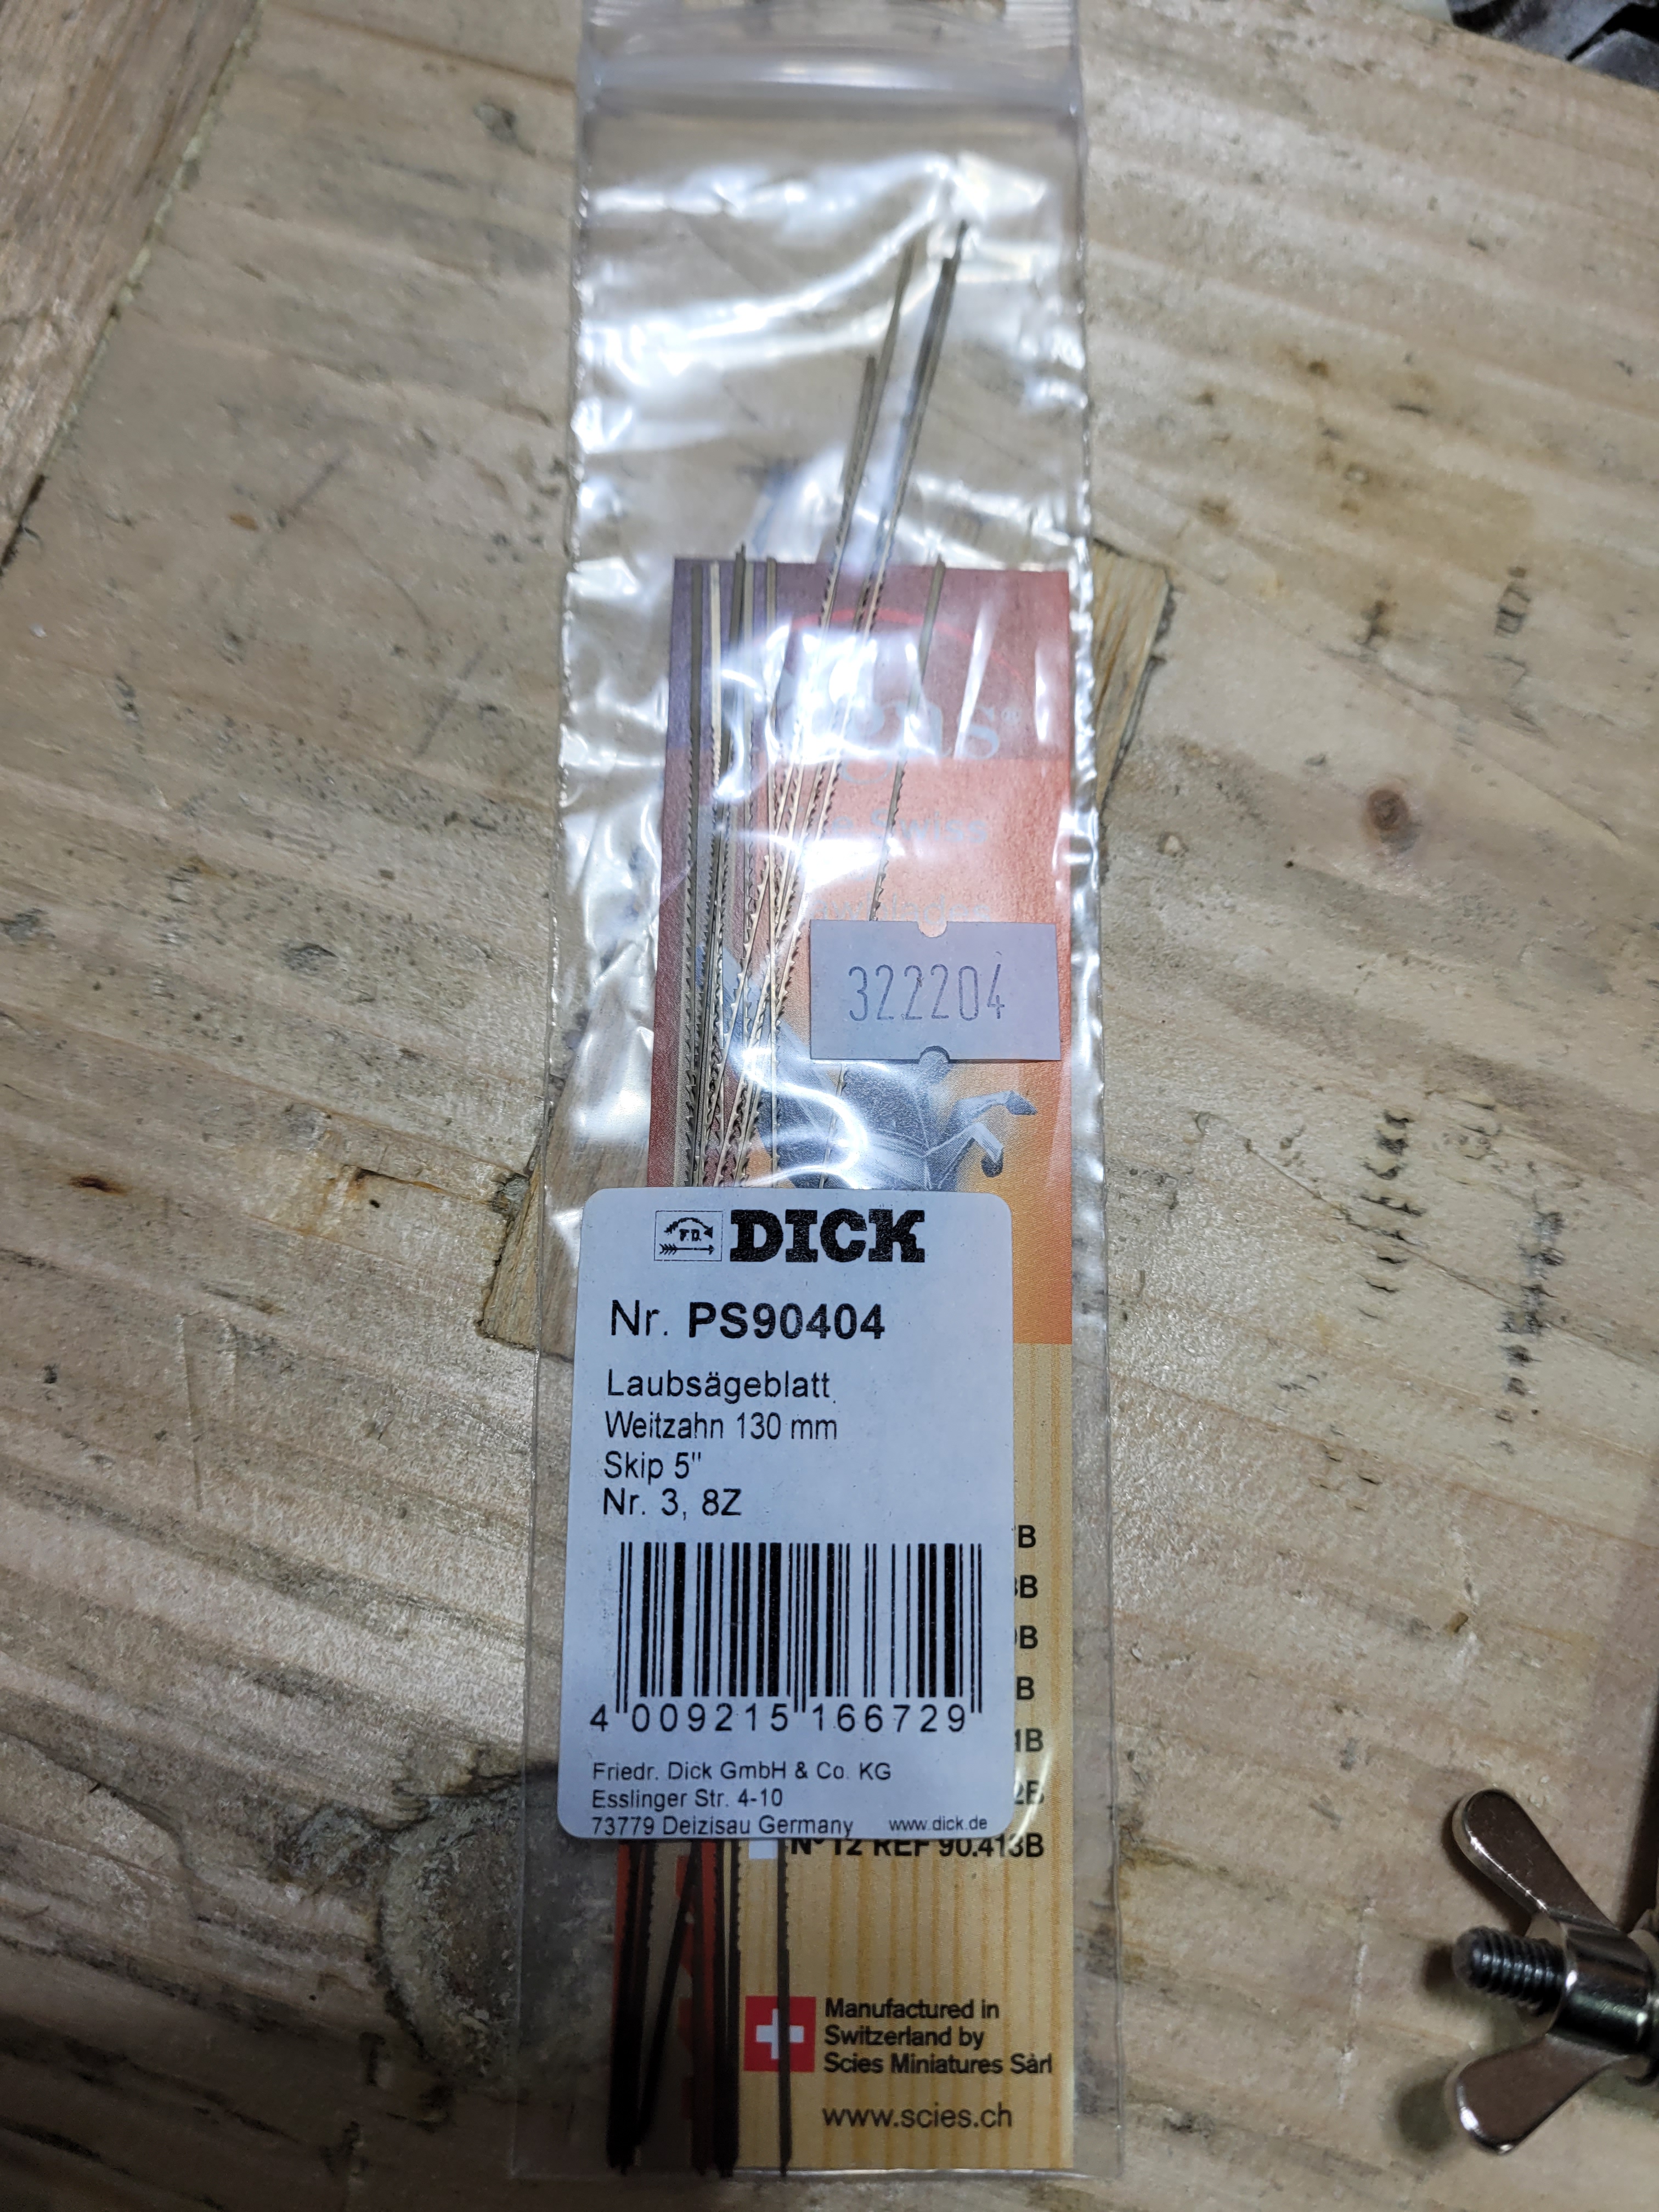
The blades I used to test (Pegas), or more precisely, the blade. This entire pack disappeared off my bench minutes later never to be seen again. Workshop gremlins got them, it’s the only explanation.
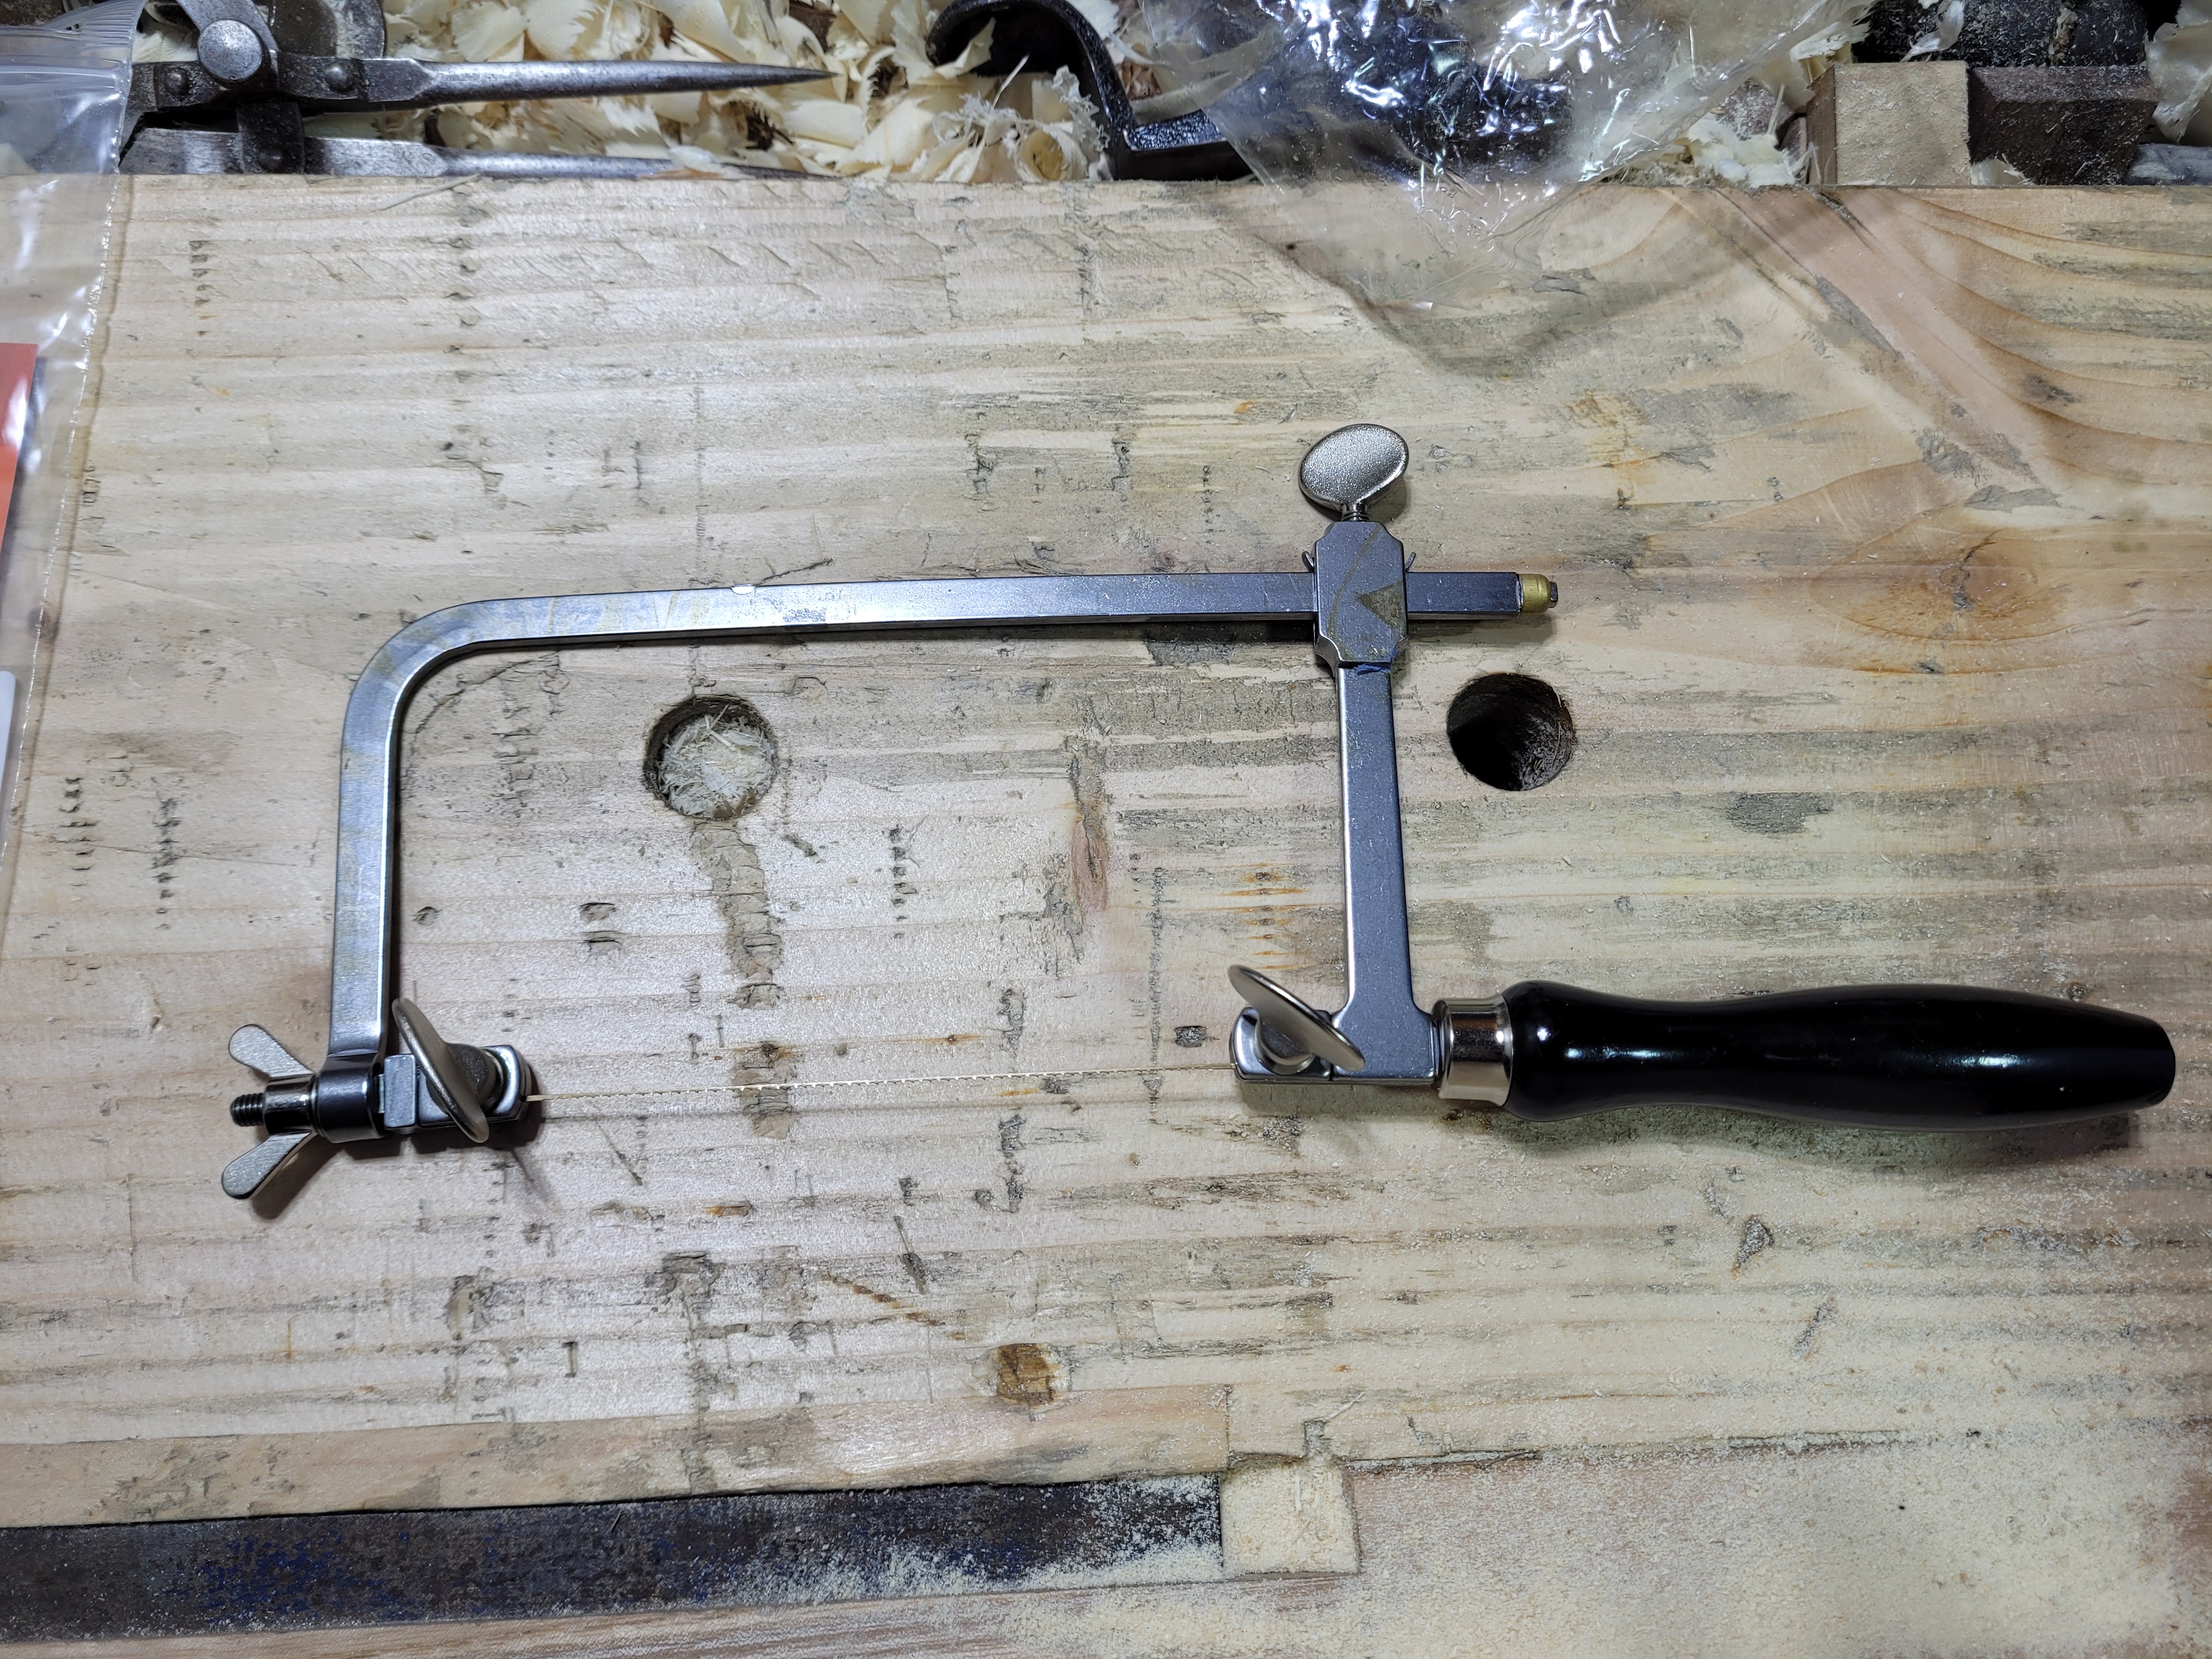
Assembled and tensioned. I completely slacken the tensioning nut on the left. Extend the frame to slightly longer than needed and lock it down. I then attach the handle side of the blade. Finally I brace the handle against my magnificent abs of steel and push to apply tension and get the other end in and clamp it down. Finally I fully tighten the tensioning nut. You get the most magnificent ping off the blades when plucked.
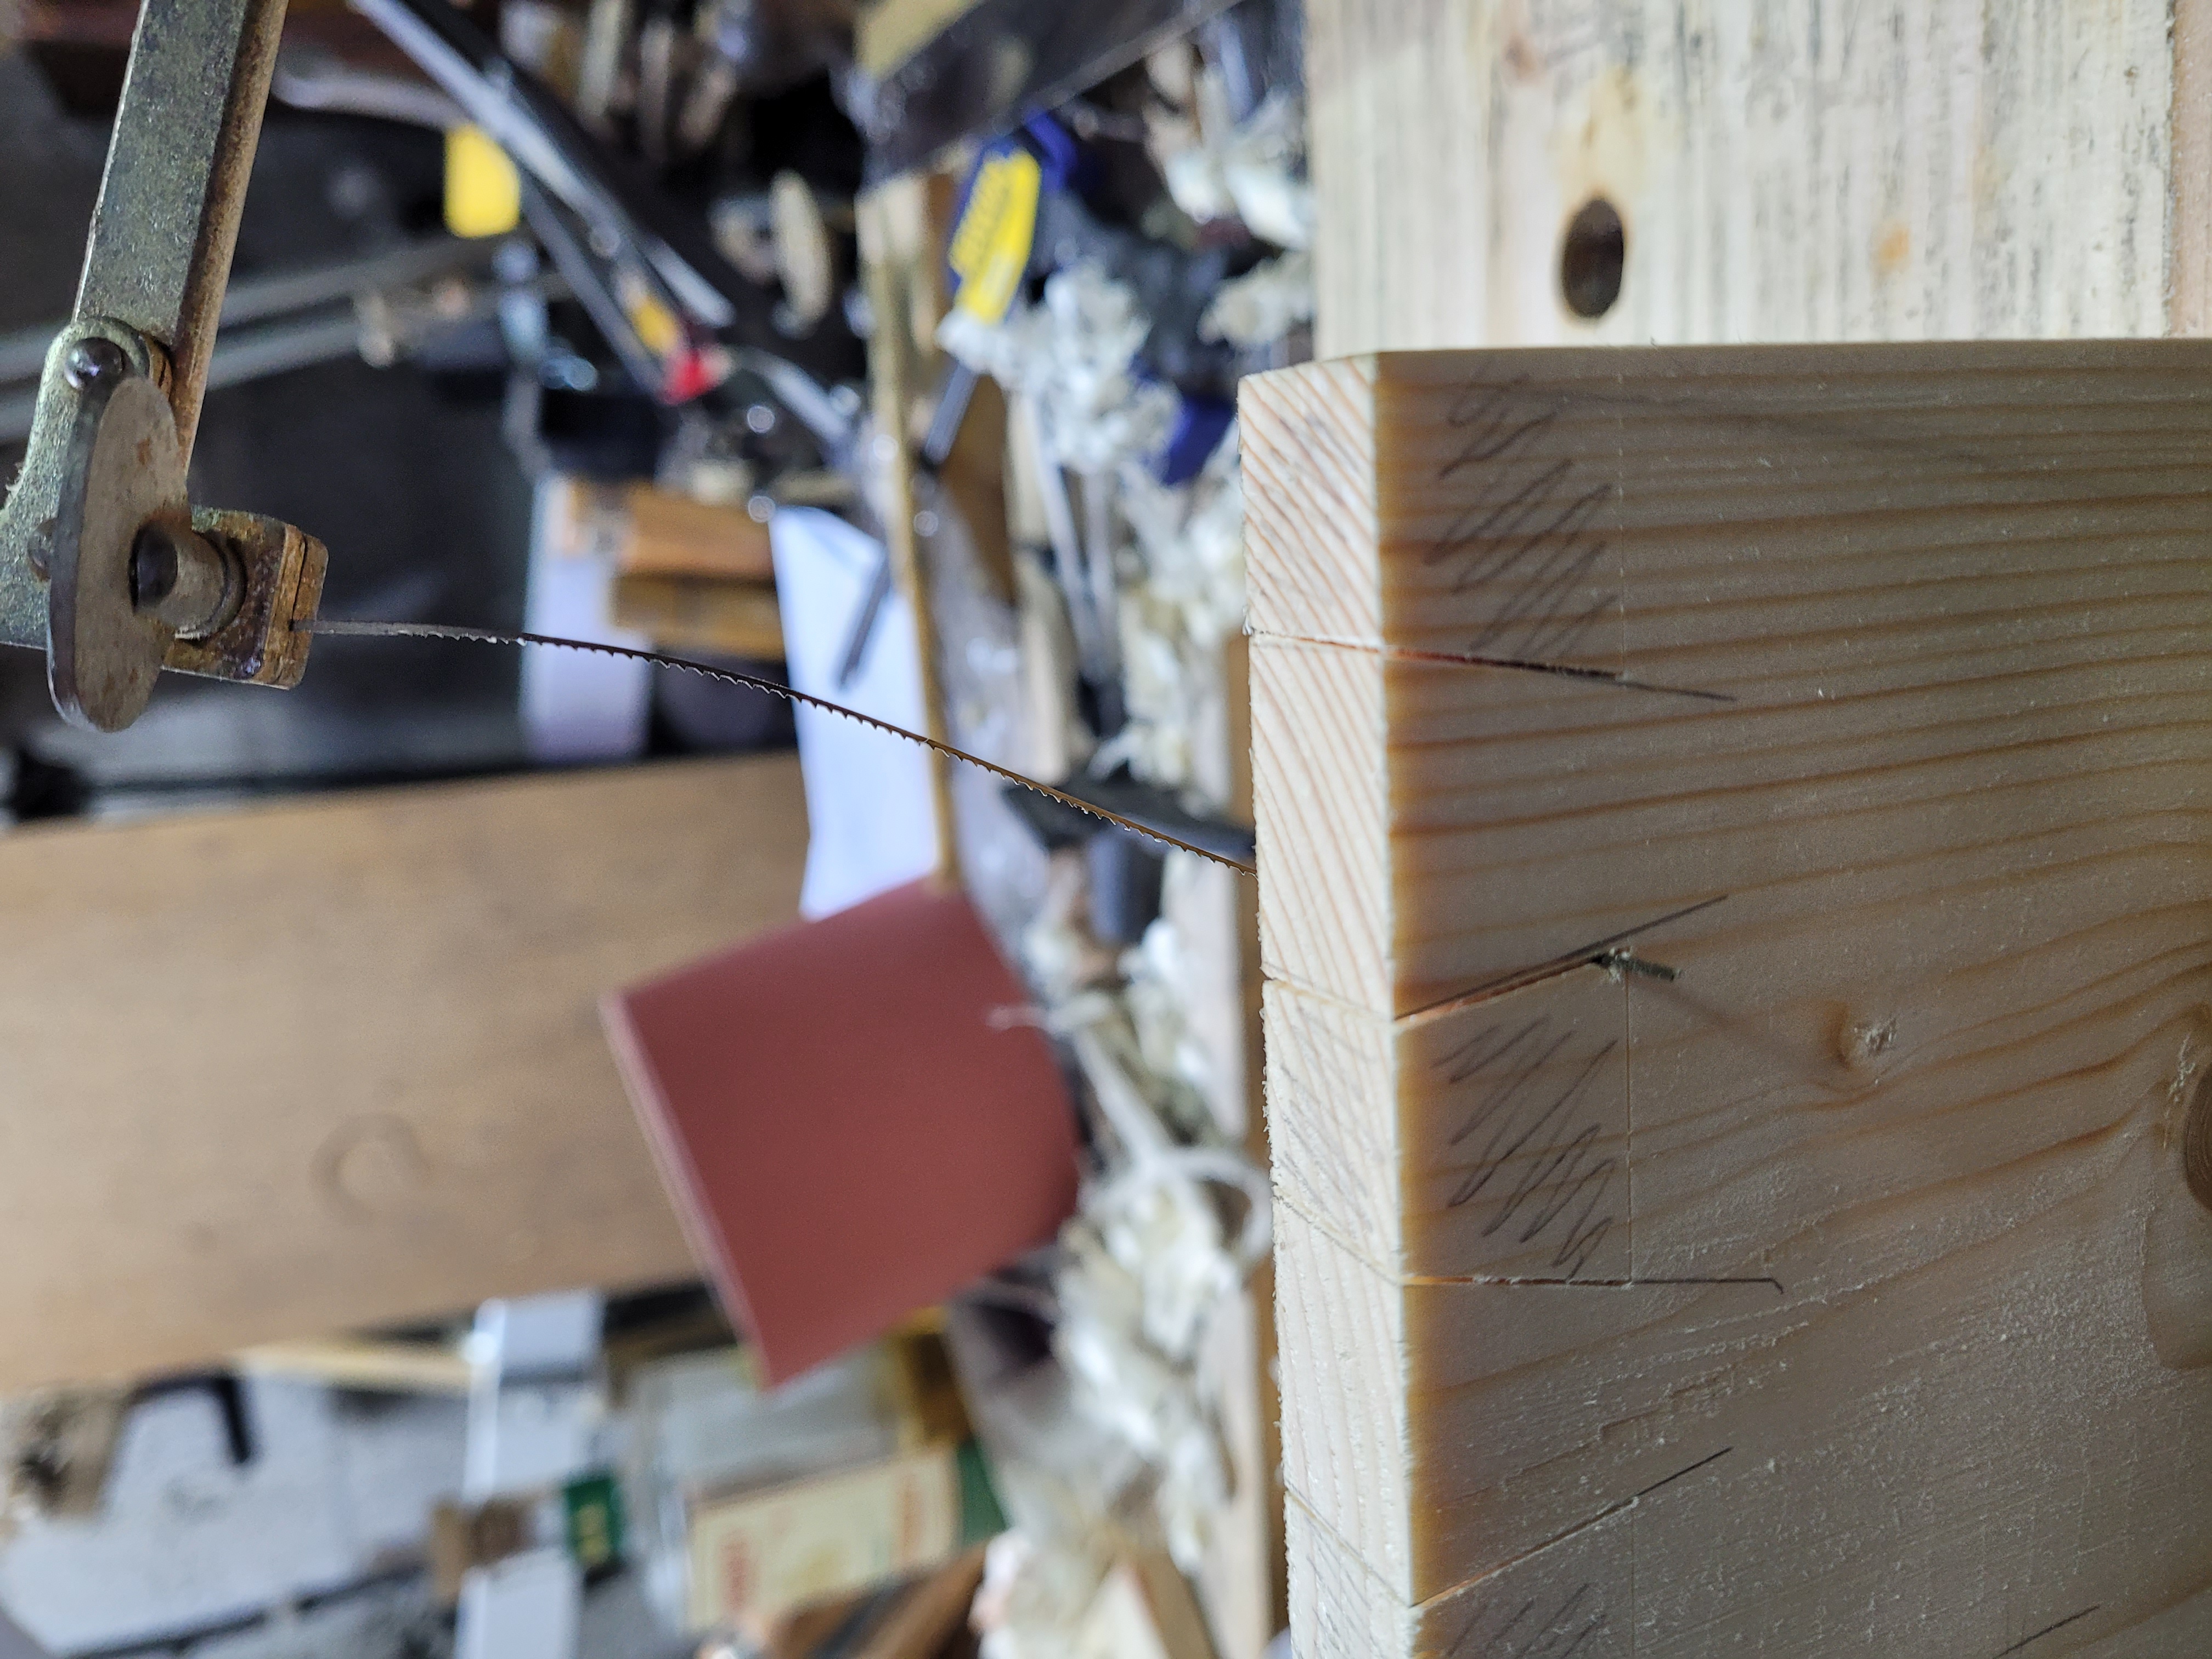
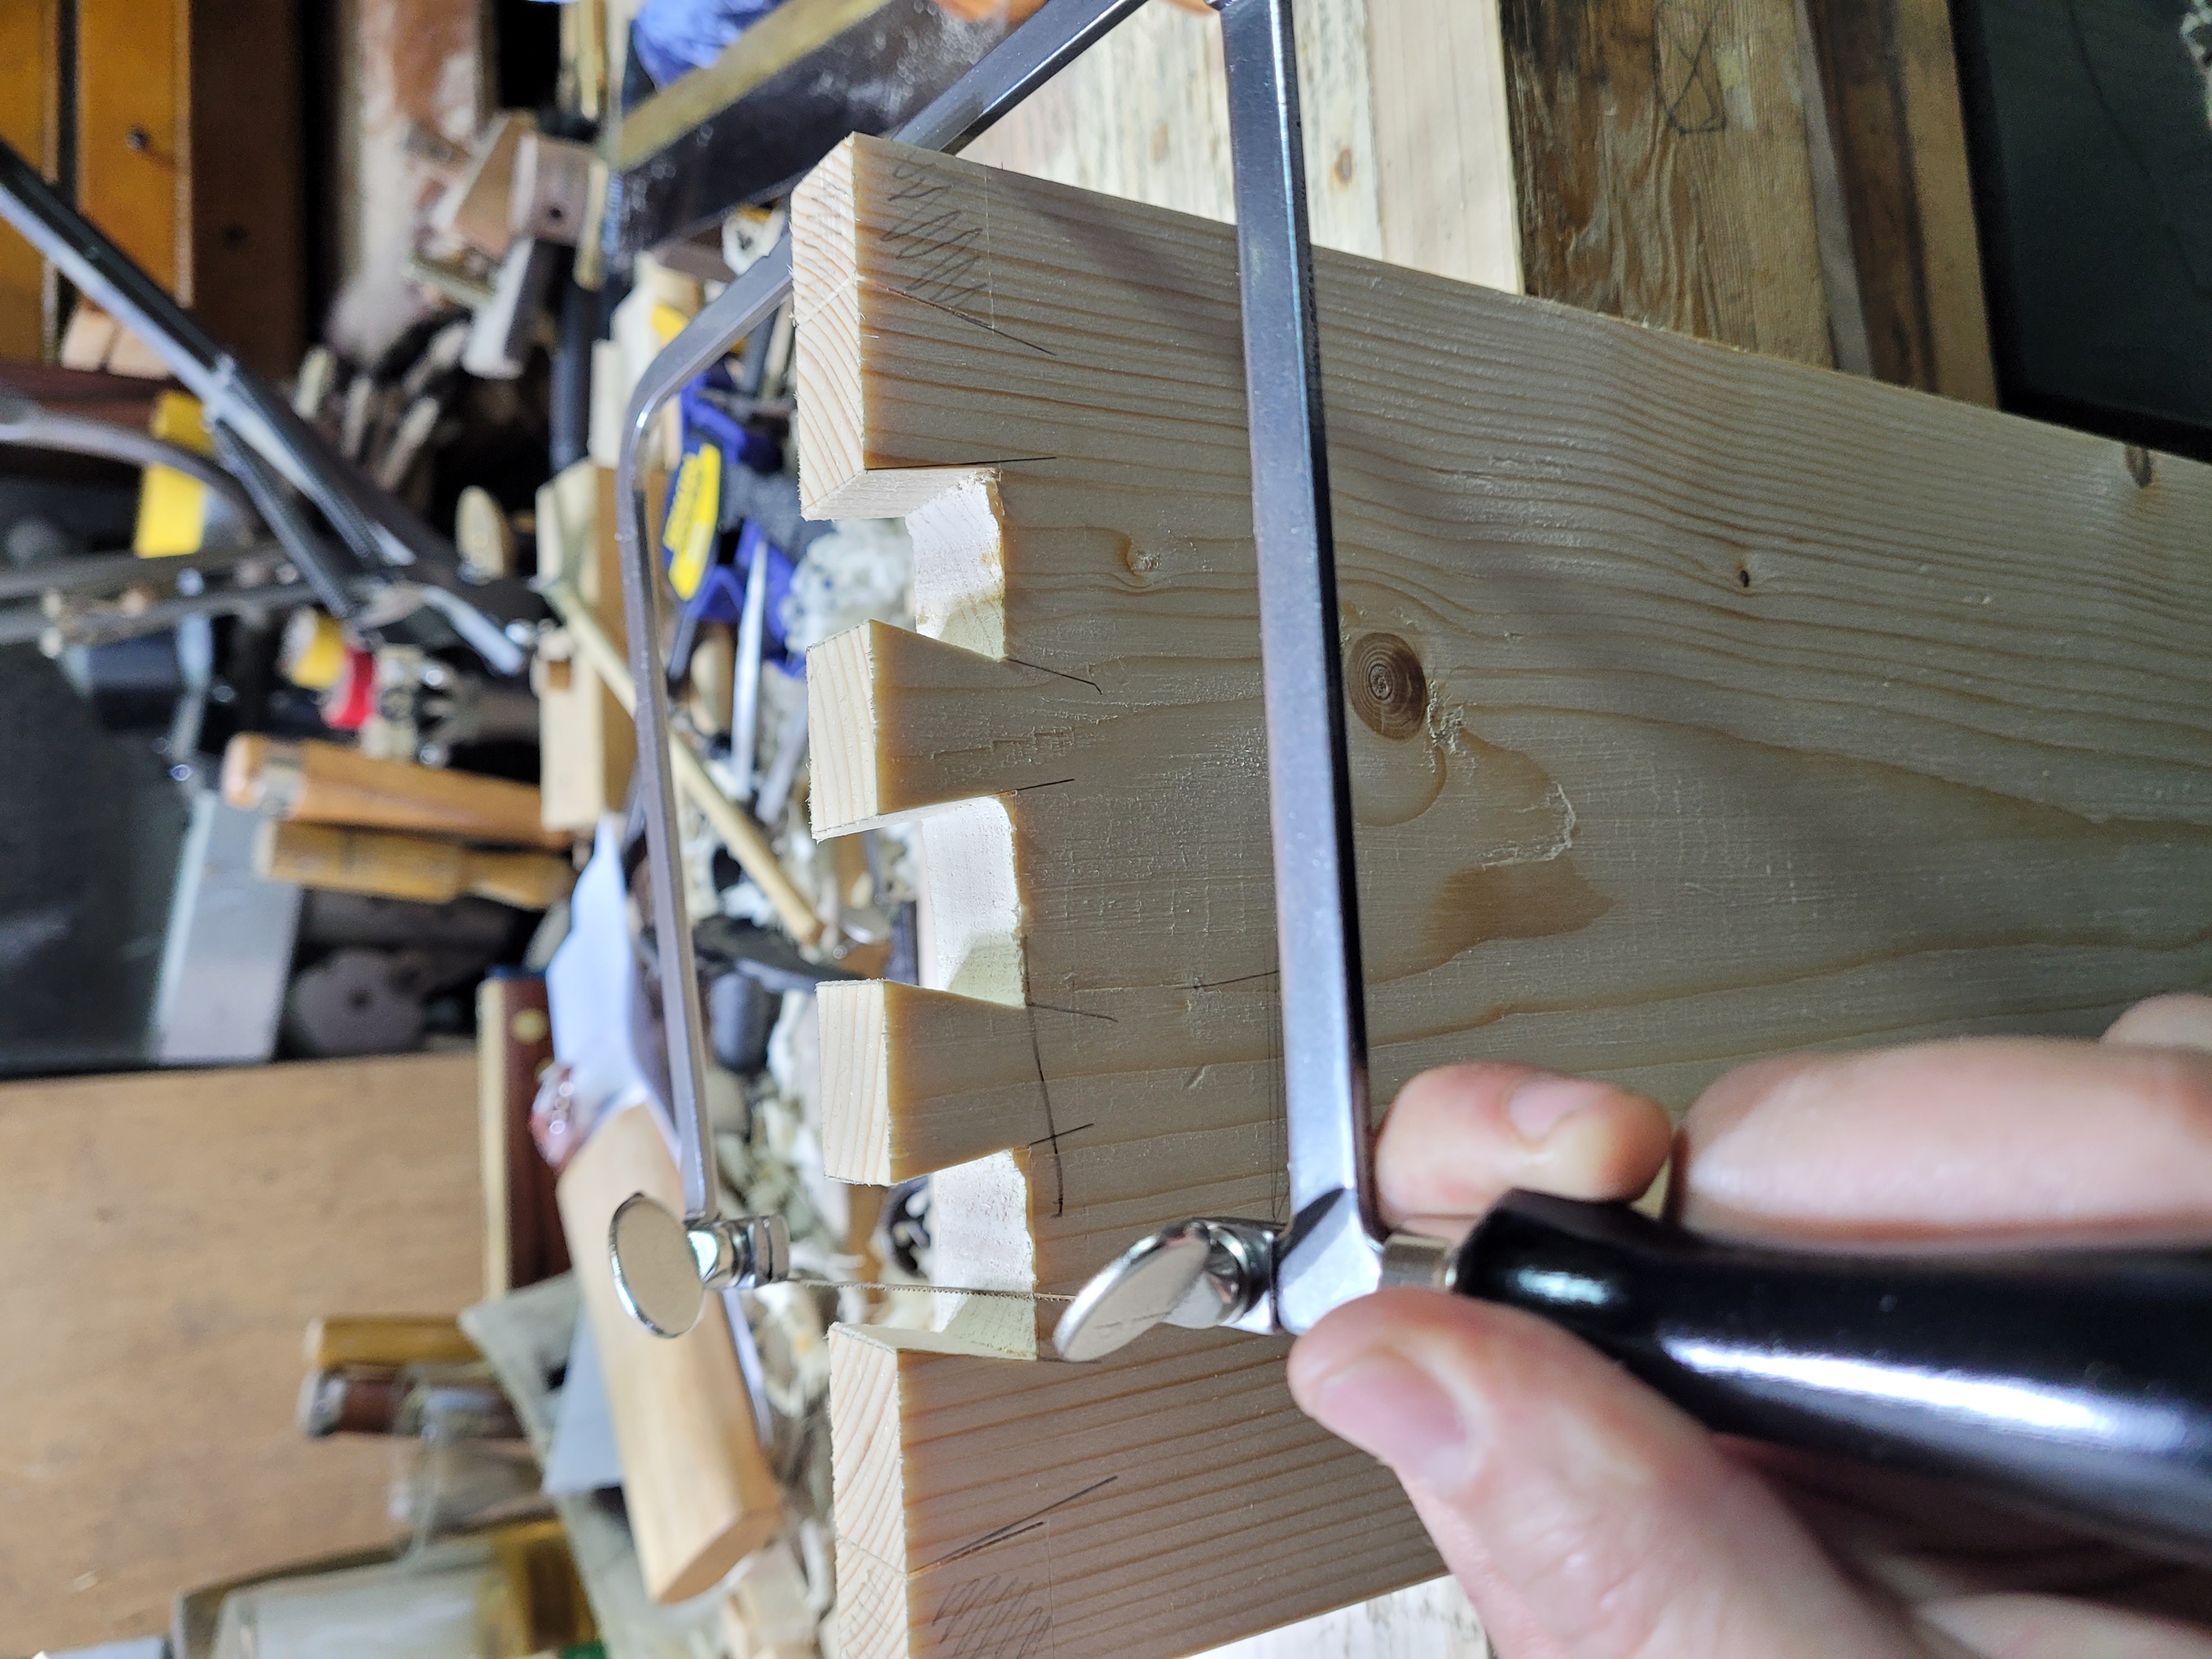
First cut. Started way higher than I needed to, but it was very easy to put the blade in the saw kerf.
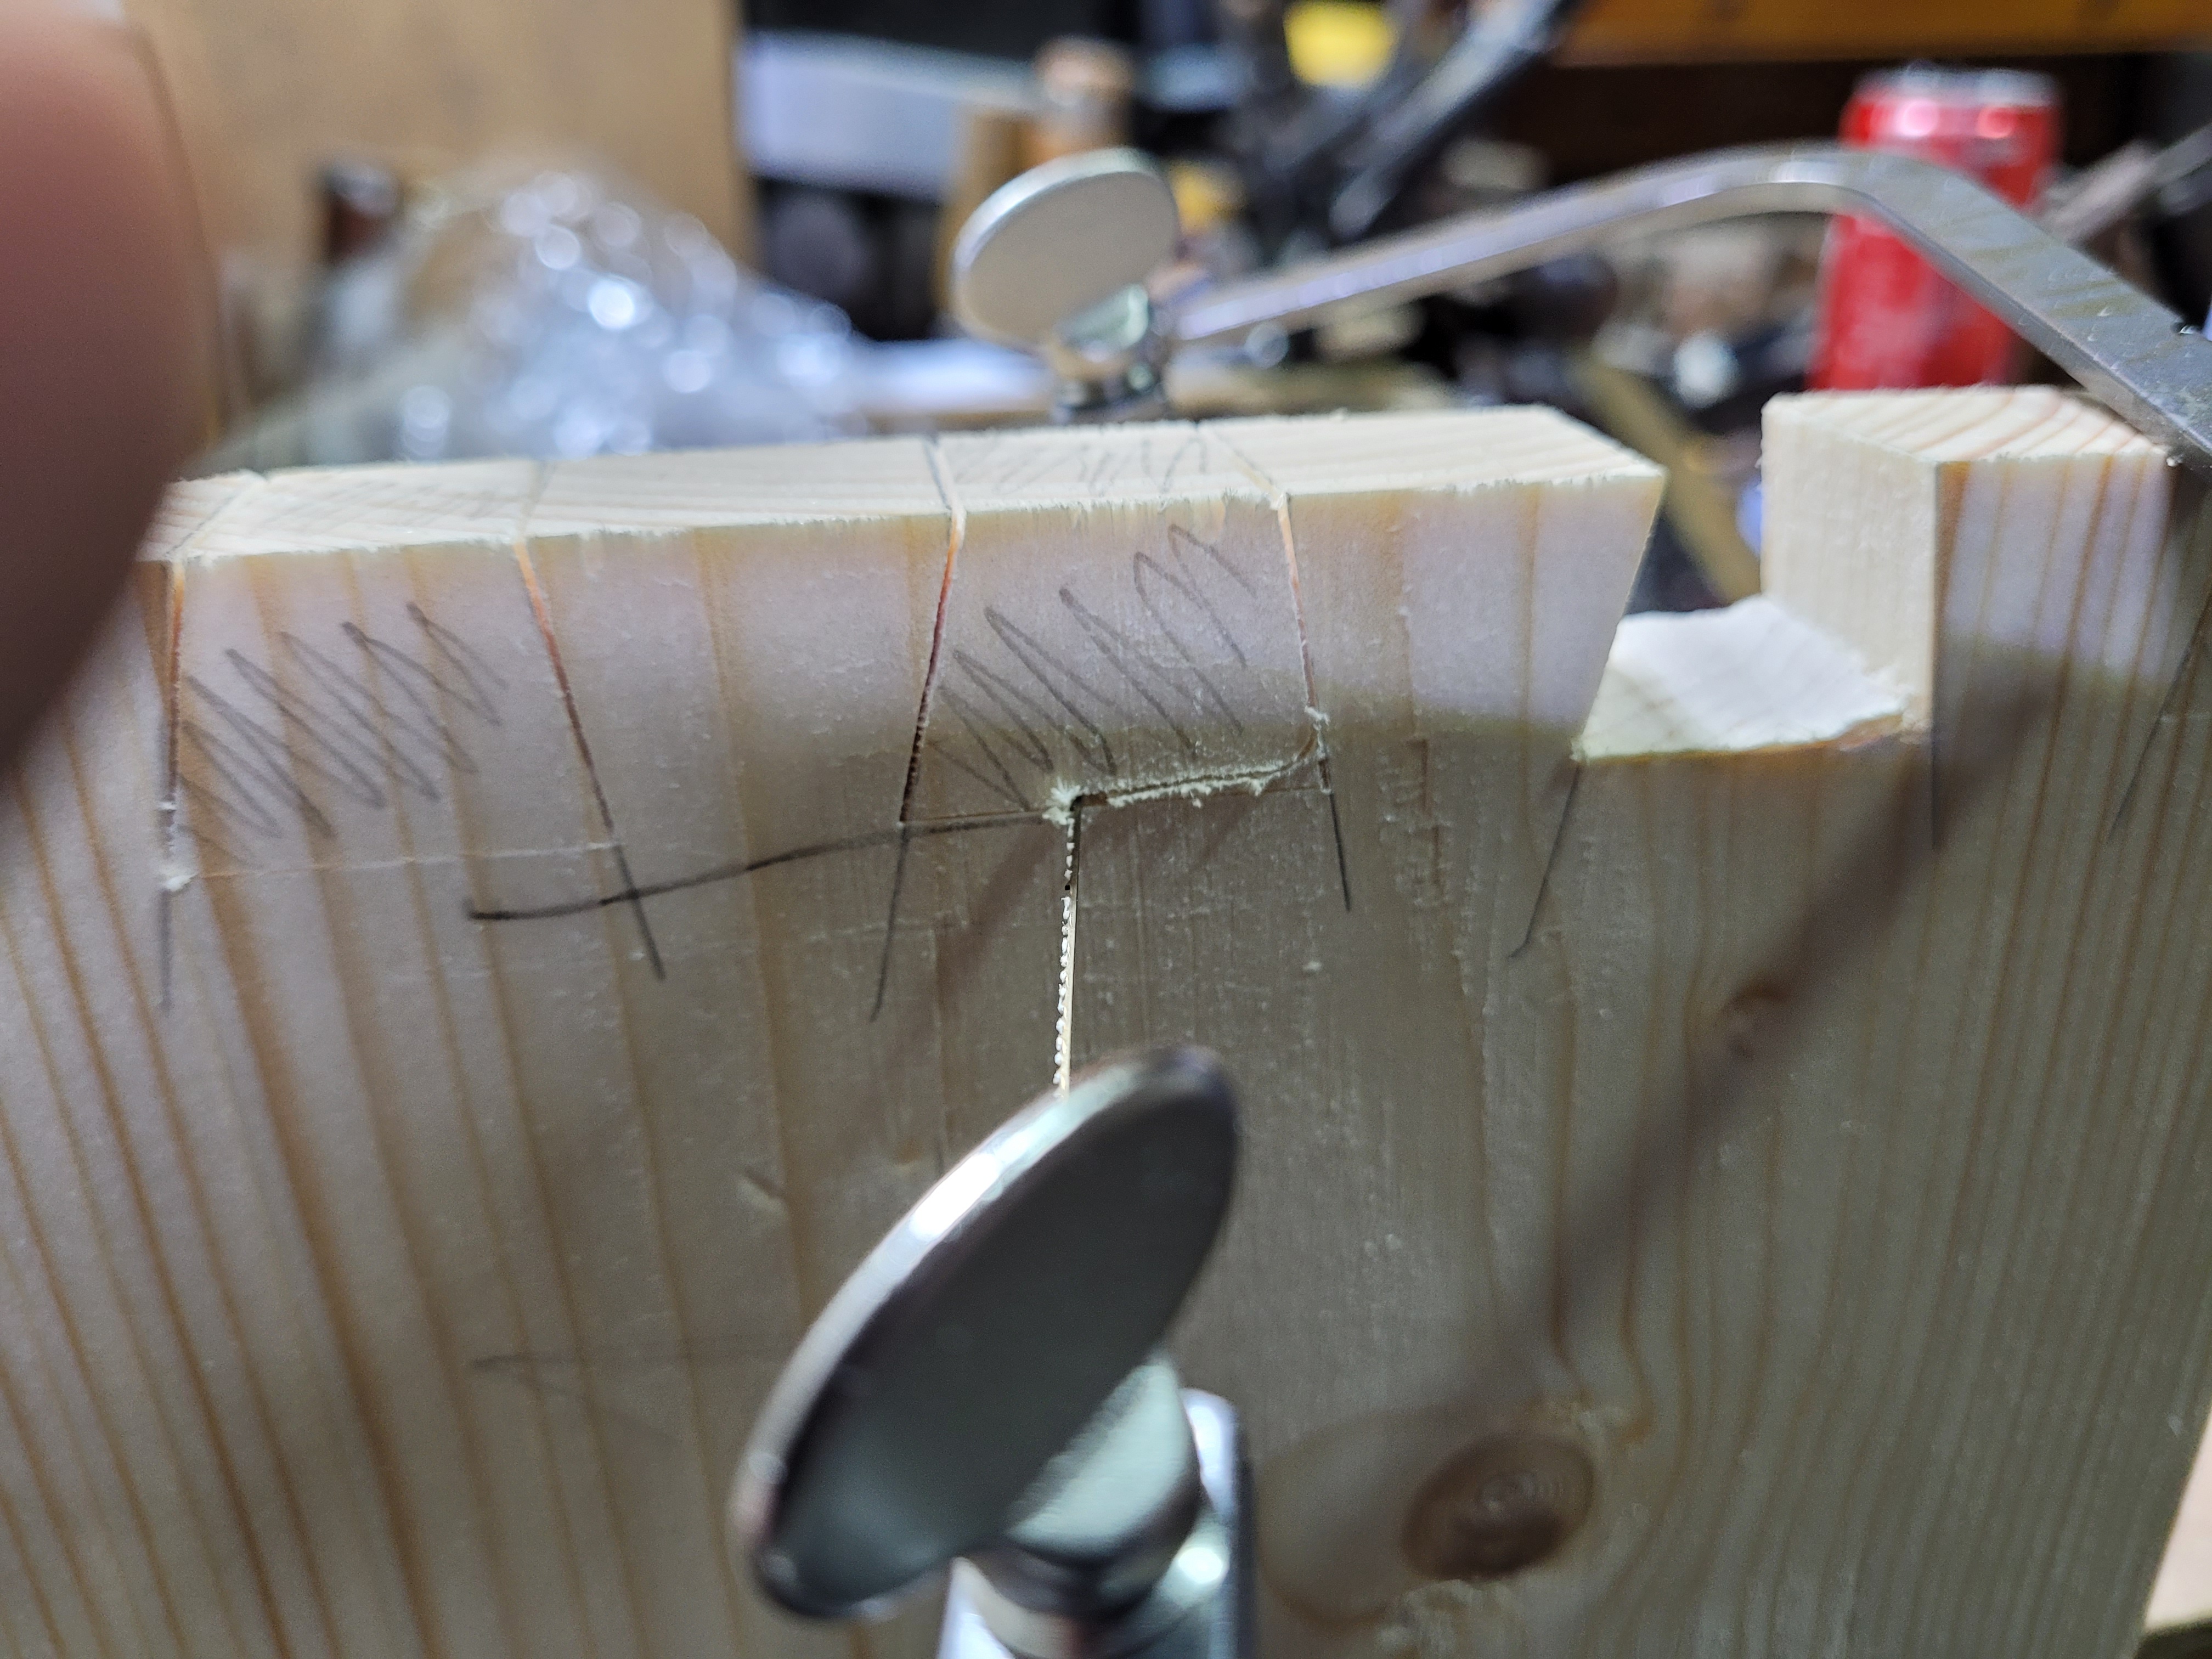
The 3” depth may seem way too small. But I found I could start just a tiny bit high and still make it across the sockets without even needing to bend the blade.
But ultimately, 3 inches is not a lot, and it’s fiddly work.
So lets try it’s 6 inch sibling. This one just had very liquid light oil. A quick wipe and it was good to go.
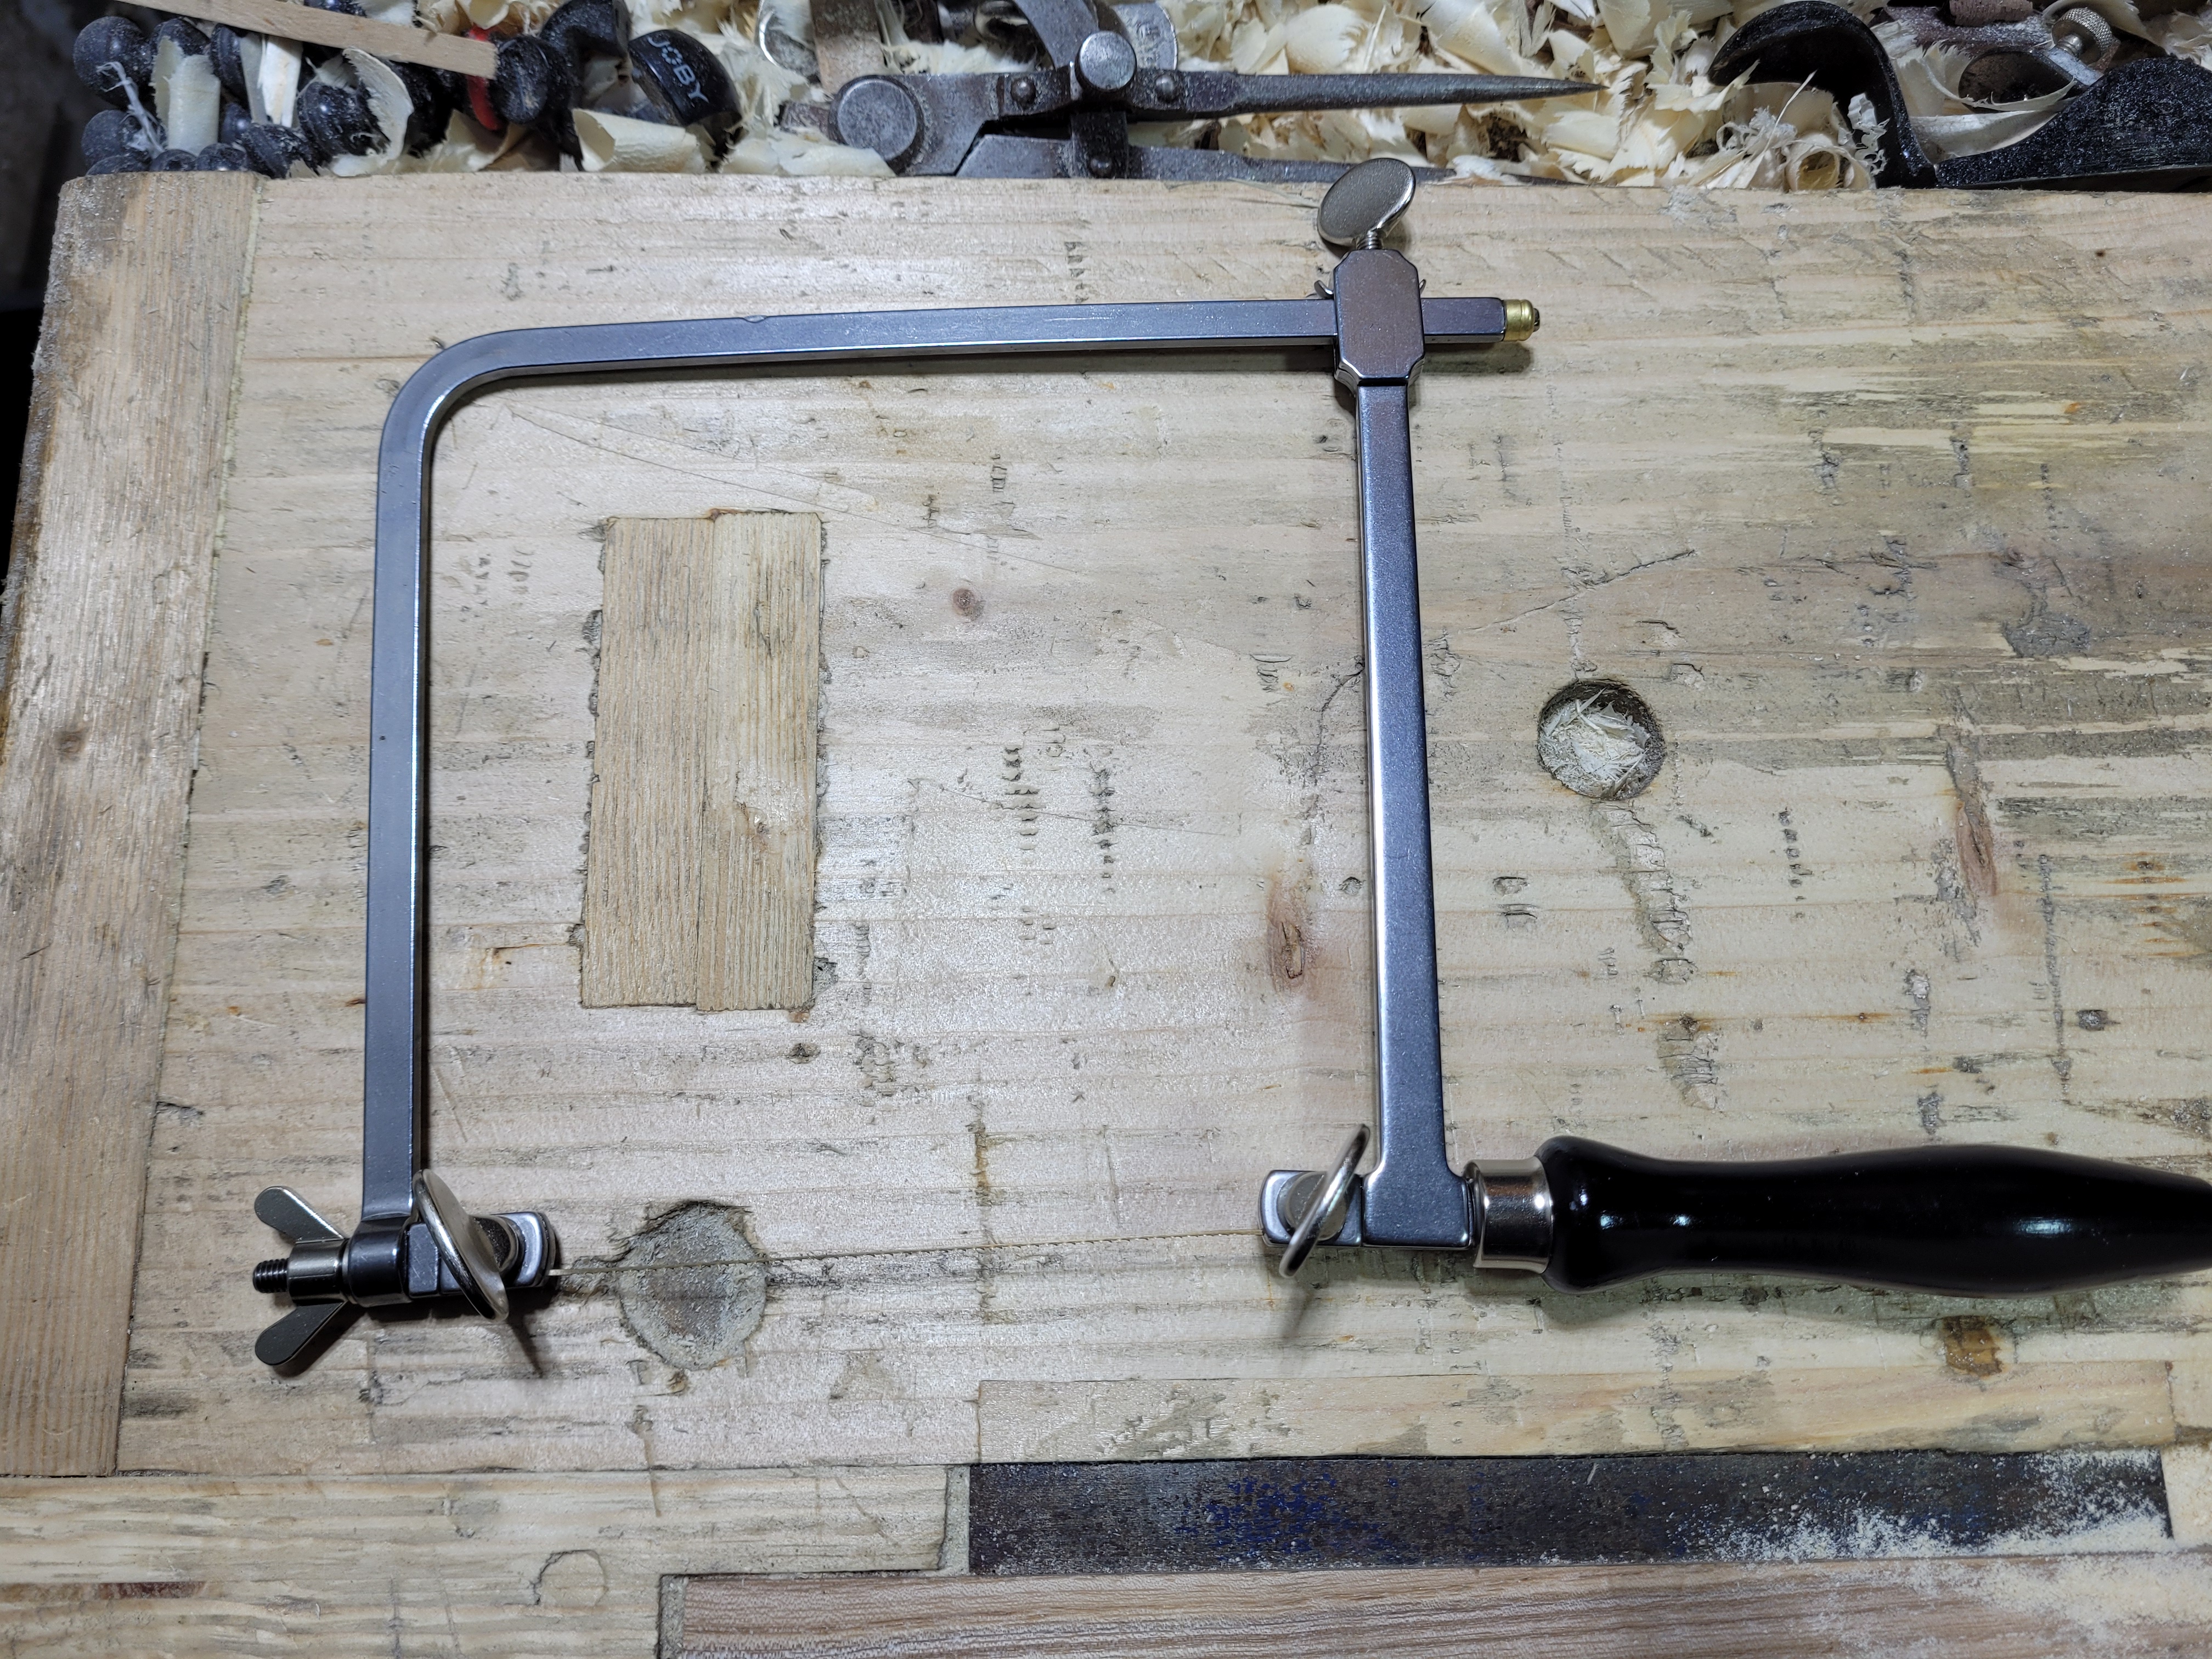
Exactly the same process to tension and fit the blade.
Absolutely no need to worry about angles and starting depth on this 8 inch board. If if you did use the “start a little high trick, it would not need to be as high.
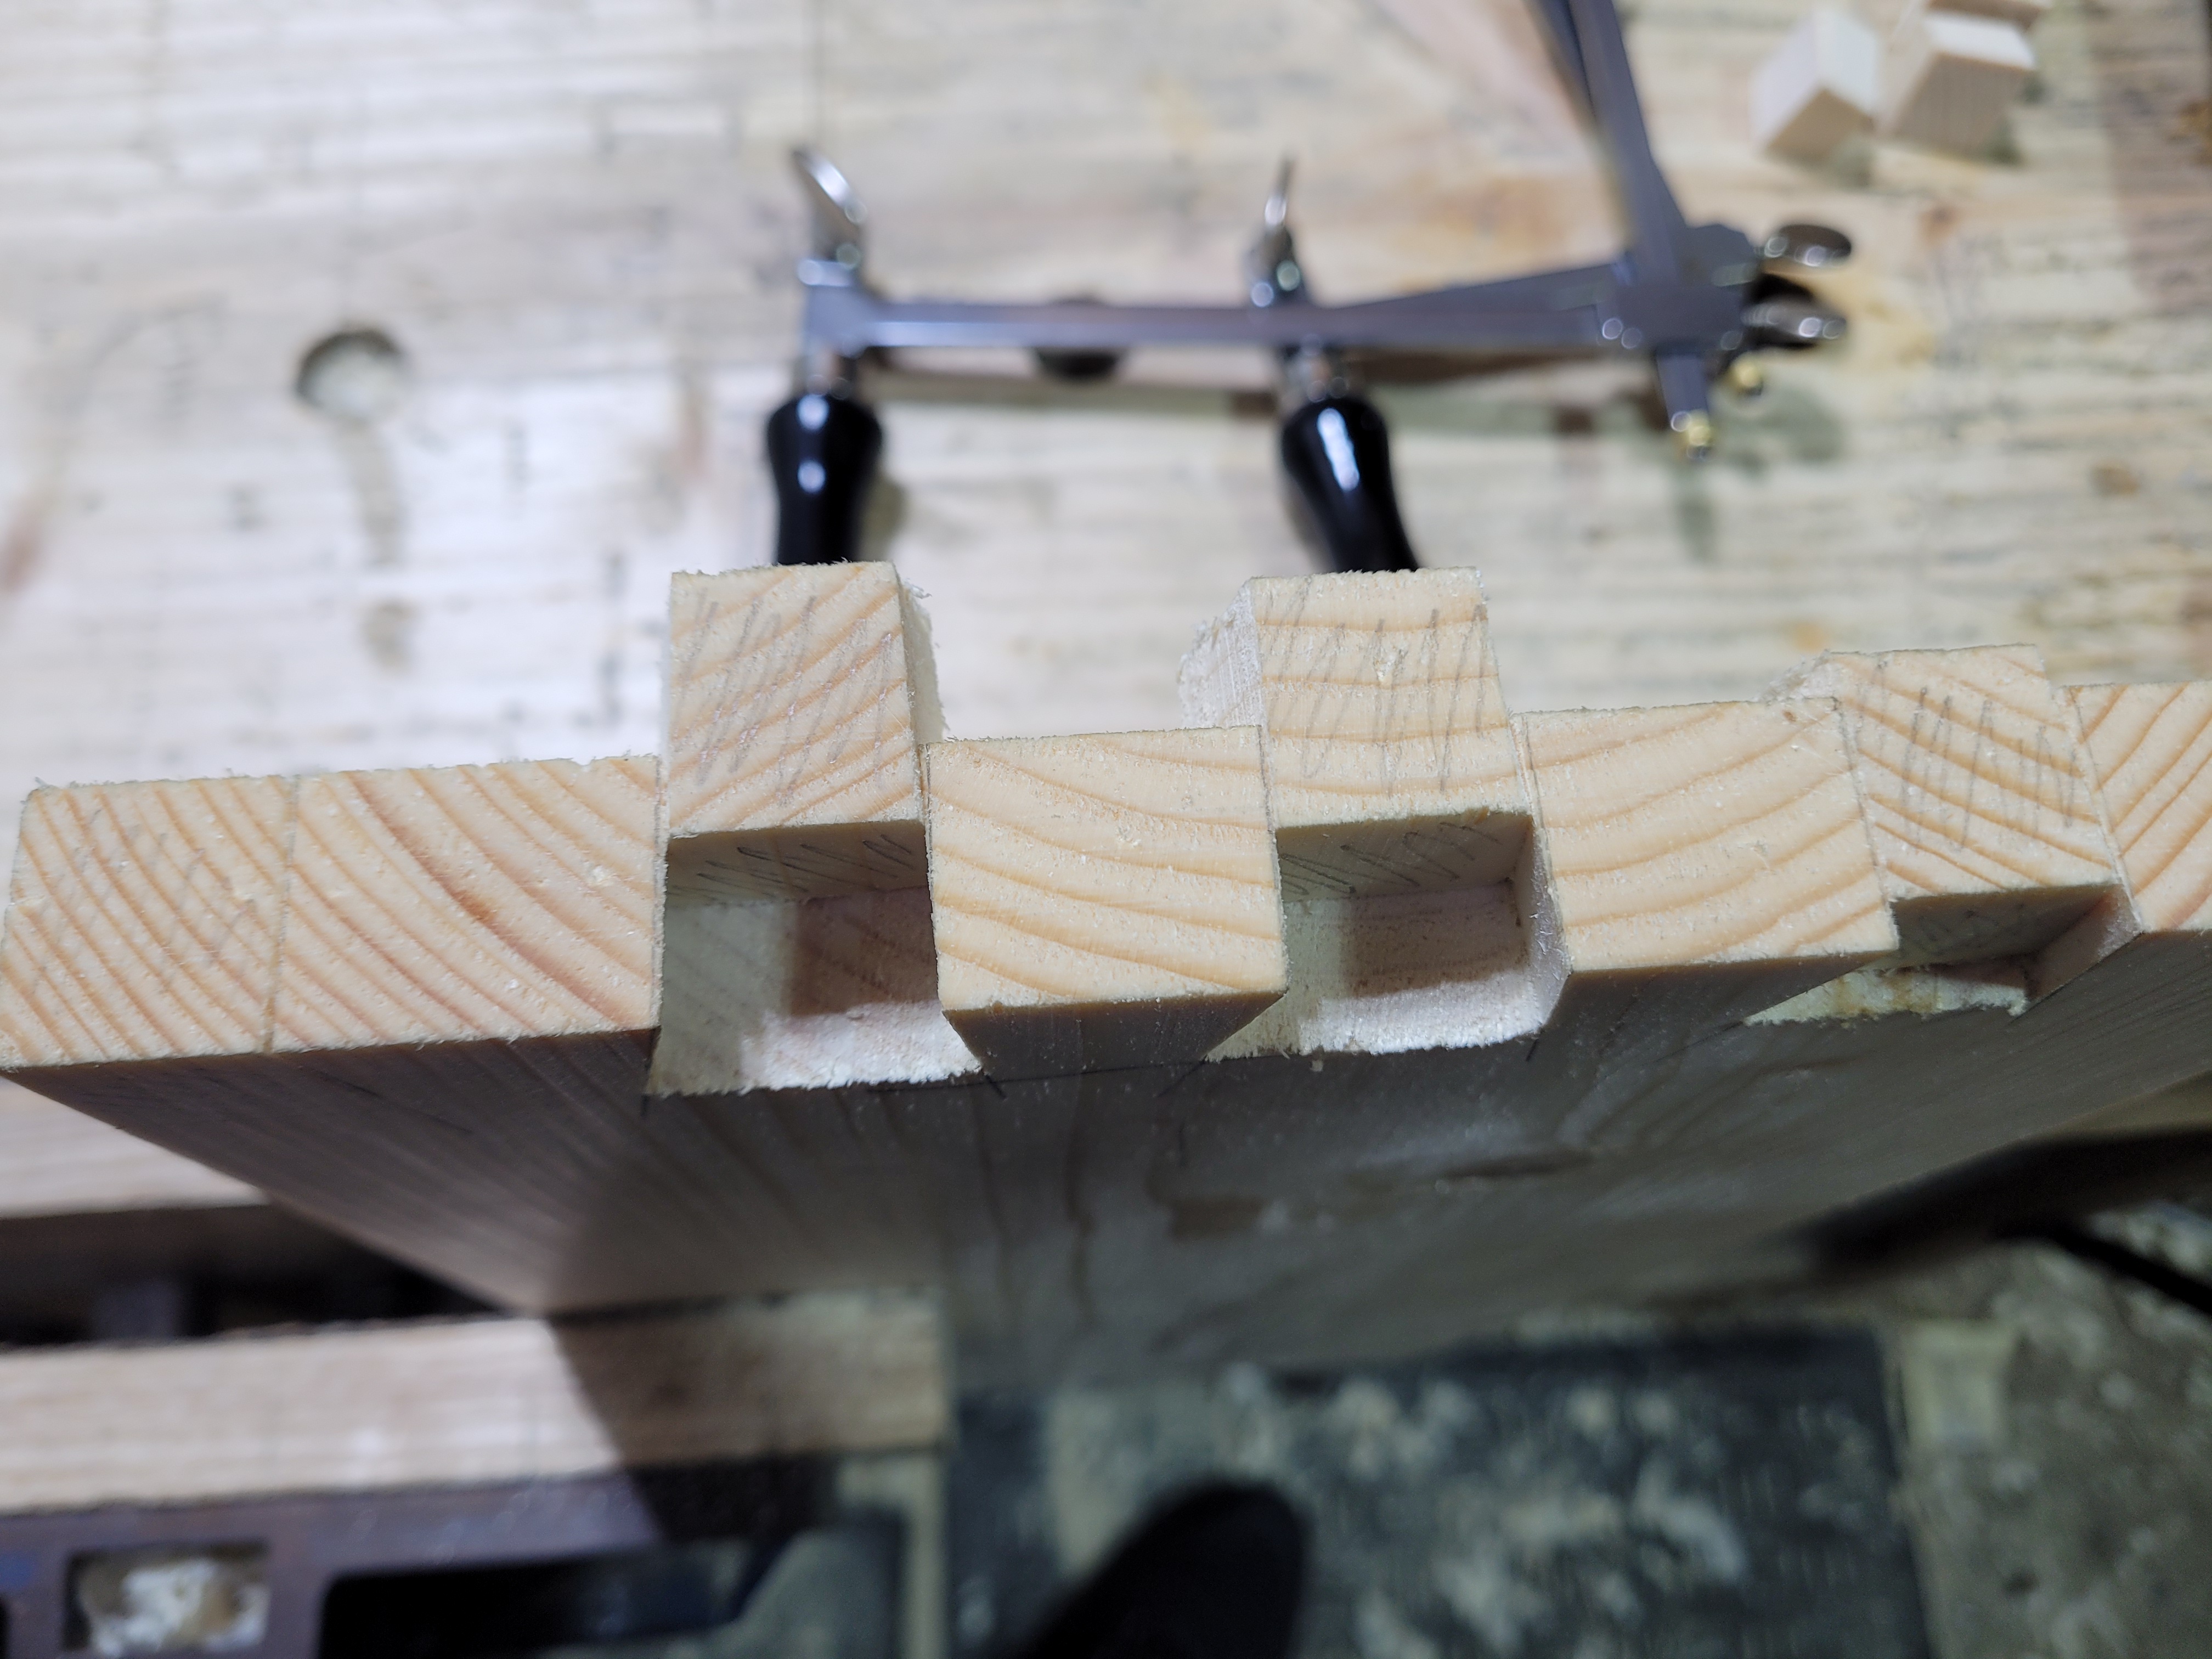
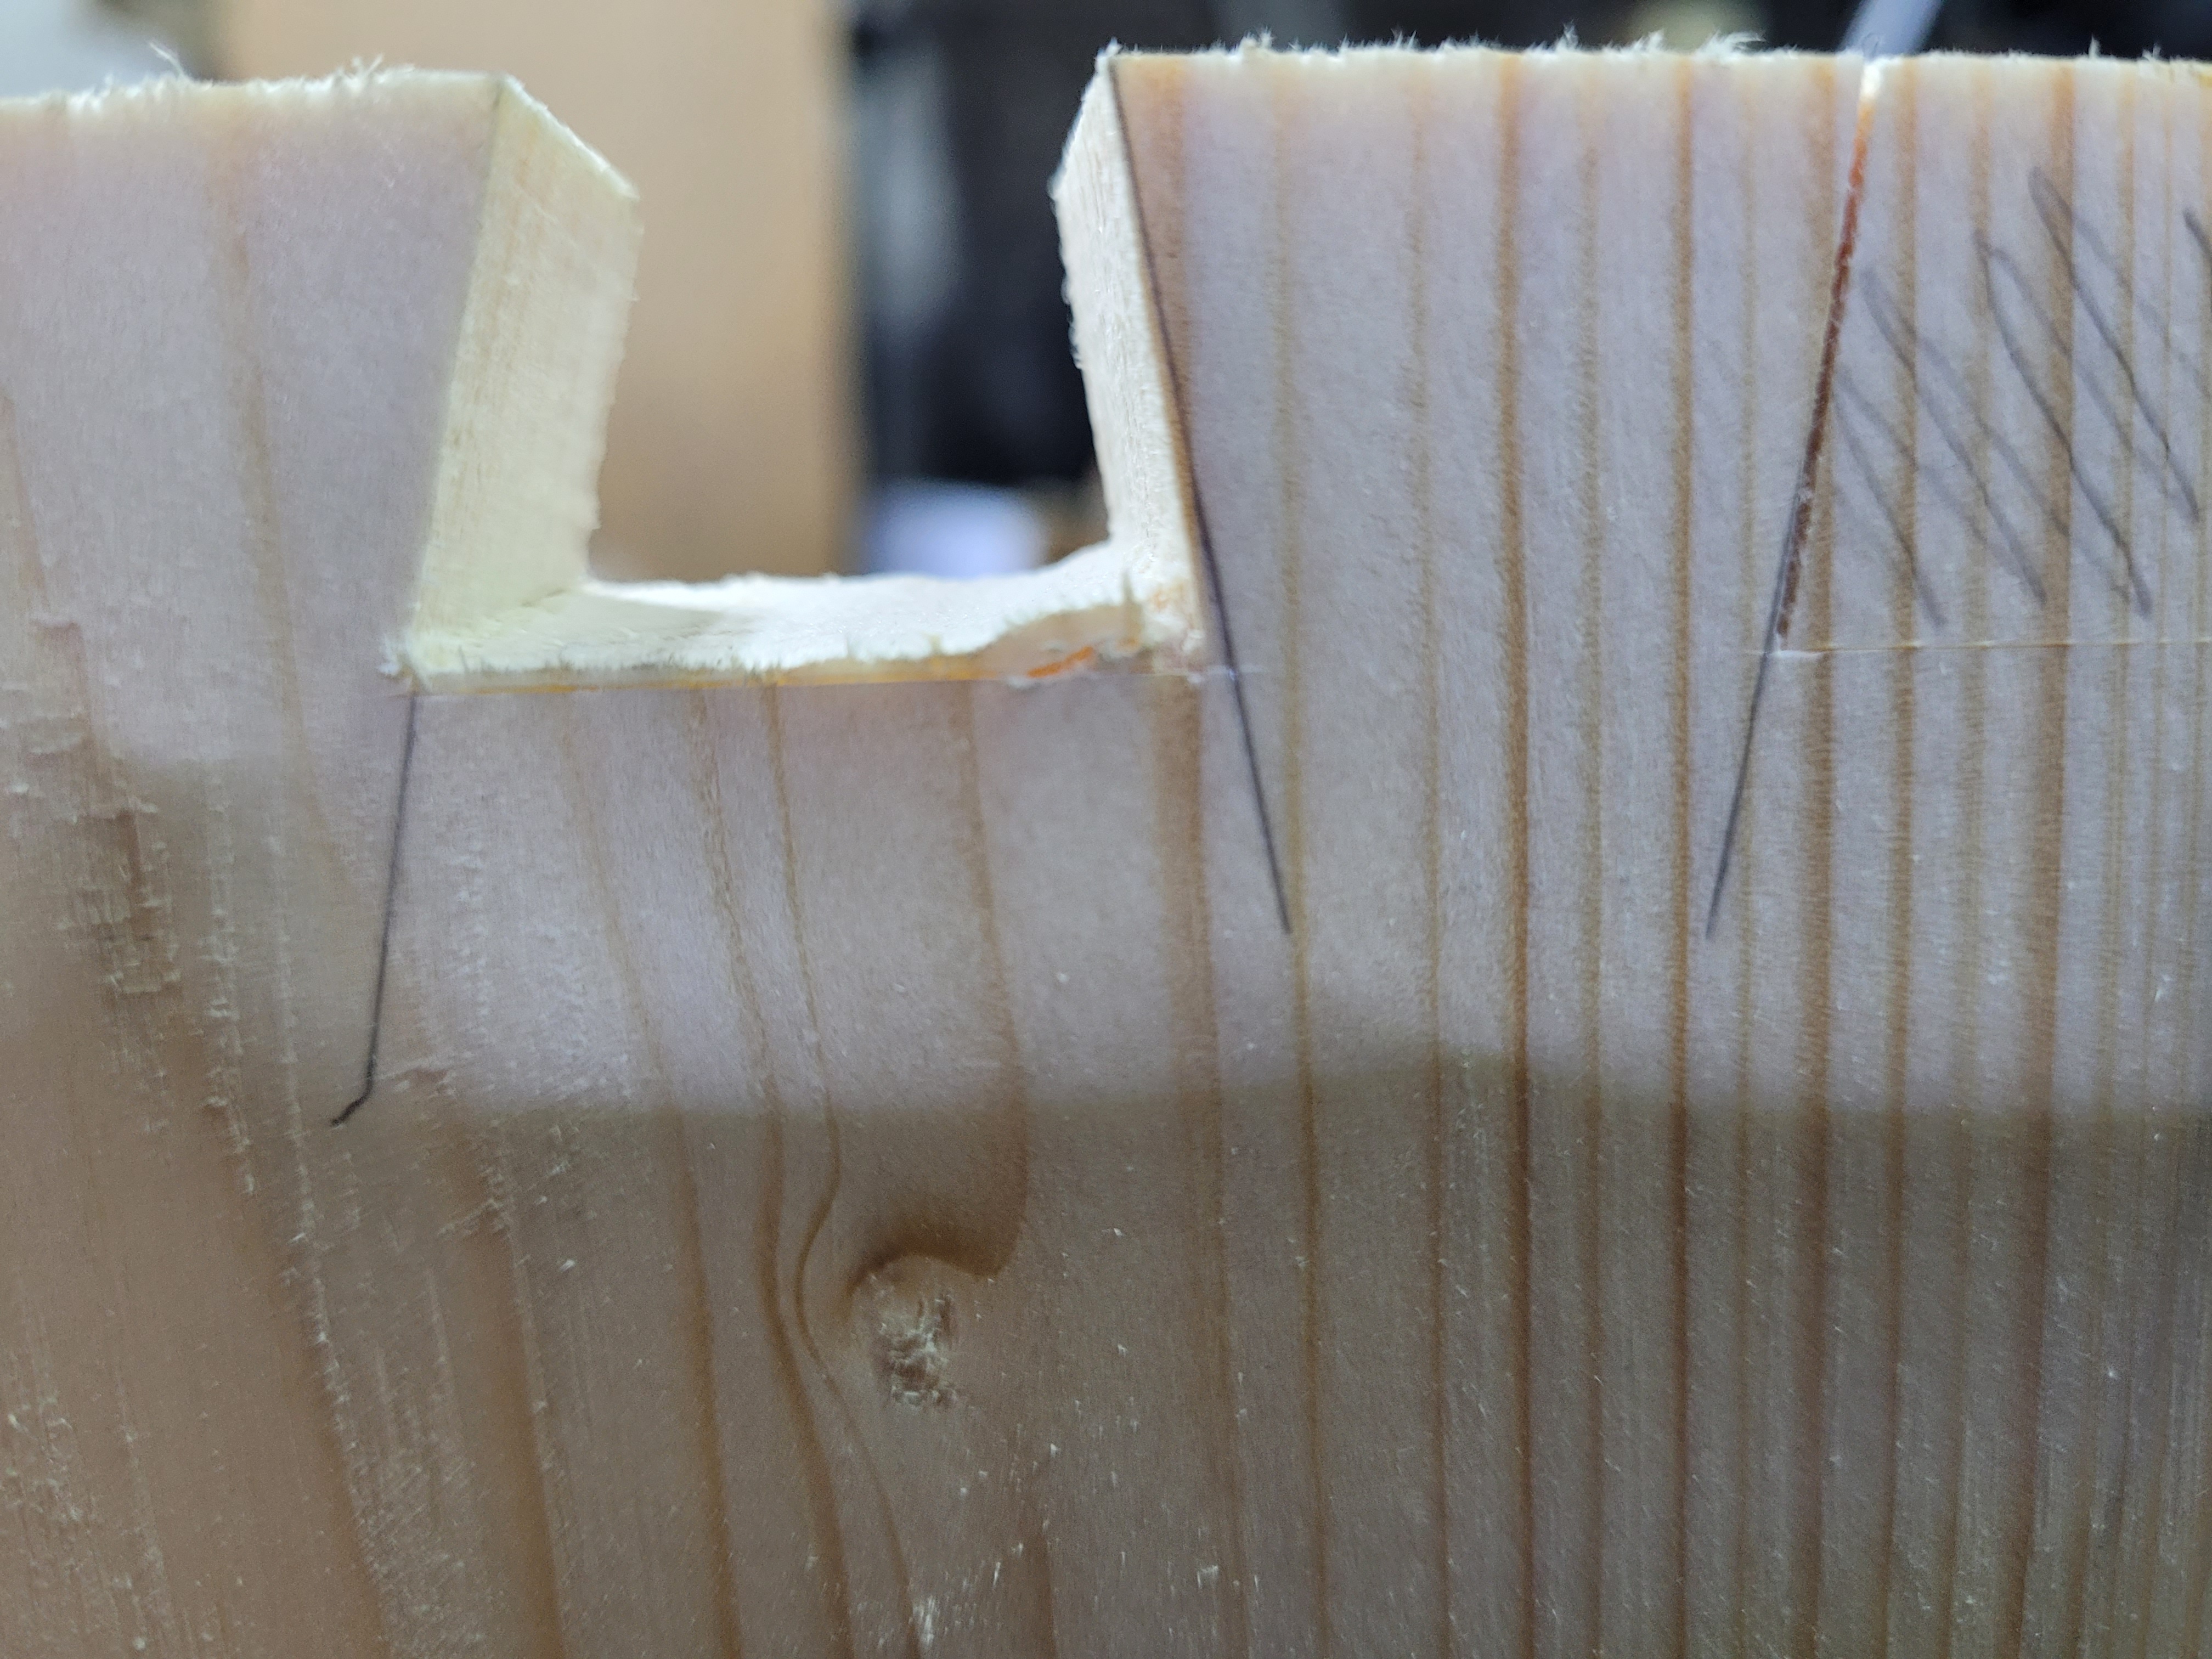
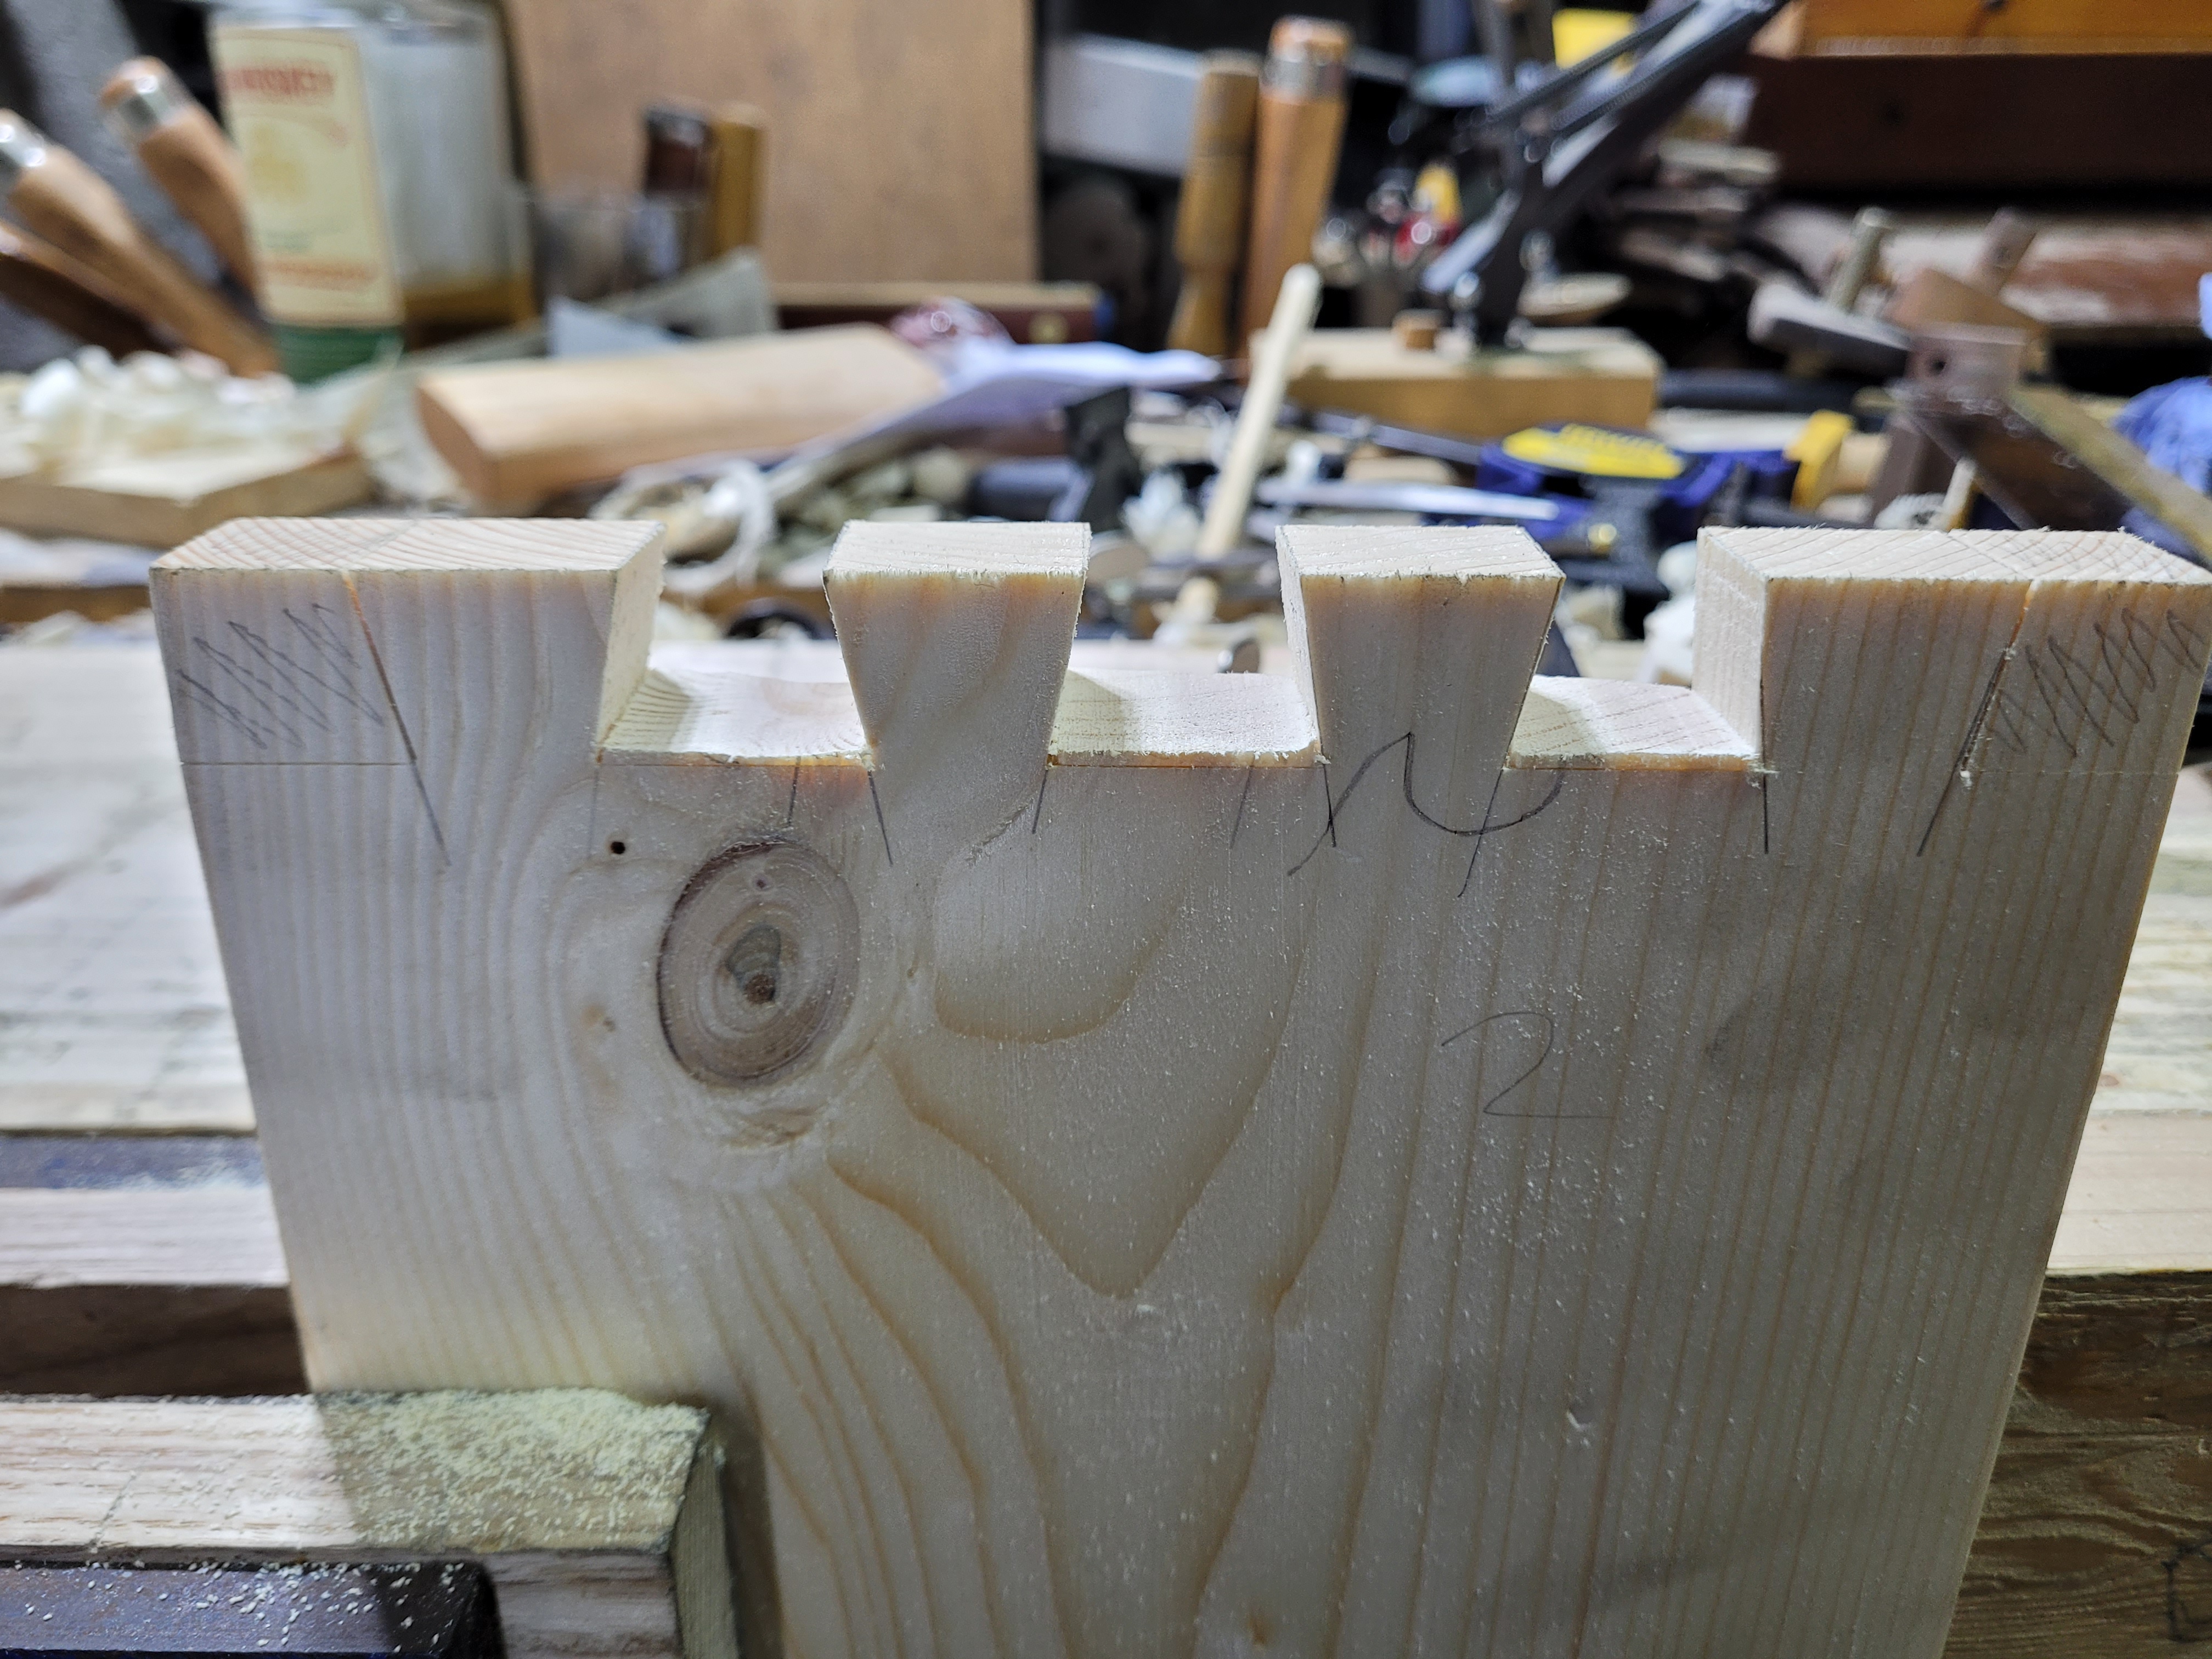
A complete aside. When popping out waste, I realised some pieces could only come out one way, and jam in the other direction. The sides are not straight. You can see it from the pencil lines. This board was the worst will all 3 jamming. Only 1 other jammed out of the total of 12 sockets I dovetailed. A close examination of the pencil lines would have had me adjusting far more tails… I decided, if the waste could get out, it’s probably good enough, and just adjusted tails if the waste jammed. This worked out pretty much perfectly and the joints all went together first try. This tactic may not work on denser woods, but it worked perfectly for pine, and saved me quite a bit of time.
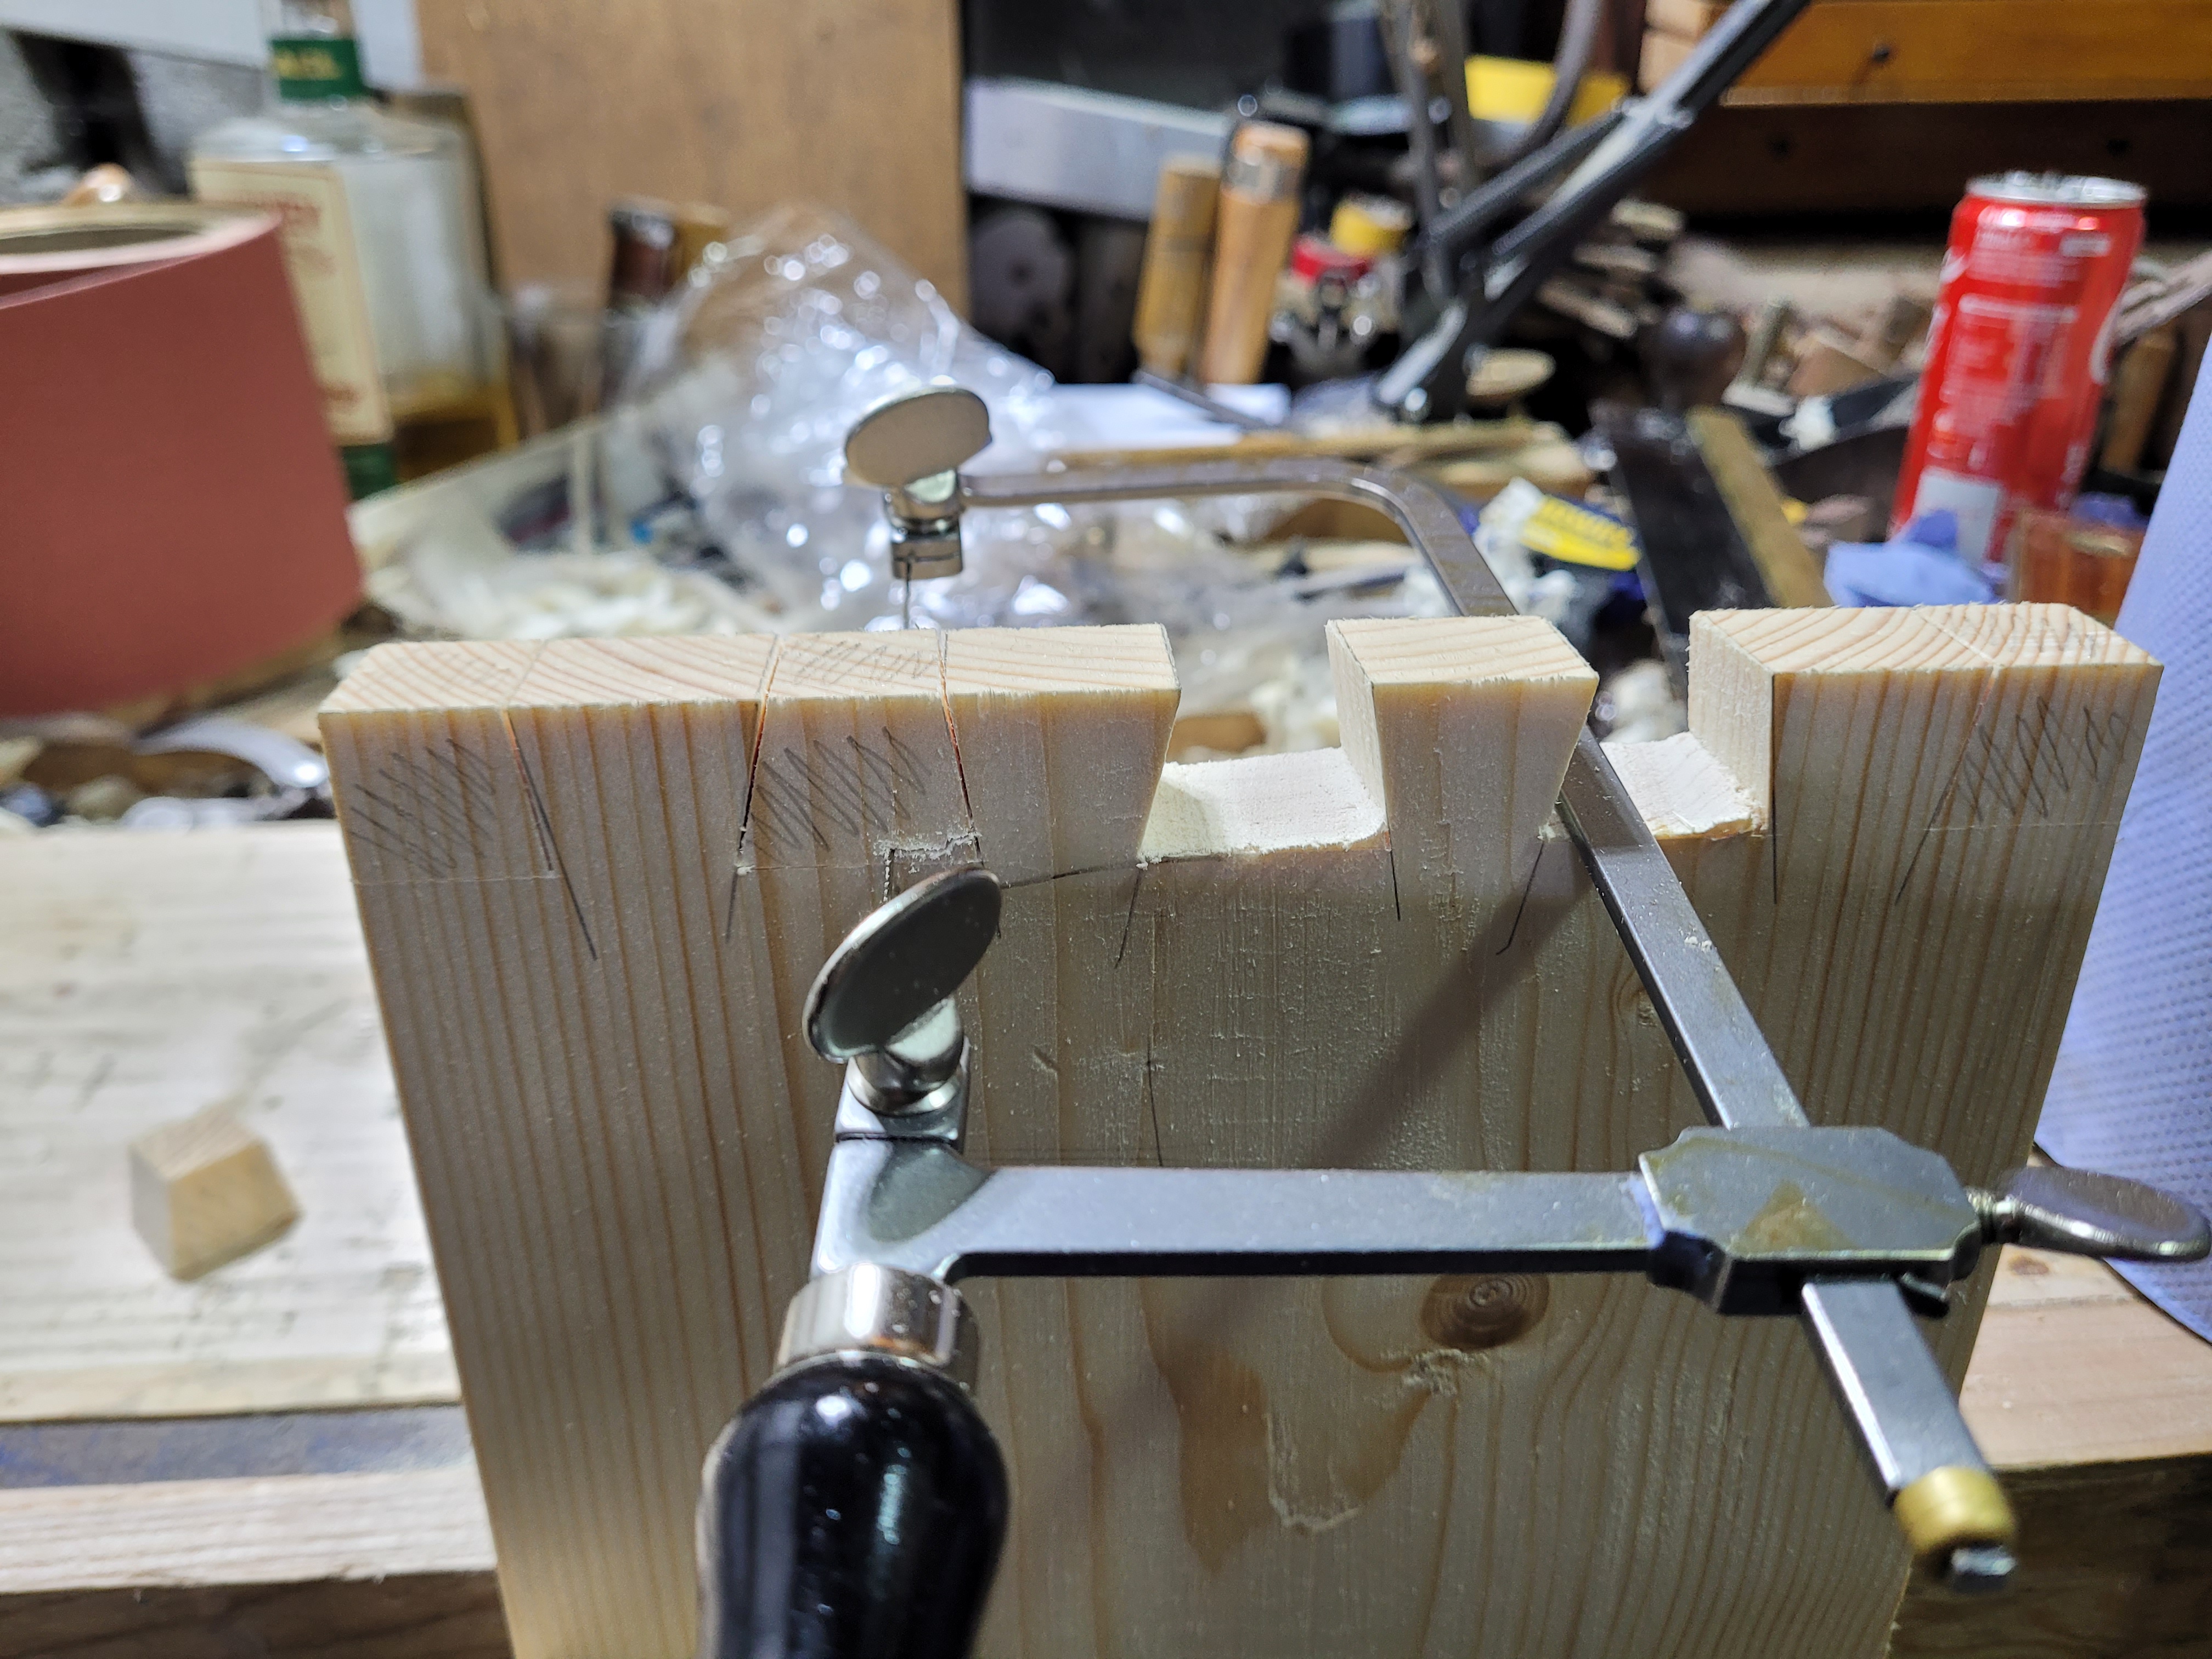
All sawn with the 6 inch jewellers saw. I could probably go a lot closer to the baselines with practice. I found no noticeable difference between using the 3 and 6 inch models. The little bit of extra weight was completely irrelevant to me. So I recommend just getting the 6 inch.
And now we come to the Hobbies fret saw. Substantially deeper at a bit over 12 inches. One of the wing nuts on mine has missing wings, but tightened and loosened fine with a pliers. As you can see, it came with a cut down hacksaw blade in it.
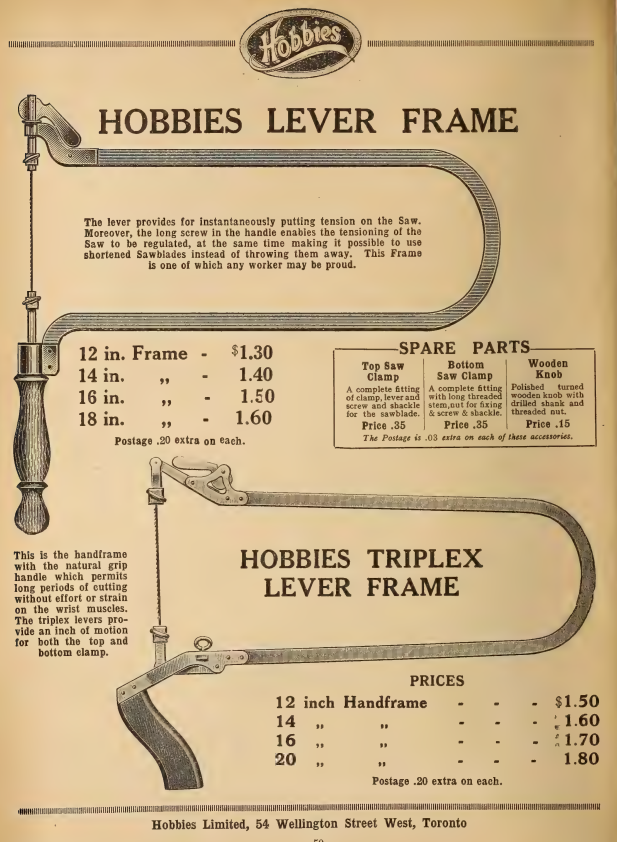
Here it is in the Hobbies catalog, because I’m a hopeless tool hoarder, I have one of the Triplex lever frame saws on the way. Will be interesting to compare.
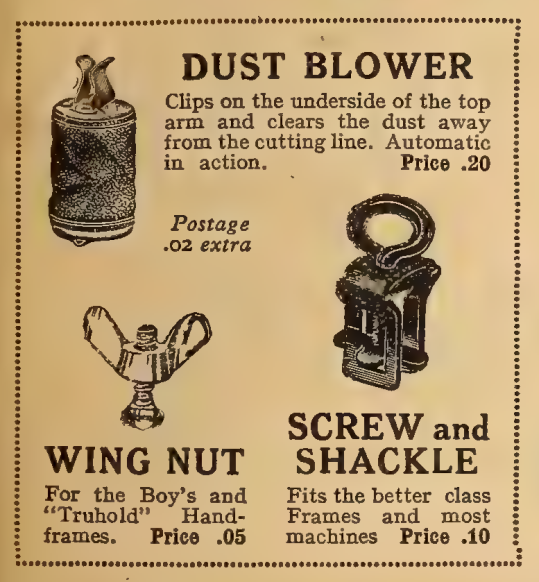
The screw and shackle allows the saw to take coping saw blades. I’m fascinated by the dust blower. Anyone ever come across one? How does it work?
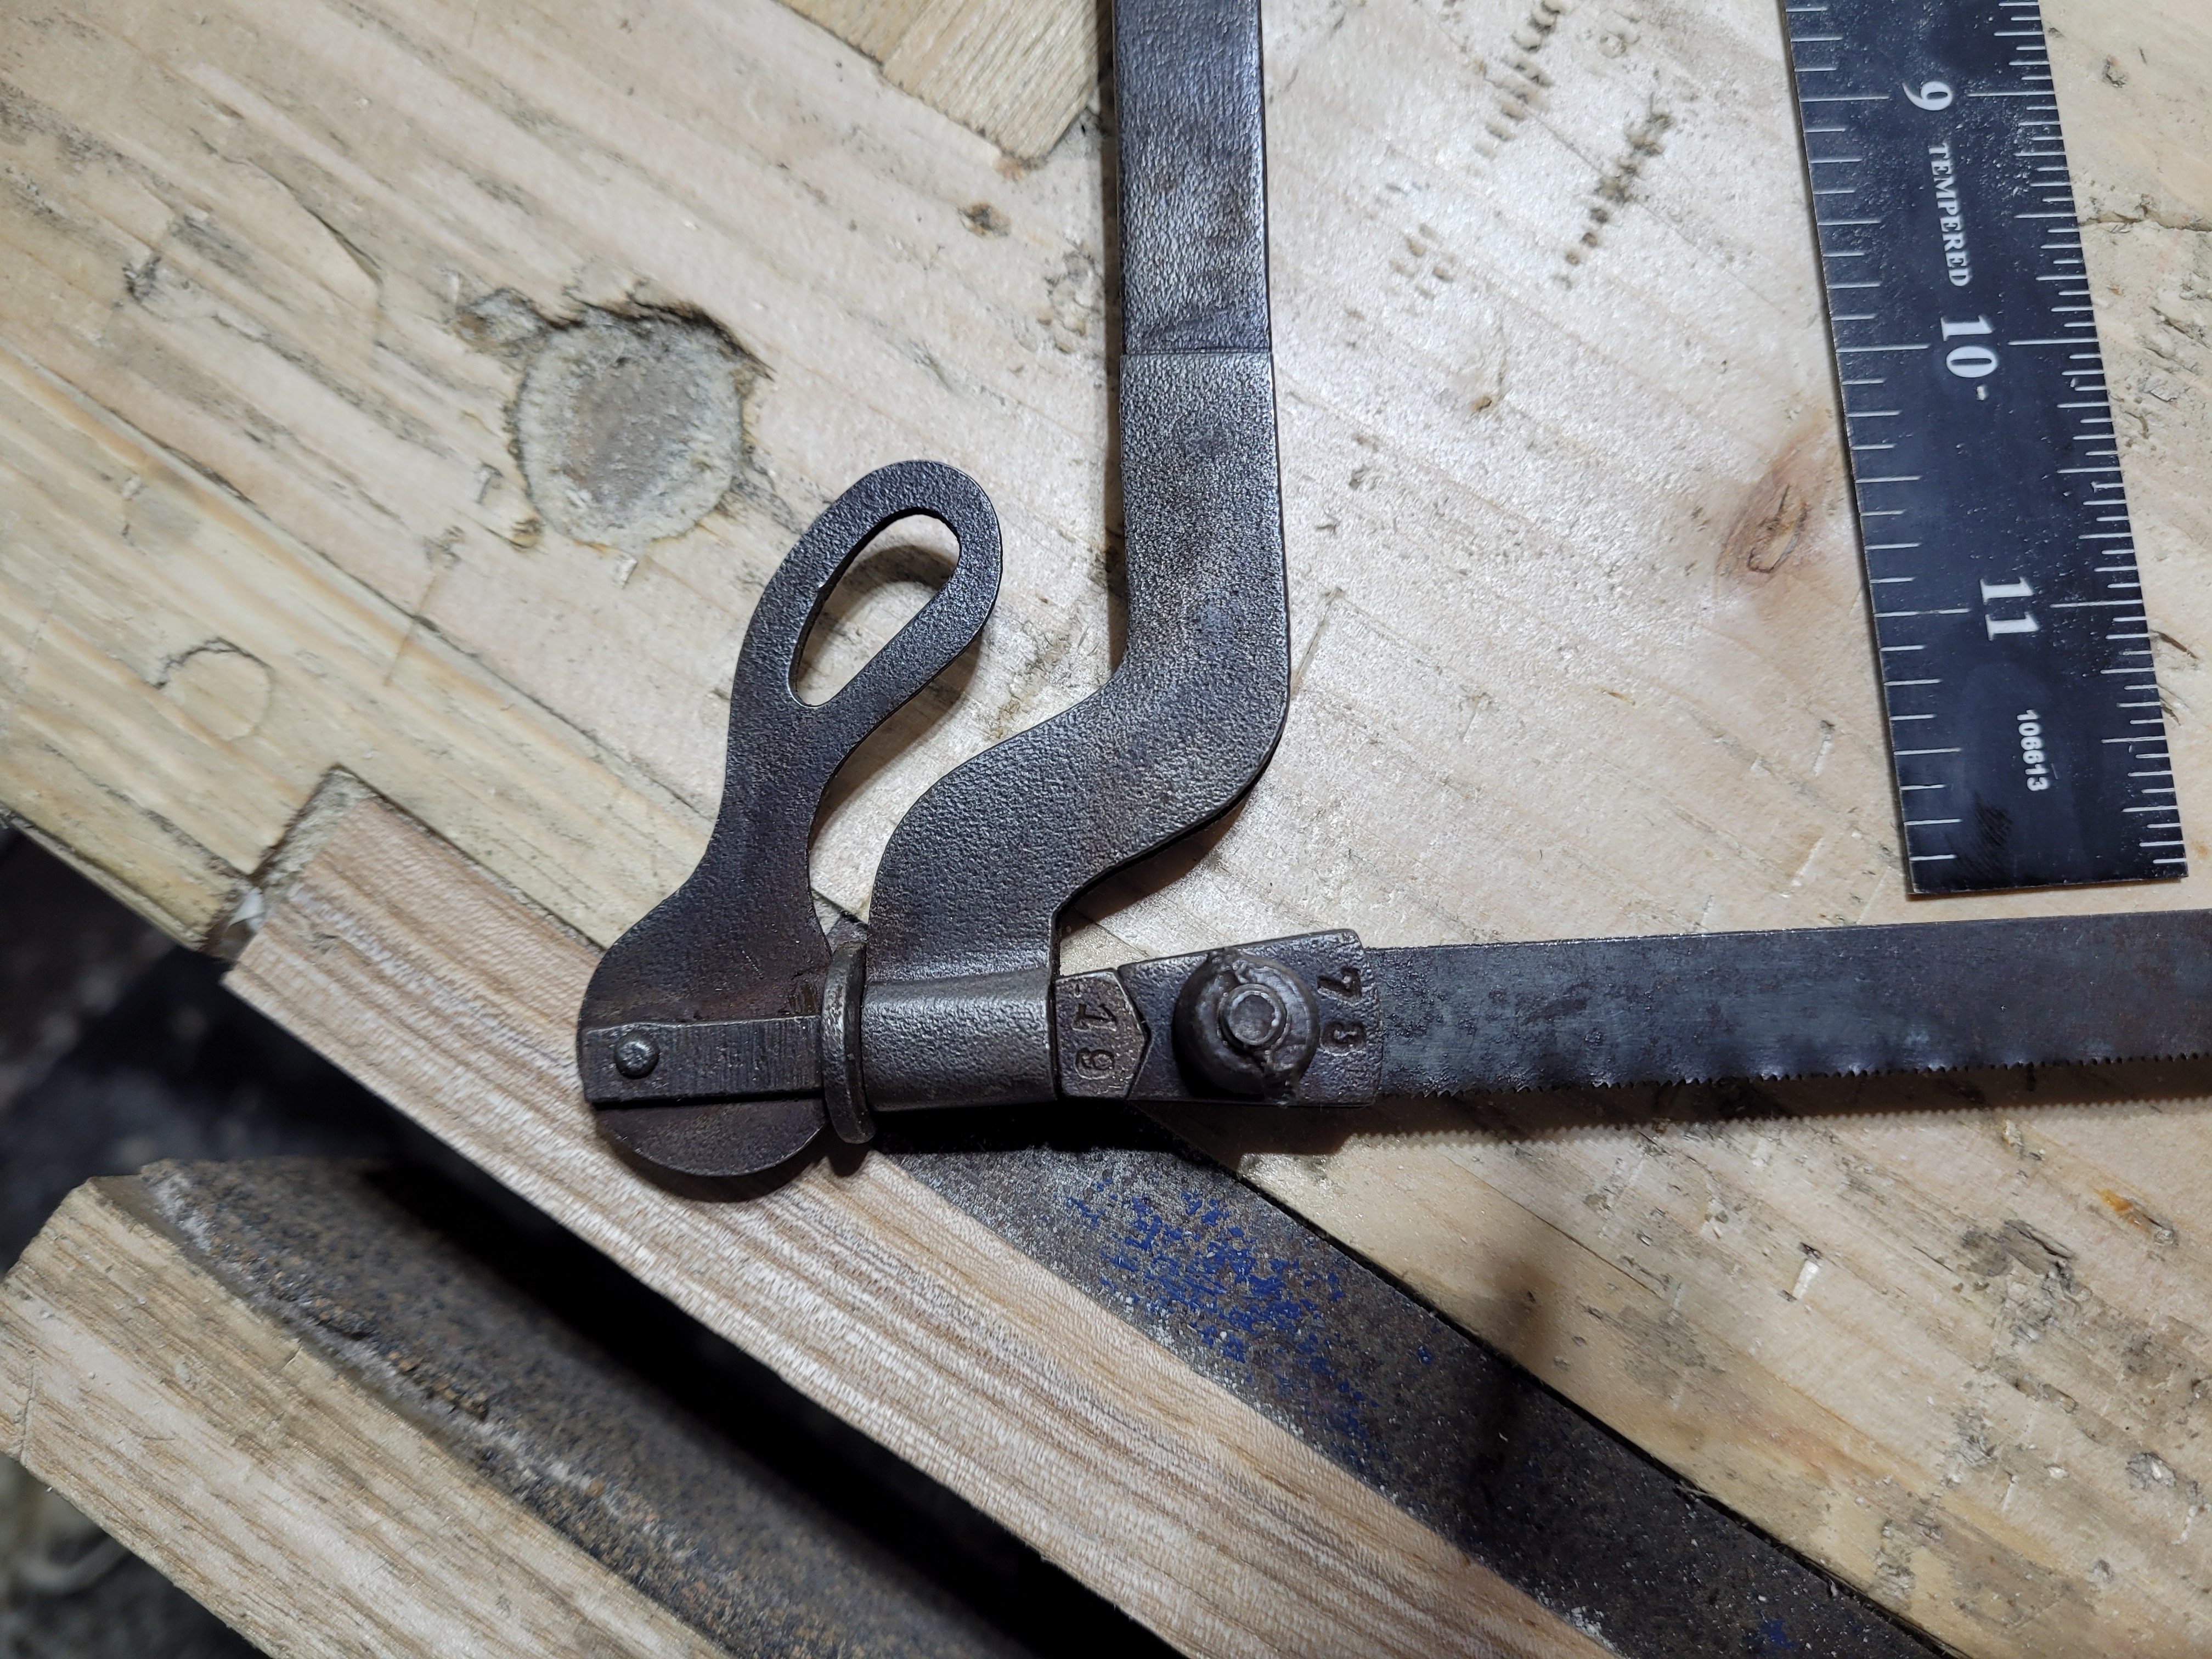
The big cam lever. This allows you to reduce tension for storage, and then quickly come back to working tension.
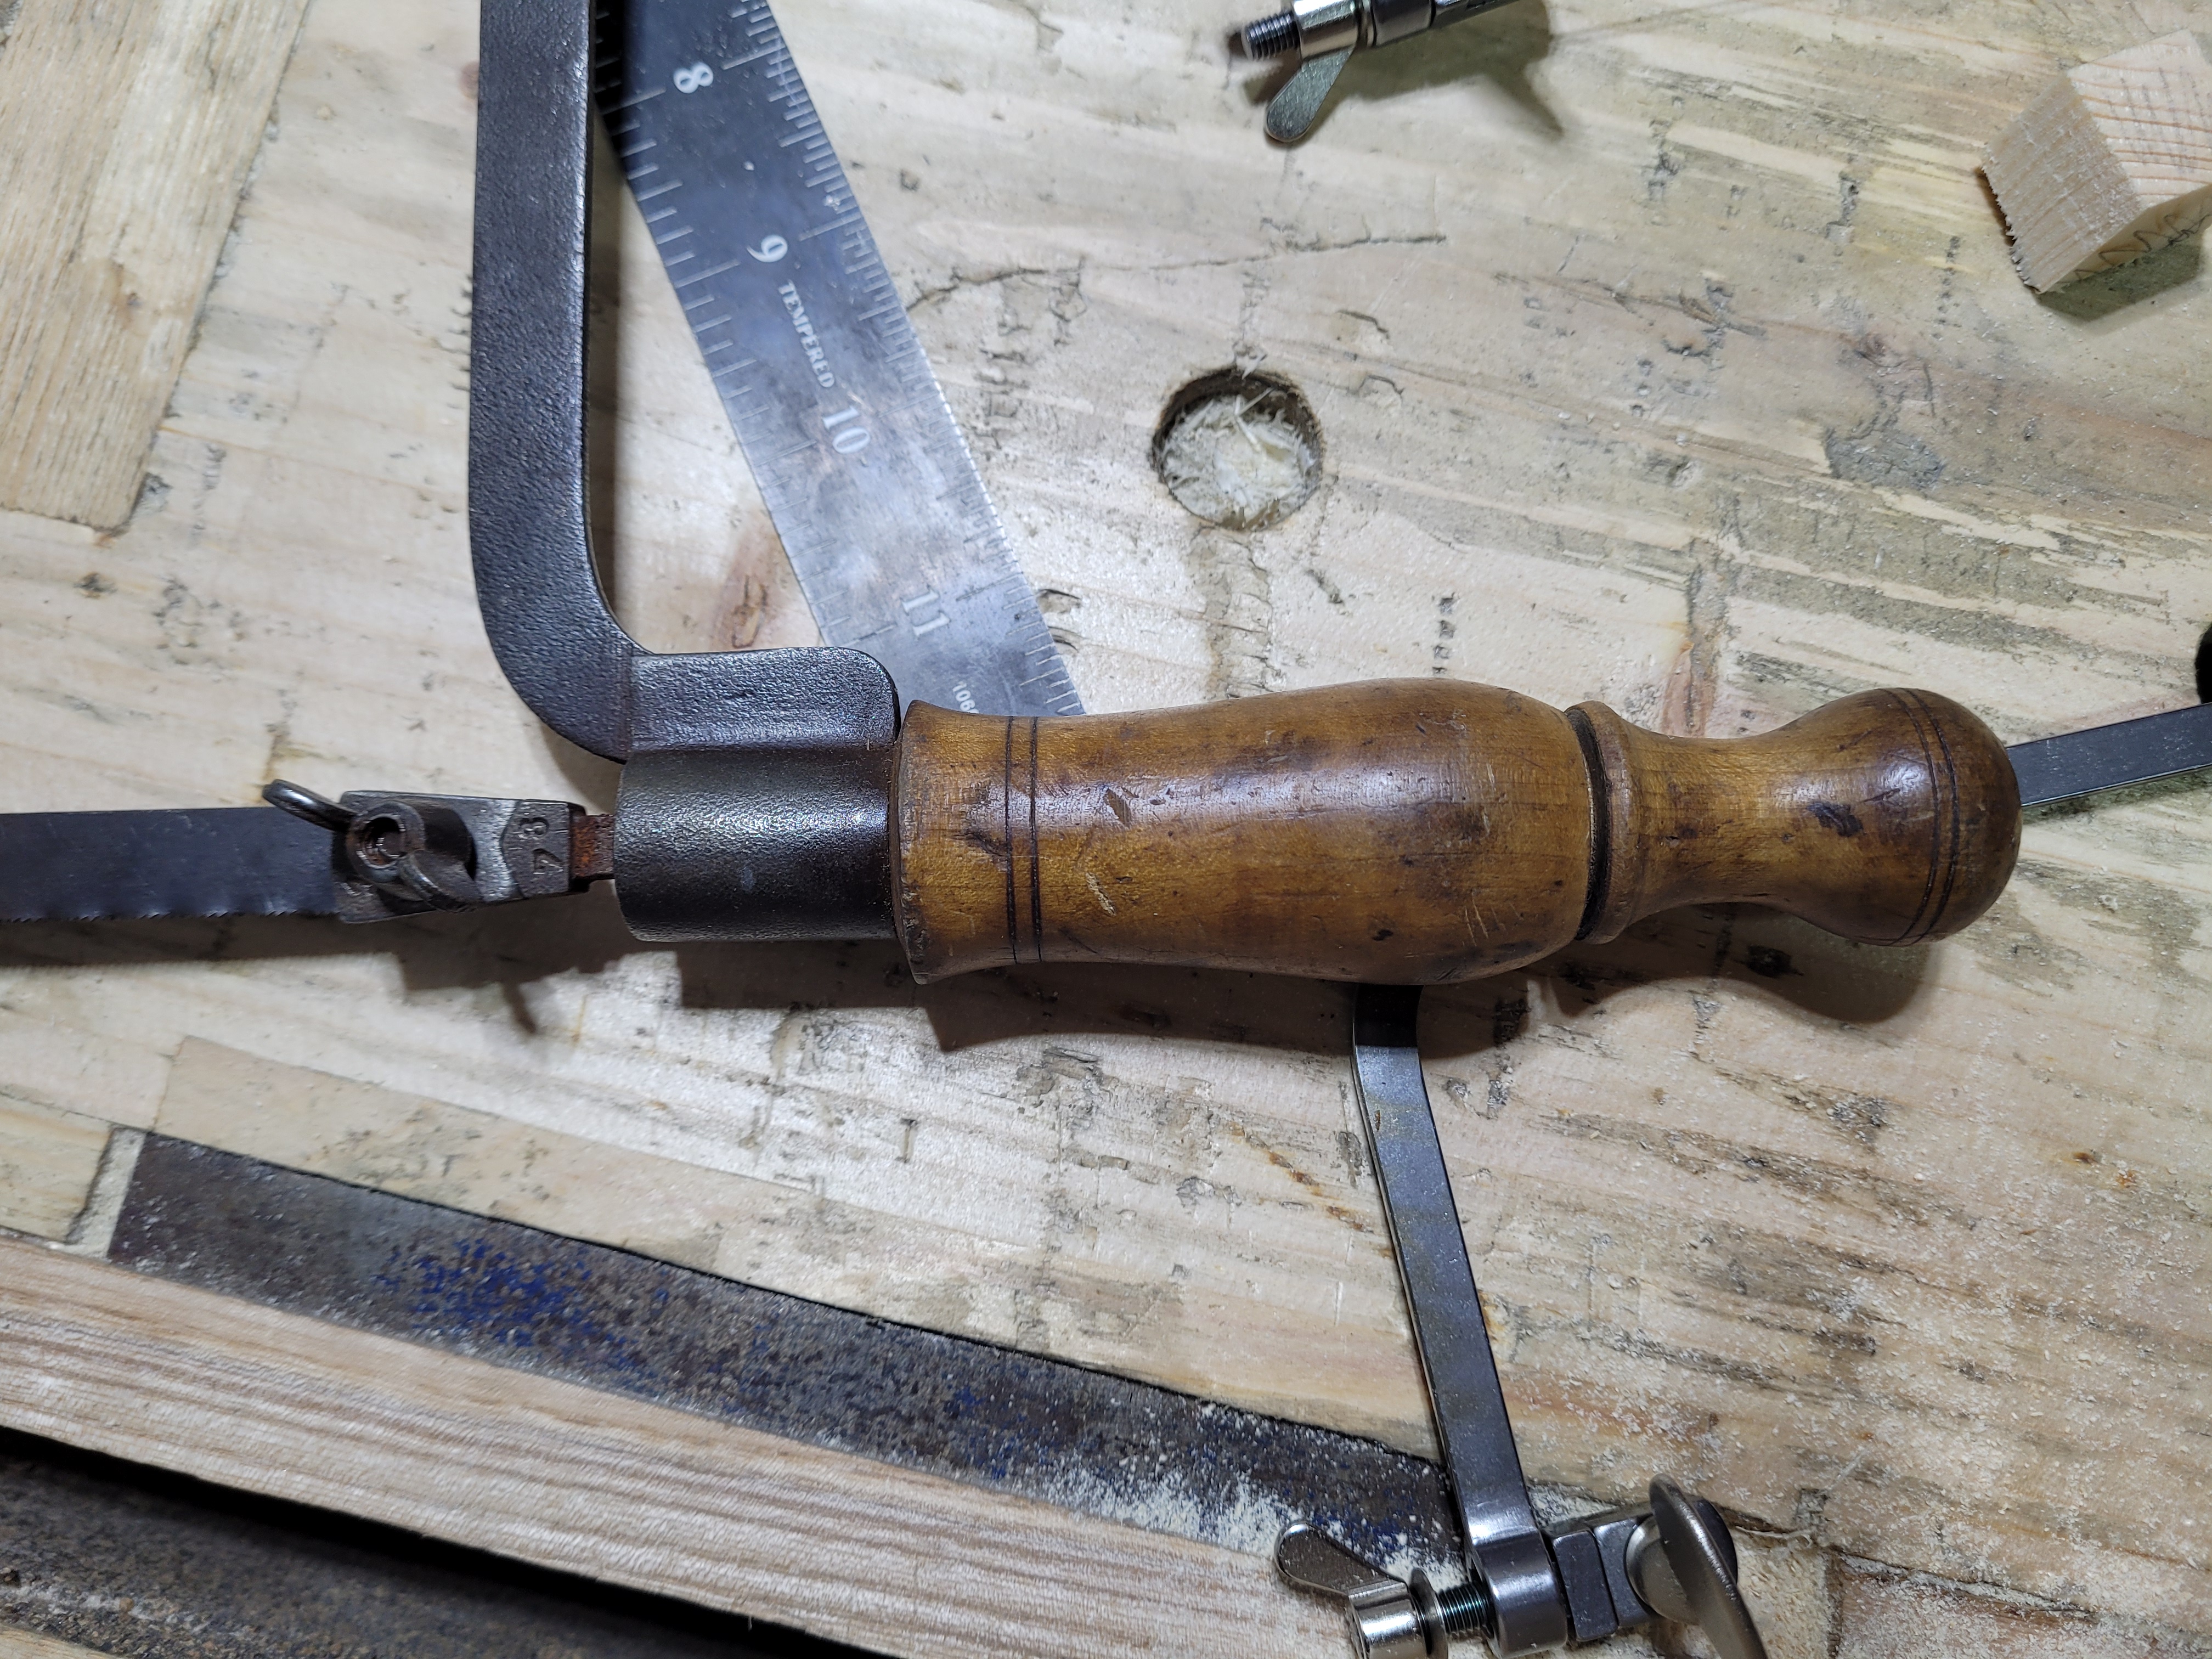
The end section of the handle can be turned to loosen/tighten a tensioning screw. The little bit of post you can see is completely flush when completely tensioned.
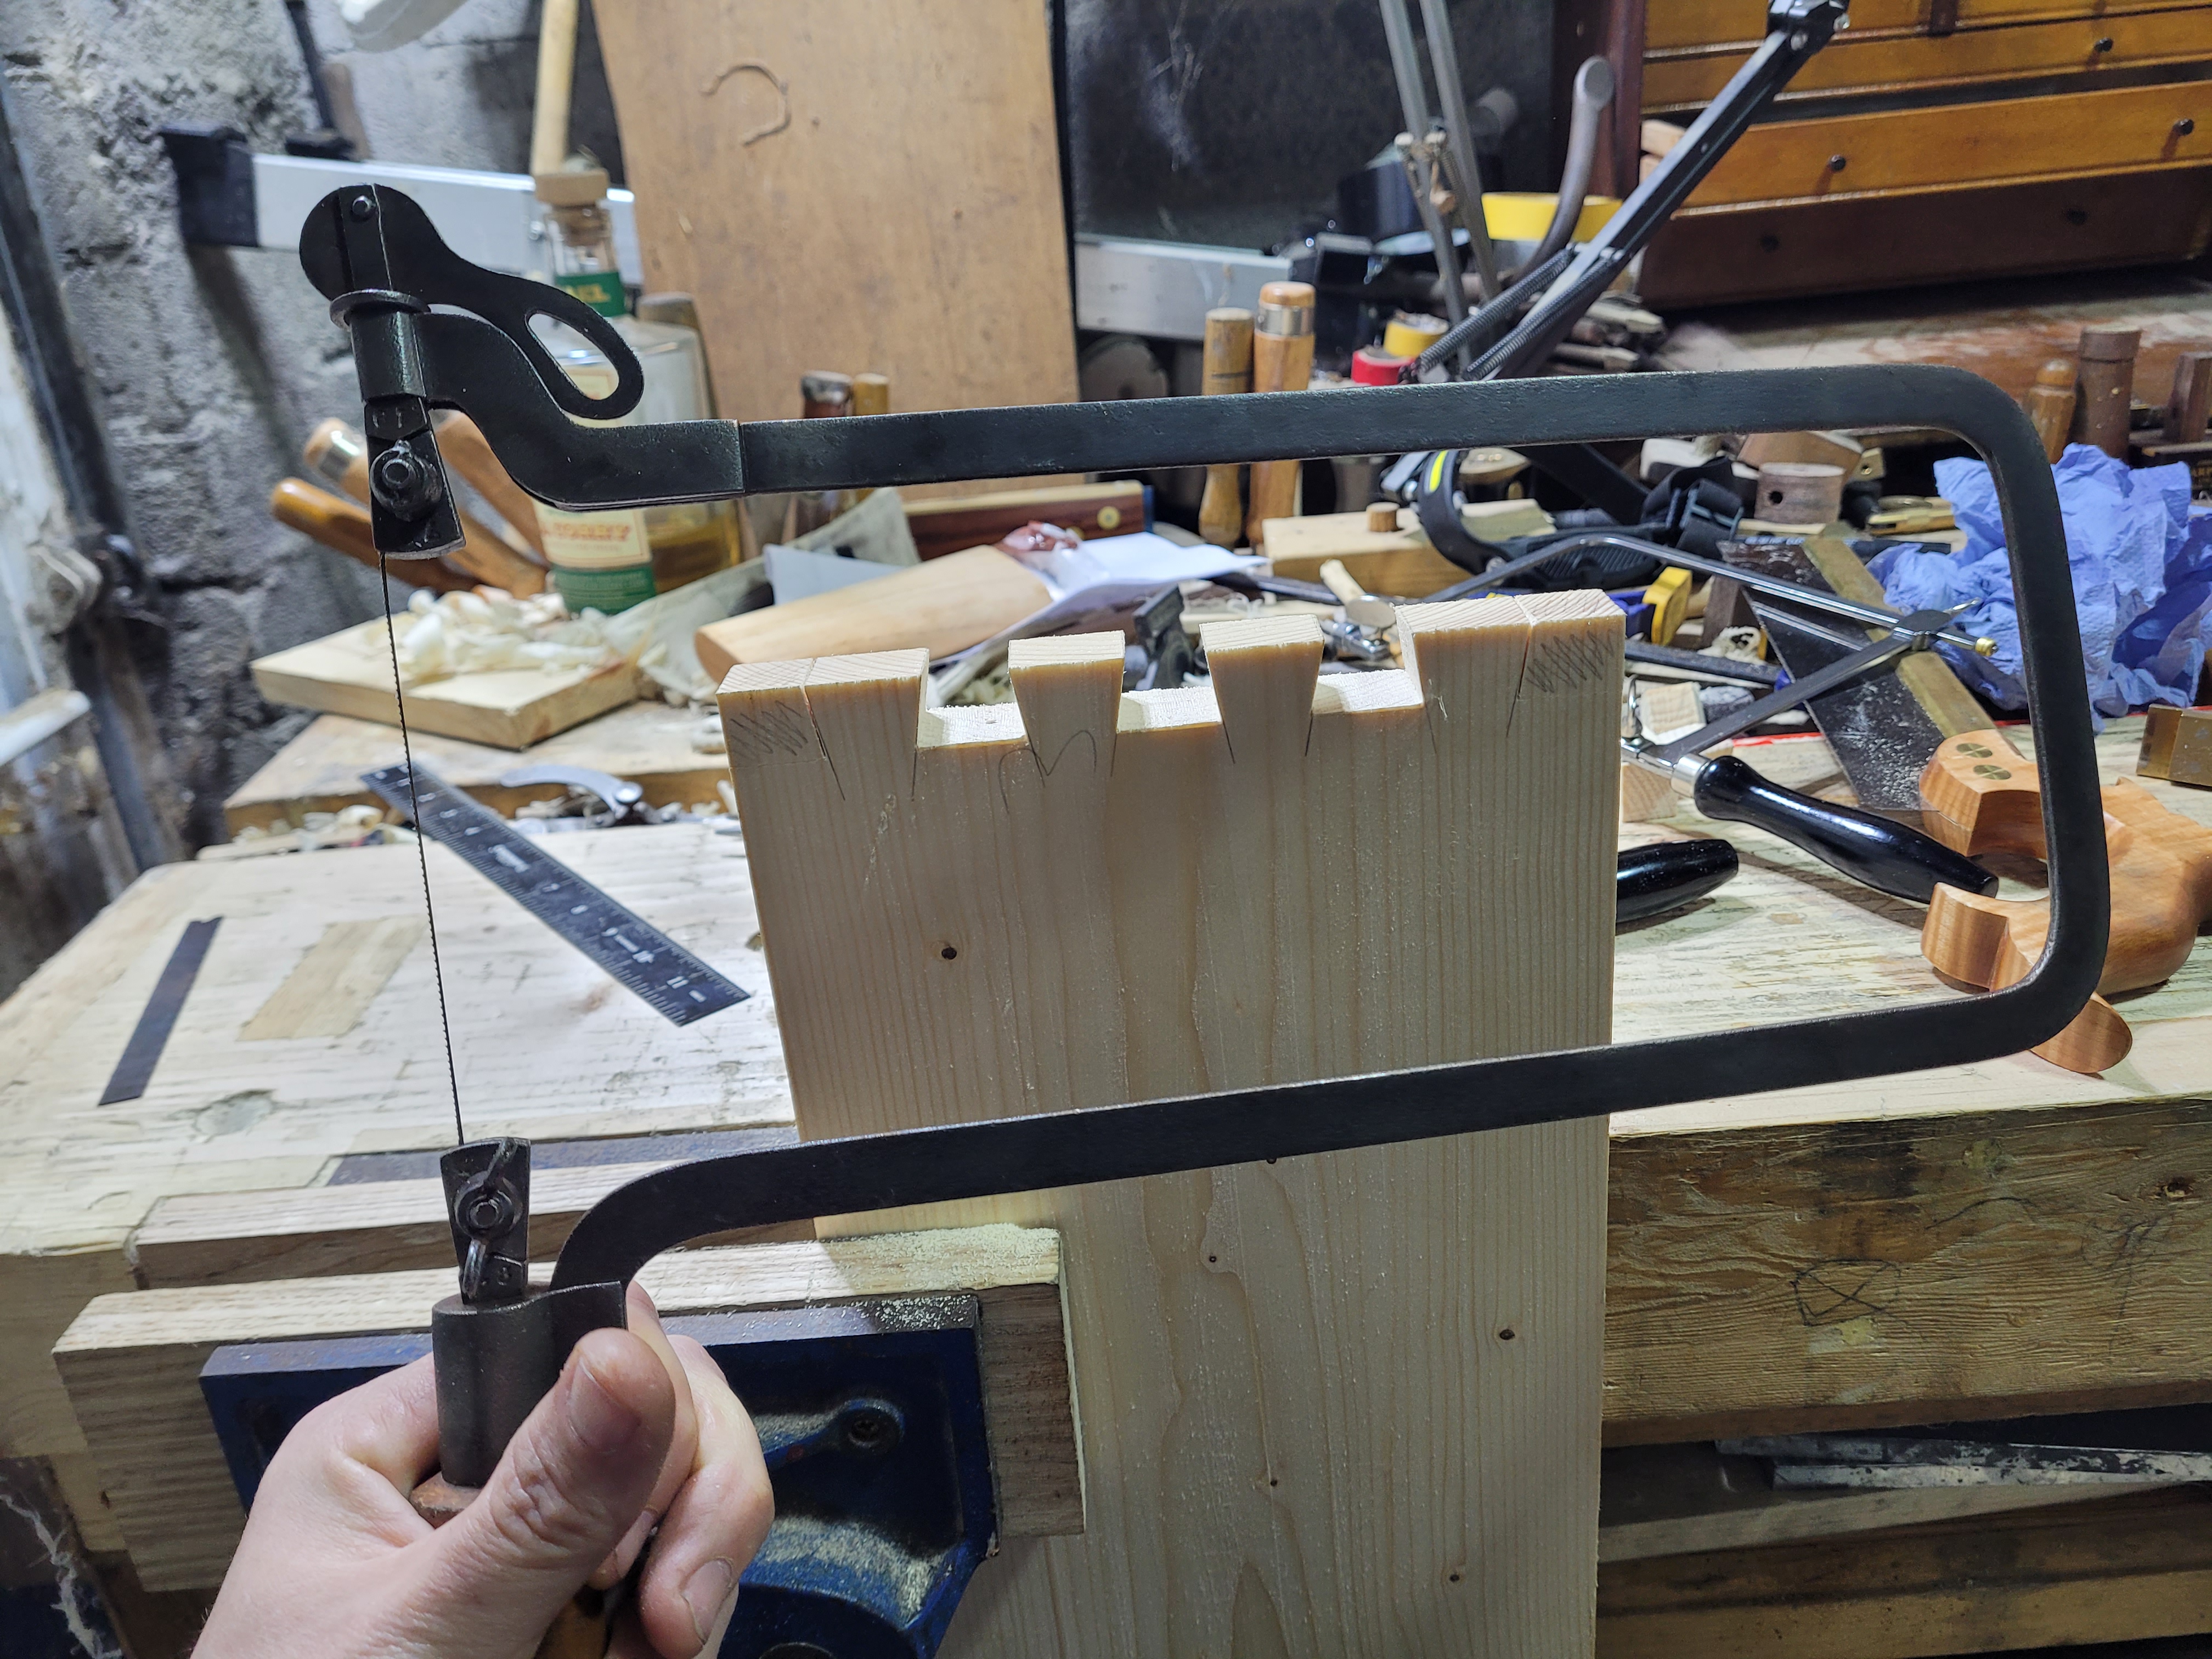
And it works great. The depth is obviously way more than required for this project. Then tension is just a little less than the jeweller’s saws. But not much. For some reason I found it easier to saw straight with this saw. A little word of warning, when hunting for the triplex version, I saw quite a few Hobbies saws missing both the clamps, and the wing nuts meaning it could no longer hold any blade. Something to watch out for if you decide you want one of these.