Spokeshave Rack
I have a very nice collection of Preston spokeshaves. I particularly like the plated ornate ones. I spent a few years gathering an example of one of each (There are many many more Preston shaves than that, but these are the ones that tickle my fancy). I do not keep them in my rust farm of a workshop, but rather in the house. This is a loss in two respects. First, they are not close to hand when I am in my workshop, and second, they are just stuffed into nooks and crannies in a bookshelf, so I cannot even admire them properly when I am in the house. I resolved to solve one of the two problems by building a simple display rack for them.
This is a simple project. You need a suitably sized drill bit, a drill, a saw, and some sandpaper and something round to wrap it around. Other tools can help, but that is all you really need.
I would encourage you to start off by grabbing two pieces of scrap wood, and doing the drilling and sawing, and making sure your spokeshave is a good fit, and figuring out the spacing between holes. I did just that with two chunks of left over pine. By trial and error I found a 7/8th inch hole was a good size for the collection of 8 spokeshaves I wanted. You may need a larger hole, or be able to get away with a smaller hole for your shaves. 2 1/2 inches between the centre of the holes worked well for me.
To start off I laid out my work on a piece of 3/4 inch by 1 3/4 inch Ash. 12 inches long gave me enough space for 4 shaves. A little more or less in any dimension will not matter much. As long as you have 1/4 inch or so at the back to hold it together, enough space for the number of holes you need, and at least another 1/4 inch after that you are good.
The joy of this project is that your parts do not need to be perfectly square. If they look good to you. They are good enough. There is no joinery. Just some hoes and sawing.
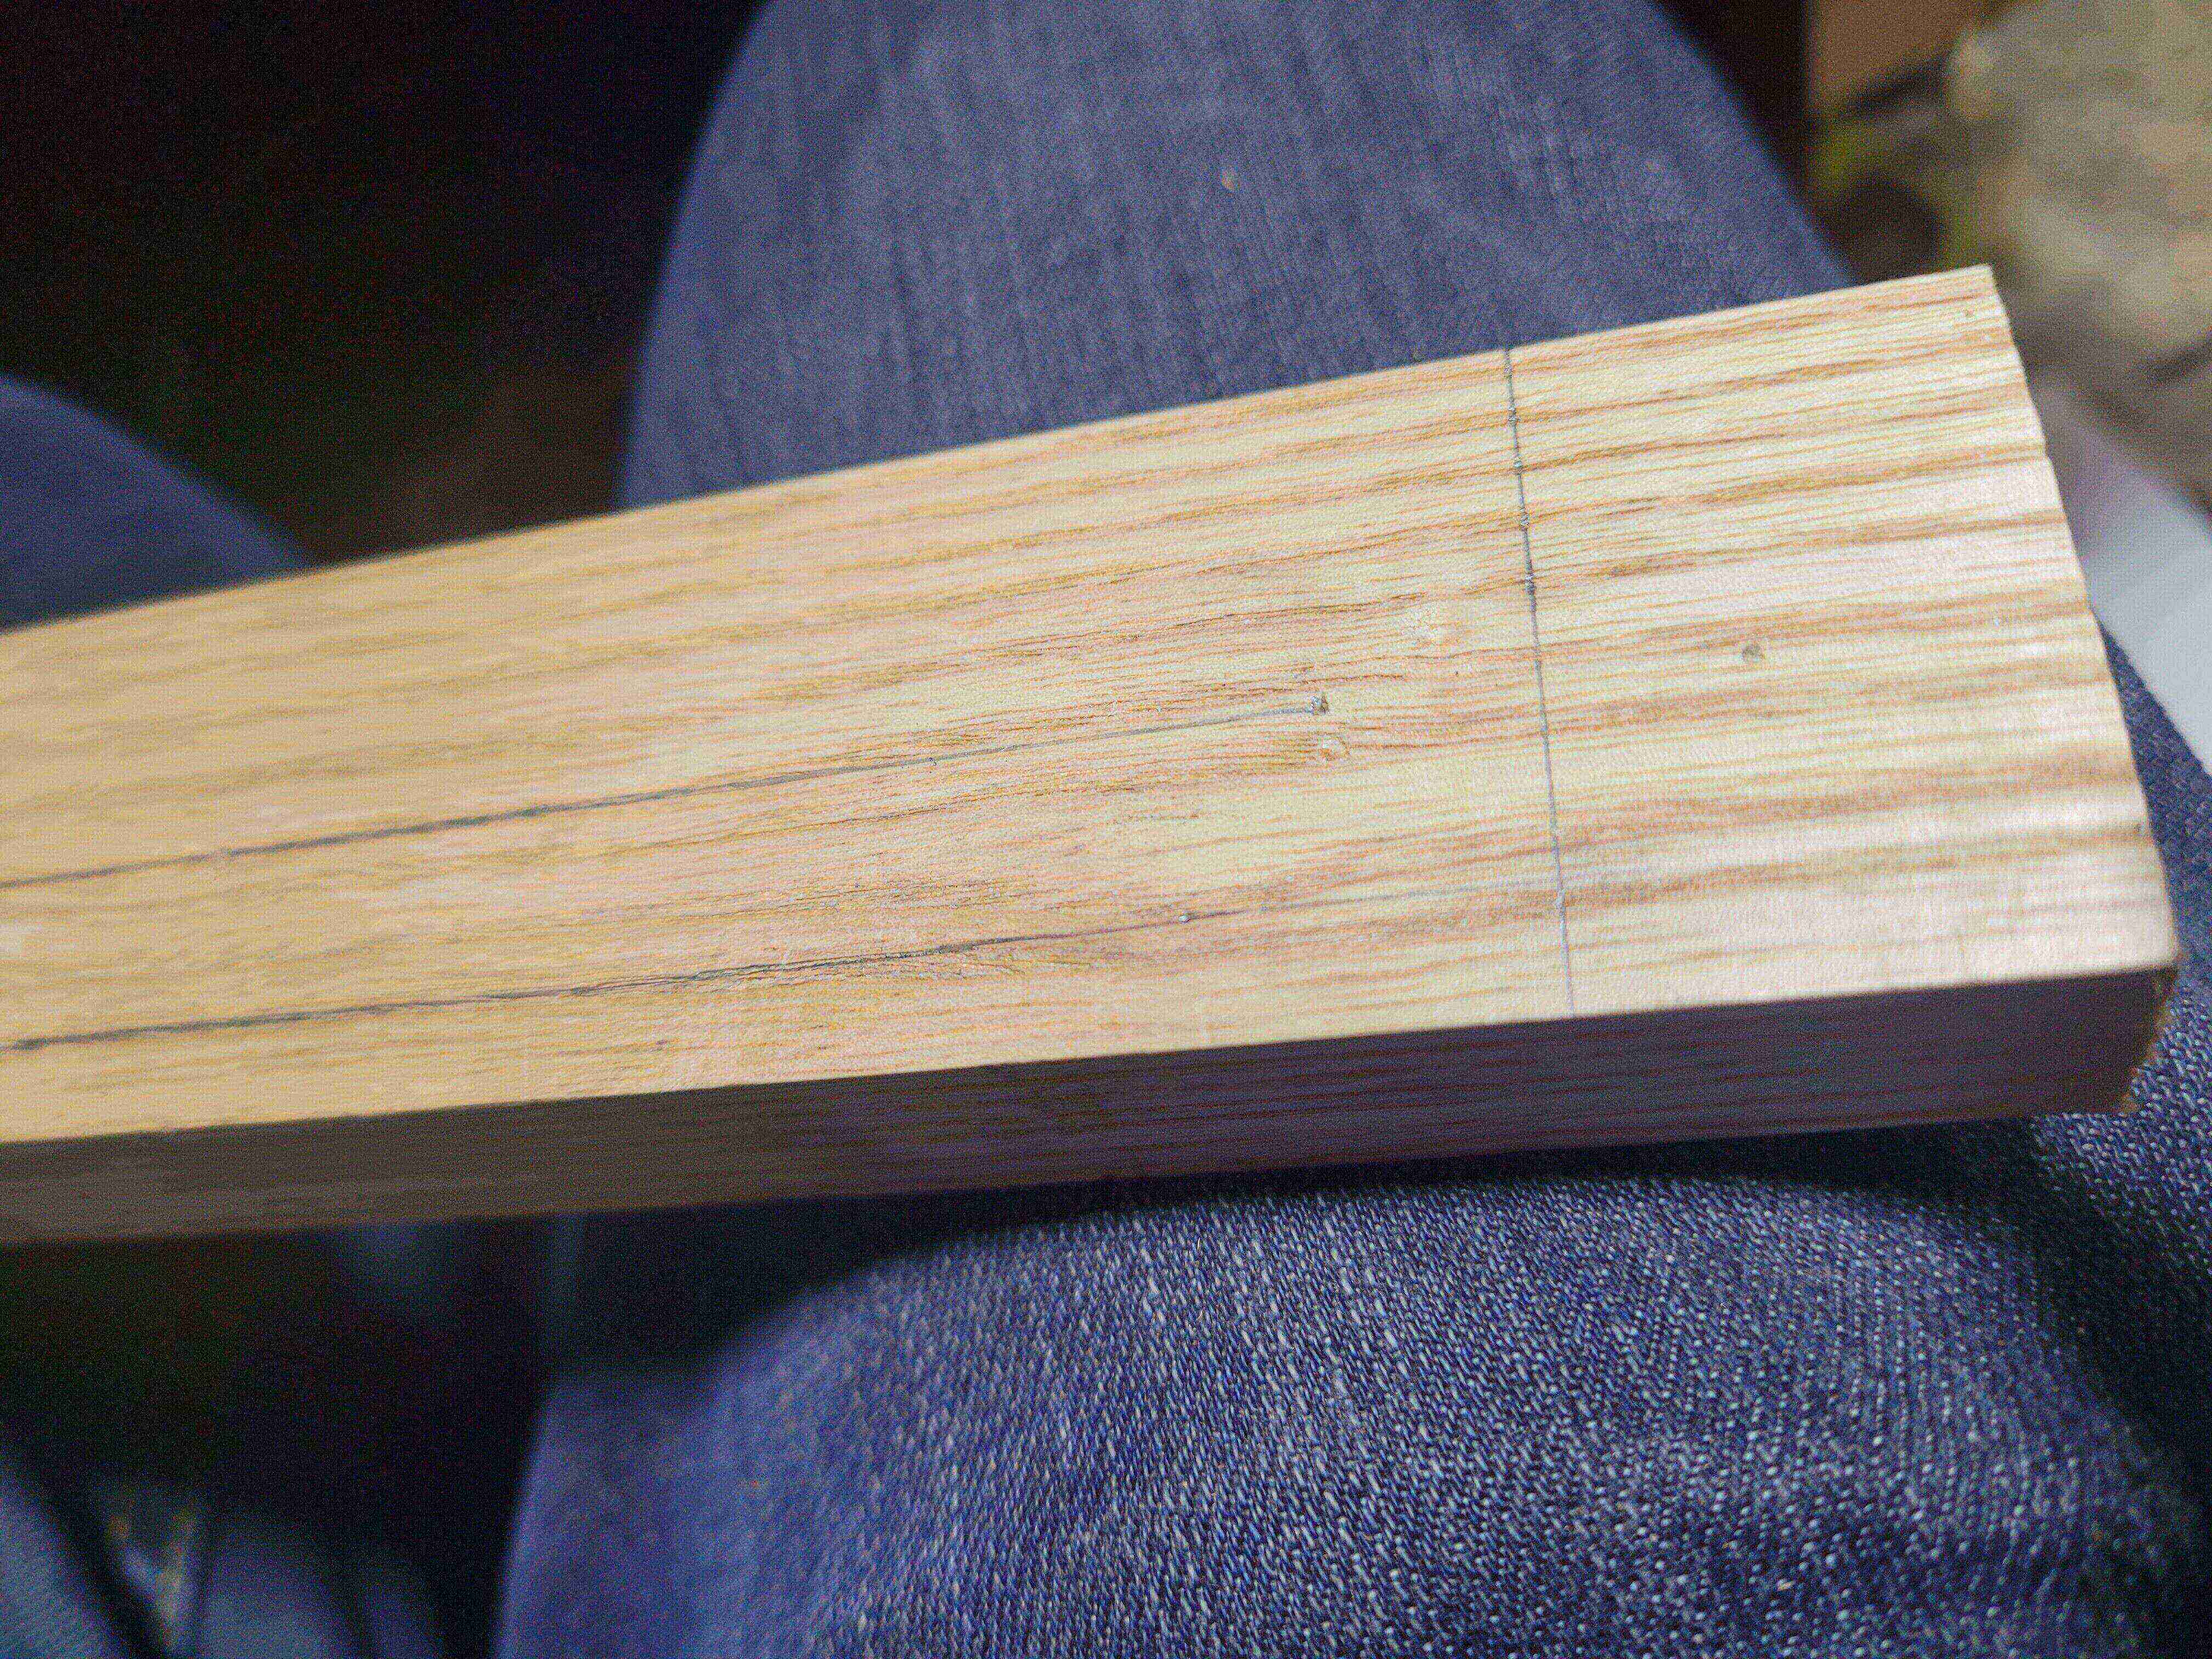
To lay it out, I used my combination square to mark off a line 1 inch from the bottom. This line just leaves some wood at the bottom to raise the first spokeshave far enough into the air. That measurement leaves a lot of space under the Preston, so if you are making this out of short pieces you can go a lot closer. Again, experiment with some scrap to find out how much.
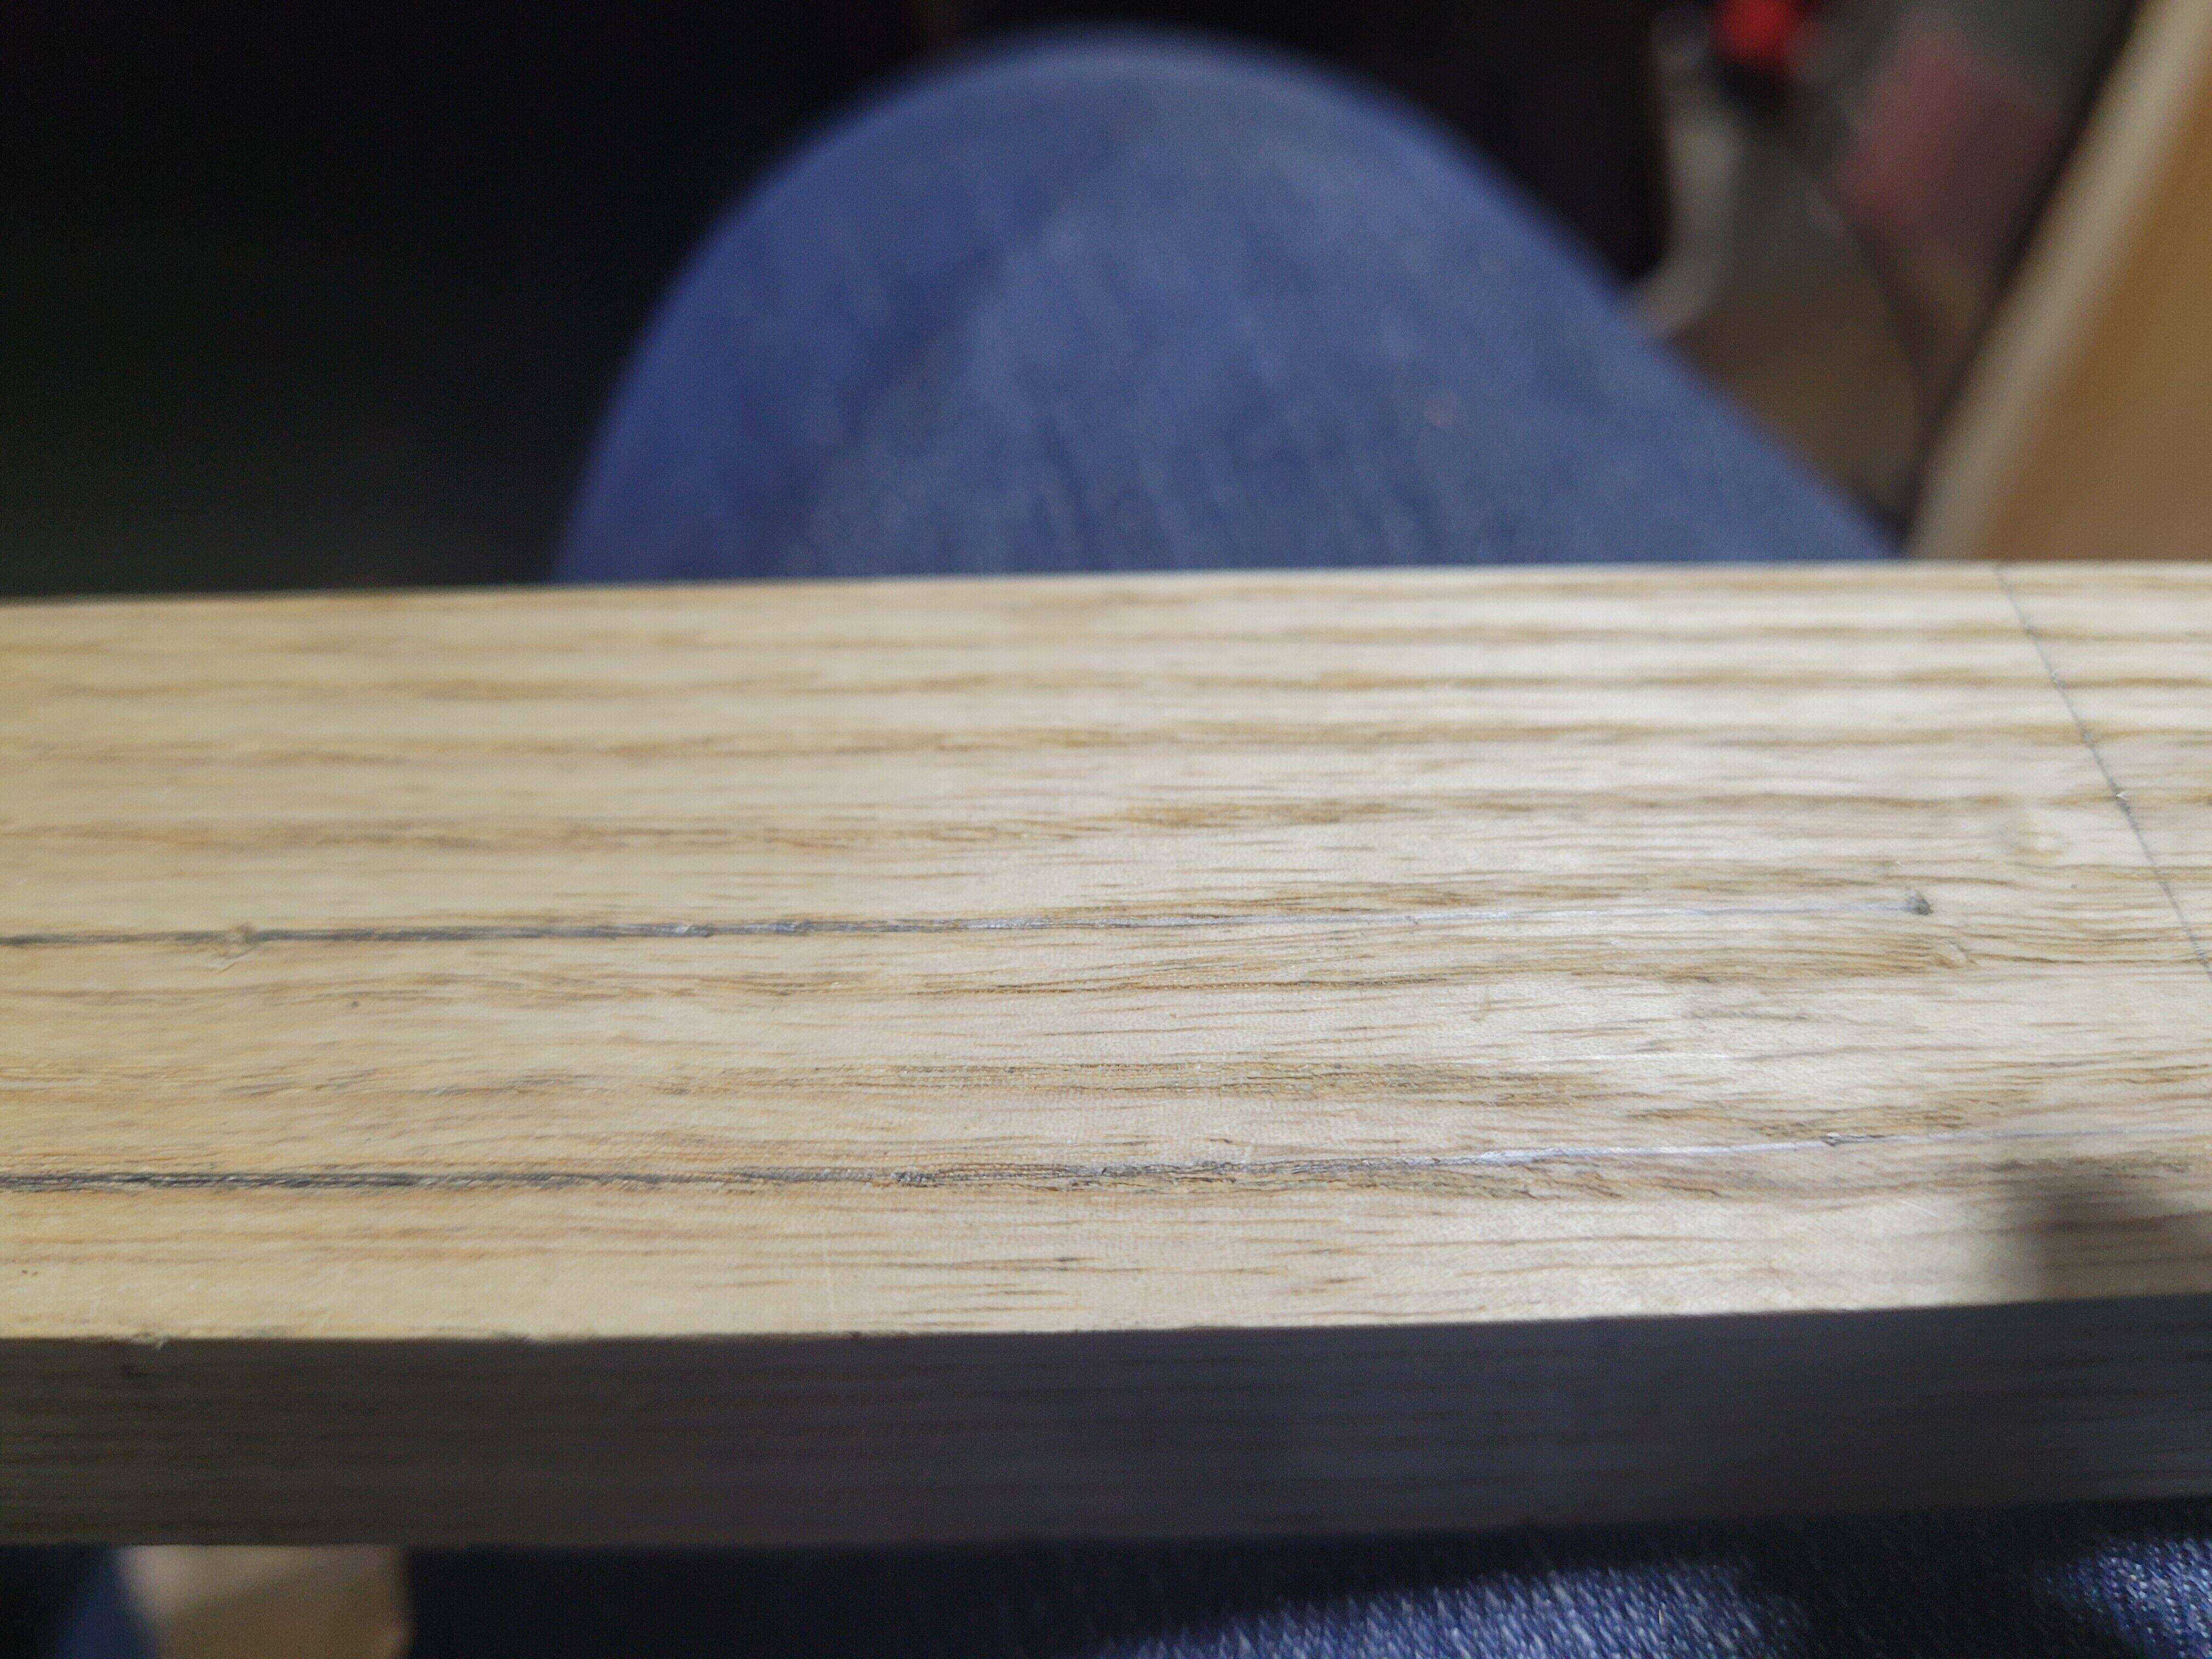
I marked a line 1/4 inch from the back of the piece all the way along. I placed down my drill bit, lined up one side with the 1/4 inch line, and the bottom with the 1 inch line. Then marked the centre of my first hole. I drew a line that matched that hole all the way along the piece. I set a dividers to 2 1/2 inches and walked down that line to mark the centres for all my holes. Nothing magic about 2 1/2 inches. It looked pleasing to me on the scrap I played with.
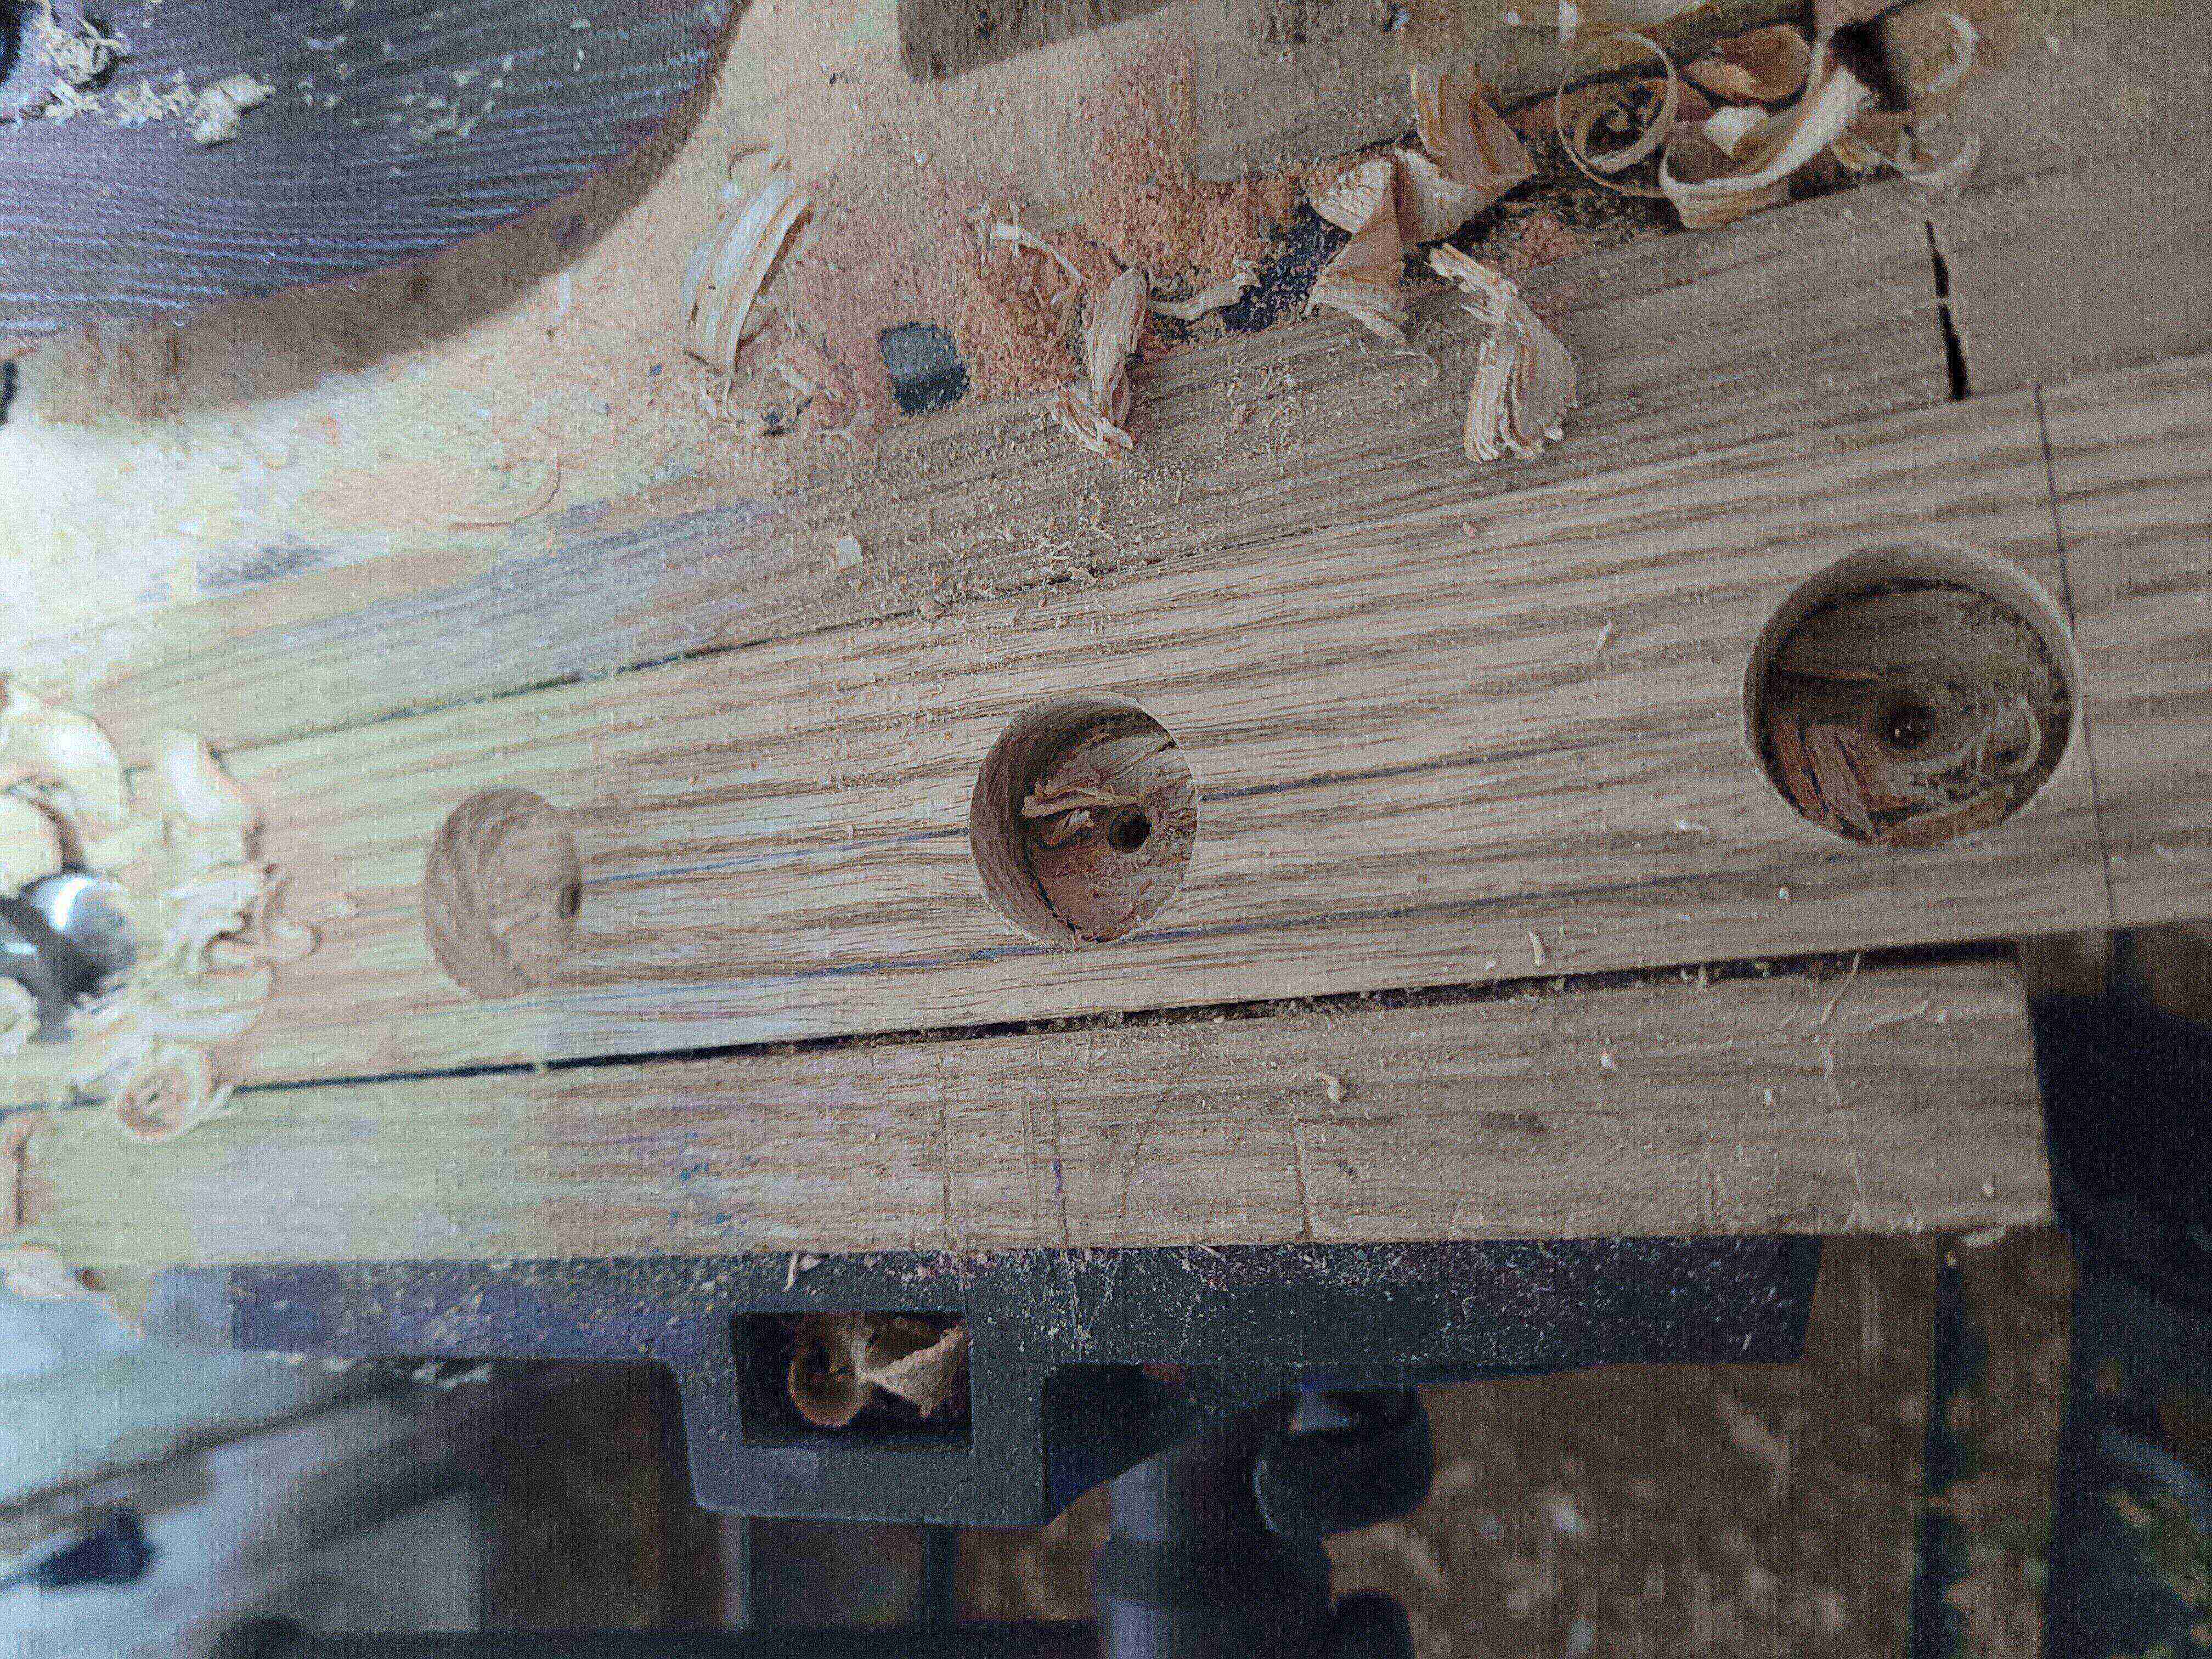
Drill your holes. If like me you use a brace and bit, stop drilling once the snail comes out the far side. This is normally done to stop breakout, but it serves a double purpose for this work. You take the second half of the spokeshave rack, line the two pieces up. Grab an awl or your drill bit and mark the drilling locations on the second piece from the snail holes on the first piece. Flip the piece over, and complete the hole. Grab the second half of the rack, and just drill where the marks you transferred from the first piece are. Now you have what look like two tea light holders.
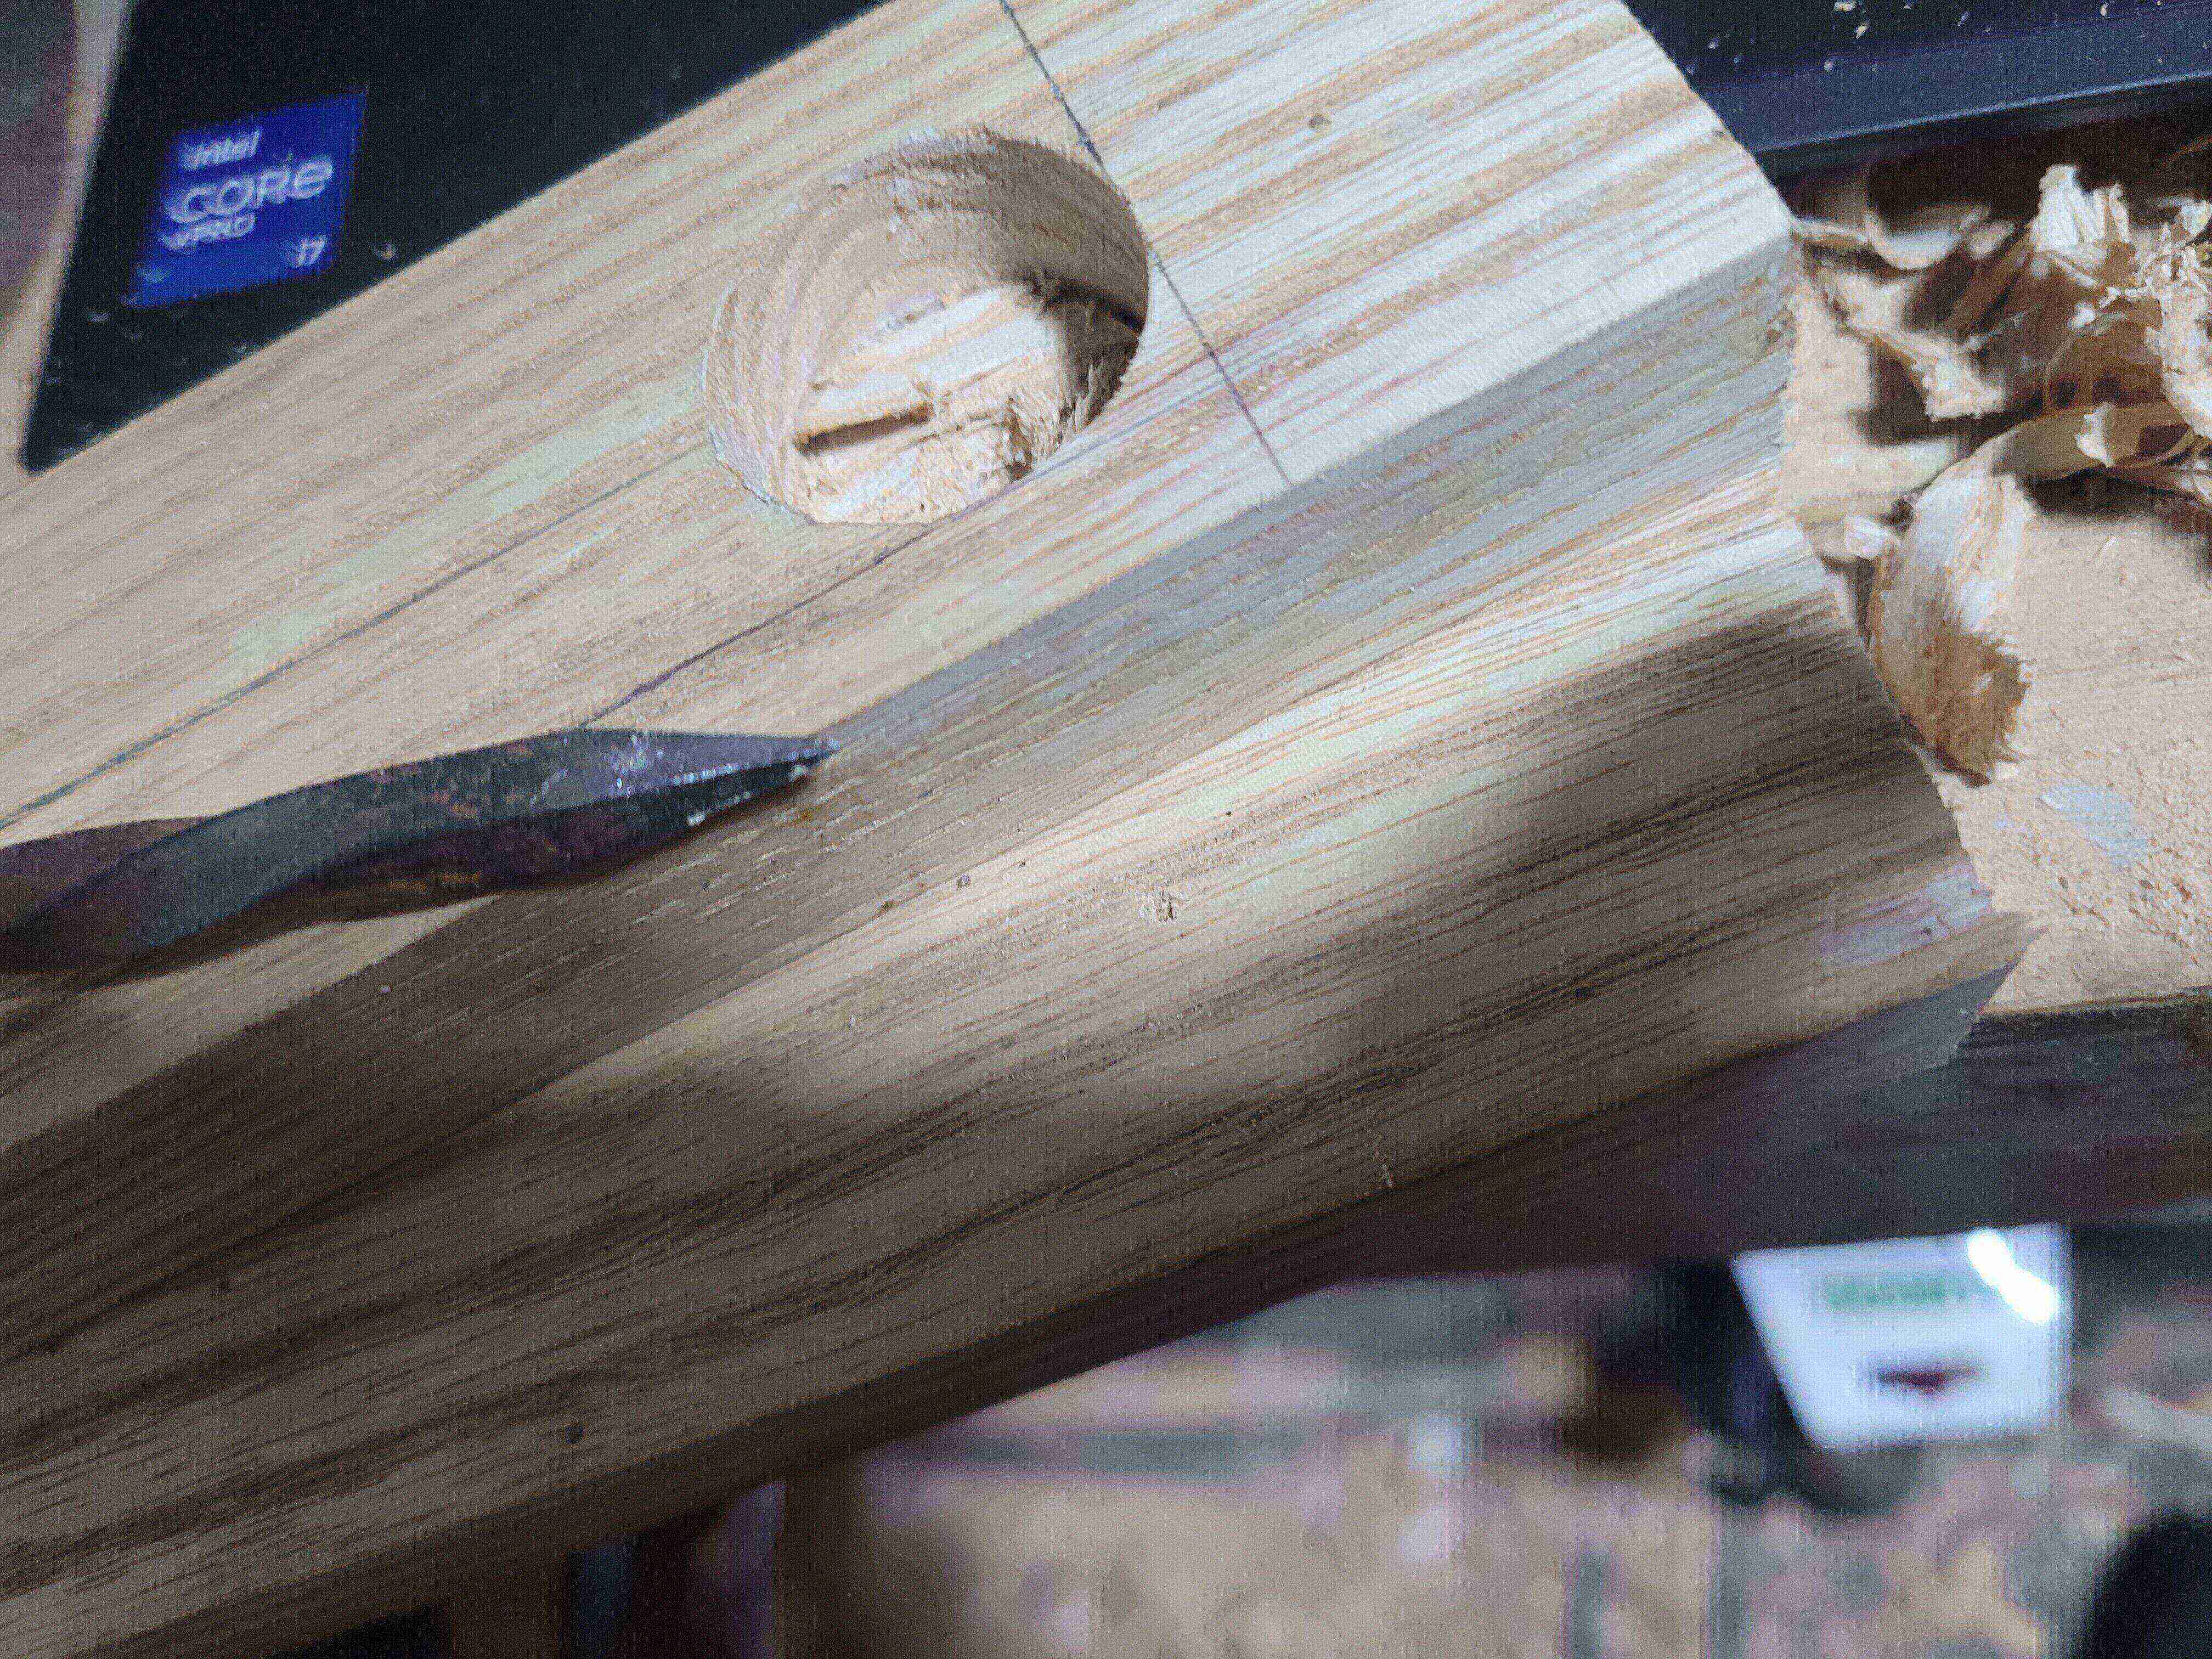
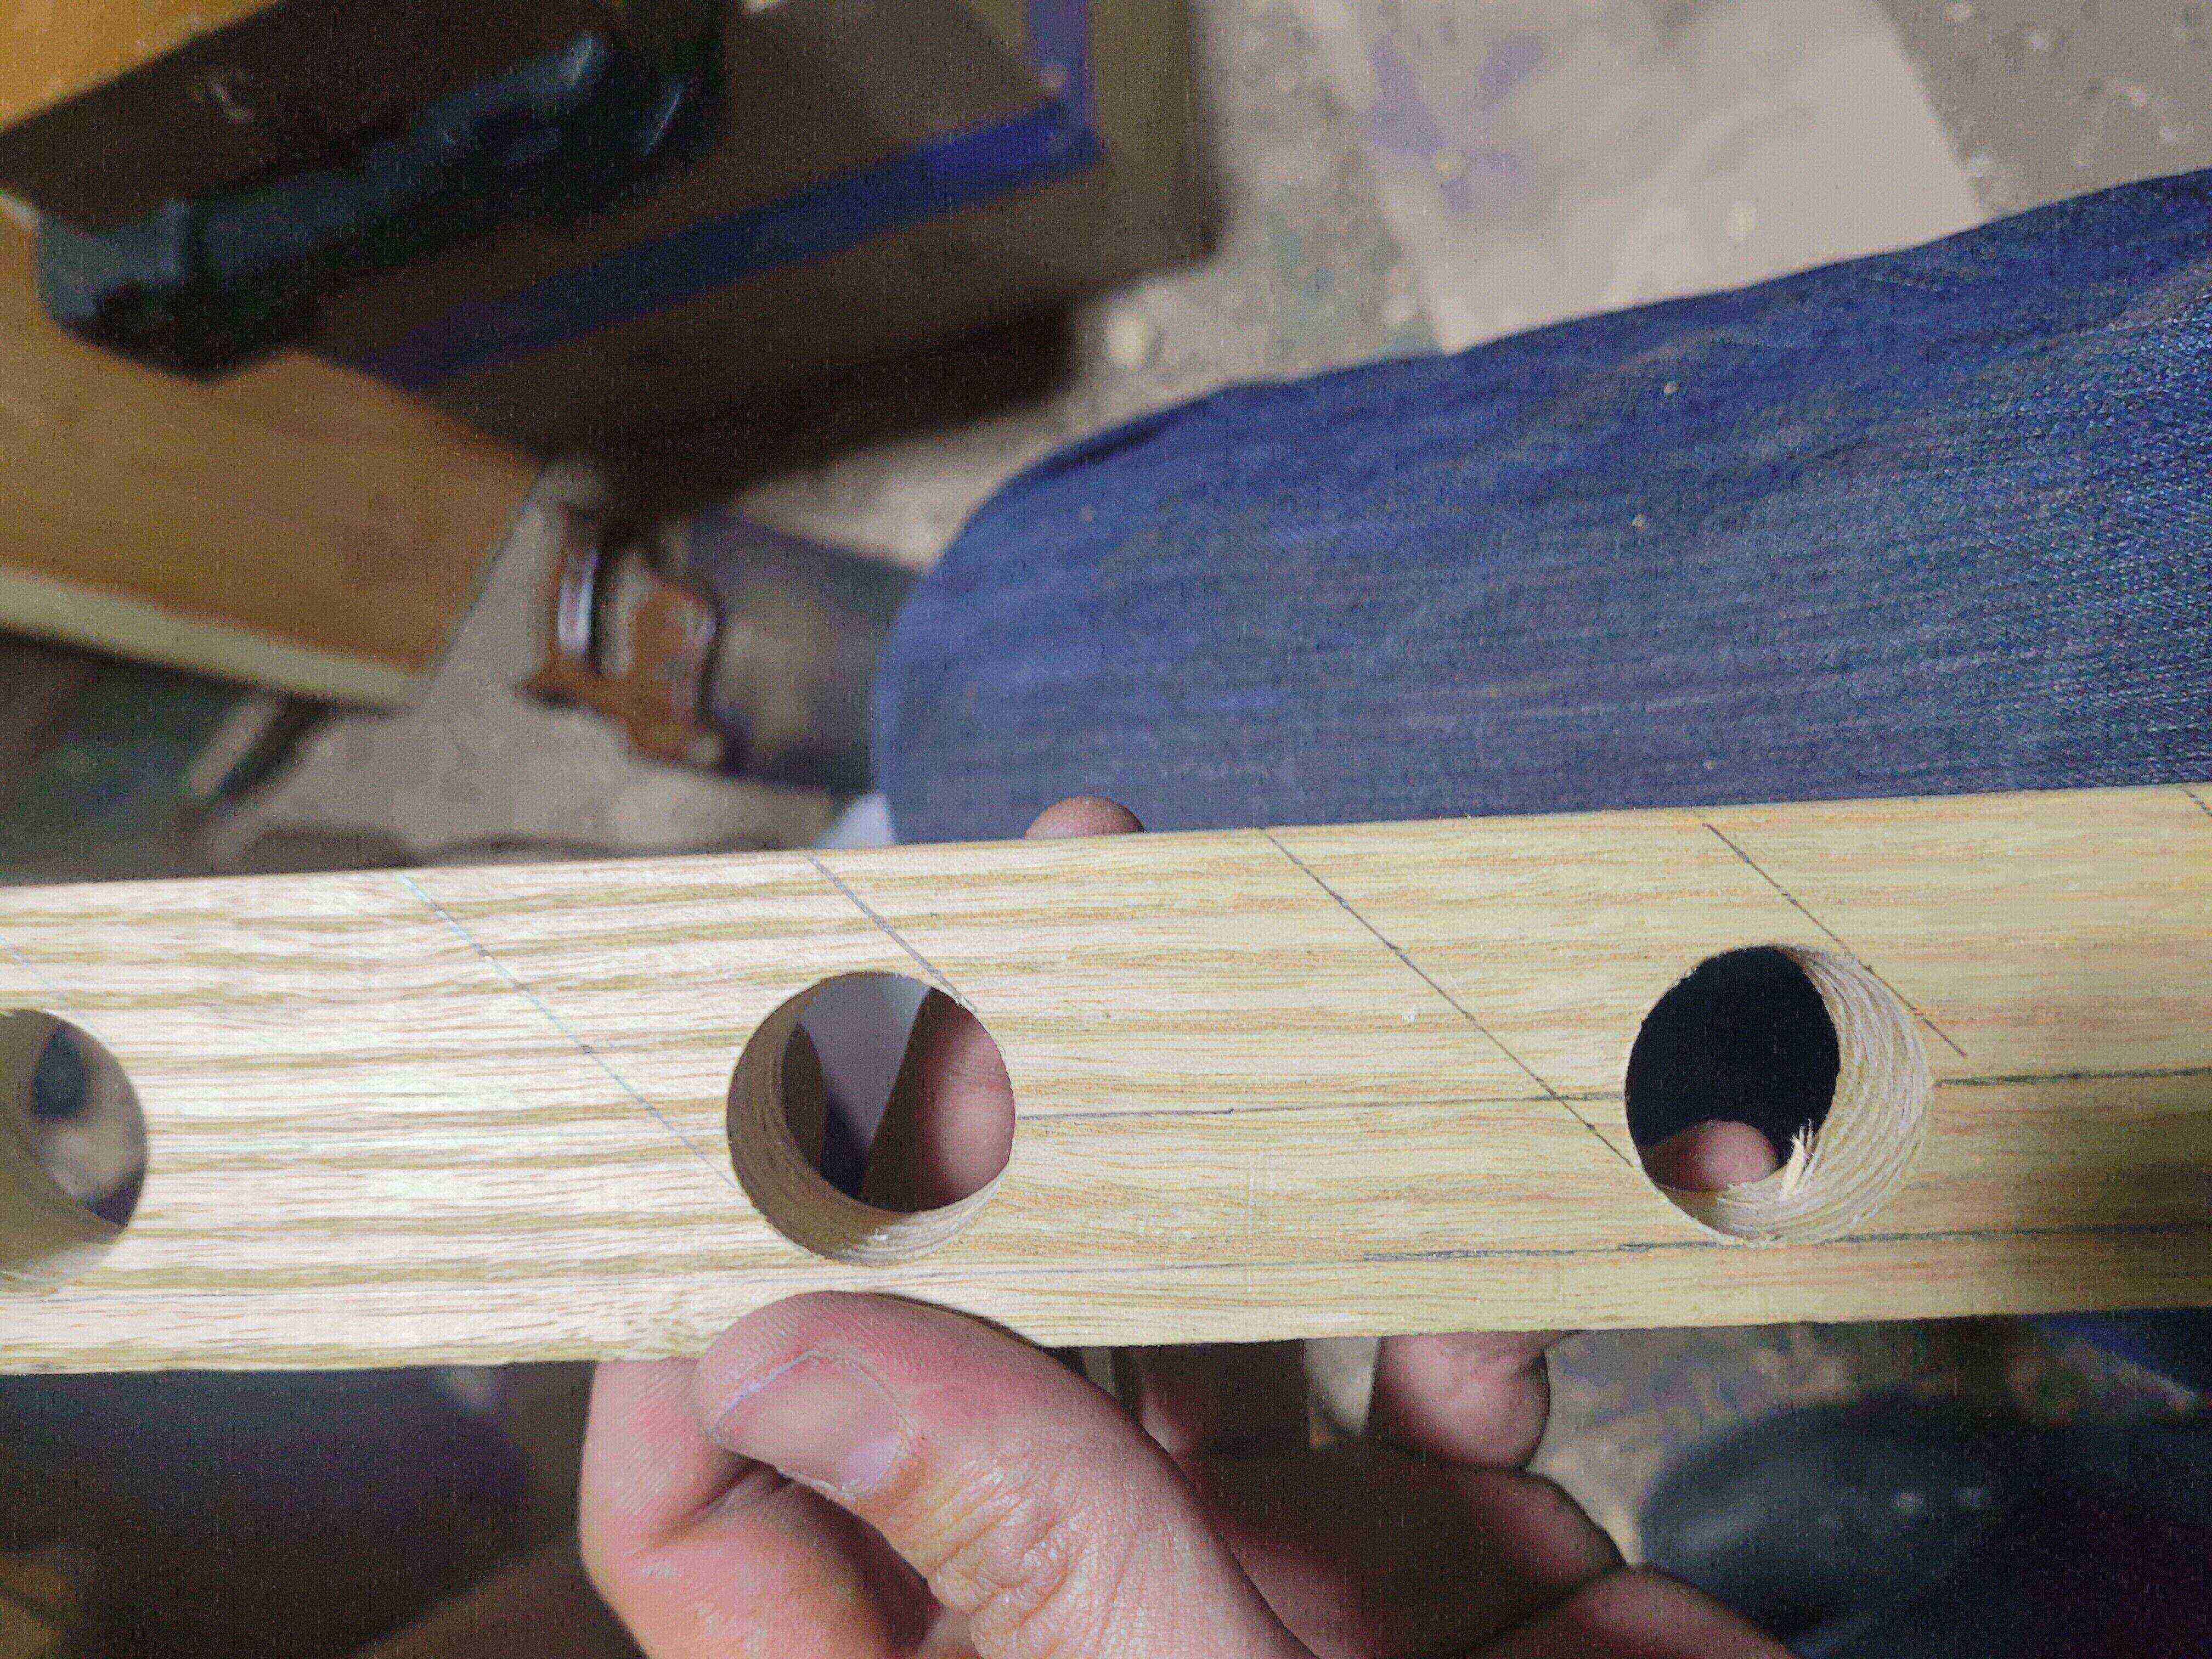
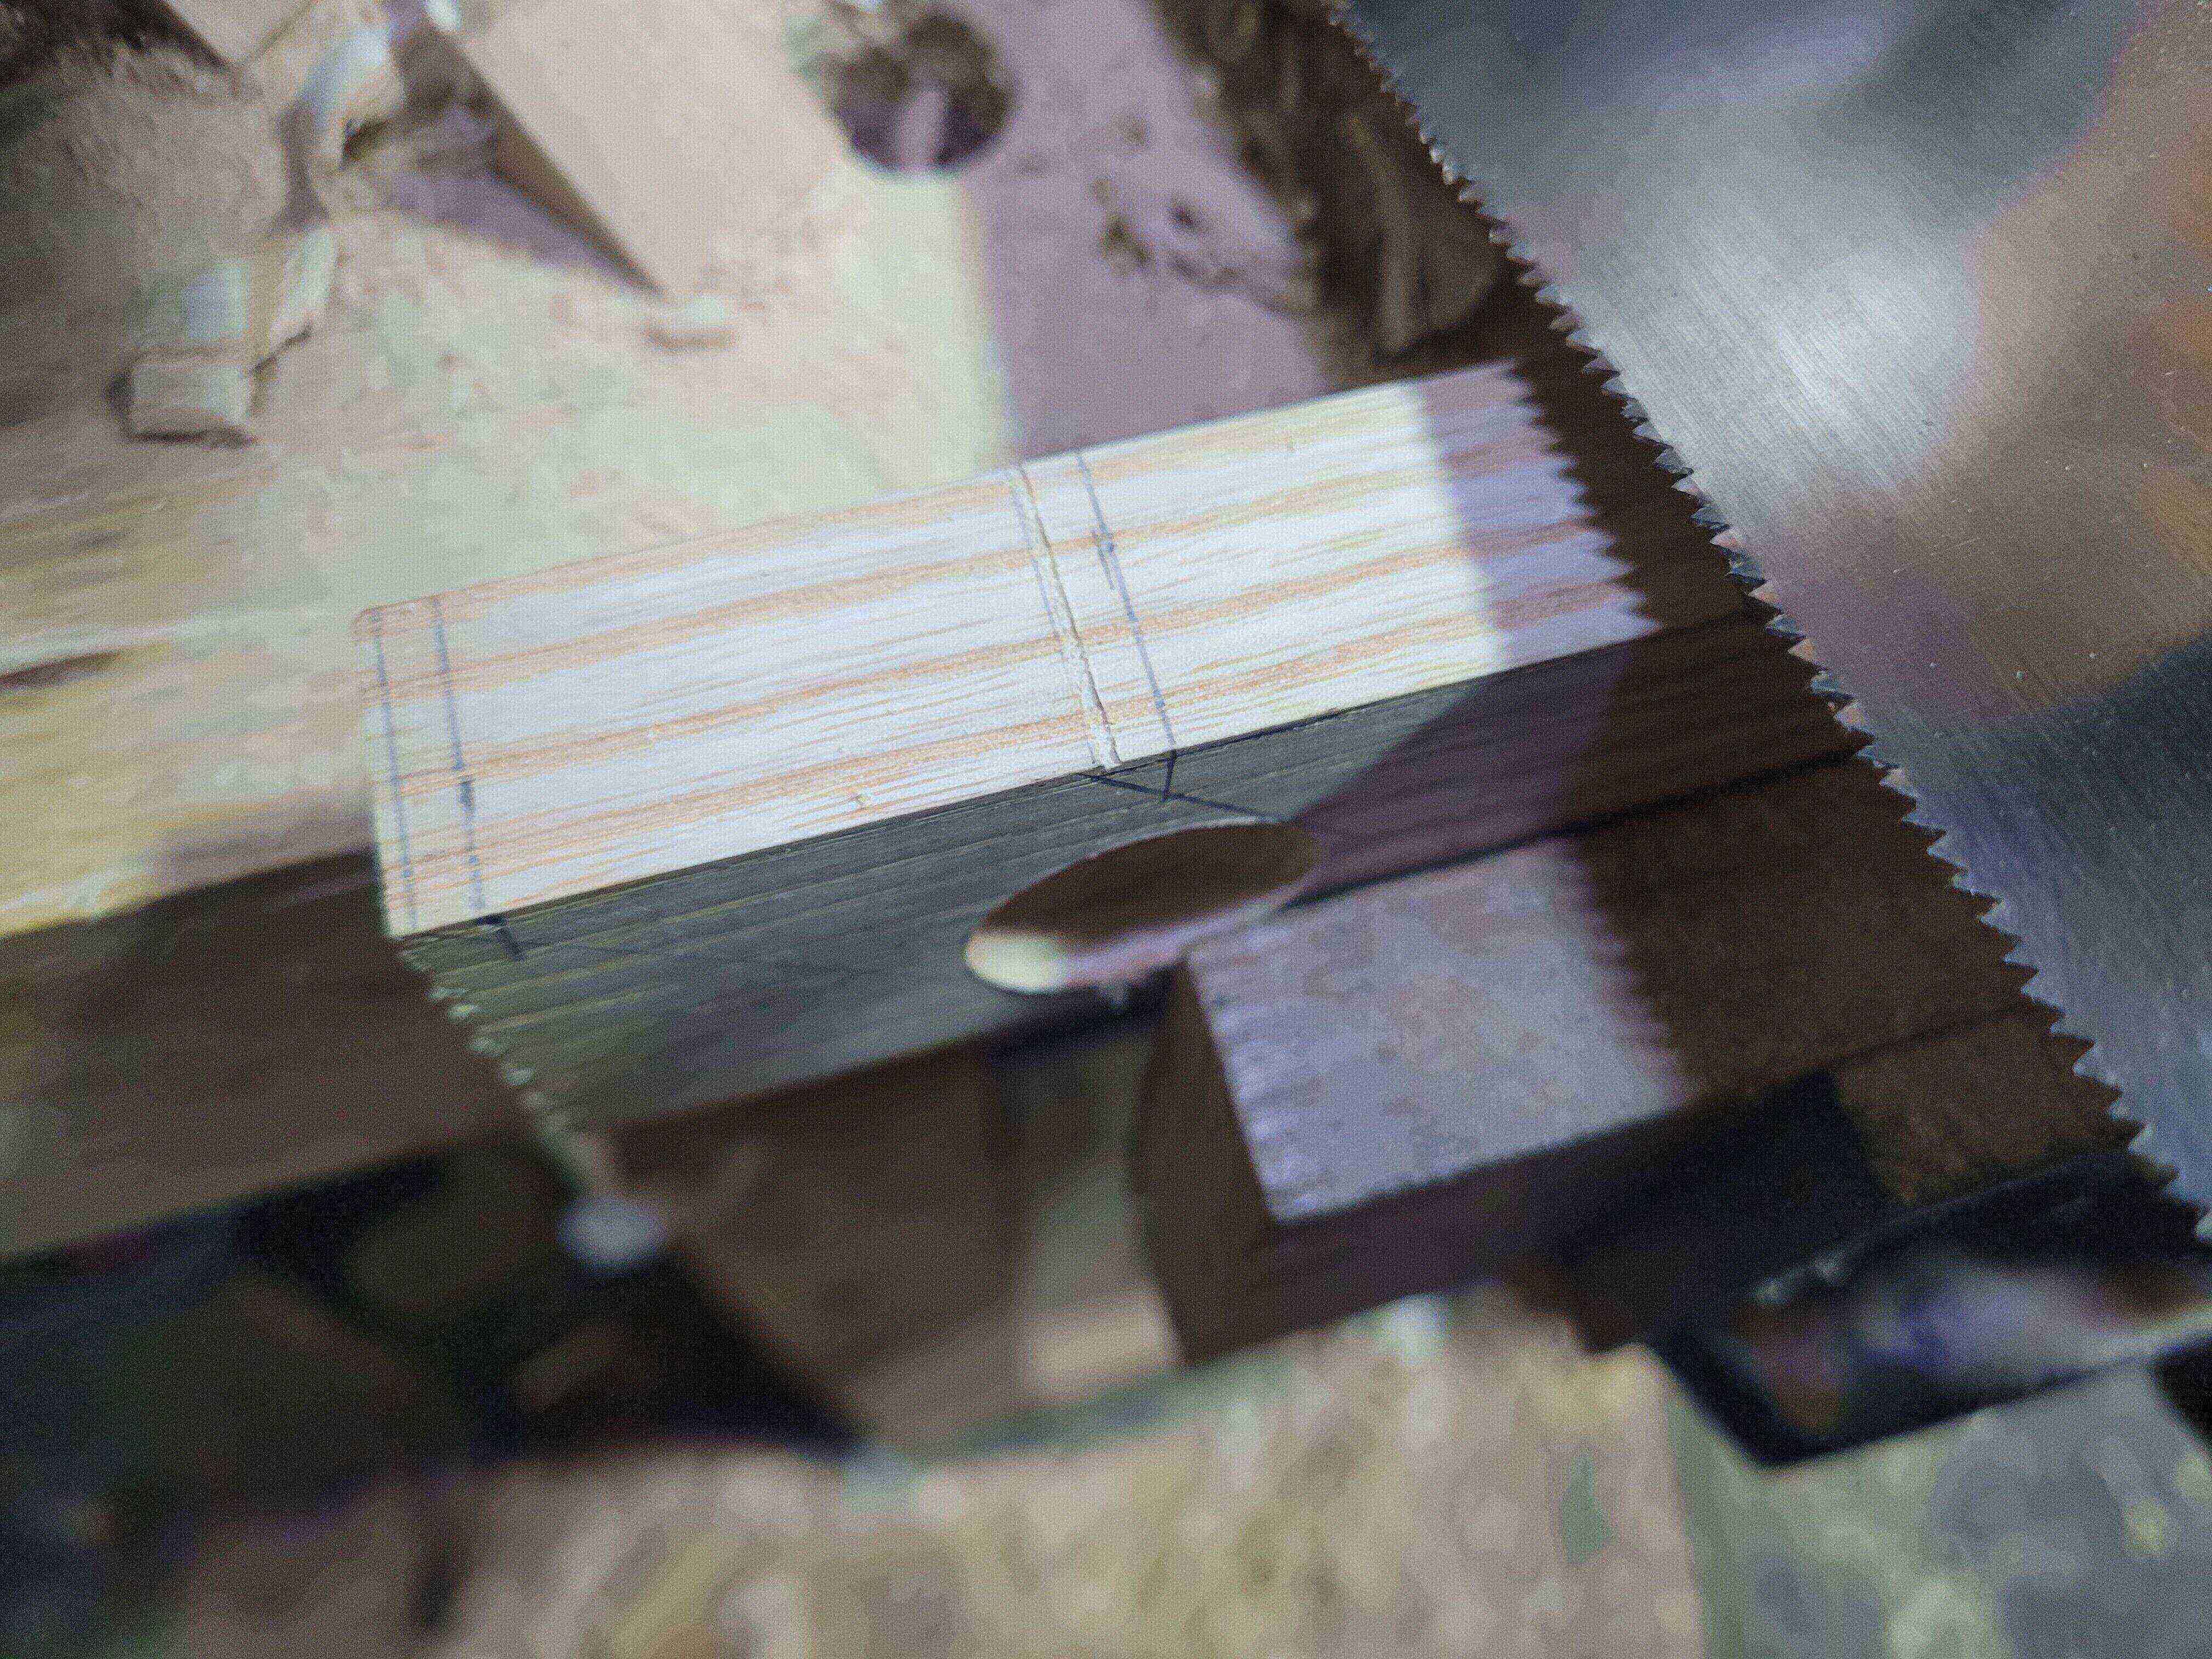
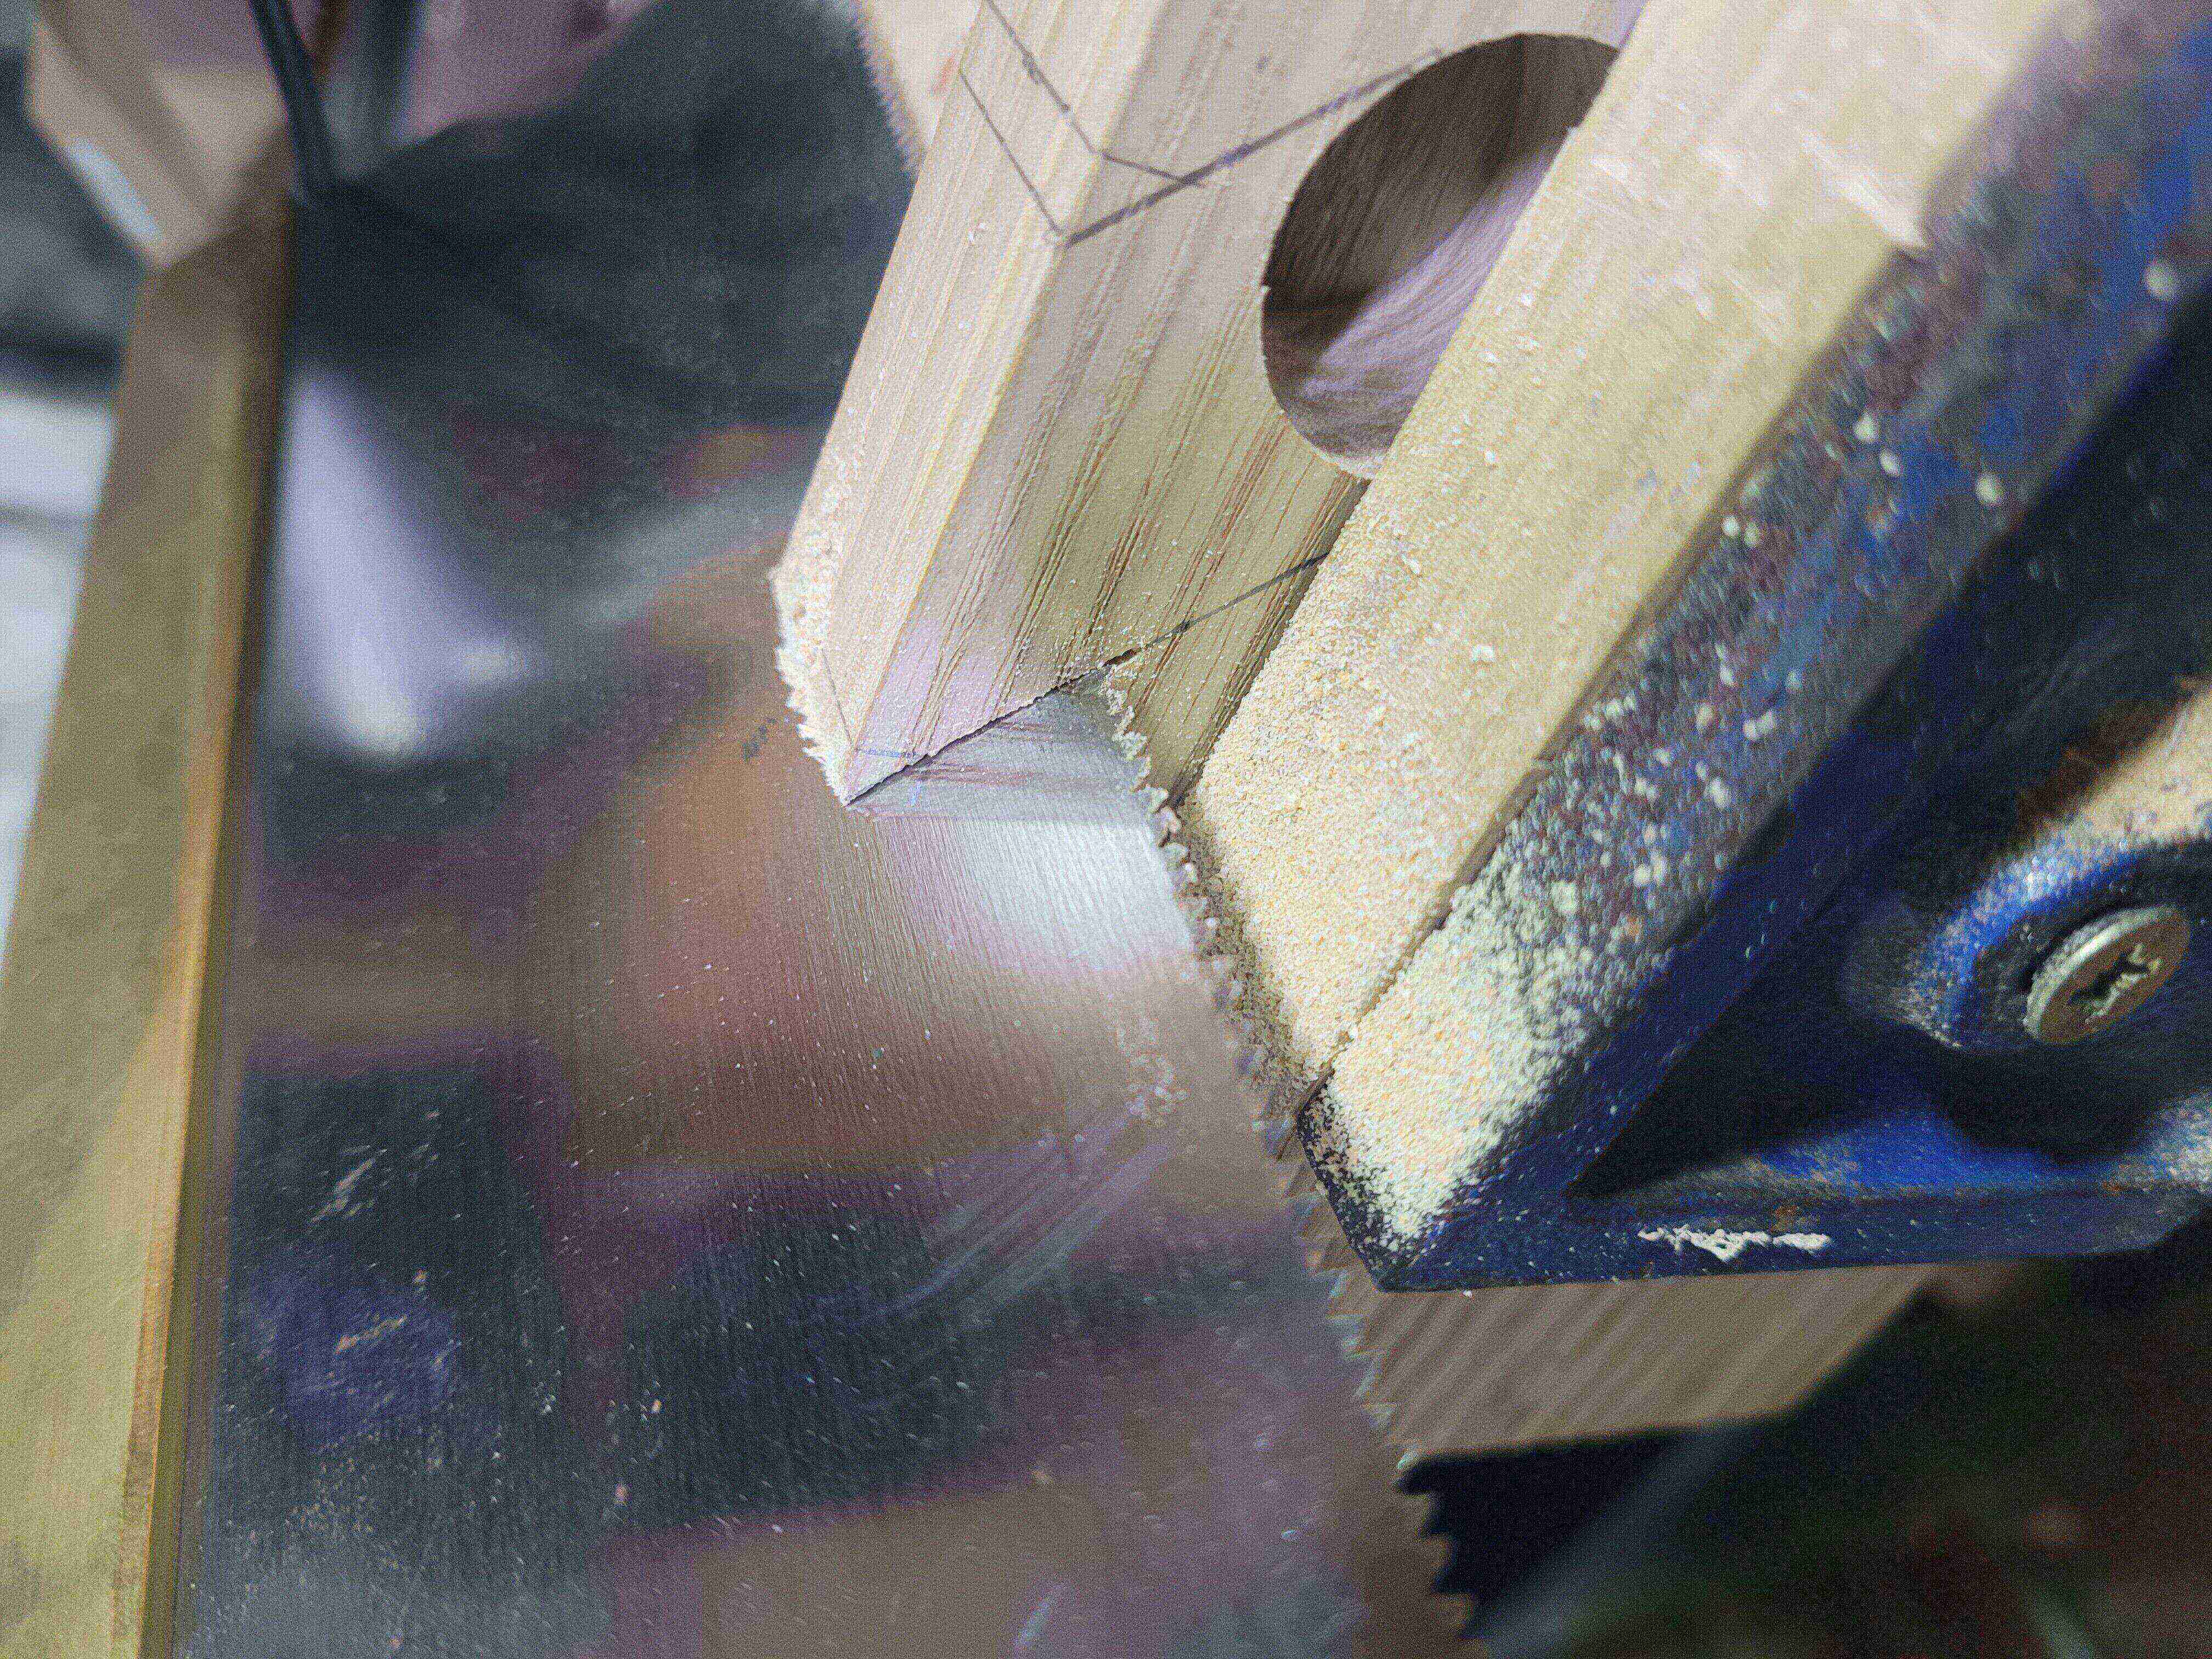
I took a combination square, used the 45 degree angle, and marked a line from the edge to where it hit the perimeter of each hole. That gives you a path from the front of the rack to the bottom of the hole at a 45 degree angle. Carry the lines over to the front of the rack. If we saw these as they are, you will have a pretty sharp point at the bottom of each rack entry point. I mark back 1/8th down from the bottom of each one, and strike a line square across. I’ll saw that much off to blunt the tips.
Sawing time. A cross-cut saw is nice, but any saw will do in a pinch. I saw just a tiny bit straight down on the line to get a kerf, then tilt the saw sighting down the line, and saw down until I hit the hole. Best to saw the tops first, as there is more to saw, and it gets a bit unstable when only one half is attached. Once you have sawed out a few the work piece begins to feel very flexible and weak. I didn’t have any snap, but you may wish to support it well in the vice while you work.
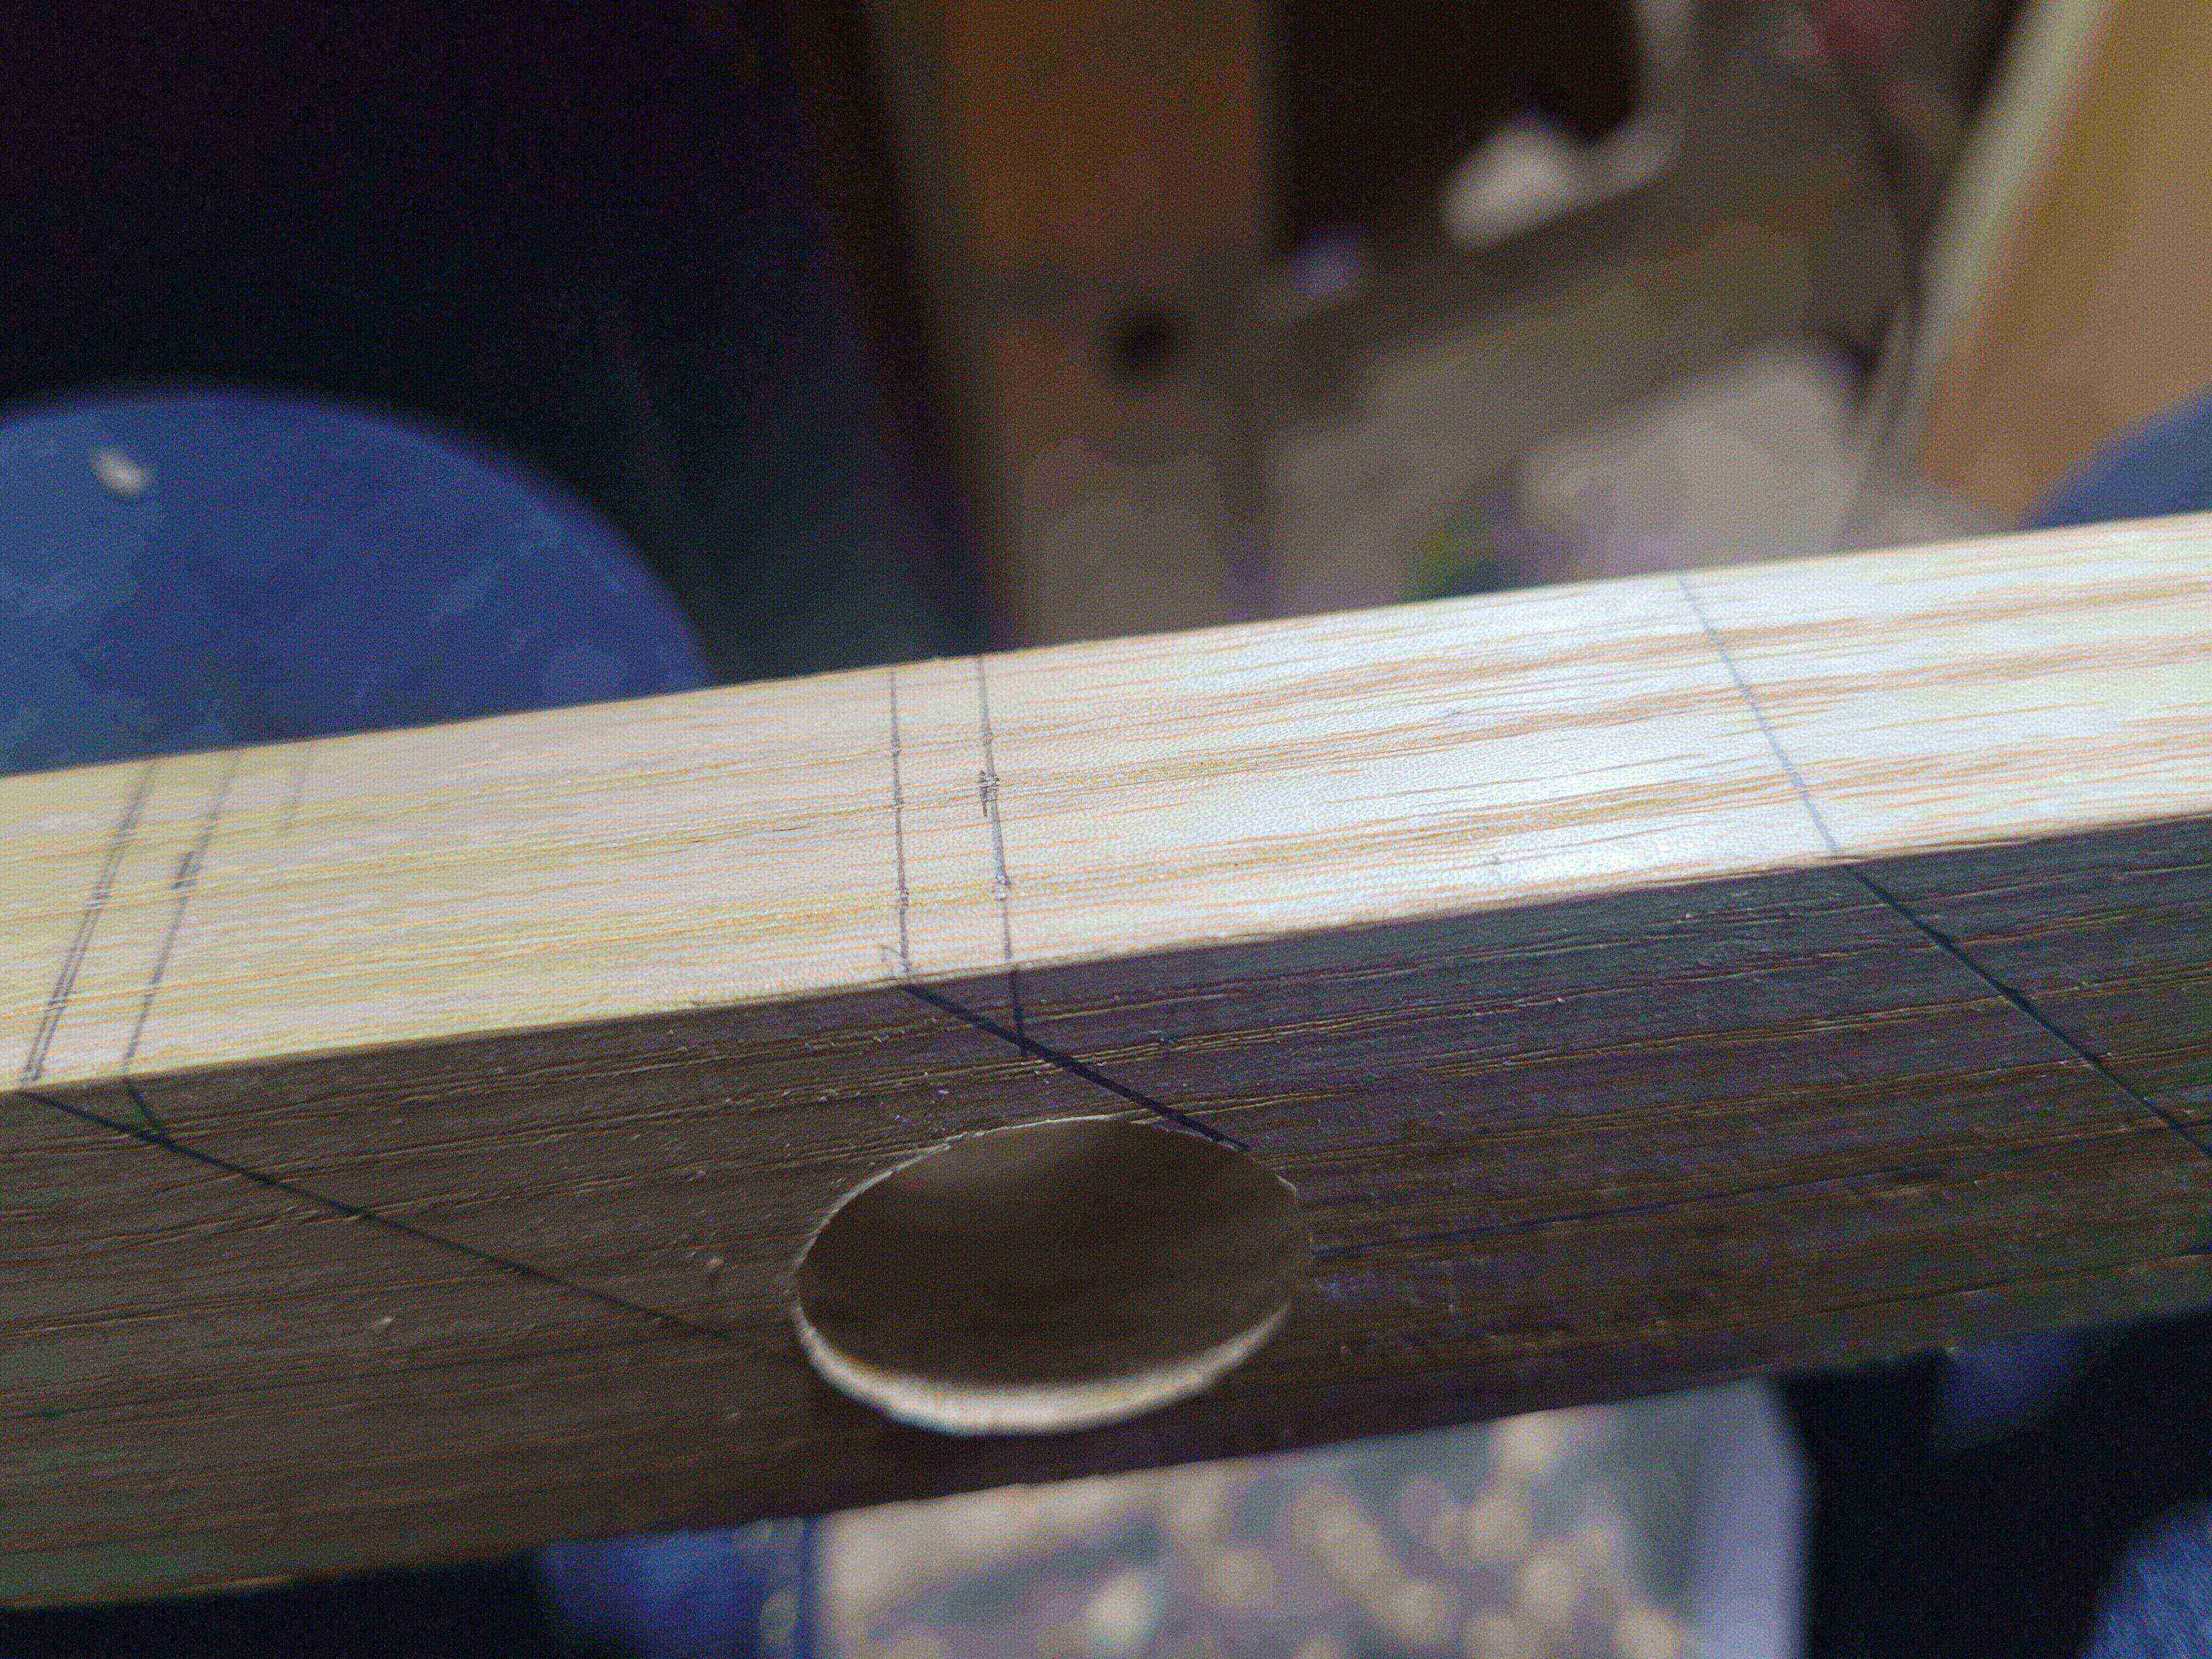
Your saw cut will probably not line up perfectly with the hole and leave you with a little hump. That is no big deal, we will clean it up in a bit. Saw off the part we marked to blunt the bottom entry. You don’t need to panic if you do not make a perfect 90 degree cut. No one will ever notice.
Now to clean up the saw marks. I have a nice medium small model makers rasp. It takes about 30 seconds to work off the humps with it. If you don’t have that, wrap some 120 grit sandpaper around a Sharpie or Dowel, and it will do the same job.
Once I’m done with the rasp, I switched to 180 grit Abranet (just a sandpaper alternative, it lasts longer, but its more expensive), normal 180 grit will do. Clean up the hole surfaces, and then break all the edges with it. You are now done. I have not put any finish on my racks, but I might get around to putting some shellac on. They look great and do their job for now without.
It is a nice project, and a quick job for an evening. I made two. One out of some scrap Beech, and one out of ash. If I ever build a cabinet for the shaves to live in, I can drill some holes and screw them in. See below for photos of the process step by step and the finished rack.
The workpiece laided out. The left side is the back of the rack. The bottom line is 1 inch up. The left line is 1/4 inch from the back. The line sort of in the centre was created by lining up the sides of my drill bit with the bottom line and the back line and then using snail to mark a hole. Then I traced the line all the way along with my combination square.
Once the middle line was there. I set a dividers to 2 1/2 inches and walked along the line punching the next 3 holes.
Then I drilled all 4 holes, stopping when the snail went through.
Before I finished the holes. I lined up the other side of the rack under the partially drilled side, and used an awl to mark the drilling locations on the second piece.
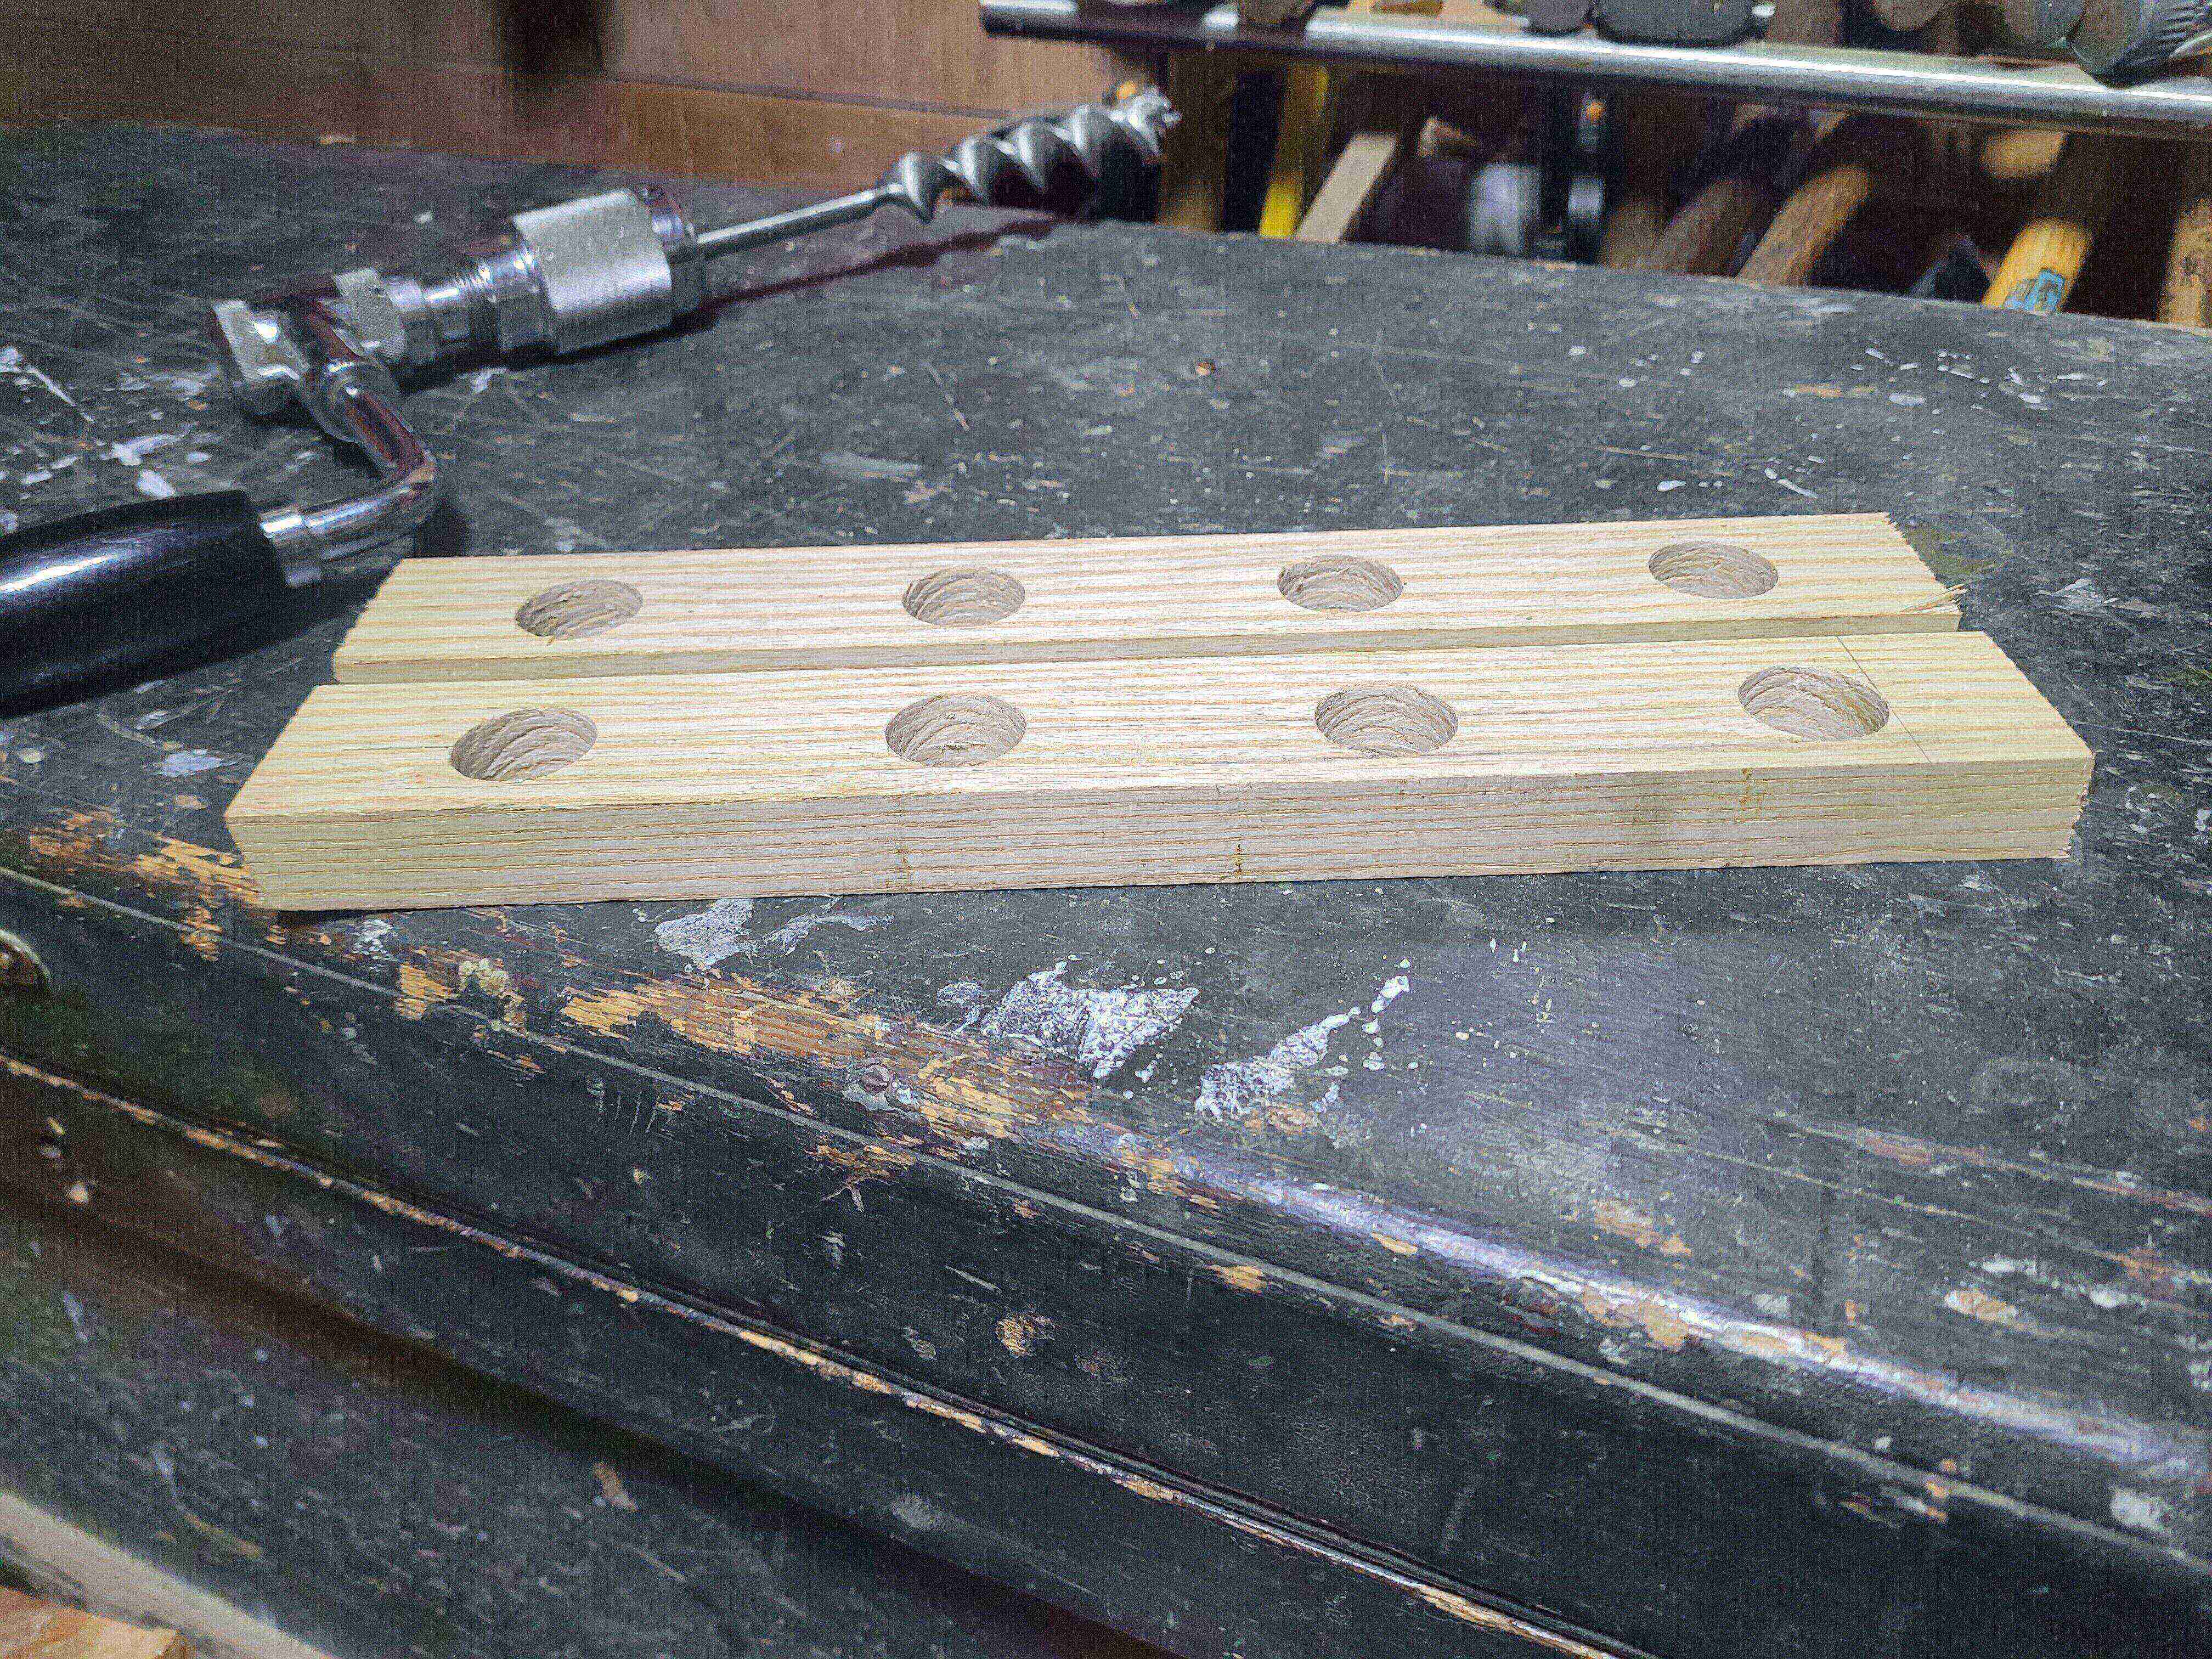
Once you have both pieces drilled you wind up with something like a pair of tea light holders.
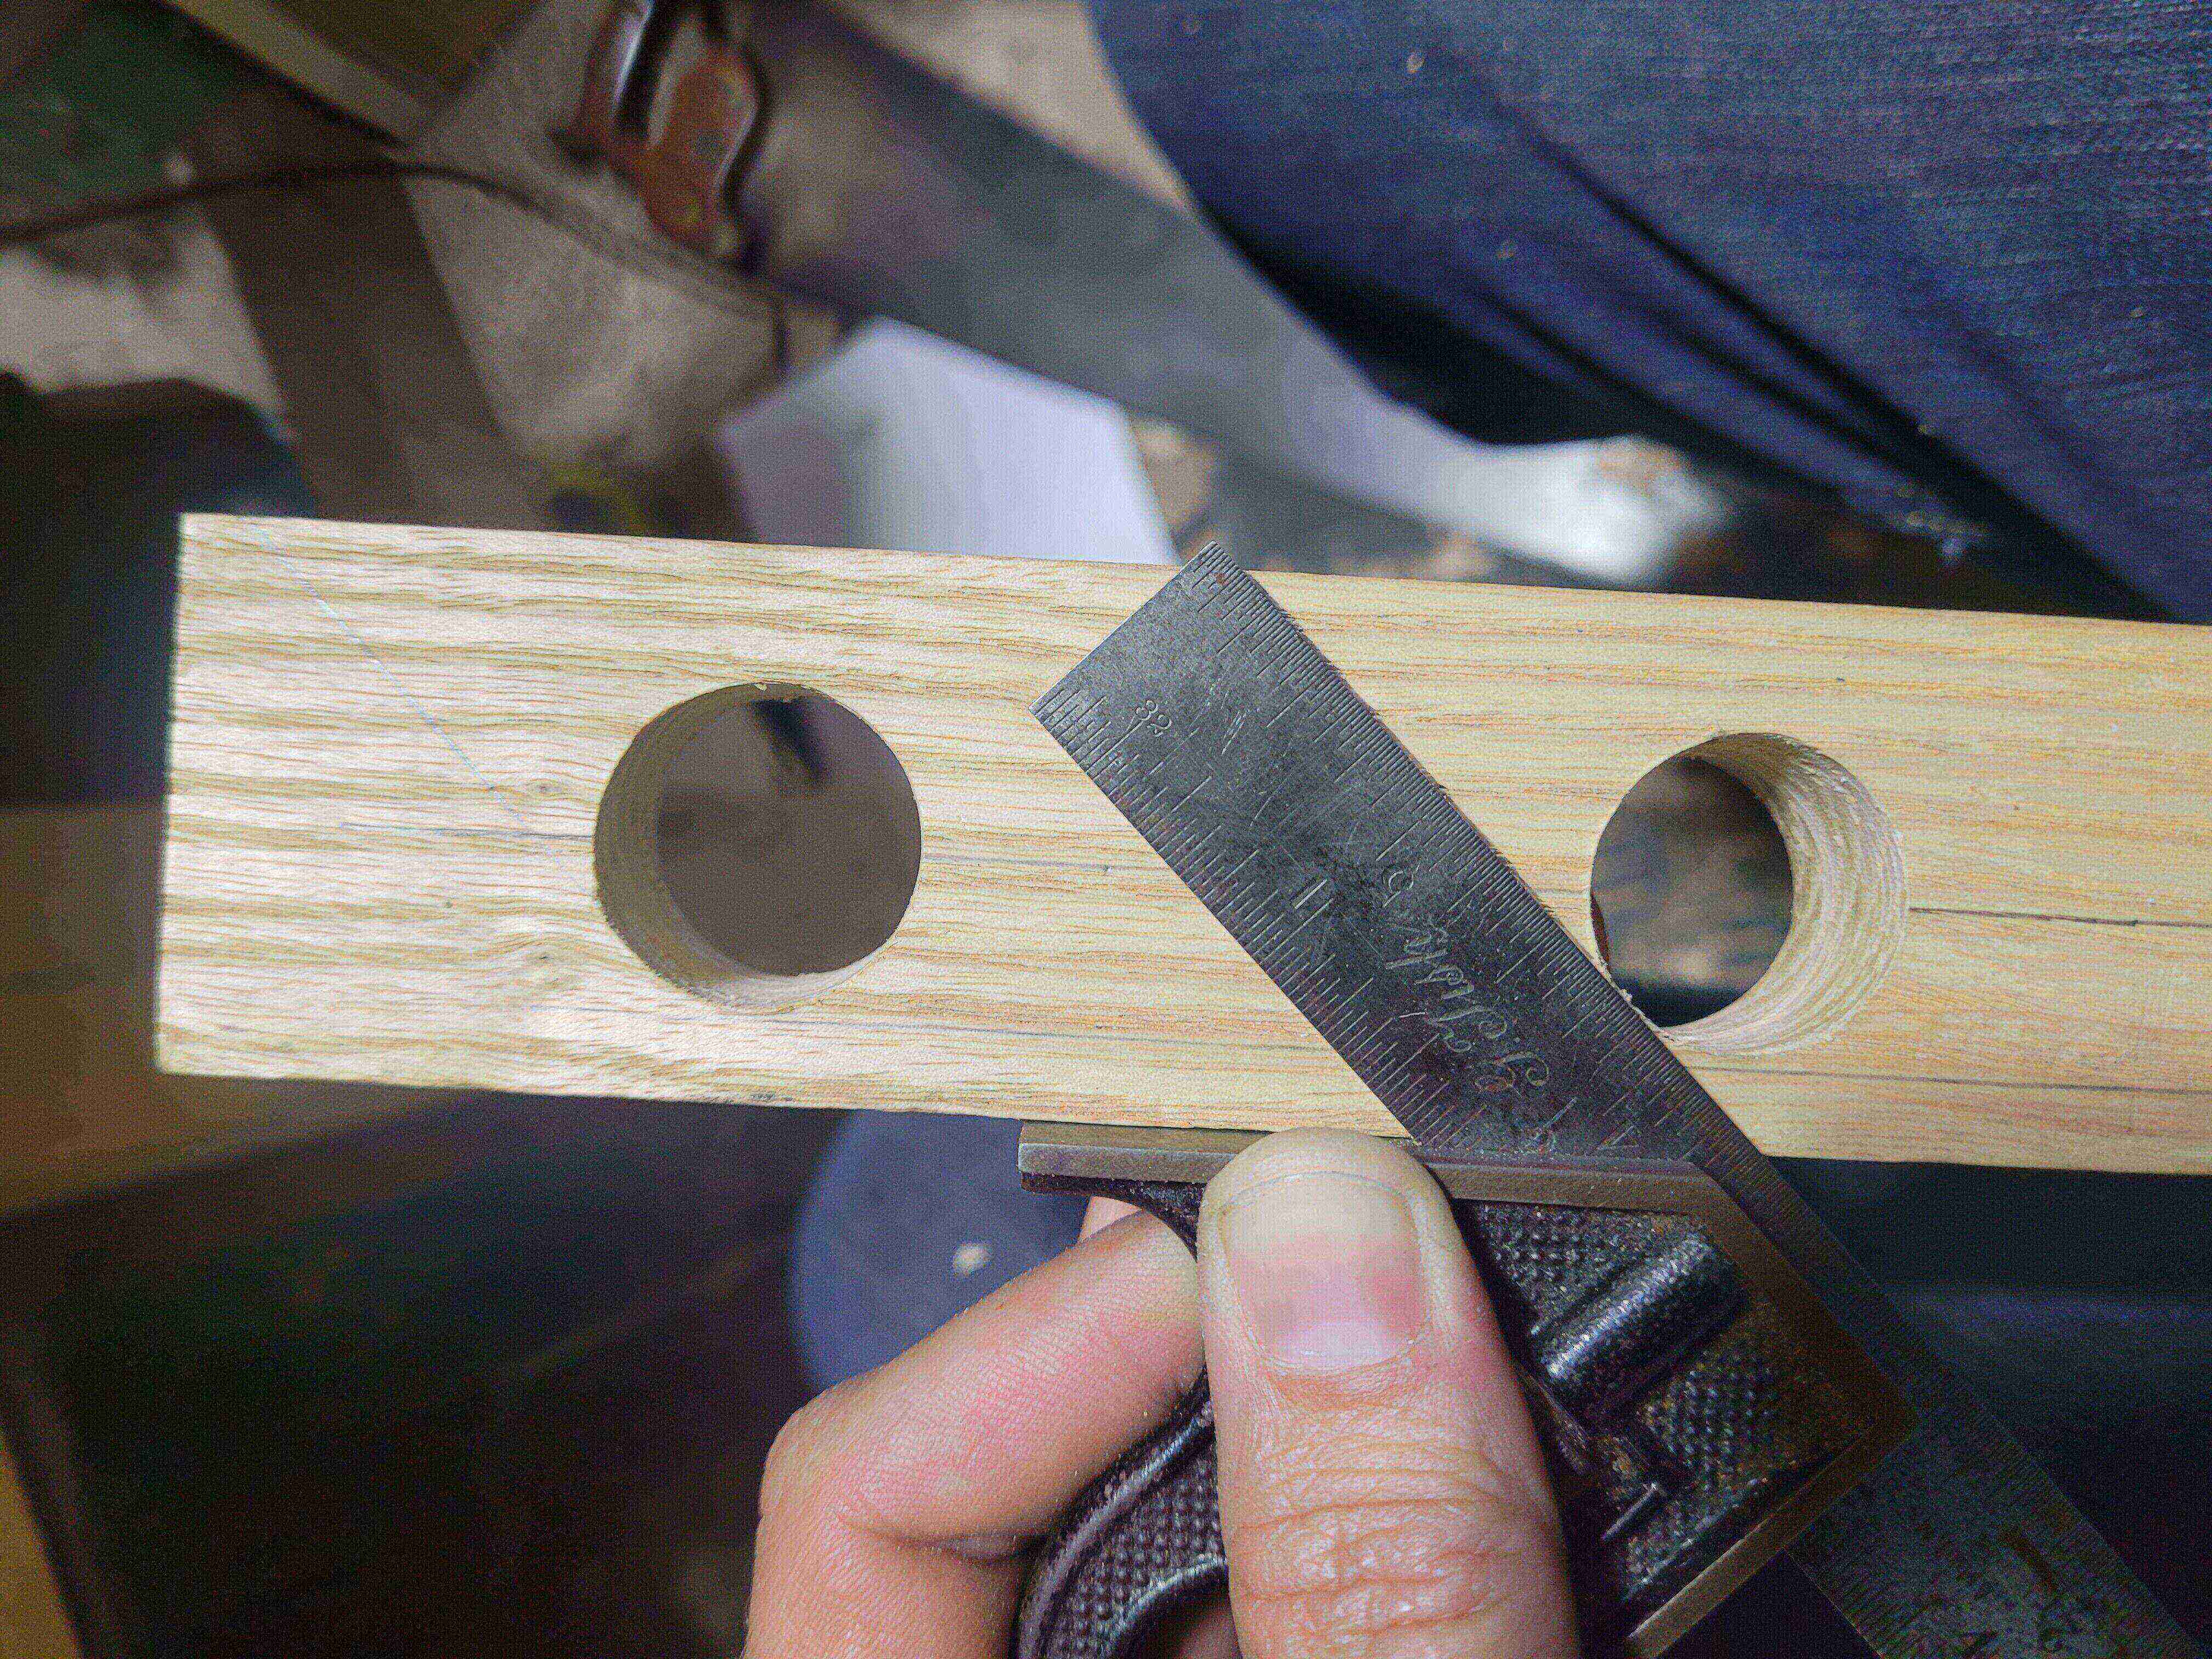
Use a combination square to strike a pair of lines from the front to the edge of the holes.
Sides marked up.
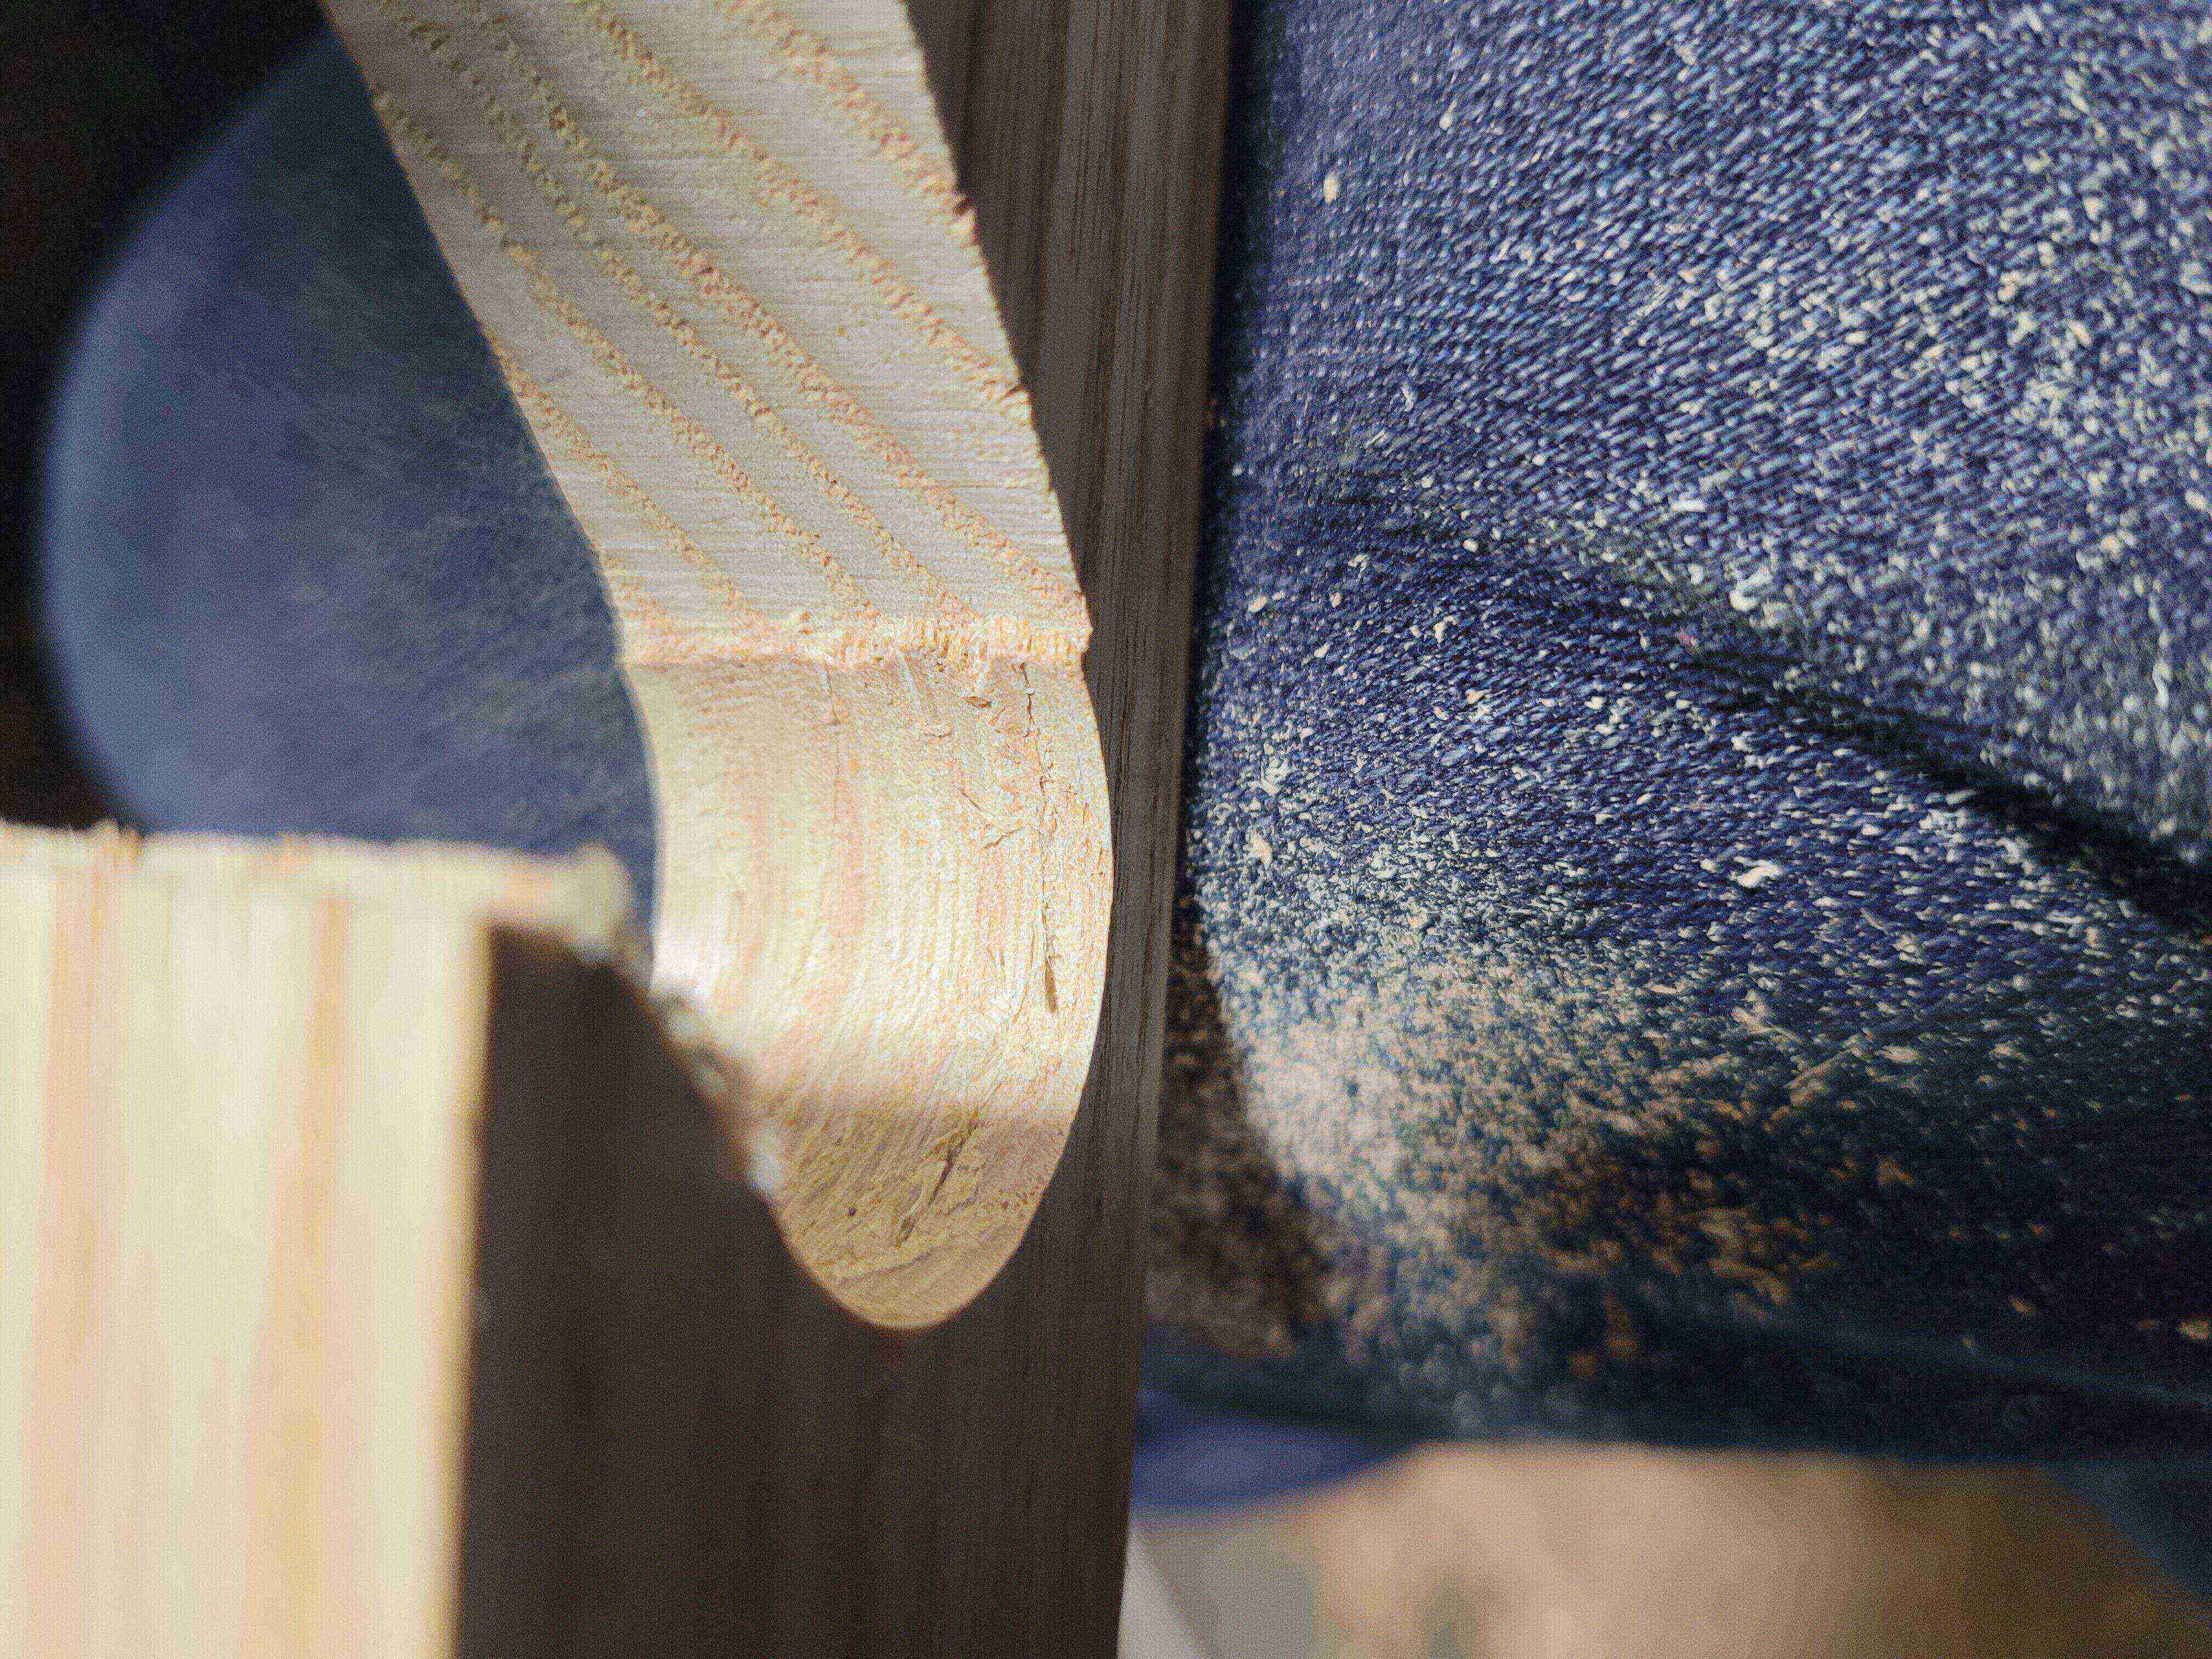
Carry the lines over to the front. You can see how sawed as is they would create quite a sharp point at the bottom of the entry. That will be fragile. Mark about an 1/8th down and put a line across.
I saw straight down just enough to create a kerf. Then I angle the saw to follow the line while the kerf holds the blade in place.
Follow the line down. Do not worry if you wander a bit, just keep aiming at the edge of the hole.
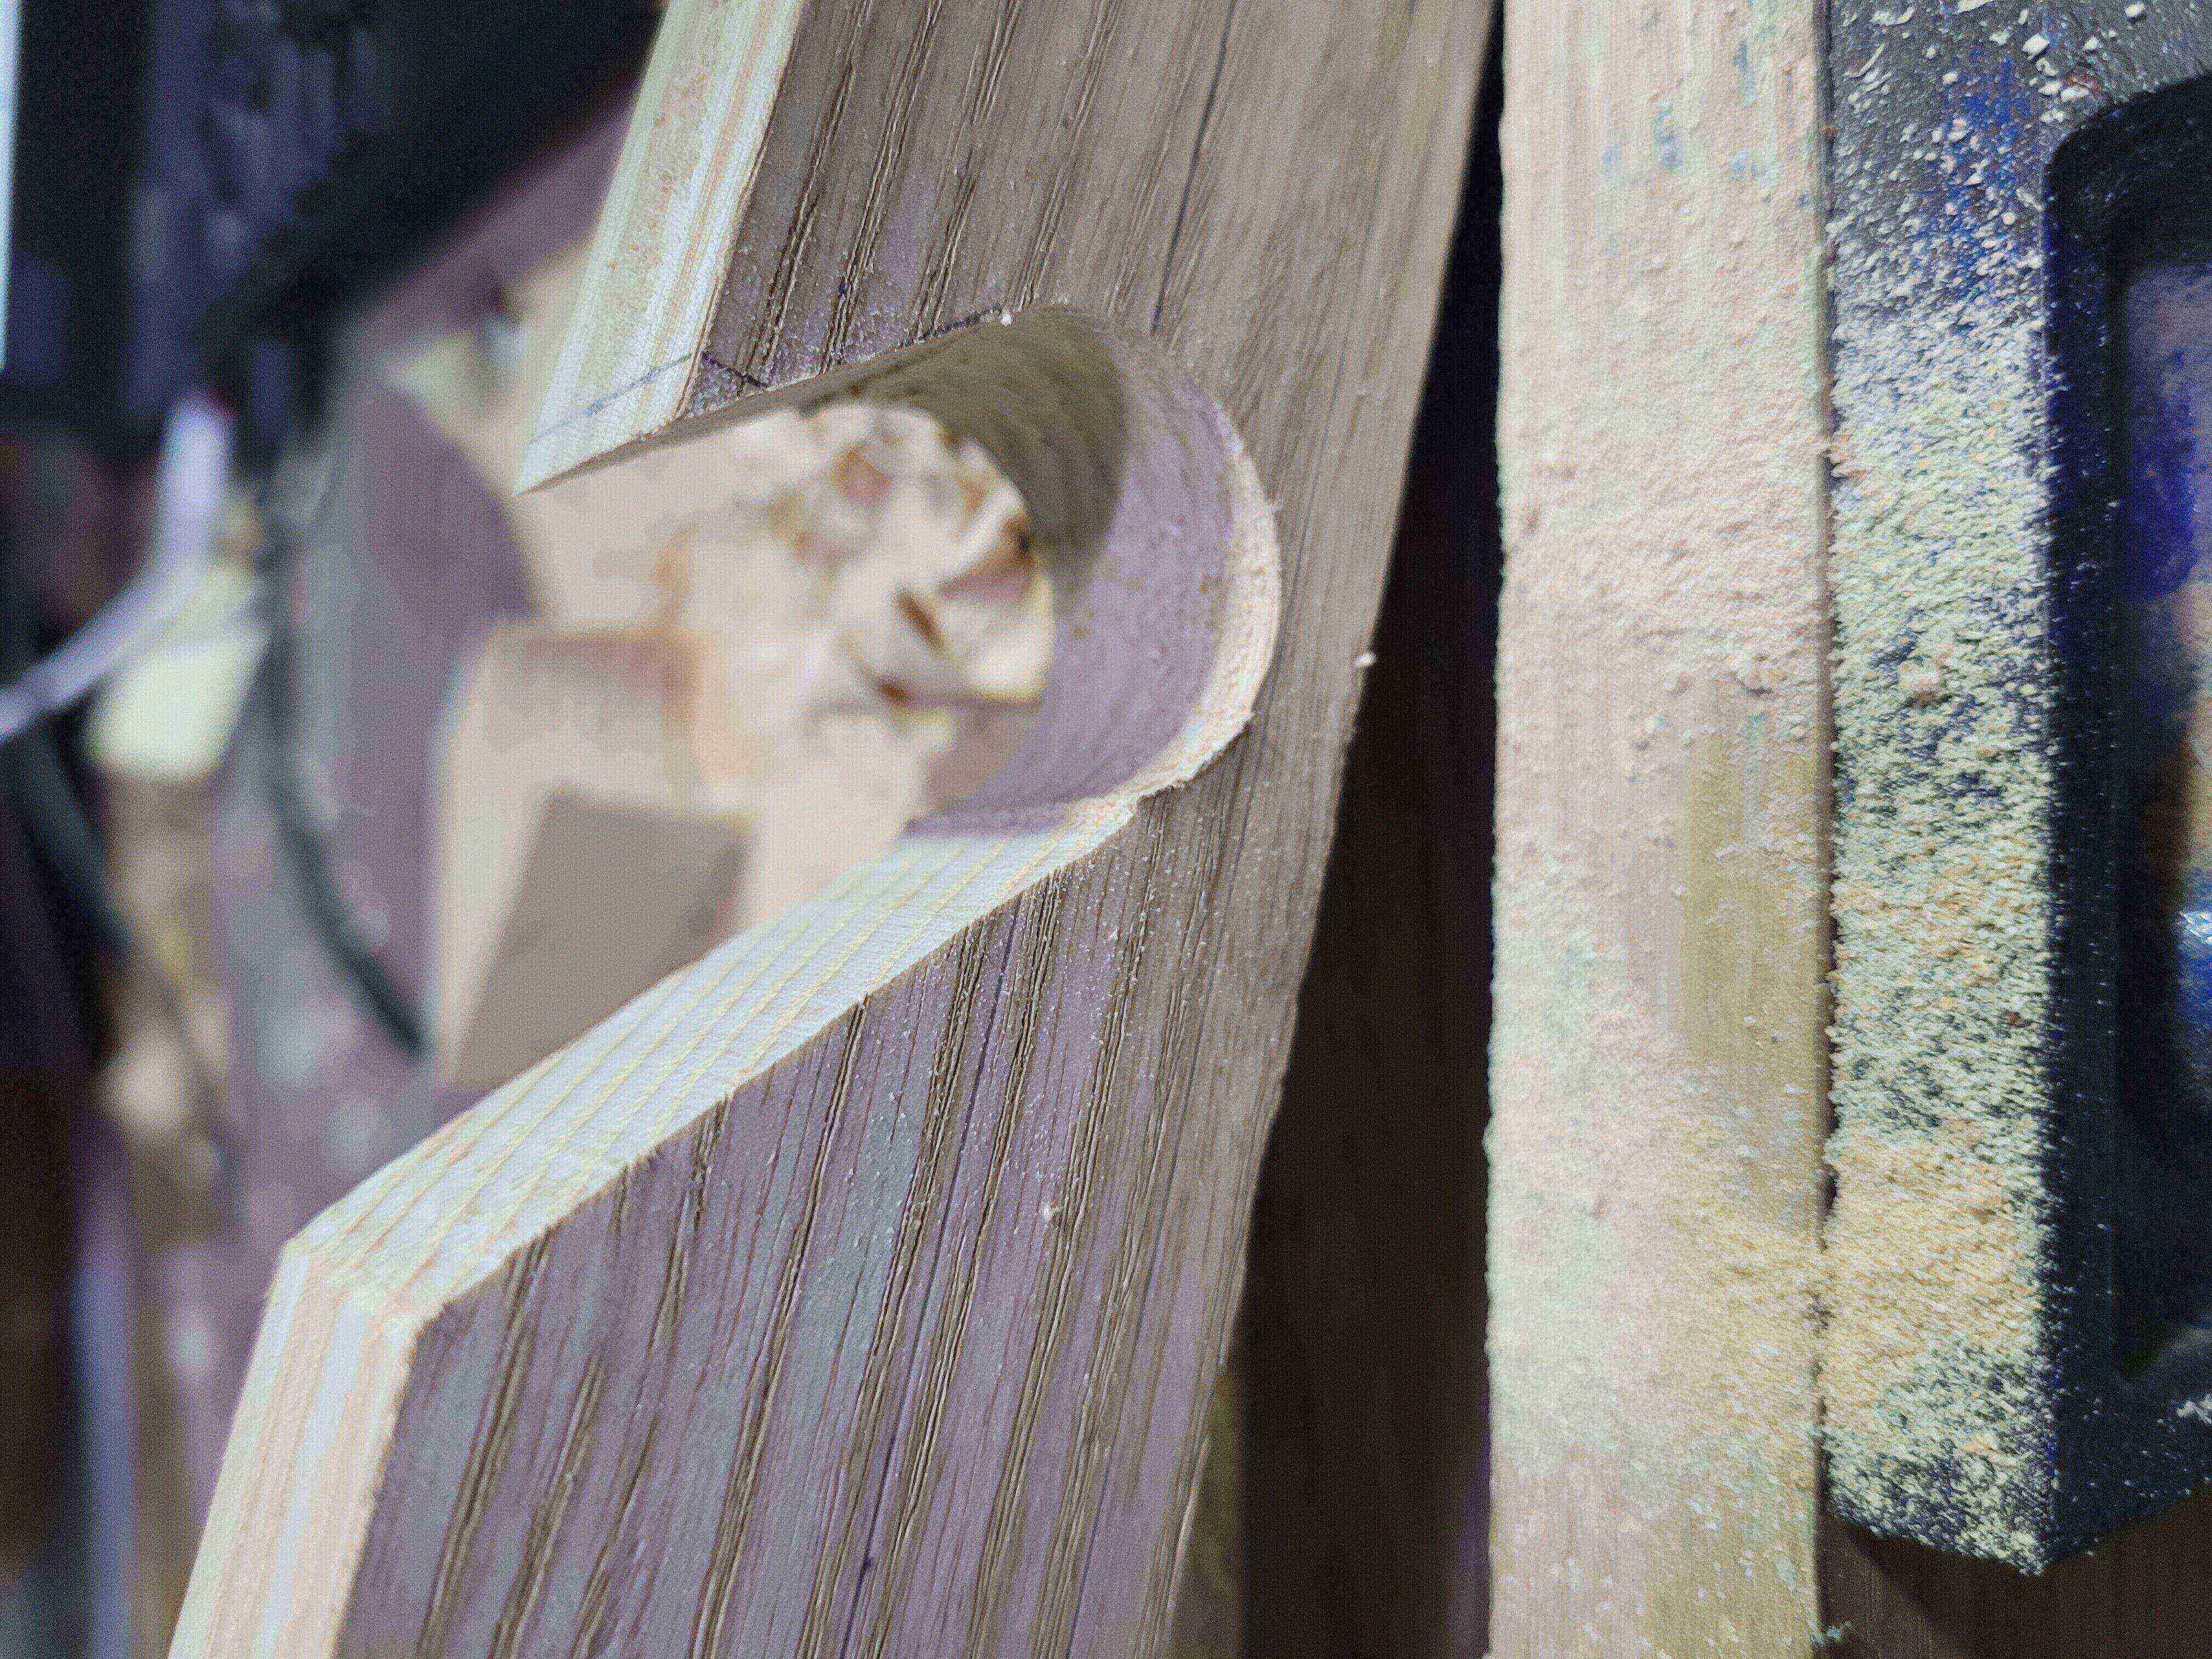
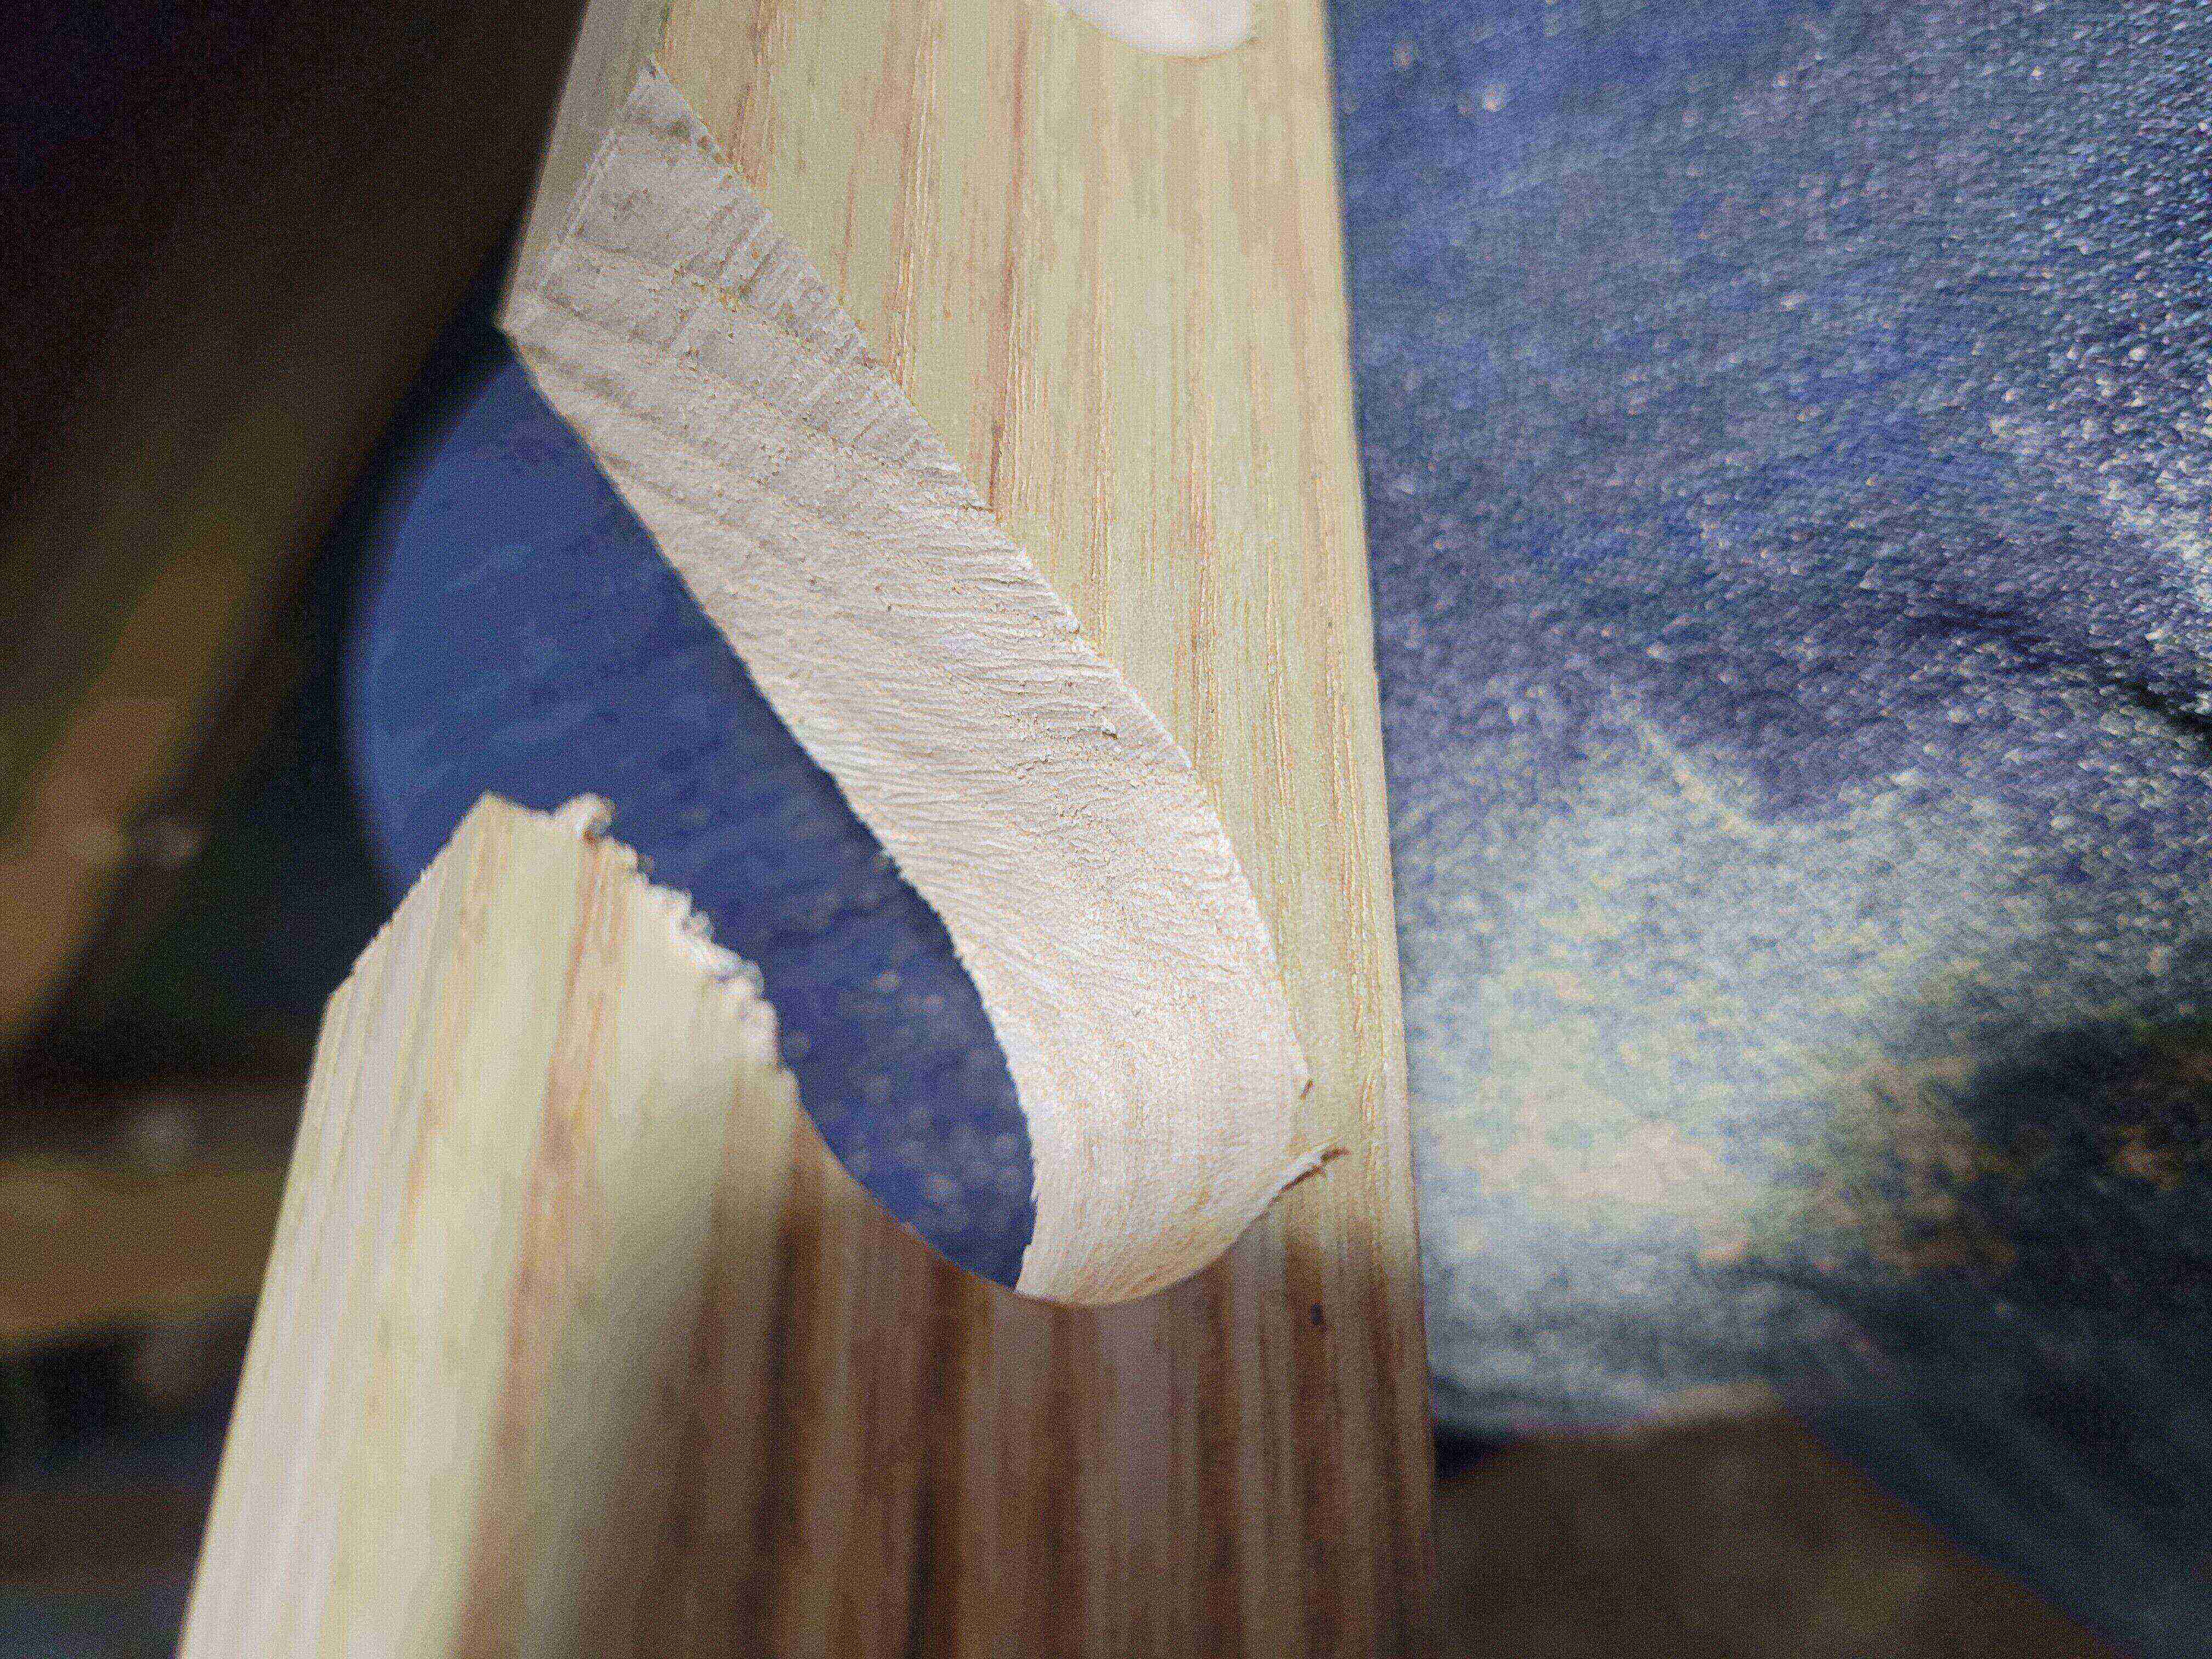
I never hit the circle perfectly. I always got a bit of a hump where the kerf met the hole. Not a big deal, easy to rasp or sand out.
Then saw the line 1/8th behind the bottom straight down to blunt the entry.
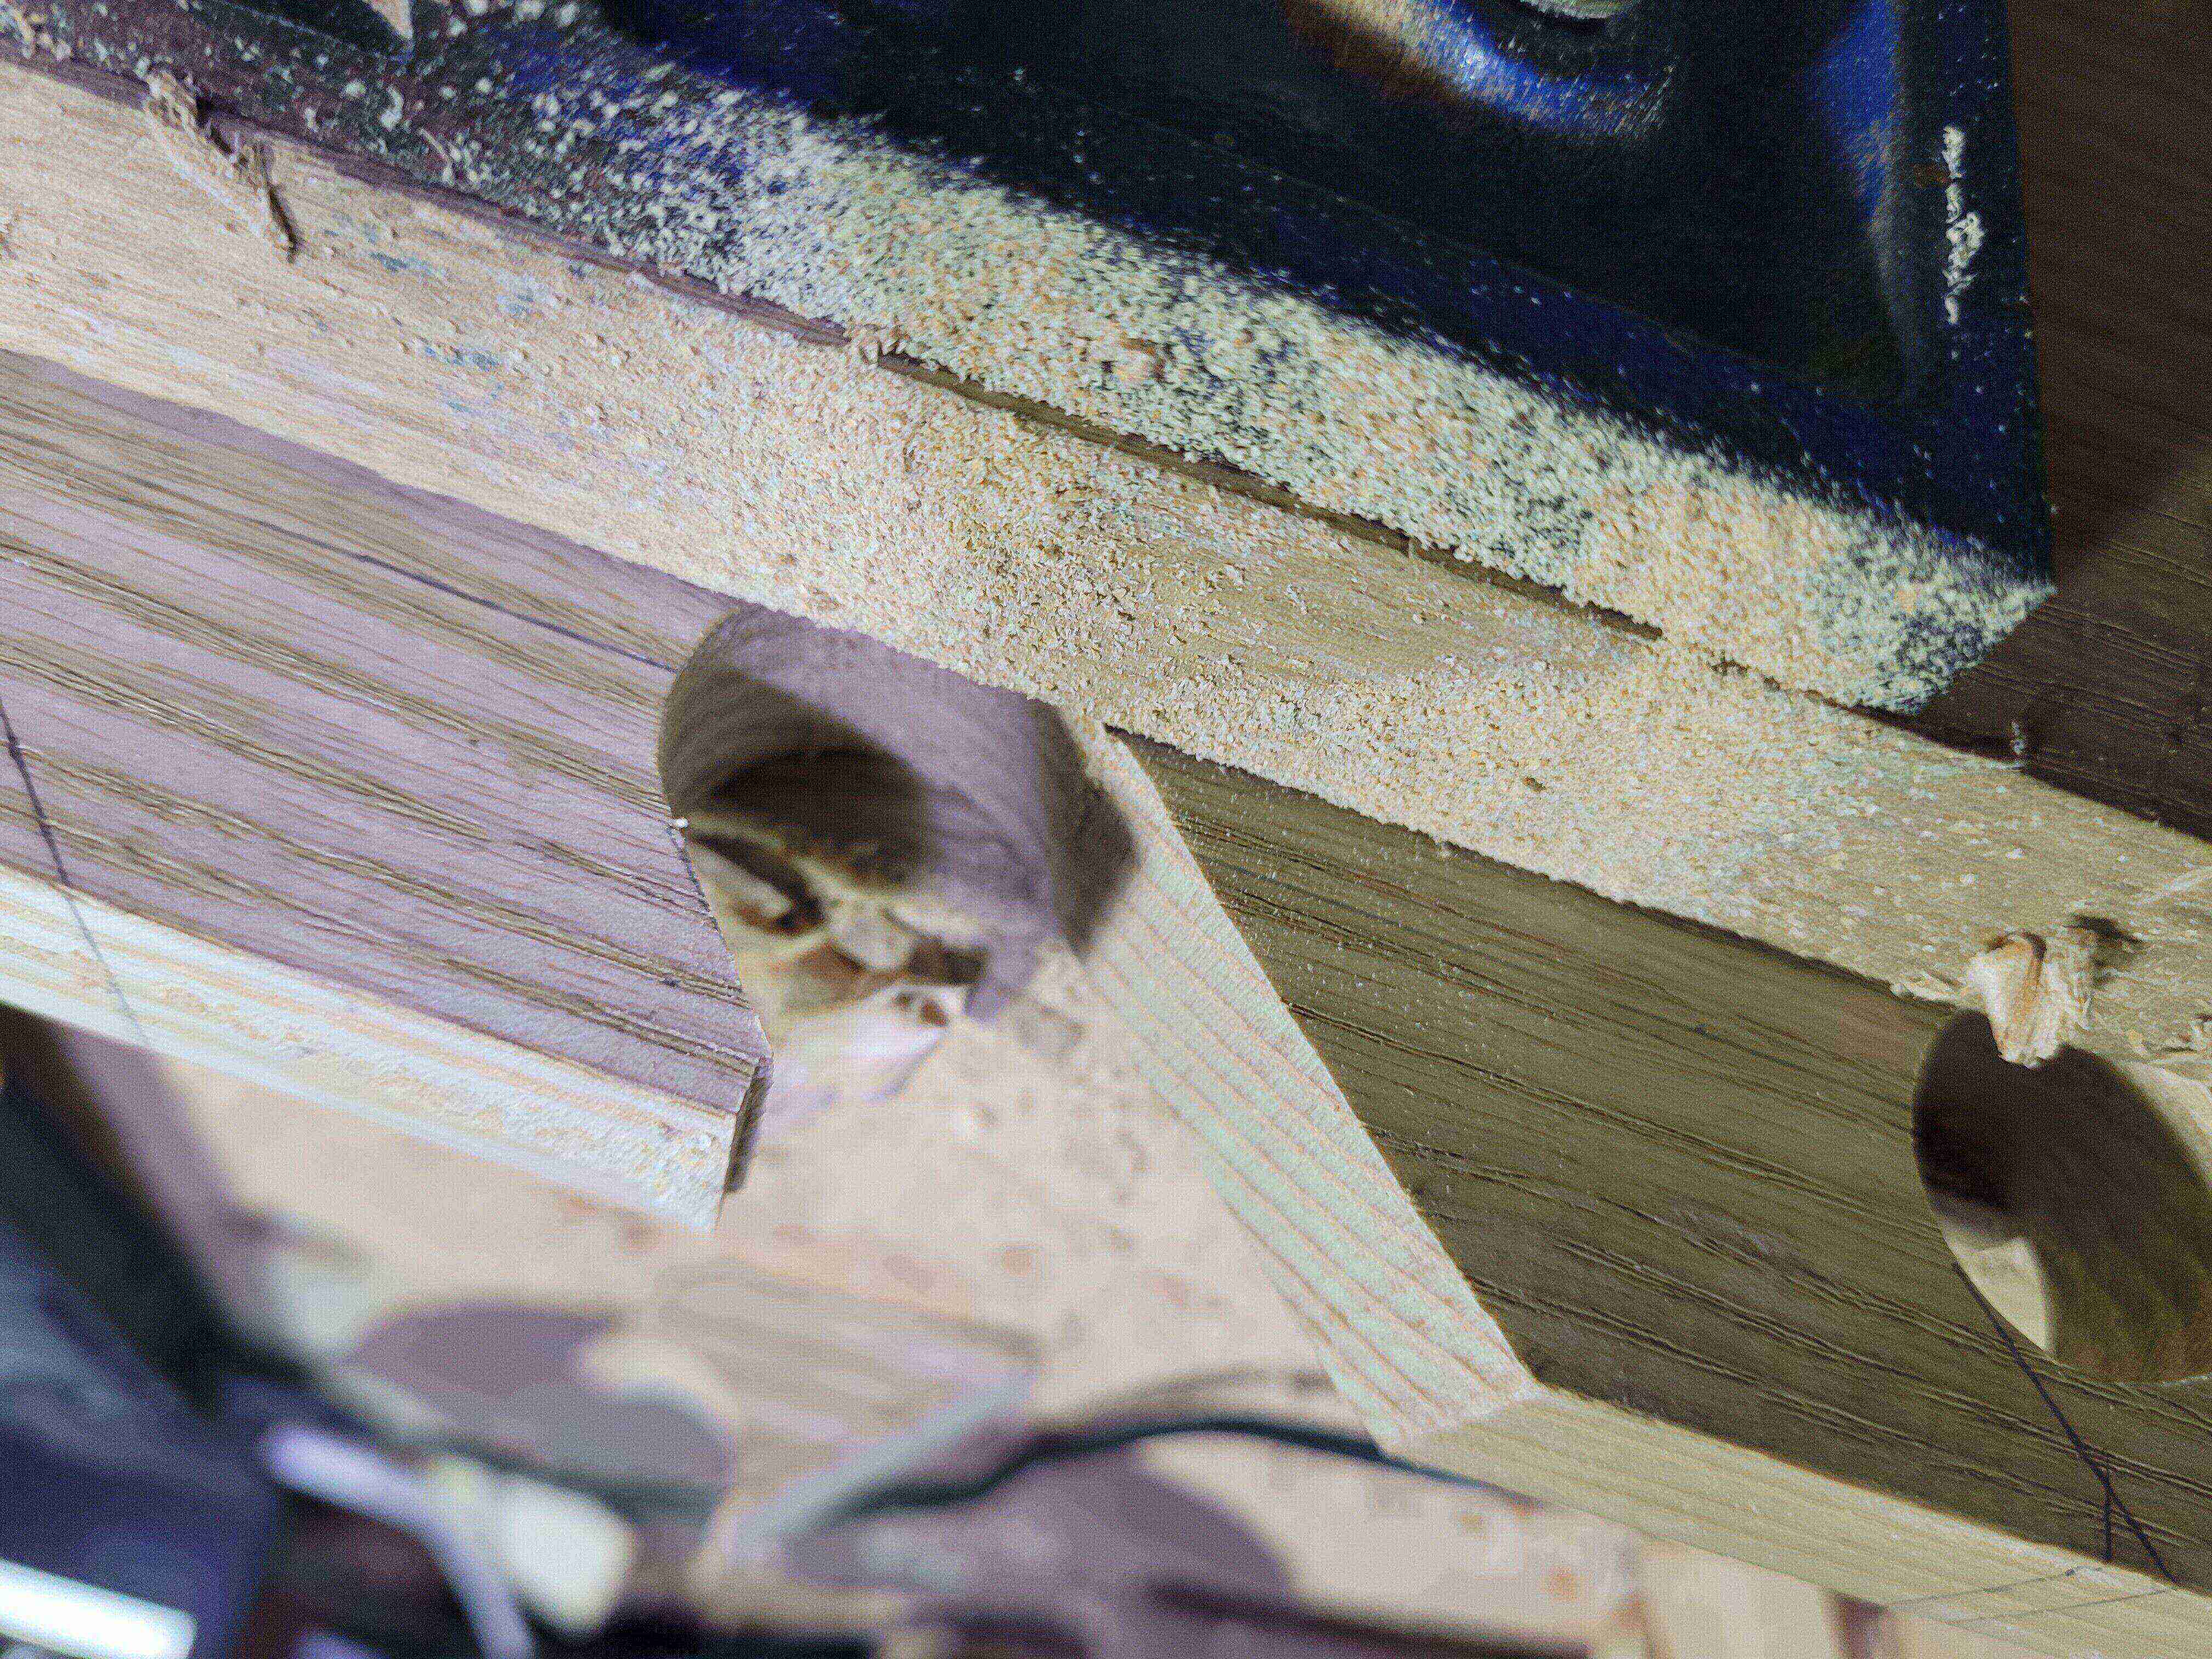
Now to deal with this hump. I grab the modeller’s rasp (sandpaper wrapped around something round will do). It took about 30 seconds a hole to work it out.
30 seconds later, the hump is gone.
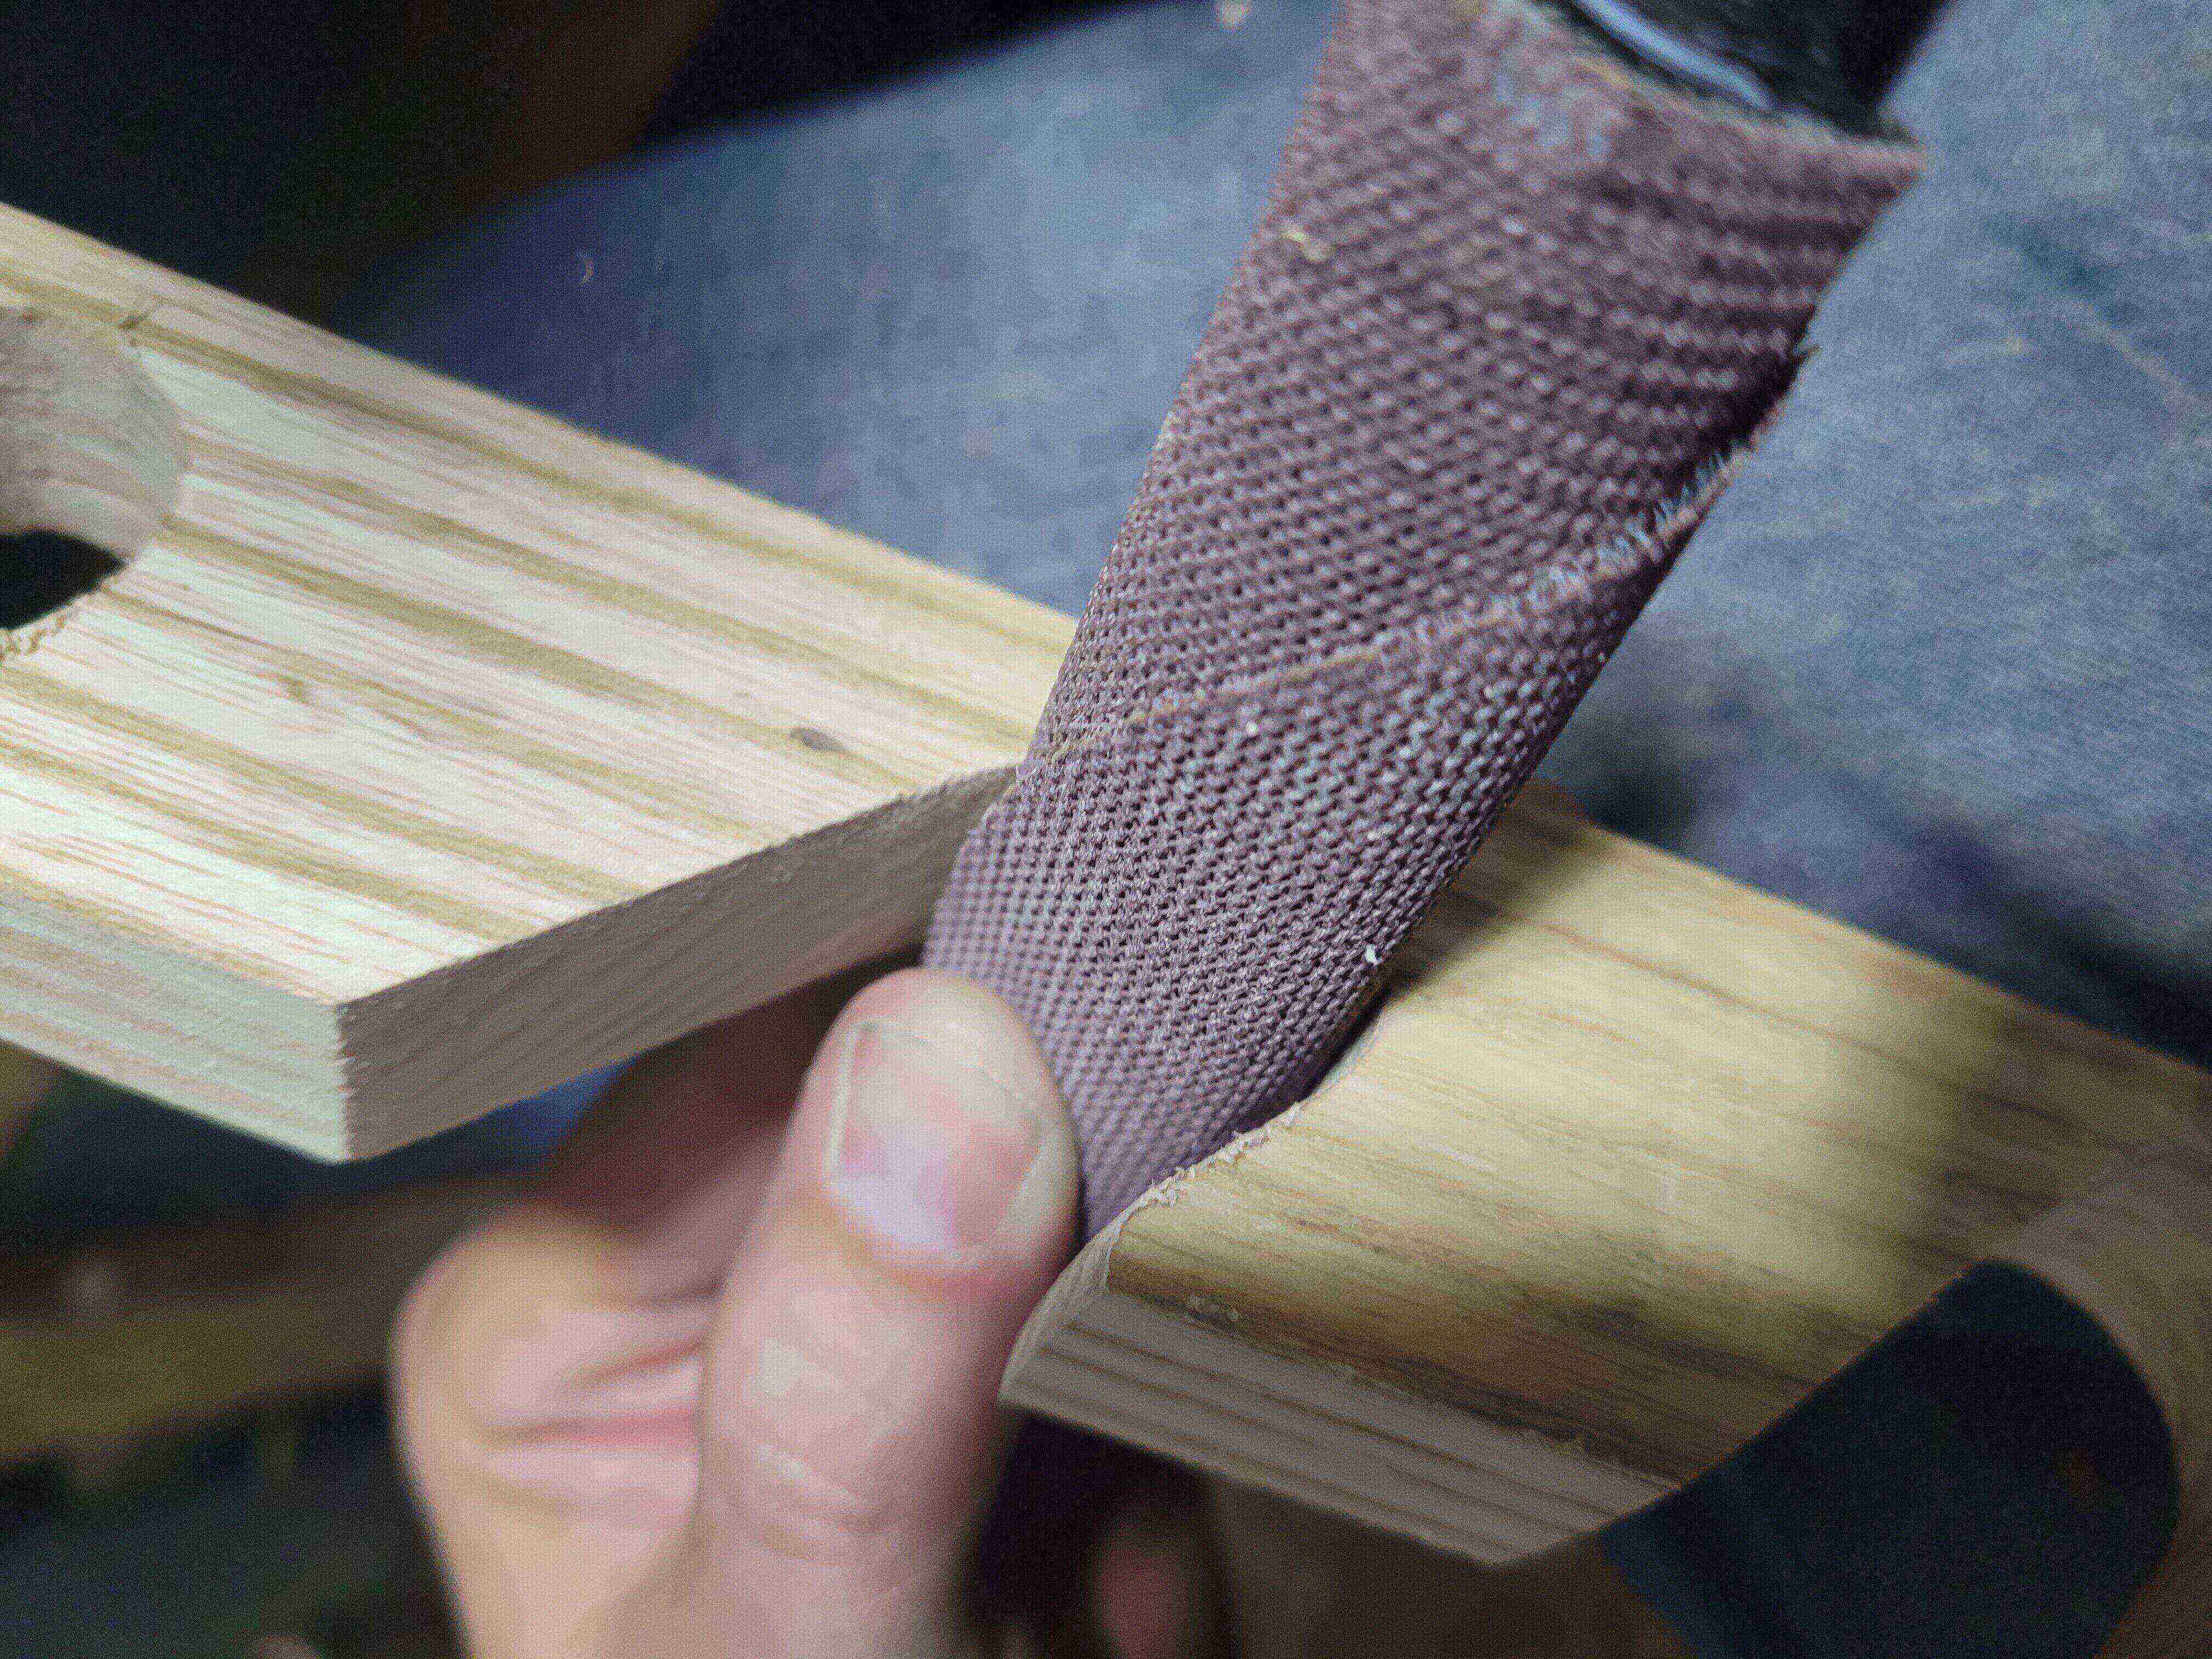
The wrap some 180 grit (Abranet in this case, sandpaper is fine) around something round, and smooth it out. Use the same paper to take off your pencil lines and break any sharp edges.
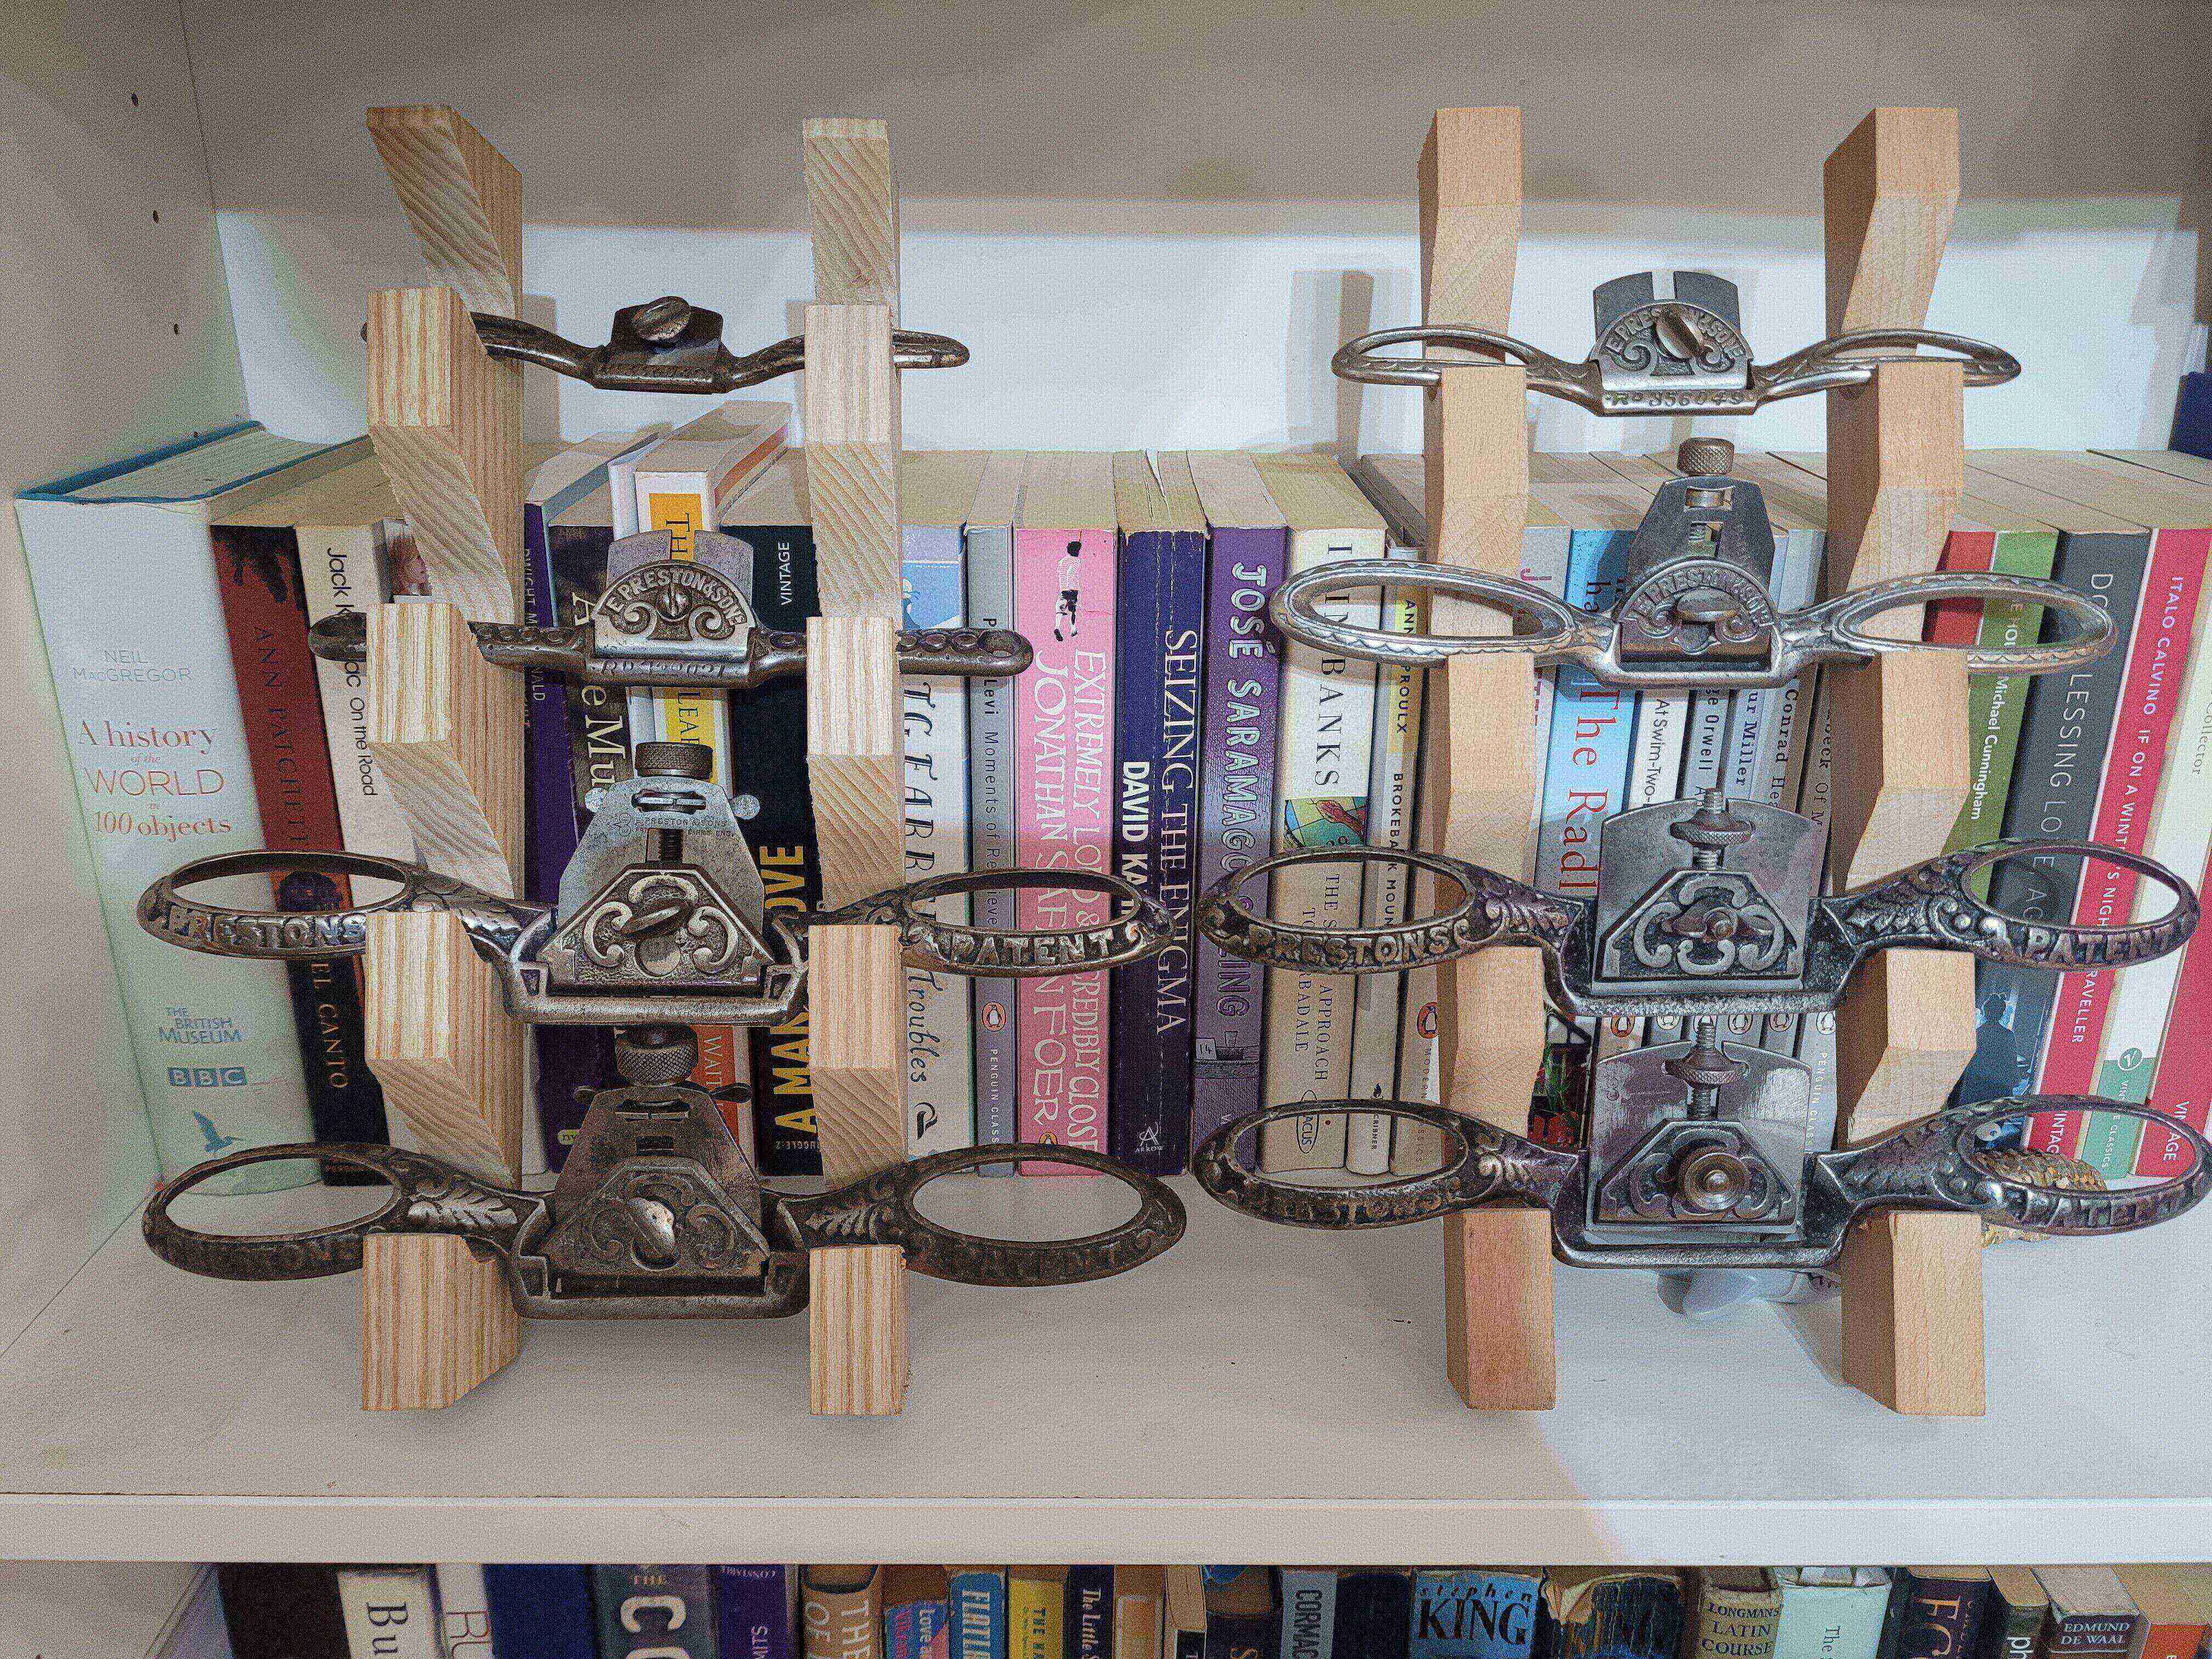
The finished rack. Now I get to admire my pretty shaves from across the room. Screwing this into a cabinet later is also something I have in mind.