Loom Heddle Bar
A Heddle bar is a device that raises and lowers alternate strings on the loom to make passing the shuttle back and forth easier. You don’t need to have a heddle bar to use a frame loom, but it makes it much more efficient and pleasant. There are two types of yarn used when weaving on a loom like this. First you have the warp thread, that runs up and down vertically. It provides the structure to work on. Then you have the weft yarn. That runs side by side, and creates the patterns, texture, colour and design.
The weft/side to side yarn goes over and under the wrap thread. Importantly, it alternates which strings it goes over and under on each pass. You can manually push the thread over and under each string, but that takes time.
Most weavers use a shuttle, a device that carries the yarn from side to side. The simplest version is just a stick with the yarn attached. Think of as a giant sewing needle. This still requires you to manually work it over and under the threads.
The heddle bar makes life simpler. It holds half of the wrap threads high, and half low, alternating all the way across. Then with a simple turn, it alternates the high and low strings. So in use, you get to pass your shuttle straight through a gap, then turn the heddle to alternate the high low strings and pass it straight back. This dramatically speeds up the weaving operation, and reduces the chances of you losing track and making a mistake in the process.
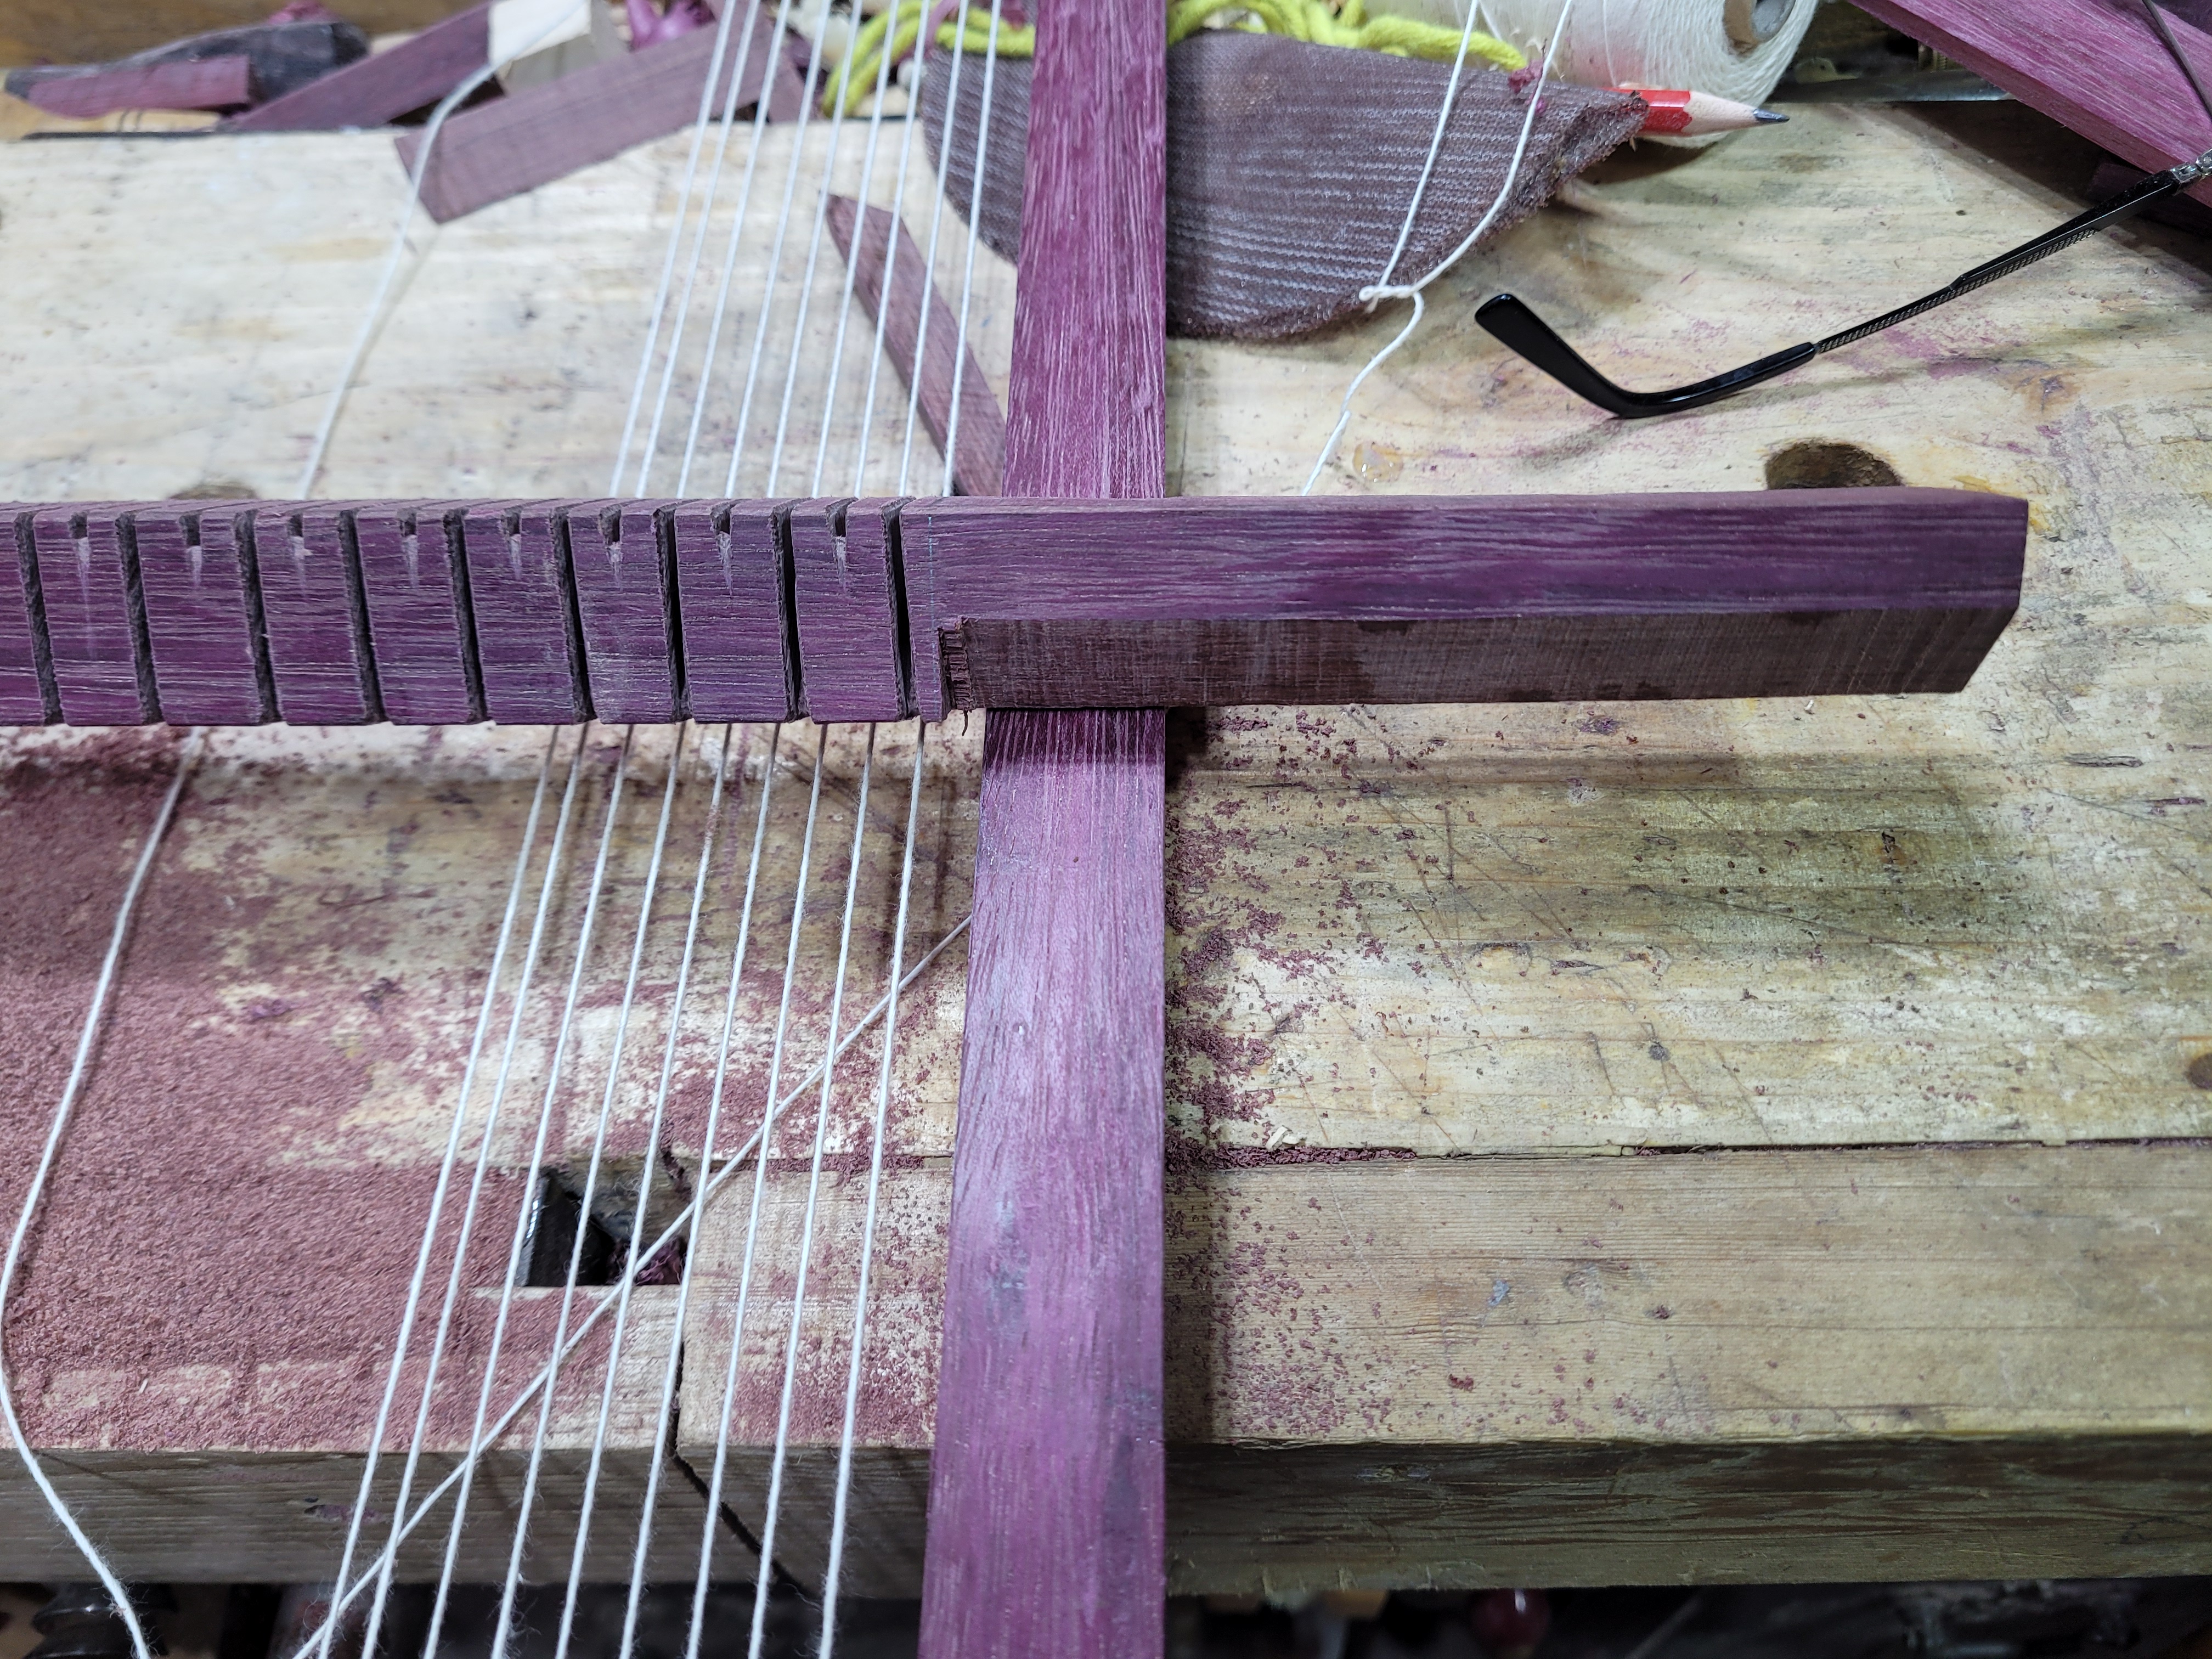
I could not find a good article or video online on making a heddle. I studied a bunch of photos to figure out how it worked. To those of you who can take a glance at one, and immediately understand it, I tip my hat to you. I didn’t. Its just a series of 45 degree cuts down the length of the stick. The cuts alternate. First cut, 45 degrees from left to right, second cut, 45 degrees from right to left. If you look at the bar head on, half the cuts will slope toward you, and half away from you. The warp thread on the cuts that slope toward you will be low, as they can run down the kerf. The warp thread on the cuts that slope away from you will be high, as they sit on the top of the kerf.
In practice you want the kerfs to go slightly more than halfway through the bar, so the high strings don’t slip out. If your heddle bar is made out of a square piece of stock, then it will need to rest on the corners in operation. You switch between two corners to change the high and low strings.
When I started trying to make the heddle, I did not realise there was a difference between warp thread and weft yarn. I was testing it out with weft yarn, which tends to be quite thick, and getting frustrated. Even with the very wide kerfs from the tiger saw, the yarn was catching in the kerf and not rising and falling as it should. I tried sanding a kerf to widen it. After a large amount of work, it was still catching. With the number of kerfs in the bar, this would be an insane amount of work. I grabbed a piece of scrap pine, and tried making two cuts side by side to make an ultra wide kerf. This worked in that the weft no longer caught, but it weakened the bar so much it snapped under very light pressure.
This confused the hell out of me. Then I realised none of the photos of heddle bars seemed to have insanely wide kerfs. What the hell was going on??? That is when I realised warp thread is significantly thinner. I could probably get away with a narrower saw than the tiger. For purely aesthetic reasons I stuck with the tiger saw, so the bar kerfs matched the width of the frame kerfs. But if you decide to build one of your own, I recommend getting some warp thread and testing with your saws to find the best option.
With that figured out, I set about making my heddle bar. See the pictures below for my process. If little of that explanation made sense to you. See the video at the end to watch the bar in action.
As the cuts into the heddle bar need to go corner to corner. I need to hold the work at 45 degrees. I cut the corners off a board of pine to make a jig to hold the work.
Screwing those corners down to a scrap of mdf gave me a 45 degree bench hook sort of device.
Which does a good job of holding the work while I saw into it.
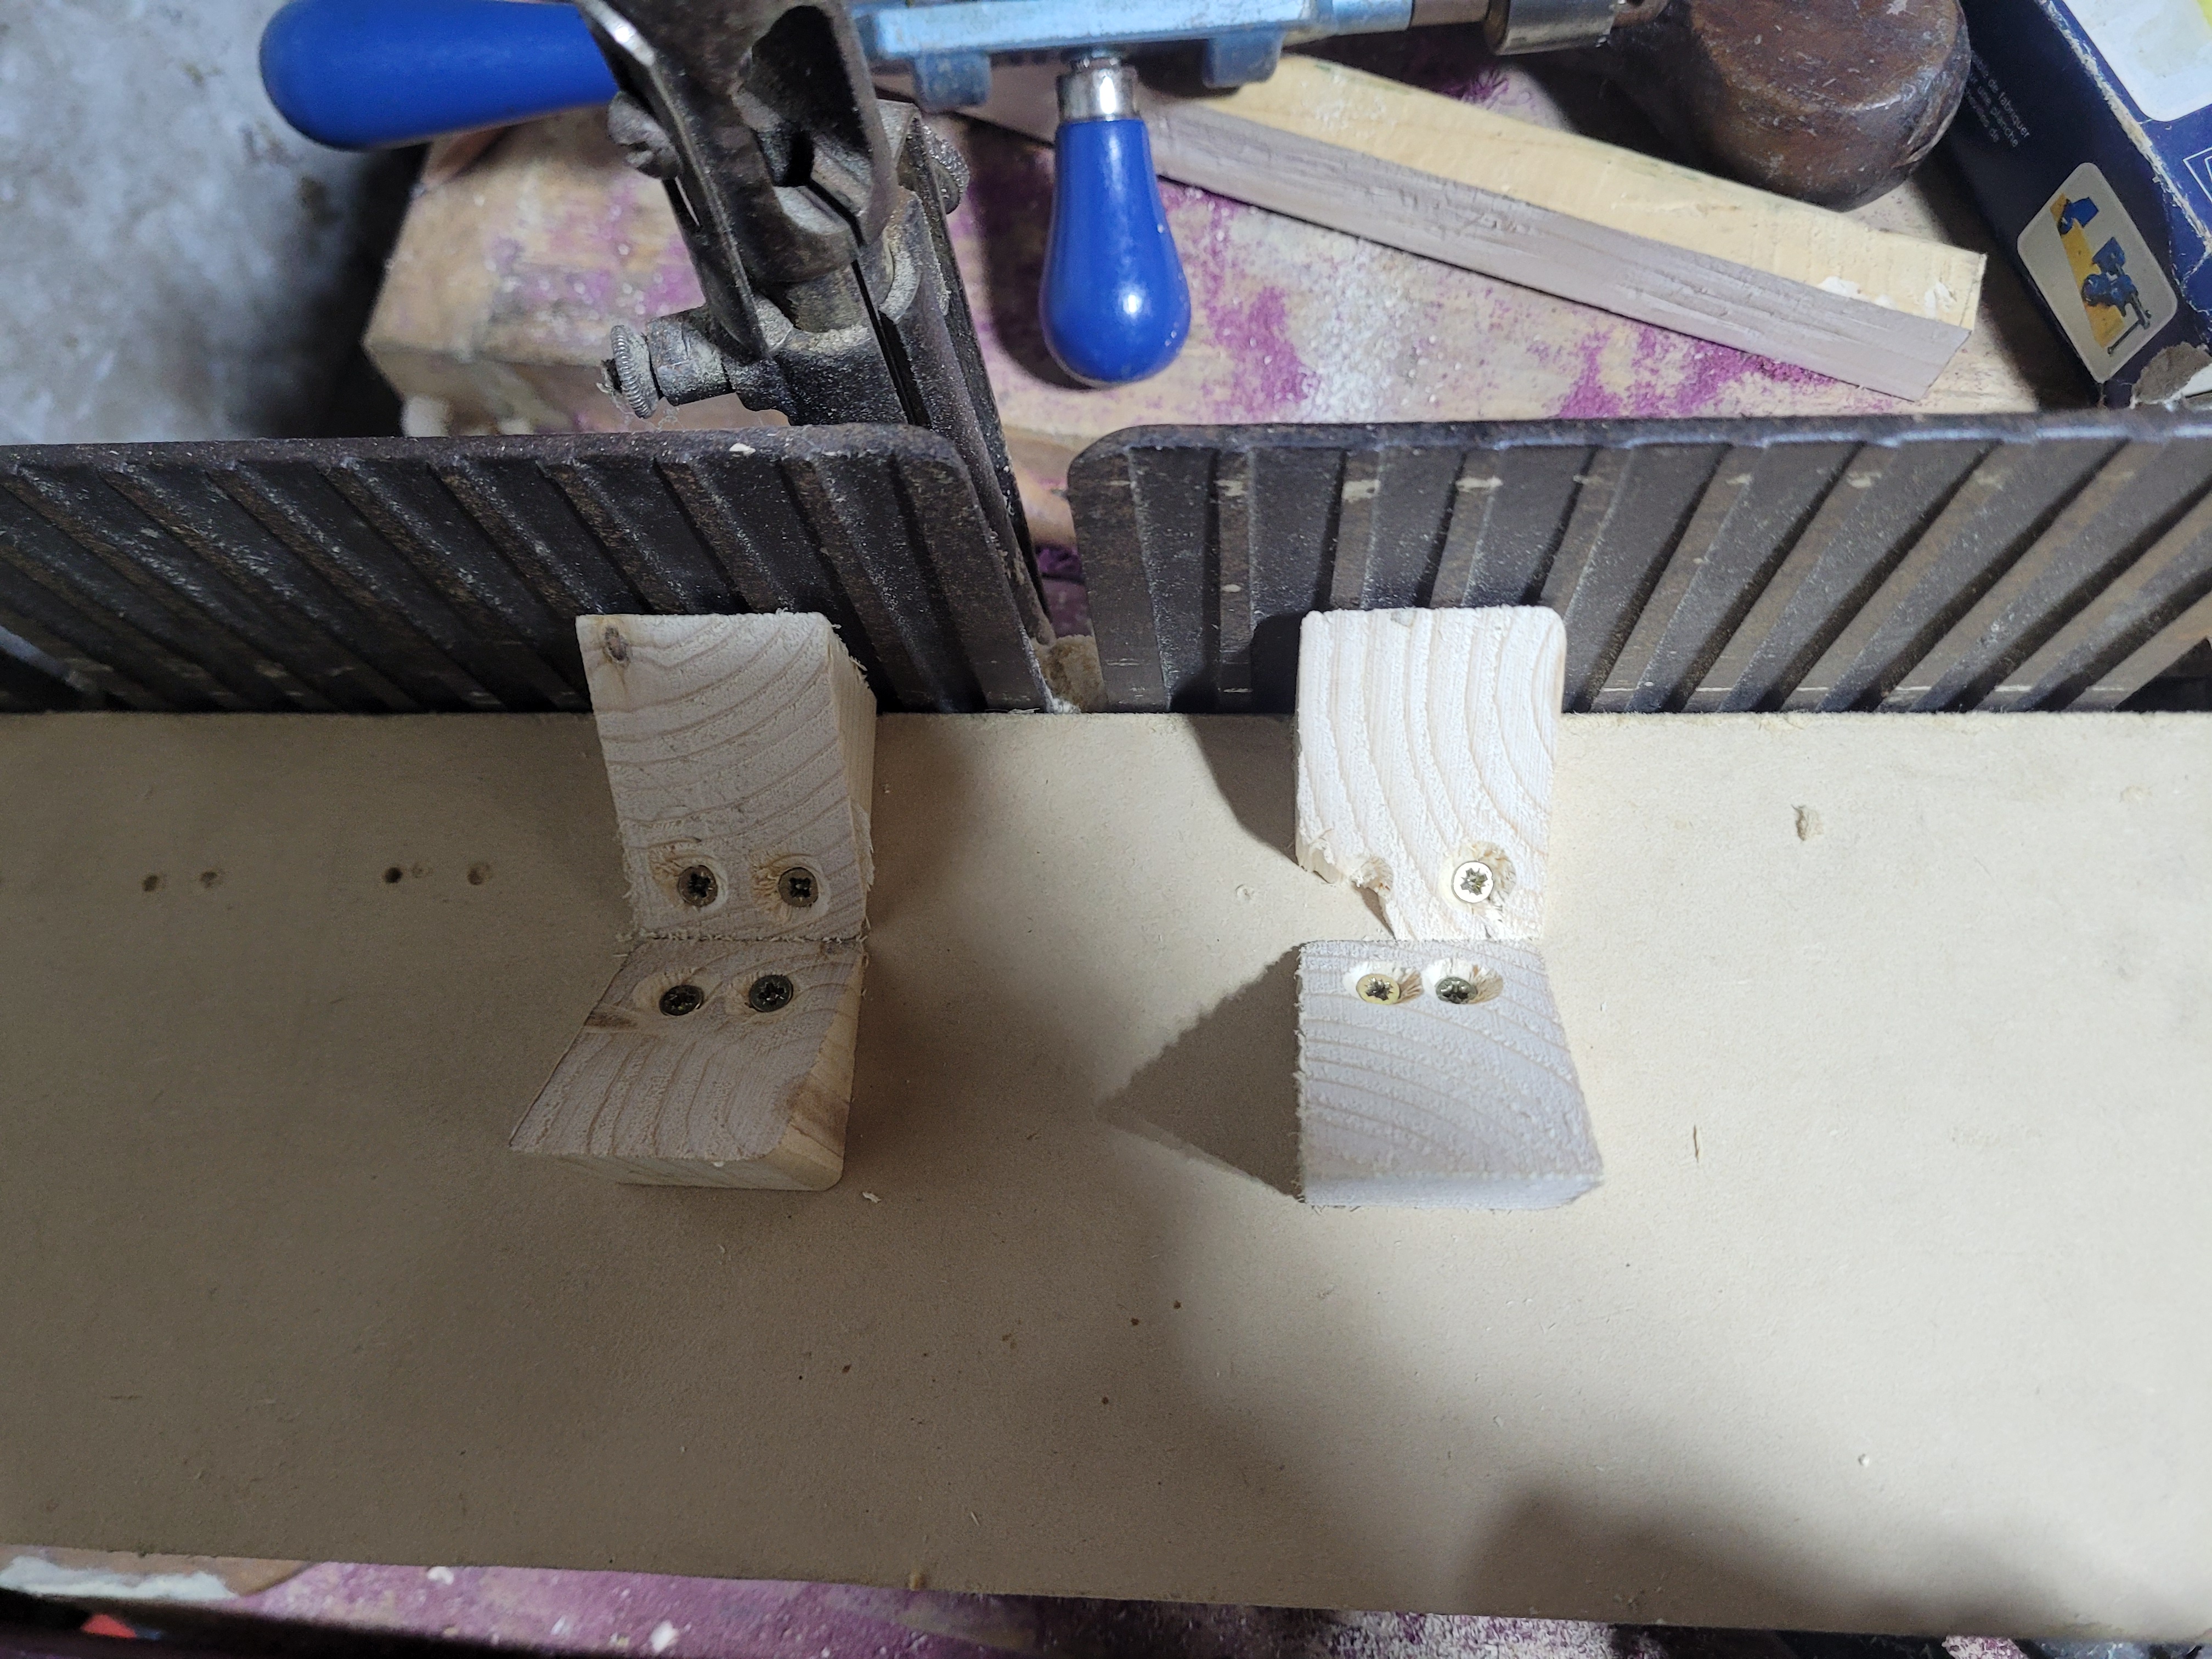
The jig was first used to make the side by side cuts in a scrap of pine. As you can see. This fatally weakened the piece. Later Simon Coldrick pointed out that some of the heddle bars on-line are rectangular (taller than they are wide) in cross section. Which leaves some uncut material at the bottom. But I had already prepped square stock for the bar, so I decided to press on and try my luck. Standard saw kerfs in the pine test piece did not seem to weaken it.

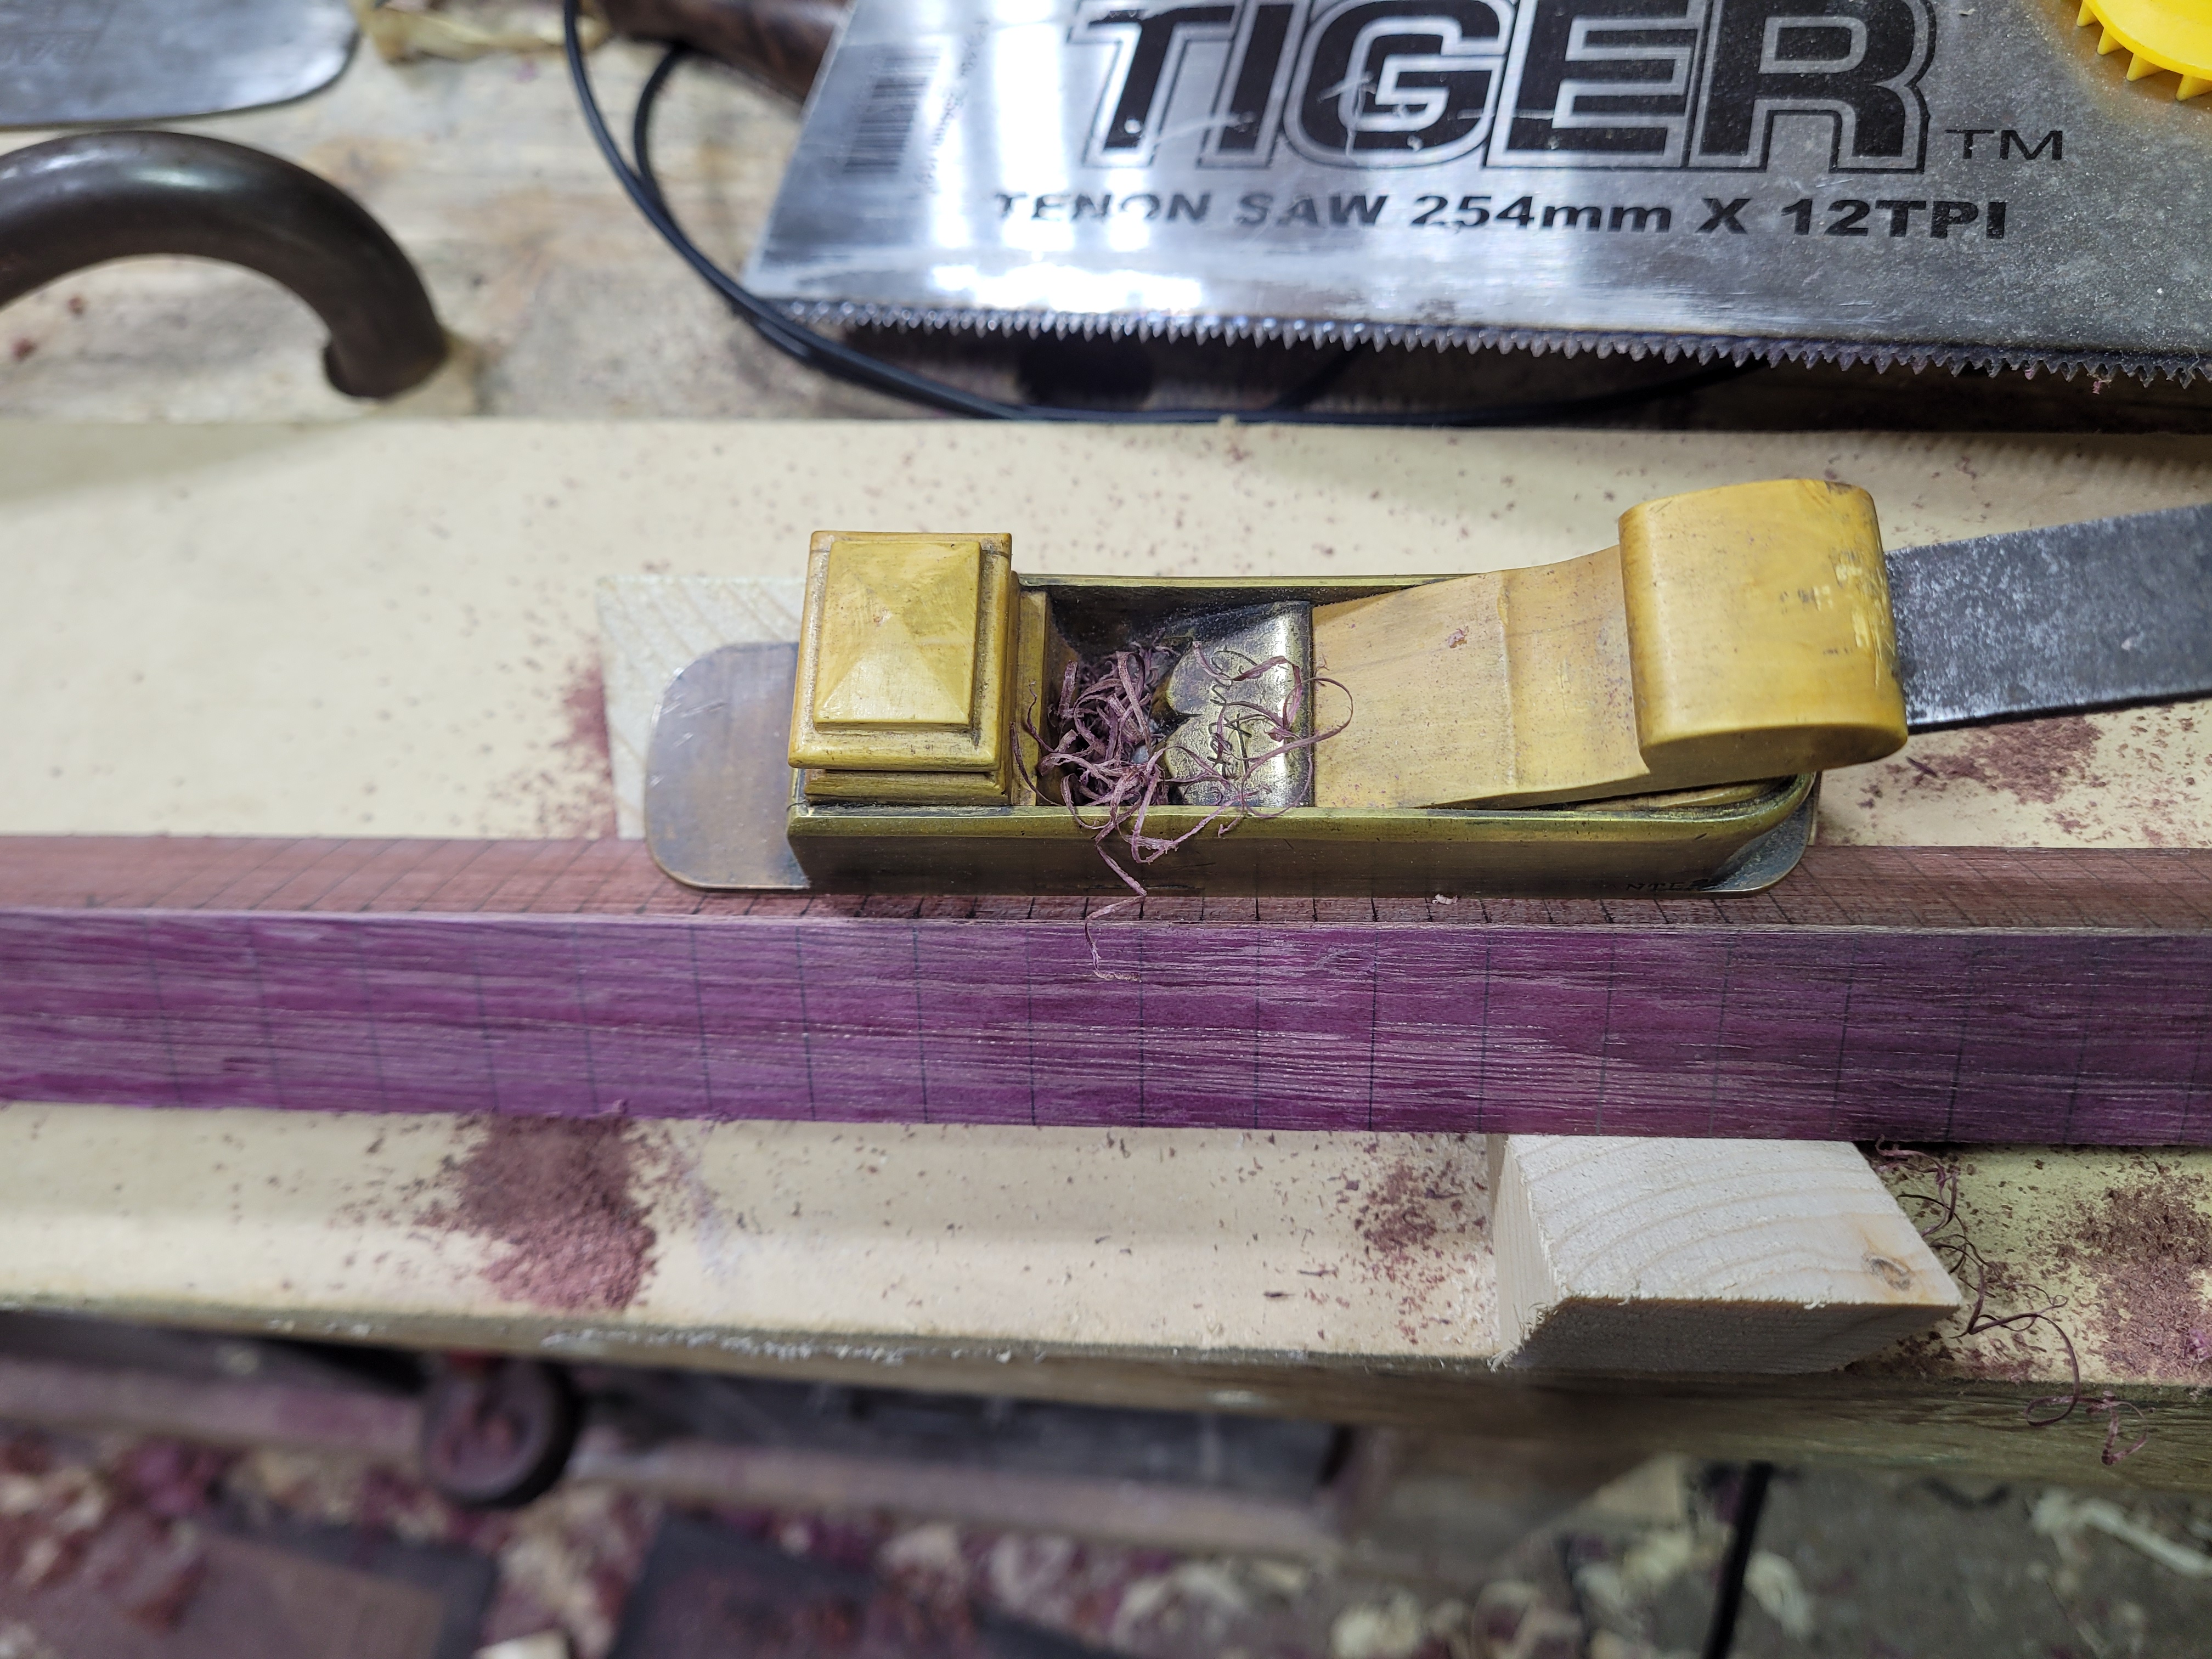
The stock is wider than the frame. This gives two handles that are easy to grab and turn. It is about an inch square. This turns out to be a decent size that produces a good gap for the shuttle to pass through. Picking this size was just a lucky guess.

I cleaned up all of the sides with a card scraper before beginning. Once the saw kerfs are in, planing or scraping would get a lot harder, and you would risk snapping off pieces.

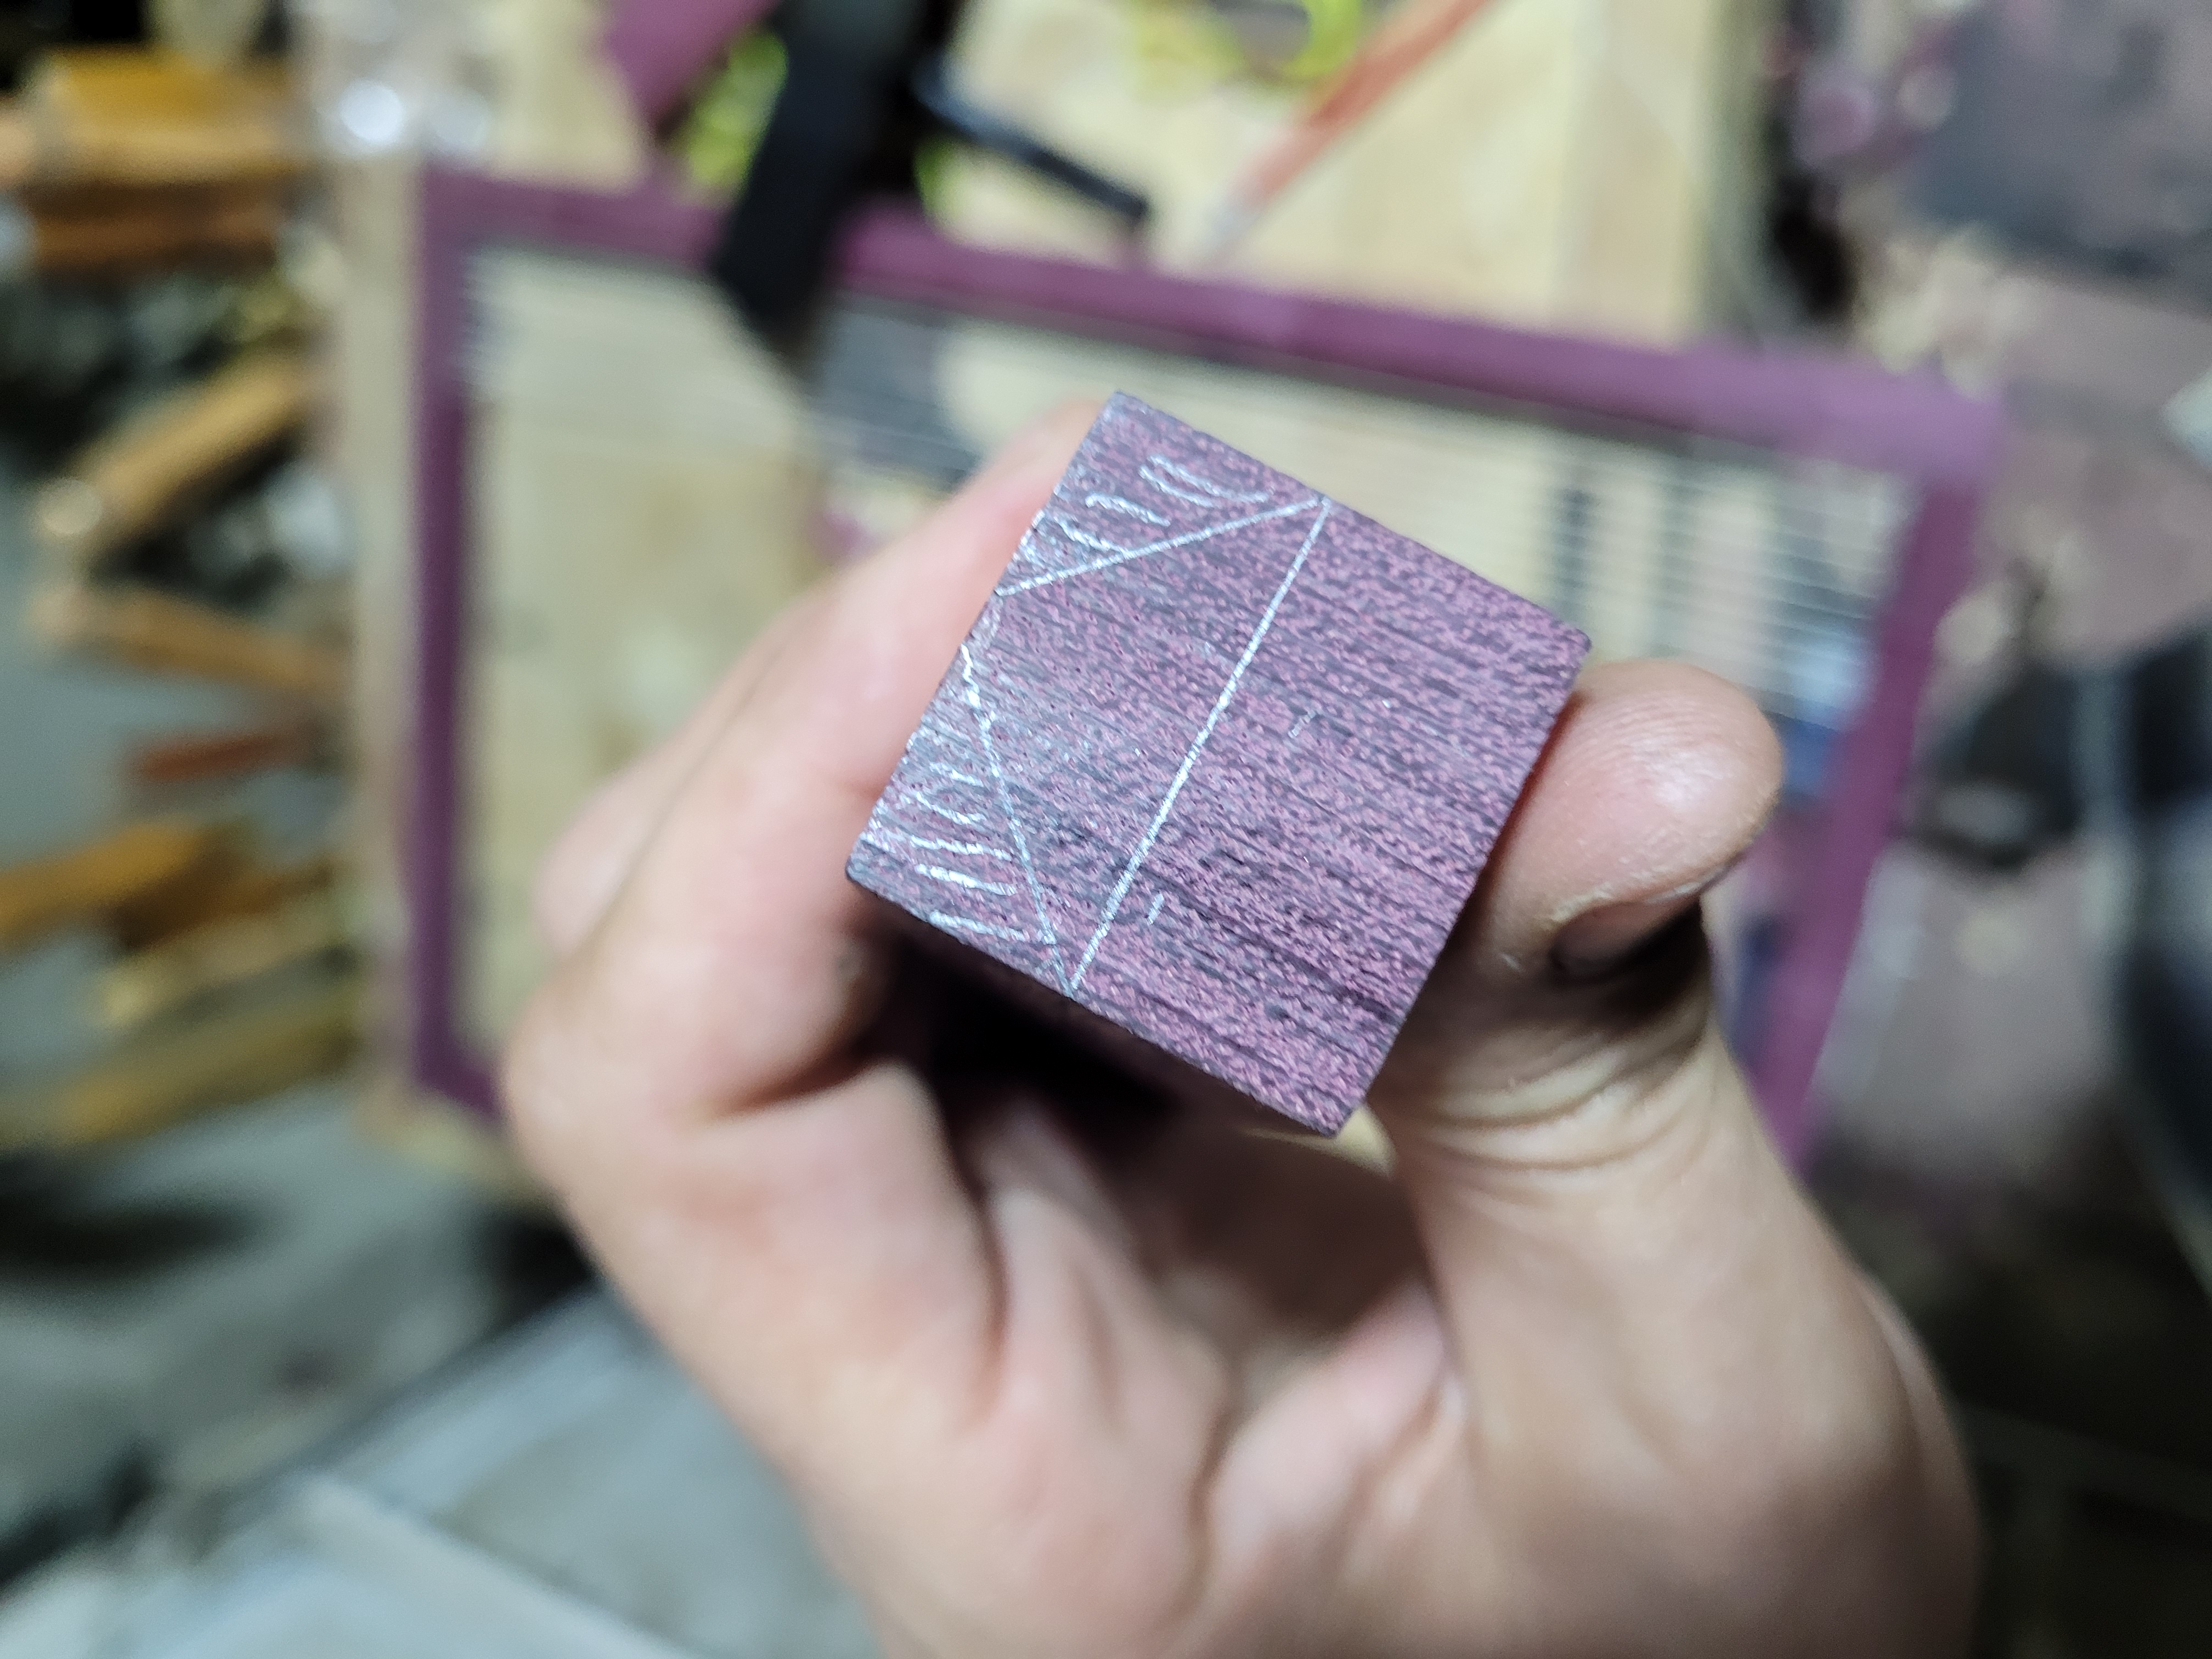
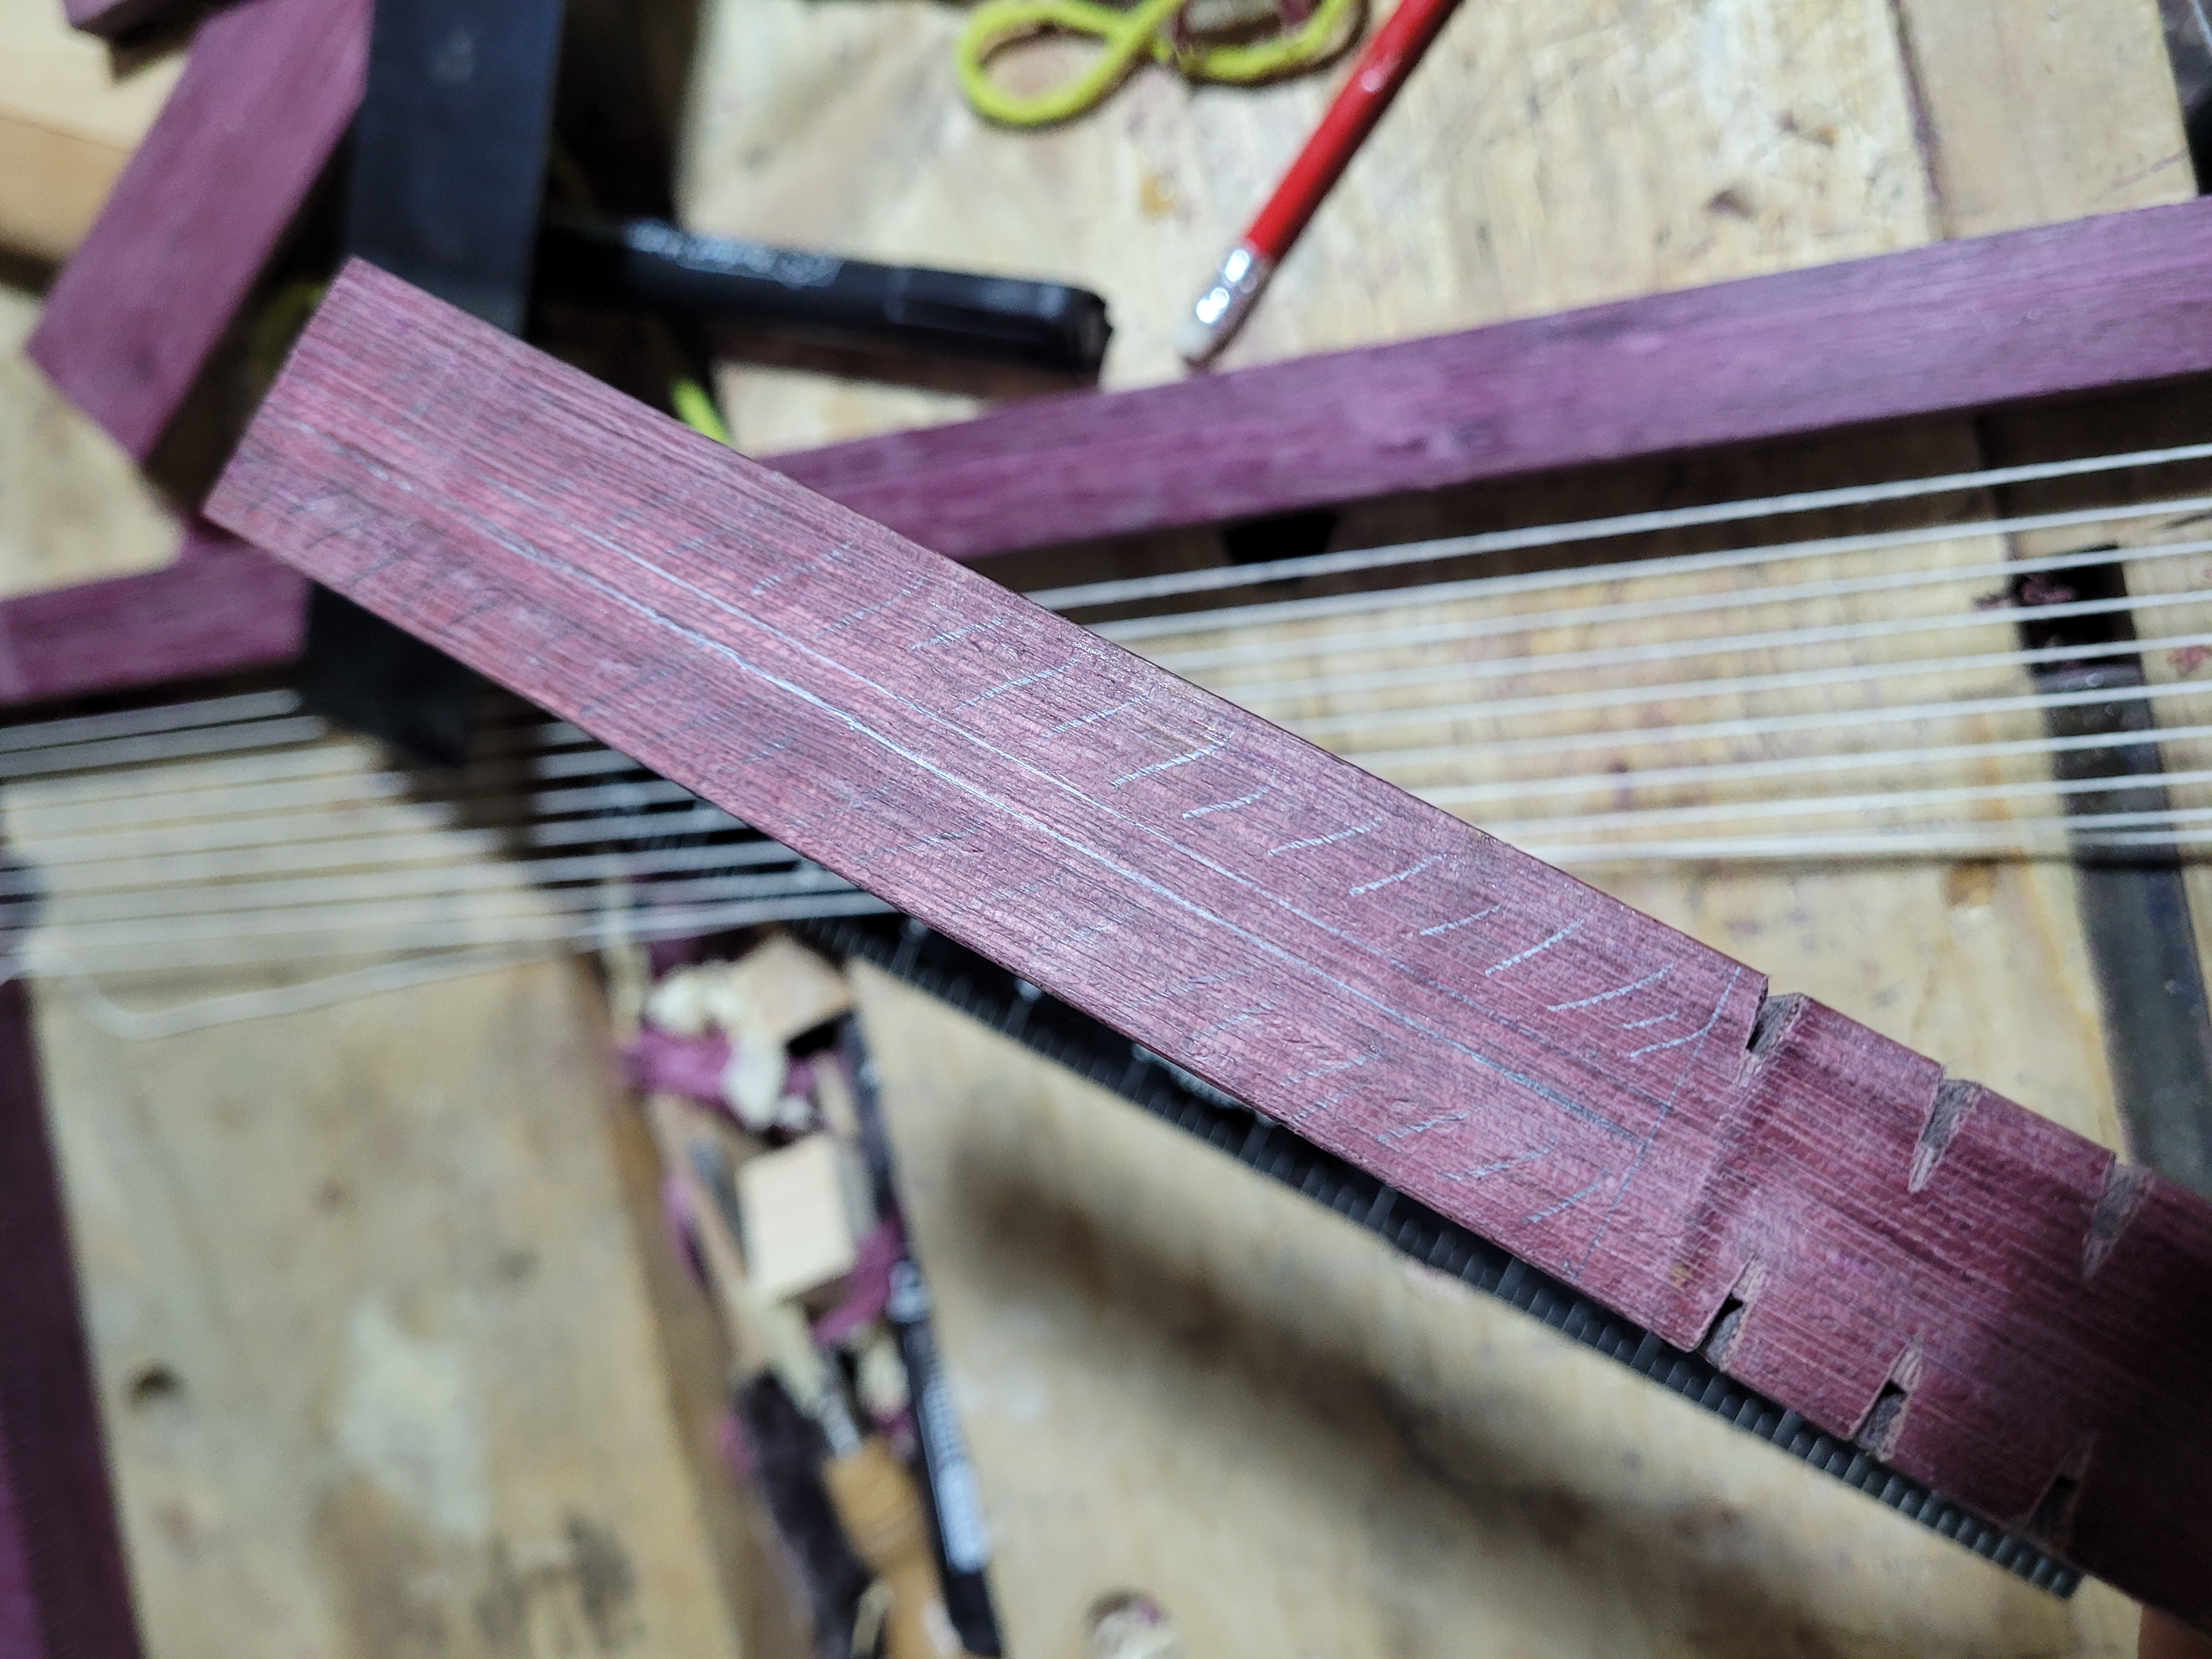
I lined up the stock with the front of the frame, and then transferred the locations of the kerfs with a pencil. Make sure the piece is centred so your handles are the same length.
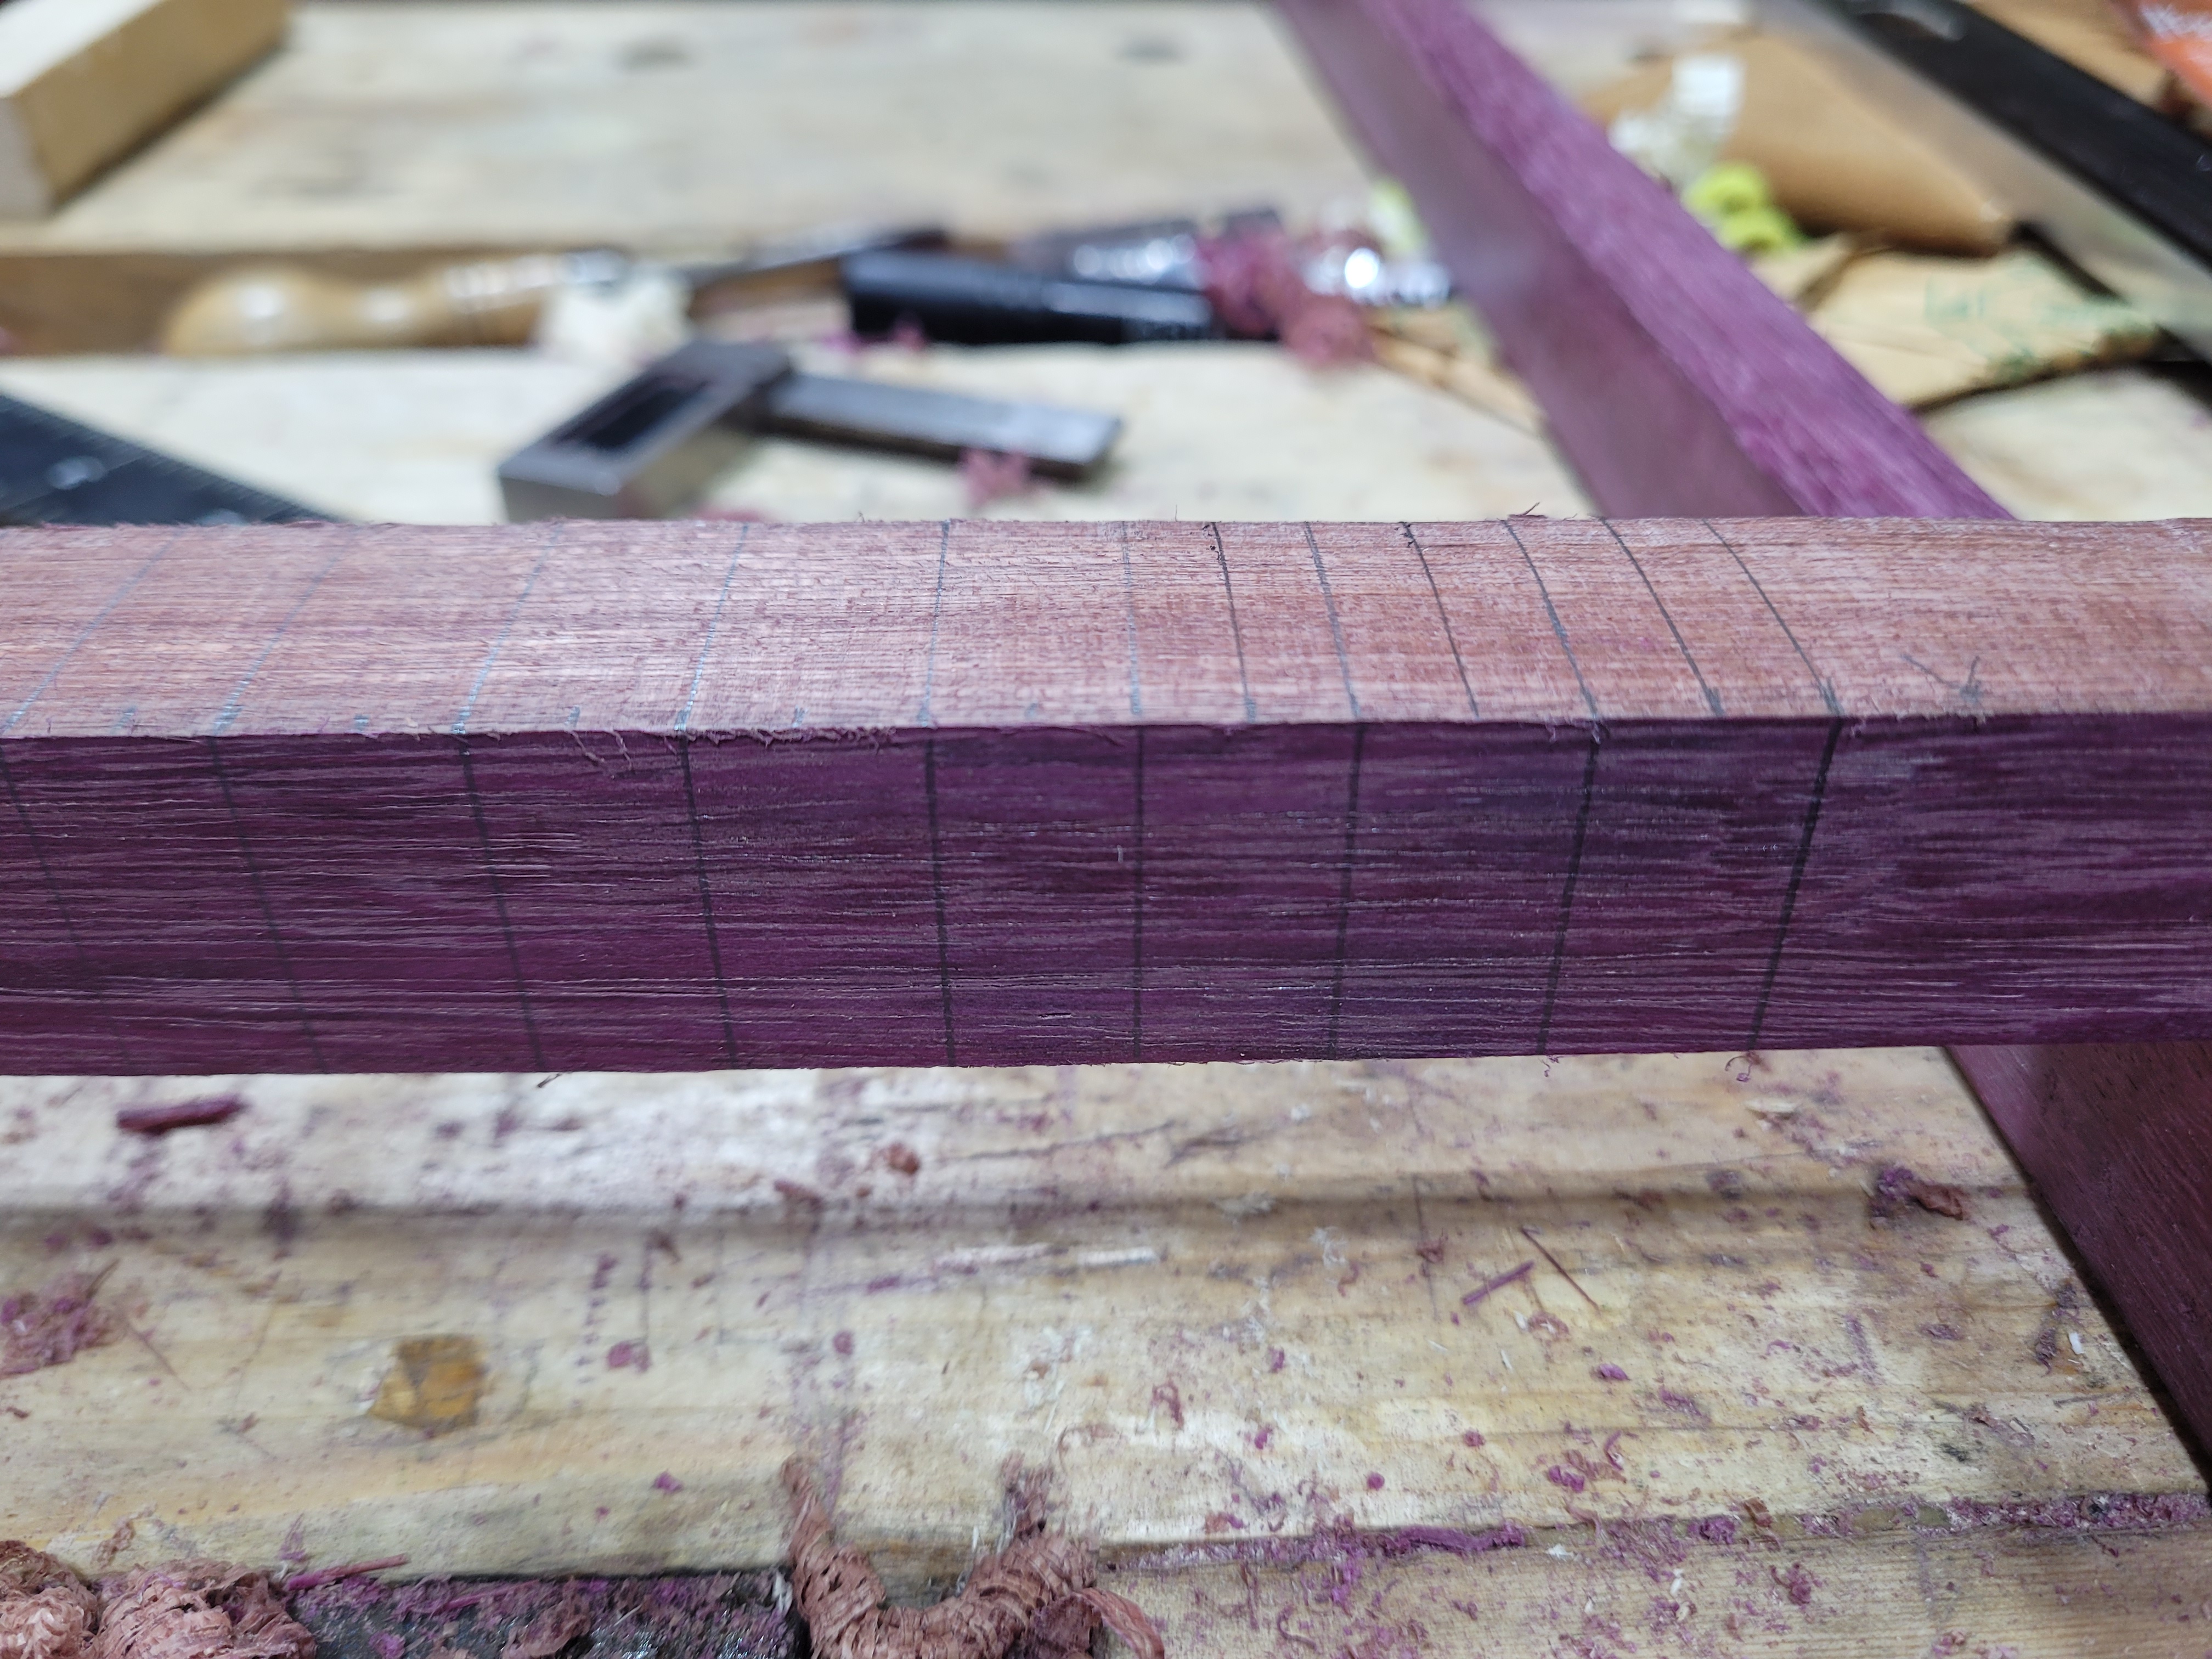
I used a square to carry the marks around. Remember the kerfs alternate sides. So from this perspective, the top of the piece will have a line for every cut, but the front and back will alternate.
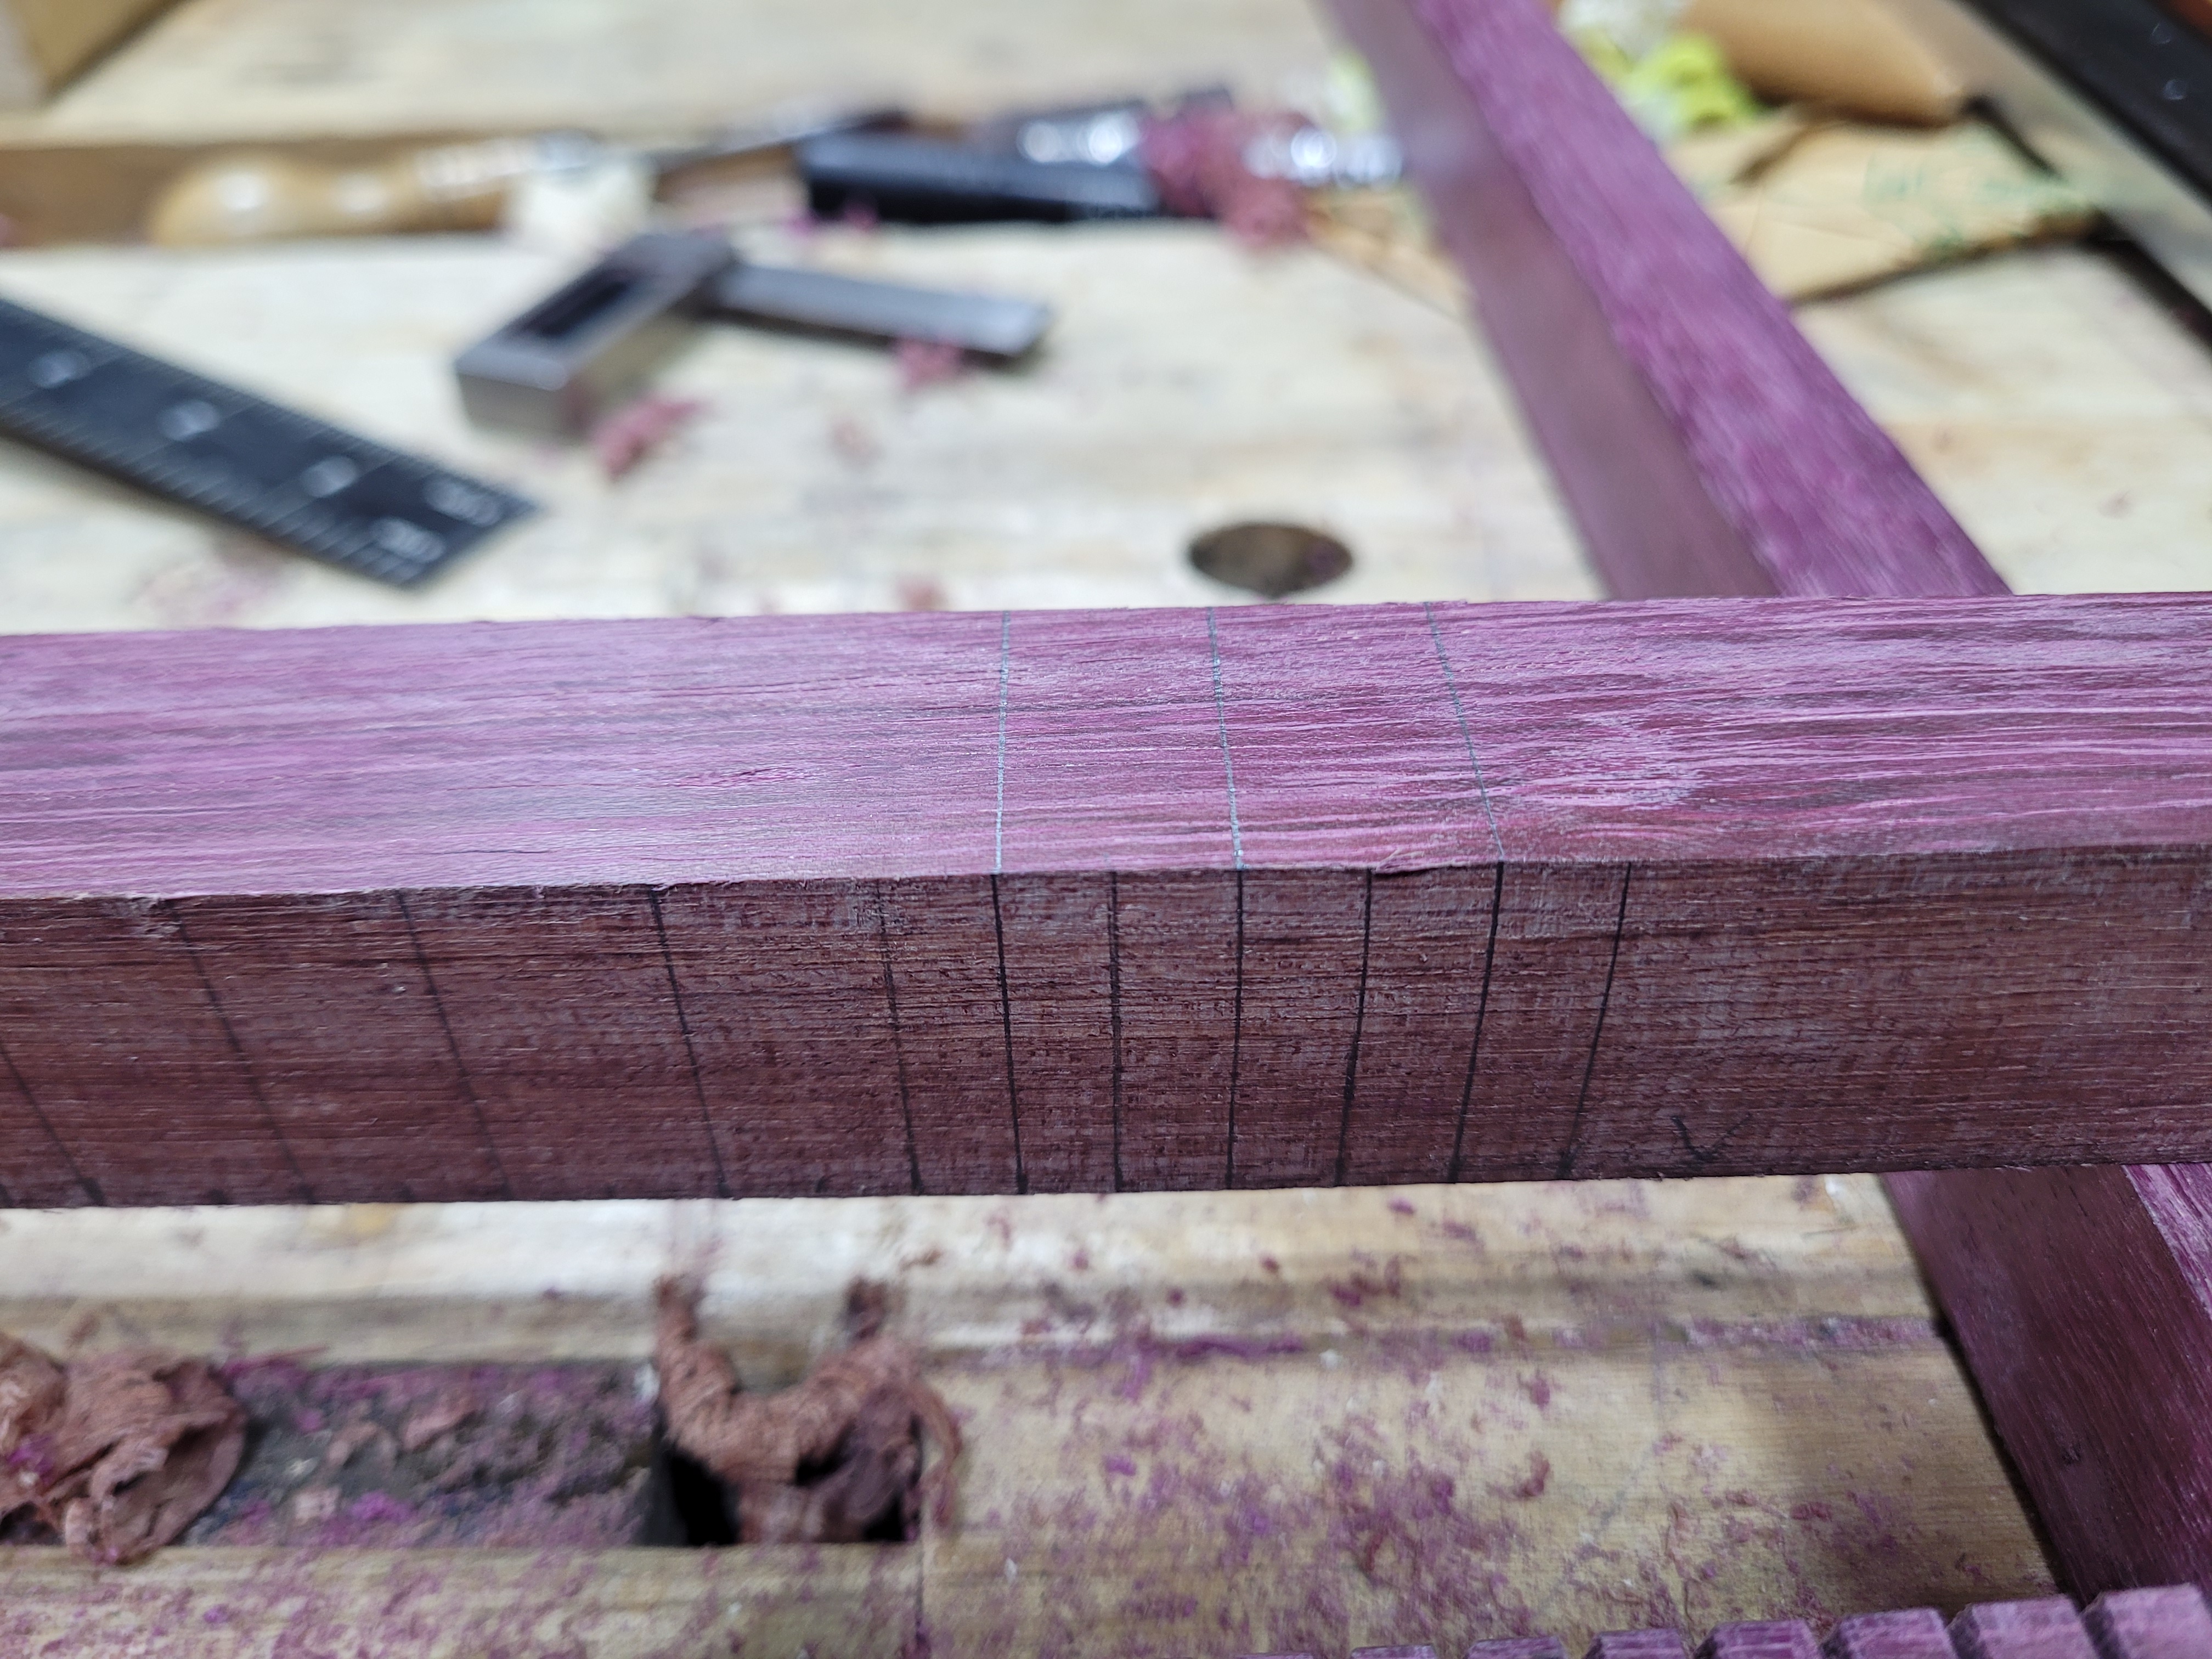
The first few marked out on the other side.
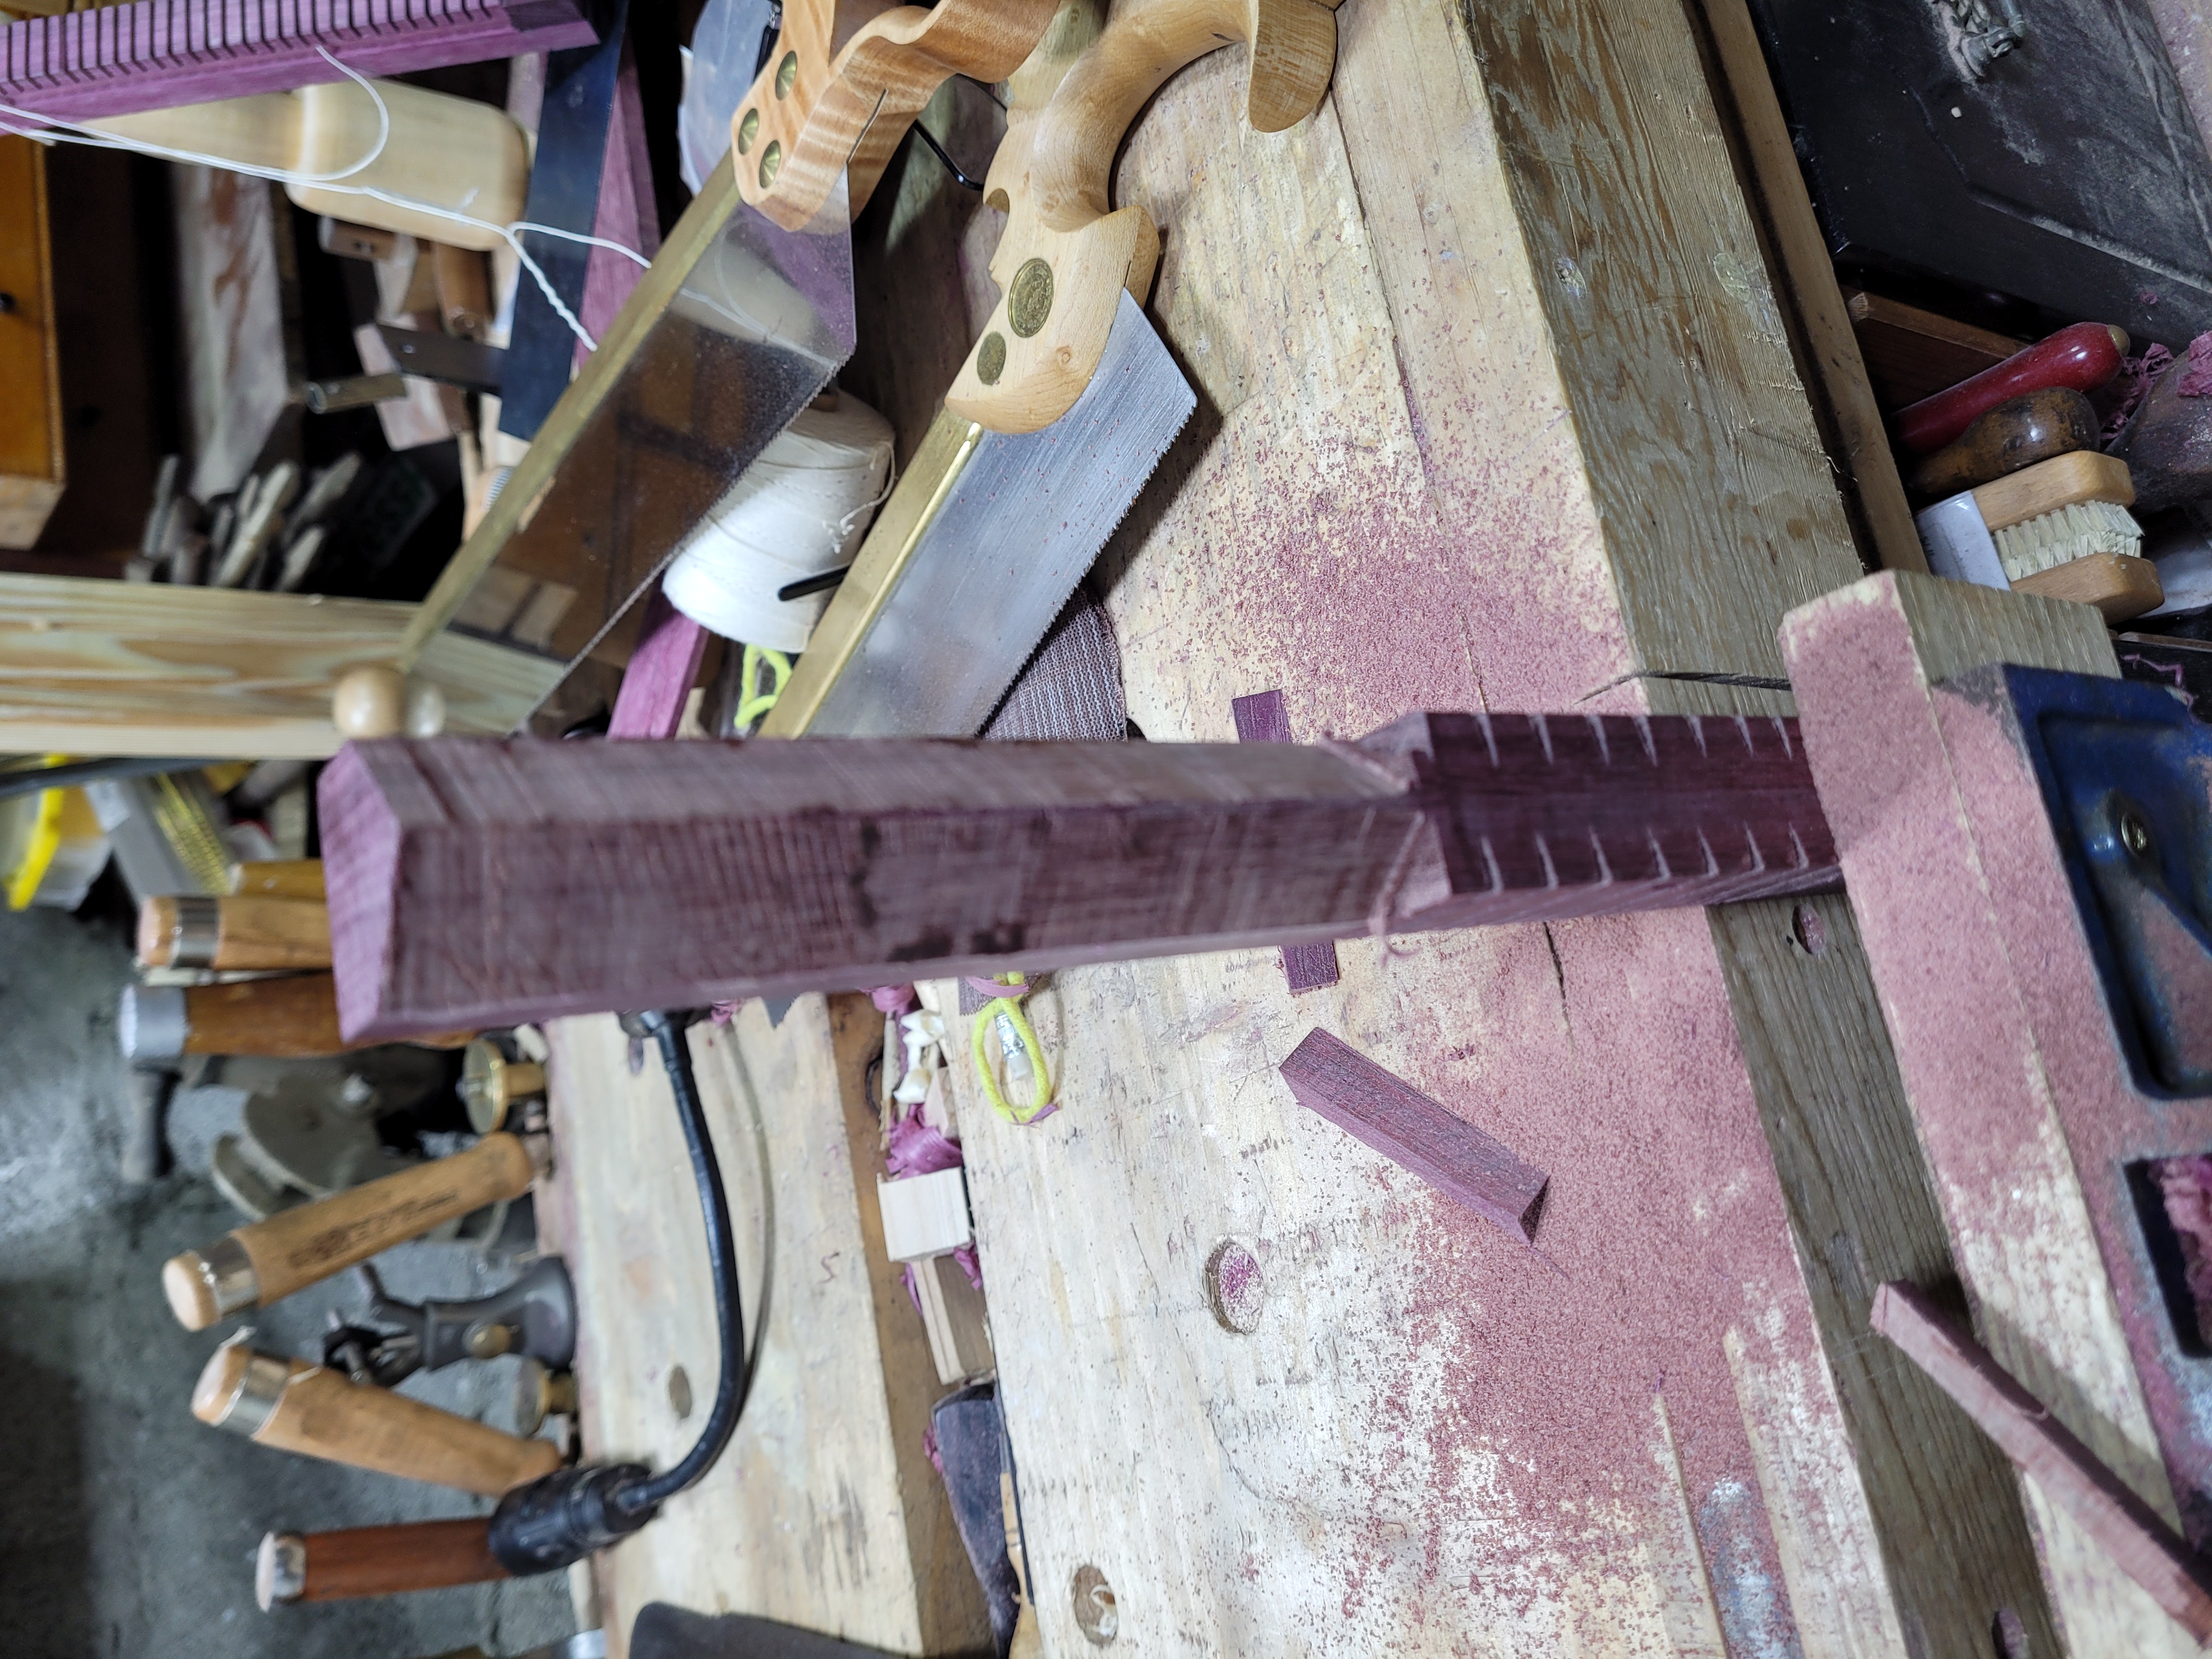
All of the kerfs marked out.
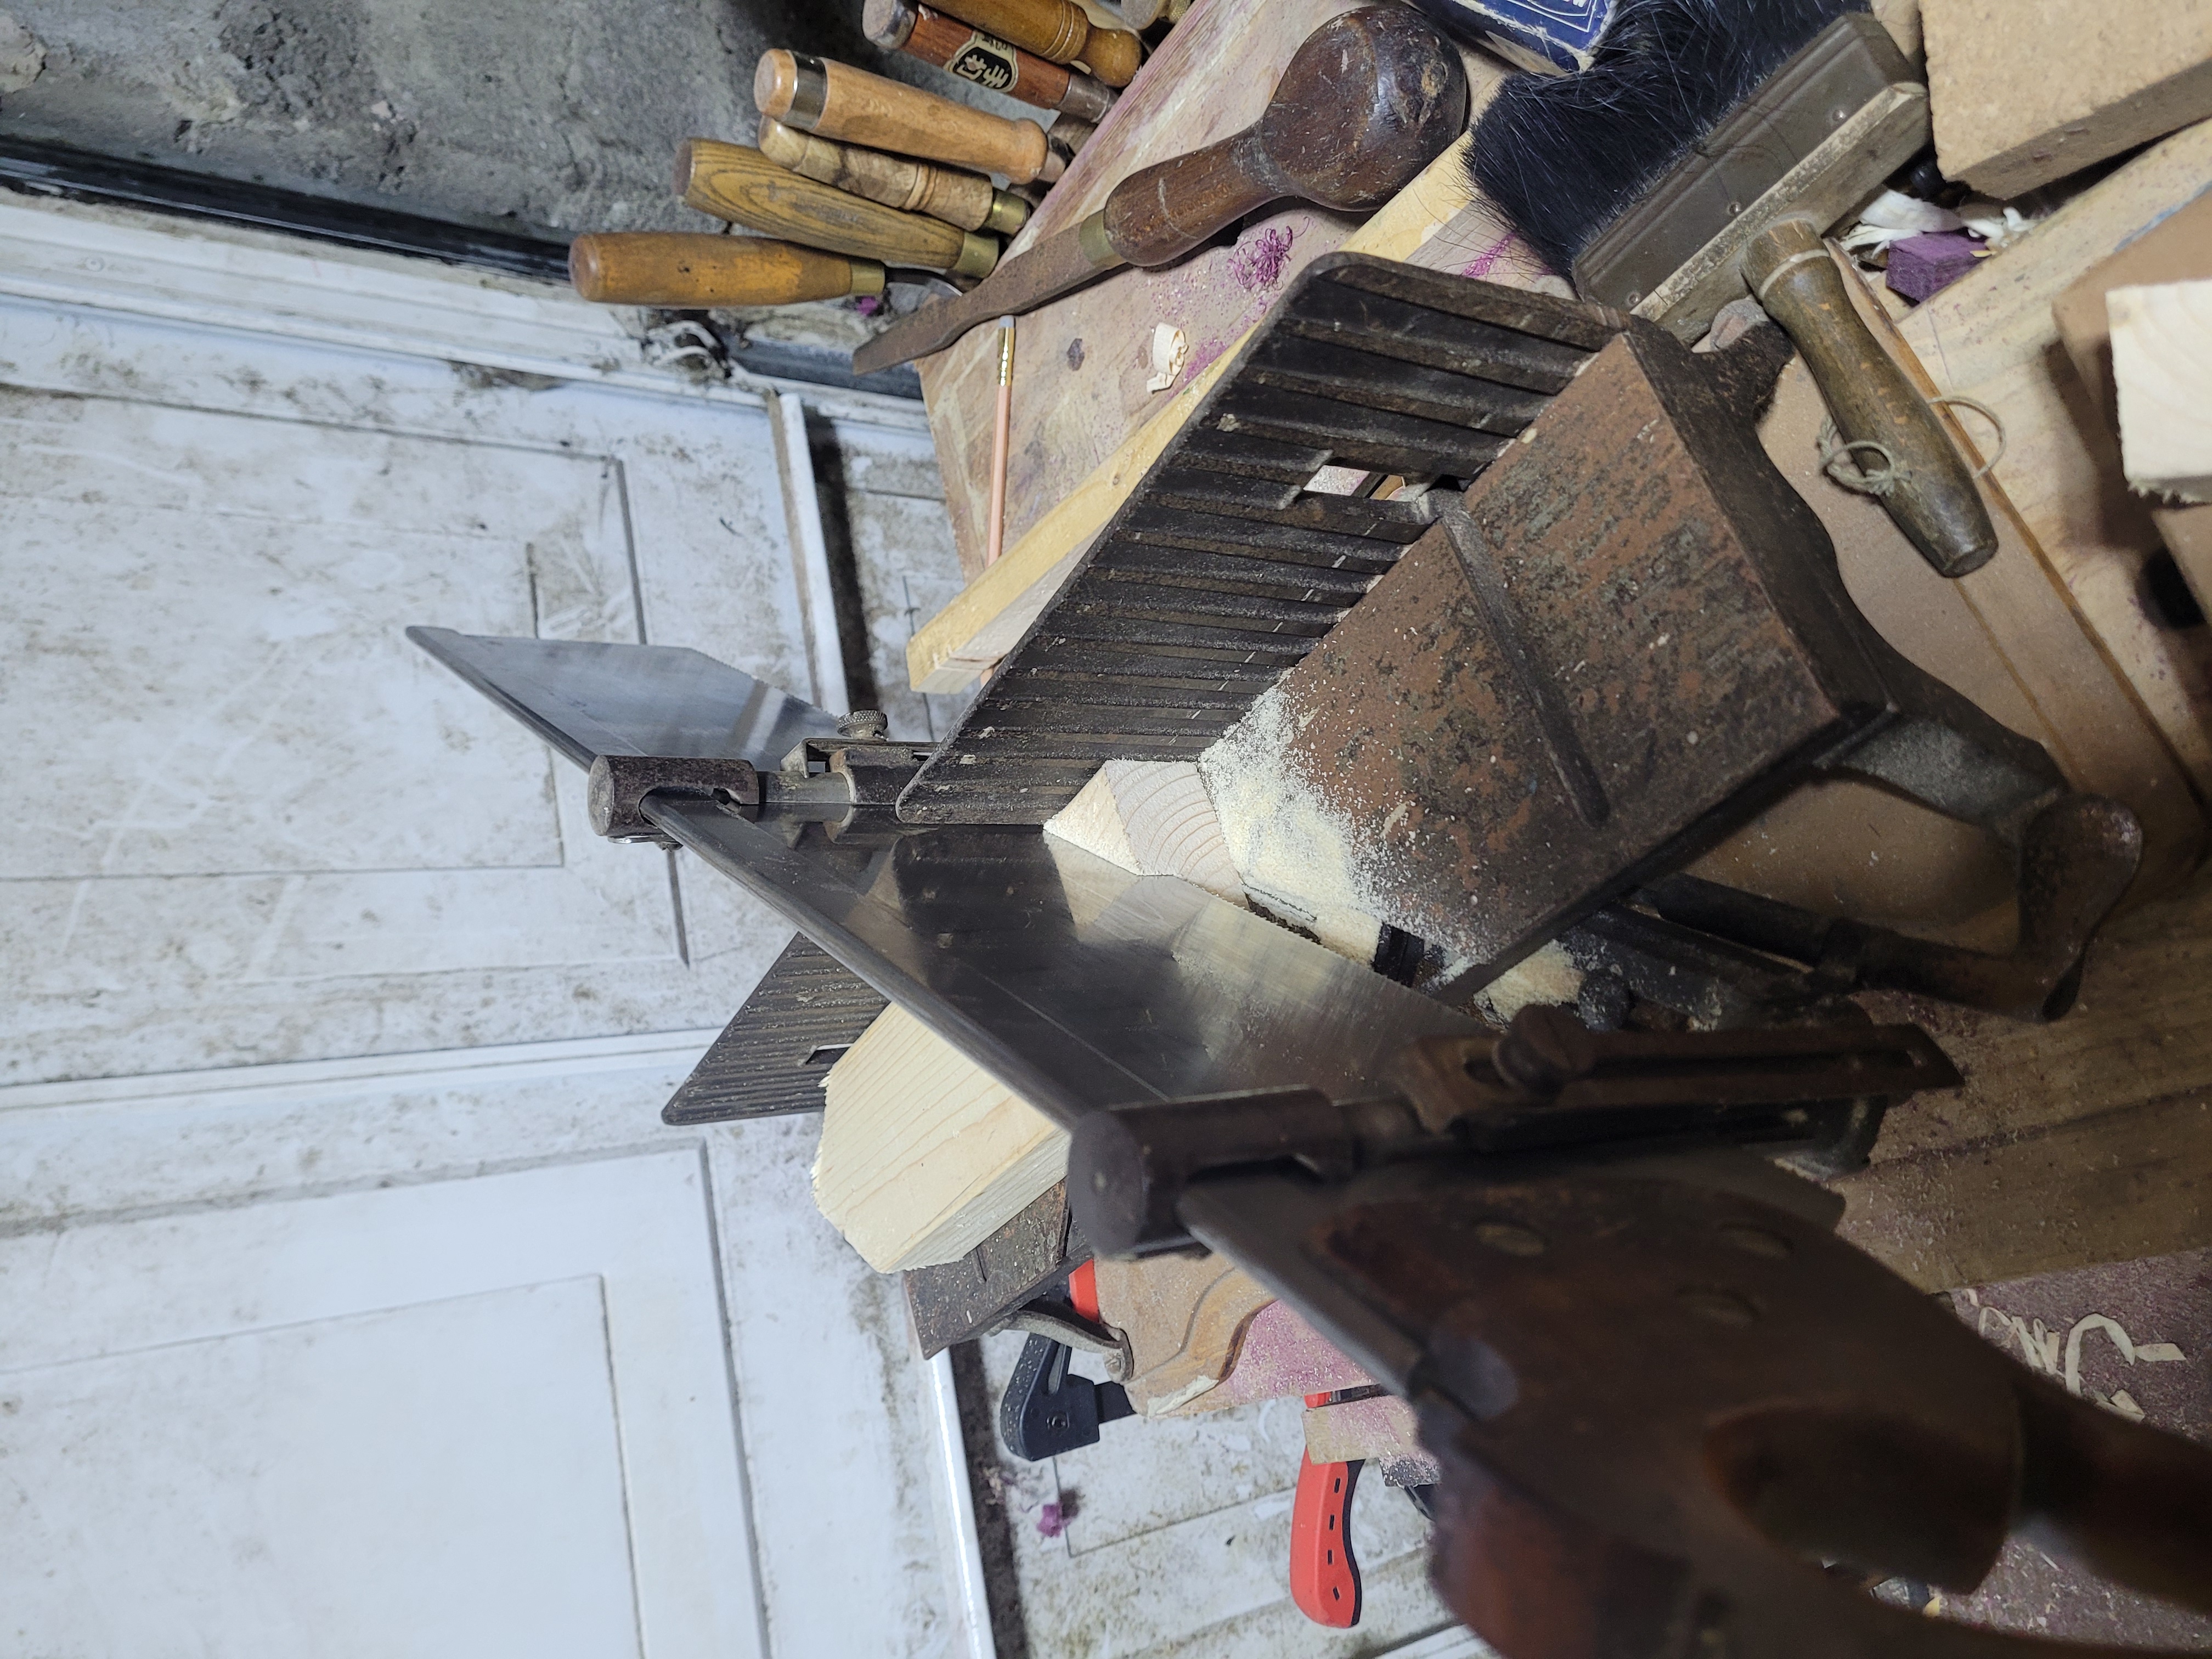
The 45 degree bench hook is held in place with holdfasts.
And the corners get chamfered to prevent the rough saw from tearing out the banks. This was not enough to prevent all the tearout, should have gone deeper.

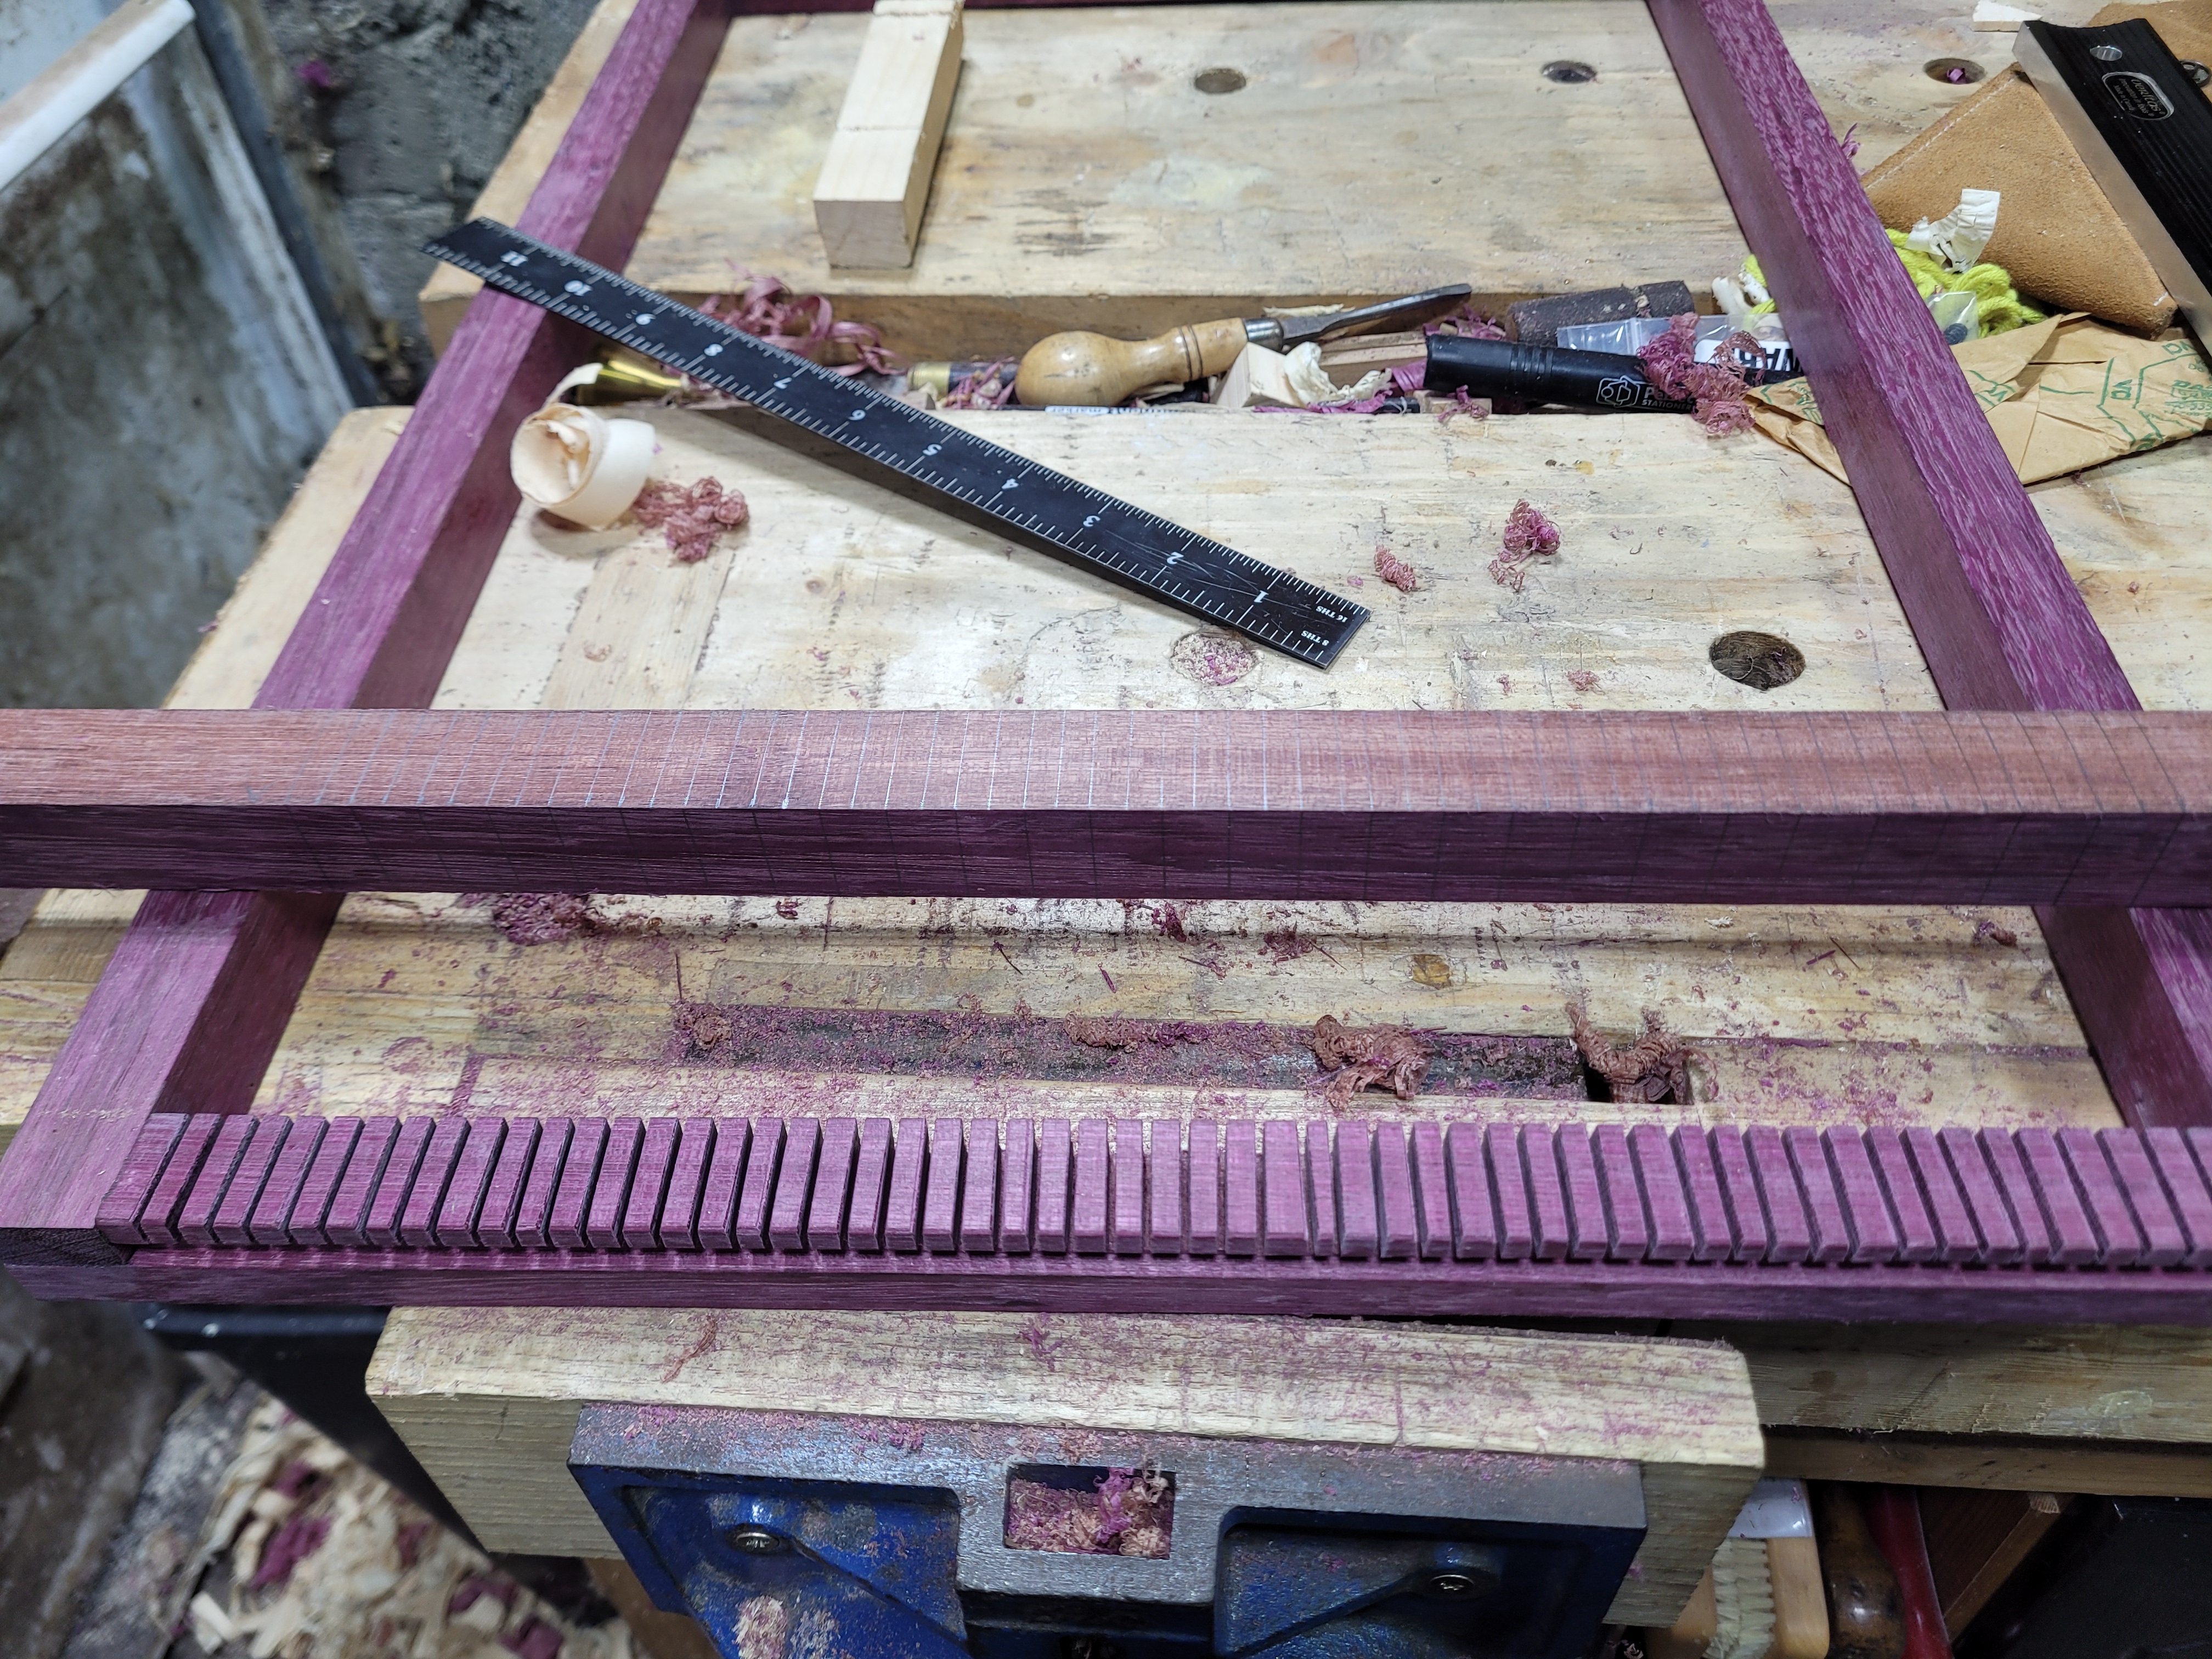
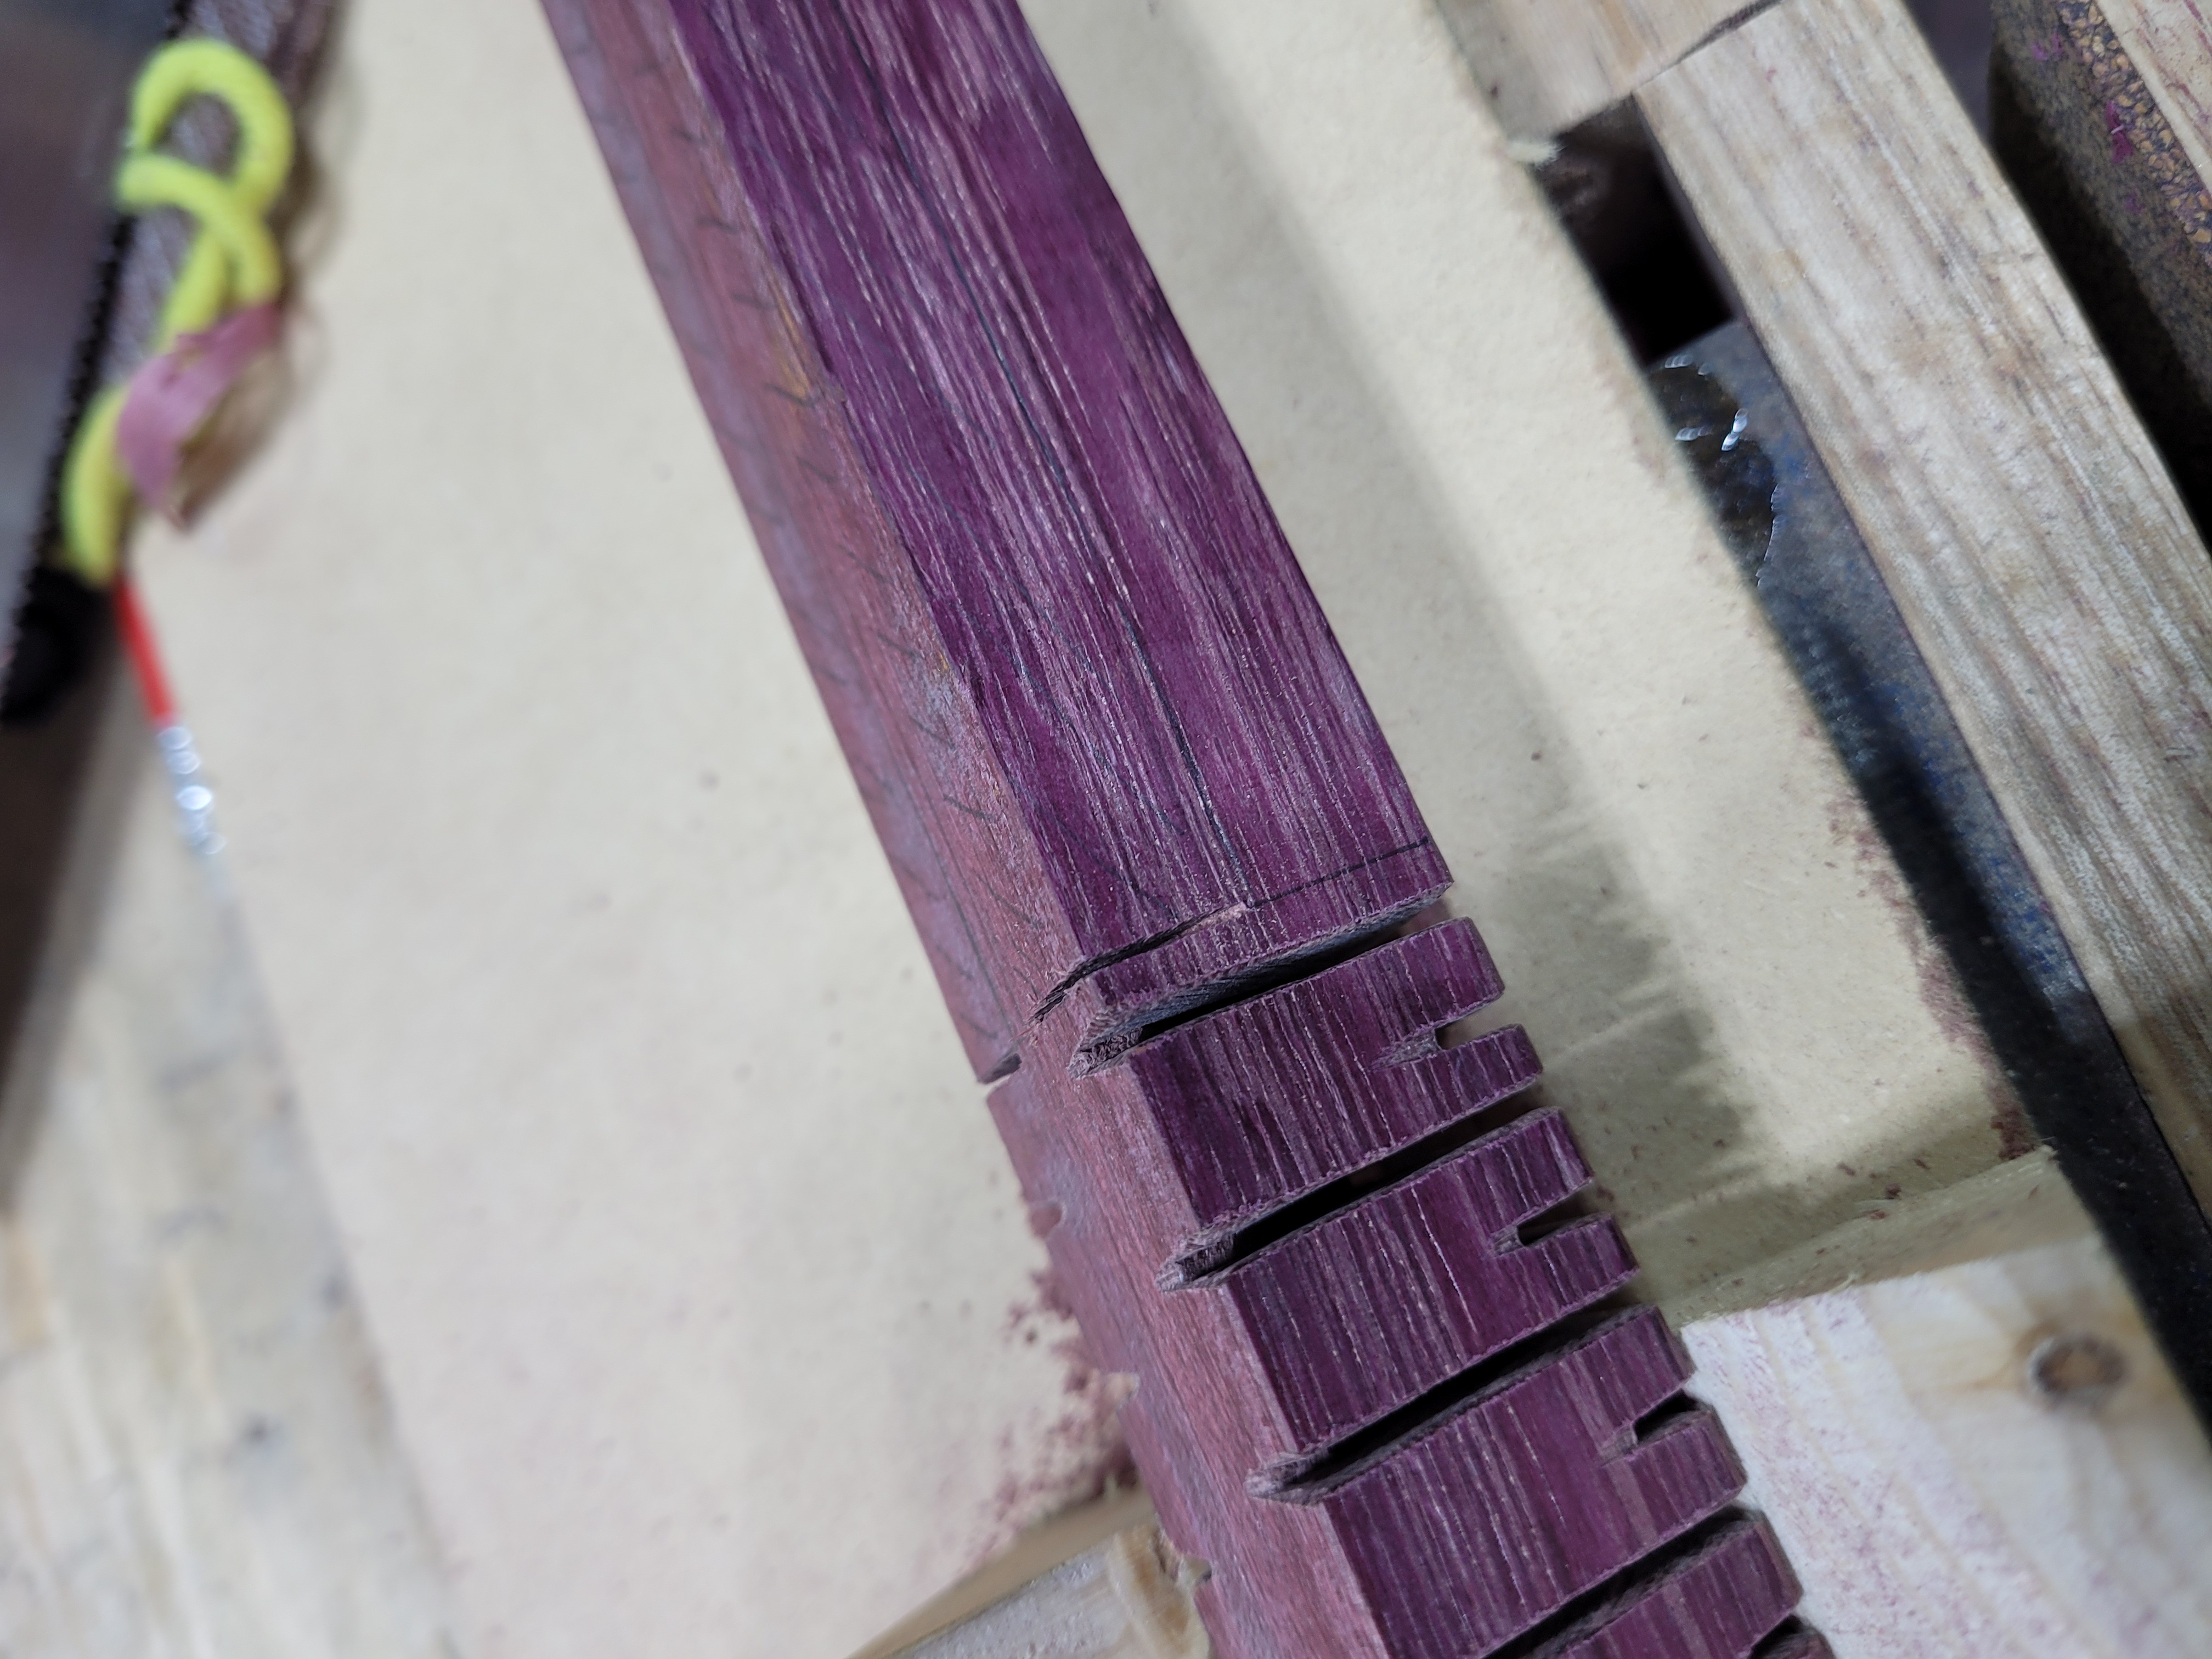
Then work your way down, being careful to alternate with the layout lines. One corner of my jig snapped off. Fortunately it only has to resist pushing force, I just rotated 180 degrees and got on with it. I was worried about the kerfs weakening the work piece. To avoid putting pressure on the piece where the kerfs might be weaking it, I made sure to work from right to left. I was never leaning on the part of the piece with kerfs. I would saw down until I hit the two corners. Then I would make a 90 degree cut to make the little notch to stop the high strings from slipping on both sides.
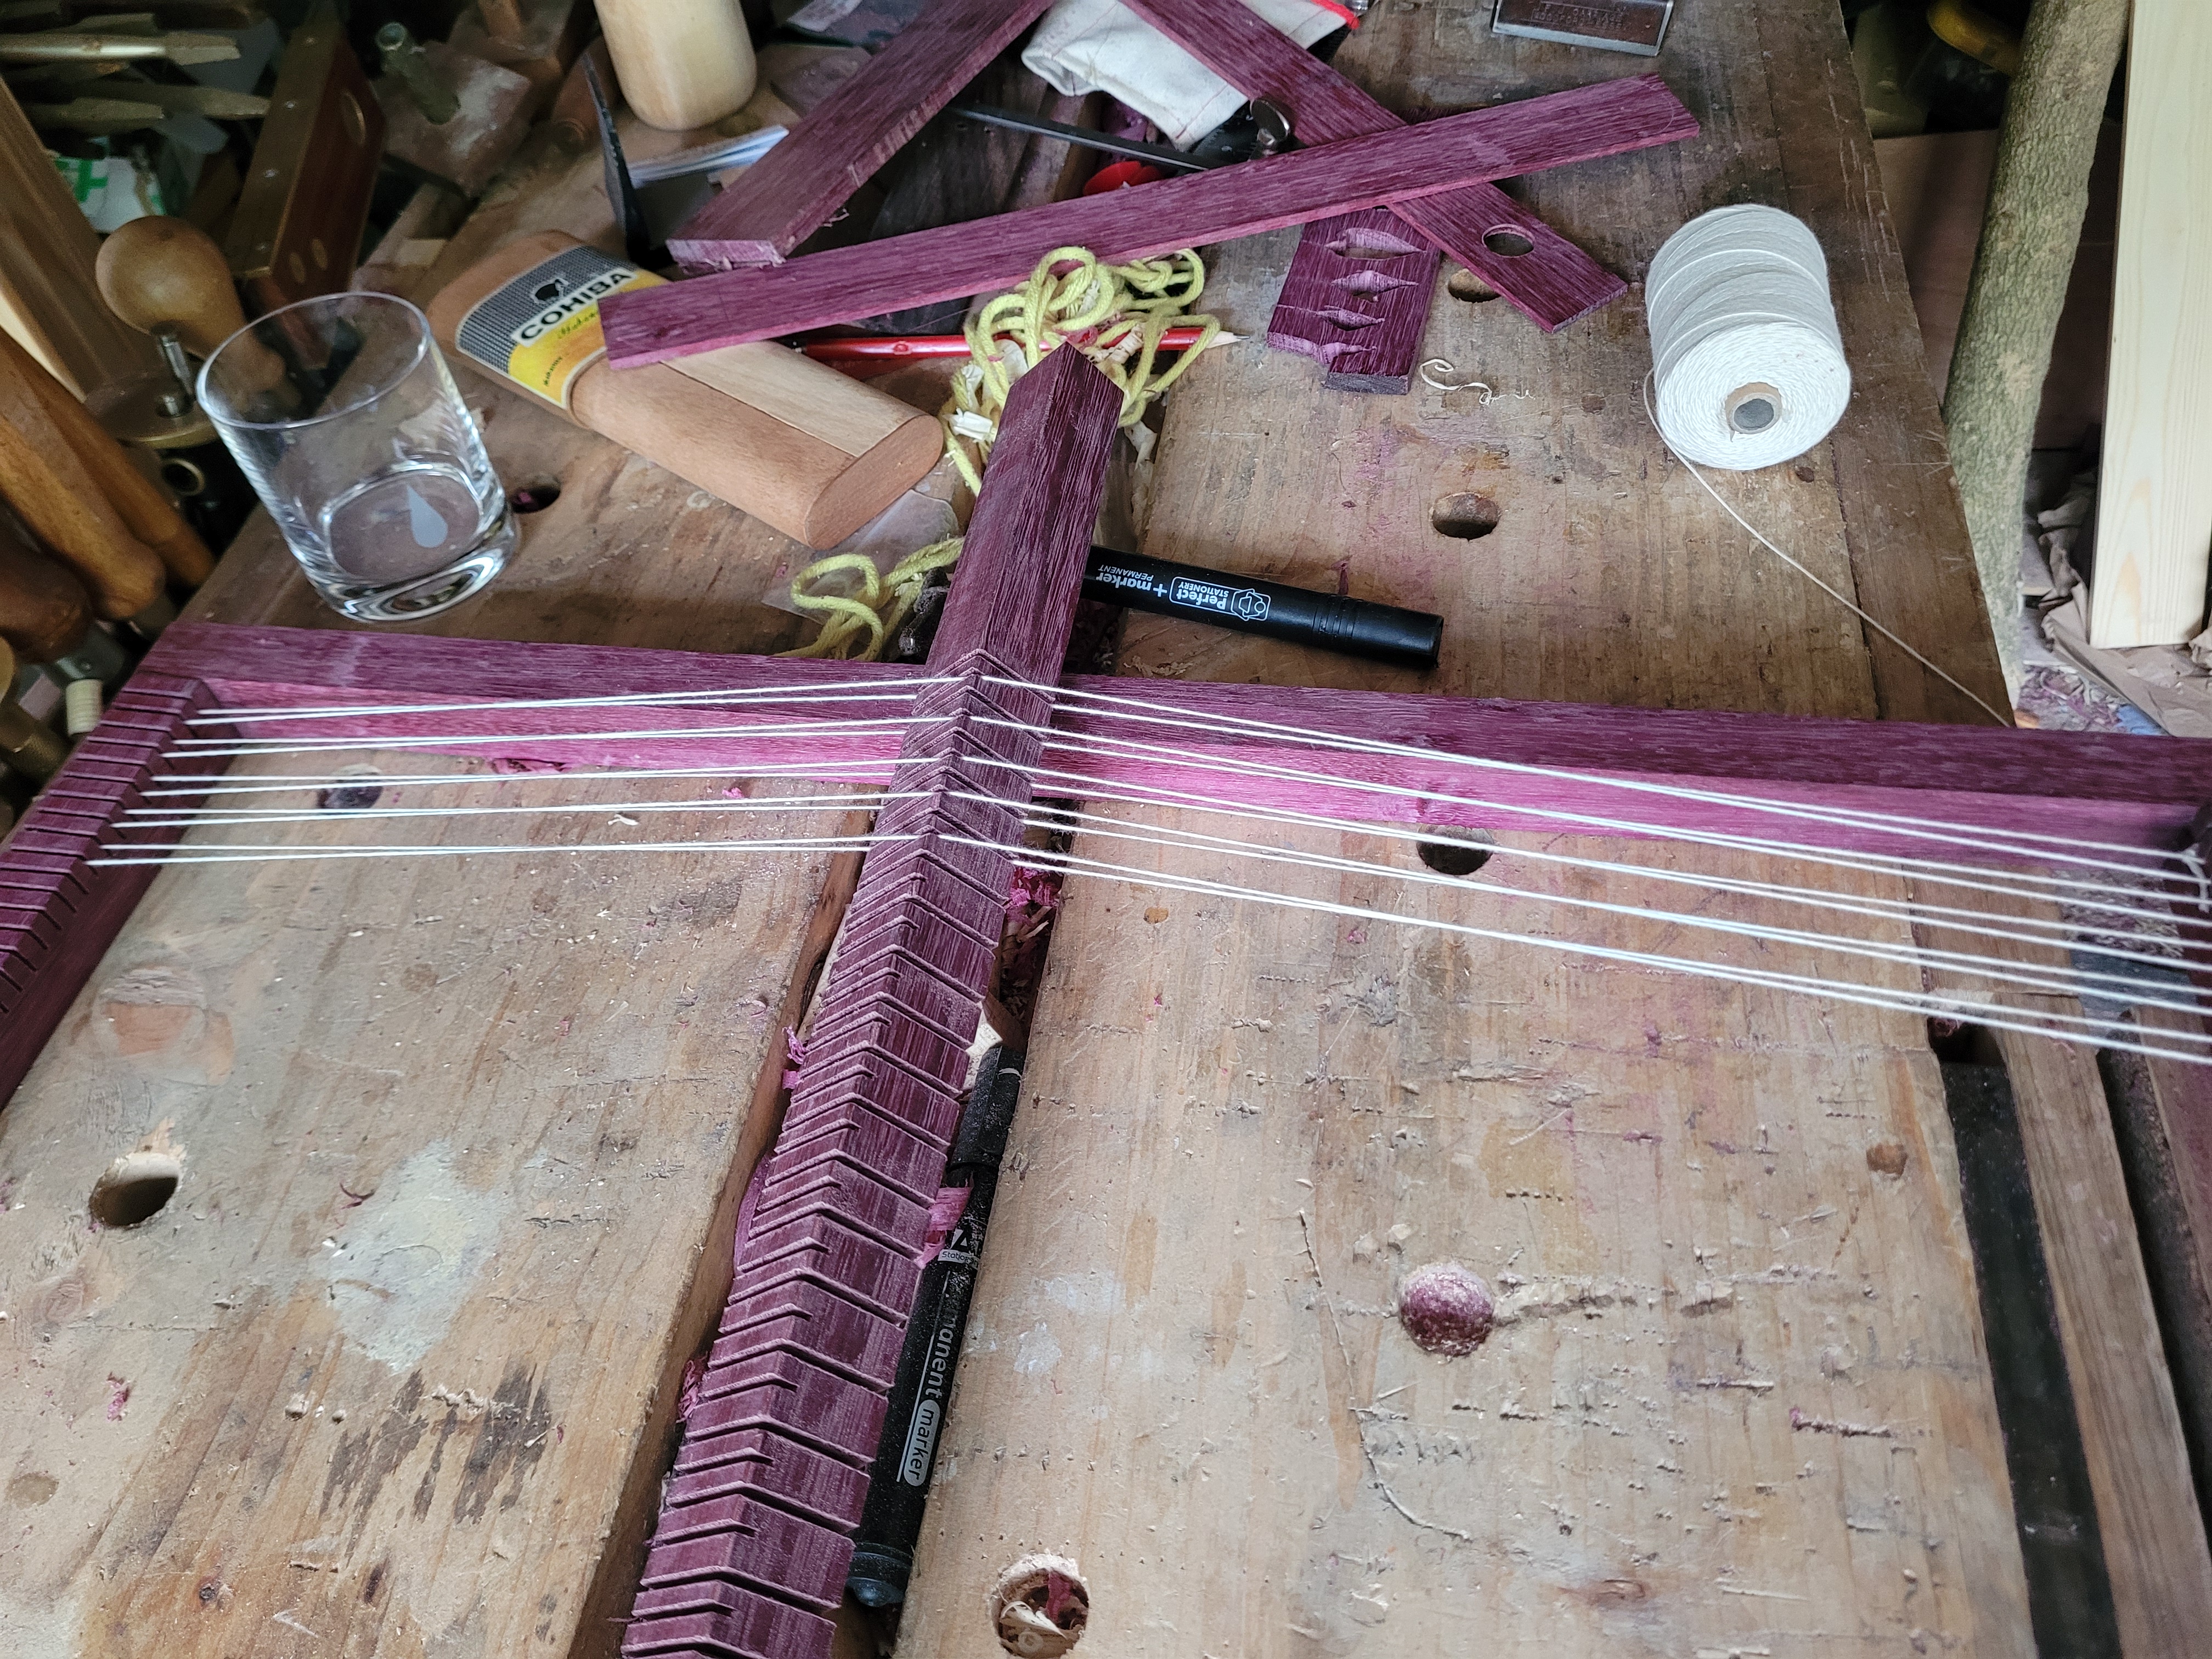
Once all of the cuts have been made, the moment of truth. I strung up the loom with some warp thread. The gap is more than big enough for the shuttle to comfortably pass through. The warp thread is not sticking when I rotate it.

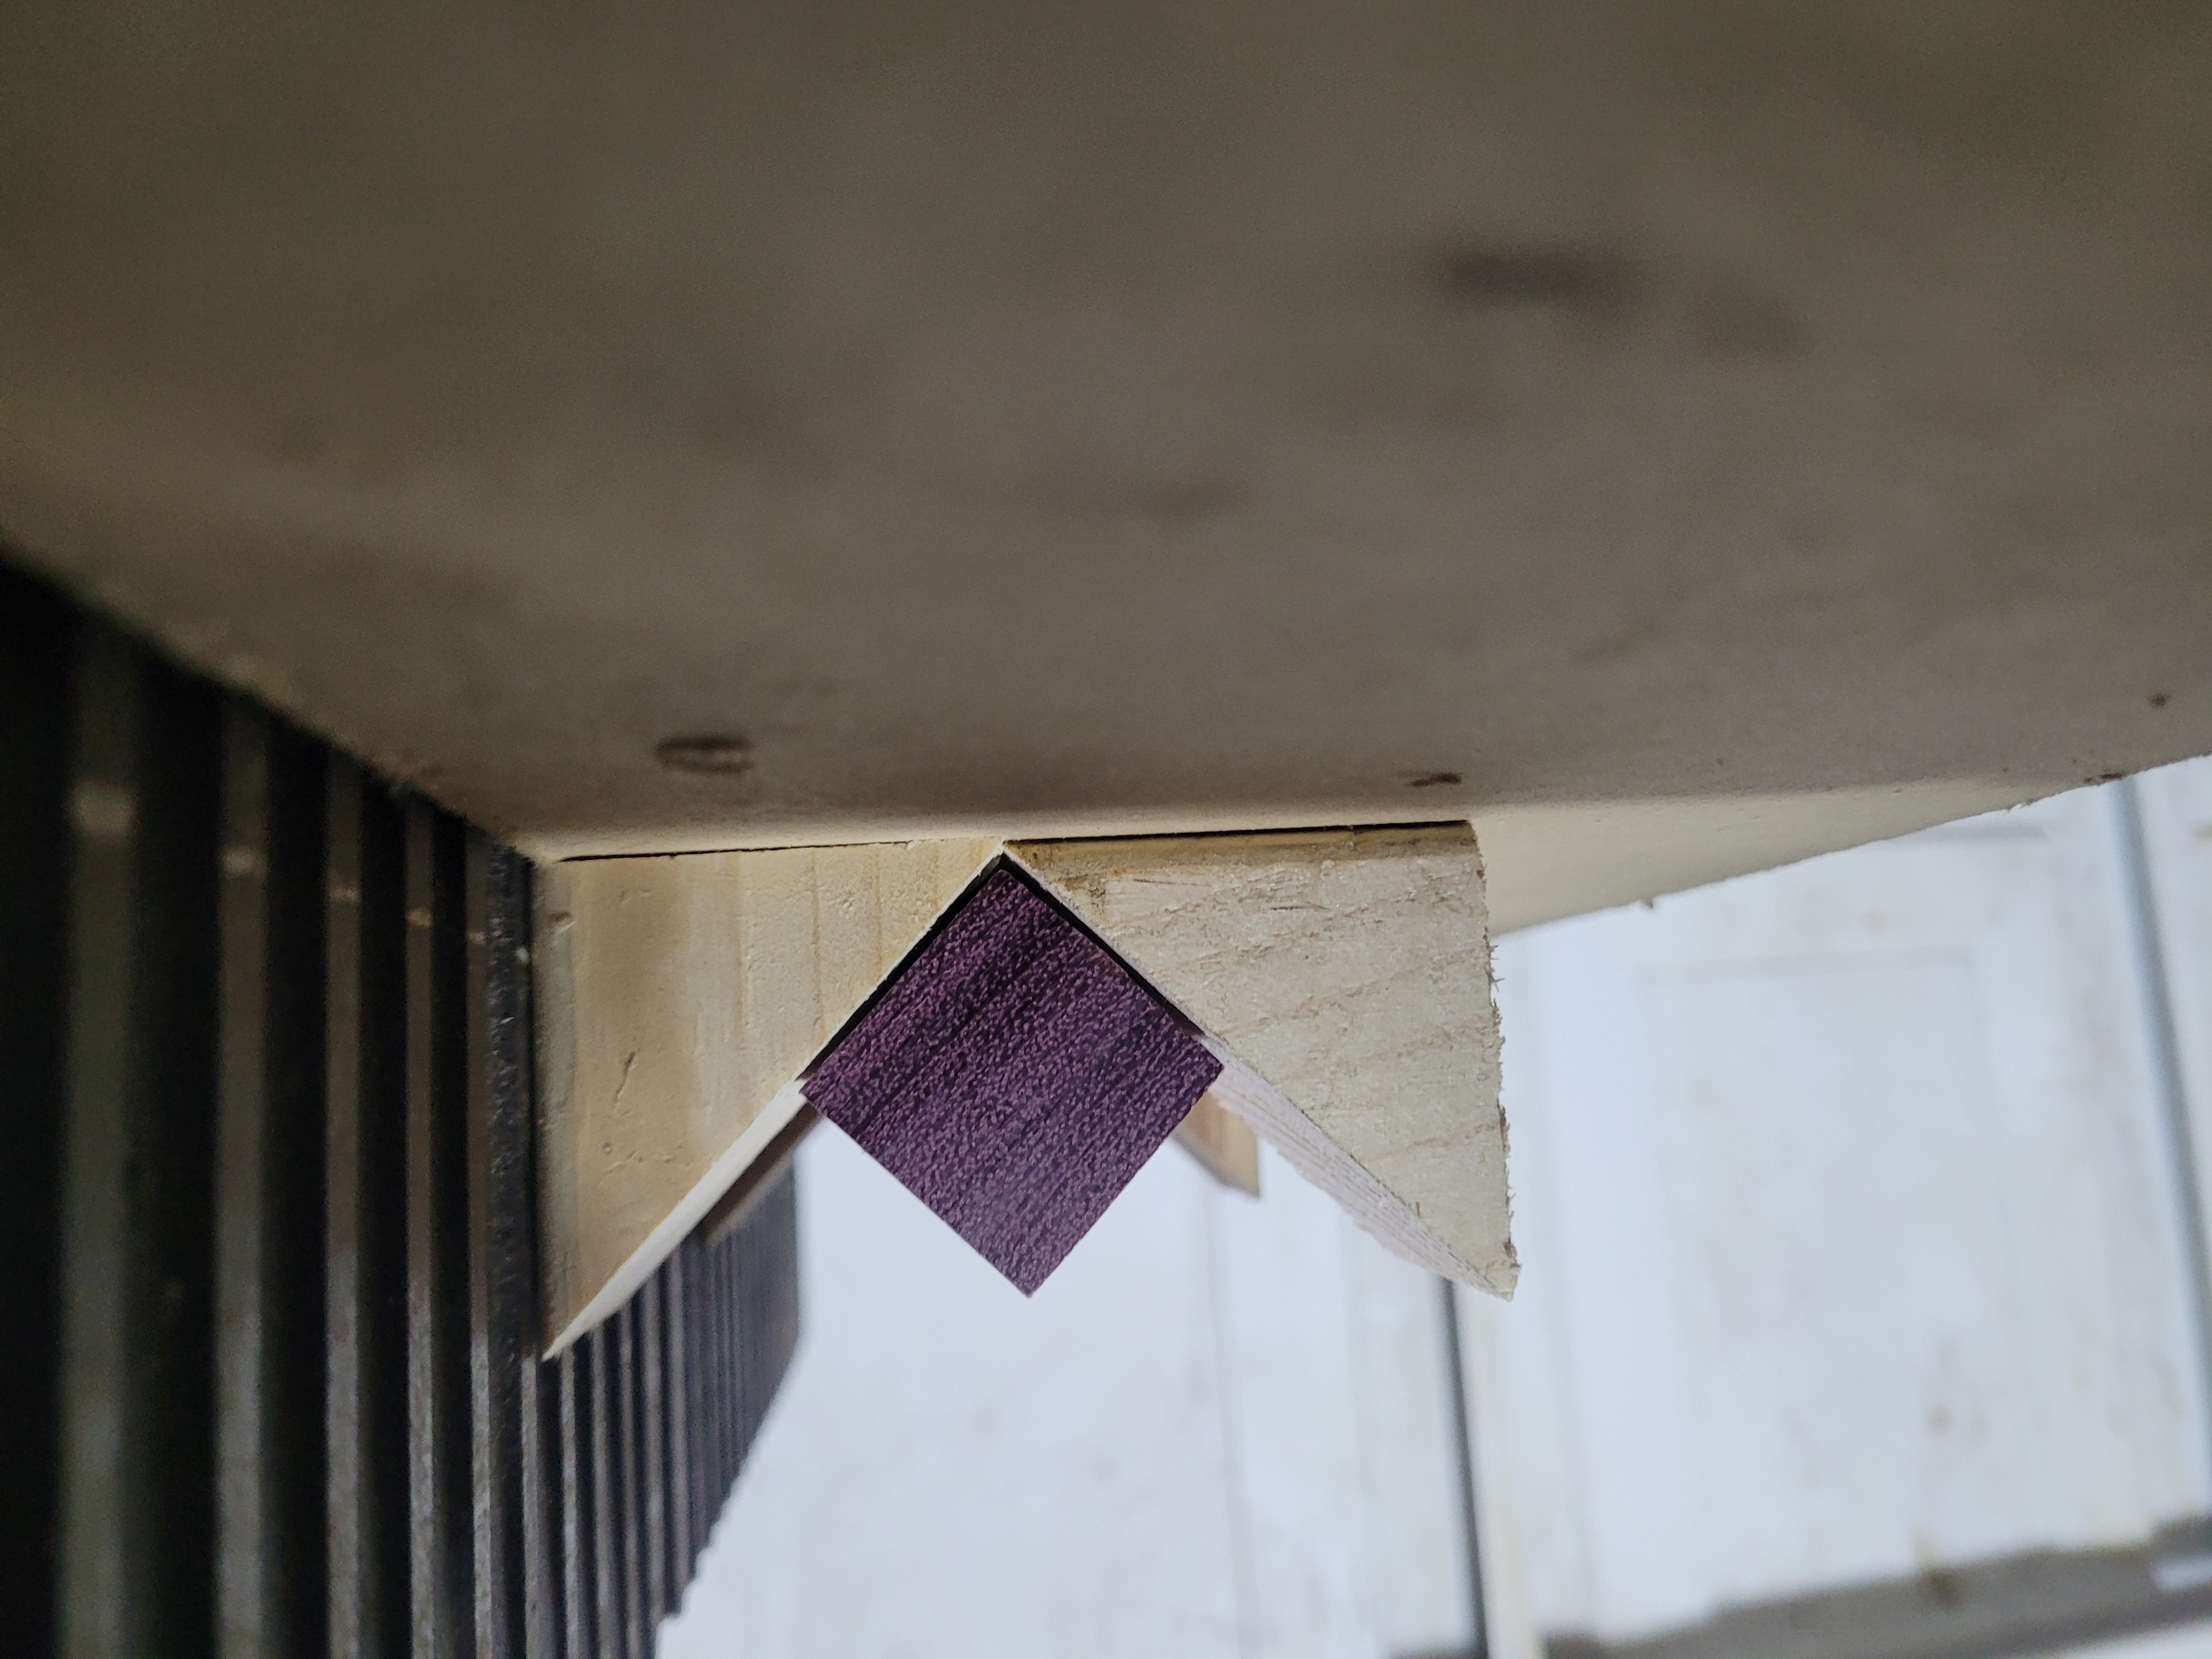
I chamfered the slots a little with a triangular file to make it easier for the thread to slip in, and reduce the risk of chipping.
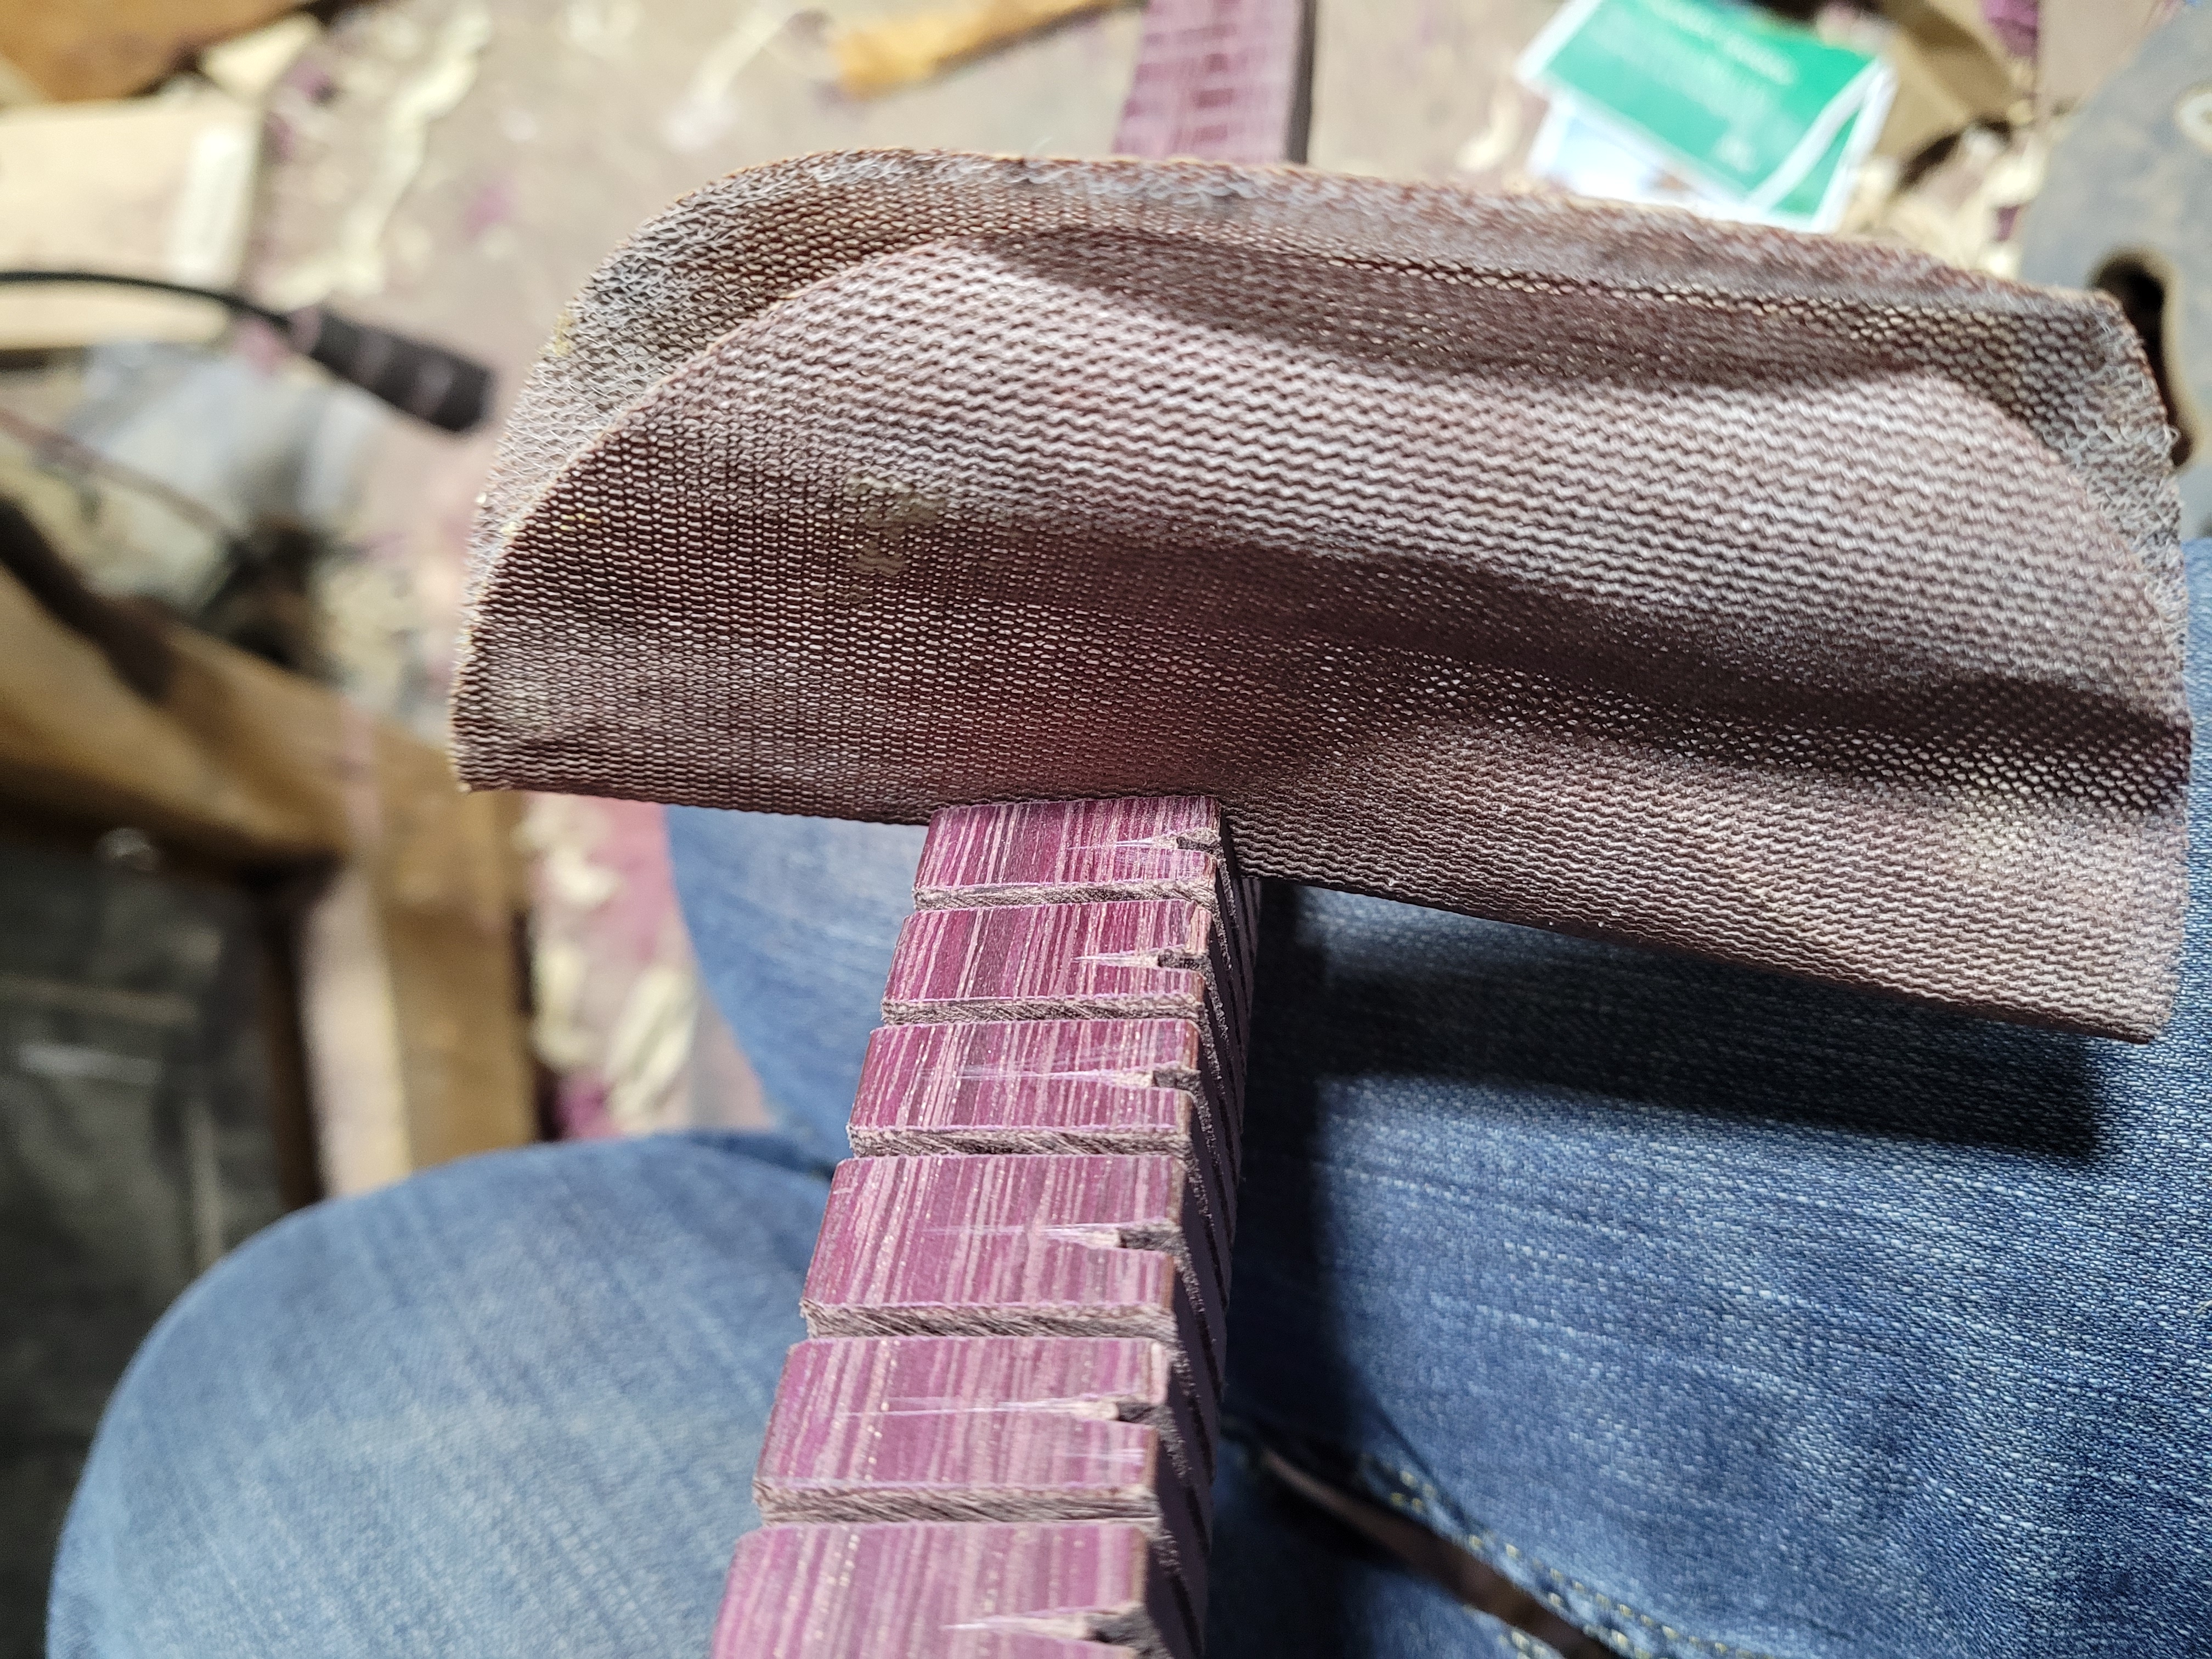
The kerfs get worked with a little abranet to get rid of any loose or rough fibres that might catch the thread.
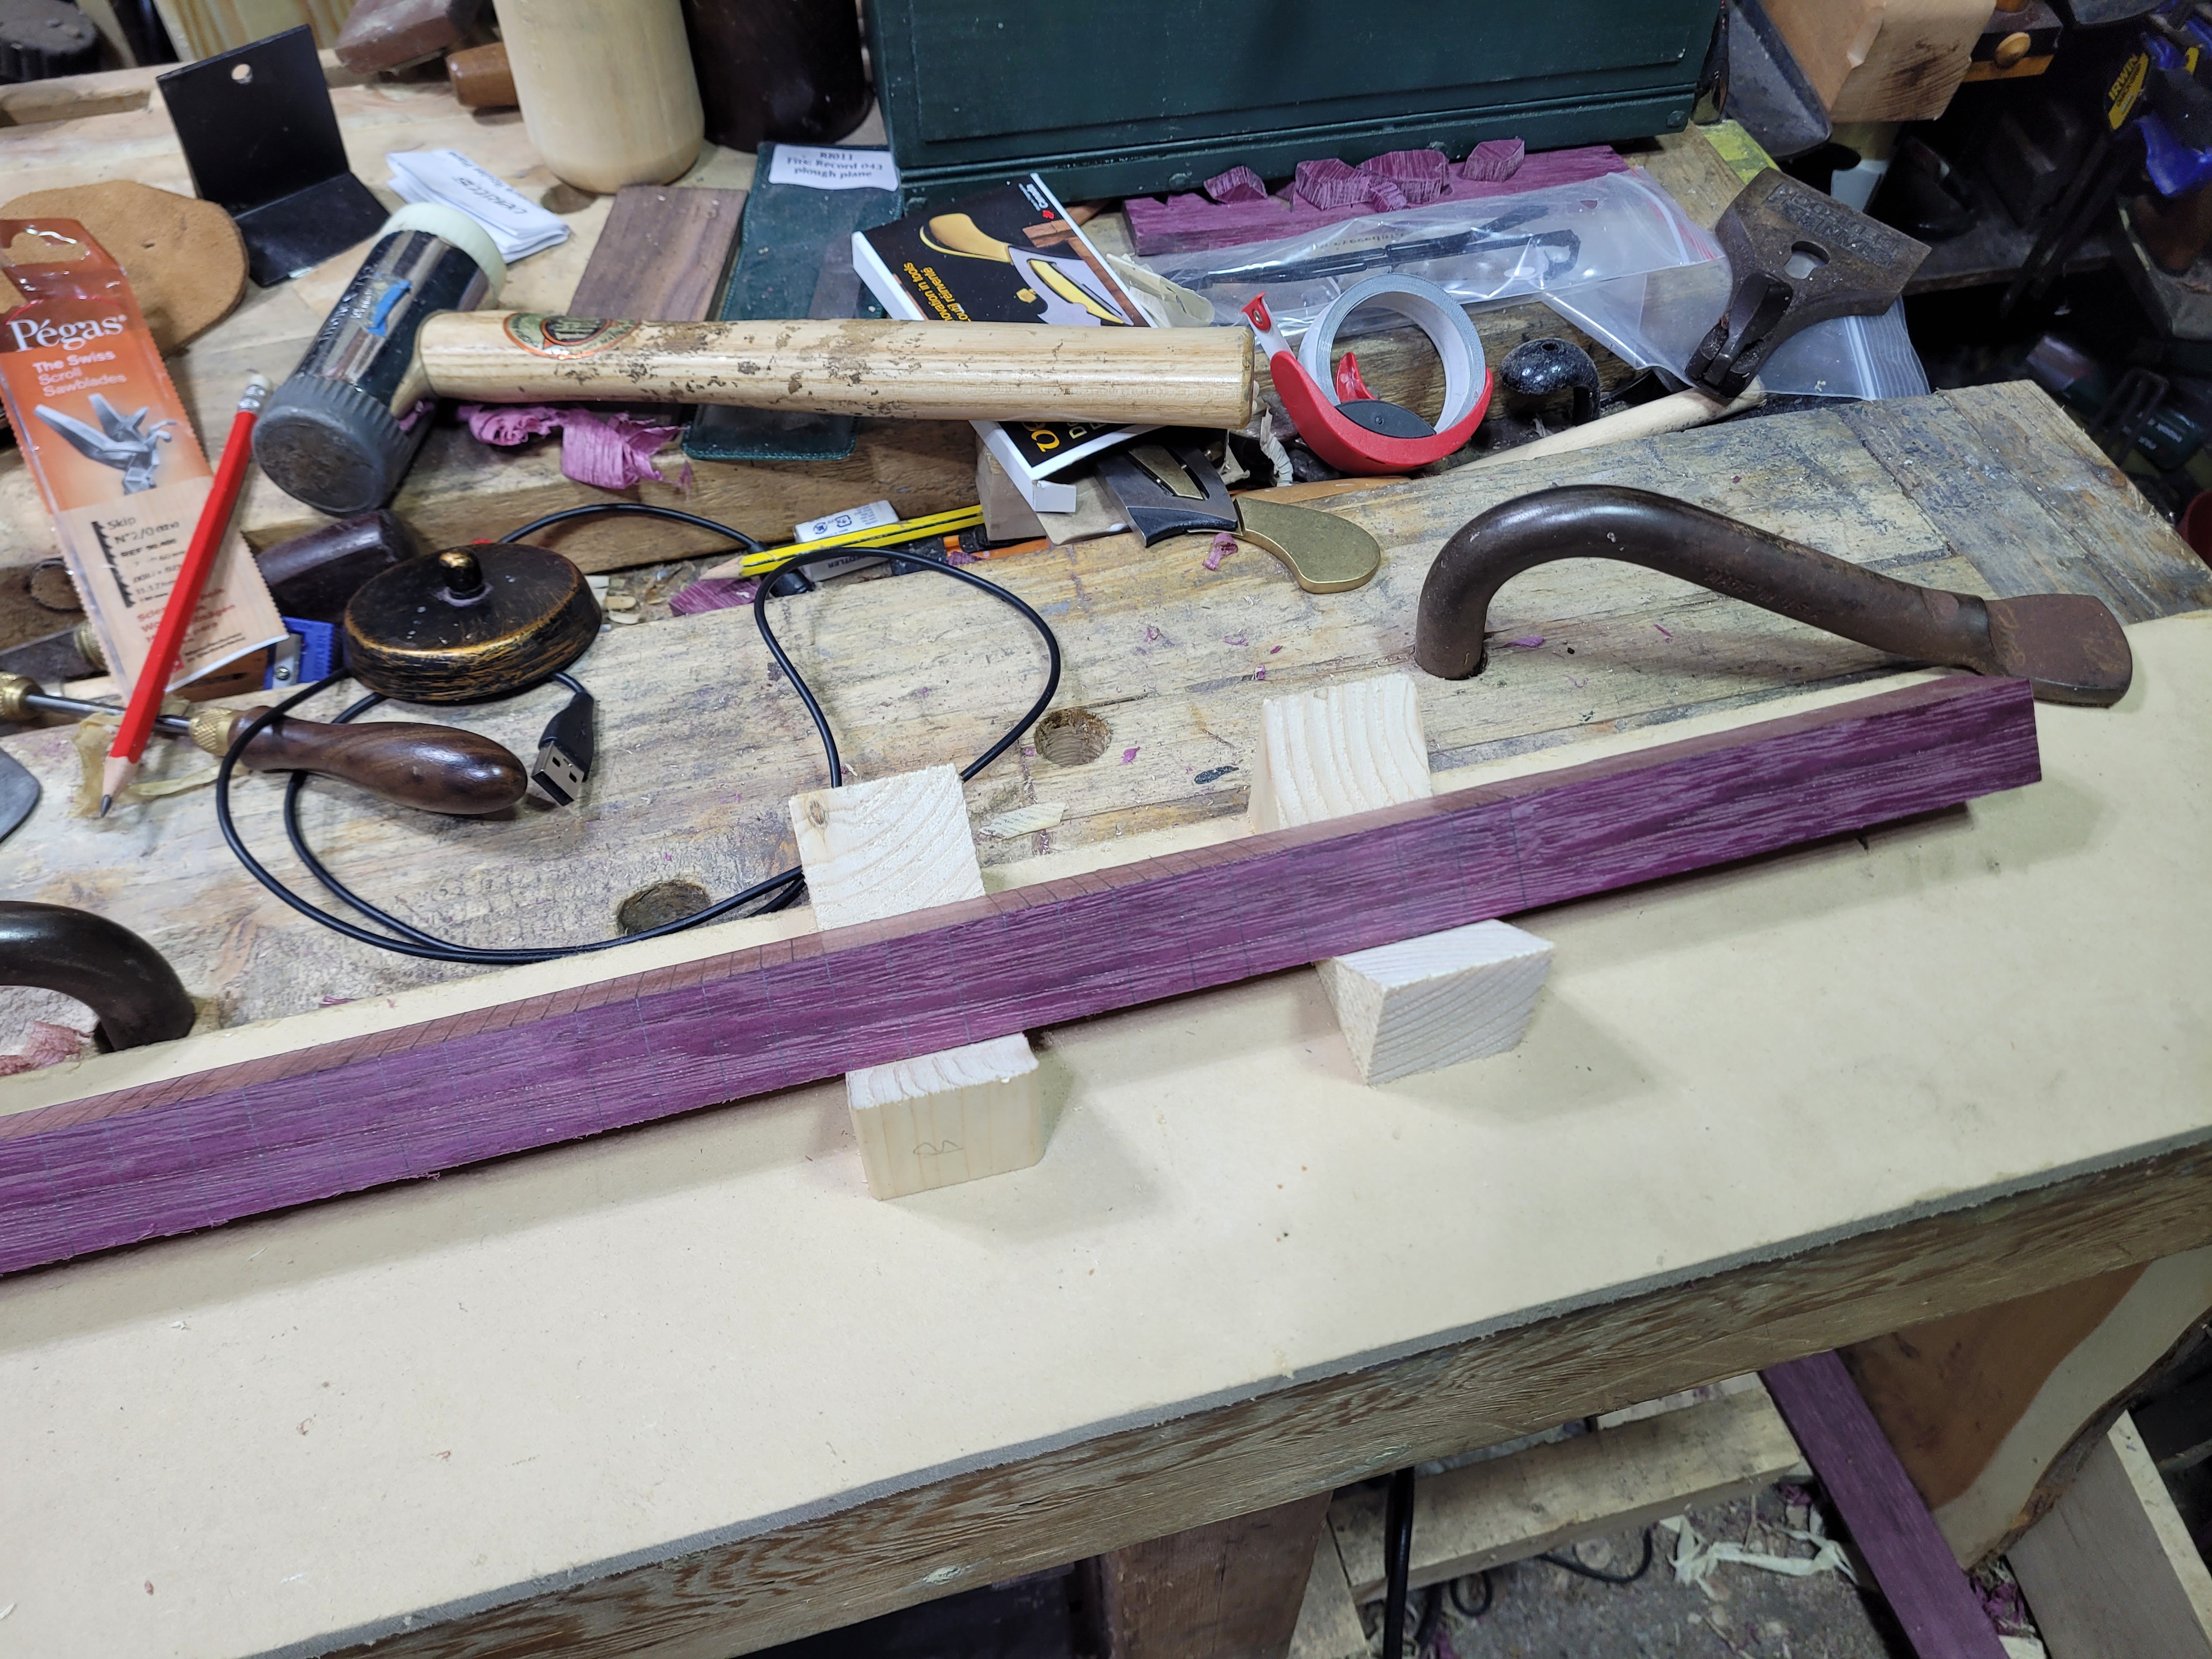
Now to make the handles. With the benefit of hindsight, I would do this before I cut the kerfs. A little past half way down, I mark out two 45 degree lines that meet at what will be the bottom of the bar.
I carry those lines down the side, stopping short of the first kerf, but making sure it will extend slightly inside the frame in use.
Make the 45 degree cross cuts.
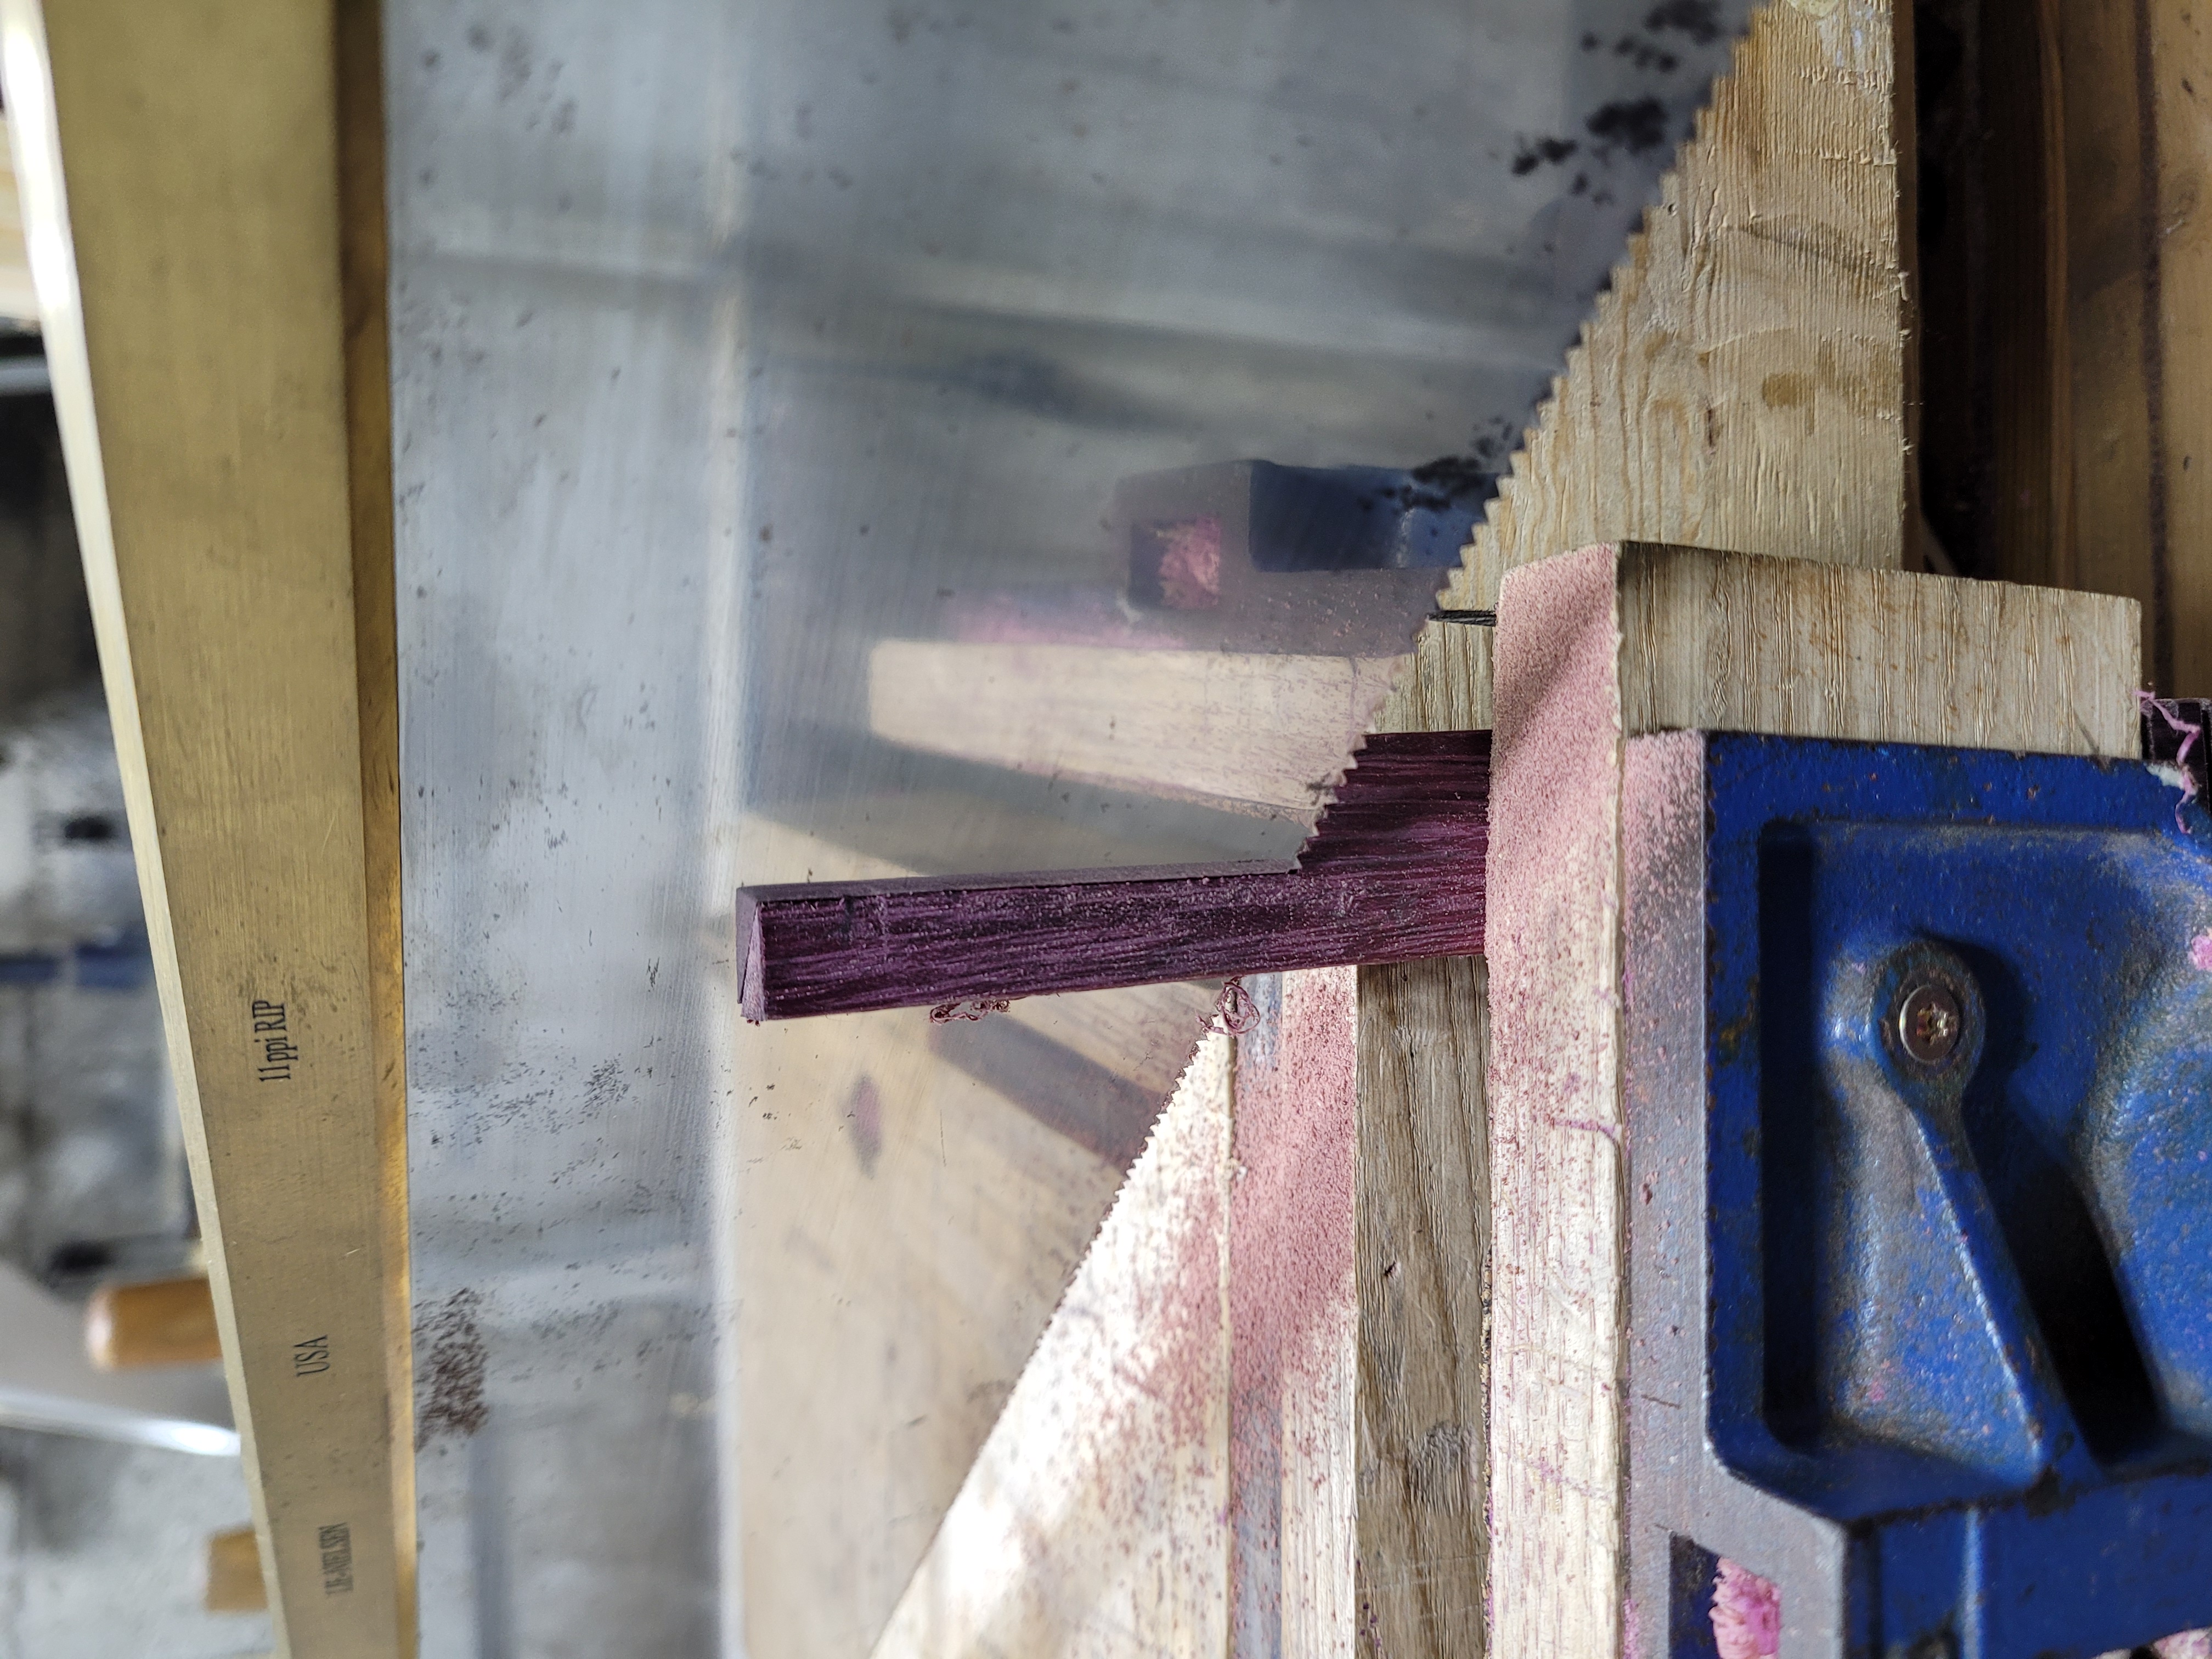
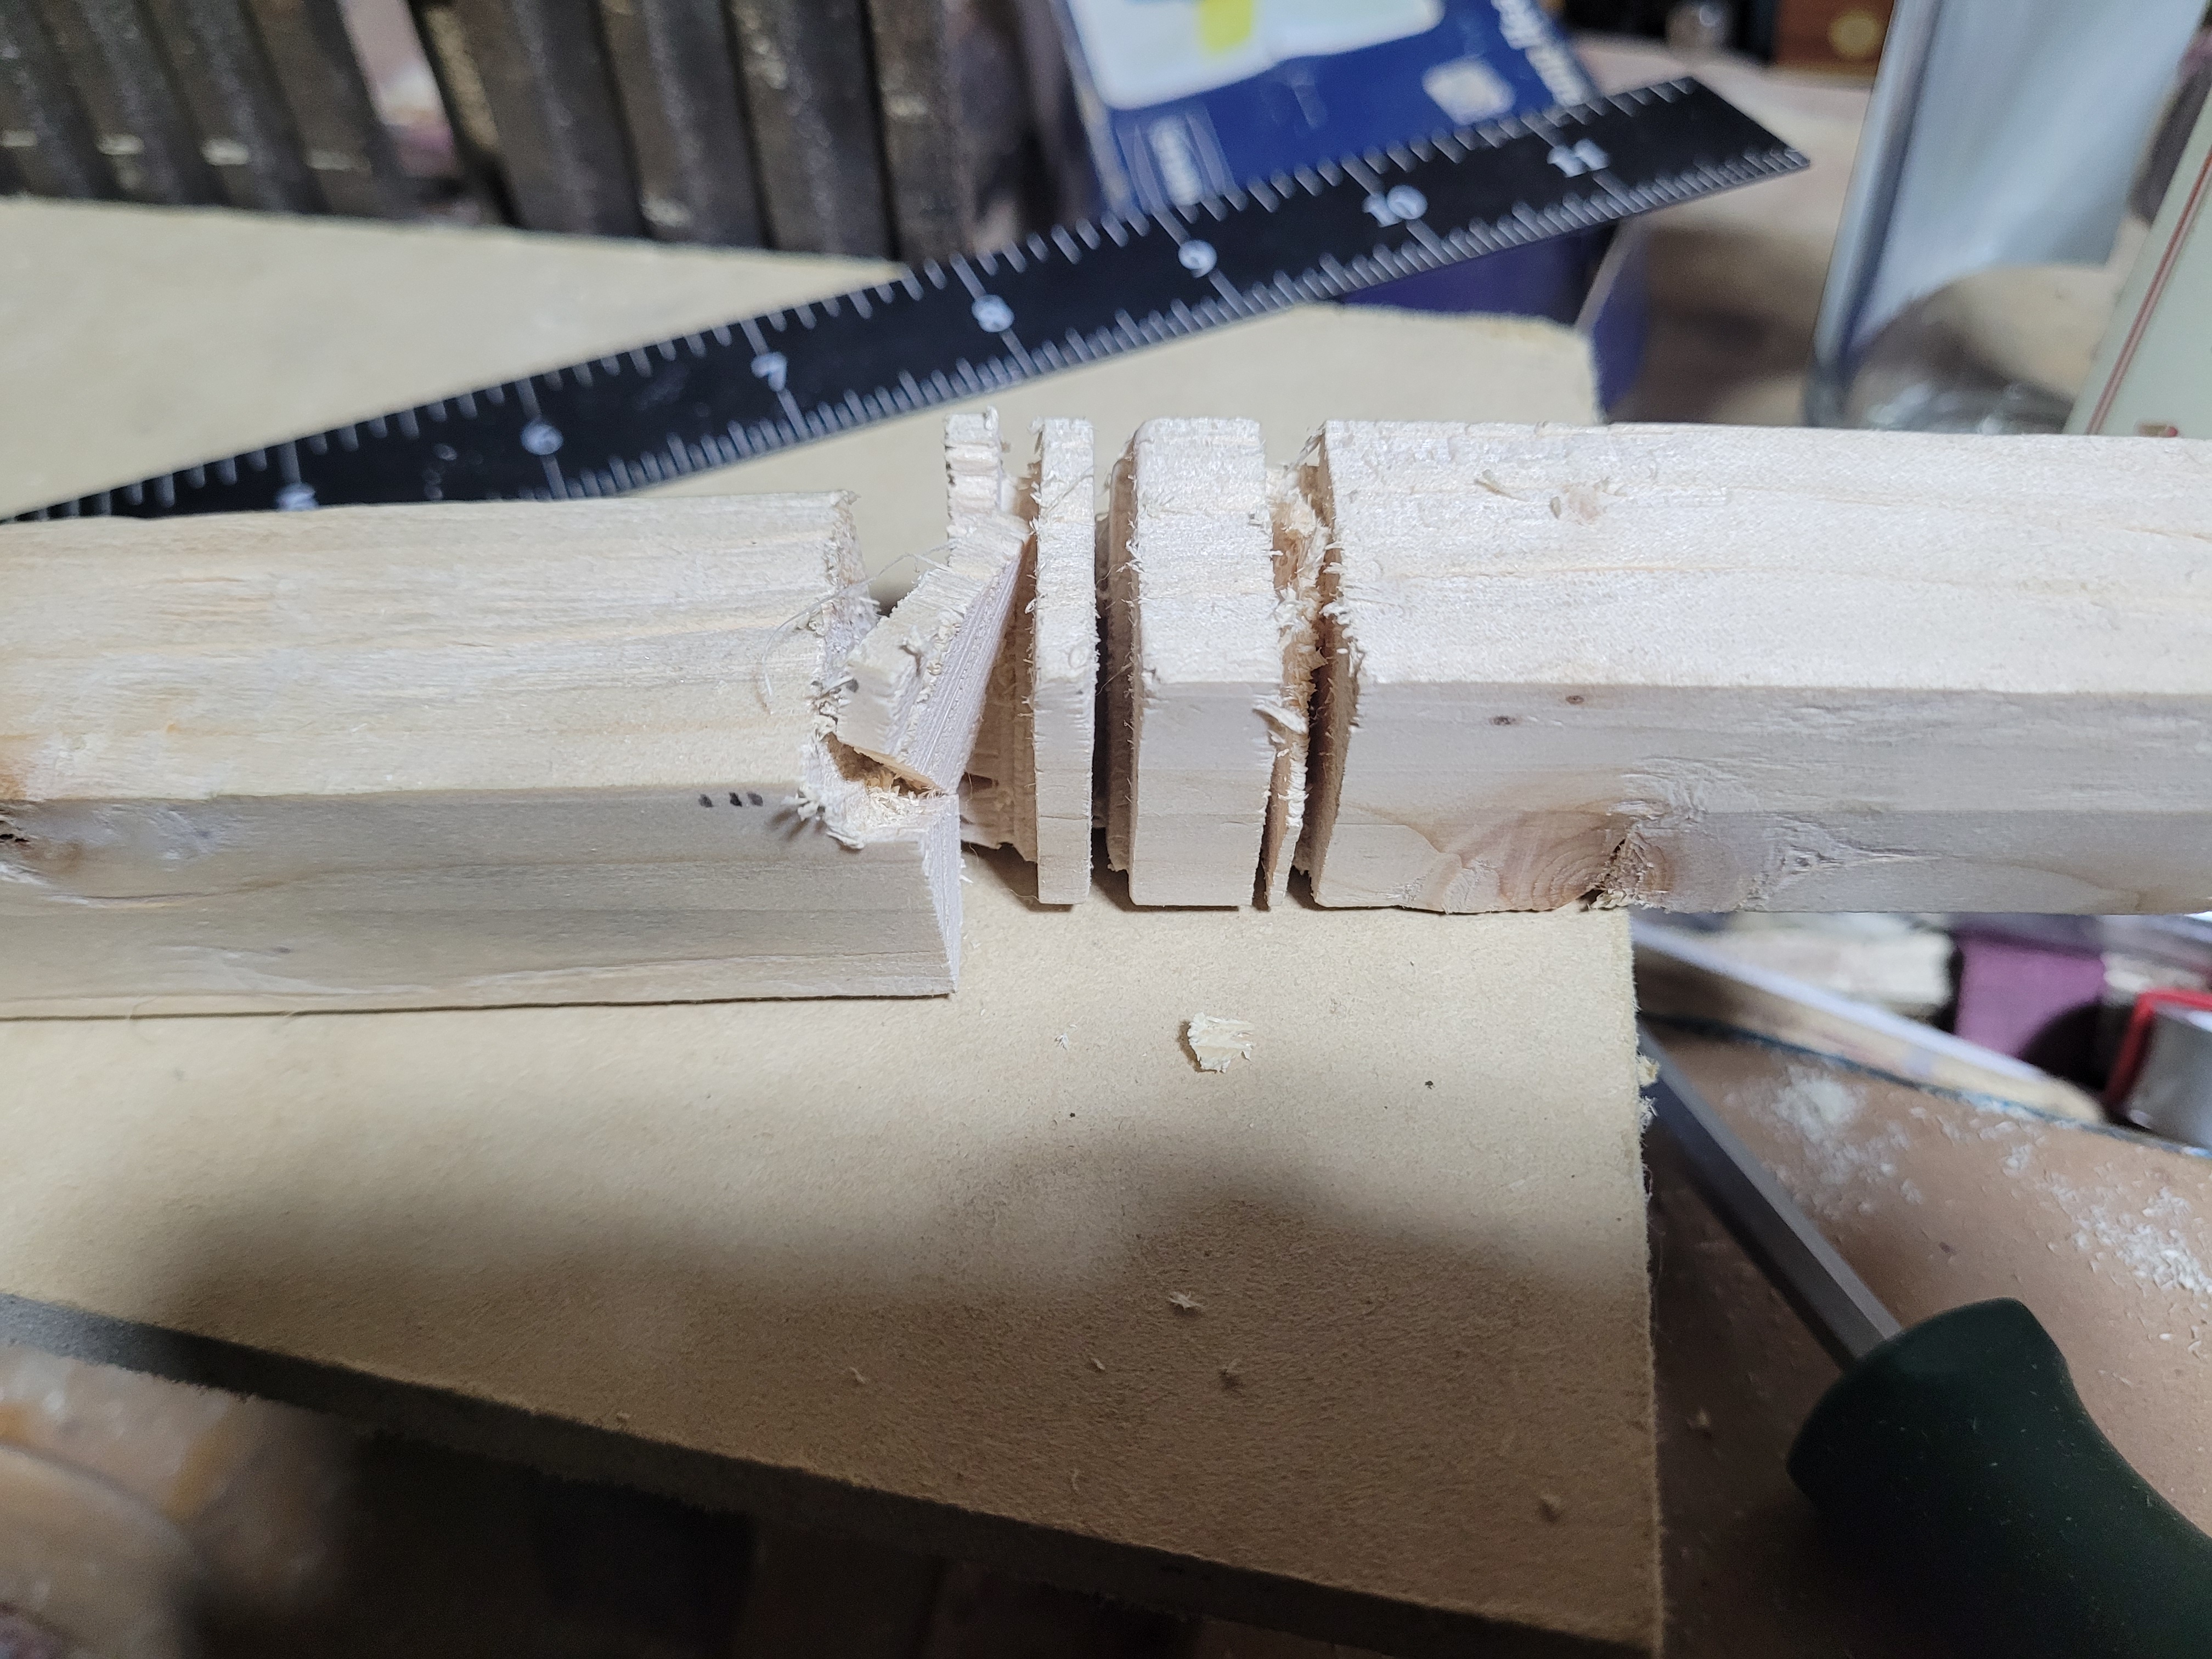
Then rip down the side to meet them. My tenon saw could not quite get deep enough.

I cross cut in to nearly the depth I hit with the tenon saw. The panel saw I’m going to use to finish is a little thicker. I want enough kerf left to guide it, but not too much in case it causes the material to split.
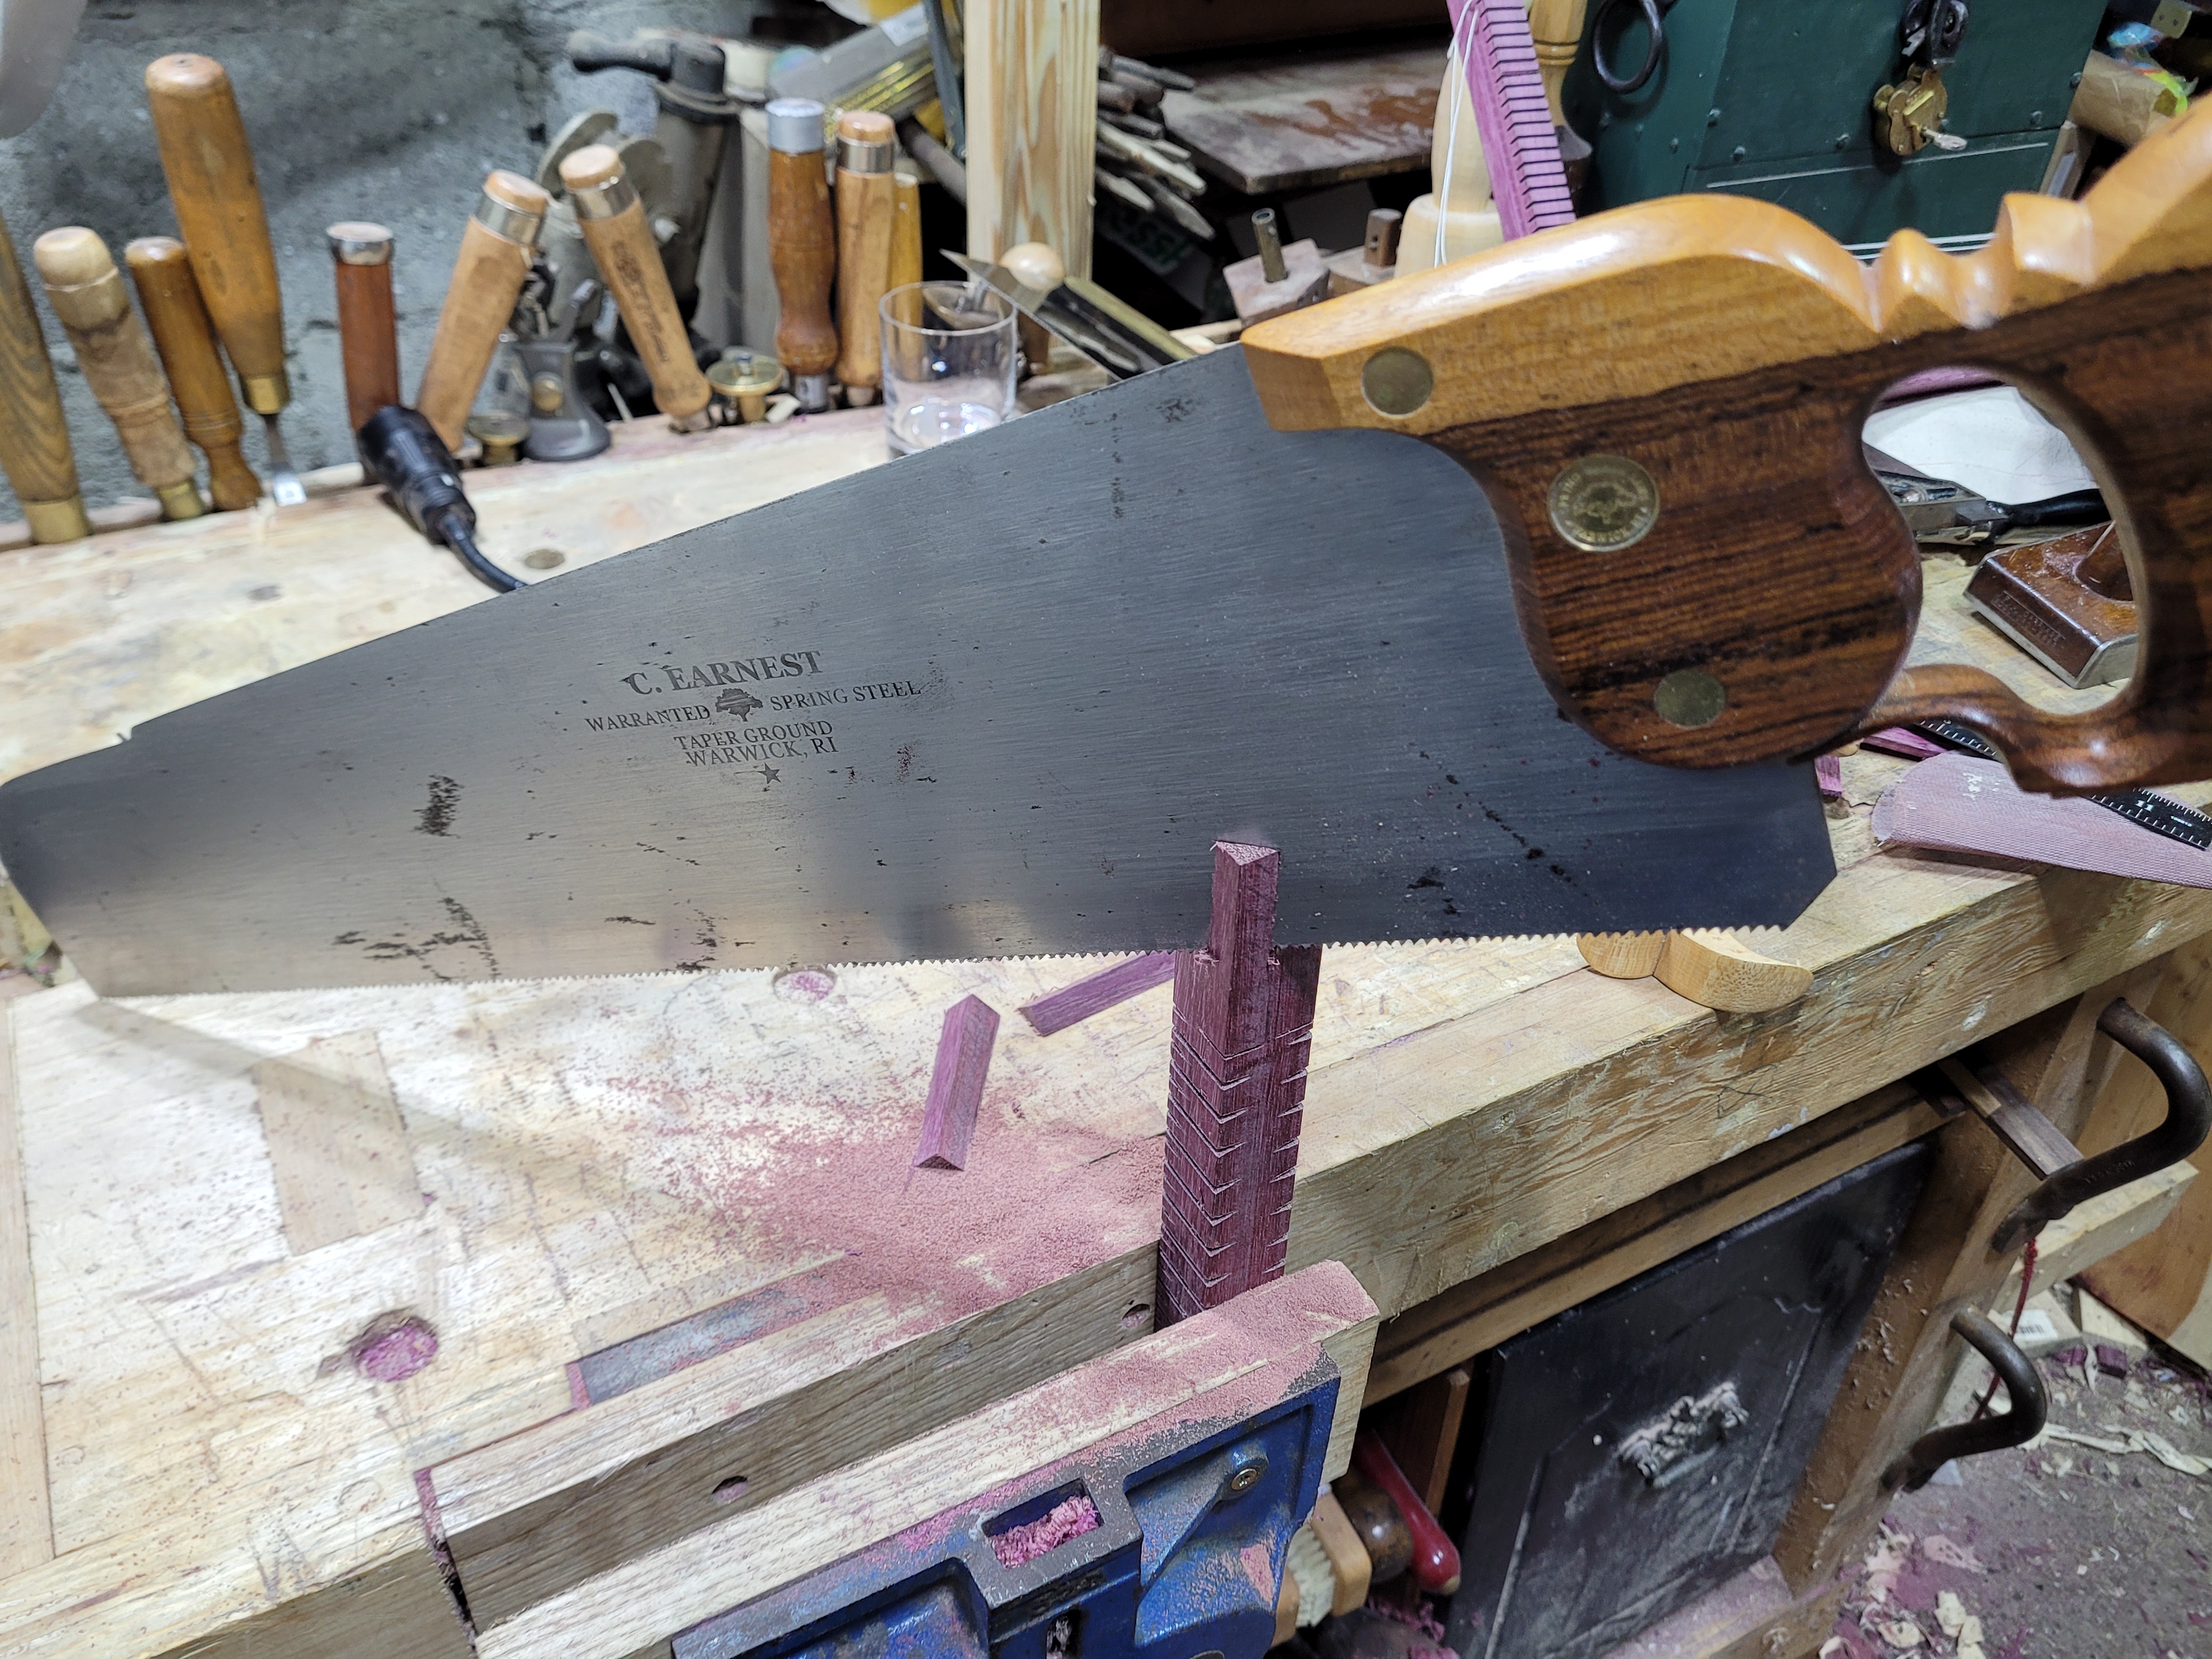
And down we go to the finish. Two things I would change here. As I mentioned before, I could make these cuts before kerfing the bar. Second, I would just use the one saw all the way through. One piece did split, and carried a thin kerf sidewall off with it. I had to glue it back in a hurry, and cleaning that bit up would prove difficult. At the other end of the bar, as I cleaned up the saw cut with a chisel, I also popped the equivalent thin corner off. Cut your handles before you saw the thread kerfs…
Look at the right hand side. You can see a corner broke right off.
This is the point of the handle cuts. You get two reference surfaces that corresponding to the working positions of the heddle. Without them you can get confused, rotate it too far, and have all your thread slip off.
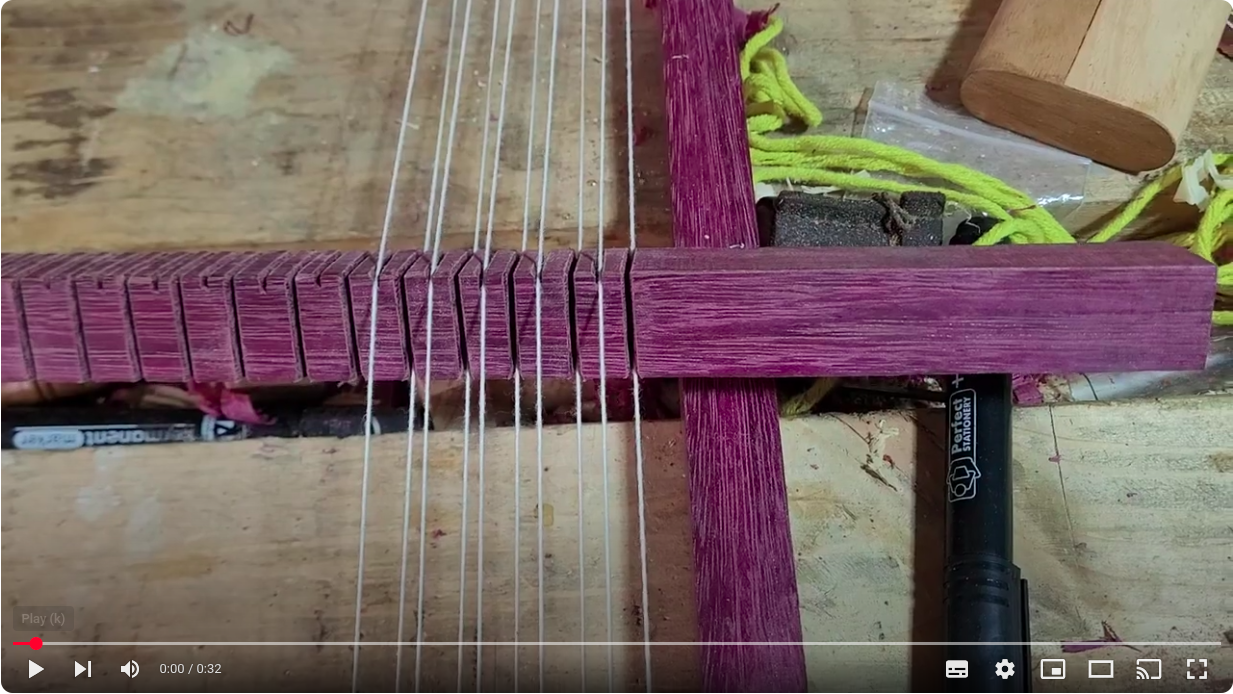
Finally here is a short demonstration of the heddle bar for the customer