Making a Shooting Board - Part 2
Last week I ended with the shooting board almost complete. The stop had just been attached. I’ll pick up from there and cover creating the fence, breaking the board in, and general tips on shooting successfully. Dive into the pictures below to follow along.
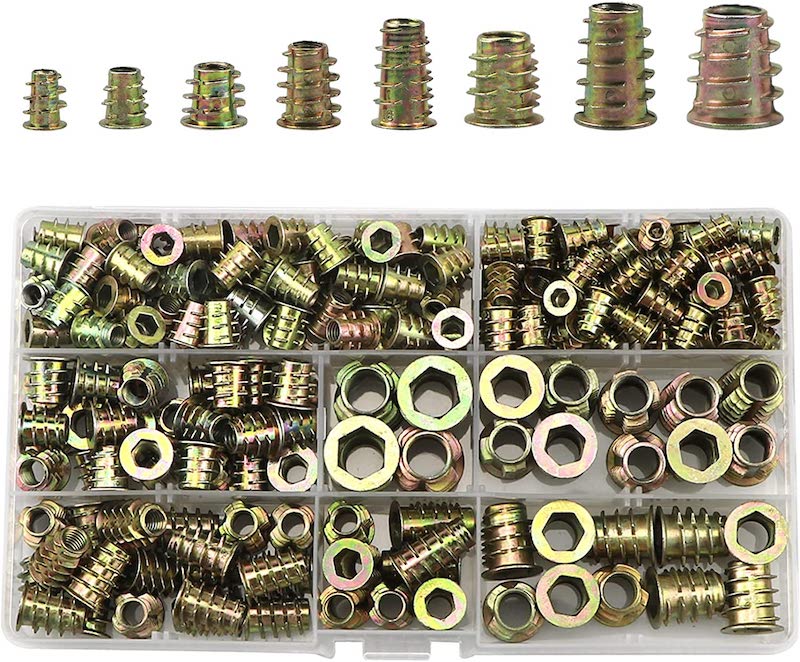
On to our fence. Its going to attach to the board with 3 threaded inserts. Threaded inserts are sort of like giant screws, with a threaded hole in the middle. Once they are inserted in wood/MDF/etc you can then screw in a bolt.
I bought the cheap box of assorted sizes above. I regret doing so. You might notice they have a…., I’m not sure what to call this… rim? at the top that protrudes past the sides. This means the insert can not be flush with the surface its going into. Its not a deal breaker, but the fence would have a little more friction to keep it in place if the inserts did not have that. You can find designs without that.
Second, the box did not come with a guide stating what size drill bit to use for what size insert. I just had to experiment on a scrap piece of MDF until I found a size that worked well. Again, not a total write off, but annoying.
Lastly, these are cheap and somewhat weak. I managed to completely destroy one while doing my tests. I also managed to break off parts of that annoying rim while driving them, not the entire rim which would have actually been a bonus. I recommend spending a bit more and getting better, rimless inserts. I made these work if you happen to already have them lying around, but you can do better. I ended up going with the M4 size.
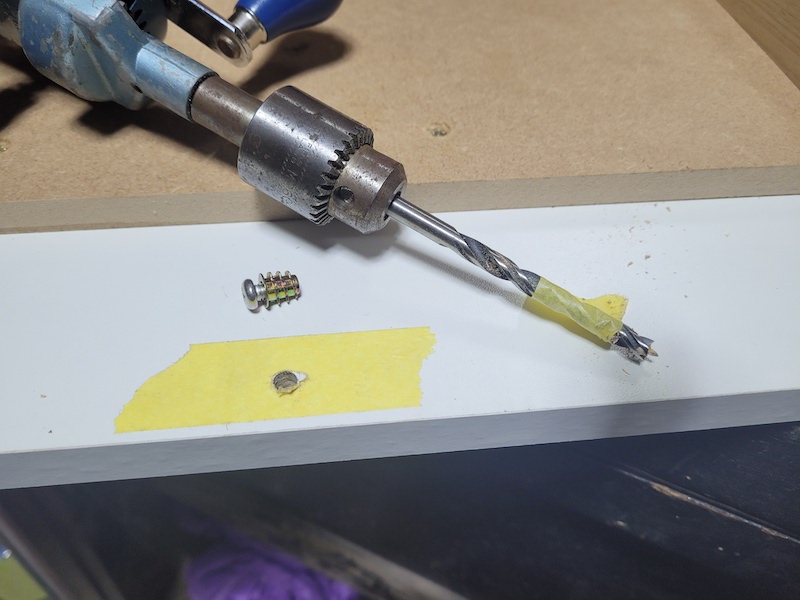
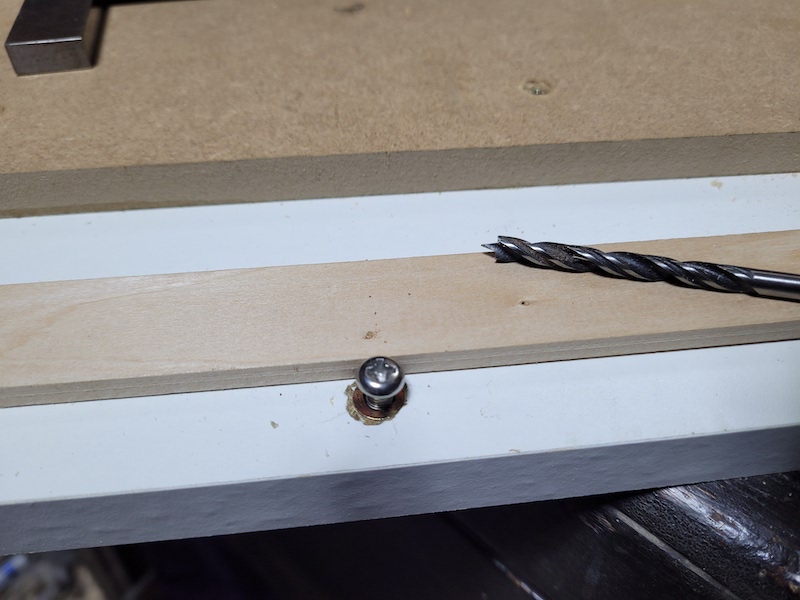
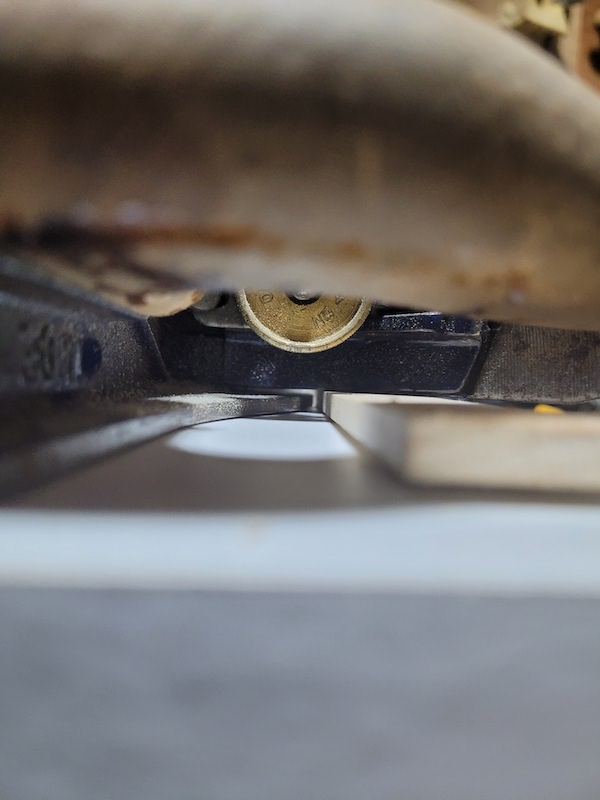
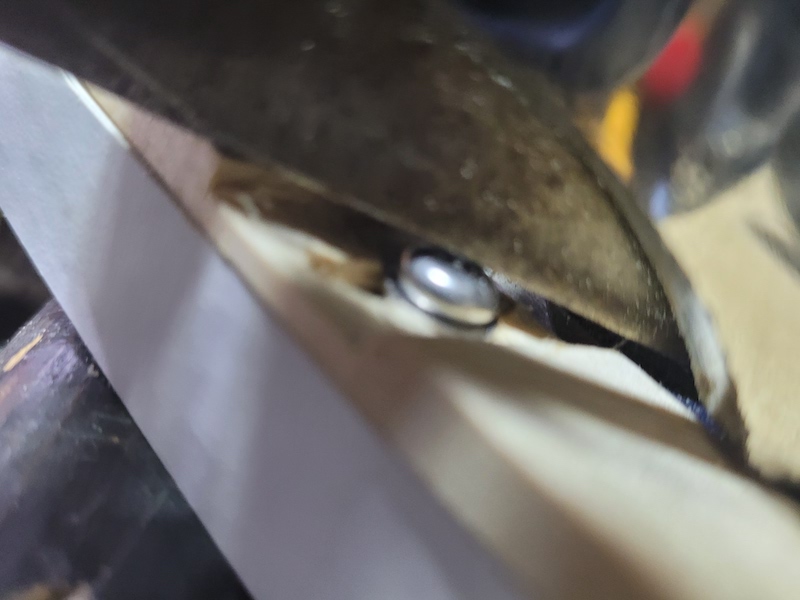
I measured to about half the width of the fence when it was against the edge of the platform. And put the plane down to make sure it would have enough movement when I was done to reach the shoulder of the plane. I discovered when building the first board that inserting these tears the hell out of the melamine facing on the board. Putting a little masking tape down before you drill reduces, but does not eliminate that. I kept the masking tape in place when inserting the insert, and only removed it when the insert was nearly completely inserted. I used a little masking tape for a depth stop on the drill bit and drill my 3 holes to depth. You can see one of the threaded inserts with a bolt in it above the hole. That’s what we are going to insert.
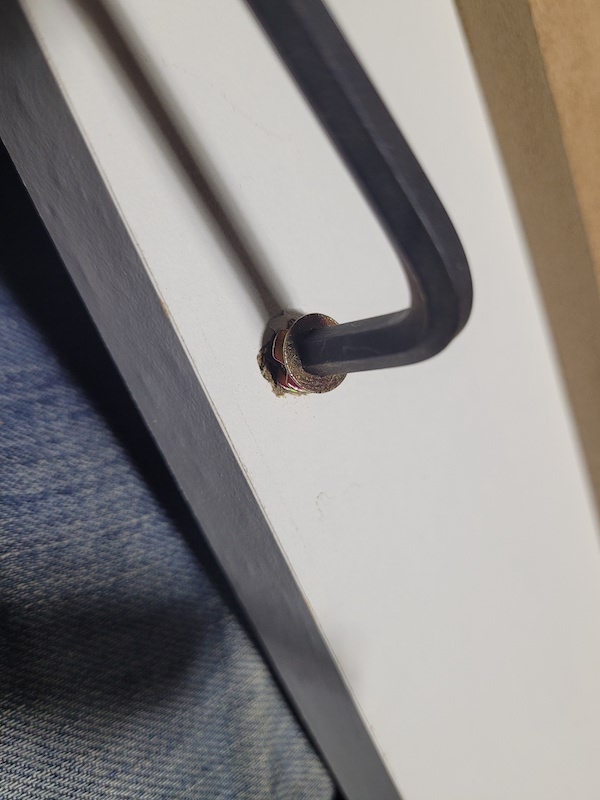
Putting the insert in the hole is simple, but tricky. Sit it on top of the hole, and turn with an allen key, it will work its way in. The hard part is trying to keep it very vertical as you do so. Its possible to just create a gaping wound in the panel if you do not. Go slow and careful. Be careful not to apply too much force at the end if you are using cheap inserts like mine. They will either strip, or tear themselves apart.
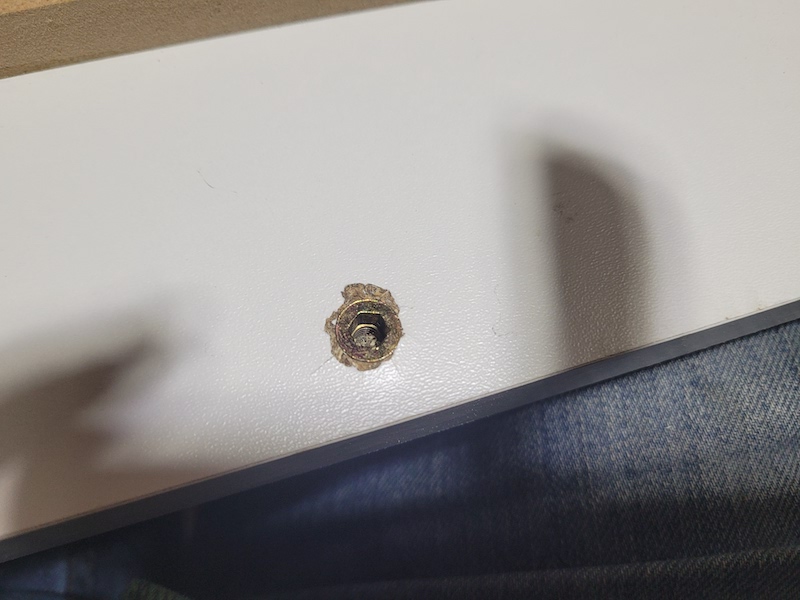
The insert in place. That’s the damage to the facing WITH masking tape. Its a lot worse without. The good news is that the fence will cover this up.
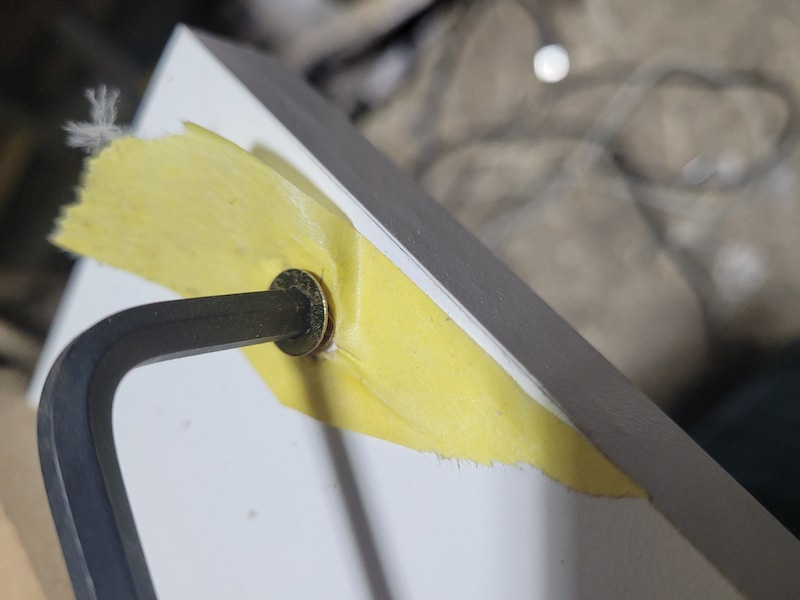
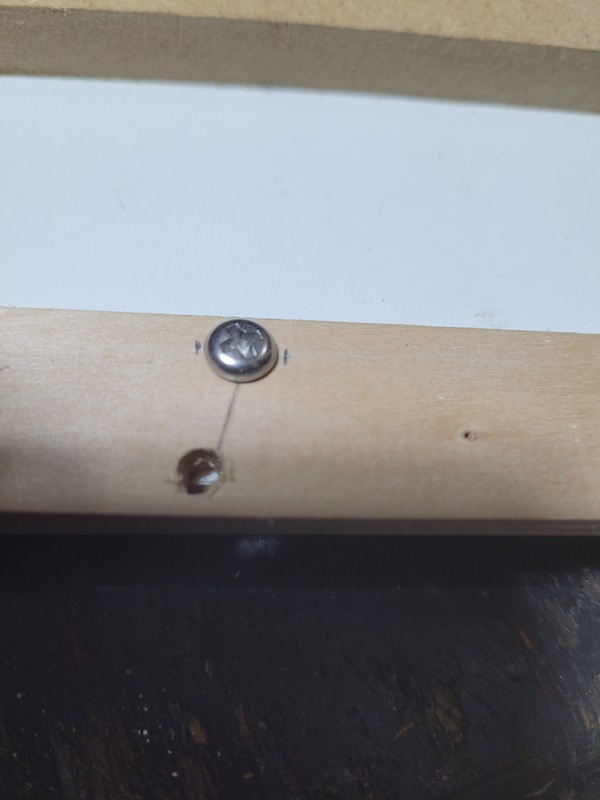
Don’t take the tape off until you are done putting the insert almost all the way down. I stop at the point in the picture above, and then pull the tape off before the last little bit of distance before the rim on the insert makes contact. l.
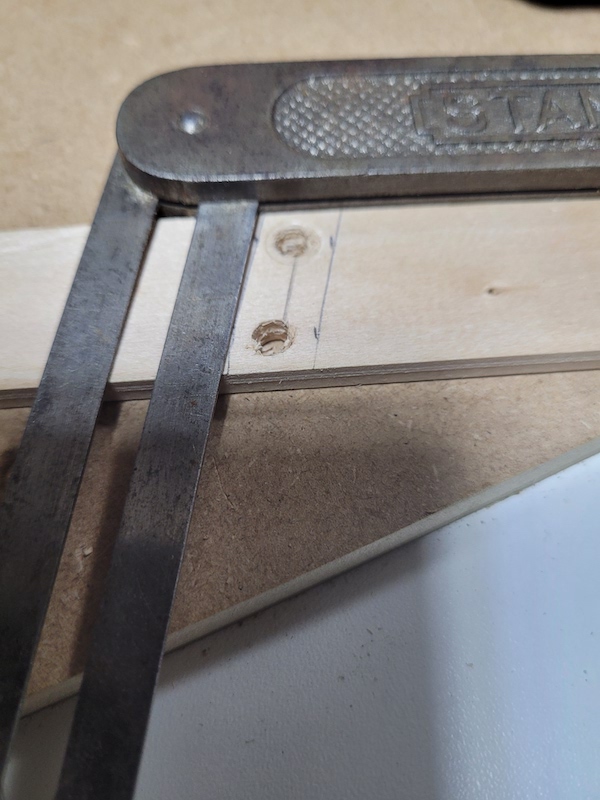
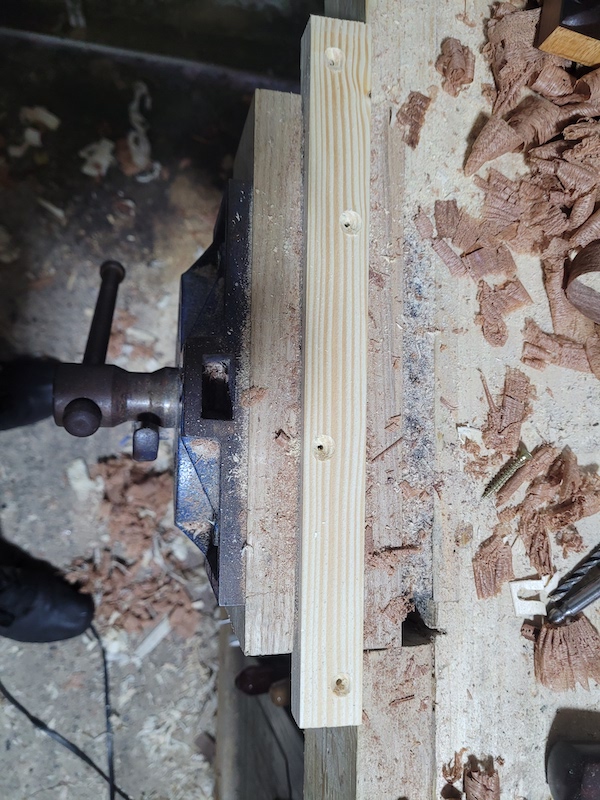
Time to mark drilling holes in the fence. I lie it down on the board, and mark the spot to drill with the drill bit. I didn’t measure the distance precisely. This is a workshop fixture, not fine furniture. Eyeballing it works out just fine.
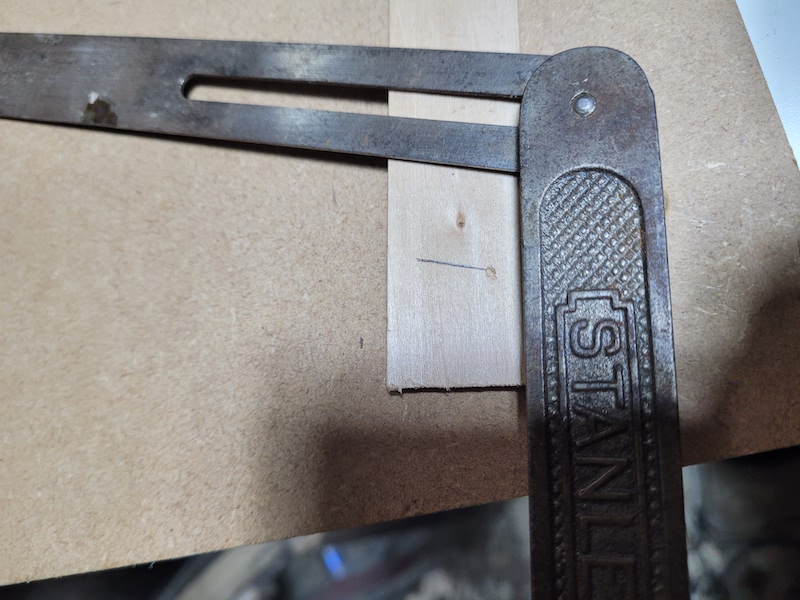
Using a bevel, I marked the slots at a slight angle. The angled slot provides a little more friction helping keep the fence in place. Not really necessary, but not much more work to do than going 90 degrees across.
Drill the hole at either end of the line.

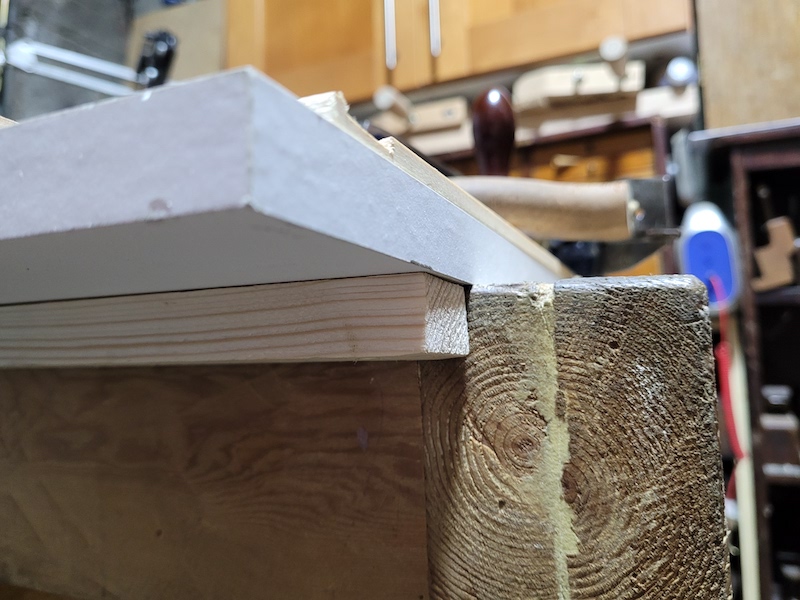
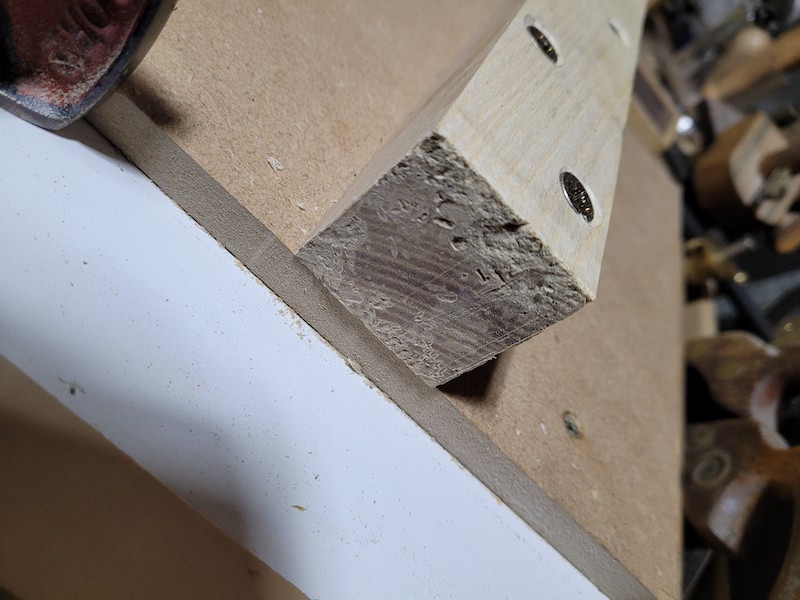
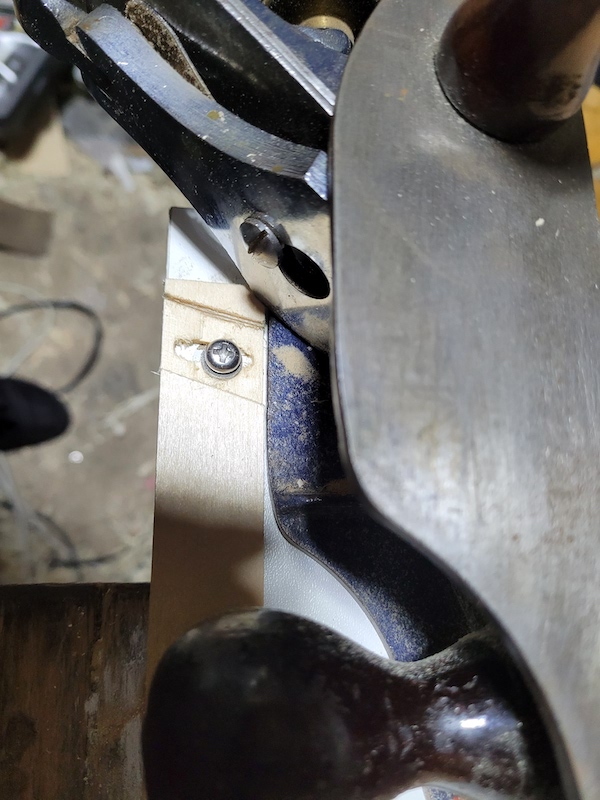
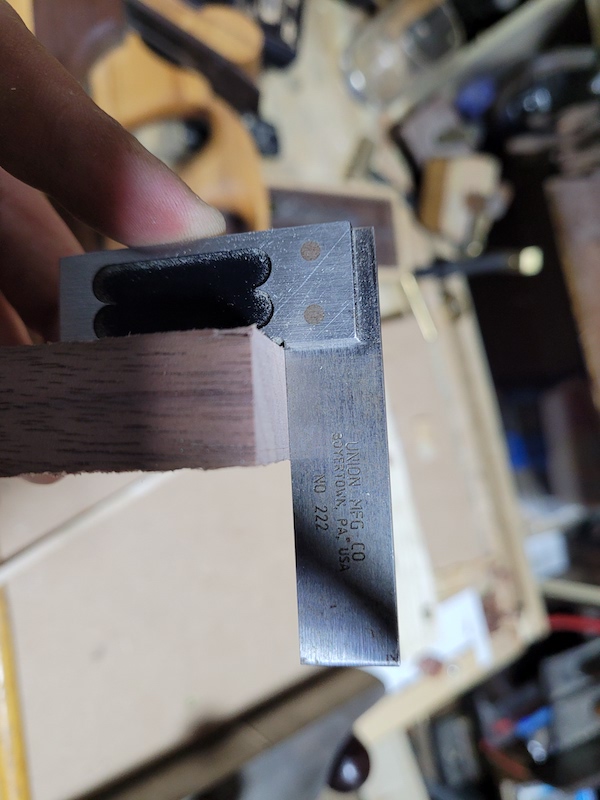
An important test. Attach the fence through one of the holes. Then slide your plane along. On most bench planes, with the thickness of the strip I used, the iron, or lever cap is going to run into the screw head. We will relieve some material to deal with this. The No. 6 I usually use for shooting had a lot more clearance than the T5 does.
Second check, is the fence just too tall in general? This was not a problem on my no. 6. But when it came to the T5 the iron was resting on the fence and taking the entire plane ever so slightly out of square. I had to plane the strip a little to make sure they where no longer in contact. You might find later that after adjusting your plane iron its contacting again. Not a big deal. Just remove the strip and plane it down a little further.
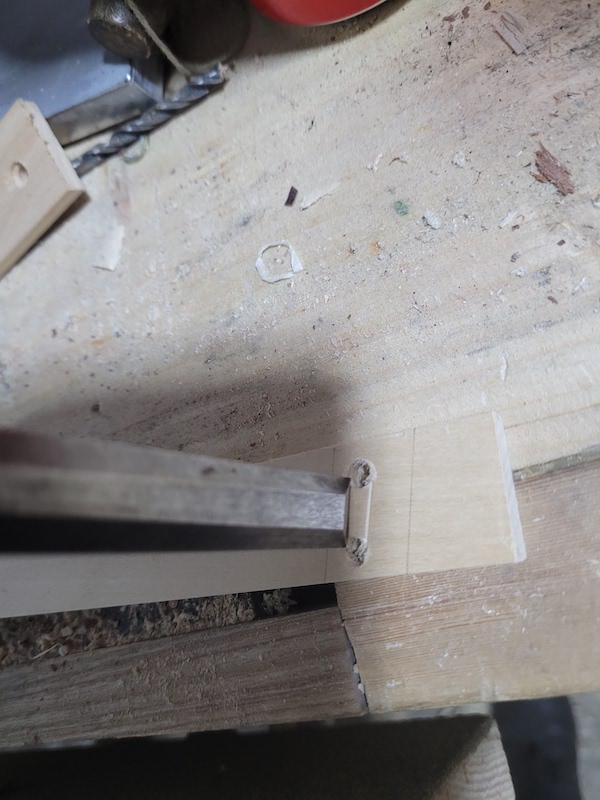
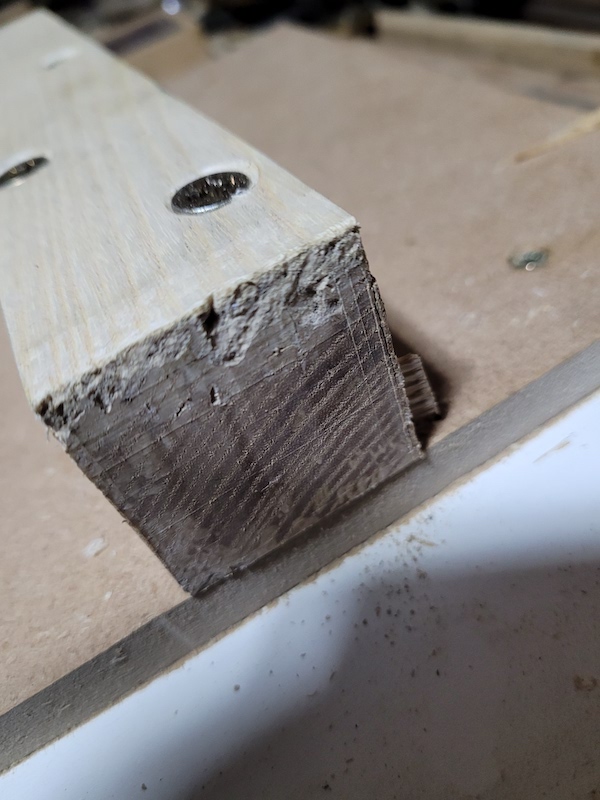
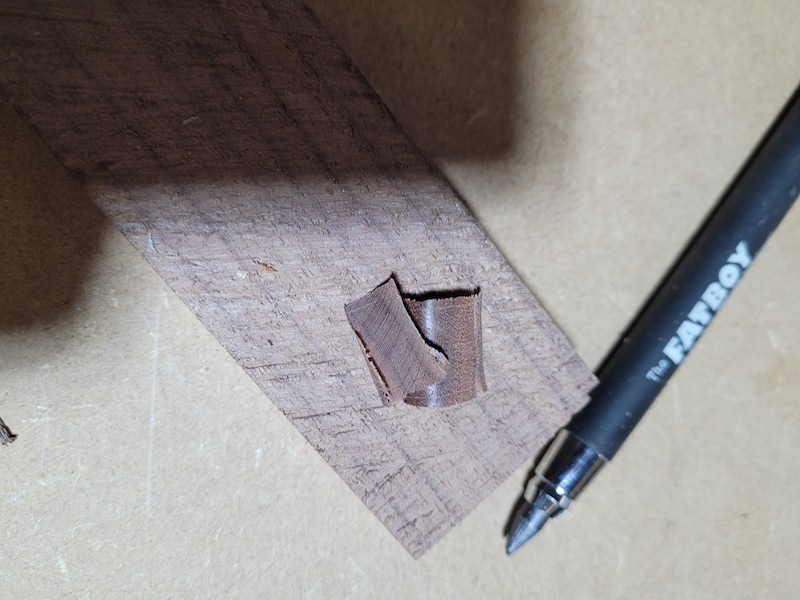
Now to remove some material to deal with the protruding bolt head. I mark a little space either side of the bolt.
The mark out the sides of what will be a through dado.
Then I mark out the depth on the side. Given this plane has so little clearance from the top of the fence, I need the entire head to be below the surface. When I built one for my no. 6 I did not need to go as deep.
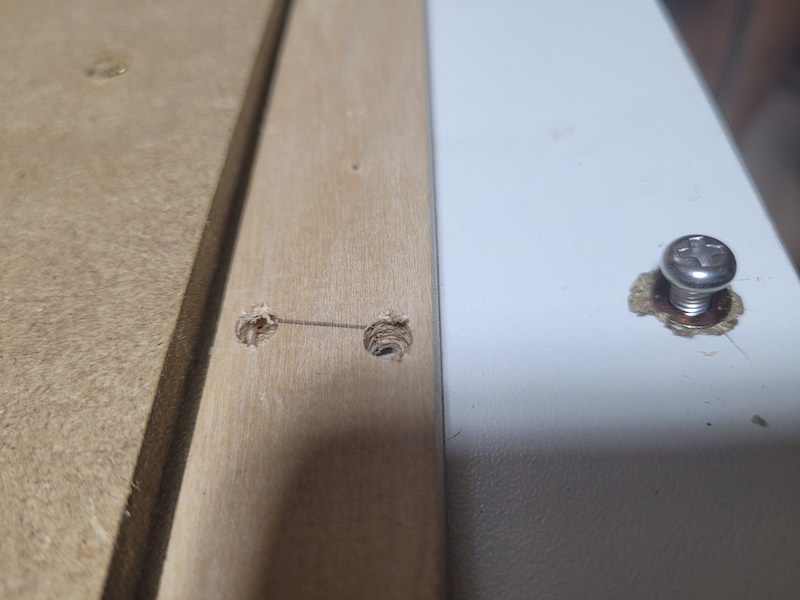
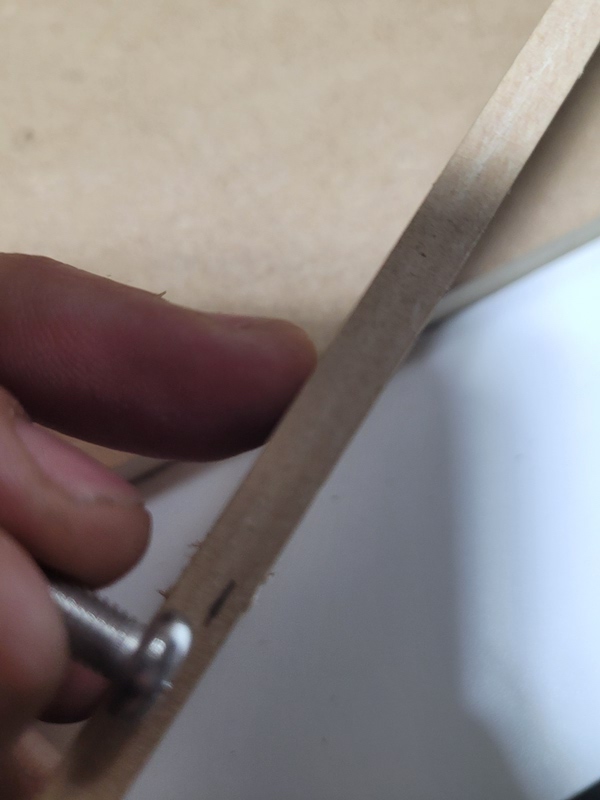
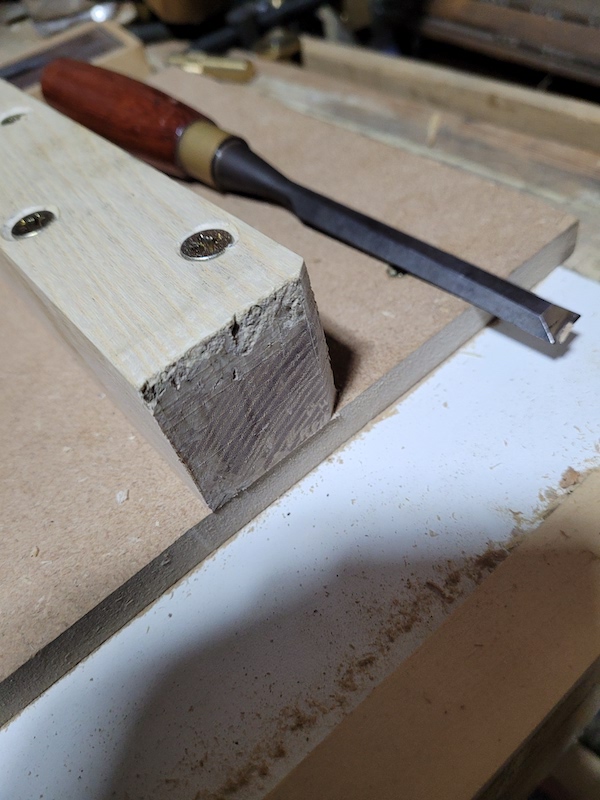
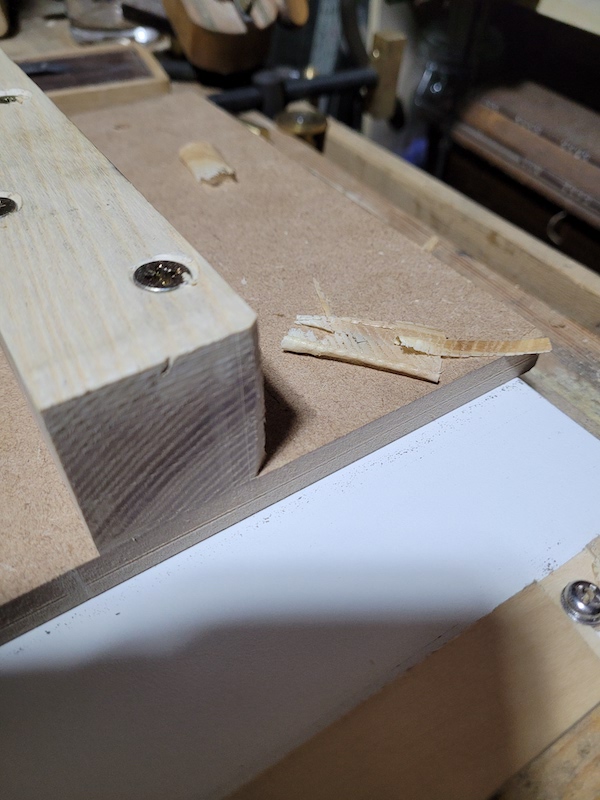
Once everything is laid out, I remove the material for the bolt to go through. Simply chopping with a chisel from either side on material this thin is quick and easy. Light chops on both sides (don’t try to go all the way through from one side). And within about a dozen chops, the center piece just pops out.
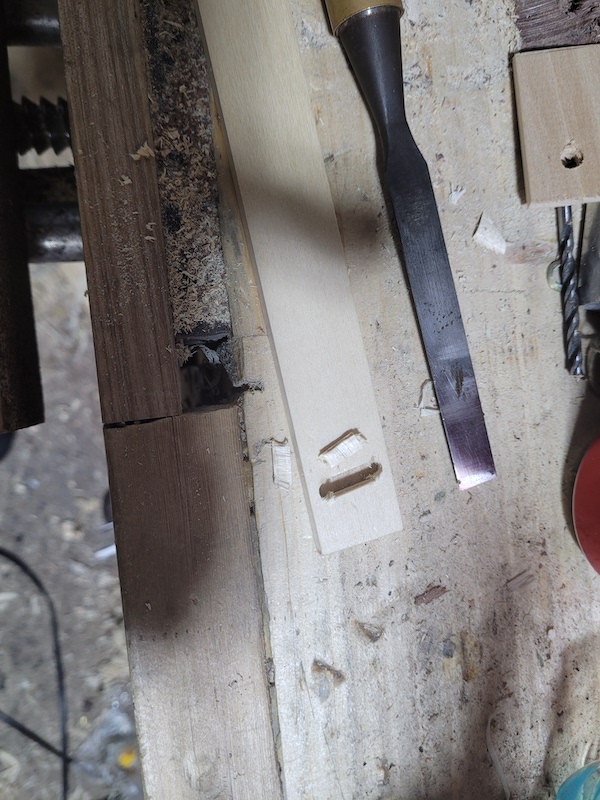
You can see the material just pops right out with finger pressure after working both sides a few times.
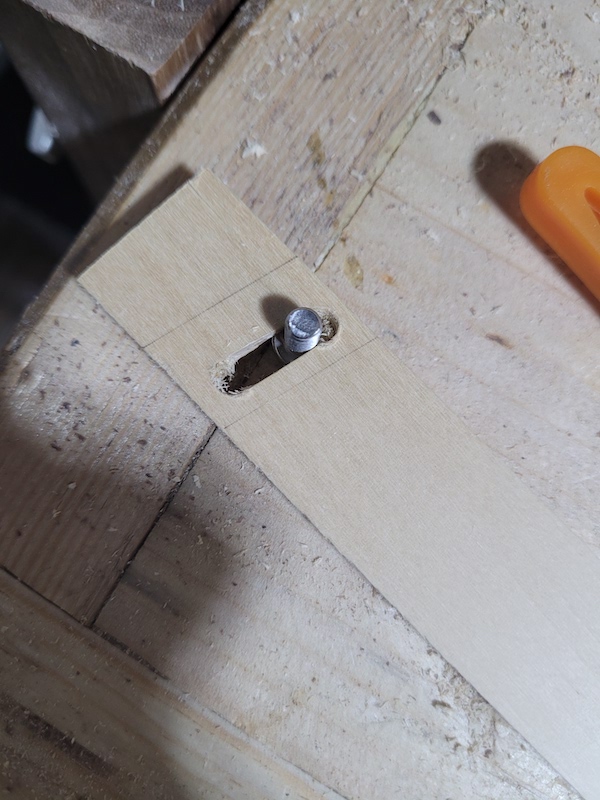
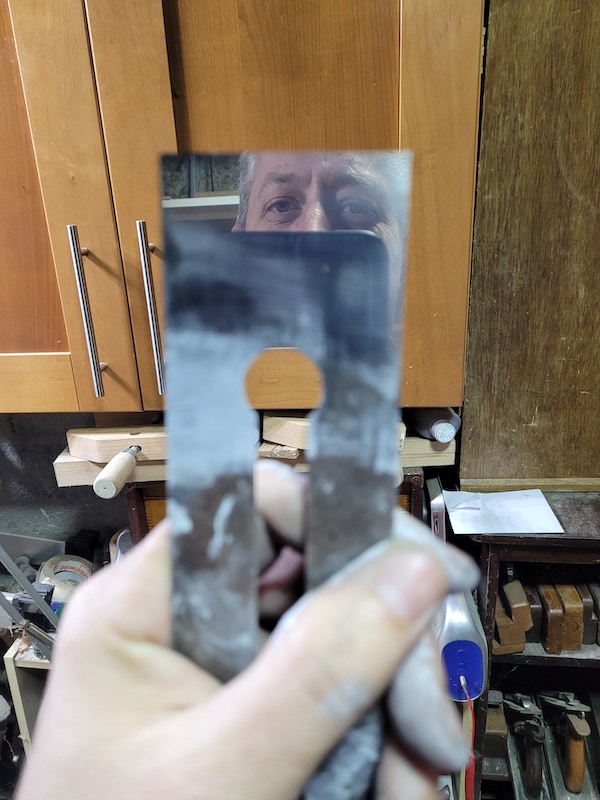
Pop your bolt in and make sure it can slide back and forth freely. If its getting stuck or not quite reaching the ends, you can fix that quickly with a little needle file work. And there is our slot. Its not important that the angles of the slots match precisely.
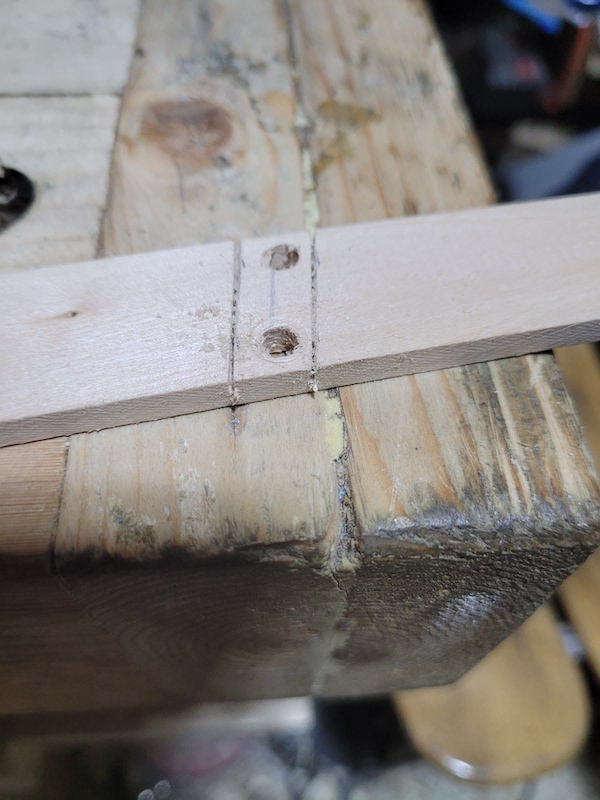
Cross cut the sides of the dado. This is a pretty thin work piece to start with. Better to cut too shallow than too deep, and keep it supported to prevent the entire thing from snapping.

Next I remove the waste in the dado. If you want to be really neat, a router plane will do a great job here. I just went straight at it with a chisel. Work from both sides, don’t go all the way through from one side or you will get some ugly tear out at the exit.
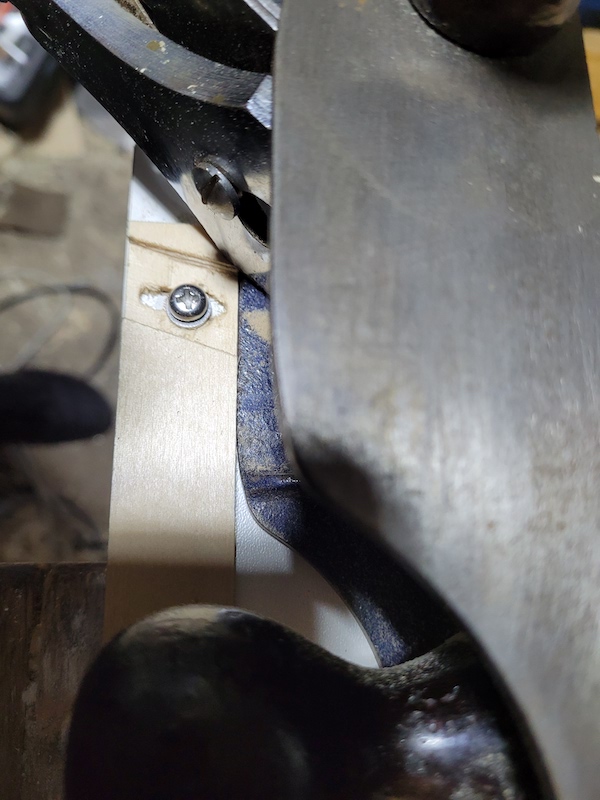
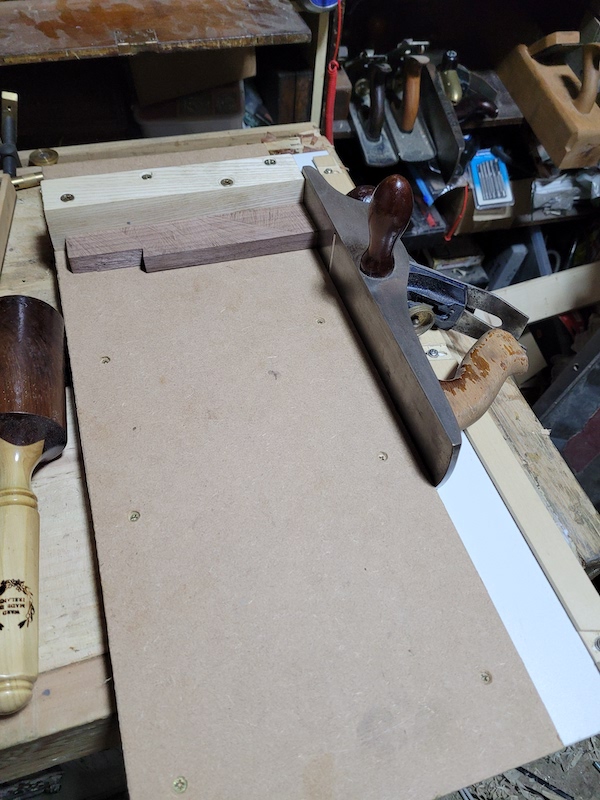
Once you think you are at depth. Screw the fence down to the shooting board through the slot and slide the plane over to test. When its really close the plane will slide over, but you can still feel the screw rubbing. Keep tweaking the depth until it slides cleanly. I used a washer as well as the bolt, as the material is pretty thin at the bottom of this dado, and the bolt is not much wider than the slot. Don’t forget to use the washer while testing for depth.
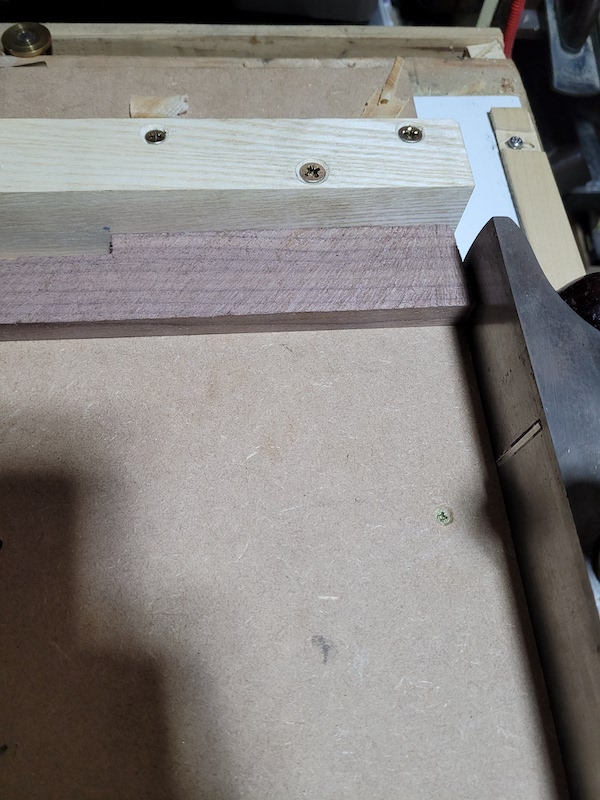
With the fence ready. Its time to make the cleat so I don’t have to clamp the board onto my bench to use it. This is very similar to the stop. I make it slightly narrower than the shooting board (maybe an 1/8th of an inch narrower at each end). I stagger the screw holes just like the stop. This really only needs one flattish face and that’s the side that will face the bench. I line it up with a square and screw it on the underside of the shooting board, perhaps 2 or 3 inches in from the edge. I countersink the screw holes, as you will wind up picking the board up by this cleat as you take it off the bench, and its a bit kinder on your hands.
Here you can see the cleat doing its job. It butts up against the edge of the bench, and stops it sliding forward, otherwise as the plane meets the workpiece, it would just move the entire shooting board. The exact depth of the cleat piece does not matter as long as it will make good contact with the bench. Shorter is better for storage.
The board is now complete, but needs to be broken in. Before you get to that, get your iron as sharp as you can. Shooting end grain is hard on an edge. I’ve learned the hard way that its worth it to sharpen before a shooting session. Sometimes, it worth it to stop in the middle of a shooting session. Planing end grain dulls most iron’s quickly.
So what do I mean by breaking in? Two jobs. 1. If you left your stop overlong like I did, you need to work it down. What’s the point of squaring it before you attach it, when its going on a shooting board that will automatically square it if you just run the plane on it. The second job is to make sure the plane has worked off the portion of the platform that its going to remove before you take it to your work piece. To start with, I bring the plane up to the stop. Rest it on the track, and just start working the material off. You can see a little gone from the middle of the stop end here.
Now you can see some breakout at the back because I forgot to chamfer it. Does no harm to the board, but I can be a little neater.
A little quick work with the chisel solves that.
Nearly done. When you start to get close, the platform is going to get in the way for a little bit.

Before breaking in the platform I put a few pencil marks down to make it obvious what’s happening, you don’t need to do this. Start the plane all the way back on the platform (the mouth should be slightly off the shooting board. Then run it all the way down. You are going to feel it cutting slightly. What’s happening?

Your plane is making a little rebate. Remember, the iron does not extend all the way to the side of the plane. It will stop cutting when it reaches the depth of cut of the iron, as the portion of the sole with no mouth will bottom out. If you adjust your plane for a heavier cut, it will cut a little deeper, but still bottom out again. Once you can run the plane all the way down and don’t feel any cutting, you are done bedding in and the shooting board is ready to use (the stop should now be flush as well).
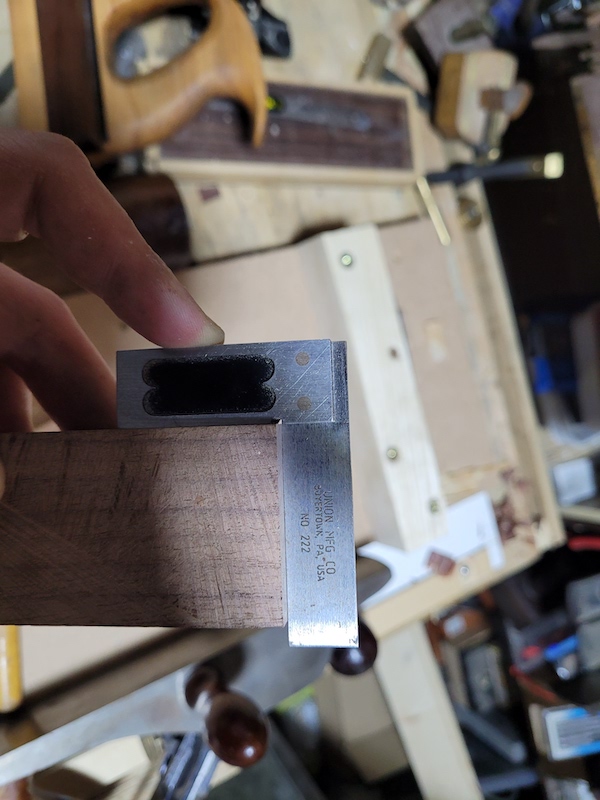
Given your plane has moved in a little we need to adjust the fence, or set it up for the first time if you have not already. Start at one end, and line it up with the plane cheek. You can see above there is a bit of a gap.
Slide the fence in, hold it down firmly, and screw it in place. You do not want it too tight. Make sure you can slide the plane smoothly past this insert before moving to the next. If like me you use soft wood for the fence, the washer is going to dig in a little, you will have to flip it up before you can adjust.
Move on to the next insert and repeat until you get to the end. Testing every time that the plane slides smoothly without wobbling back and forth. Remember, the track is not essential, but its a nice to have. It gives you one less thing to pay attention to while shooting.
Let’s take it for a test drive. First a few notes on shooting. Shooting works best on pieces that already have flat and square sides and faces. At the very least, you need the edge that will rest against the stop to be straight. If its not, the end result will not be perfect. If the stock is cupped, you can get odd results. If its twisted, you will definitely get odd results. If you only have one straight edge, and one flat face. That edge will have to rest against the stop, and the face on the platform. You will not have the option of flipping the piece over as you work.
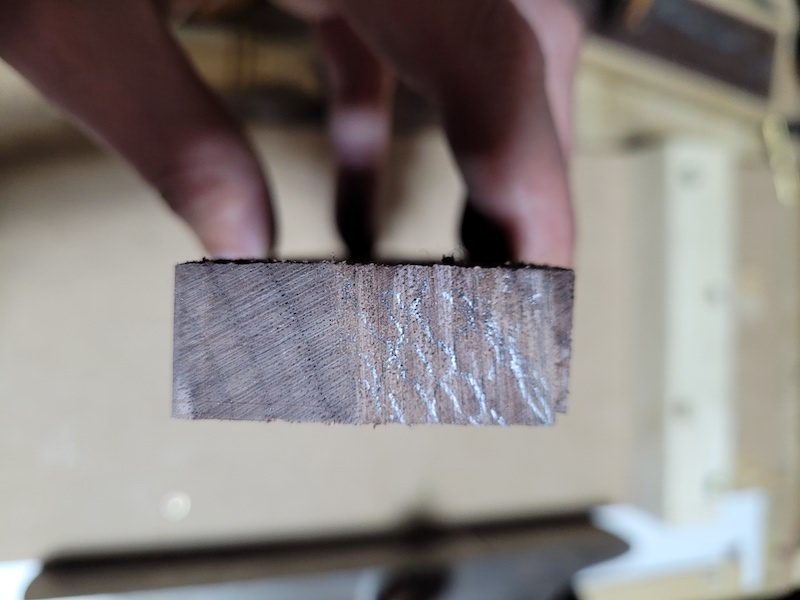
The test piece above has flat edges, but not faces. Not ideal, but being relatively narrow and thin I should be able to get away with it. Its very out of square, so we have a fair bit of material to remove.
Butt your flat edge up against the stop, then slide the work piece forward until it contacts the sole of the plane. This is the ideal starting position. I have the plane set for a fairly deep cut at this point. The high side of the piece is furthest from the stop. This means as I do the bulk of the removal, tear out is not something I have to worry about. If you run into a situation where when you but the piece against the sole, the plane just slides by without cutting, even though the iron is out. Your shooting plane does not have a flat sole, or you have not completely broken in the platform. you will need to deal with that to get the best results.

Once I start approaching a square end, I mark the piece with pencil (I don’t do this all the time, but we are just getting this plane and board up and running).
Then I take a few passes, and this is exactly what I want to see. Its cleanly cutting the entire thickness with nothing left out. The end is not square yet, so we expect some pencil to be left behind.
At this point its taking off some pretty chunky end gain shavings.

I’m getting close to the low side. Its time to back the iron off to a shallower cut, I do not want to reach the far edge yet. So I will sneak up on it with shallow cuts.
After reducing the depth of cut, I re-pencil, and re-check how its cutting. With the shallow cut we can see its cutting slightly more at the right than the left. I adjust the plane until I see the pencil marks being removed evenly.
As I reach the low side. I flip the piece over, and make a small pass about 1/3rd of the way into the board. Before flipping over and making a full pass. This prevent breakout on the far side. Some people will say the stop should provide some backing material and prevent the breakout. Not unless you are always planing at the same depth of cut, which is hard to achieve. There will be a little bit of unsupported wood if you switch from a thick to thin shaving as we have done, and it can break out. Some people advise putting some scrap between your work and the stop… Now you have to keep that level with the end of your work, and if your scrap is not perfectly square… your shooting results will not be. I prefer use small cuts to chamfer the exit side, and then flip back over. As I mentioned earlier, if both sides and edges are not flat and parallel, you wont get perfect results this way either. You can always file, sand, plane, do whatever you want to chamfer the back edge before shooting it as well,and then work to the chamfer.
We have a nice square end. Including pencilling and plane adjusting, that piece of scrap was squared in about 2 minutes.
Despite not even being planed, we are also pretty square to the face. Its not a hard requirement that the stock be perfectly flat and square, but if you are going to try and do some perfect dovetails, I wouldn’t trust this piece.
That’s it. The board is complete and working well. I’m not entirely happy with the fence, the dados make it a bit too thin for my liking, I’m not sure it will last a long time. If it does break, I’ll try making the replacement out of perspex or something similar.