The Worksharp WS3000
I seem to have raised a few eyebrows when I explained just how much time I spend lapping some irons. Sometimes I enjoy that process. Sometimes I just want it over and done with already. I definitely find it worth it in terms of how the tools perform. That said, I’ve always been on the hunt for ways to reduce the time involved. The ultimate answer to this problem is a surface grinder, but that’s not a practical option in a small shop like mine. Its also not a practical option in terms of expense. Lately the Worksharp WS3000 caught my eye and I finally bit the bullet and bought one.
I have not completely made up my mind on this tool, so consider this more of an introduction to the tool rather than a complete review or a recommendation. I want to go through some more irons and let the glow of “shiny new tool” wear off before I give my final verdict.
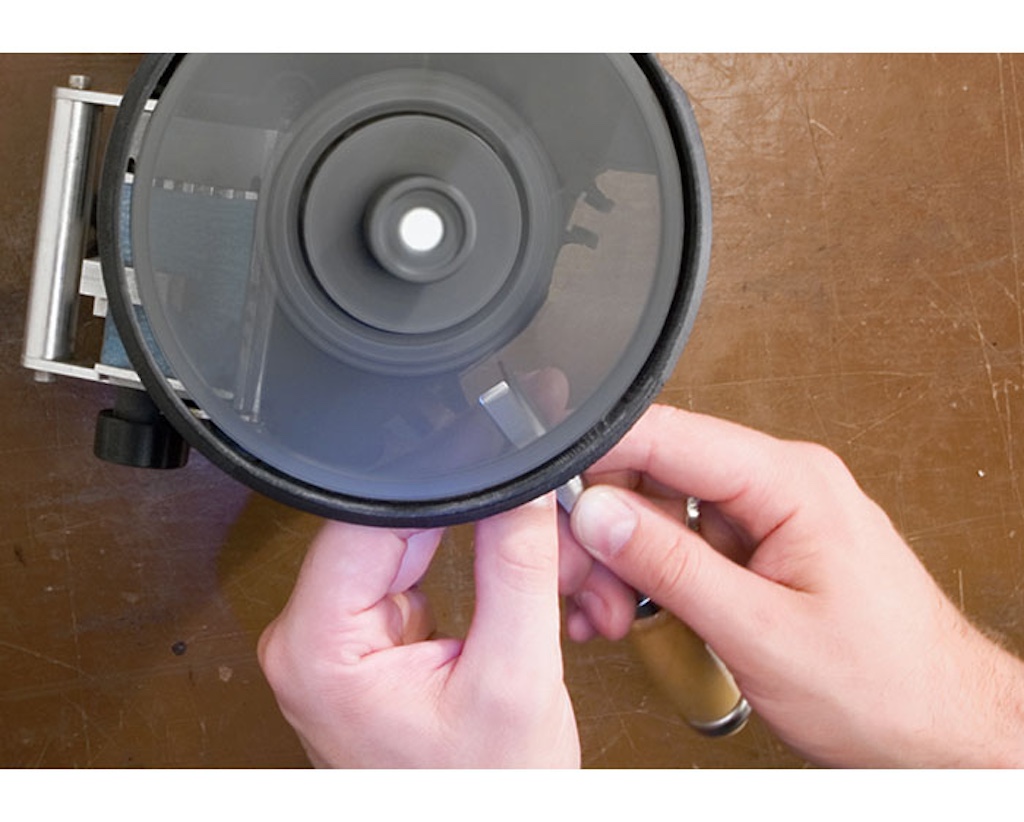
The Worksharp is a bit like a bench grinder flipped on its side. It gives you a rotating flat grinding surface, a bit like an abrasive record player. Dig into the photos below to find out more.
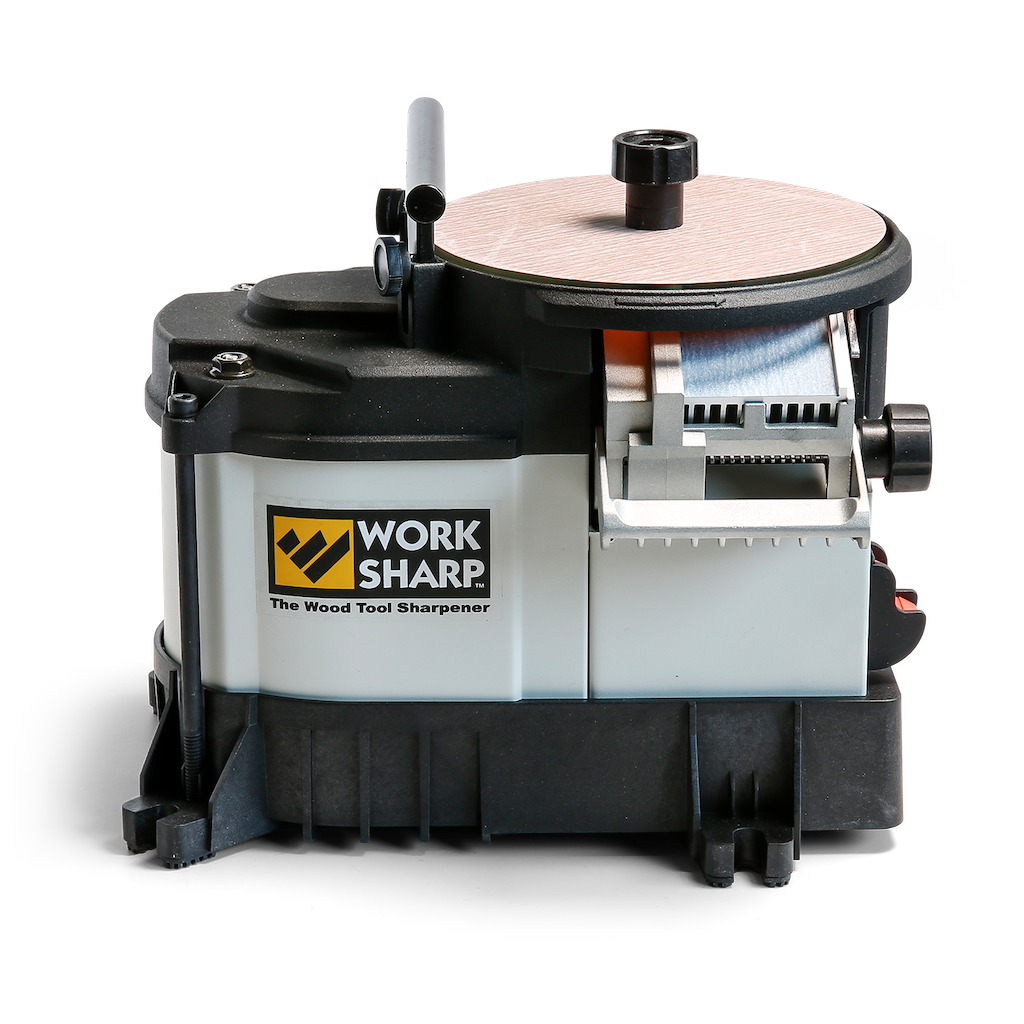
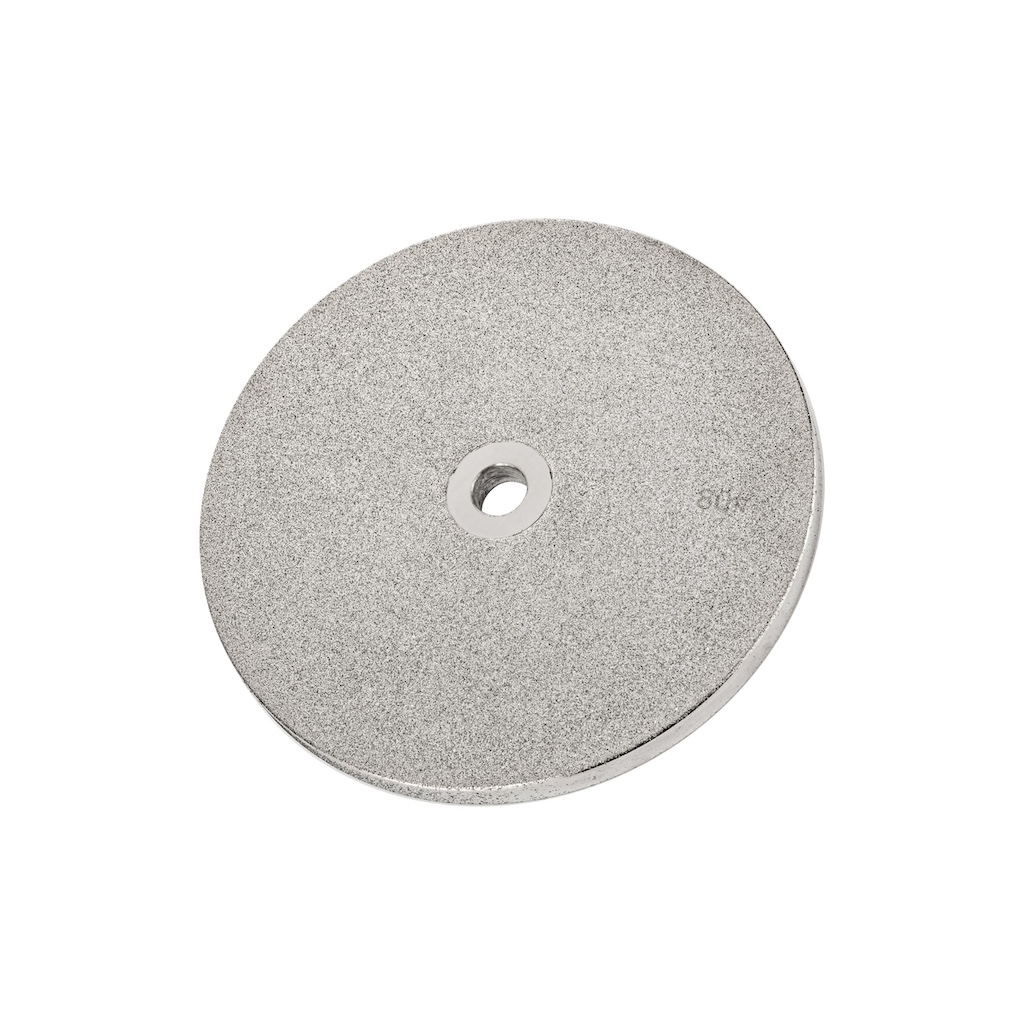
This is what the device looks like. The disc at the top is a 150mm adhesive backed piece of sandpaper, attached to a glass disc, which rotates at 560 rpm (so slow speed) when the device is turned on. If I want to lap a blade flat, in theory I just rest it on there while the device is powered on and it will grind it flat.
Below the disc on the right you can see the bevel sharpening port. This has 4 settings, 20 degree, 25 degree, 30 degree and 35 degree. The discs can have abrasive mounted on both sides. To sharpen (or create) a bevel. You just feed the blade into that port until it makes contact with the underside of the disc, and you will get a predictable flat ground bevel. The aluminium base of the port serves as a heat sink and the air intake below it sucks air in to help cool the tool as you work. The knob on the side moves the fence back and forth to help you keep the blade square as you create a bevel. It accepts a maximum of a 2 inch wide blade. You can freehand any width of blade on the upper surface if you like. Worksharp used to sell a wide blade attachment which handled up to 3 inch blades, but that seems to have been discontinued. On the far side of the grinder there is an opening which allows you to free hand on the under side of disc as well.
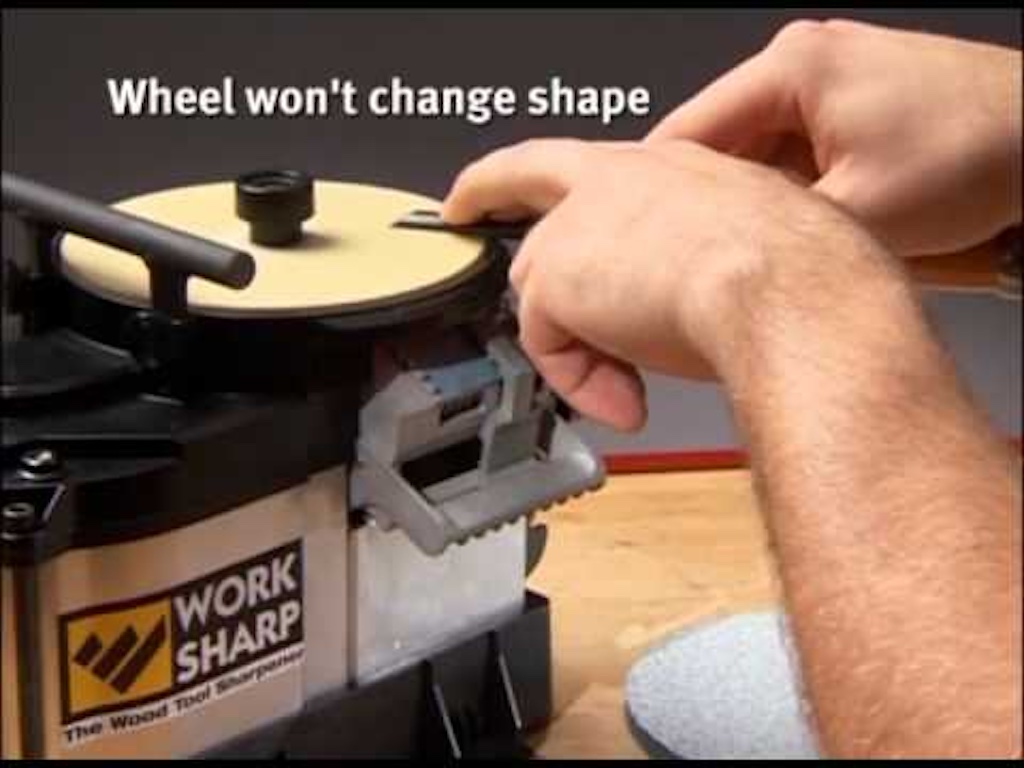
This is how flattening the back of an iron looks in practice. You need to make contact with the rear (non bevel end) of the tool first. On most chisels and plane irons this is pretty simple. The edge can dig in a little as you make contact. this is mostly a cosmetic issue, and further lapping on finer grits usually gets rid of it. On a smaller iron it could be a bigger issue. One interesting detail of the Worksharp is that it does not move on the bench when working smaller irons and chisels. I dont need to clamp it down. On larger irons there was enough friction that the worksharp would begin to move. Light clamping with a speed clamp is enough to immobilise it through.
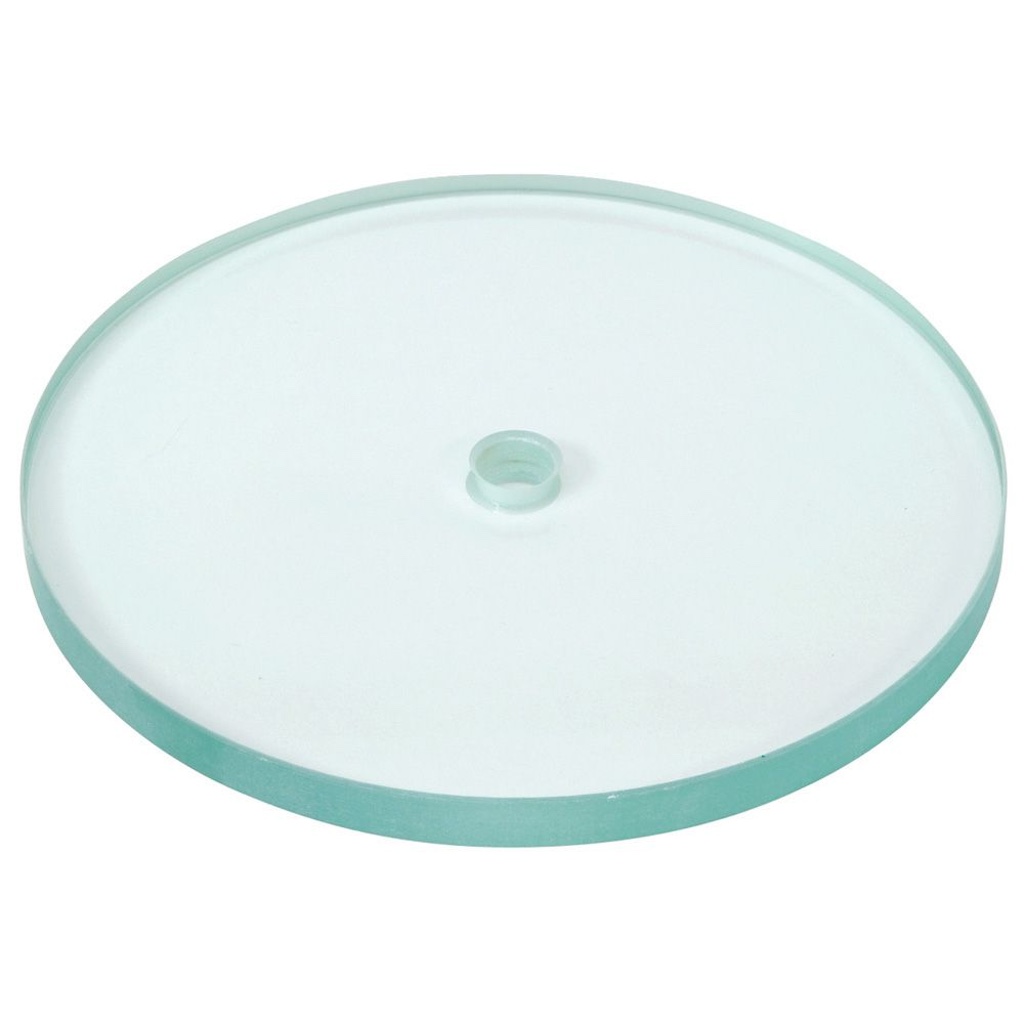
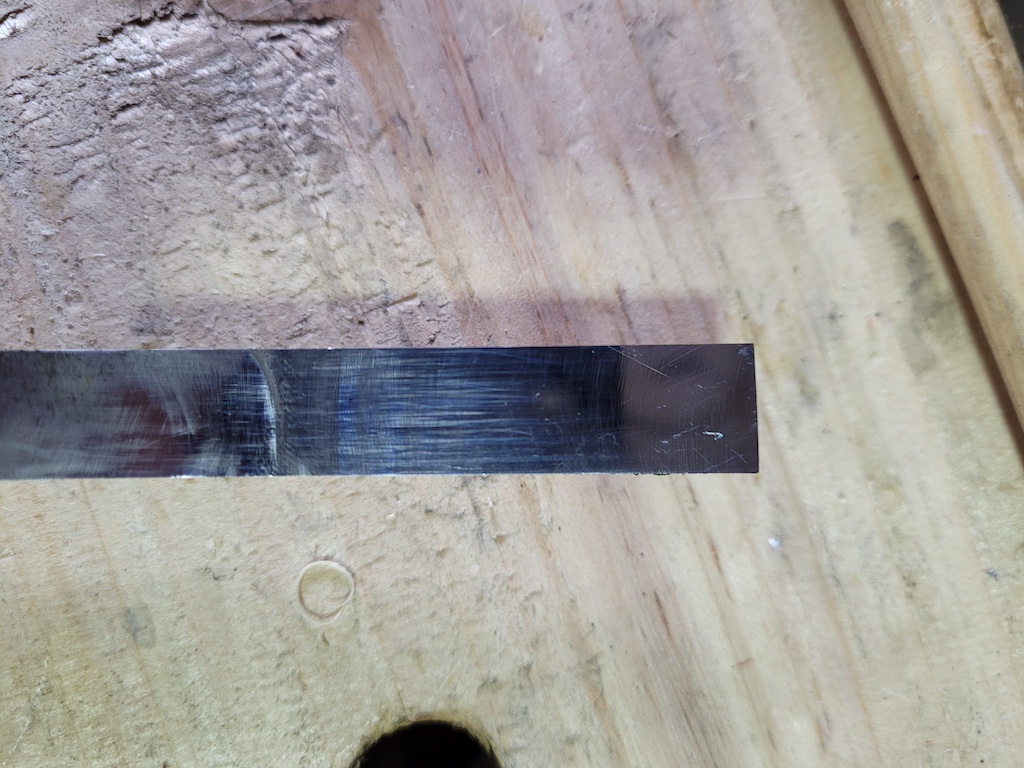
The glass discs that come with the worksharp. By default the tool uses sandpaper as the abrasive. During my first experiments on chisels in moderately good shape and small irons, sand paper worked out great. The tools heated up fairly quickly to the point where it was uncomfortable to hold them, but it did not take long to flatten them. On a larger 2 1/4 inch plane iron, with severe pitting, this was a bigger problem. I wore out a 120 grit piece of sandpaper fairly quickly, and did not have a replacement to hand. There are however other things you can use in the Worksharp.
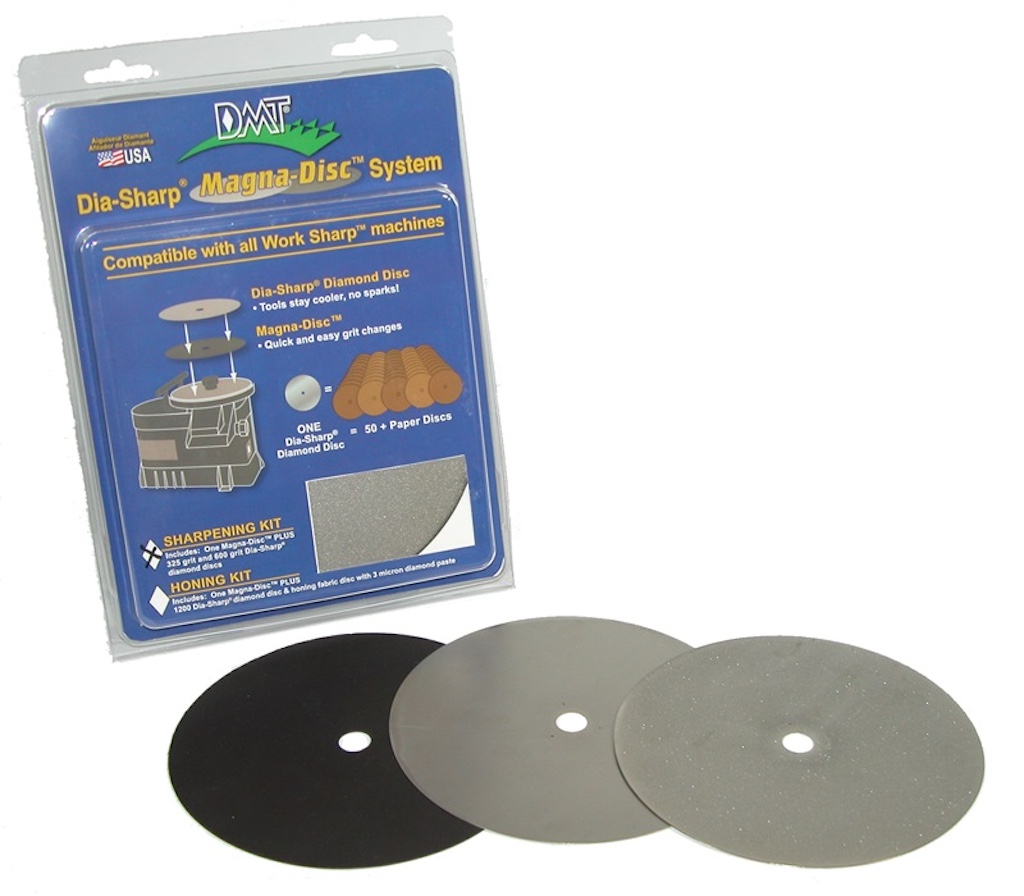
DMT sell diamond discs for the Worksharp. 320, 600, 1200 grit, and a honing disc for using diamond paste. I bought my Worksharp used with the full set. The diamond discs have a few advantages. In theory they should massively outlast a sandpaper disc. They also run a lot cooler. Starting from cool the 120 grit sandpaper could be used for about a minute before it needed to be cooled. I could use the 320 grit diamond wheel for as long as I liked without the tool becoming hot. The downside is, I found the material removal rate pretty slow. Confusingly, I found the finer the diamond wheel I used, the quicker I could remove material. As I said, my kit was used. Perhaps the coarser discs have been worn out. This kit comes with a magnetic adhesive backed disc that you attach to the Worksharp glass platter. Then you slap the diamond discs on and lift them off. I have ordered some cheap generic 150mm diamond discs, I’m curious to see how well they work with the Worksharp.
Woodturners Wonders in the US sell CBN wheels for the Worksharp. They come with 2 grits per disc (one each side). Their grinder CBN wheels have a great reputation, so I’m very tempted to pick one up and try it out. Sadly they have no resellers in the EU/UK, and their shipping charges are pretty steep, so I’m still thinking about it.
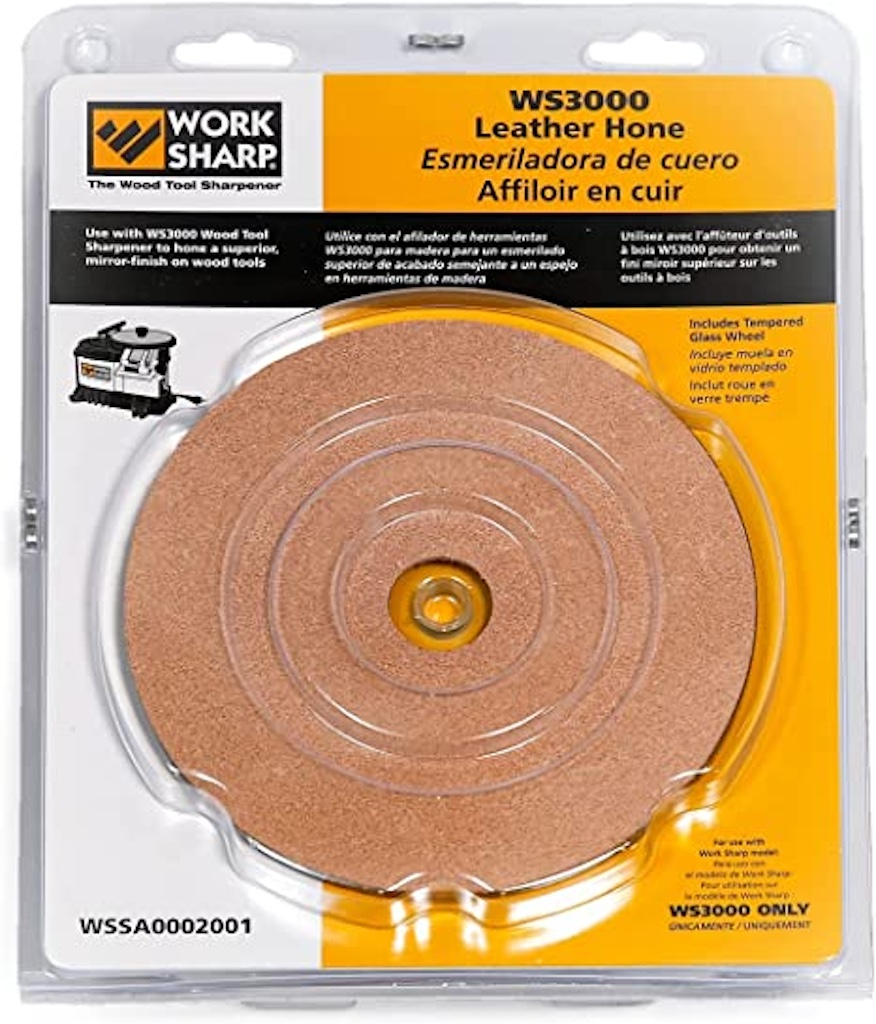
You can get a leather wheel to use with your stropping compound of choice.
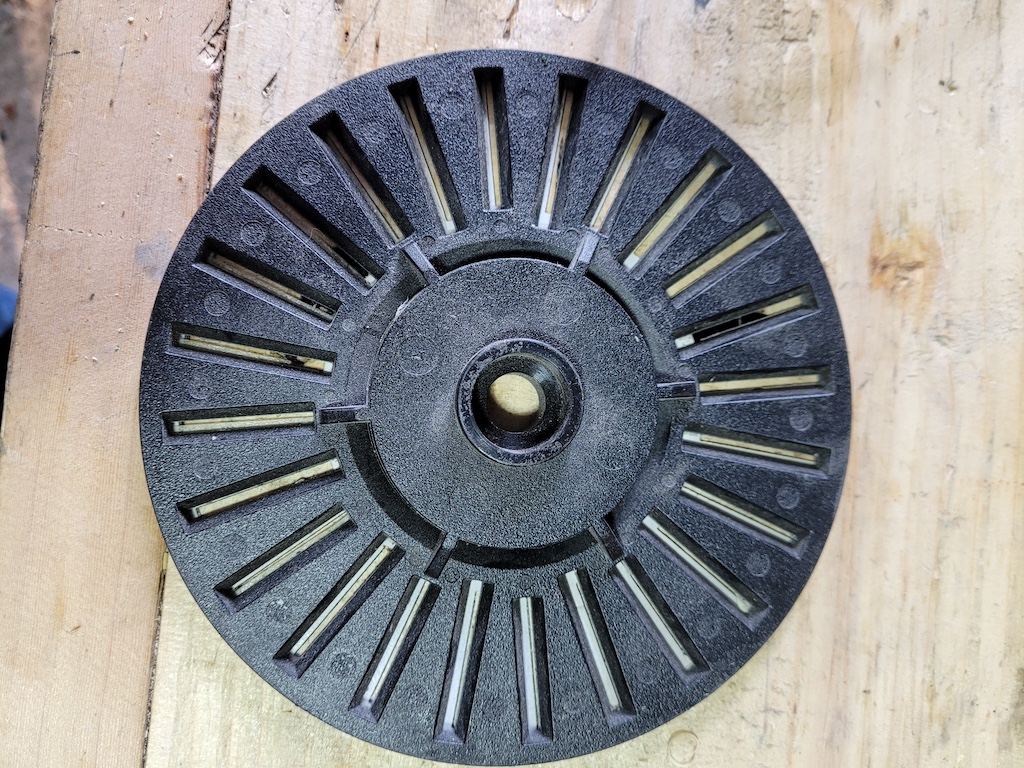
Finally you can get this odd slotted base you use instead of a glass disc.
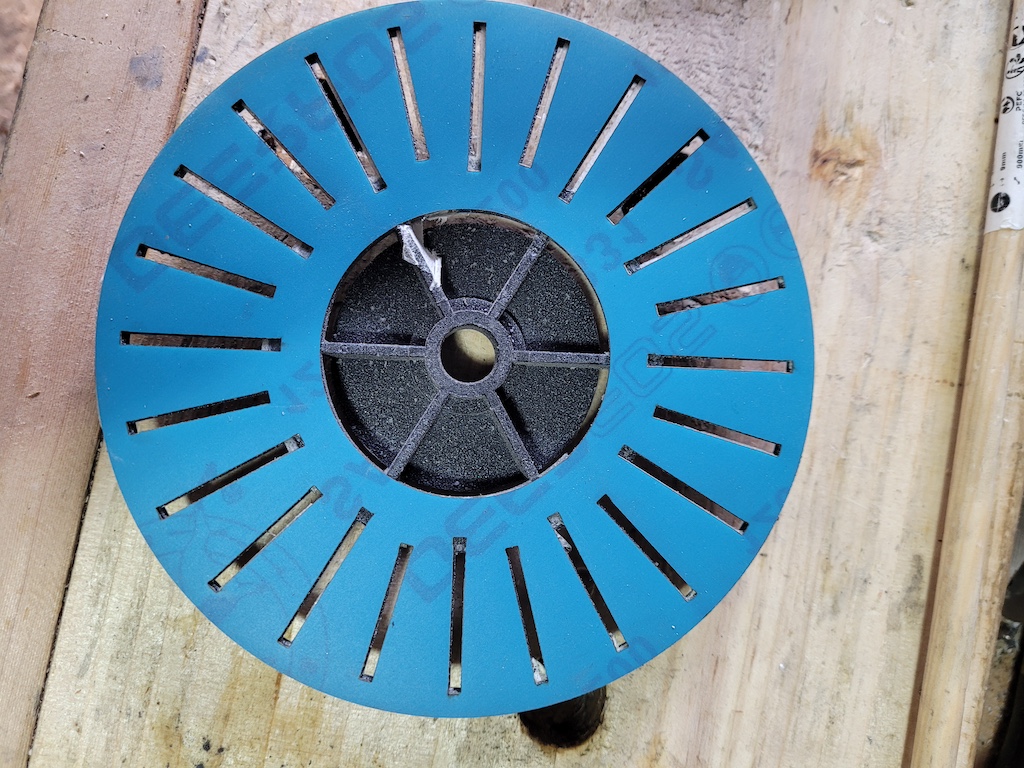
You mount custom sandpaper with matching slots on it.
Then you can freehand a tool from underneath, and look down and see the bevel of the tool you are working. It creates the illusion of transparency. This looks insanely useful for working an in-cannel gouge, but I have not had a chance to try it out yet.
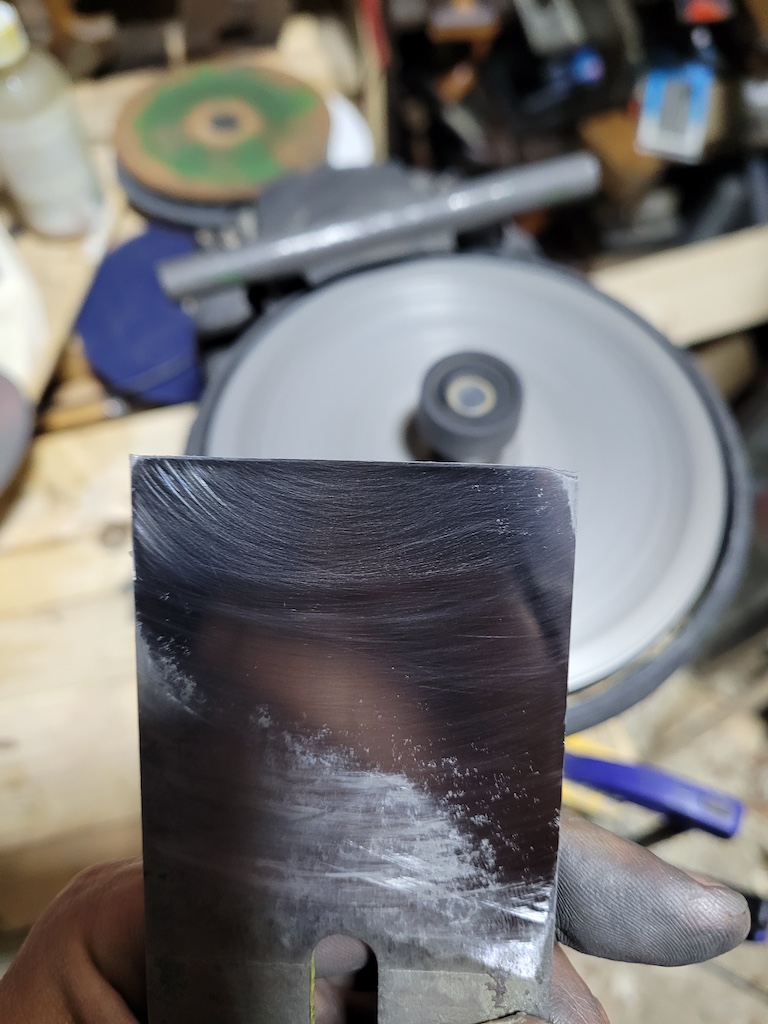
So how is initial testing going? I flattened the back of this old Aldi chisel to a mirror polish in about 5 minutes. I went from 120 grit sandpaper, to 1000, to 3000 grit getting a fairly decent mirror finish. Changing the glass platters on the Worksharp only takes a few seconds. And the disc stops rotating quickly when you turn it off.
About 30 seconds work on the 3000 grit gave me a fresh bevel, and then I freehand stropped it using the leather disc. This gave me a well performing chisel. It shaved hair, and pared end grain pine. It did not feel quite as sharp as I am used to with my stones, but it was not far off, and it was better than my typical sharpening only a few years ago. So that was a plus. I can take a chisel in OK shape and have it become a user in under 10 minutes using nothing but the Worksharp.
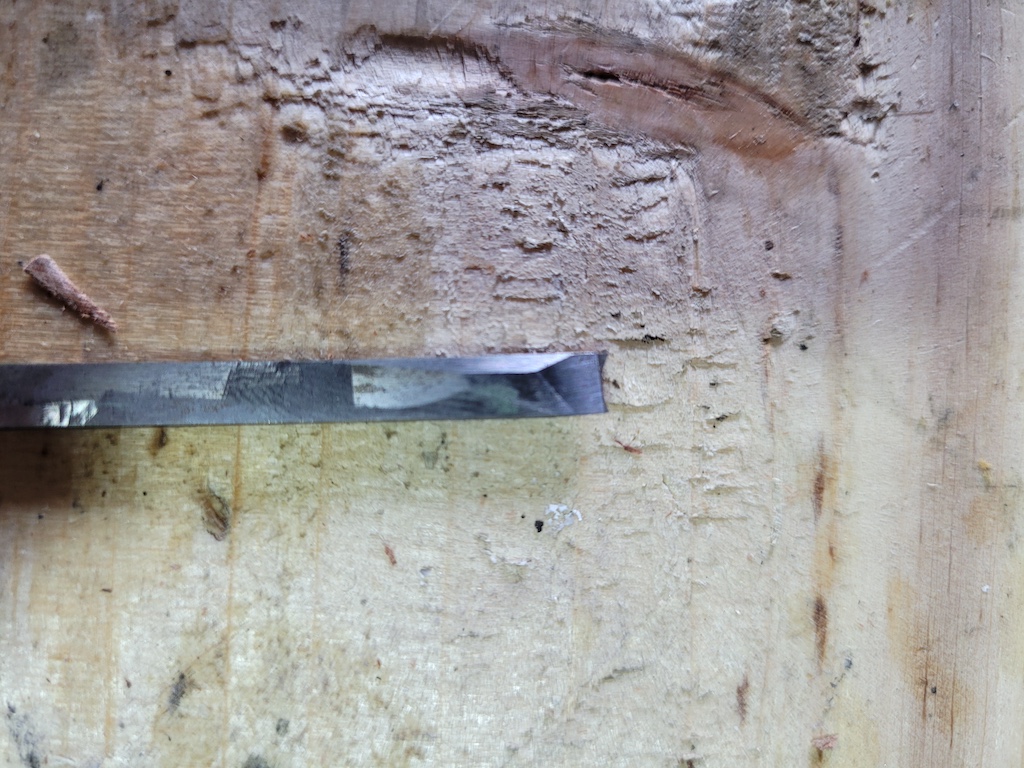
On the downside, I took this small side bead iron and tried to flatten the back. I got there, but you can see that it was after a few attempts. I was not far off ruining this blade. With something this small and narrow its hard to be sure you have actually rested it flat. I’ll try some smaller irons again with a much finer grit and see if that helps. But I think very narrow blades, or tools that would be unstable (say a mortise chisel), may not be a good match for the Worksharp.
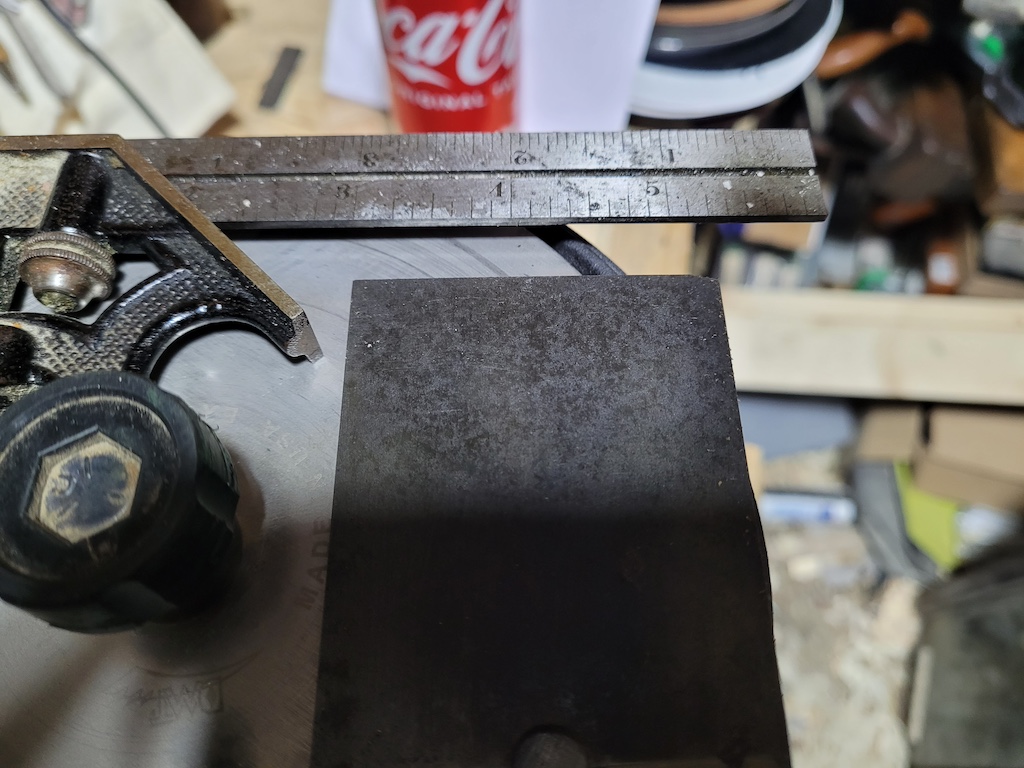
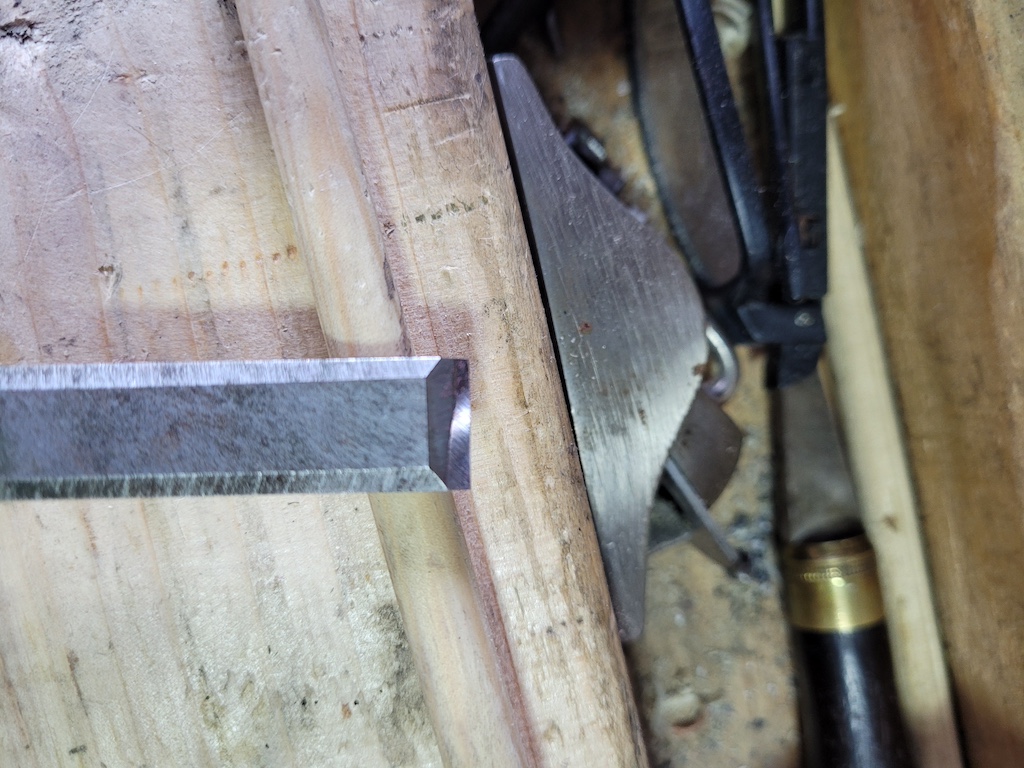
Finally I tried out this vintage 2 1/4 inch plane iron. This is the kind of lapping project I would normally dread.
This represents about 2 hours of work on the Worksharp. And it still needs some work on the corners. I wore out a 120 grit disc and a 400 grit disc in about 10 minutes each. I switched to the coarse diamond plate, then tried the 600 grit on a whim, and found it was removing material faster. So then I tried the 1200 grit and found it was removing material faster still. I’m still not sure what’s up there, but being second hand, its hard to tell how much use those diamond discs have seen before. 2 hours is still a hell of a lot less than doing the job by hand would take. I’m going to be playing around a bit more with different options for flattening an iron like this, when a lot of material needs to be removed. I’m going to try cheap (but fresh) generic diamond discs. See how I get on with 120 grit sandpaper when I have a good supply so I can swap out discs when they wear. I’m also debating buying that CBN wheel. I have a feeling that I can do a iron like this in well under an hour with the right abrasive choice.
I’m also curious to see how flat the back really is when its done. The edges of the worksharp disc are going to be rotating faster than the center. I have no idea how this will play out with flatness in practice. But it’s the opposite of what I would expect when I work irons on my stones (the front gets worked more as I work across a stone, the rear should be getting worked more on the Worksharp).
I’m planning on lapping on my diamond stones afterwards to see if Worksharp flat agrees with Atoma diamond stone flat, and if not, how much lapping is required to move from one to the other. Given that once I have currently lapped on my coarse diamond stone, it only takes a few minutes to move up the grits, including switching to water stones, that will be interesting to see.
So far the Worksharp is promising. I’m not sure I would think of it as a replacement for a bench grinder, but it certainly looks like a valuable addition and a lot easier to use. The obvious shortcoming is that I cannot see any way to create or sharpen in bevels on a tool like an incannel gouge, but you generally need a narrow wheel for a bench grinder to do a good job of that as well.
The Worksharp is available in the UK/EU, but at a significantly higher price than in the US. I bought mine used off Ebay, with a lot of extra glass discs and accessories. Even with shipping and tax, it was massively cheaper. The downside is that the US Worksharp is 100V only, so you will need a transformer. I could not find the wattage rating for the Worksharp anywhere, so I played it safe and bought a 2000W transformer. For something like this, a cheap travel transformer is unlikely to work. A 2000W transformer may be overkill (and they are not cheap or small). If you decide to import from the US, take the 110V/wattage issue into account.
I’ll update everyone at some point in the future when I have spent some more time with the Worksharp. So far, I’ll say its interesting and fun, and it looks like it will be a win for heavy material removal when lapping, even if I still have to finish by hand.