A Chisel Holder, a new saw, and the B-Square
I have two wonderful little chisels that were made for me by Gordon McCall. One was made from an off-cut of union plane iron. I used them while making the chest and really wanted to find a place for them to live in it. They are just too long to go in the tool rack in the upper compartment. I decided they could live in the bottom compartment, but I would need some sort of tool holder to stop them from rattling around.
I played with a few options in my head, but didn’t have anything I was happy with. Zach Dillinger posted a wonderful chisel holder on unplugged woodworkers. He took an earlier design from “Making Wood Tools” by John Wilson. The design consists of a frame, with a pivoting body that holds the chisels. When not in use the body protects the blades, and the frame shields the chisel handles from unwanted knocks. When in use, the body pivots upwards presenting the chisels to the user for easy access. It is wonderful.
The original design used a simple stick to present the chisels upwards. Zach added a pivoting toggle that provided two valuable additions. It locks the holder shut, and means you don’t have to keep track of a random stick when it is closed. When rotated it holds the chisel holder up. Knowing how cramped the bottom of my mini tool chest would be I wanted that functionality, but without the toggle being proud of the body. I think it would just be a matter of time before it was battered in use. Space constraints in the bottom of the chest would also mean getting it in and out with extra thickness of the toggle would be a challenge.
Eventually my eye strayed on a spare bullet catch in my benches tool well and I hit on a design. I use bullet catches in the side of my bench dogs to allow me to easily set them at any height. By putting two bullet catches in the side of the frame, I could have the chisel holder lock shut, or prop up the chisels with nothing proud of the frame. With a design in mind, I set off to build it.
You saw me make the body and drill it to hold the chisels a few weeks ago. So now its time to build the frame and mount it. My plan was to put two lengths of brass tube in the sides and bodies and then insert a brass pin in each side for the body to pivot on. I considered just using a pin, but I think over time it would wear away the wood. Likewise a simple dowel would probably have a more limited lifetime.
The frame itself just needs to be tall enough that the handles will not project above or below. The ball catches go in a few inches from the pivot pins. In a corresponding location on the body I have the catches for the bullet holes. I decided to dovetail the frame. Its not necessary to dovetail this. Screws nails, just about anything would do the job. But its going into a pretty chest, so I decided to try and make it pretty.
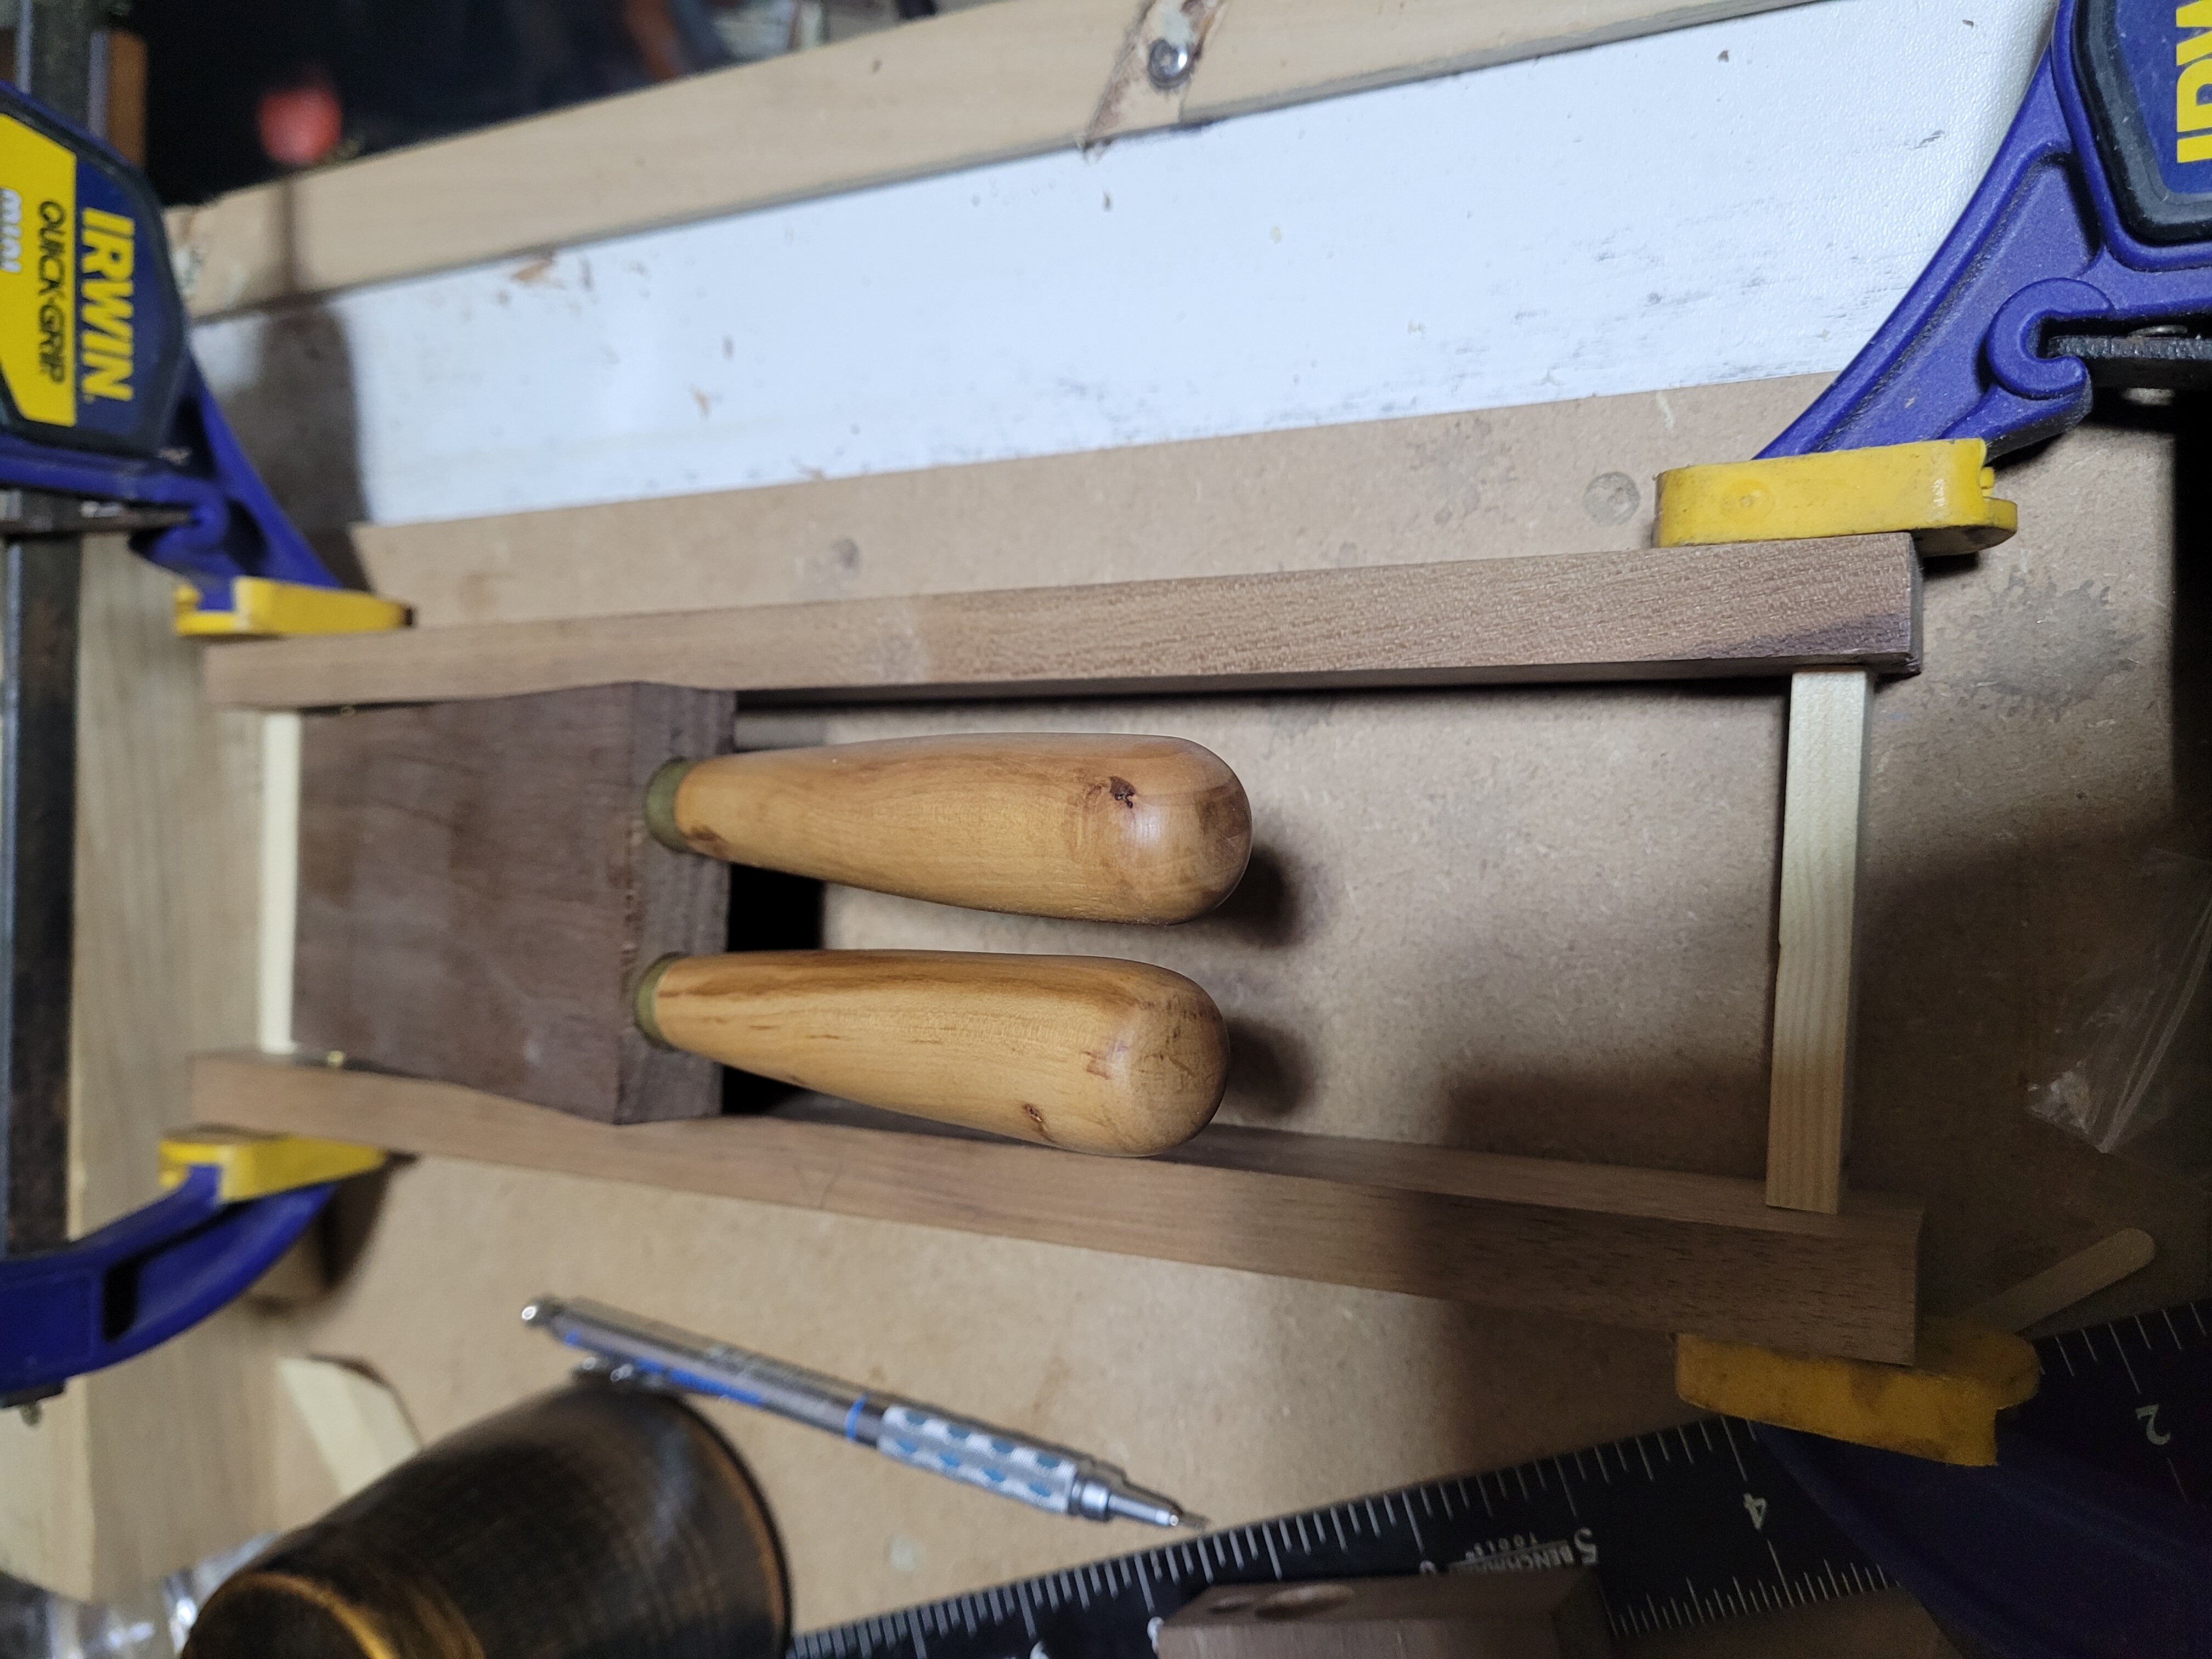
Actual construction was not very hard. The tricky part was making sure everything lined up and was spaced correctly. I made a pair of pine pieces that would hold the sides of the holder the final distance apart. This let me “assemble” everything with clamps. Check that the body could pivot up without hitting the bench. Make sure the bullet catches had enough room to work, but not too much. I made the pine spacers a little oversize, and then took them down bit by bit with a shooting board to make it as narrow as possible, while still allowing the bullet catches to work.
I used dowel pins to help with aligning all the holes to drill. If you are not familiar with them. These are small pins with a spike on the end. You select the pin that matches the size of hole you have drilled. Insert the side without the spike. Then you can line up the piece that needs a matching hole and press them together to mark the spot for drilling. Cheap and simple, these made locating the holes for the brass rod and the bullet catches easy.
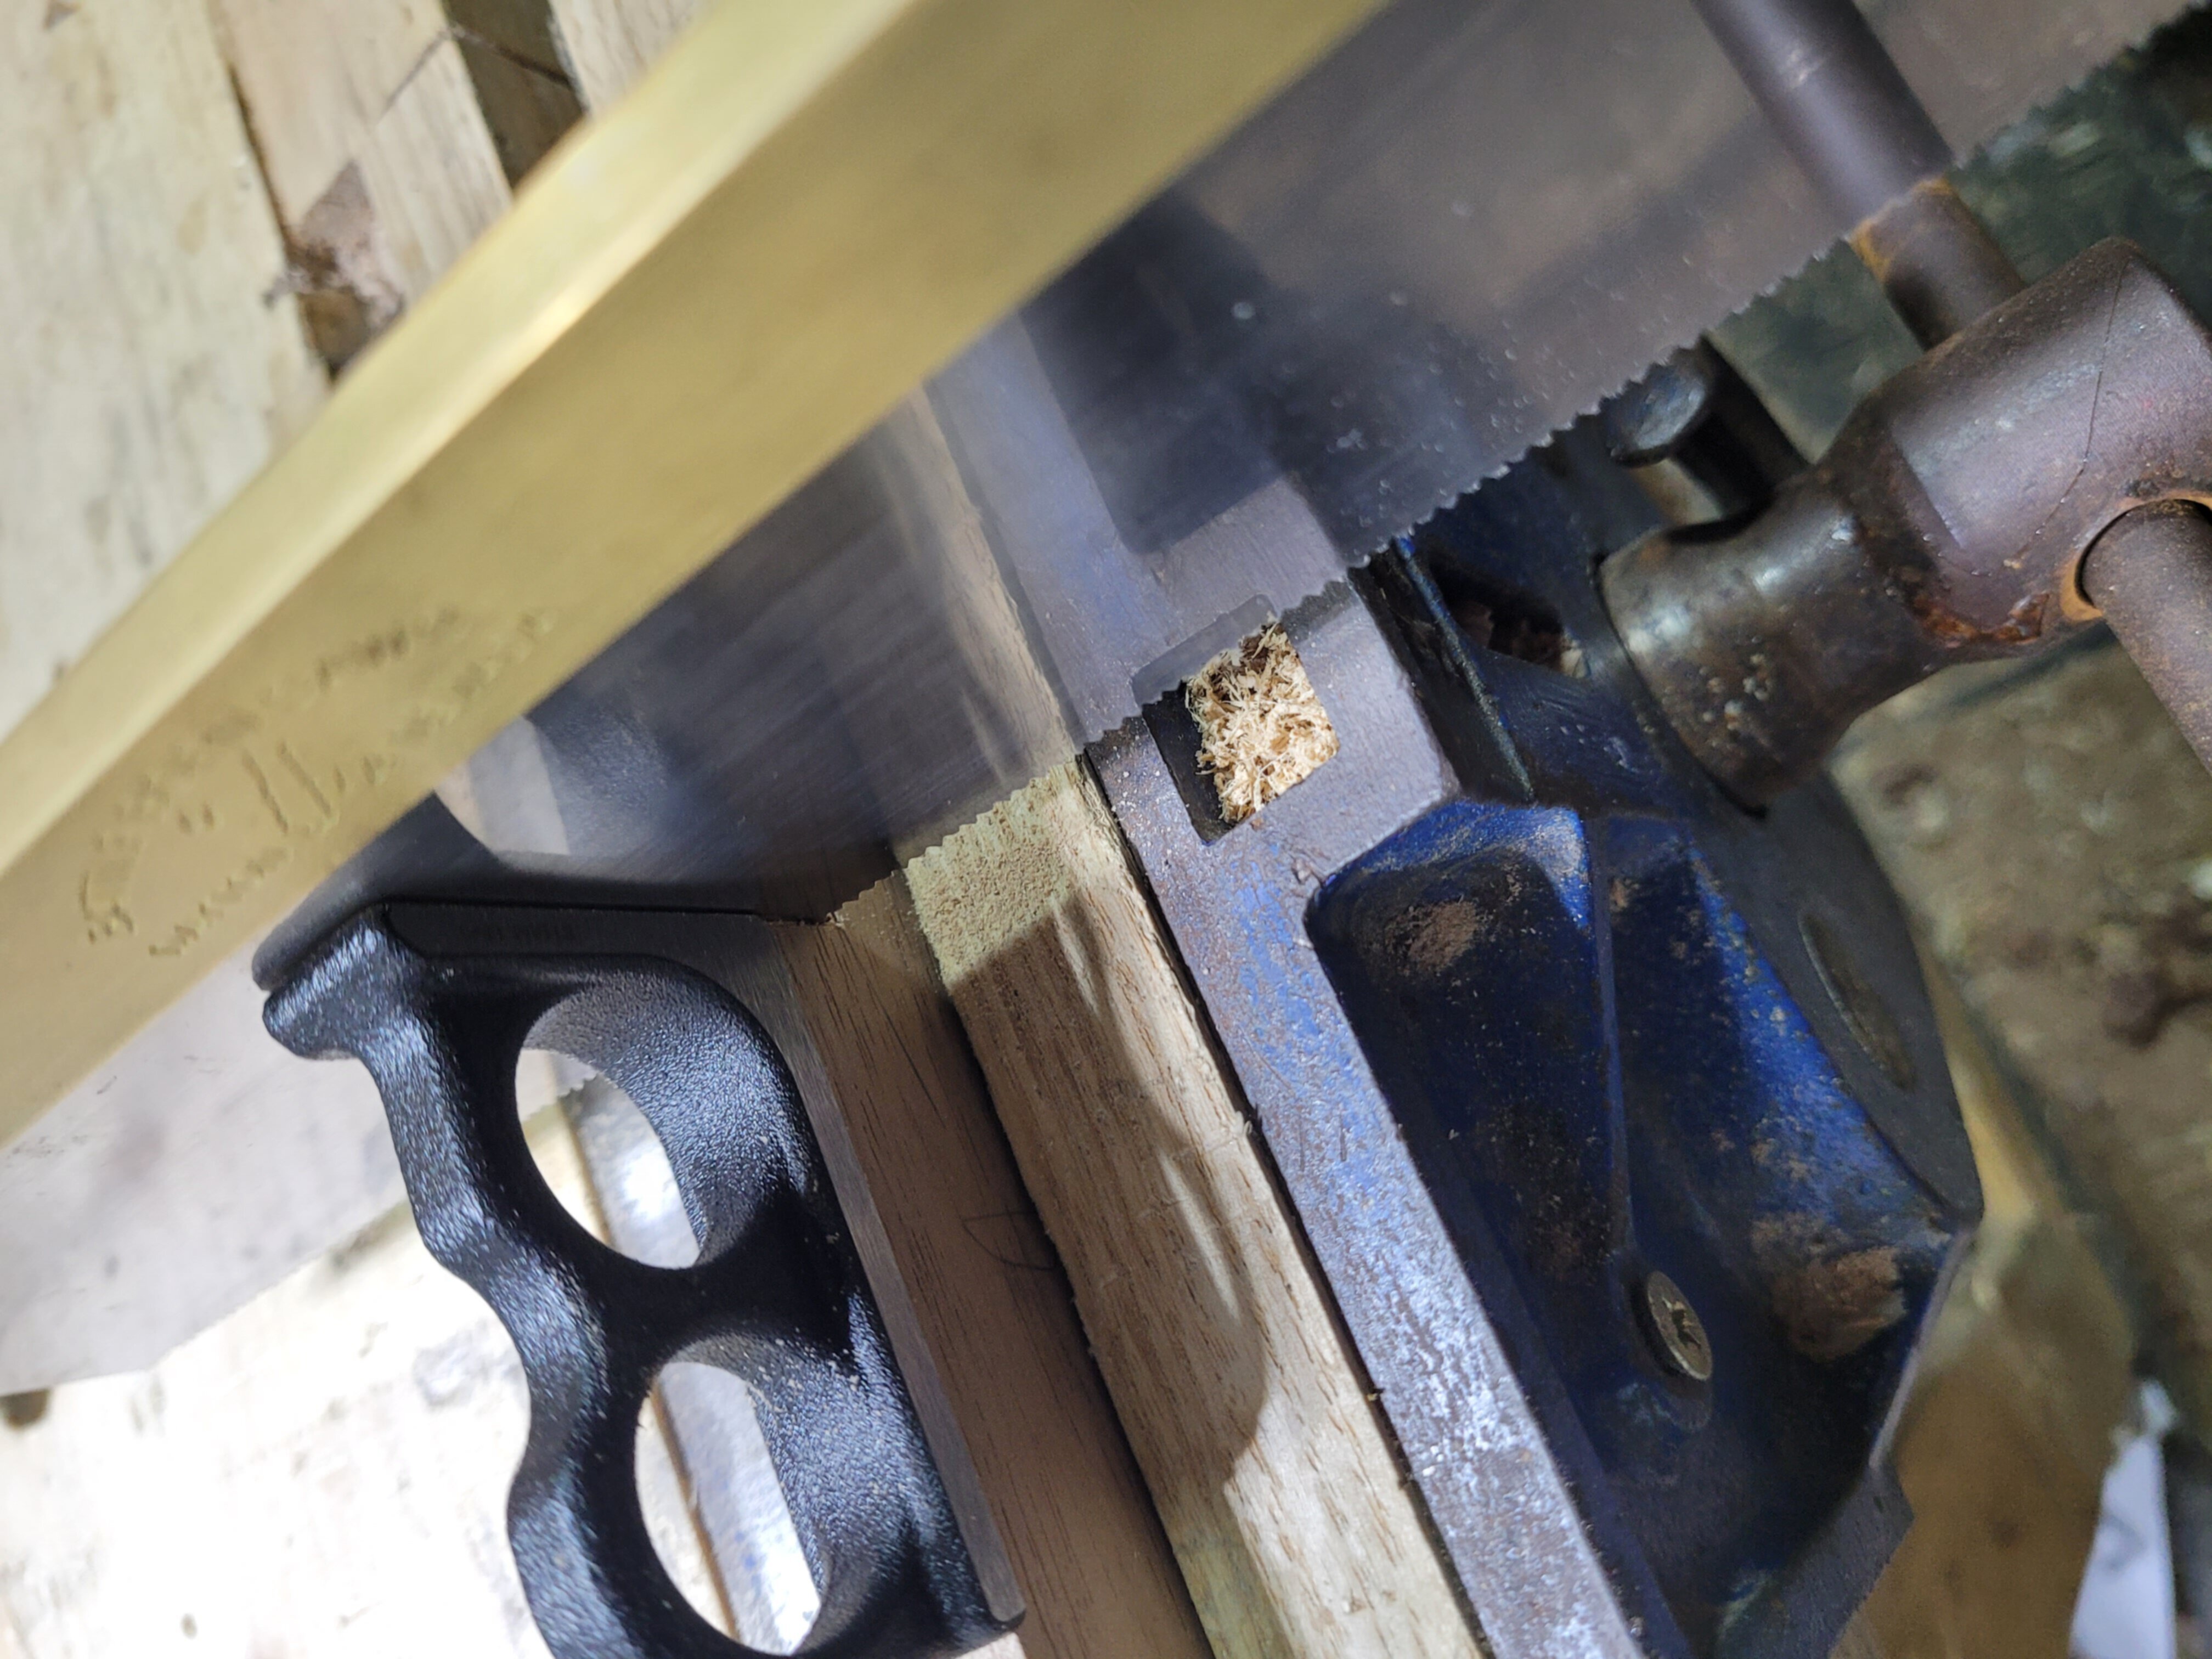
Finally when it came to dovetailing, I broke out two tools I had not had a chance to use in anger yet. The first is a Battle Born Saws bought here on the patch from its maker, Ian Murdock. This poor saw appeared to have been used as a seat for someone as they ate their lunch when it arrived. It took me quite a while to get around to straightening it, but I’m glad I did. It tracks wonderfully, and the finish it leaves on walnut is just fantastic. Above all, I don’t think Ian could have made me a more comfortable handle if I had sent him a 3D model of my hands. The dovetails came out great, and this is going to be my primary dovetail saw from here on out.
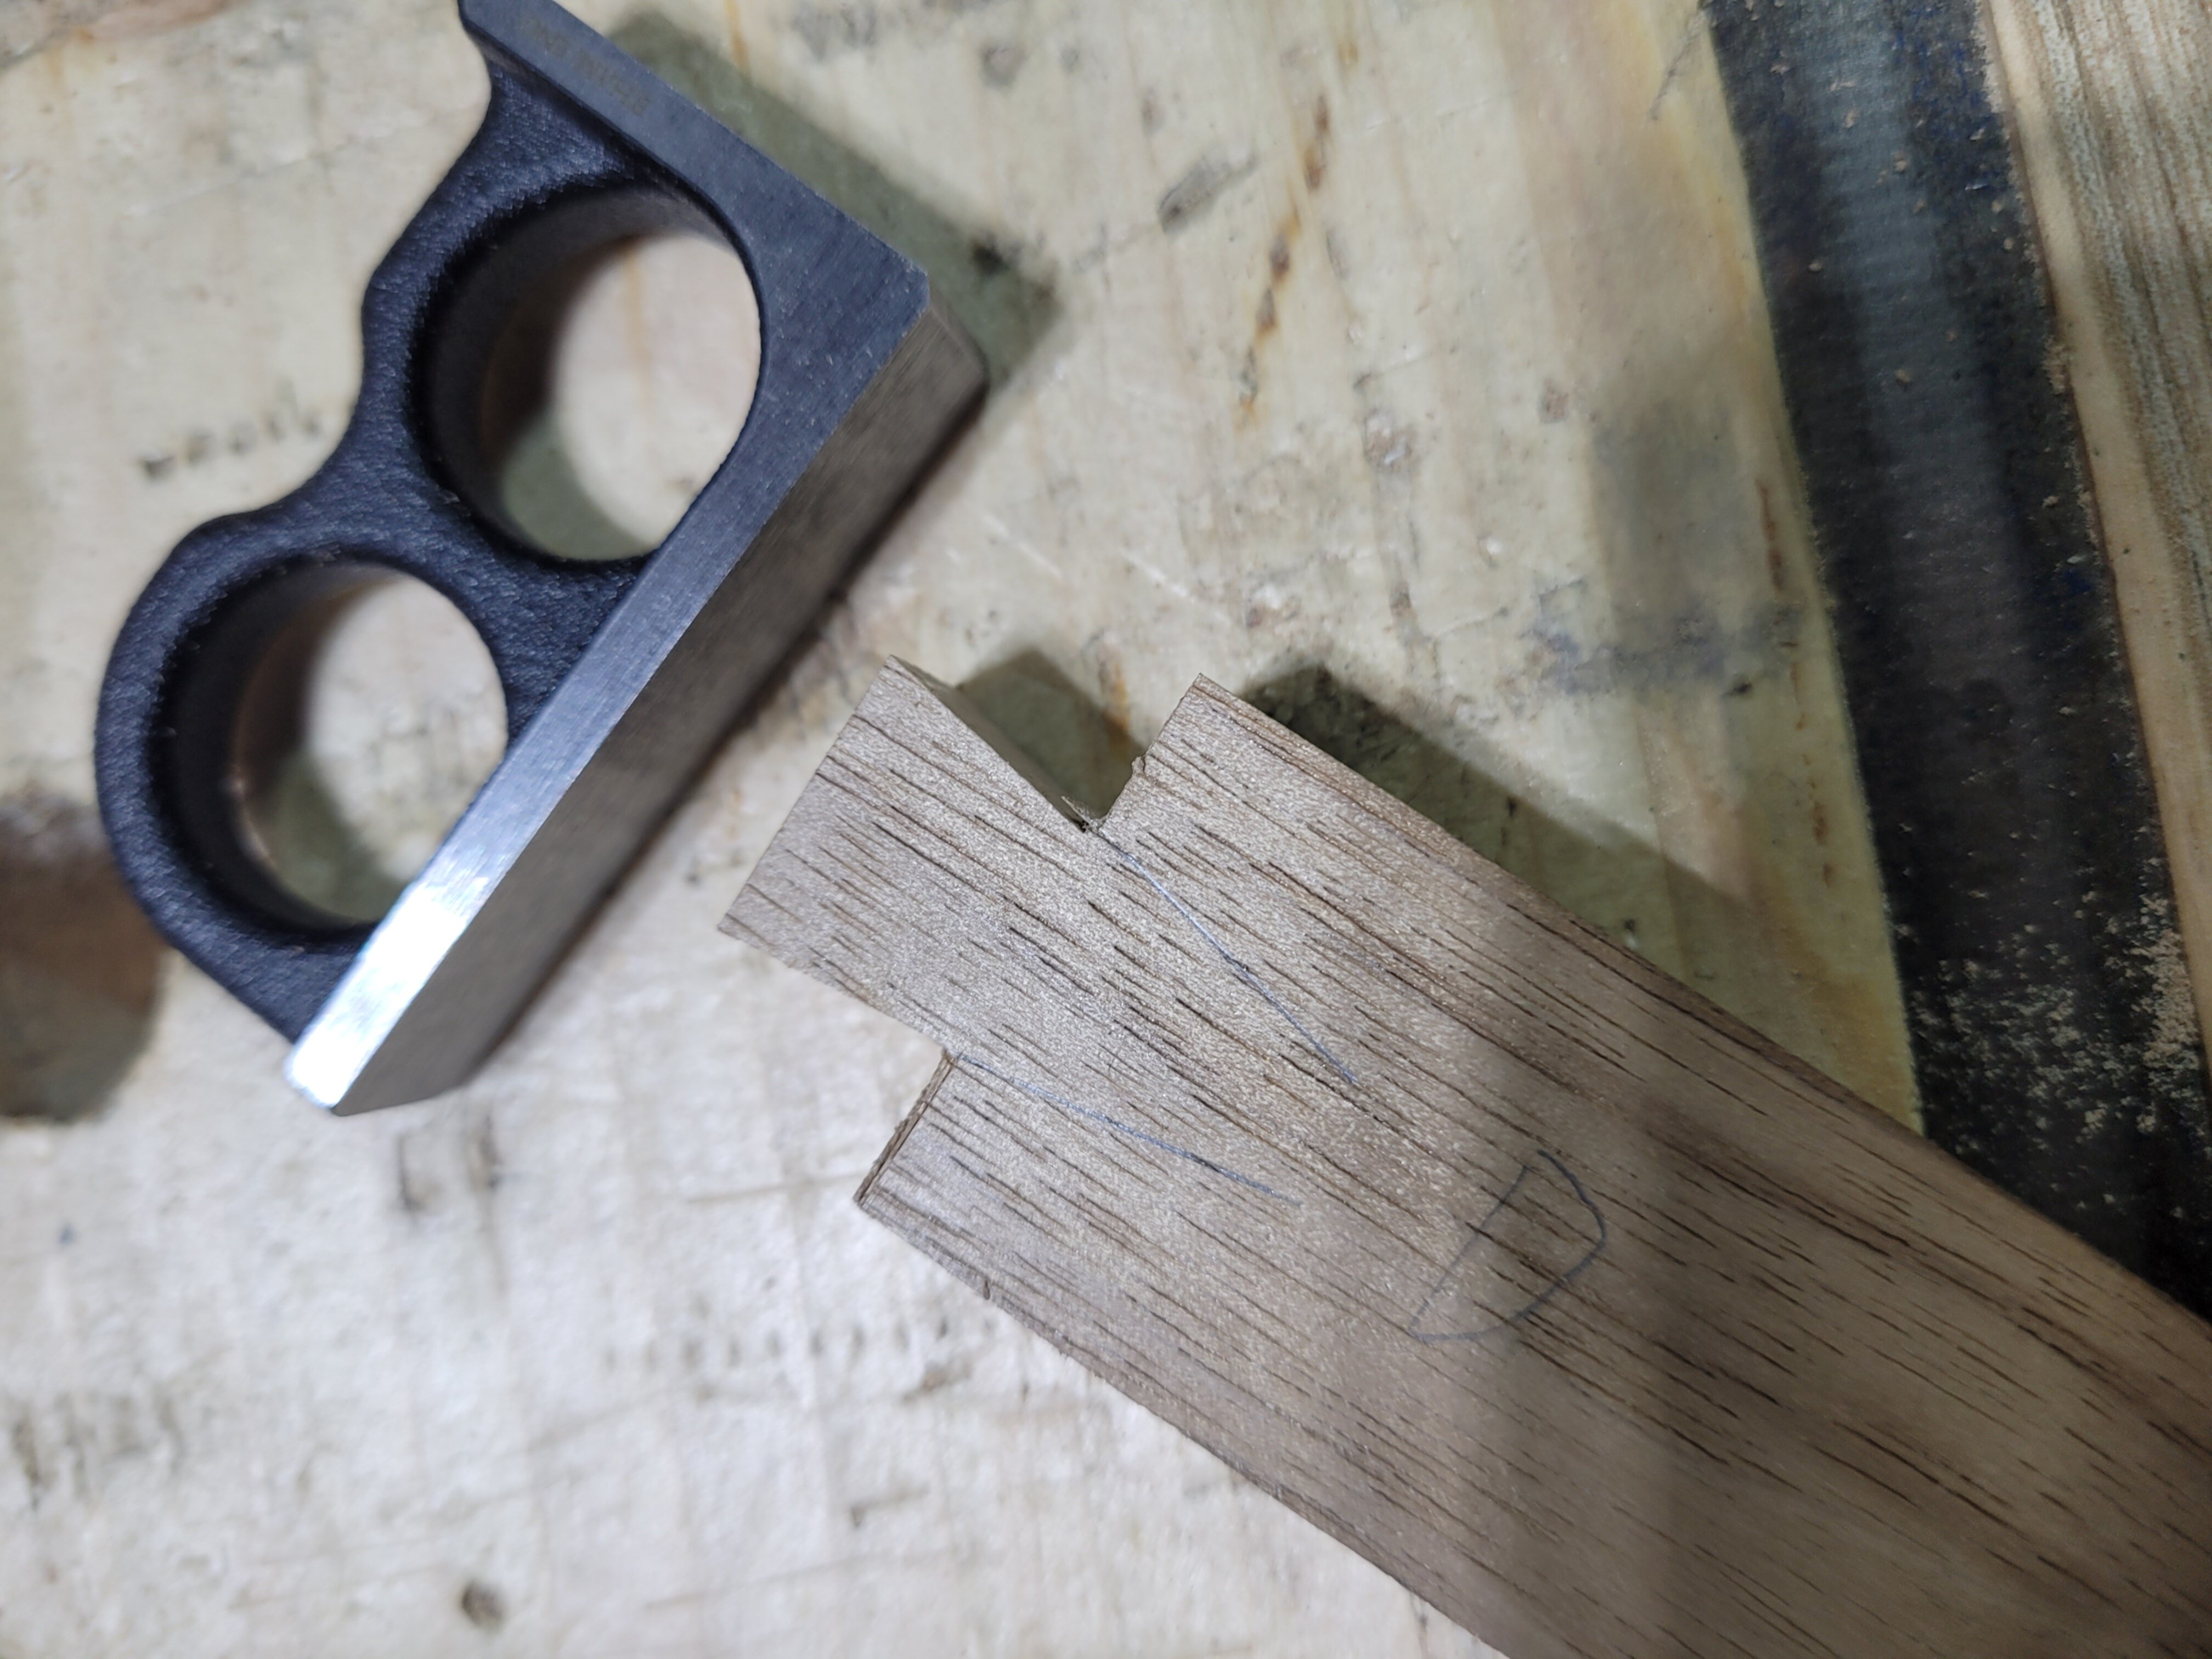
The other new tool I broke out is the MJ Platt & Co. B Square. A quick note, I have deal with Workshop Heaven as part of my work at Union. But I bought this with my own money, they have no idea I’m writing about it, and I doubt they have even realised I ordered one.
The B Square is a tool that I immediately knew I would have to try. A lot of the uses for it are the same things I use my tiny square for. It is a chisel/saw guide. Use it to be sure you are at 90 degrees to a reference surface when chiselling or sawing. The advantage over my tiny square is that you get a much wider reference surface, and the corner is relieved so you don’t need to worry about battering your saws set against it. It is also a lot easier to hold than the tiny square.
I tried using it for just about every stage in these dovetails to see how it worked out. For sawing the dovetail shoulders it is excellent. In fact, when using it, I did not need to pare the shoulders at all afterwards. I could accurately saw perfect shoulders every time. I alternated sides on each piece, one side of the tails I tried to saw exactly to the line requiring no further work, the other side I sawed a little short of the line, to require some final paring.
I found it less useful for paring the shoulders when only a tiny bit of material was left. It was very easy to either knock the chisel out of the line, or partially knock it out of the line leaving the chisel at a slight angle. I had the pieces vertically in the vice, and with hindsight, I probably should have turned them to pare straight down, that would have made the B-Square easier to use. In any case, after a few tries, I stopped using it for this operation. I’ll try again next time I’m dovetailing and see how a vertical approach works out.
I used it again when sawing the pins. Again, it is tricky to present the square to the saw without knocking it off the line. I found that if I presented it at an angle to the saw, so only a corner contacted it was easier to start the cut, get a little depth, and then fully reference the side of the square off the saw when the kerf was deep enough to hold the plate in place.
This resulted in pretty much perfect pin saw cuts every time. They were all perfectly plumb. 3 out of the 4 tails assembled off the saw. The last one just needed a single shaving removed, and the problem was me not starting the cut in the right place, nothing to do with the B Square.
The last operation I used it on was chopping out the dovetail waste. I only used it for the final chops…. It is a delight. I’ve never done the job more accurately. It has never taken me so little time to clean up the sockets.
So the B-Square does the job it advertises. Its not a mindless cure all, you need to pay attention when using it. My largest complaint is that the finger holes are too small for me to use it as a knuckle duster :) I have mixed feelings on the B-Square. I think I’ll use it to check my angle before I start chopping/sawing, but I don’t think I’ll use it as a guide during the operation. I worry it may de-skill me. I’ve been using my tiny square that way to slowly but surely improve my ability to cut/chop square. This will be a better tool for the job.
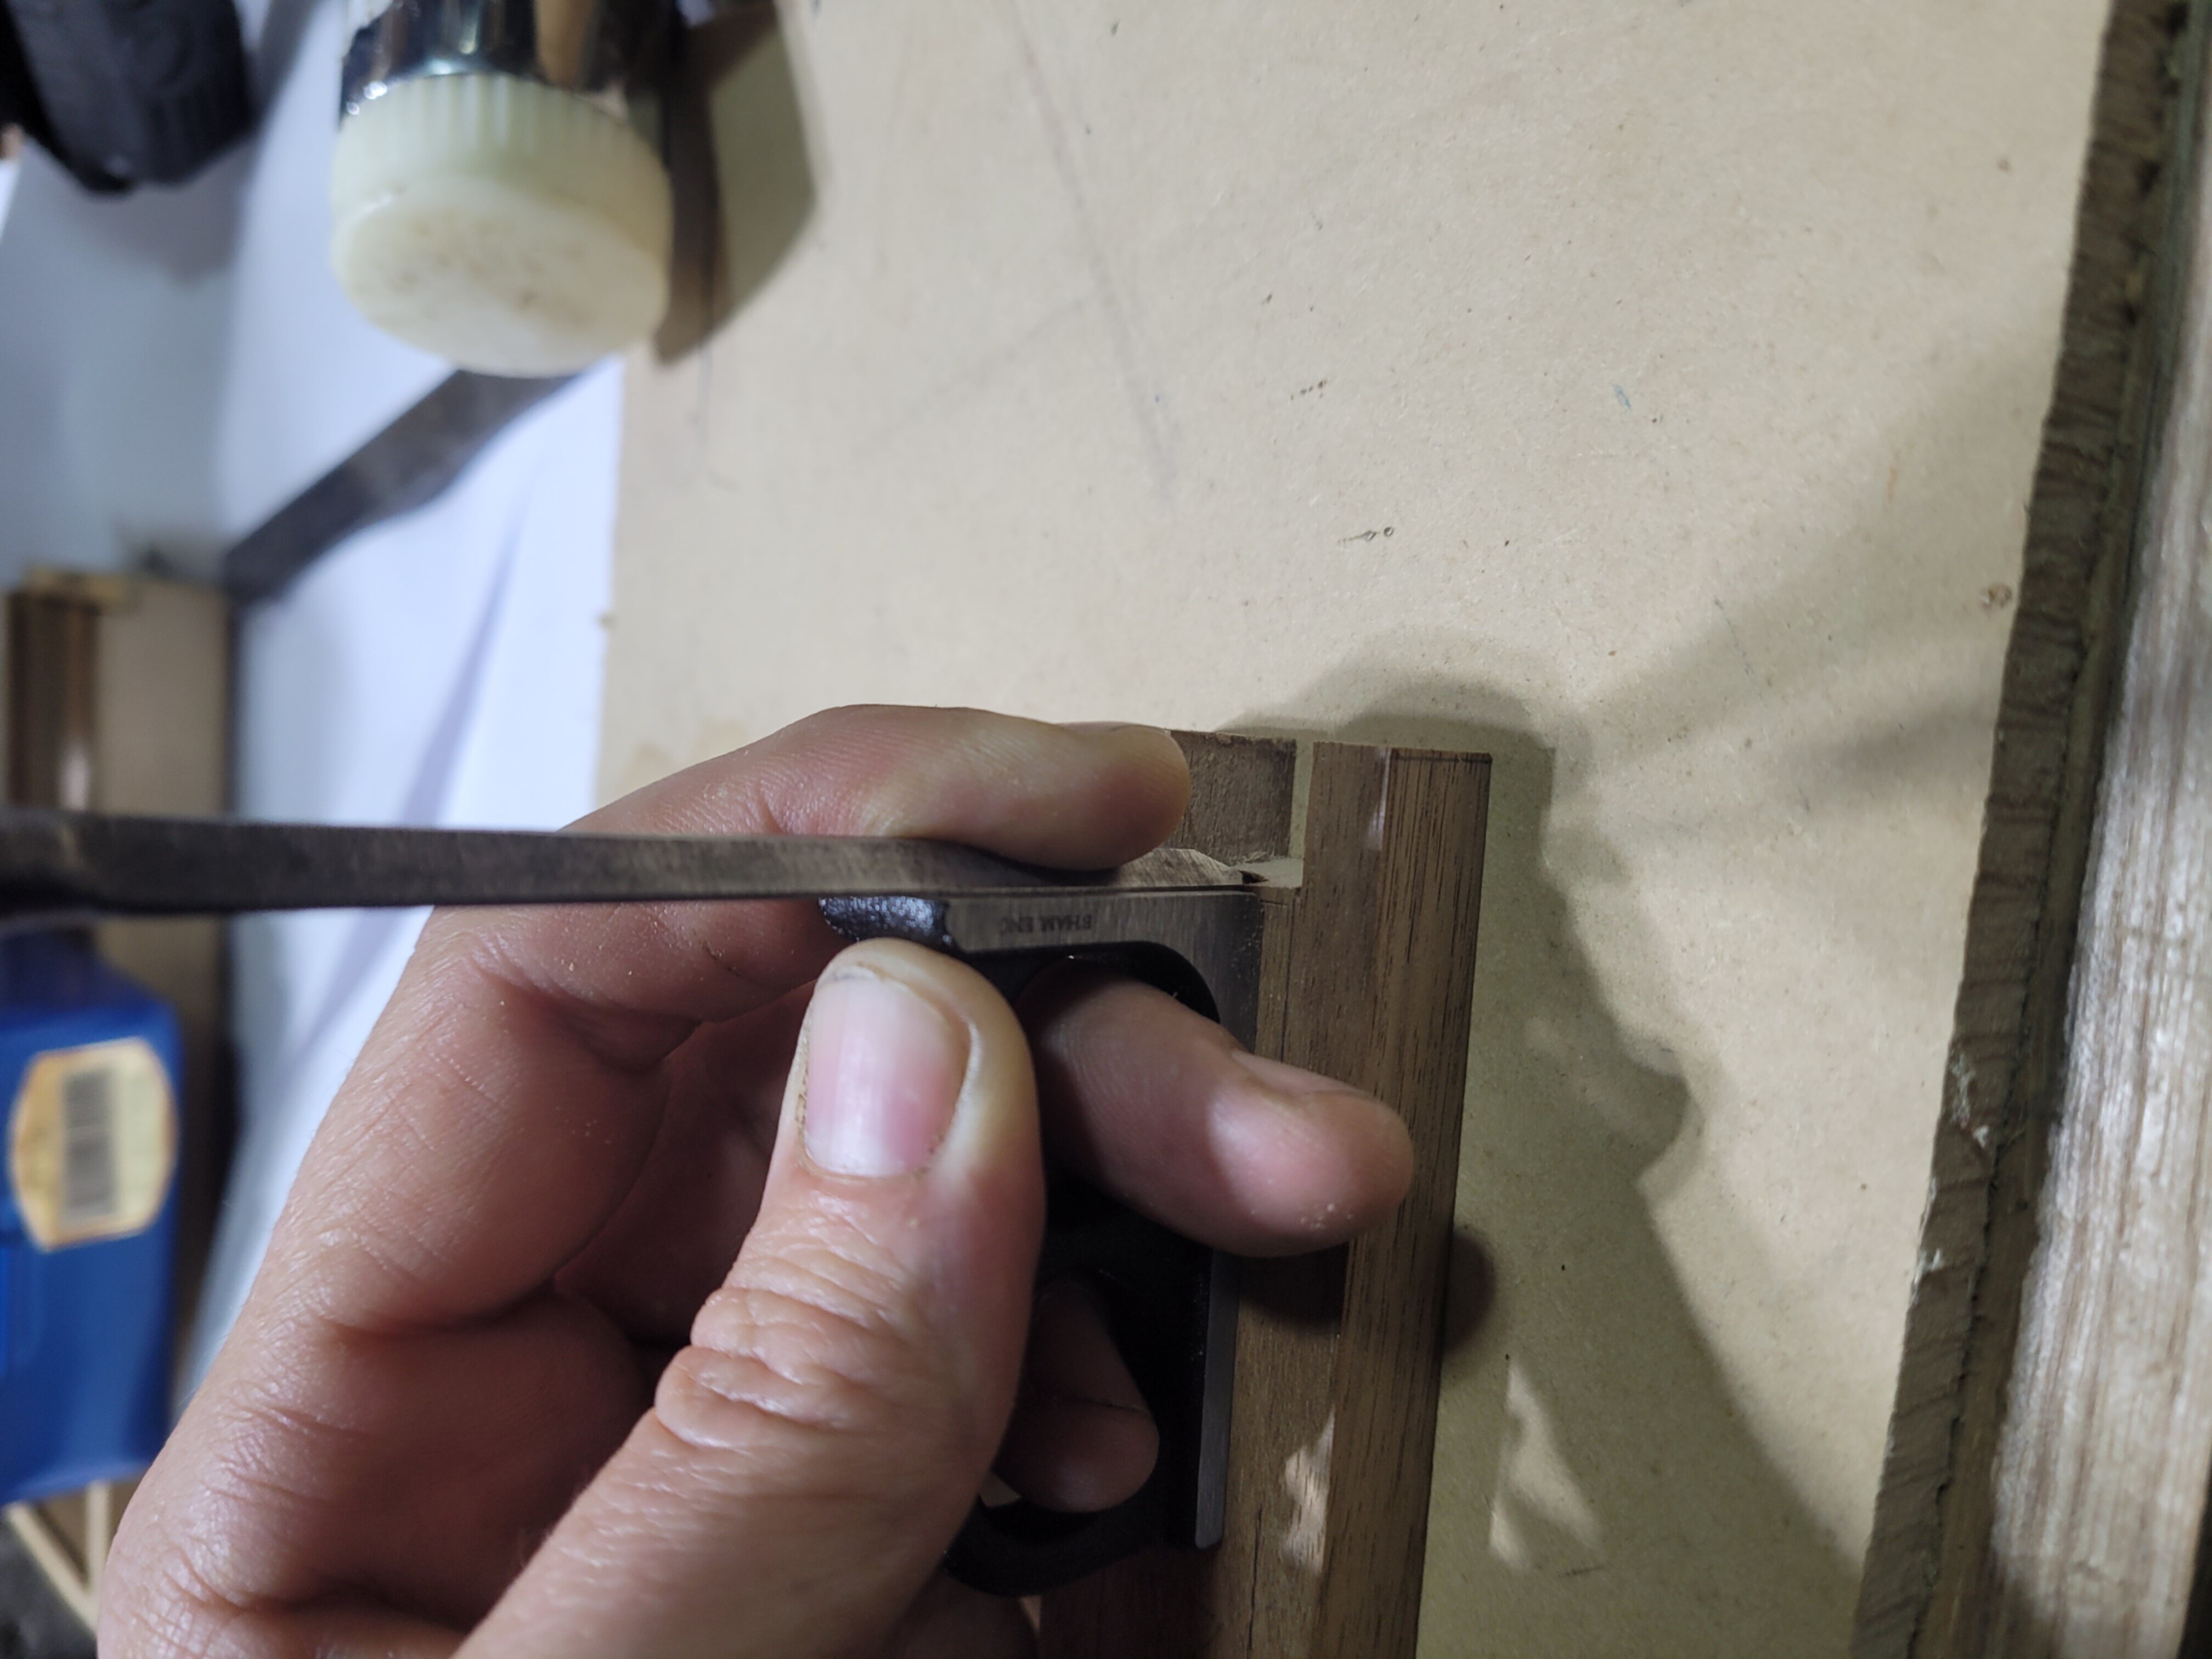
The holder assembled easily. I pre finished the inside faces of the long sides and the body of the holder before assembly, as it would be difficult to get to the parts near the pins after assembly. Once the dovetails were planed down it fit in the chest with a hair of space to spare. The bullet catches lodge solidly. I’m very happy with it.
As always, check out the photos below to see the process in detail. This was the last significant job for the chest, so with a little luck, I’ll be showing you the finished chest soon!
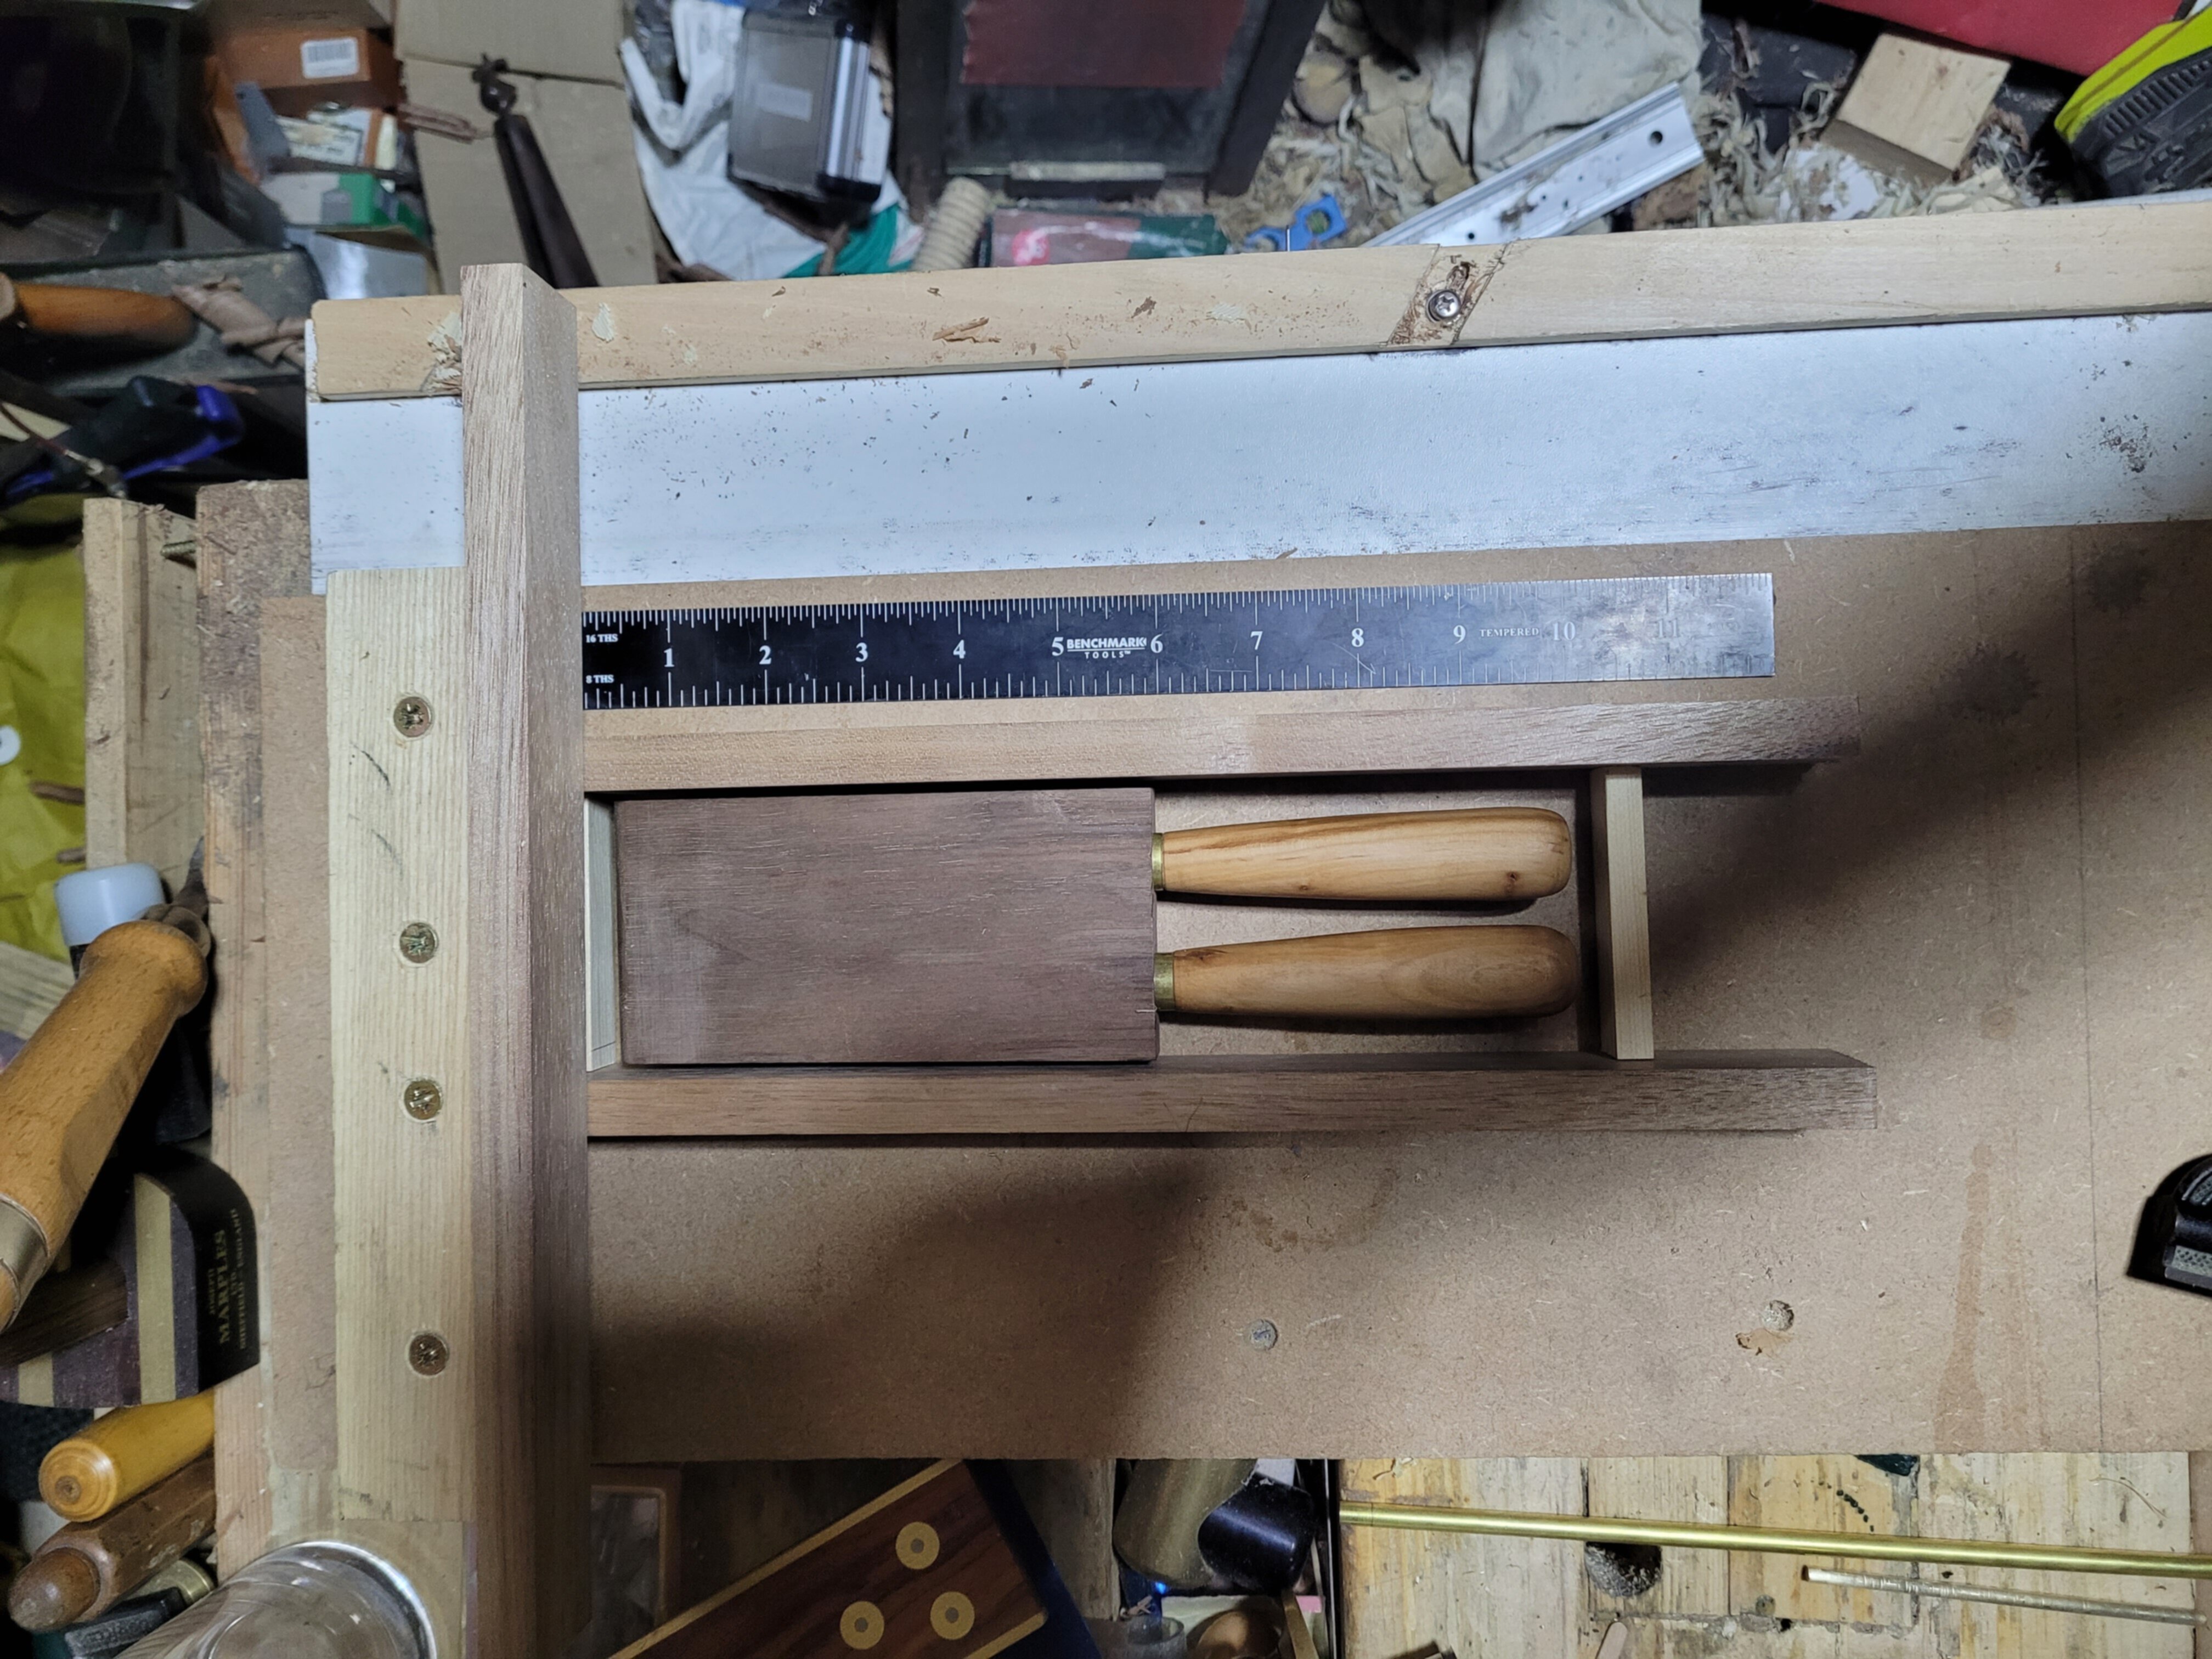
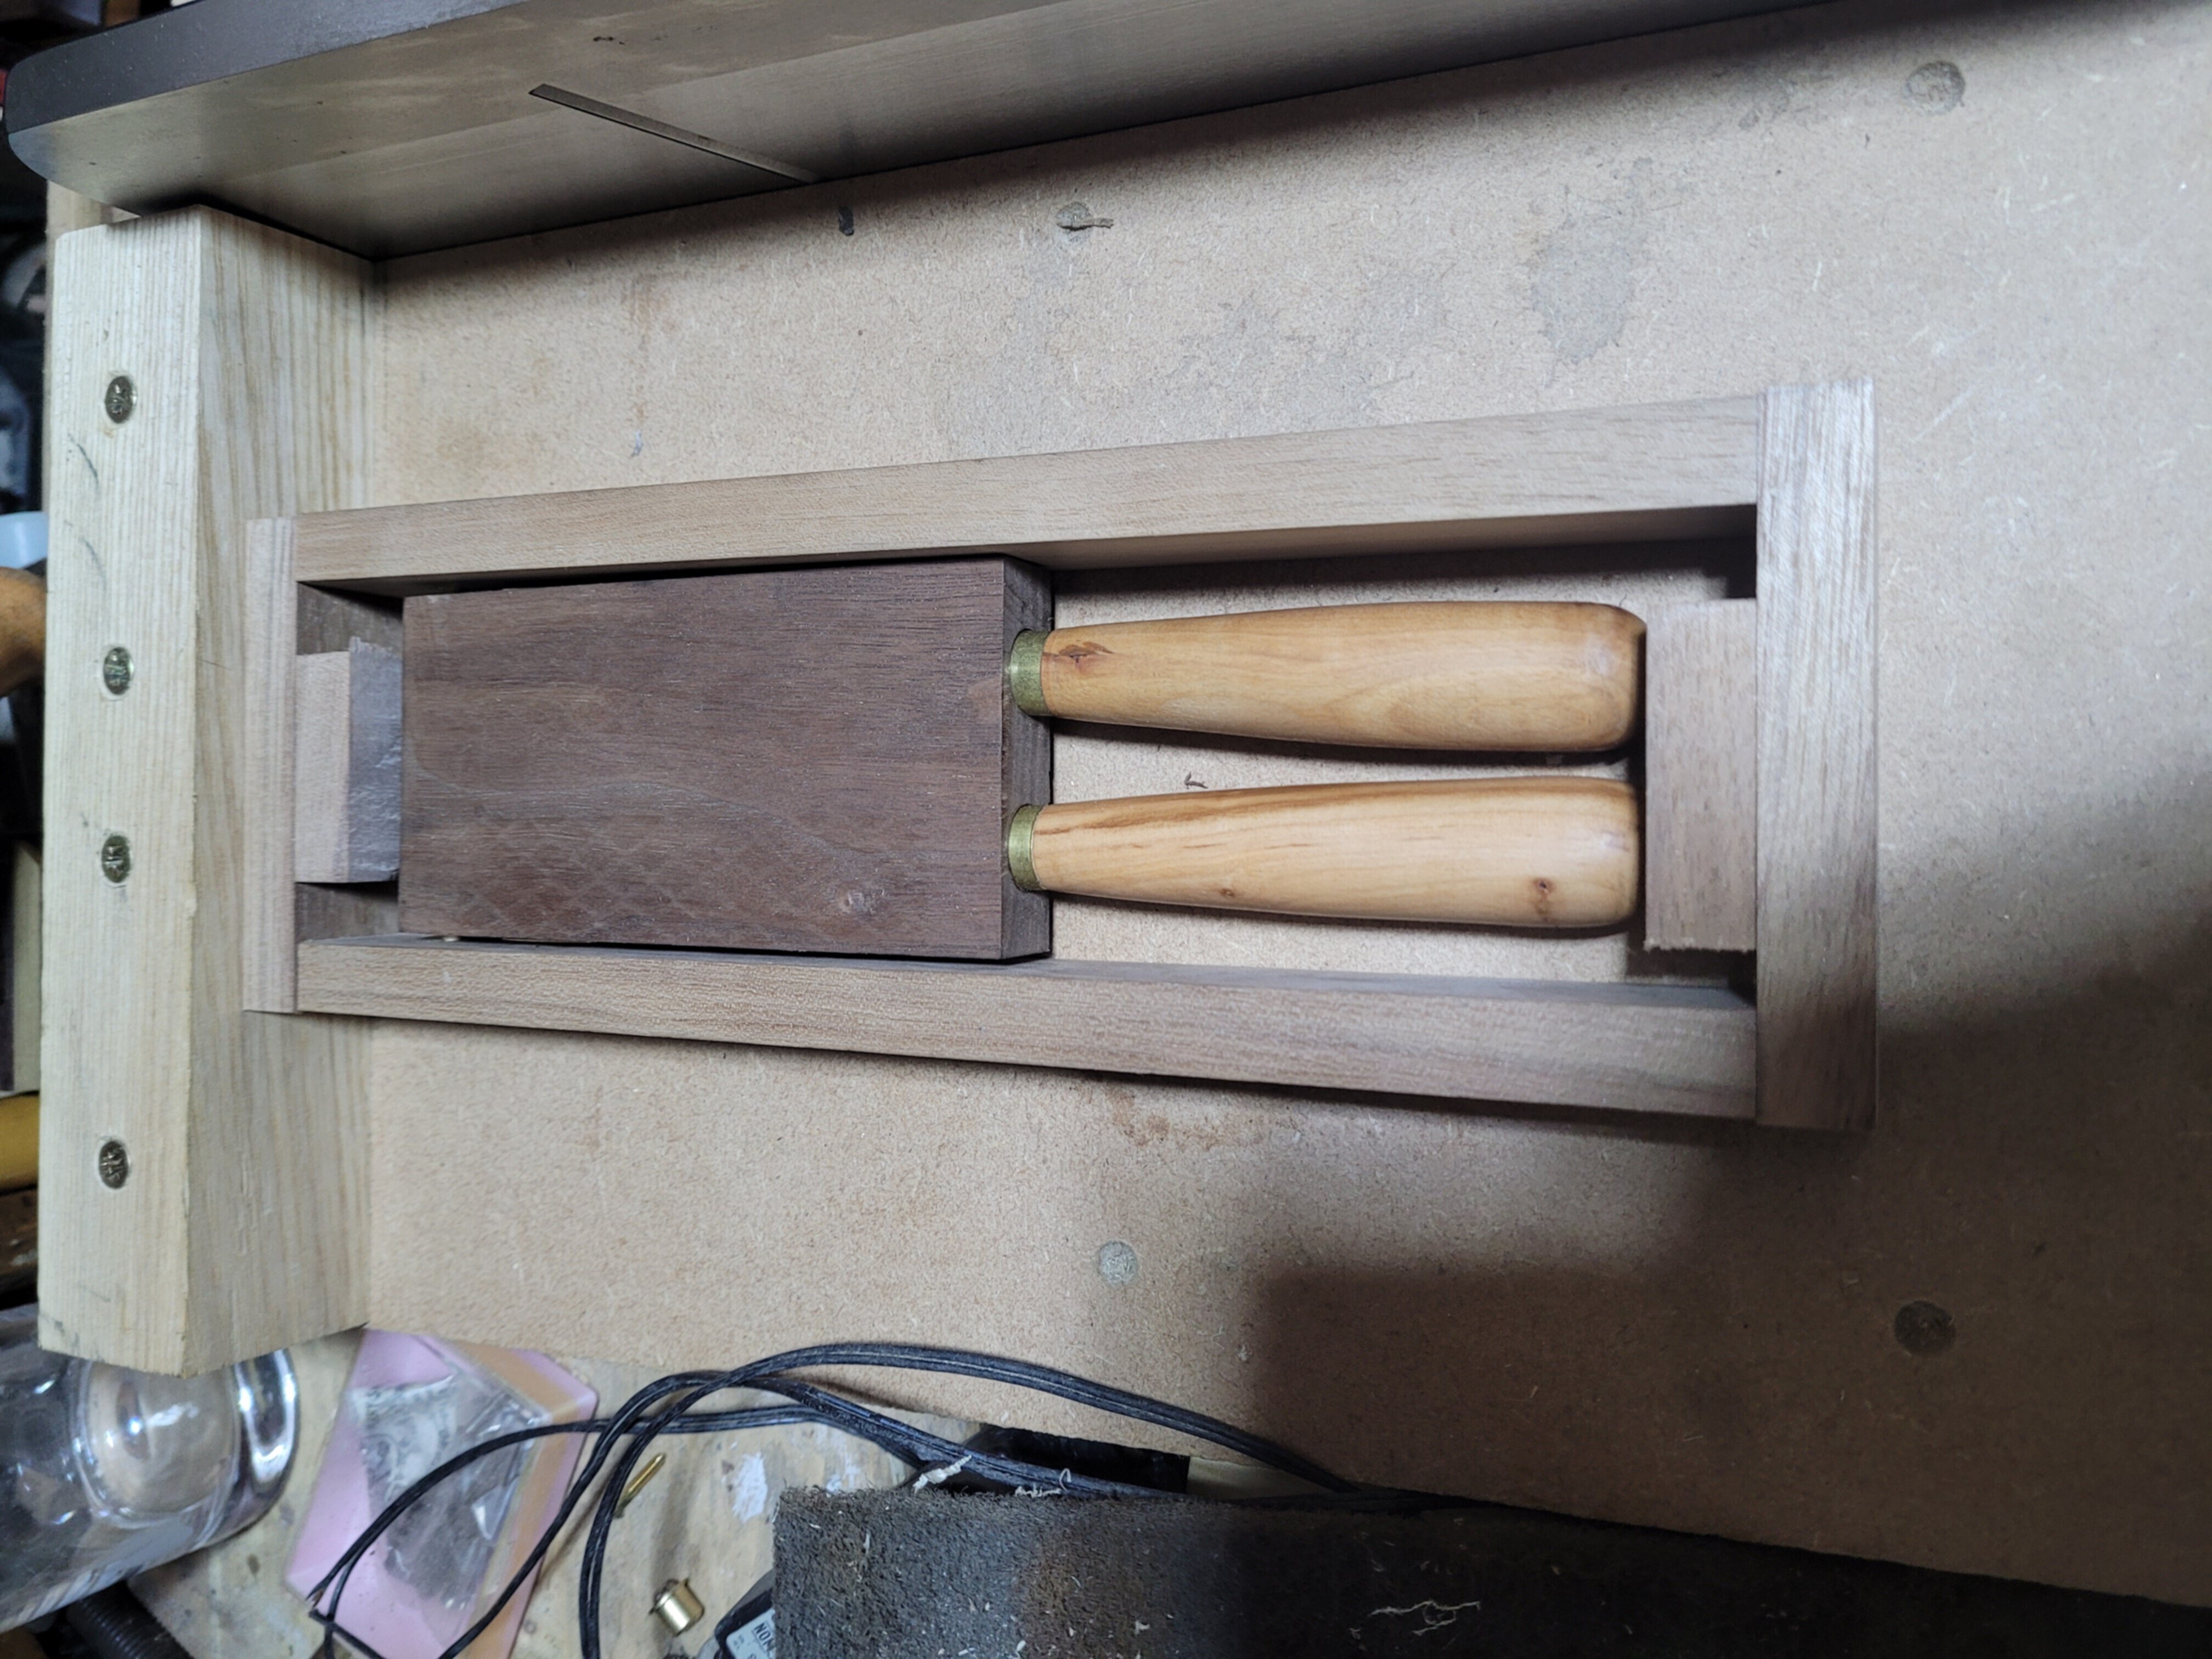
This is the finished chisel holder. I’m very happy with it.
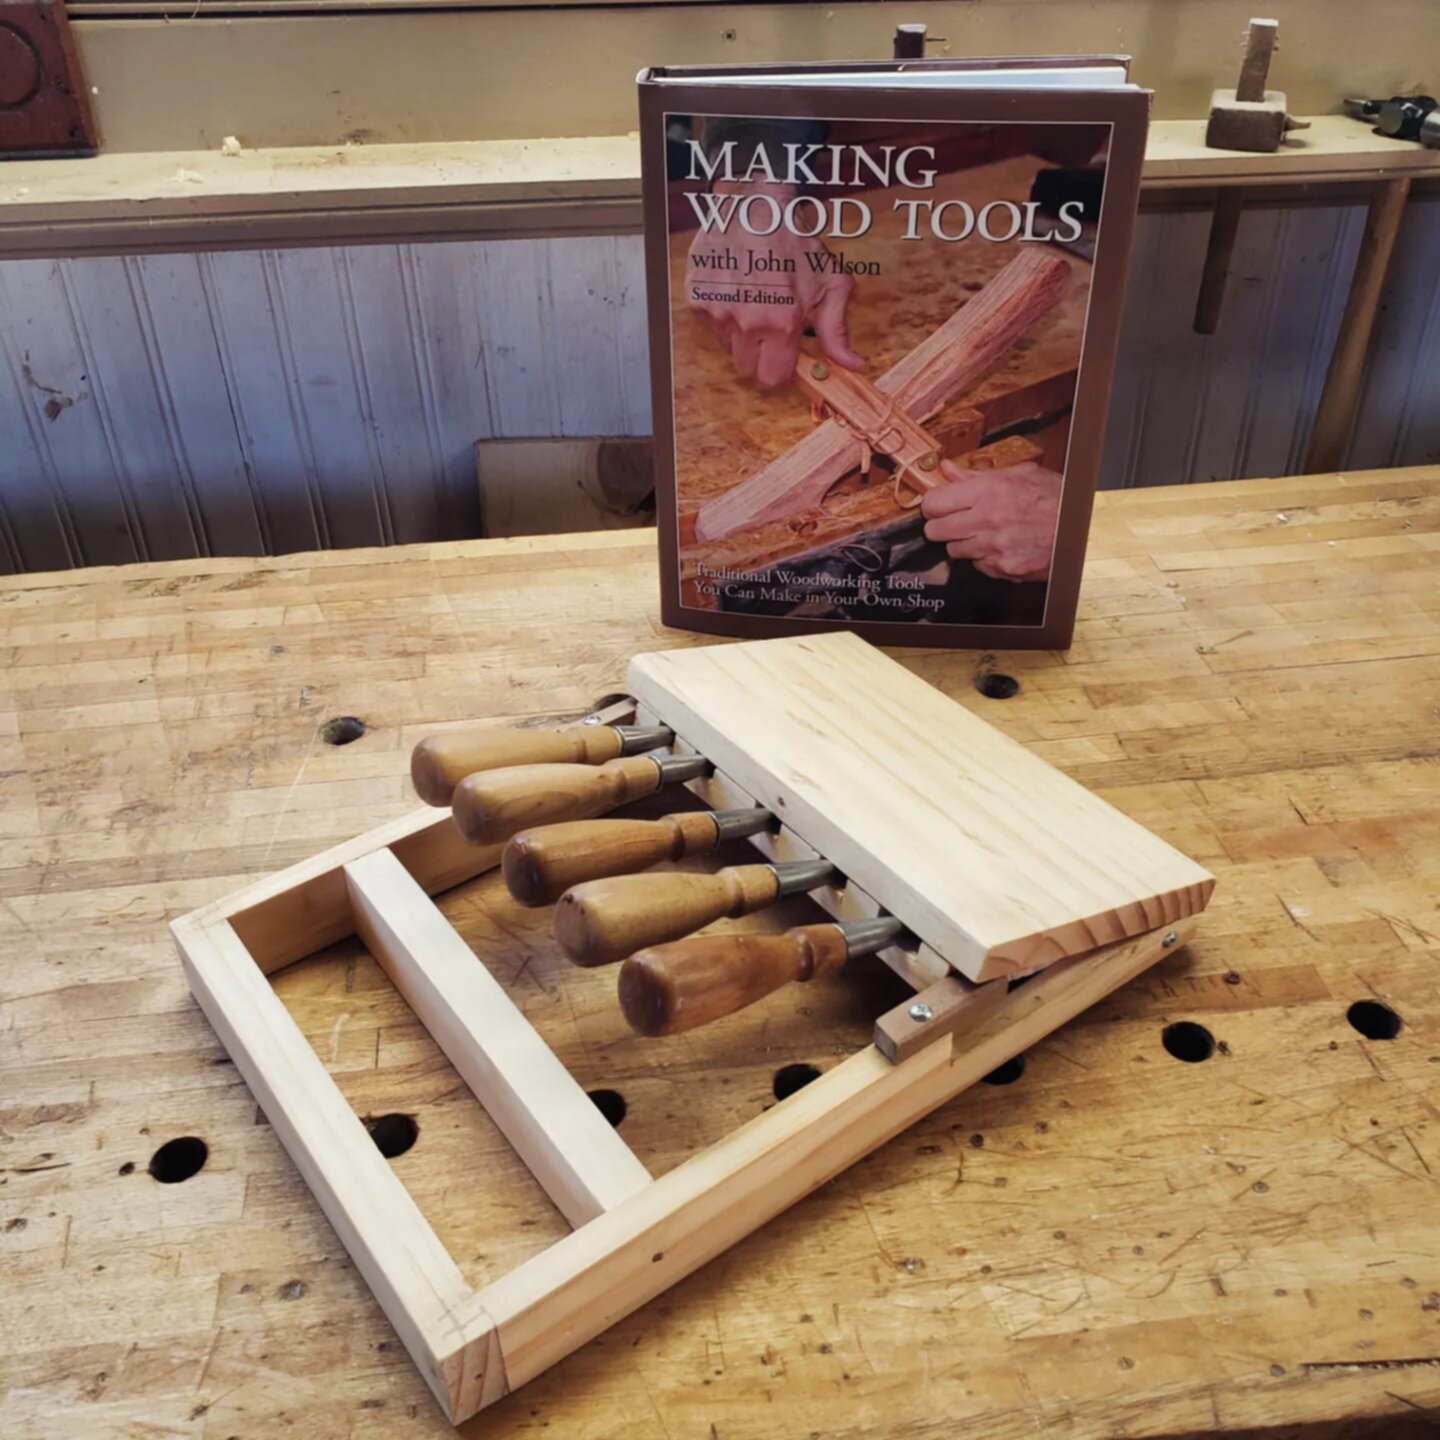
Zach Dillinger’s version. The top of this holder has a carrying handle. Something I did not have the space for. This and the original design use a 2 piece body with grooves for the chisel blades. If you have wider chisels this approach is a must. Give my two chisels are very small, drilling a hole was just as good. Note the toggle Zach added to hold it closed or open. Genius! In the background you can see the book Zach took inspiration from.
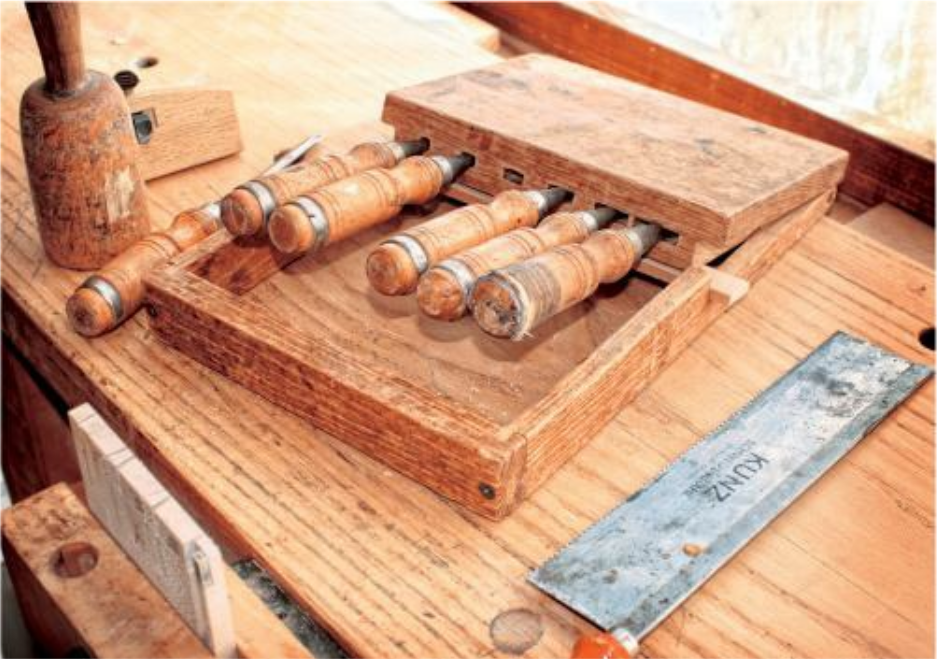
The original John Wilson version. You can see the stick used to hold it open, and there is no locking mechanism. Still a wonderful design, and optimized for being very quick and simple to make.
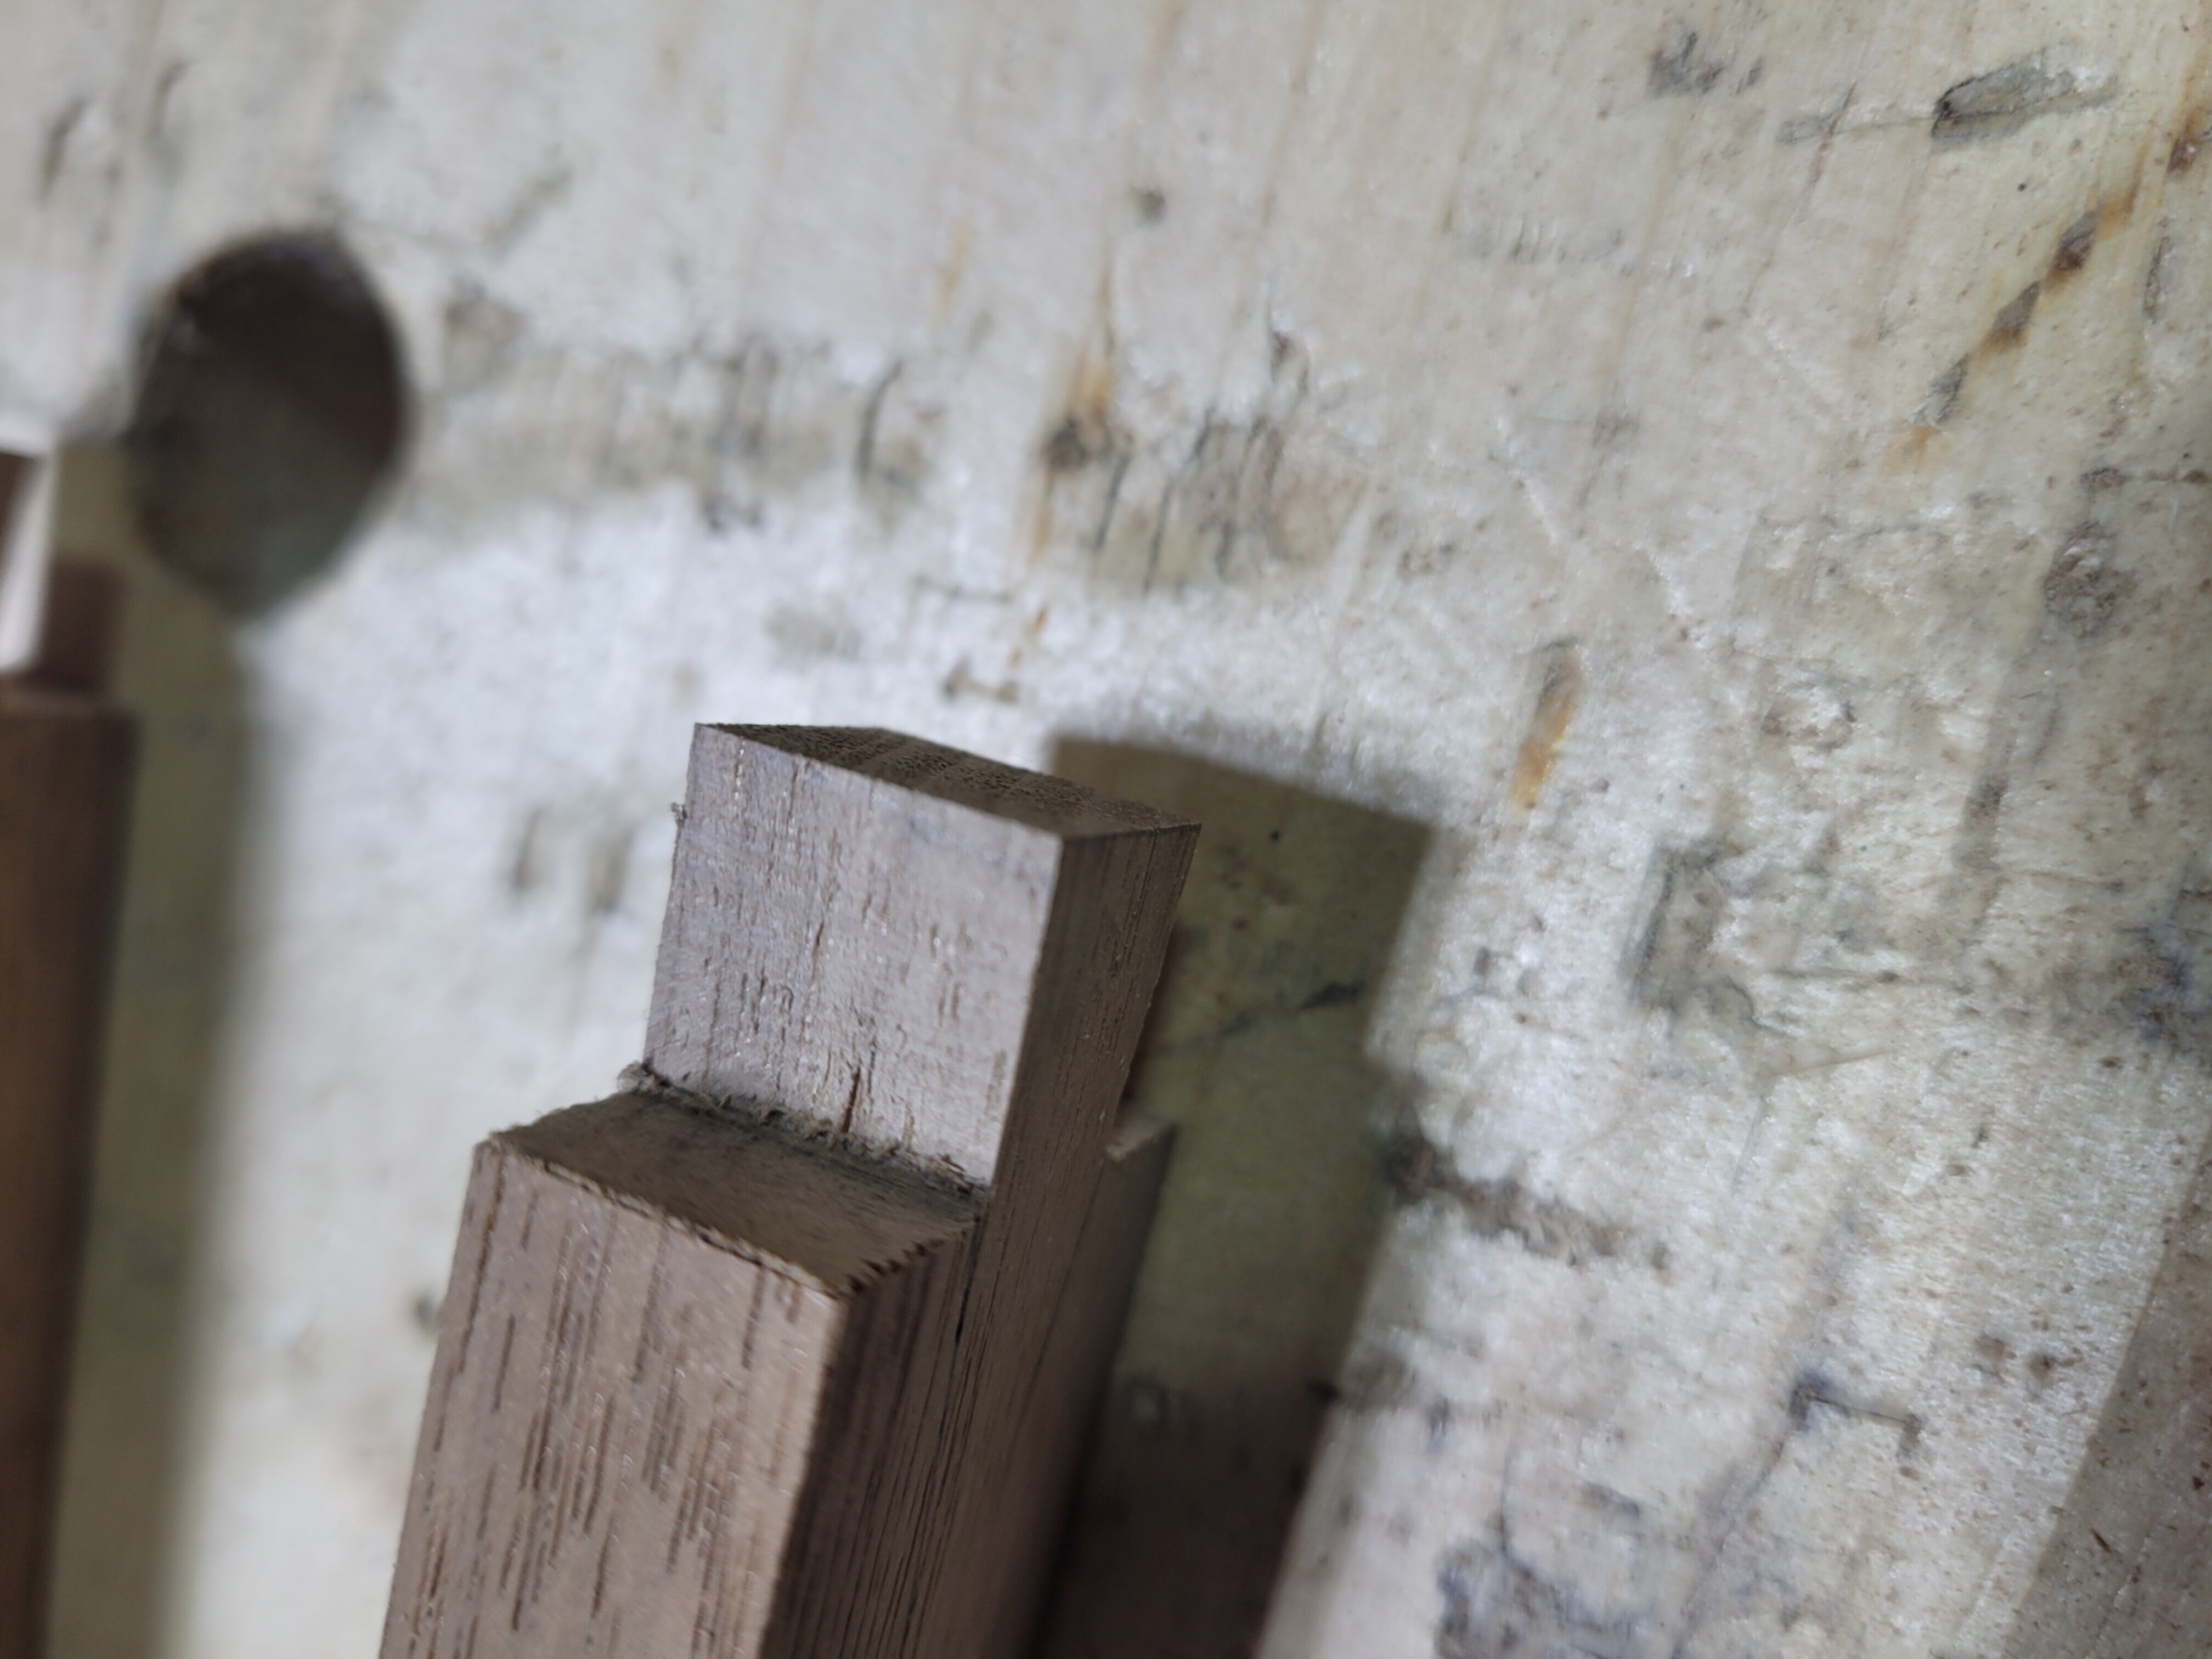
This is where I left off last time. The chisel holding body with its holes drilled.
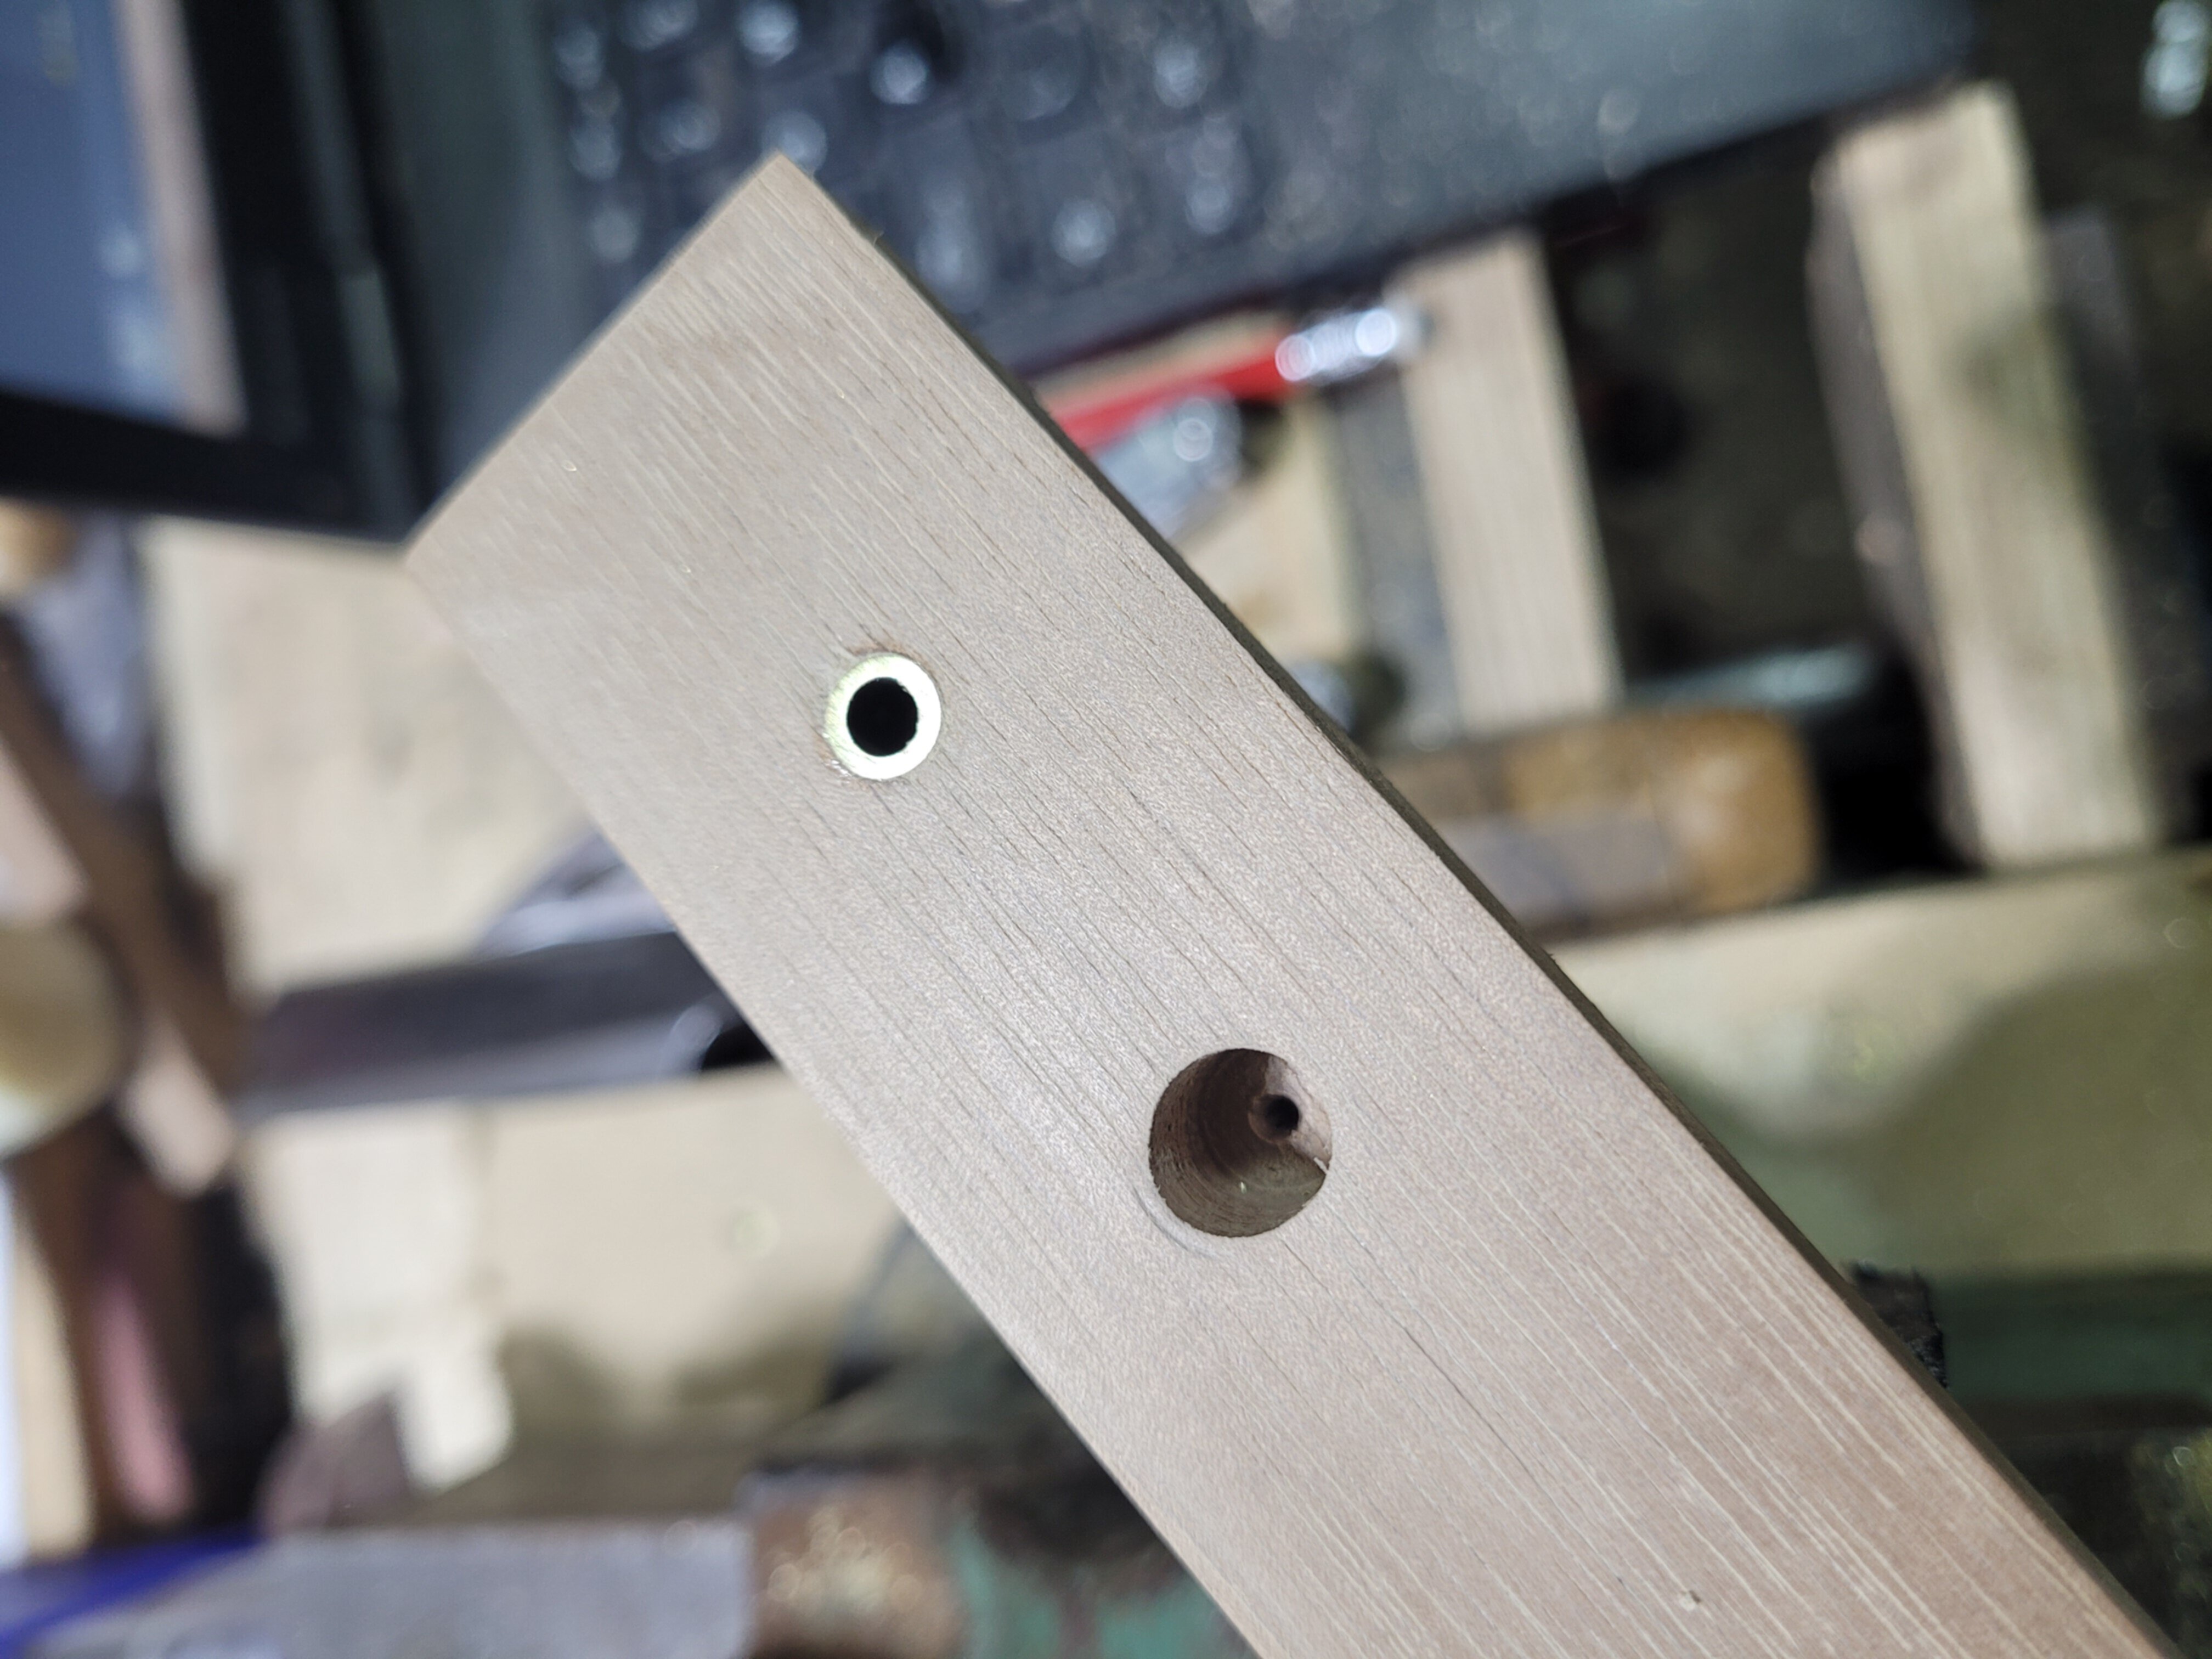
I ordered some brass rod and tube, paying careful attention to the relative inner and outer diameters to make sure one would fit in the other. To my dismay, I could only insert the rod a tiny bit into the tube before it jammed. Someone’s tolerances were off just enough.
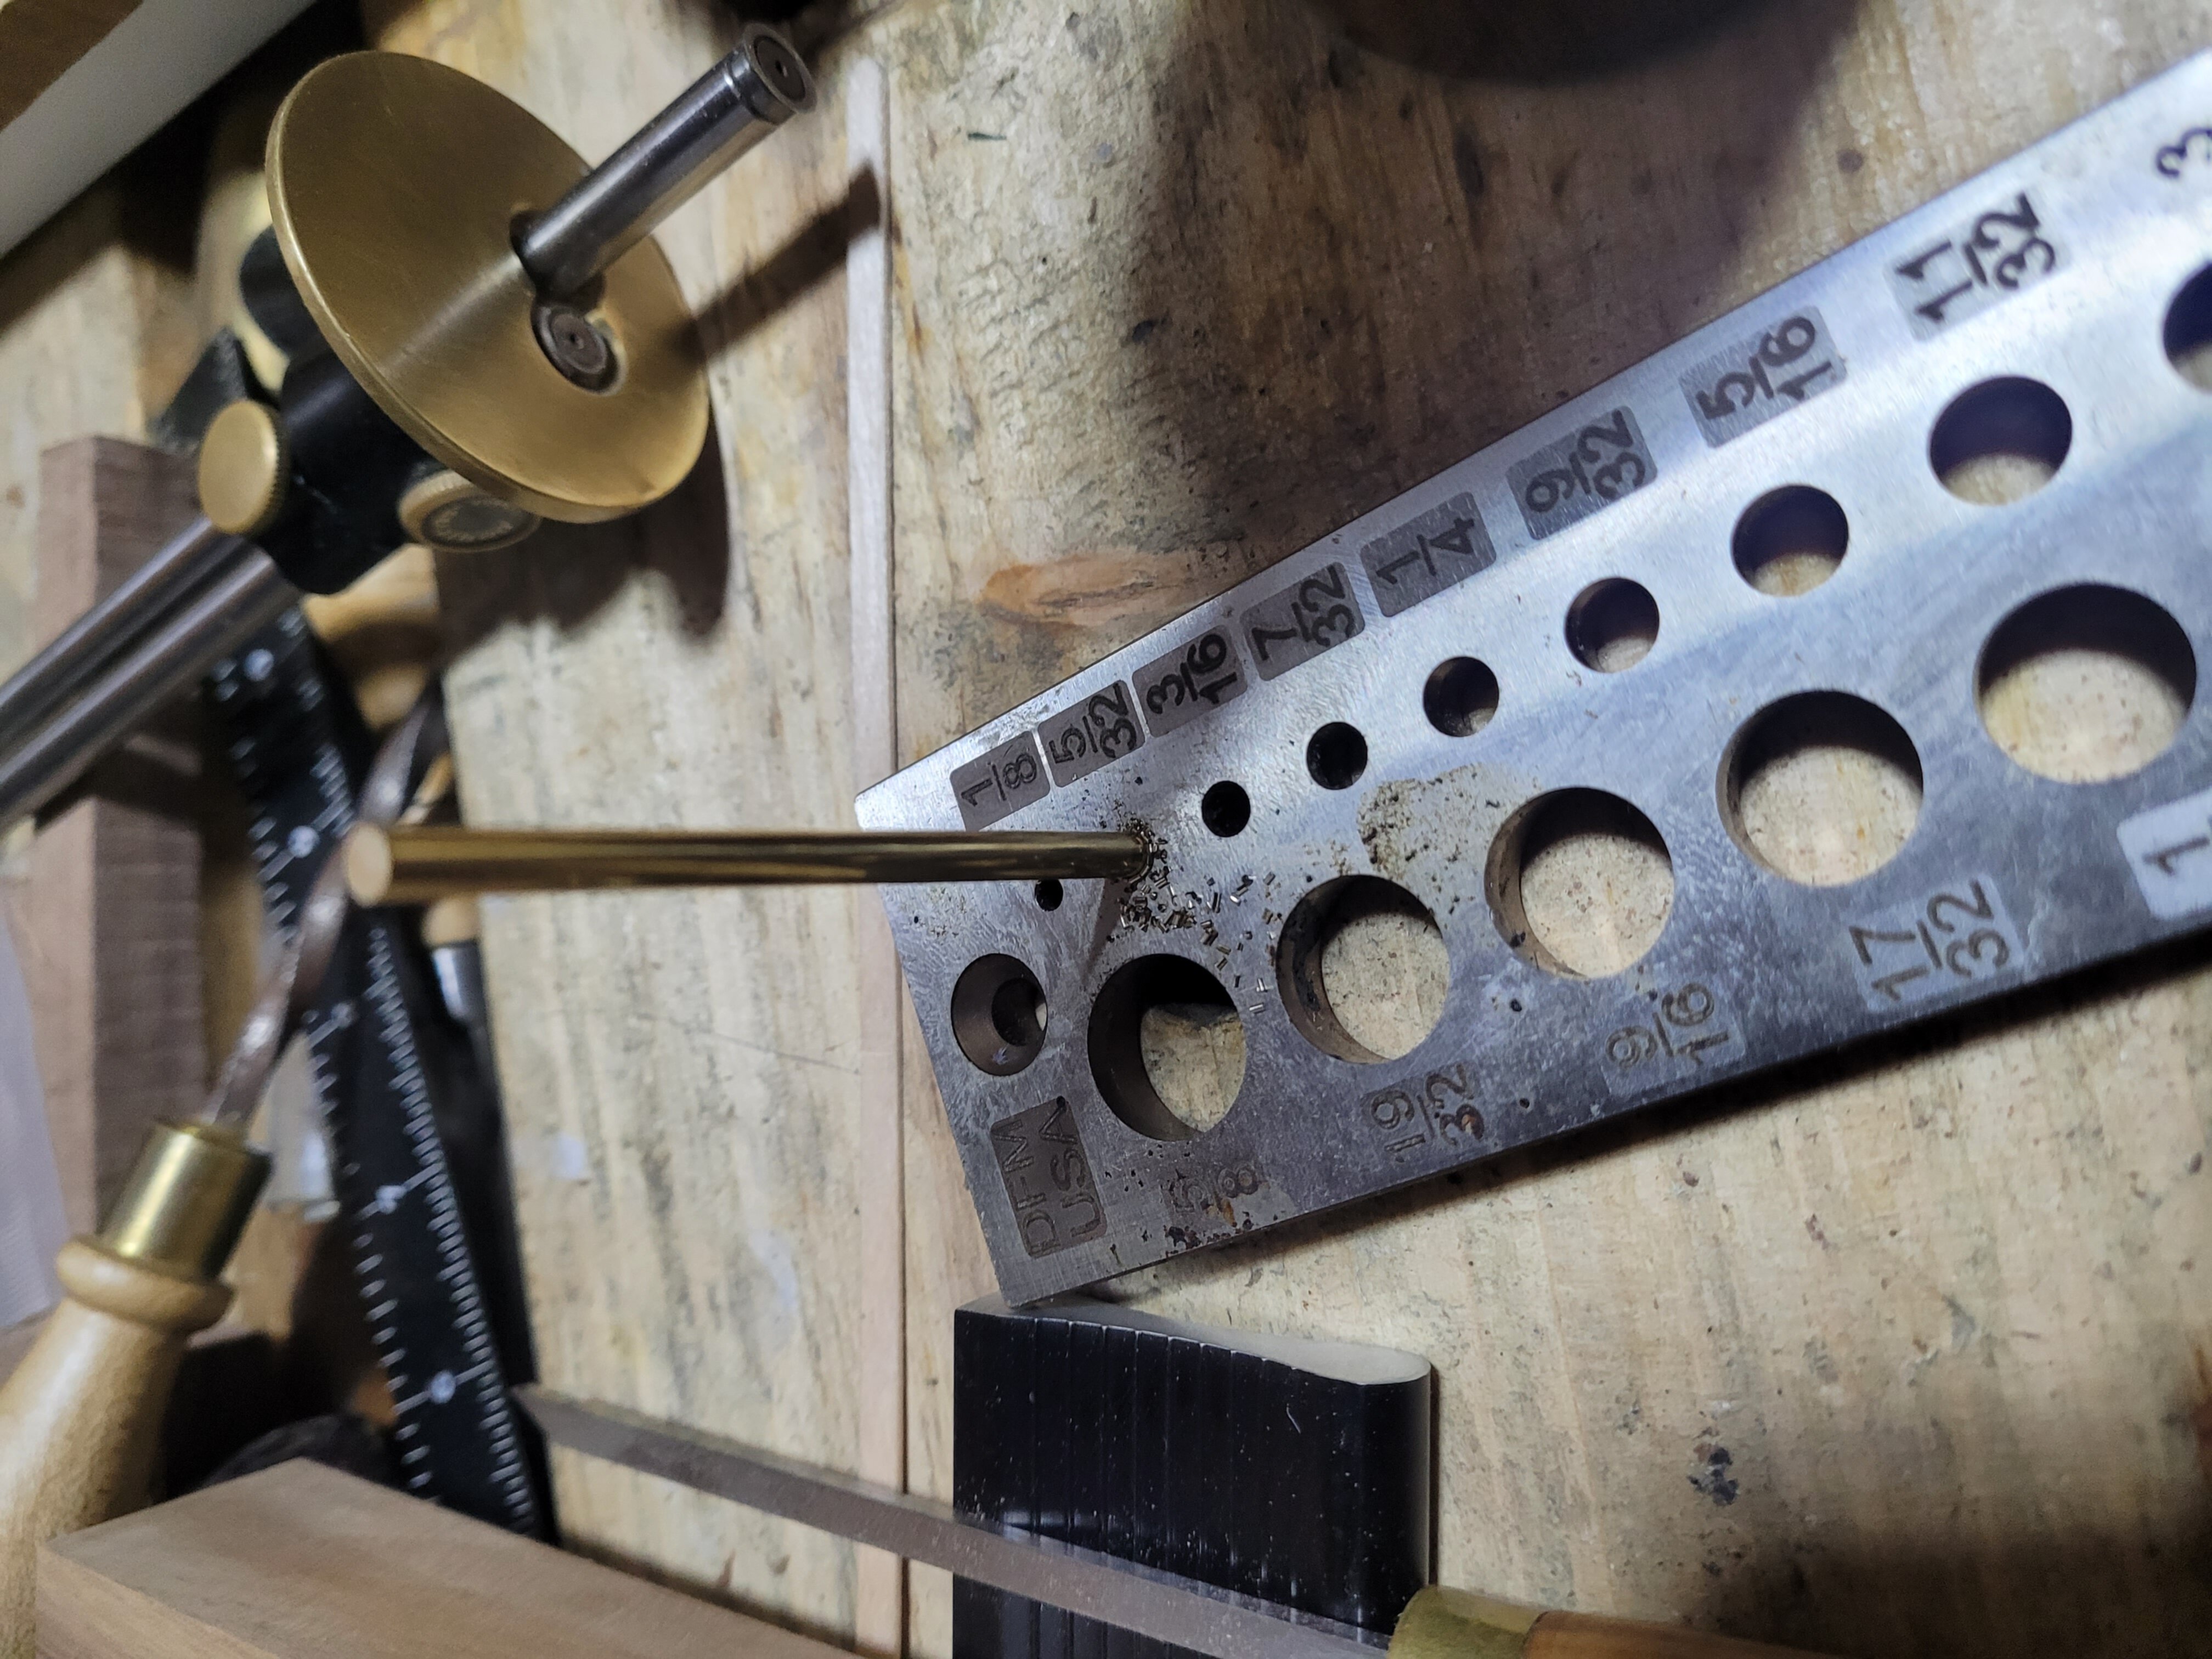
I keep hearing people say they work brass with woodworking tools. So I did what I would do with an oversize dowel. I drove it through my dowel plate.
Worked great, but I needed a punch to drive it the last little bit through.
I found I needed to drive it through about 4 times before it could just slide through easily. And the finish on the dowel is pretty rough. So no good for brass rod that is going to be on display. But this will be invisible in the tool holder once it is inserted.
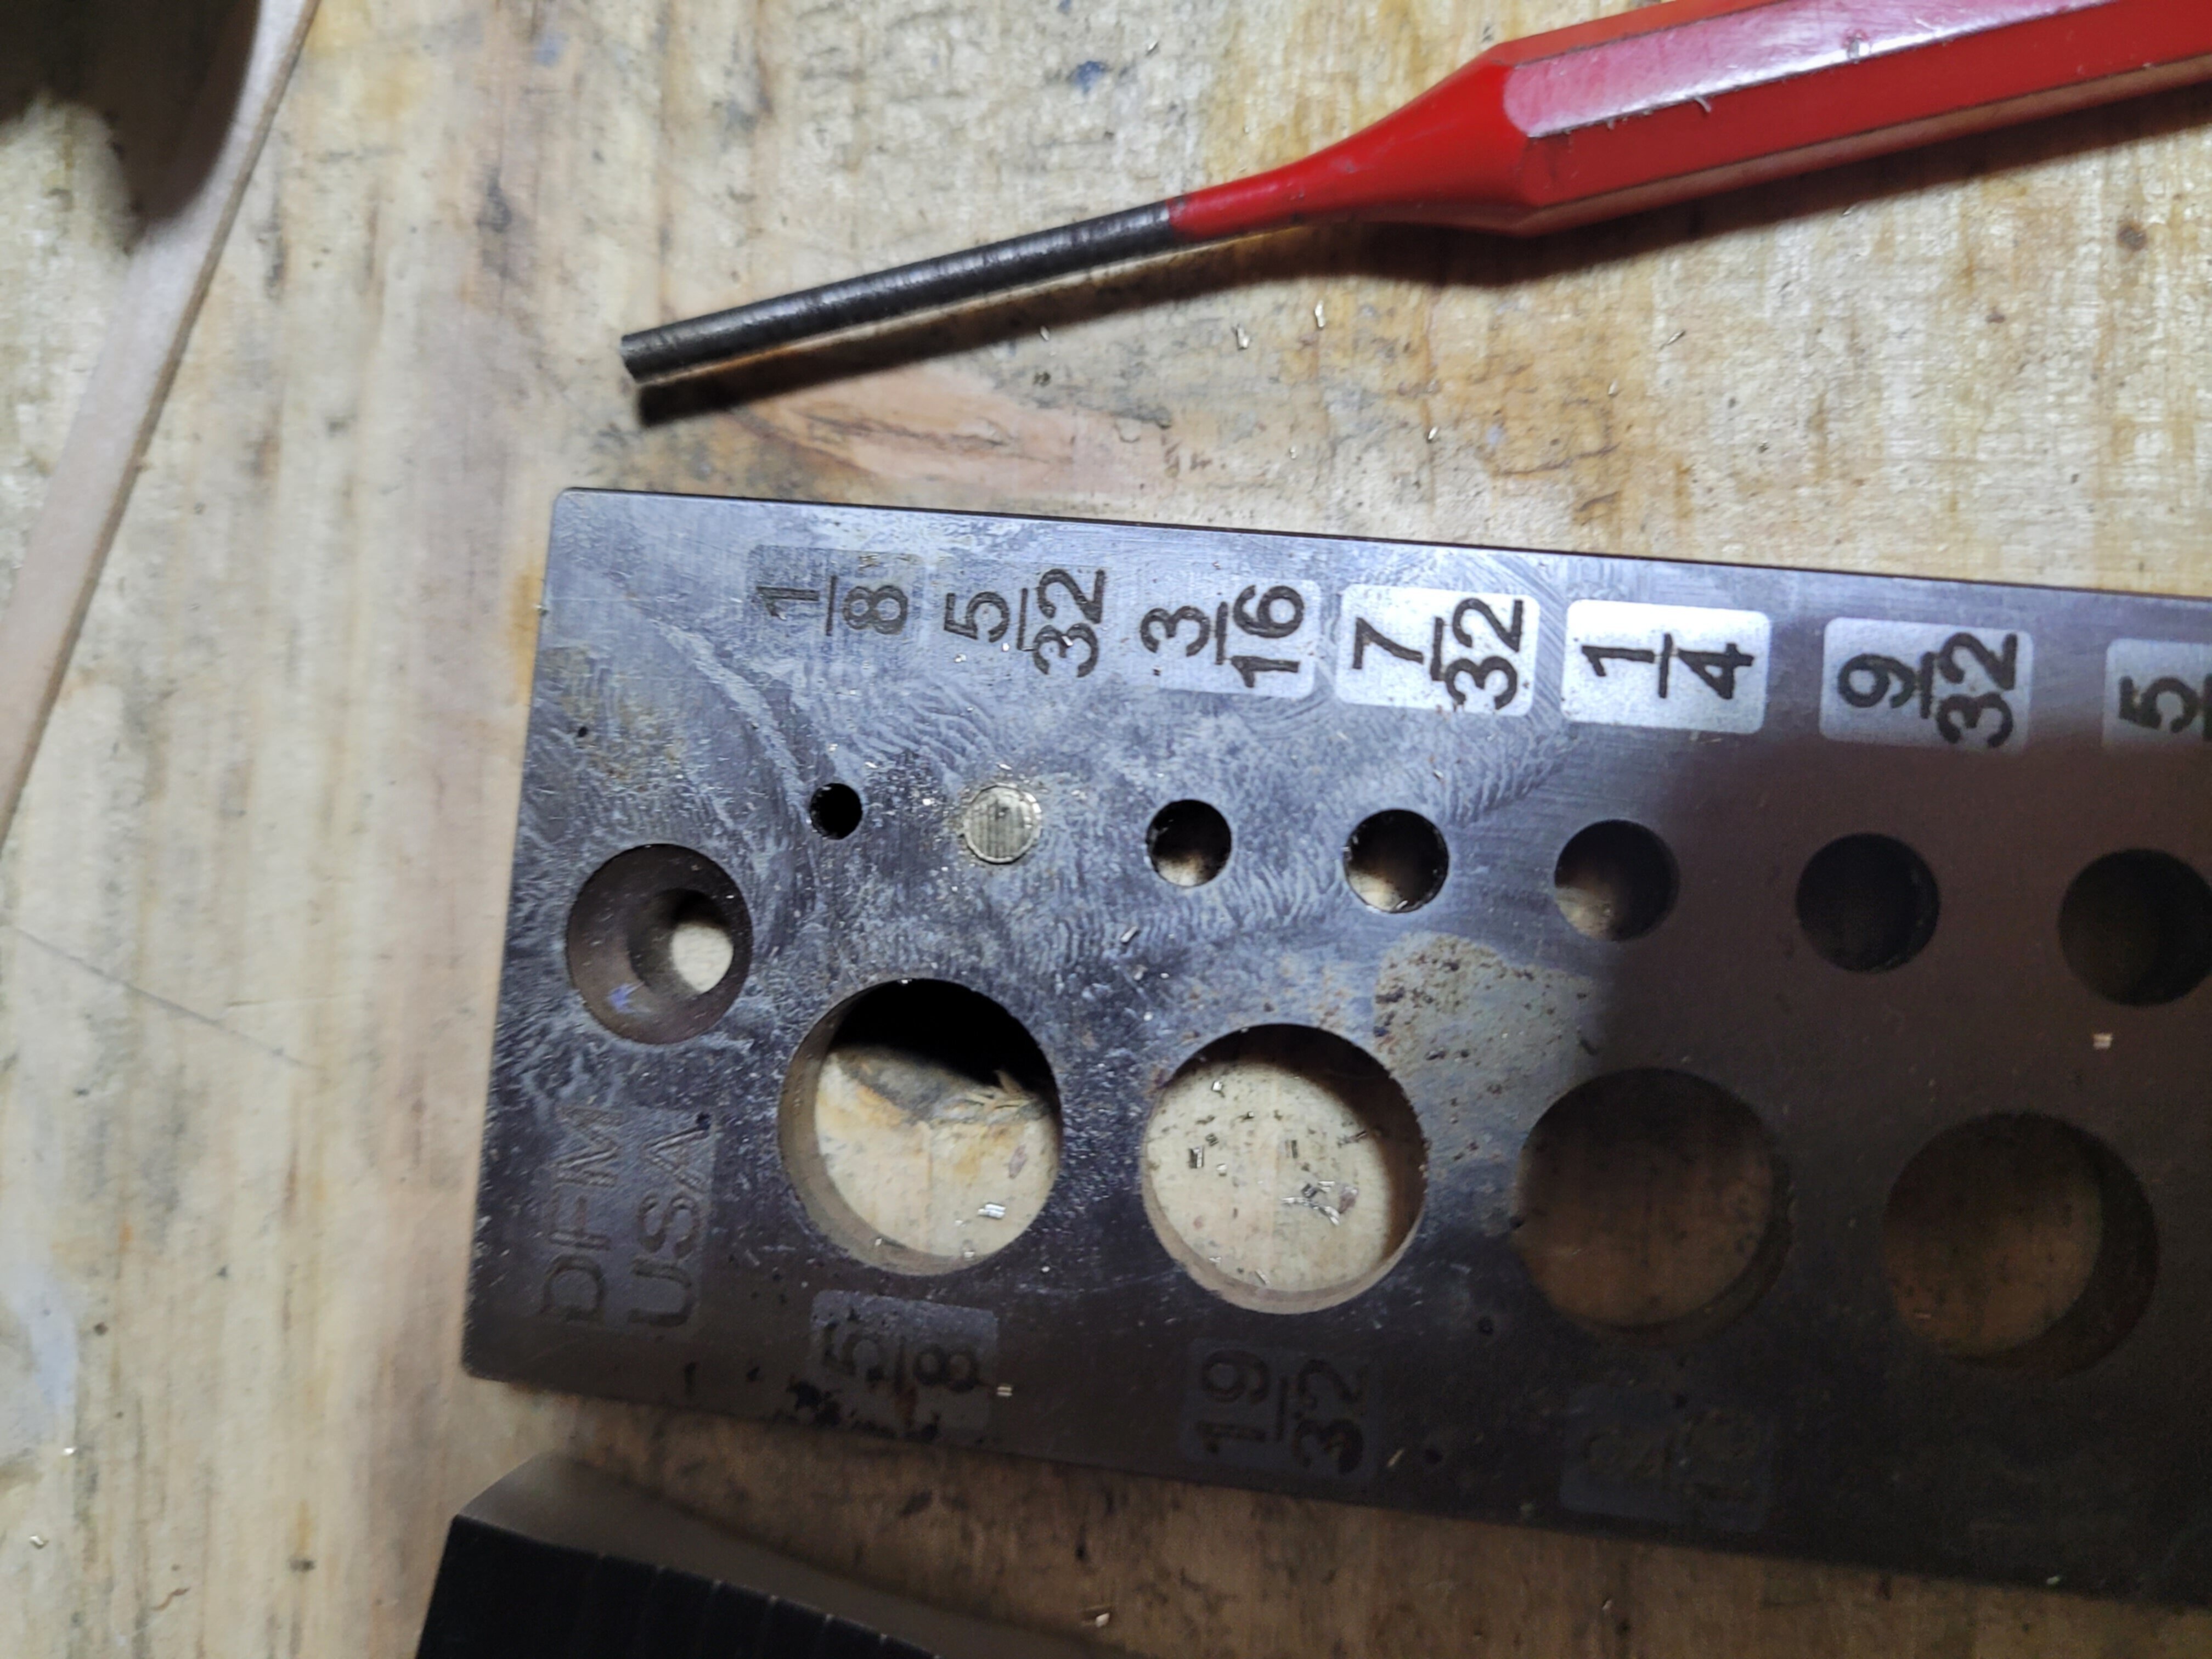
Drilled test holes to make sure I would get a snug fit for the tube.
And then tested that the dowel pins fit snugly as well. When buying the tube and pins, I made sure that I would have matching sizes.
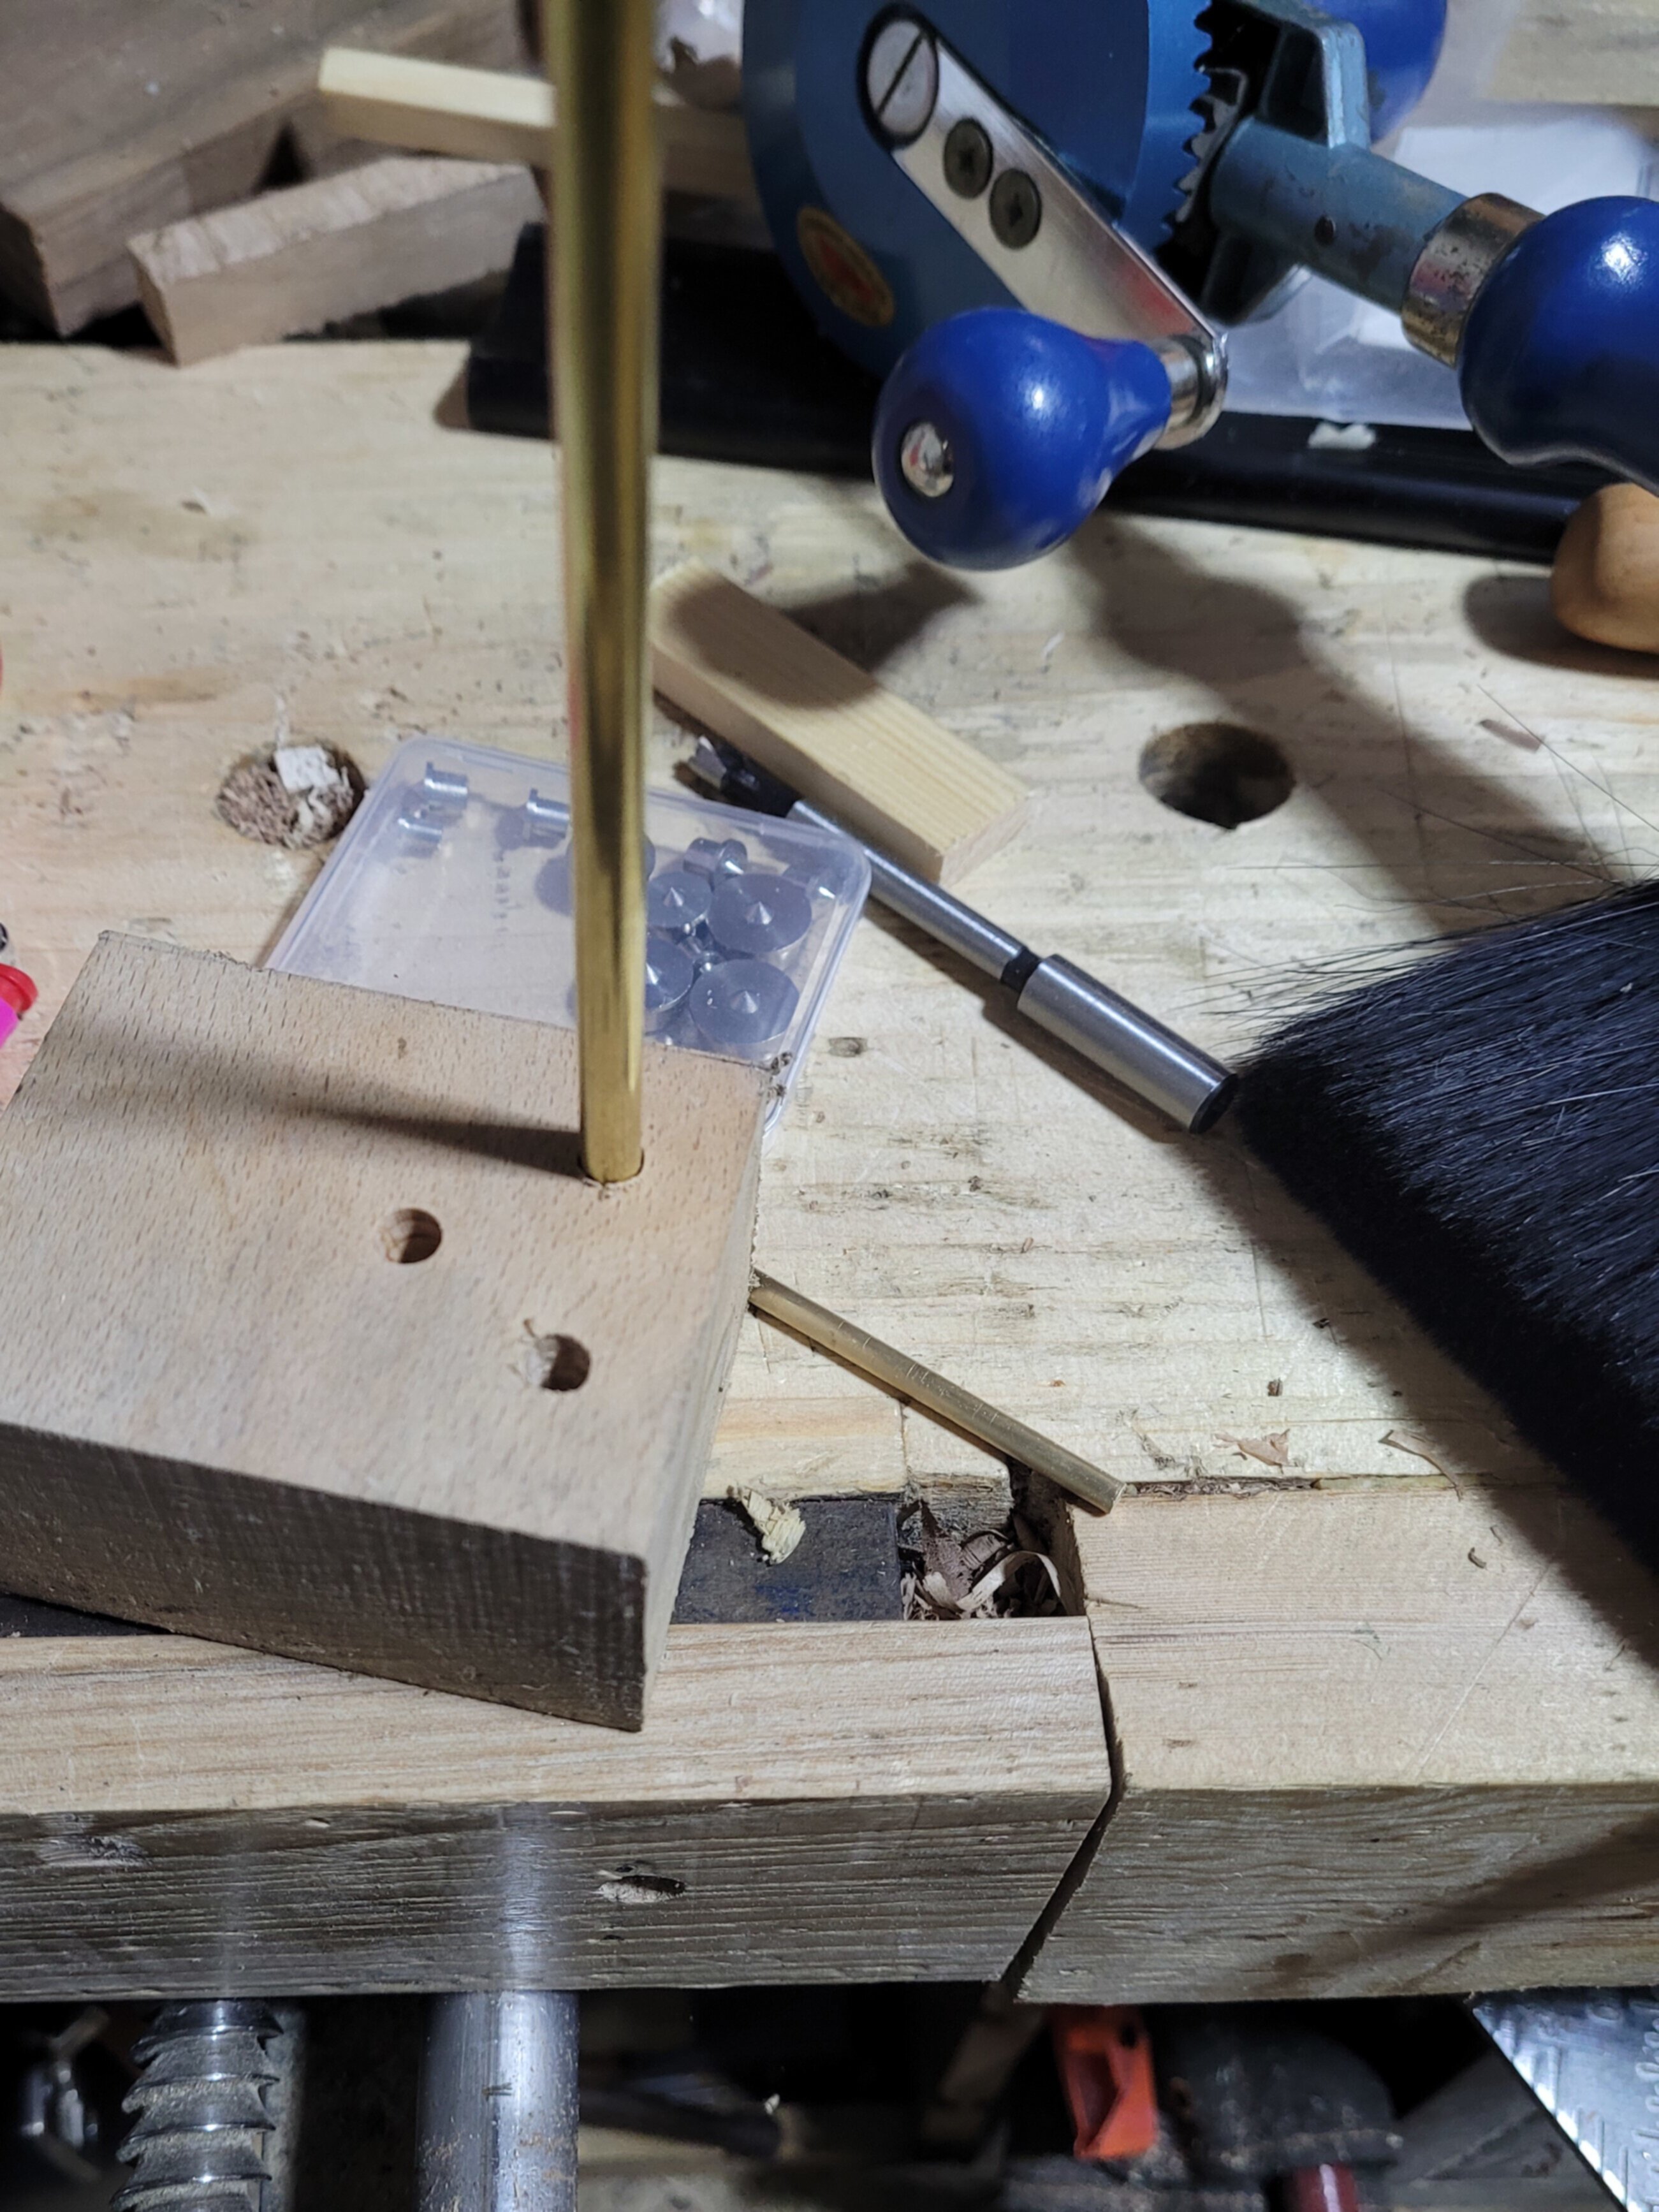
Drilled out the holes in the body with my hand cranked drill press. Given my space constraints I need everything to be as short as possible. So these holes are only about 3/8th deep, not through holes, as I would run into the chisel blades if I went all the way through. In order to make sure there was little chance of the holder binding as it rotated. I carefully marked out the spot on both sides and used the drill press to keep them in the same plane.
My test setup for sizing. The front and back pine pieces are sized to simulate the final width. The two pieces in the middle have been planed down to hold the body at final height. The walnut stock resting on top shows me the final depth of the end piece, so I make sure the body can turn freely.
Then I play with positioning to get everything to roughly the right position.
Insert my dowel pins
I line everything up carefully. Use the ruler as a spacer to make sure there is enough space for the body to rotate. Then press the sides in to mark the drilling locations in the sides.
You can see the marks on the right showing where to drill the holes in the sides.
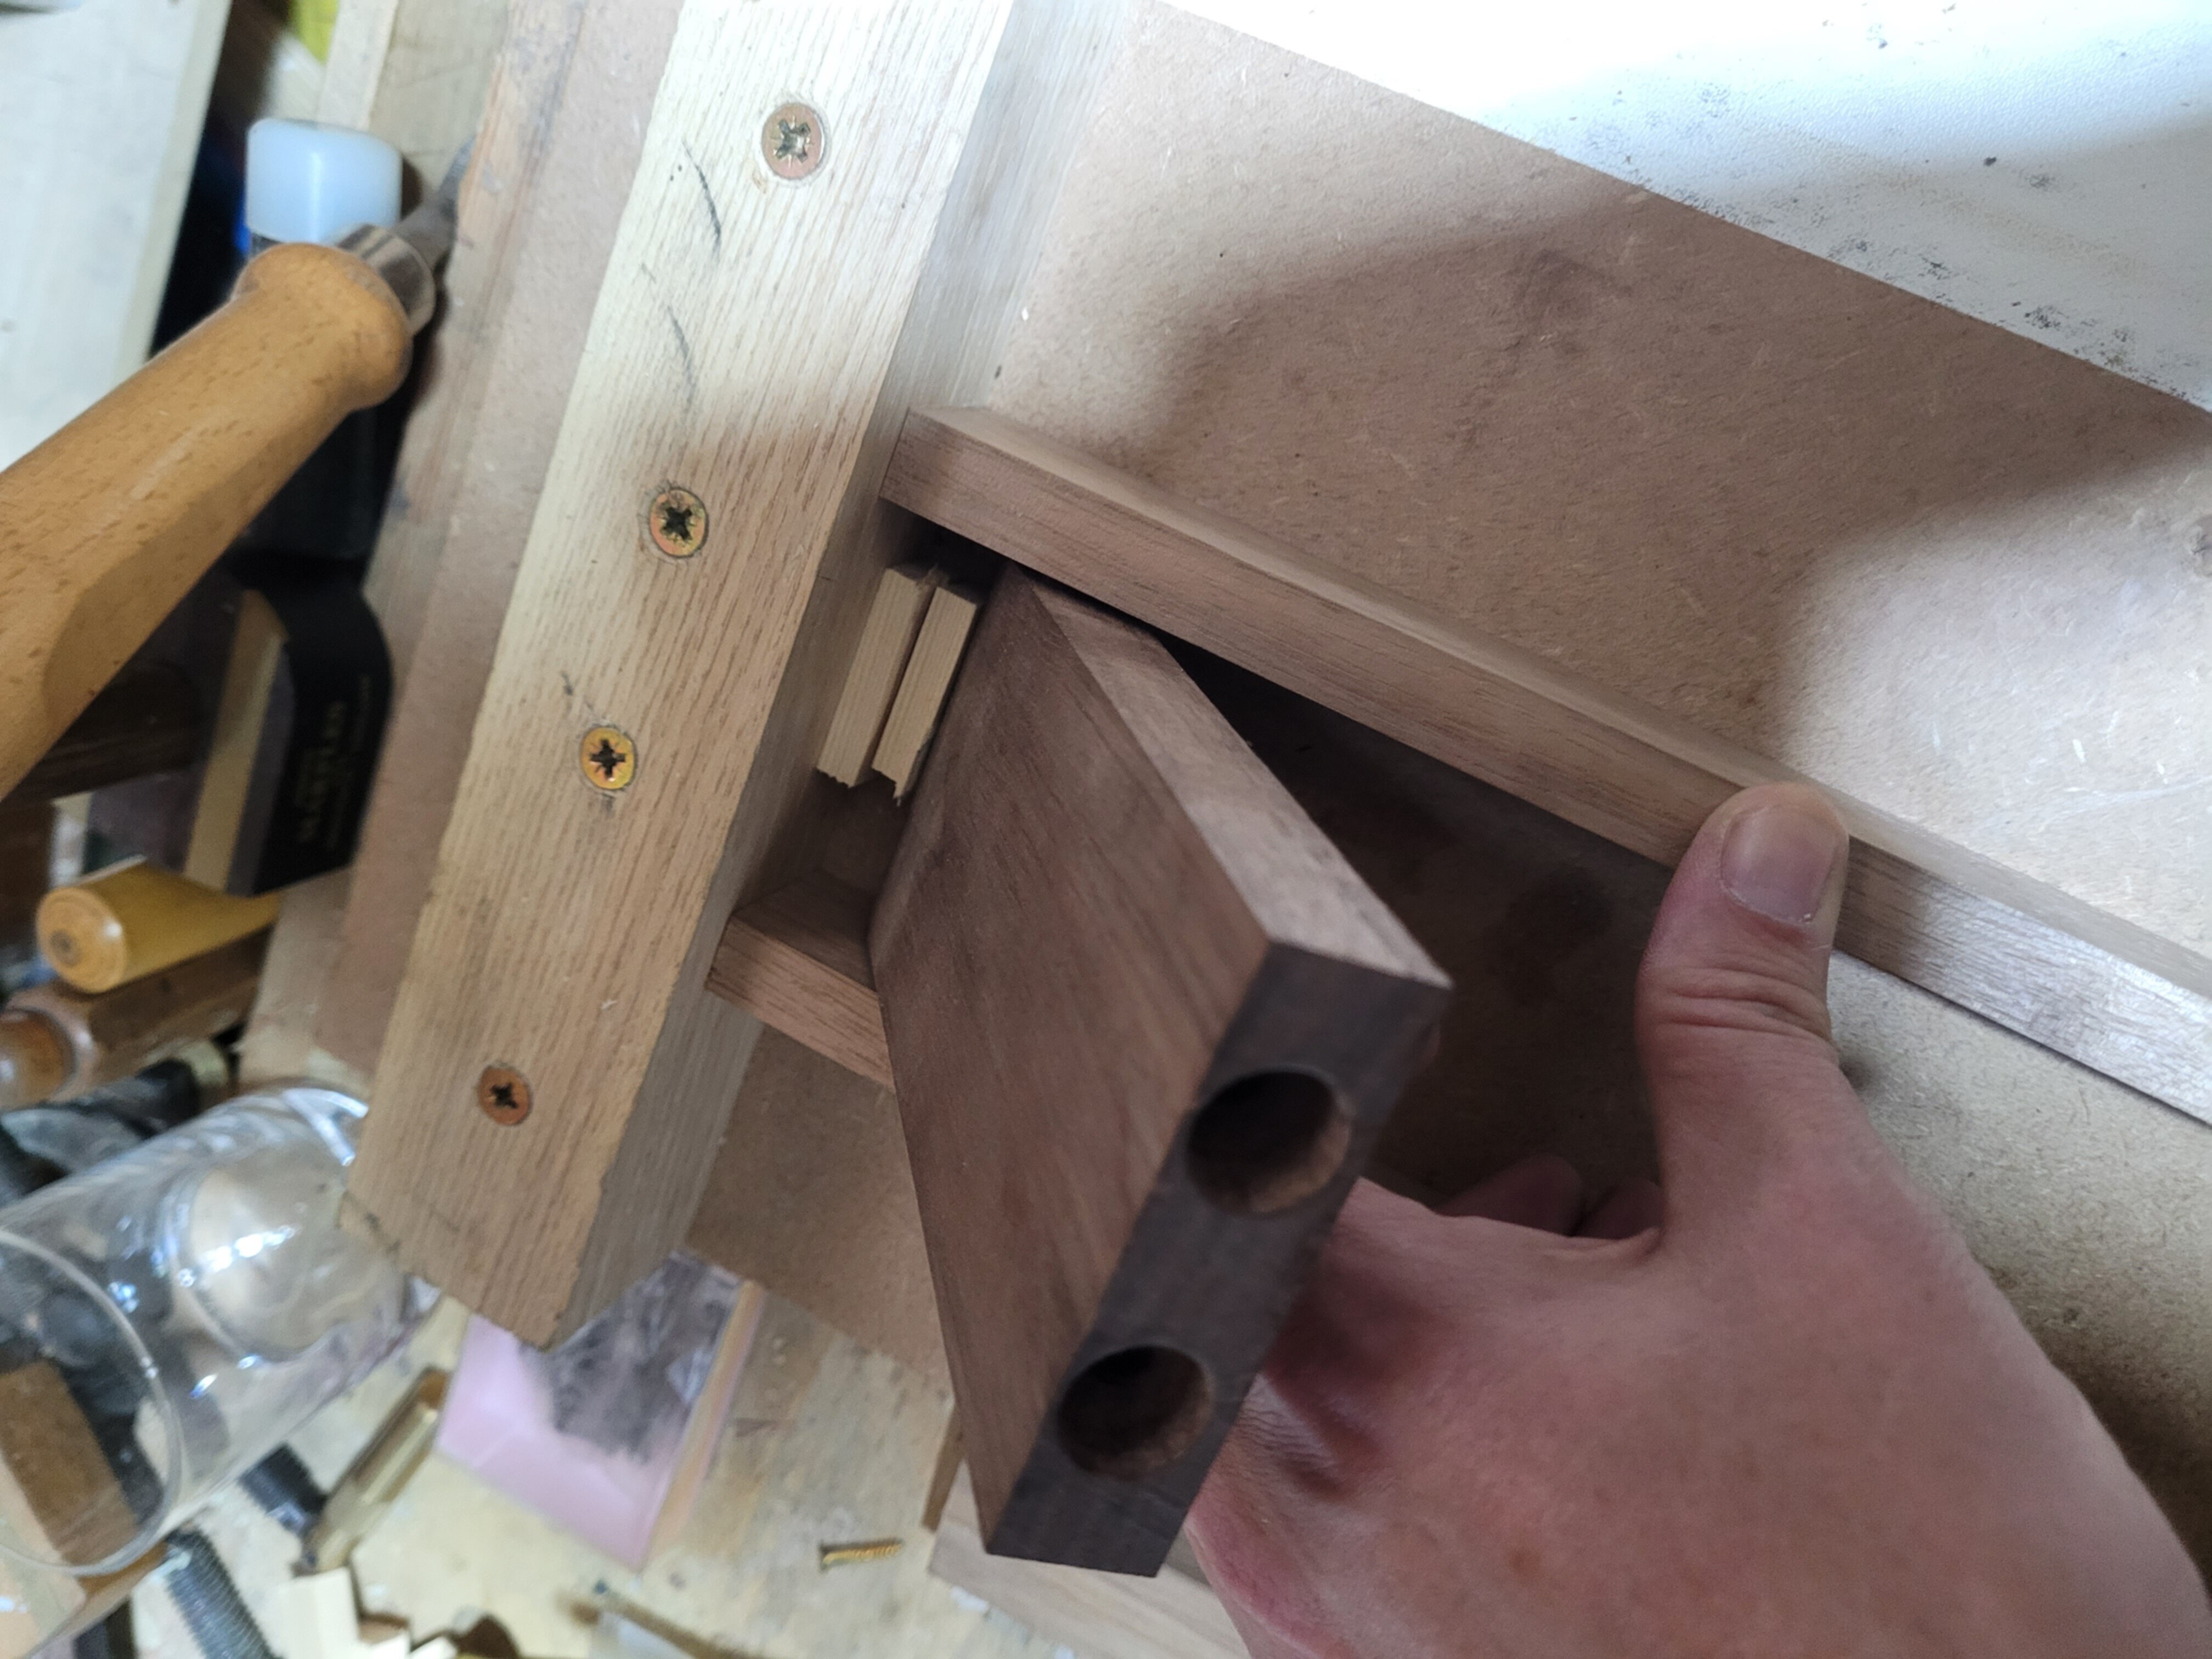
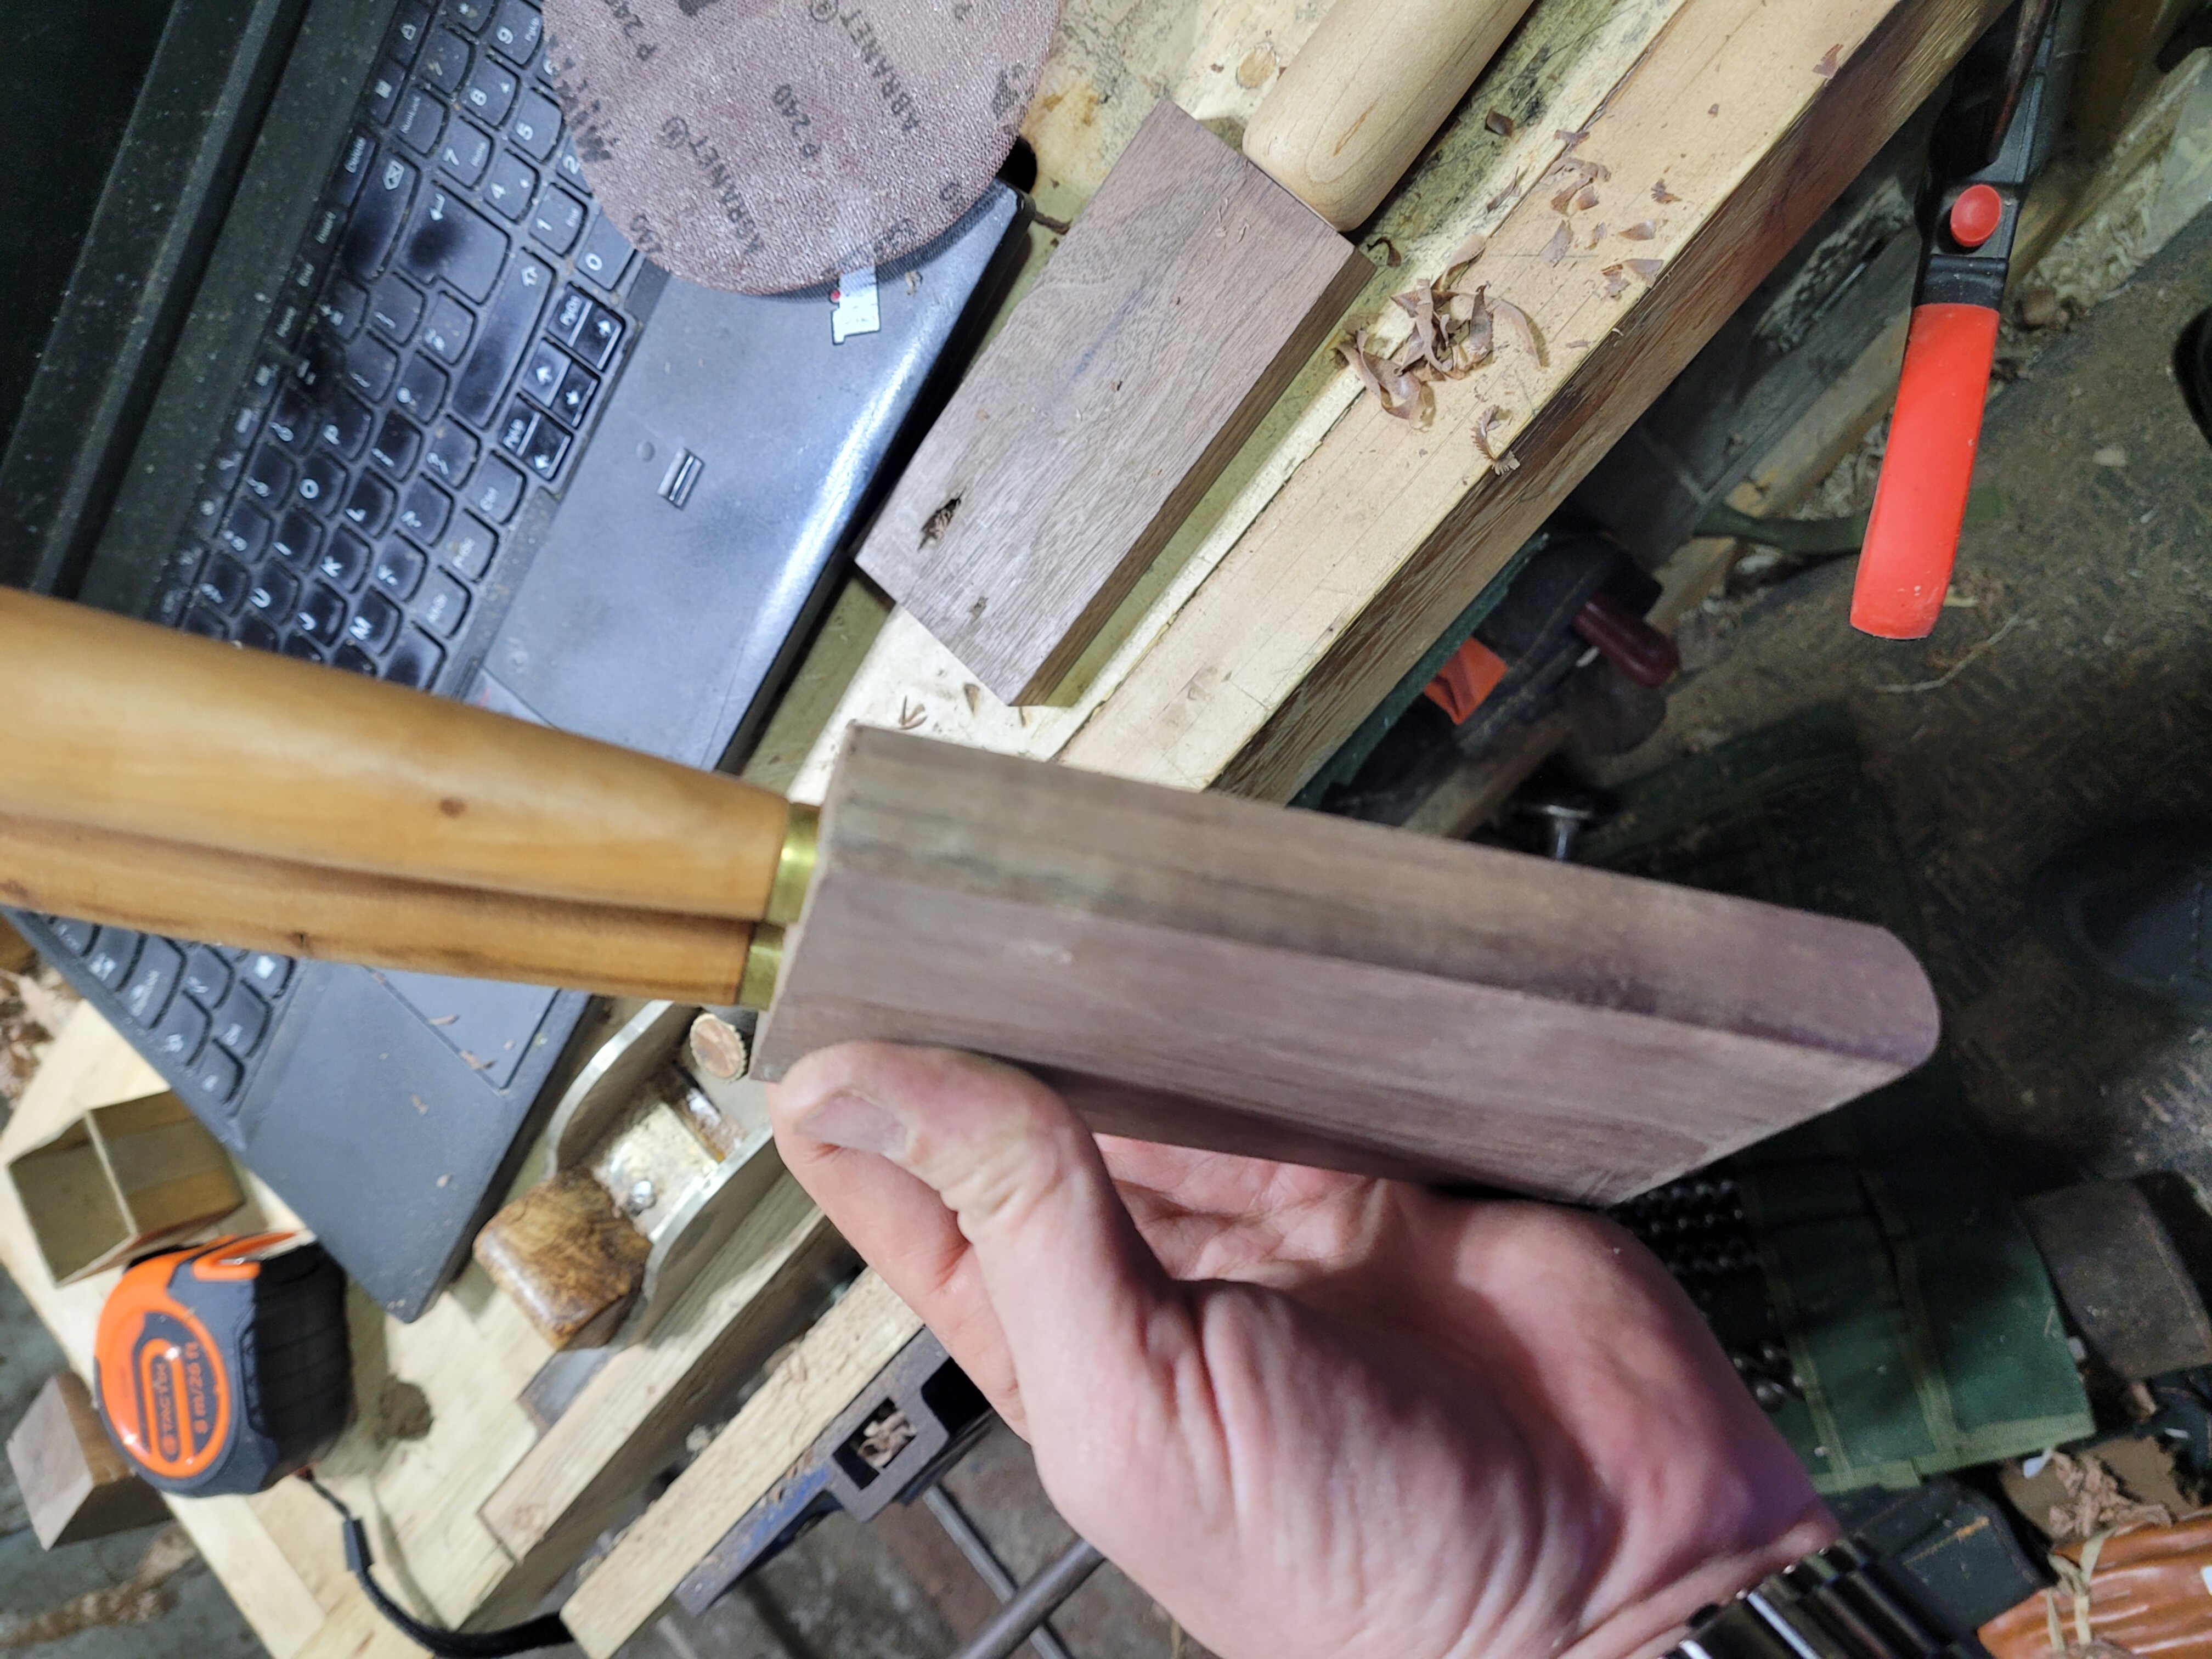
After drilling the side holes I cut a length of tube for each side, and inserted them to test rotation. Its all good! Worth noting the rounded end of the chisel holder is not for looks. If it was square, it would strike the bench as its rotated.
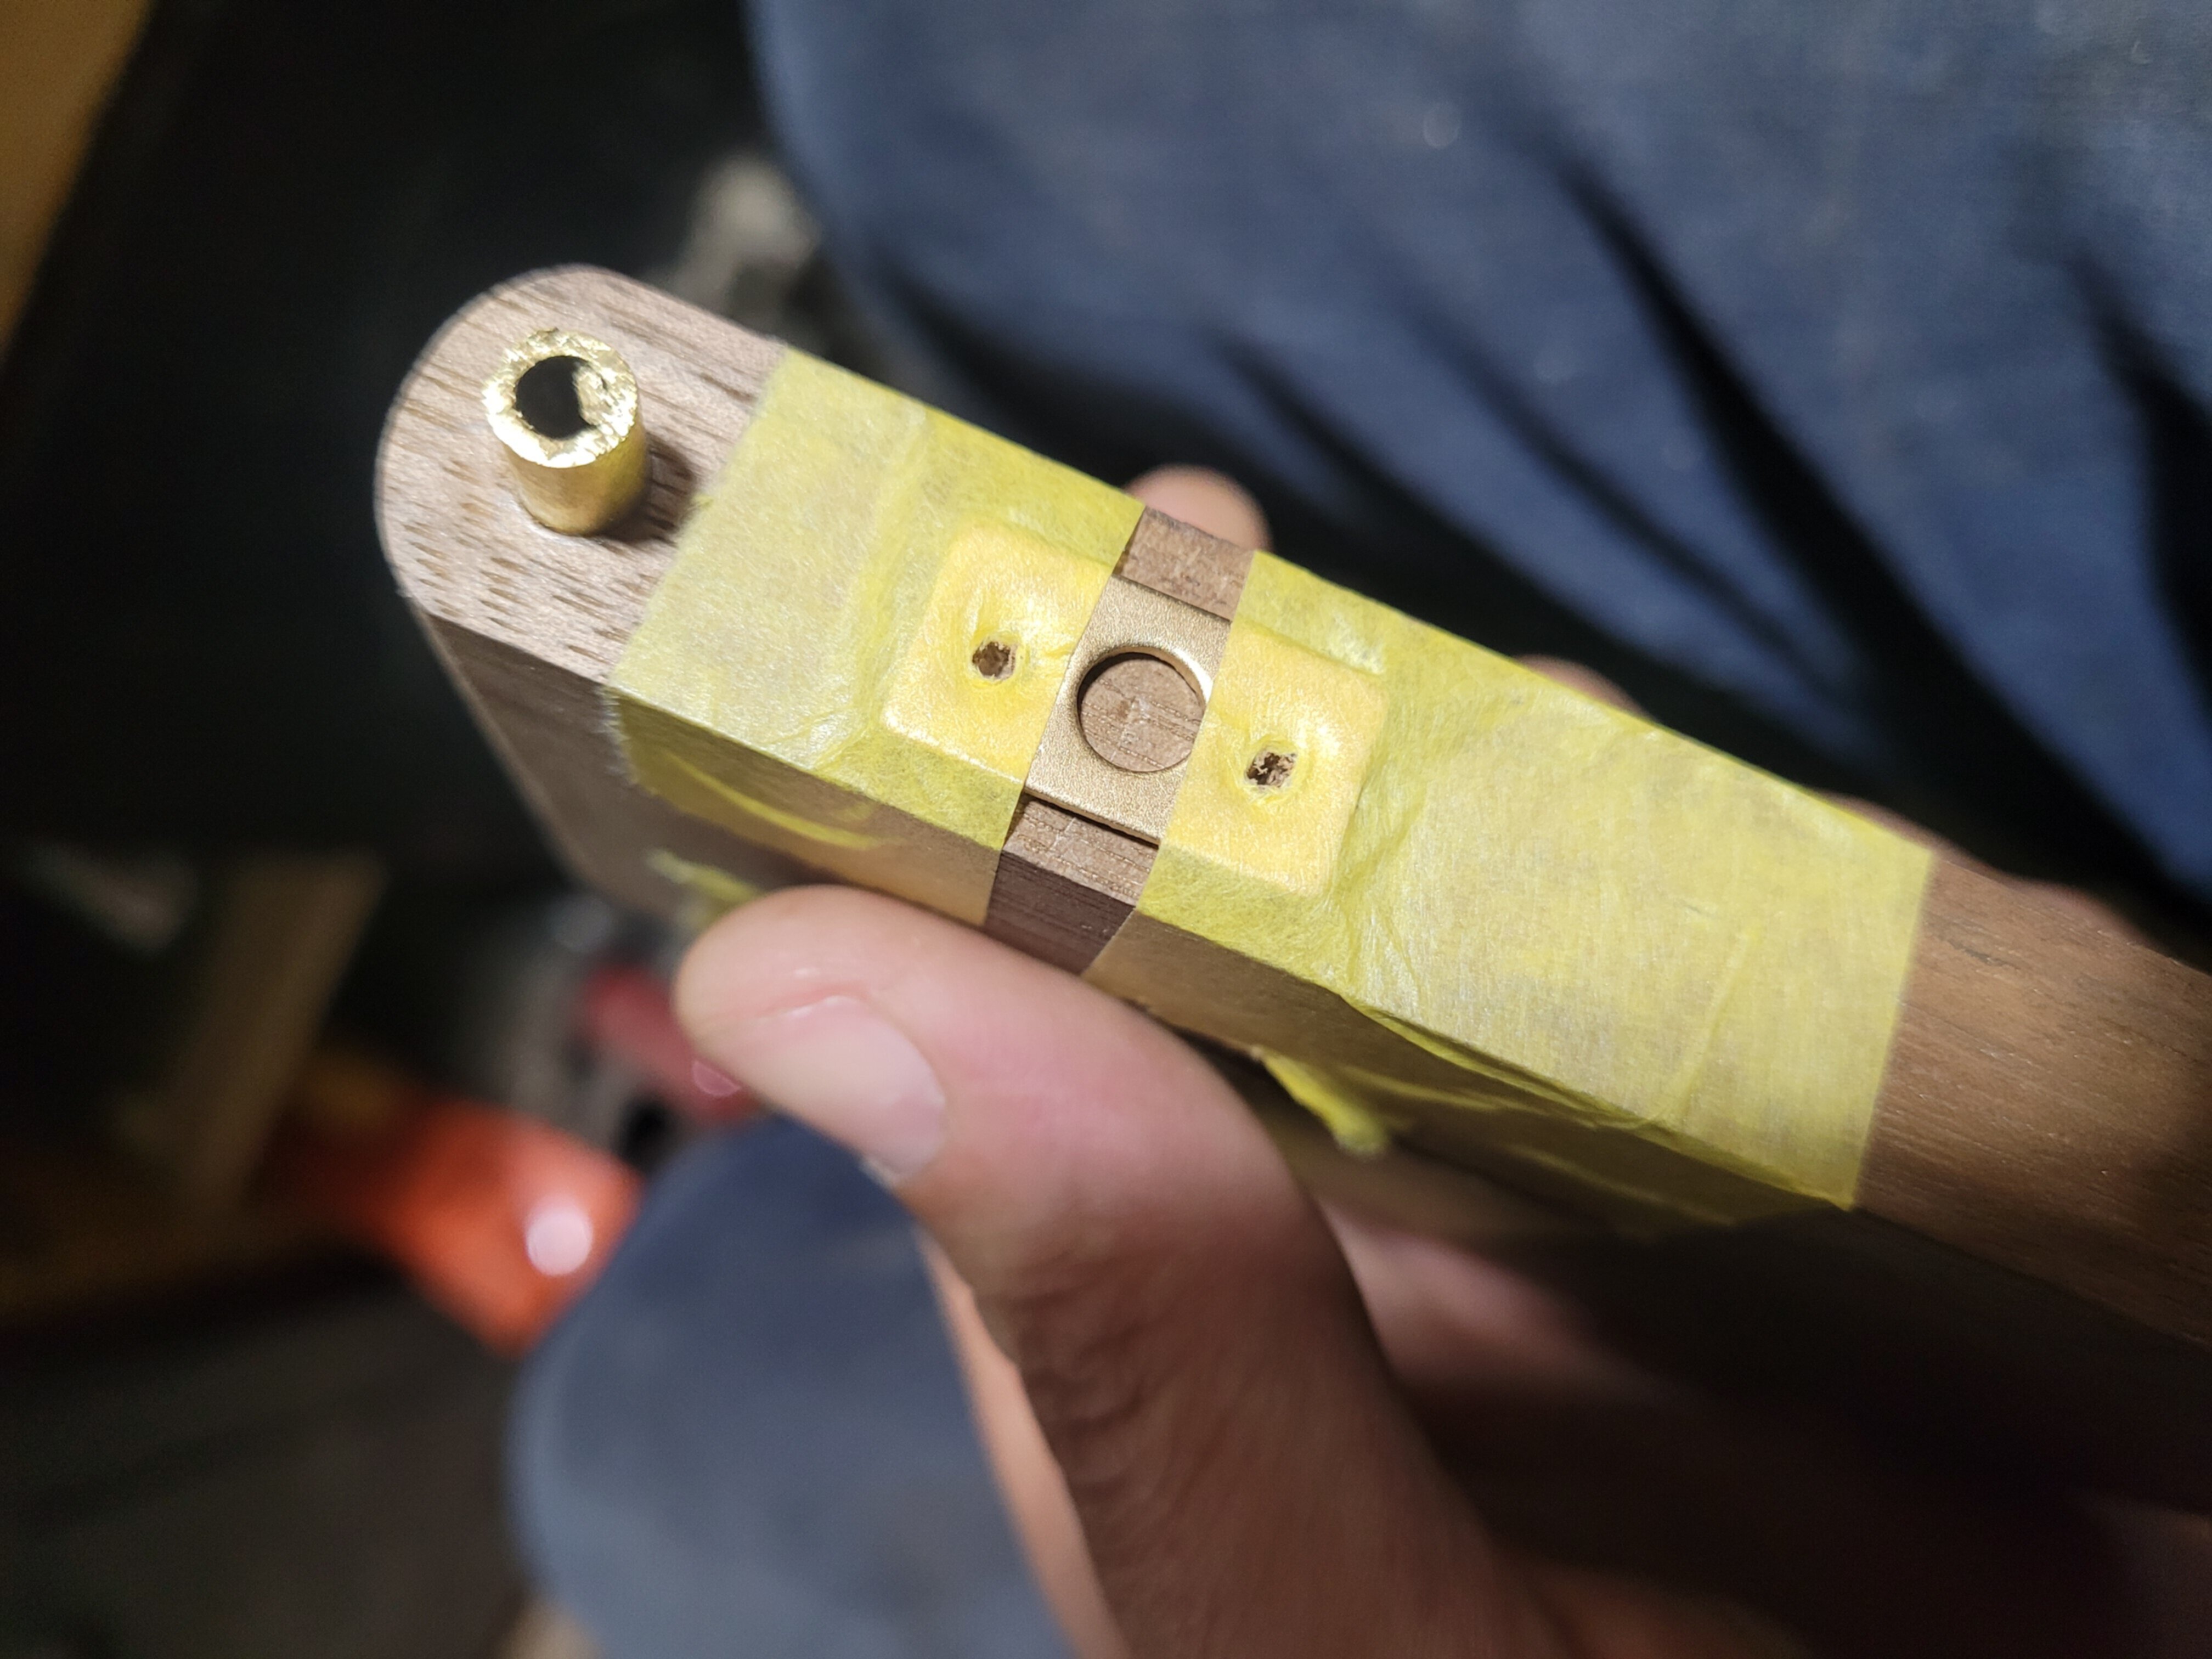
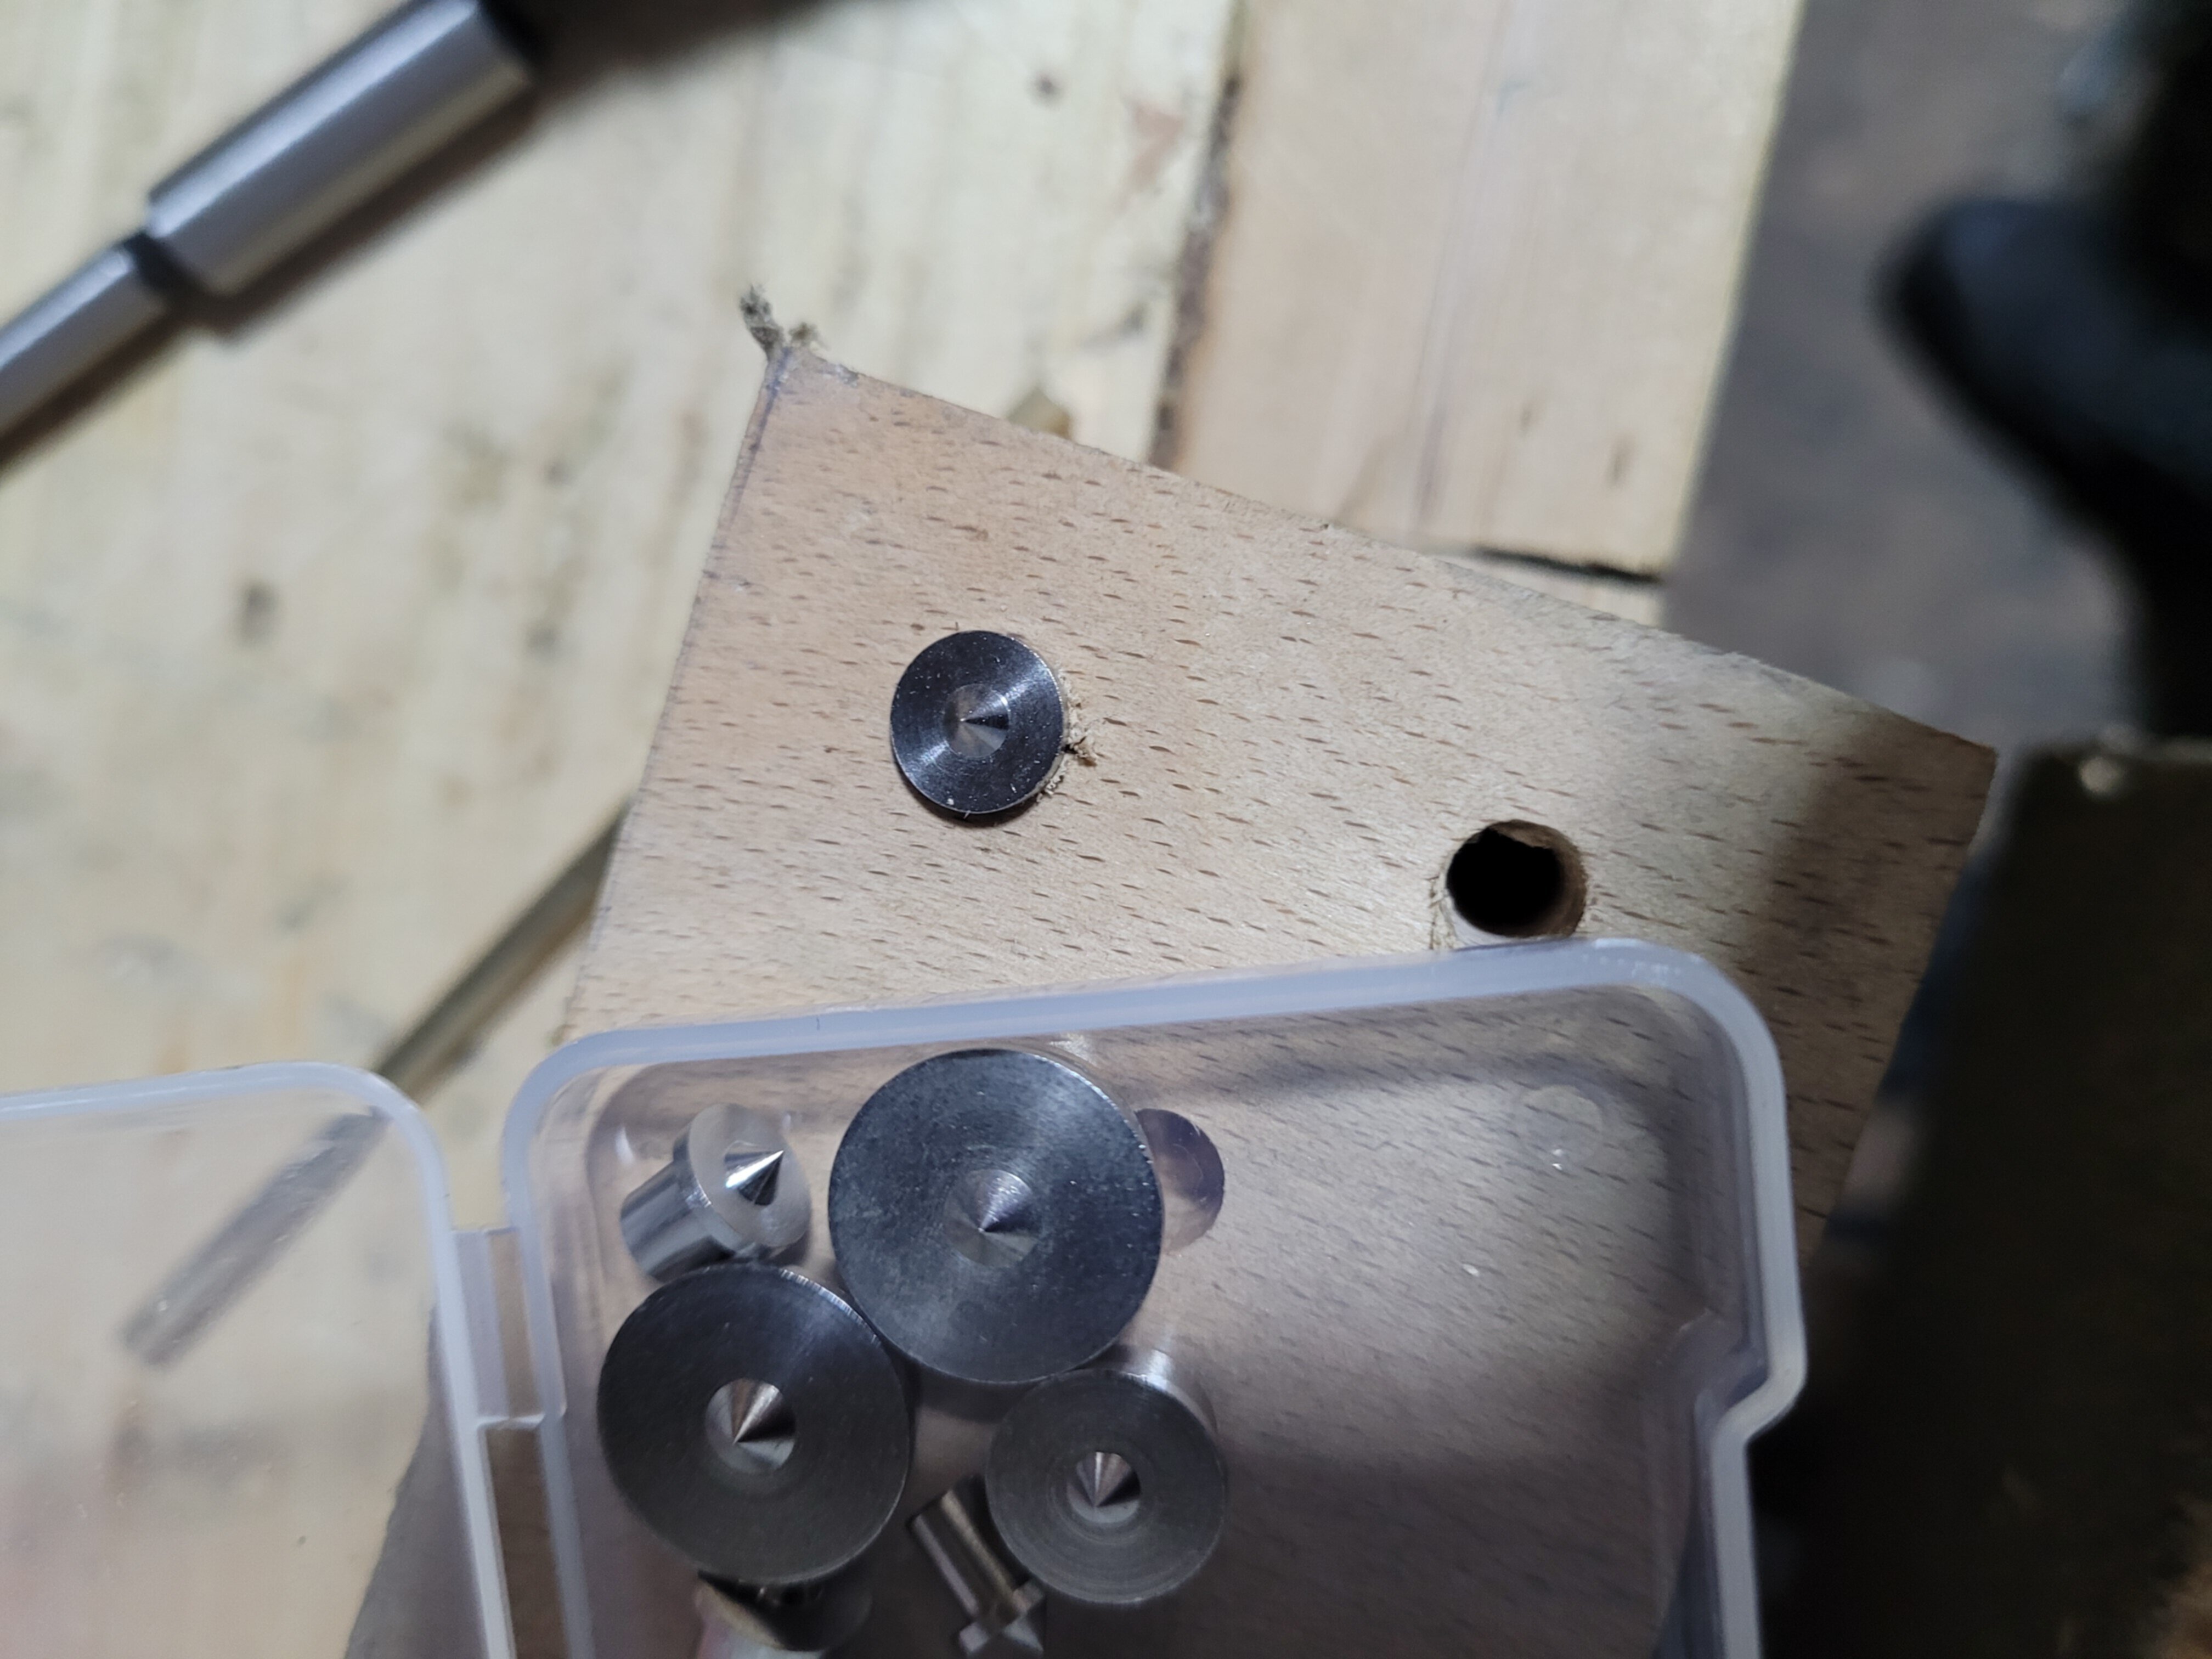
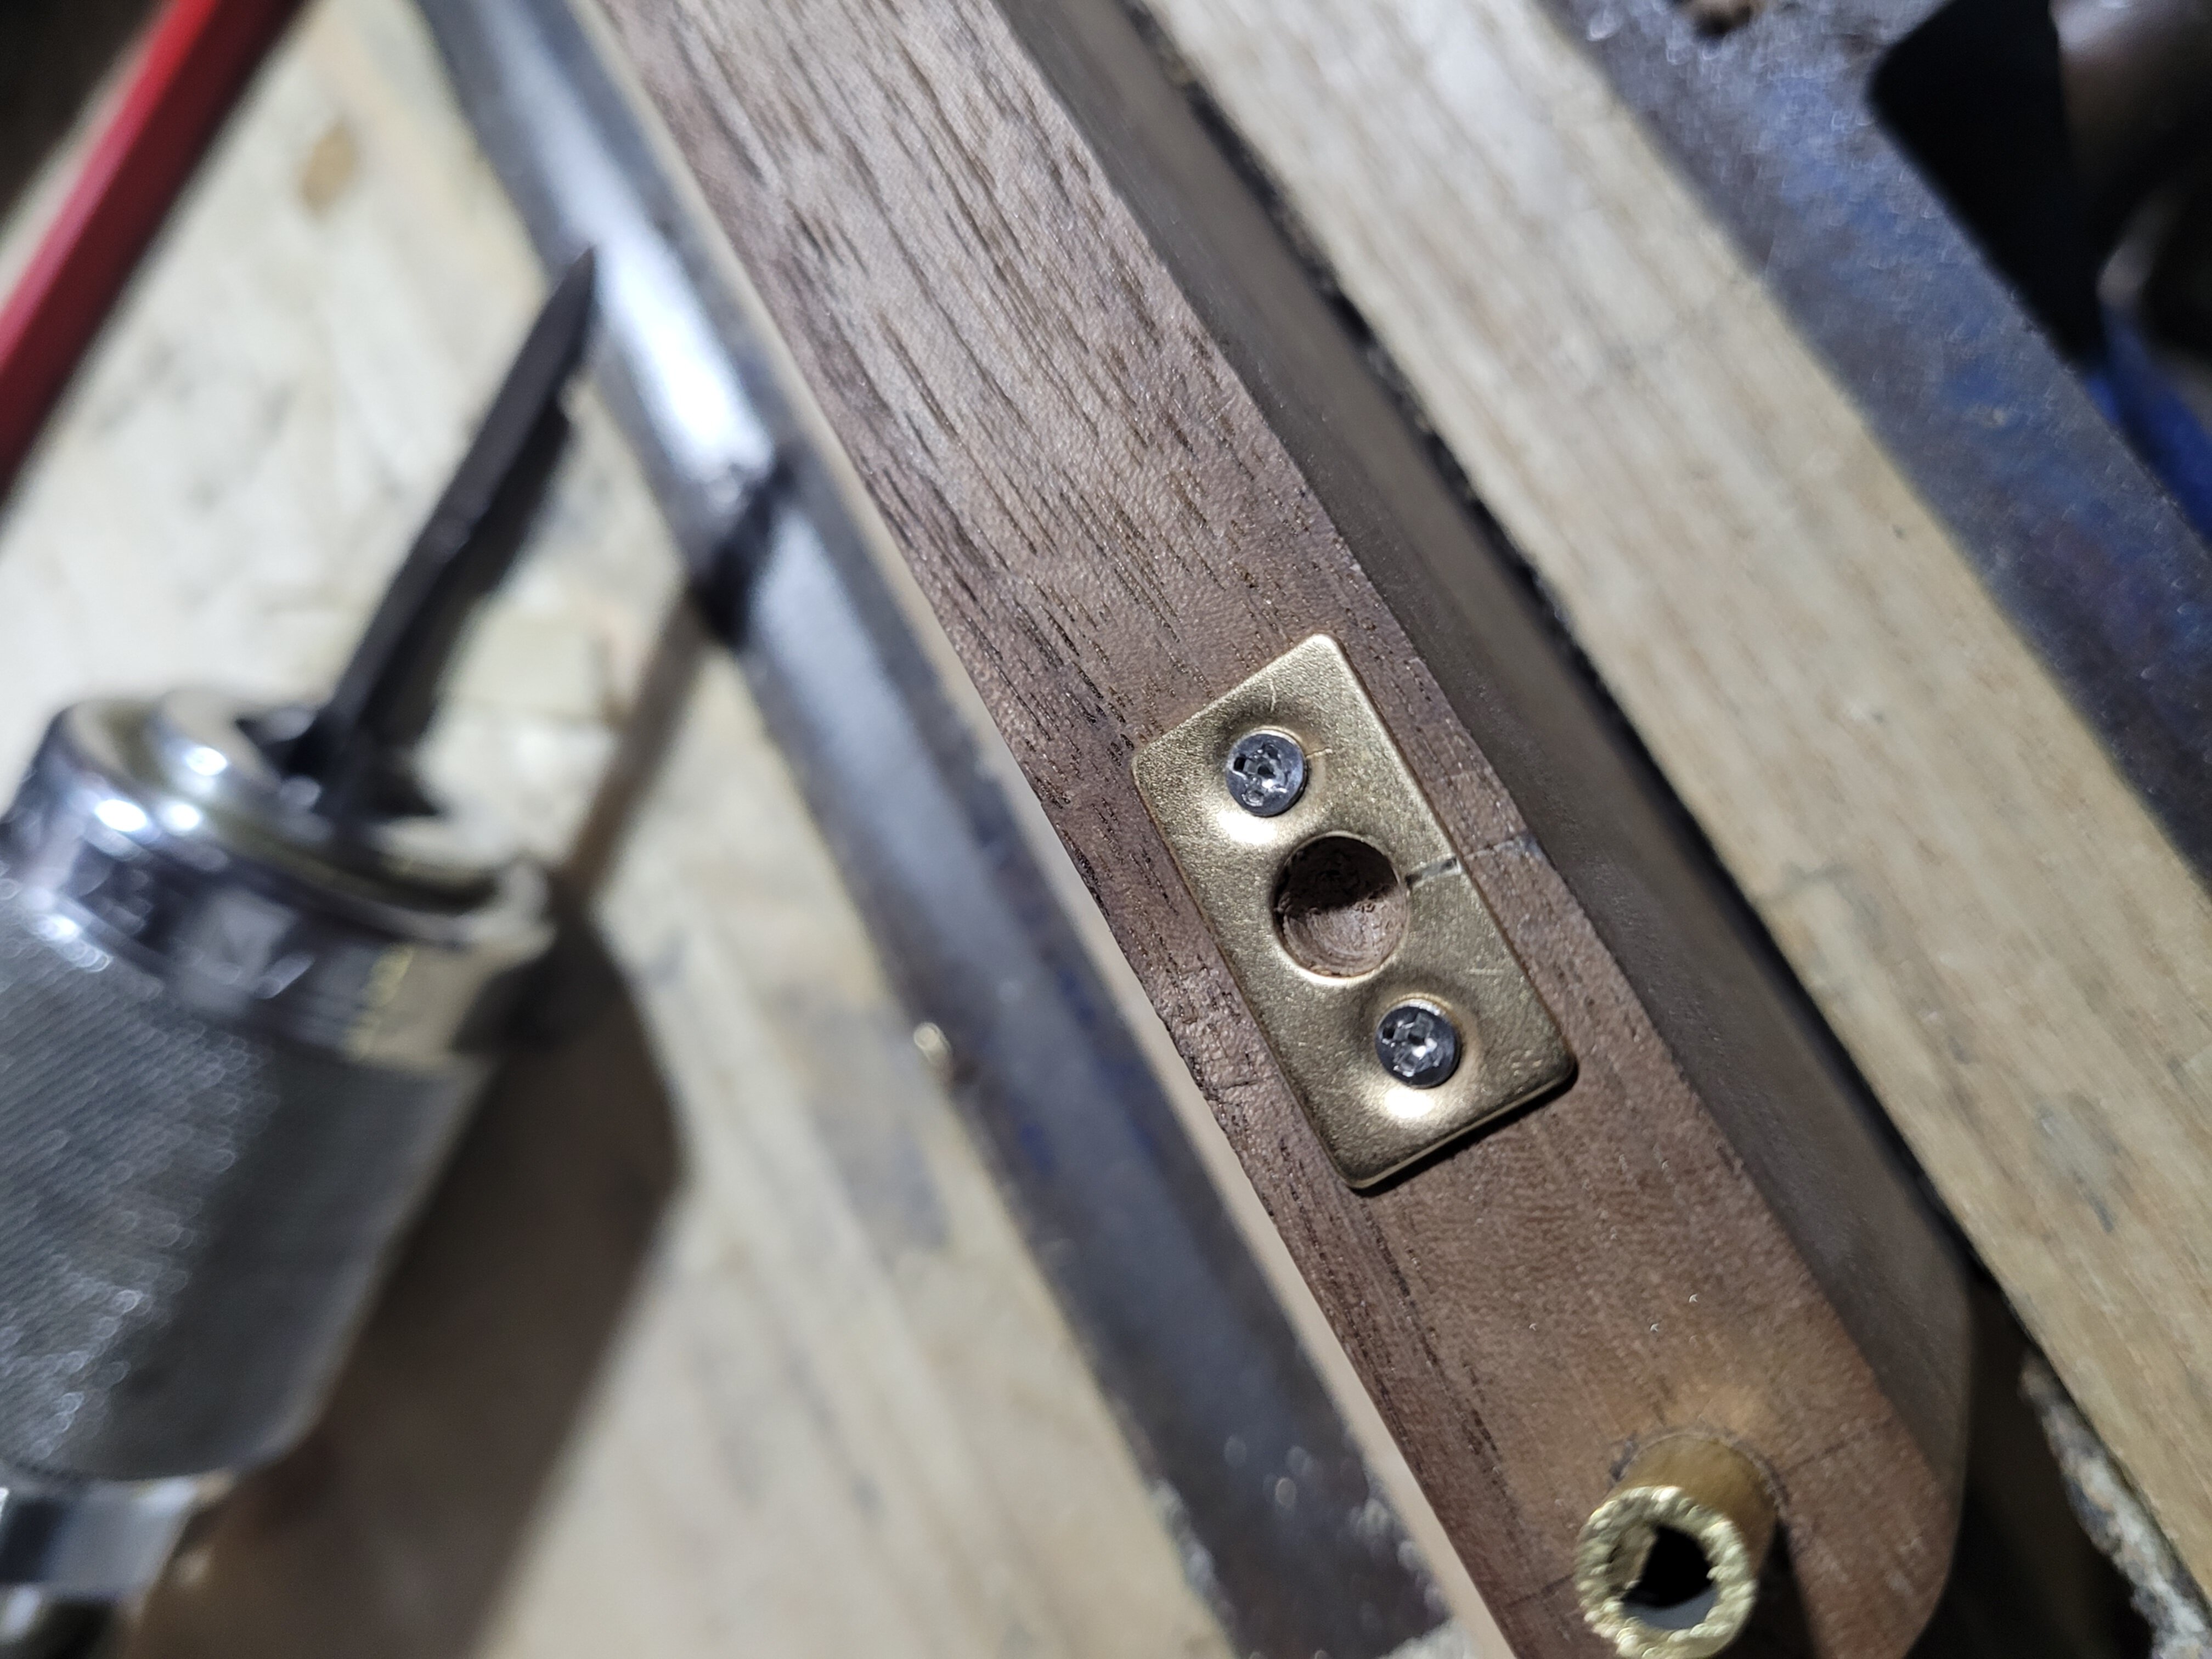
Now its time to locate the bullet catches. I played around with positioning the bullet catches to lift the chisel holder an amount I liked. Then drilled the holes, and again used the dowel pins to mark the position. You can see the little pin prick inside the bullet catch plate here. Then I used masking tape to temporarily attach the bullet catch plates. I played around with their location, and once I was happy I used an awl to mark the screw locations.
As you can see here, the backs of the plates that came with these bullet catches are not flush. So I drilled out a little material at each of the screw hole locations to let it sit flush.
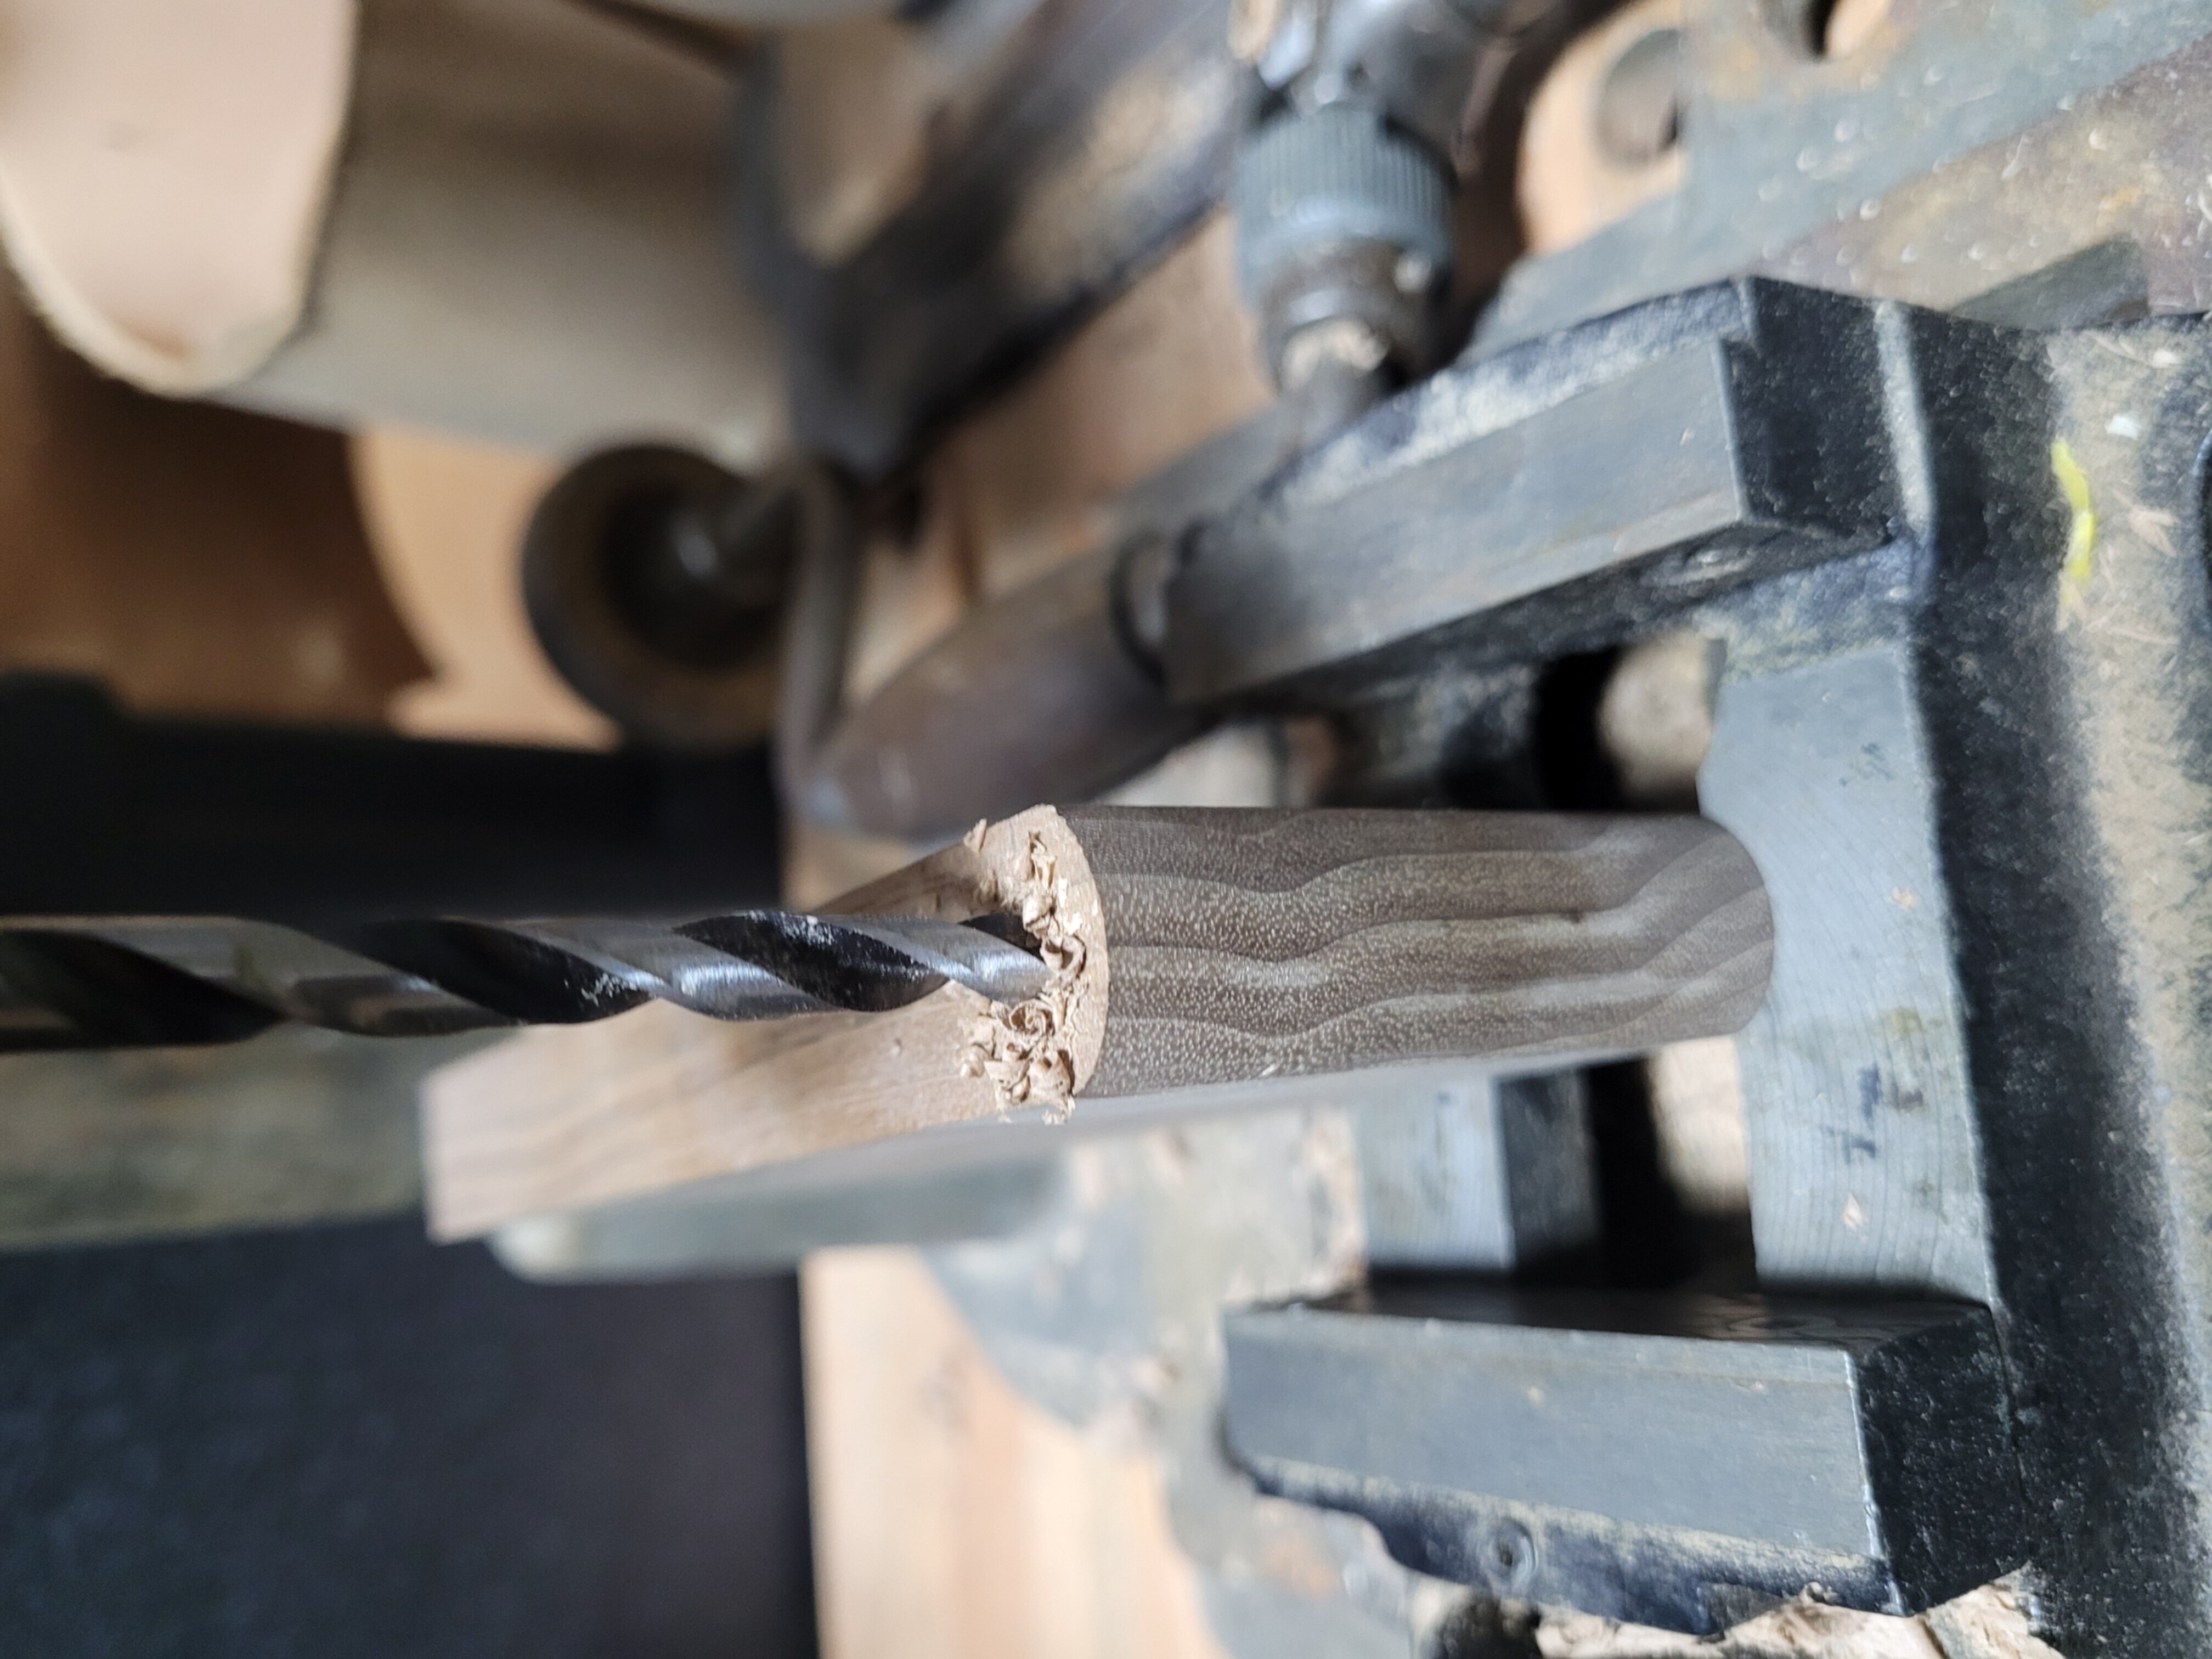
This is the little spoon bit I used to drill that. Its perfect for the job. Just 1/4 inch wide. You could do the job with any old bit that made a hole large enough, but I had this bit out already for another job. This is probably a brush makers bit. Small, short spoon bits that were made to drill the holes in brush heads before the bristles were glued in.
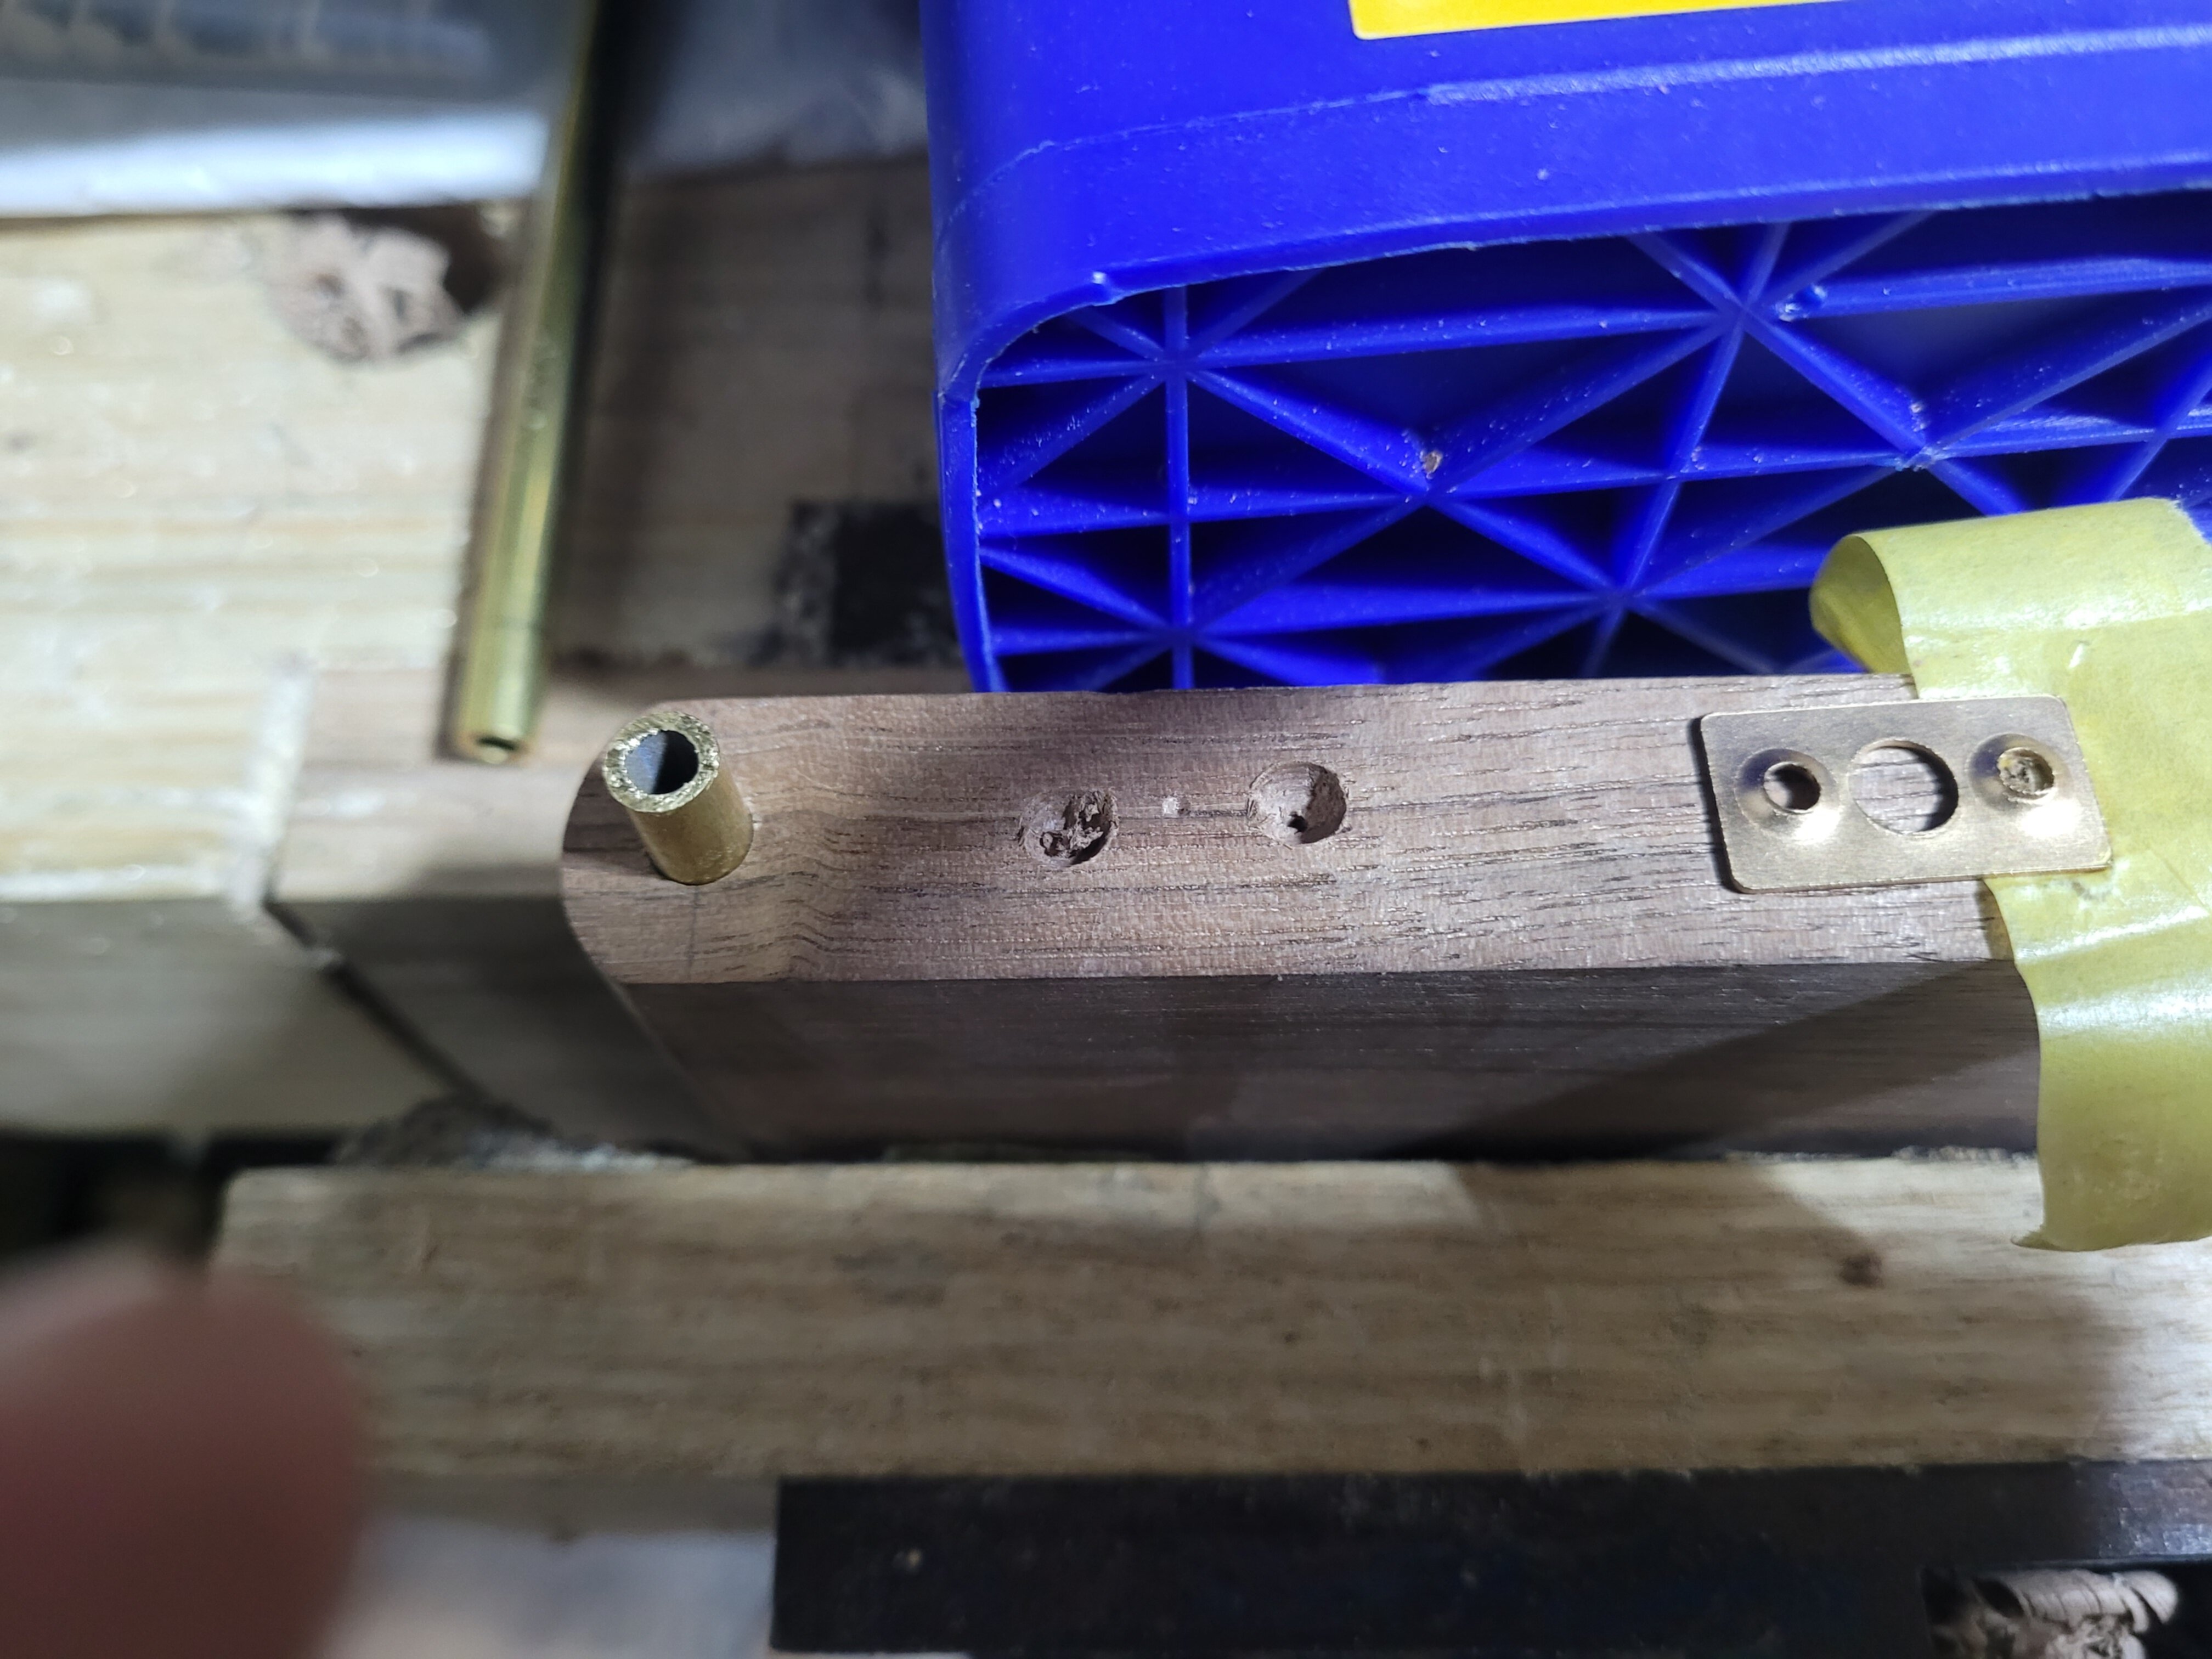
When I was testing the bullet catches, I found the plate on its own left a lot of play in the bullet catches. They would hold, but the body could rock back and forth a bit. By drilling into the hole that holds the ball, I found it could seat more, and lock in place. Again, you do not need such an odd bit for this job. Anything that makes a hole the right size will work. Nice to have, as the curved bottom looks a little neater. A forstner bit small enough would be another great choice.
A final test to make sure everything fits and locks well.
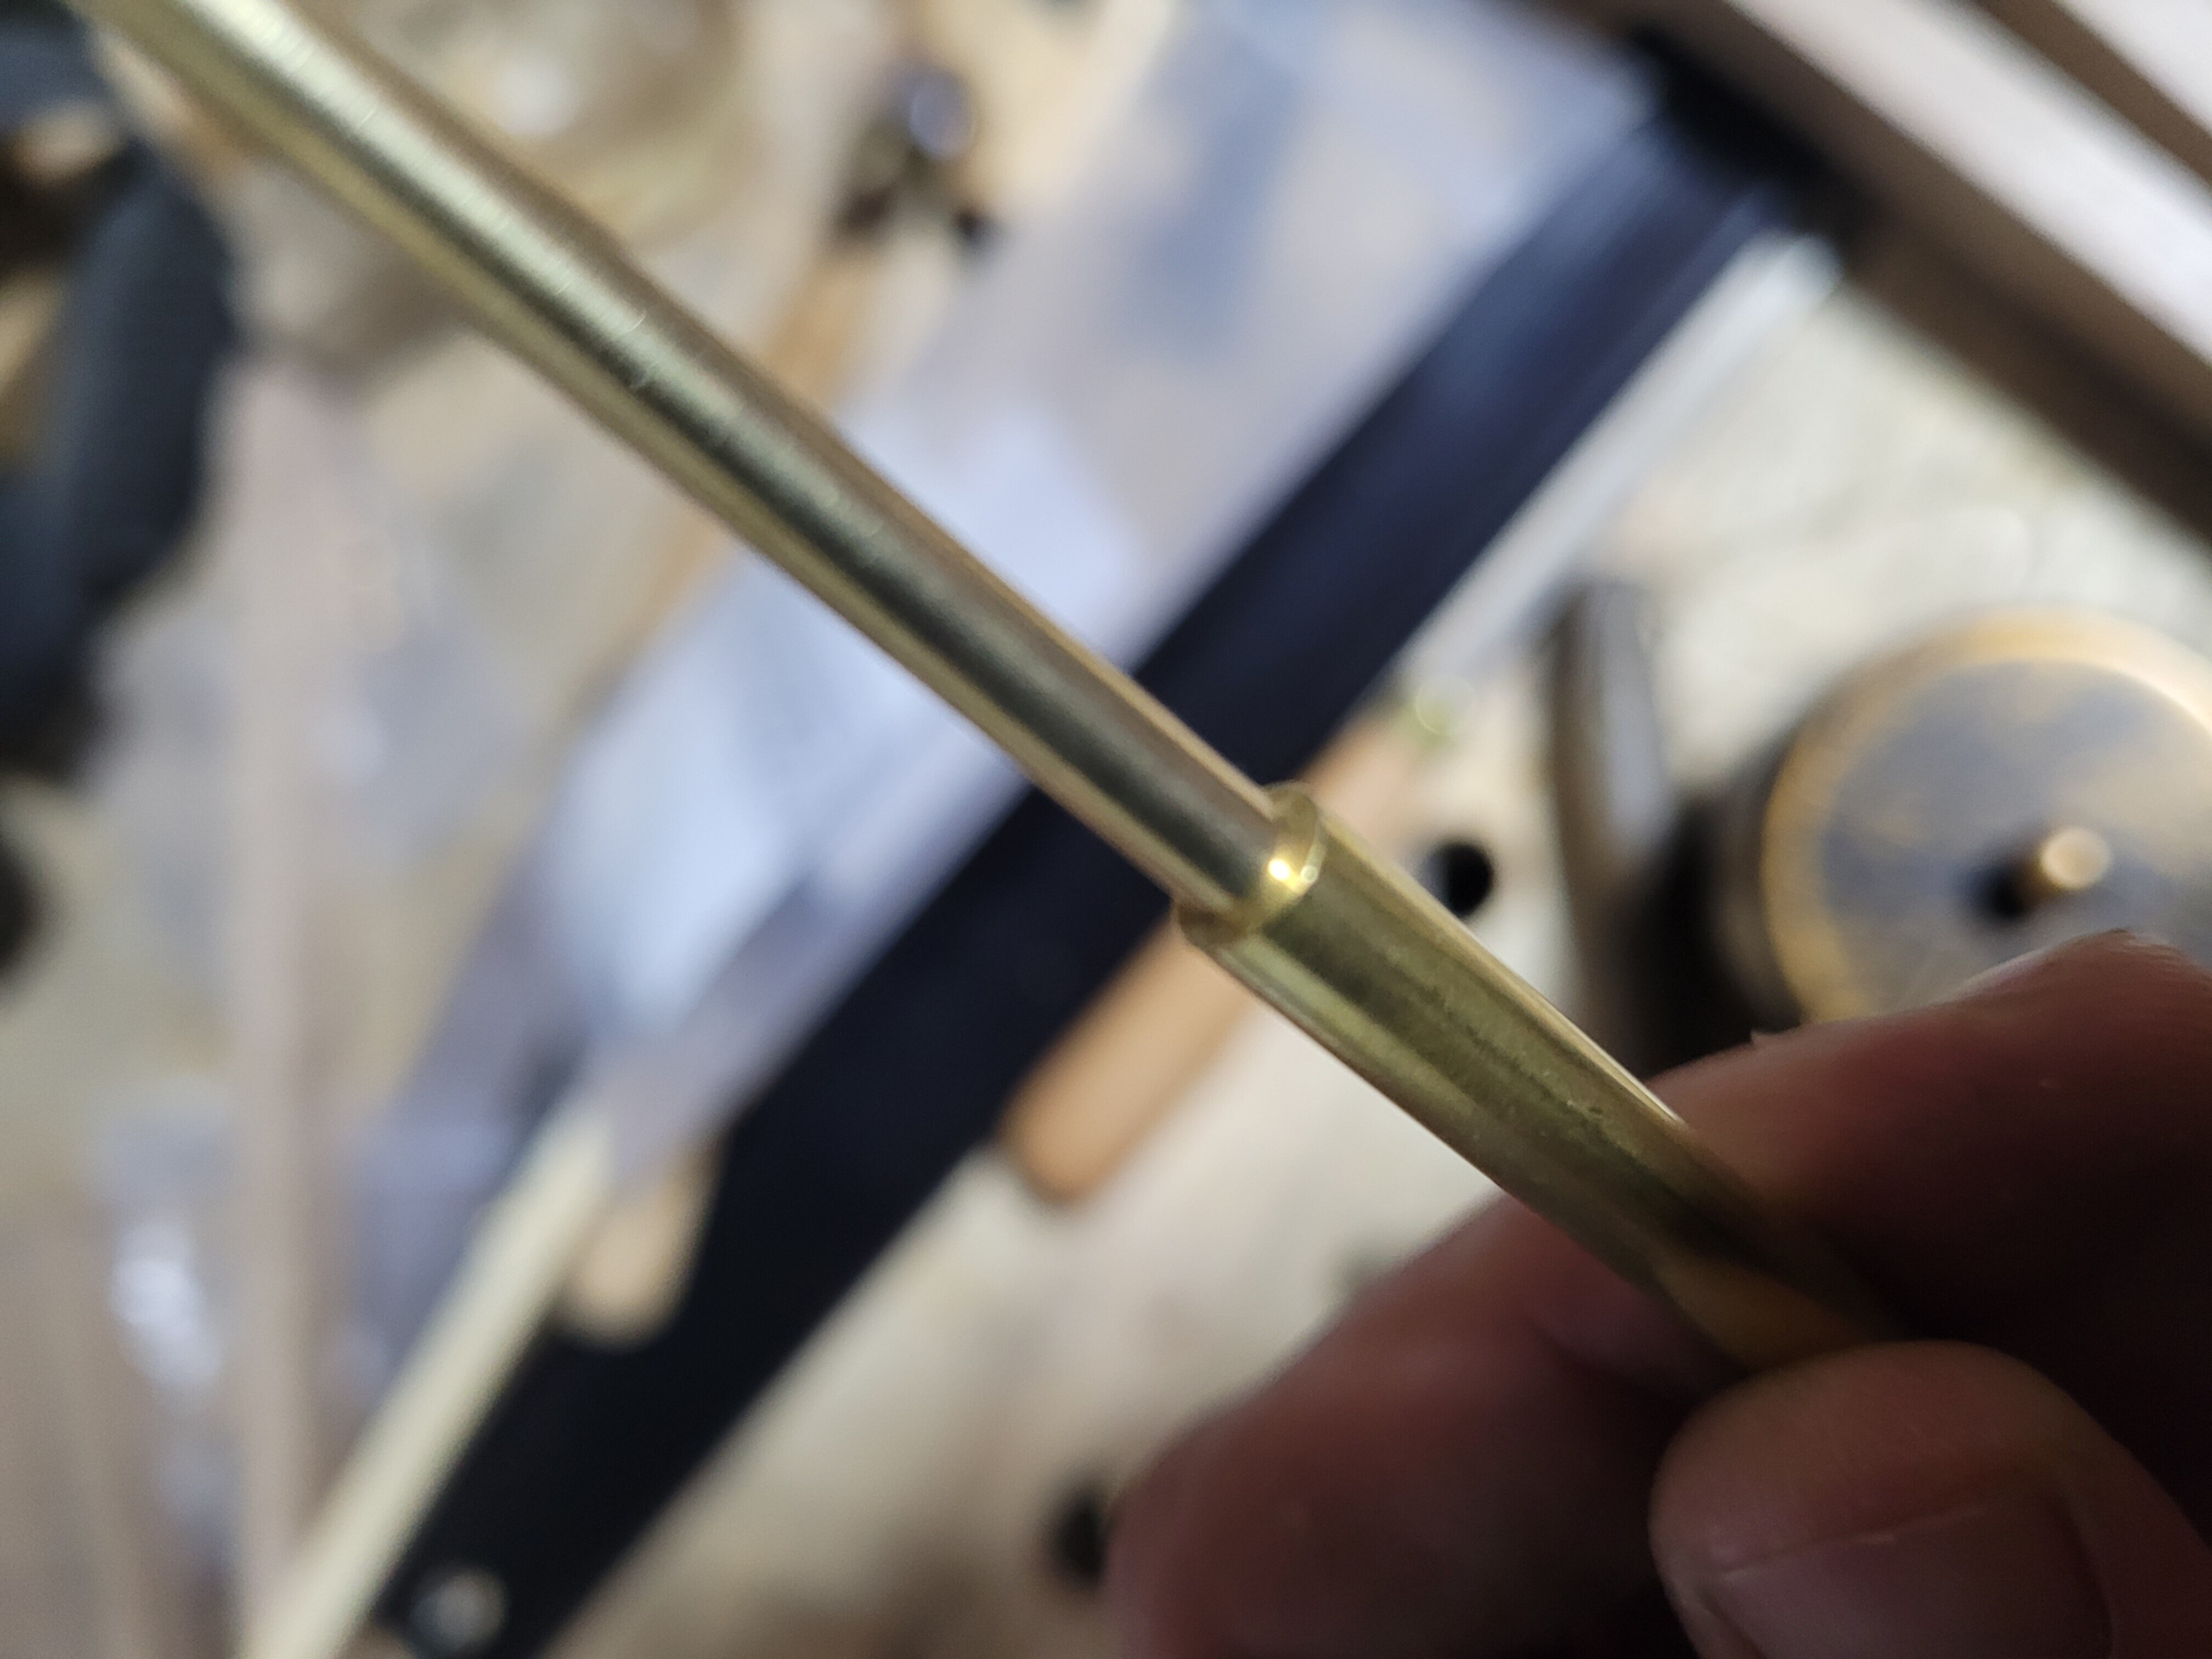
The side tube glued in and filed down. It turns out sawing narrow brass tube with a hacksaw is a pain. Once you cut all the way through the blade is trying to cut two very narrow faces, its hard to keep enough teeth in the cut, and it jams like crazy. You can get there, its just frustrating. The tube also heats up a lot as its being sawn.
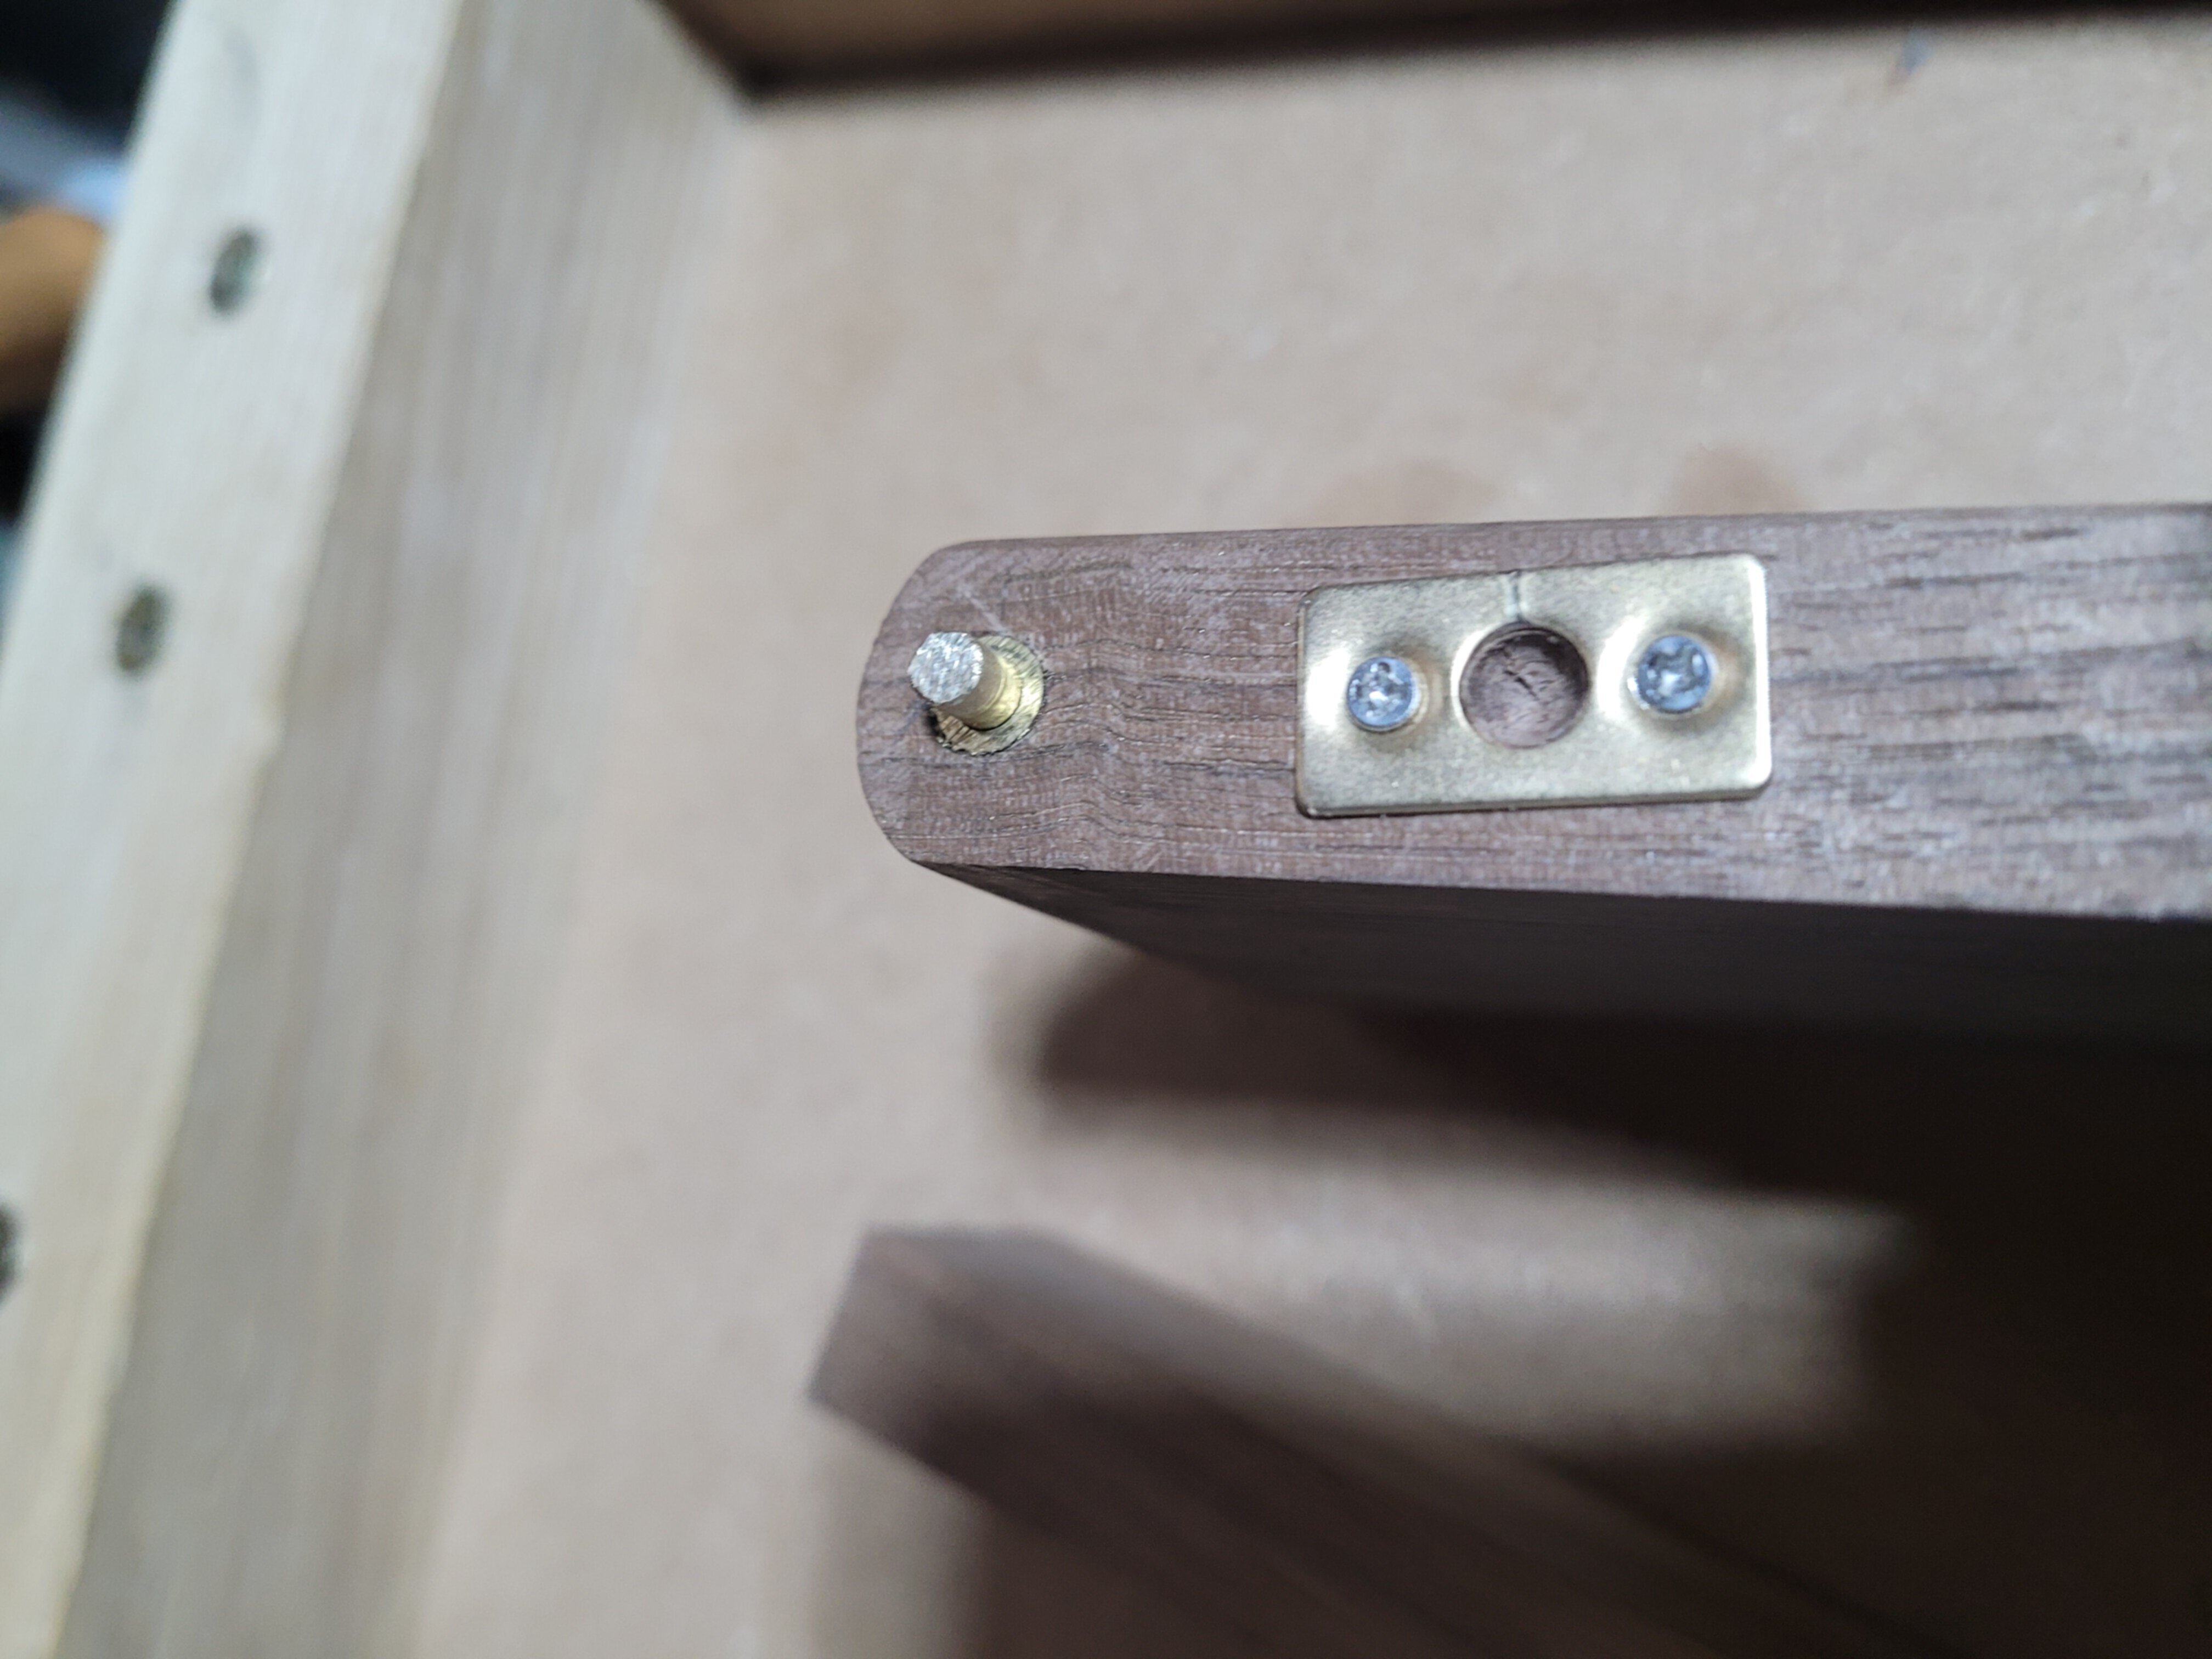
And the brass pin inserted. Make the pin a little shorter than the two lengths of tube. A small amount of side to side play in the body will give the bullet catches an easier time seating.
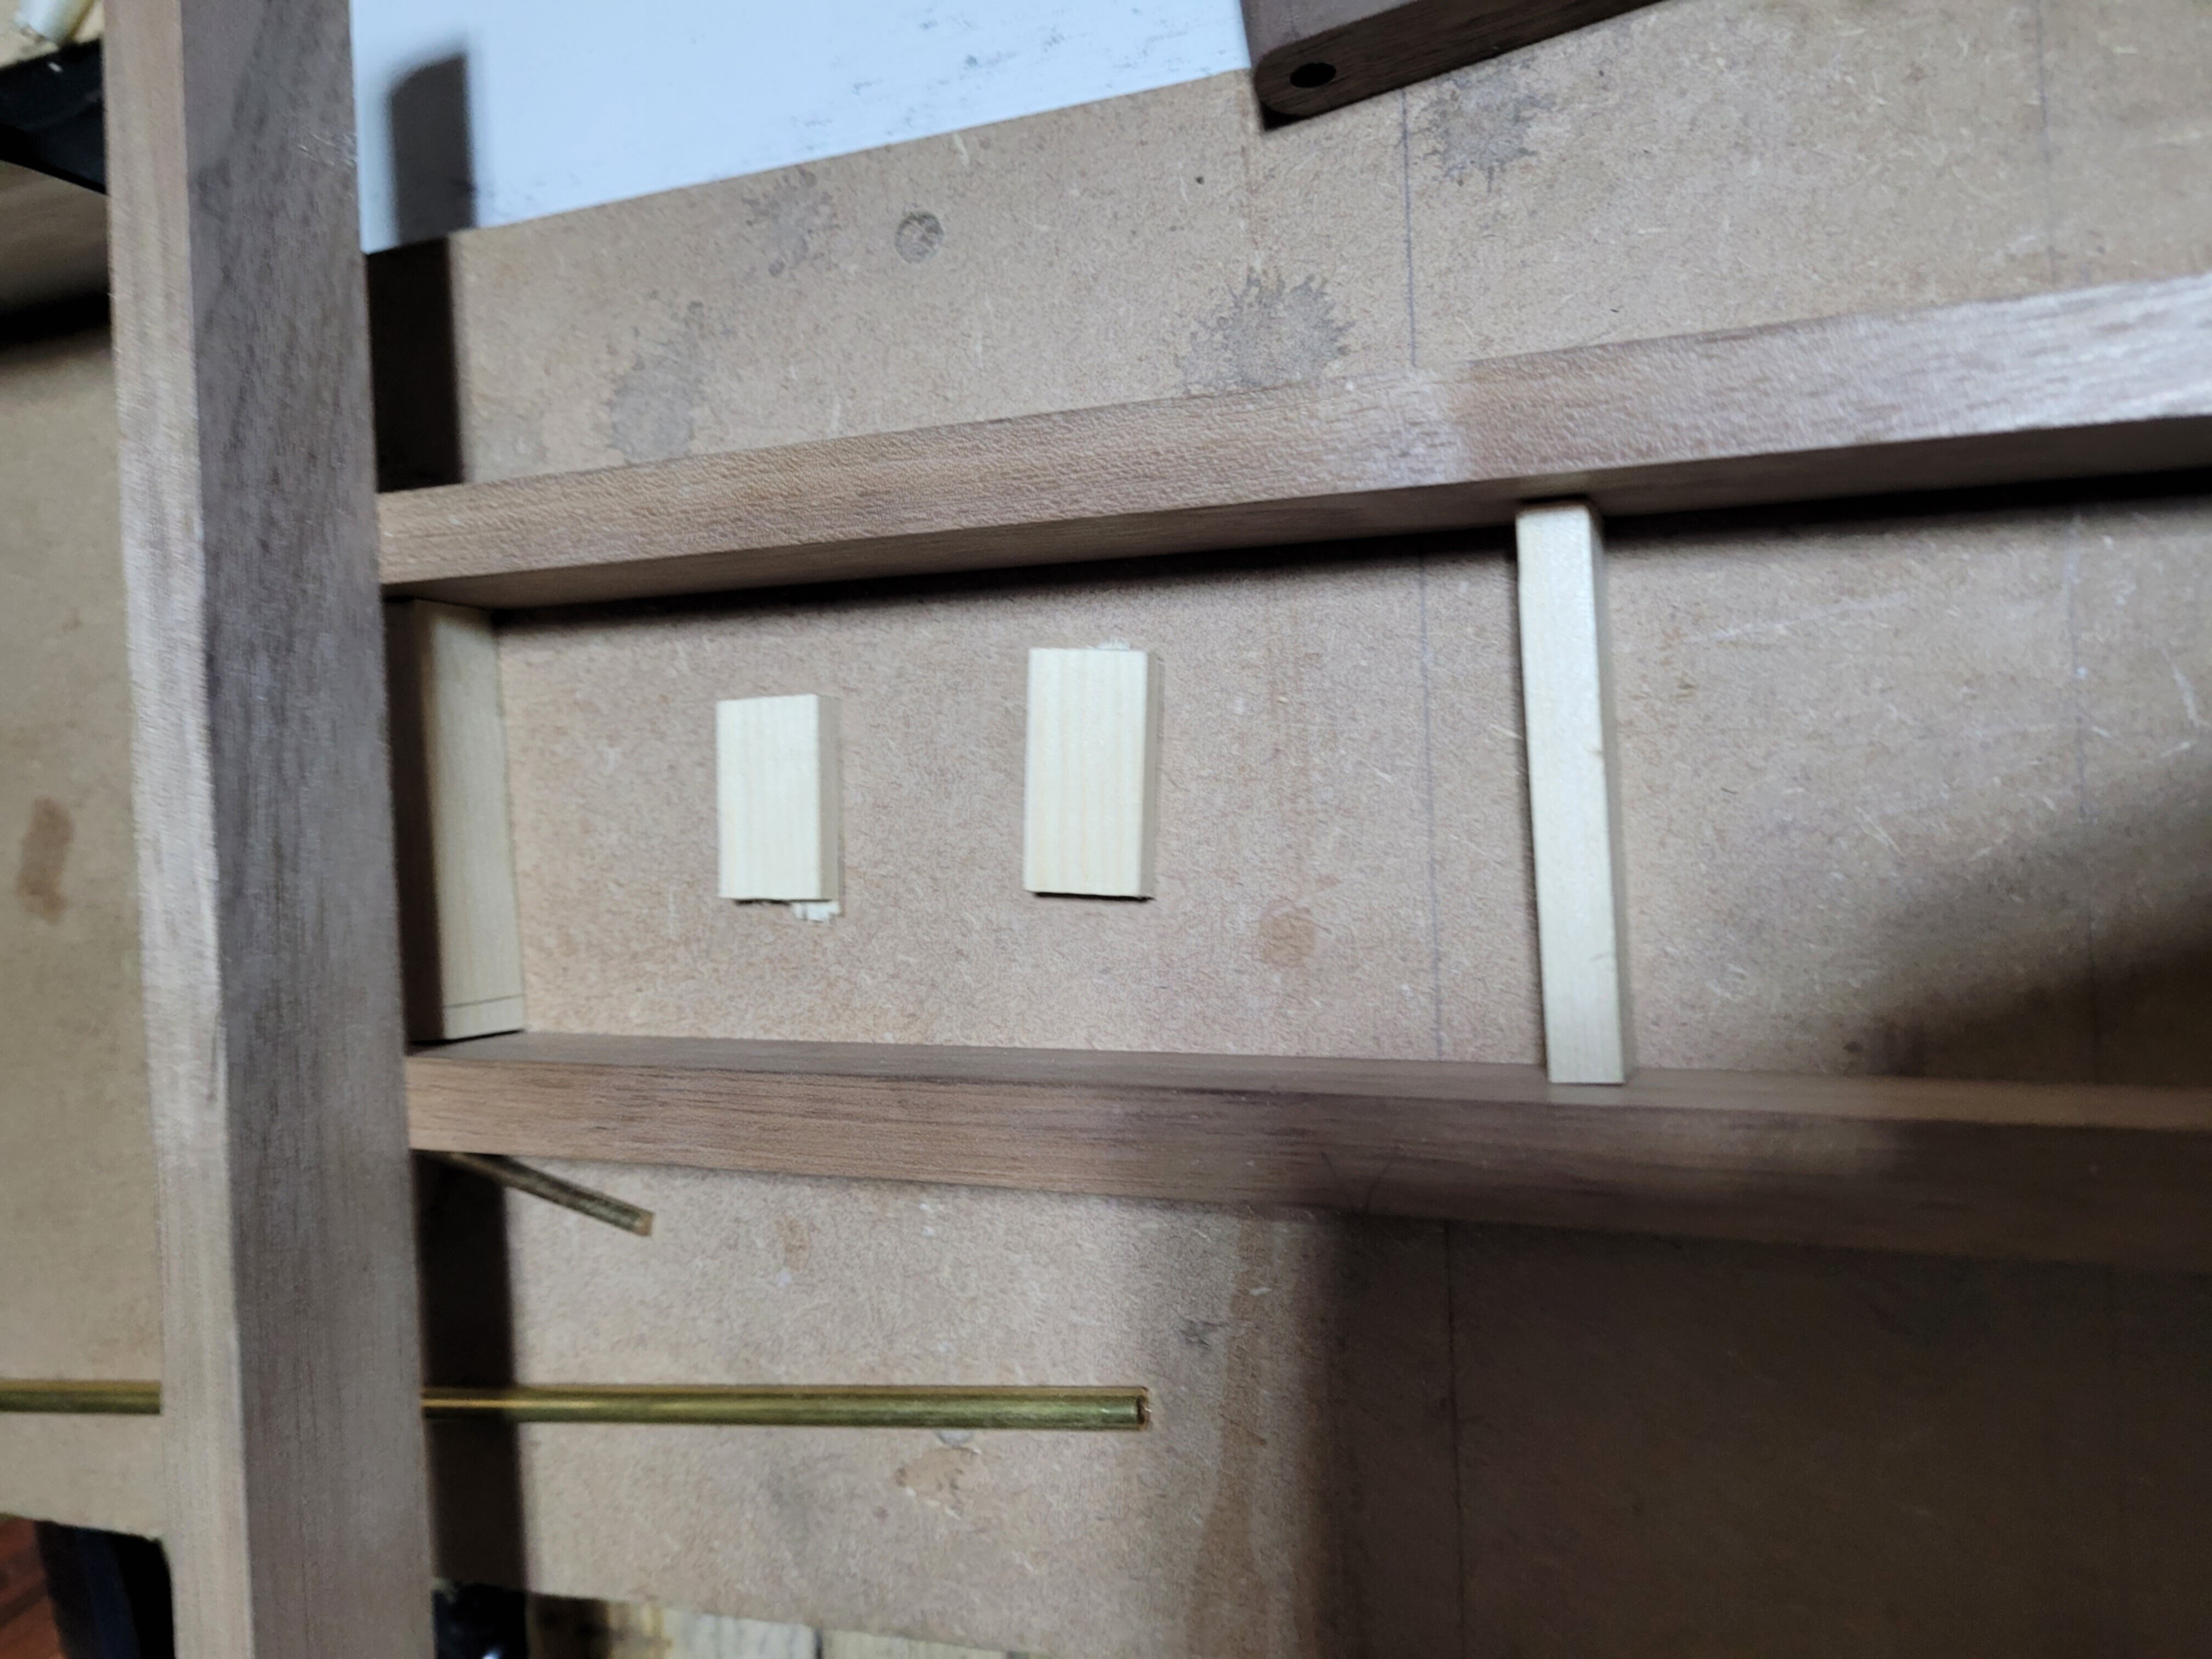
Made the final end pieces to size, and did a final size test.
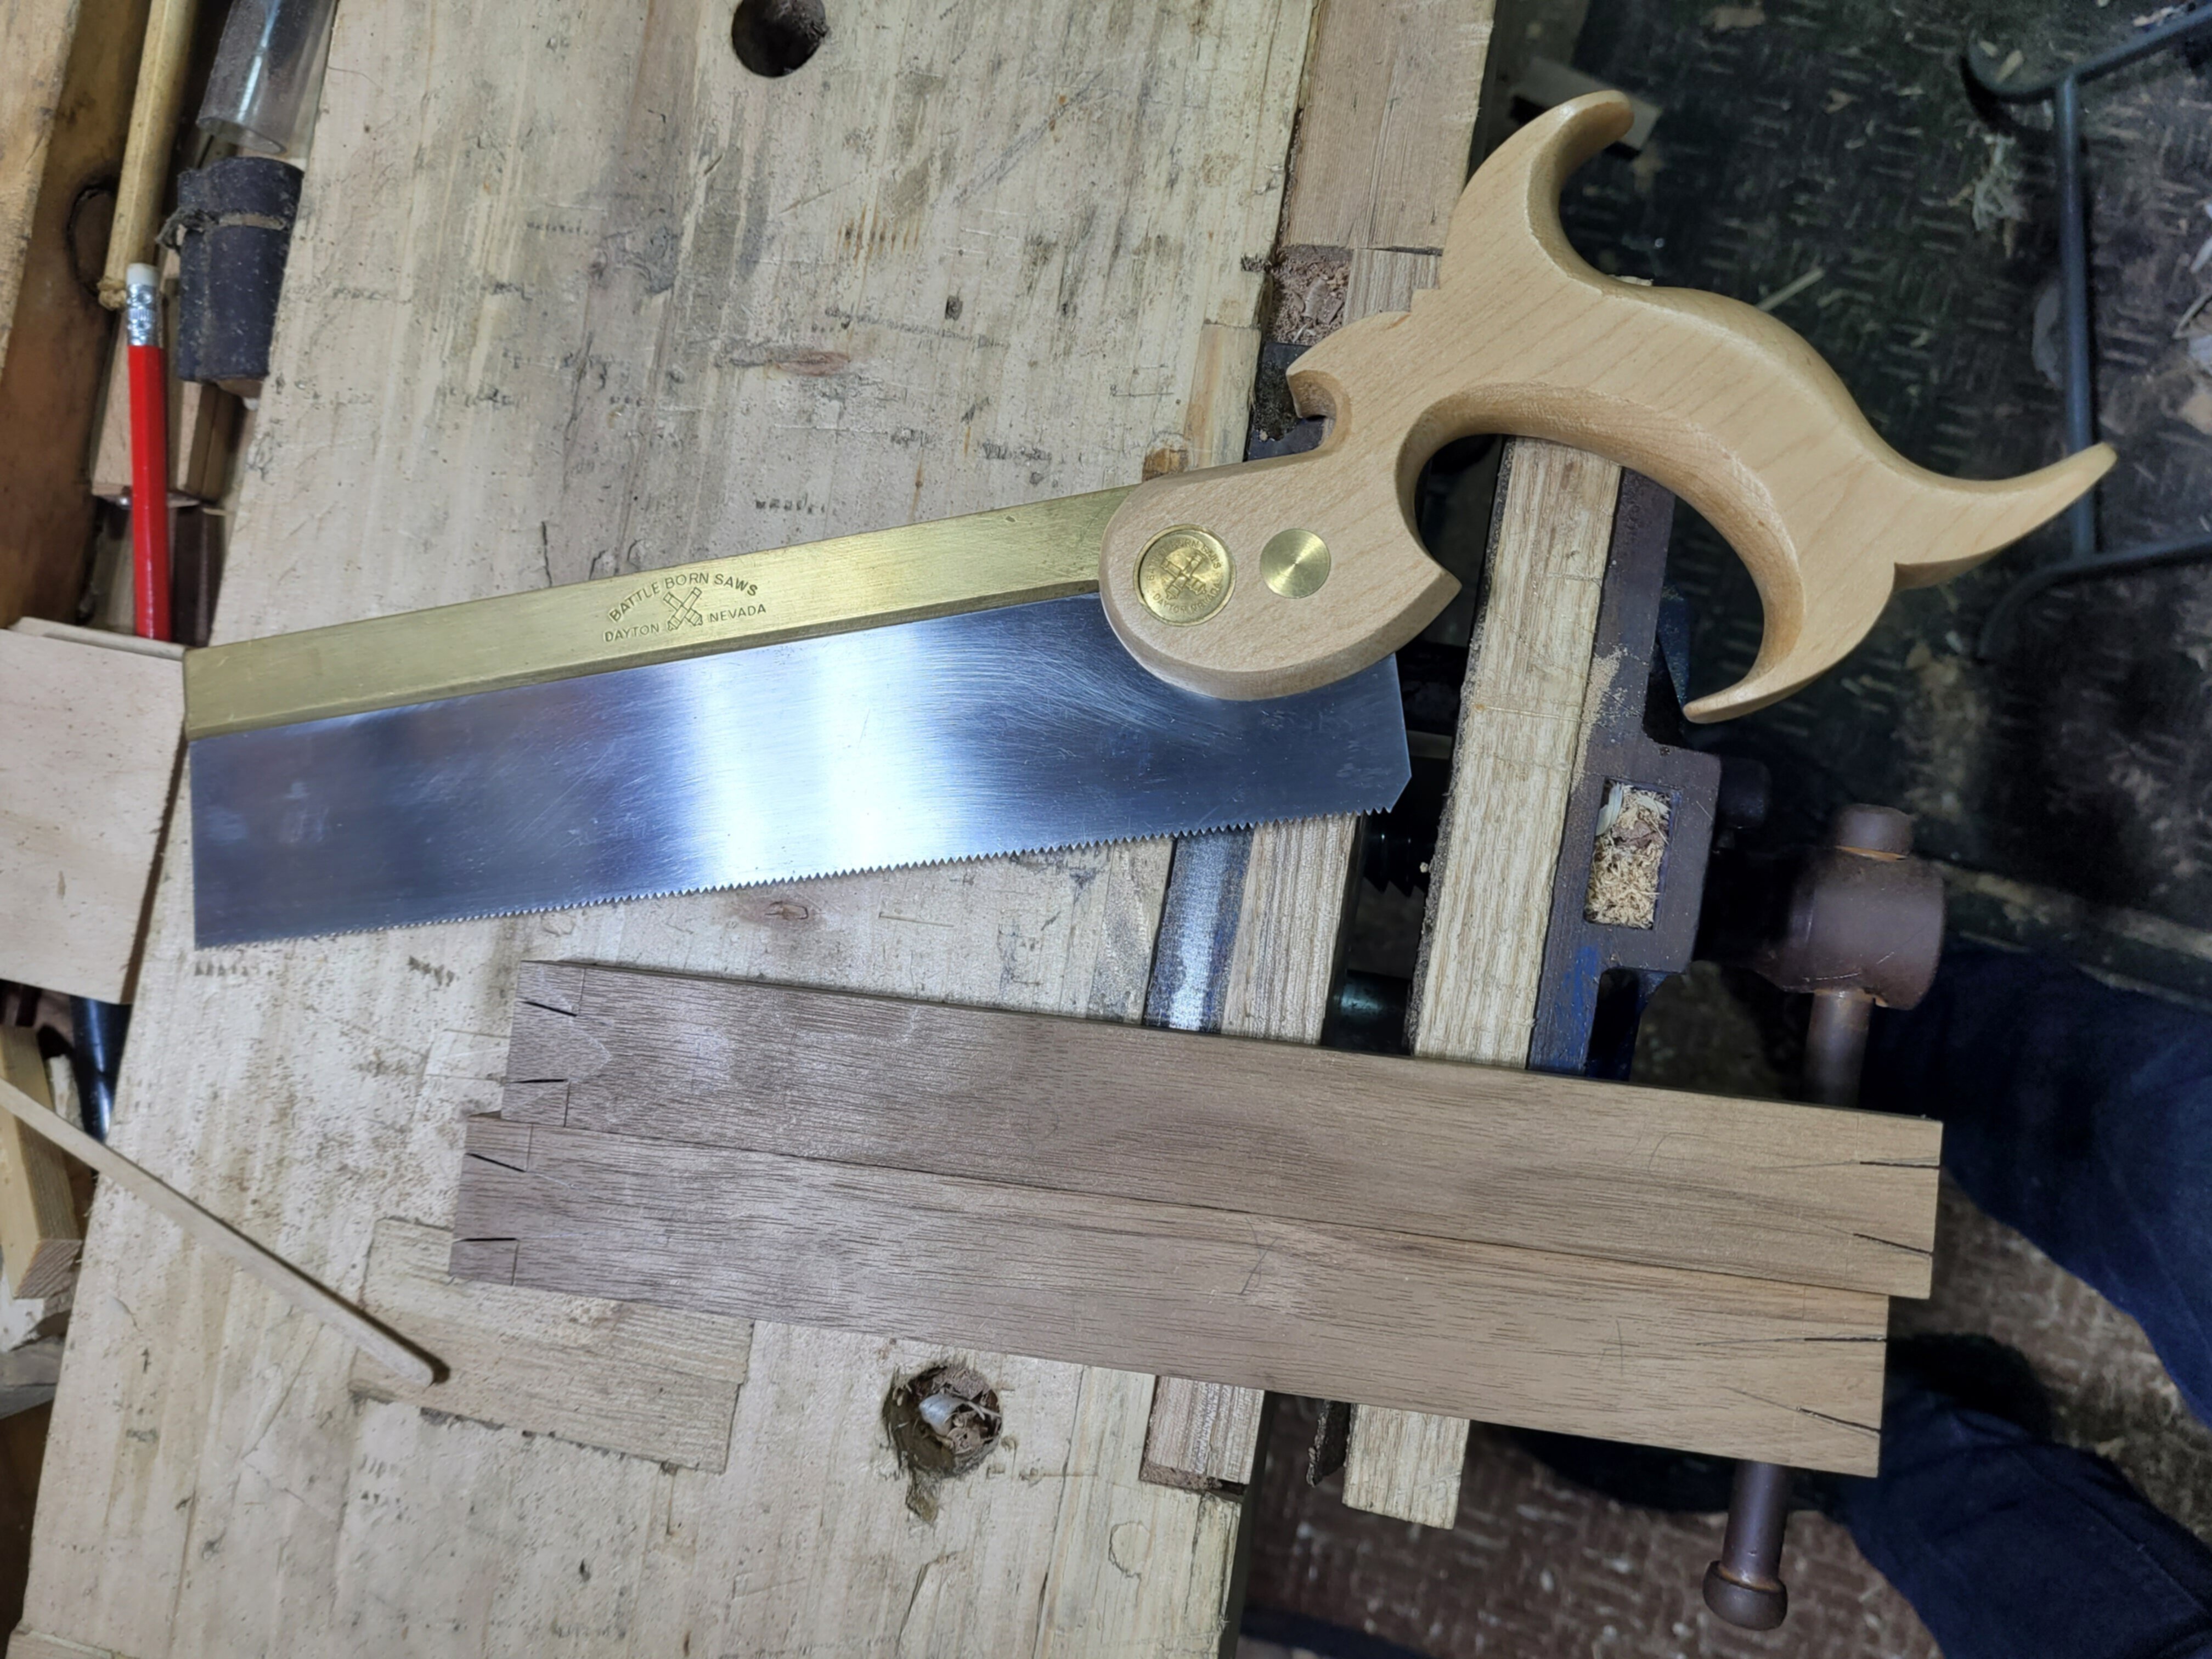
Time to dovetail it. This is the Battle Born Saw I was using in anger for the first time. You can see it tracks well in the cut.
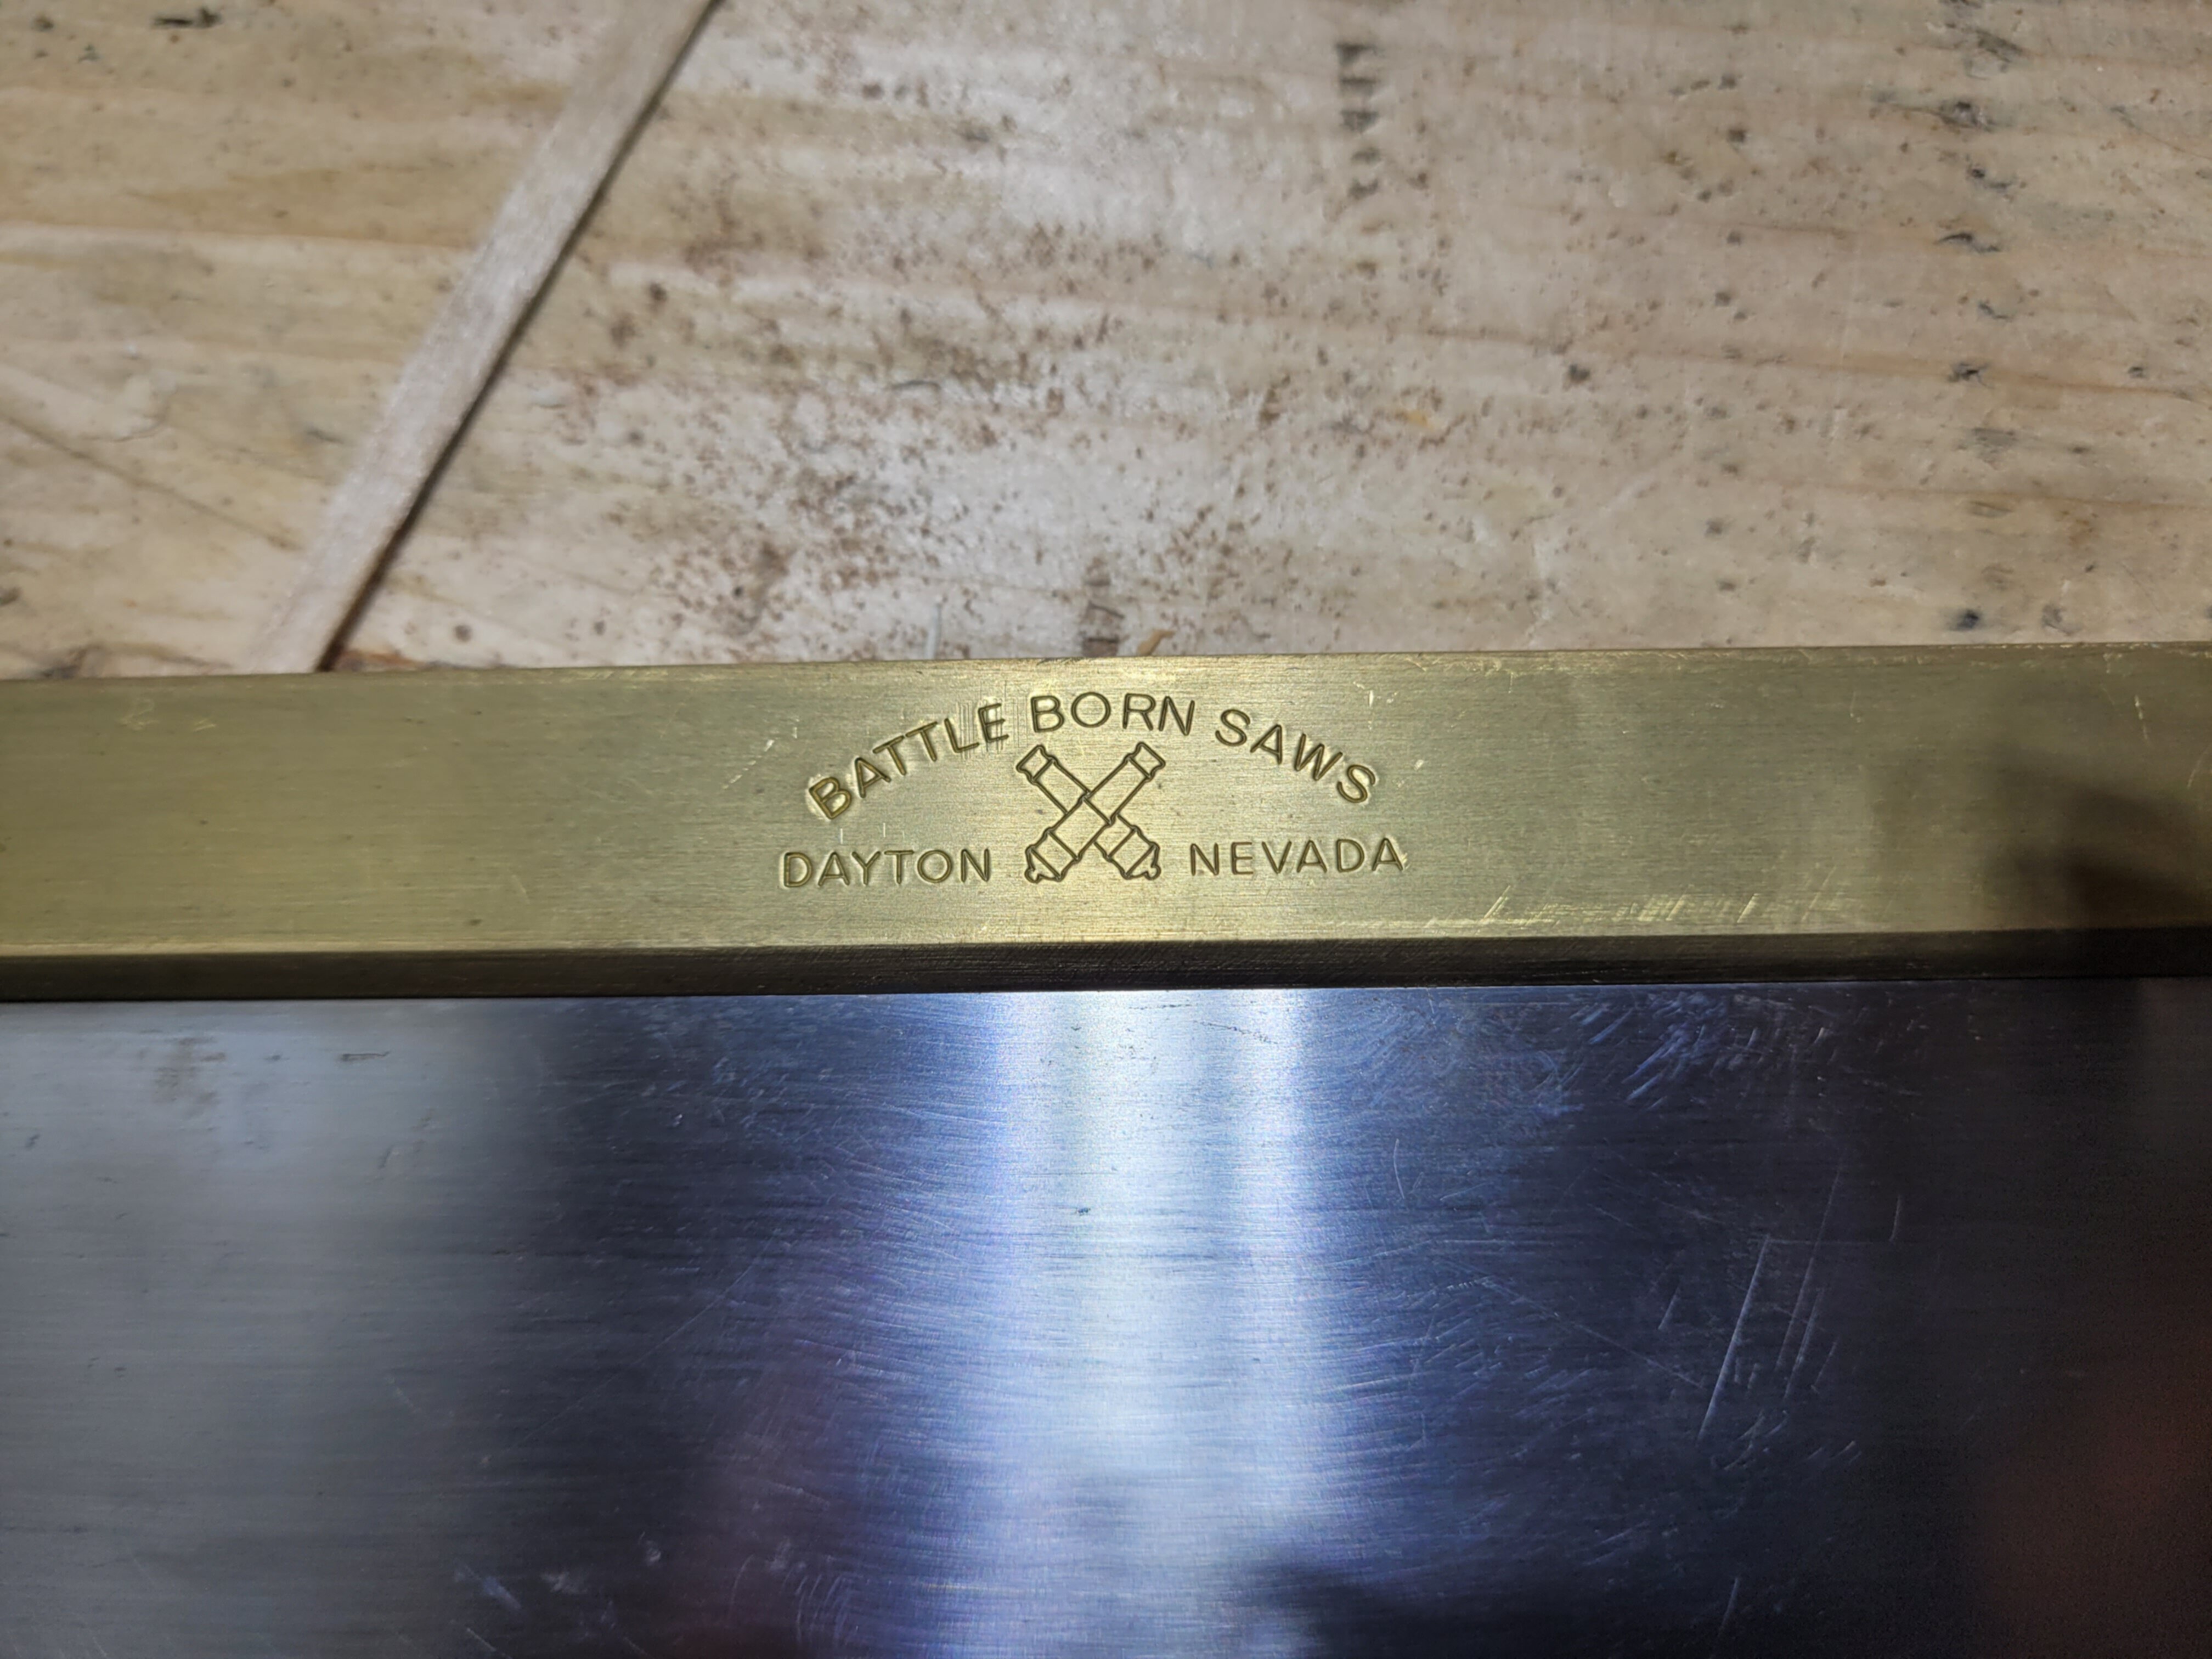
I like the crossed cannons logo
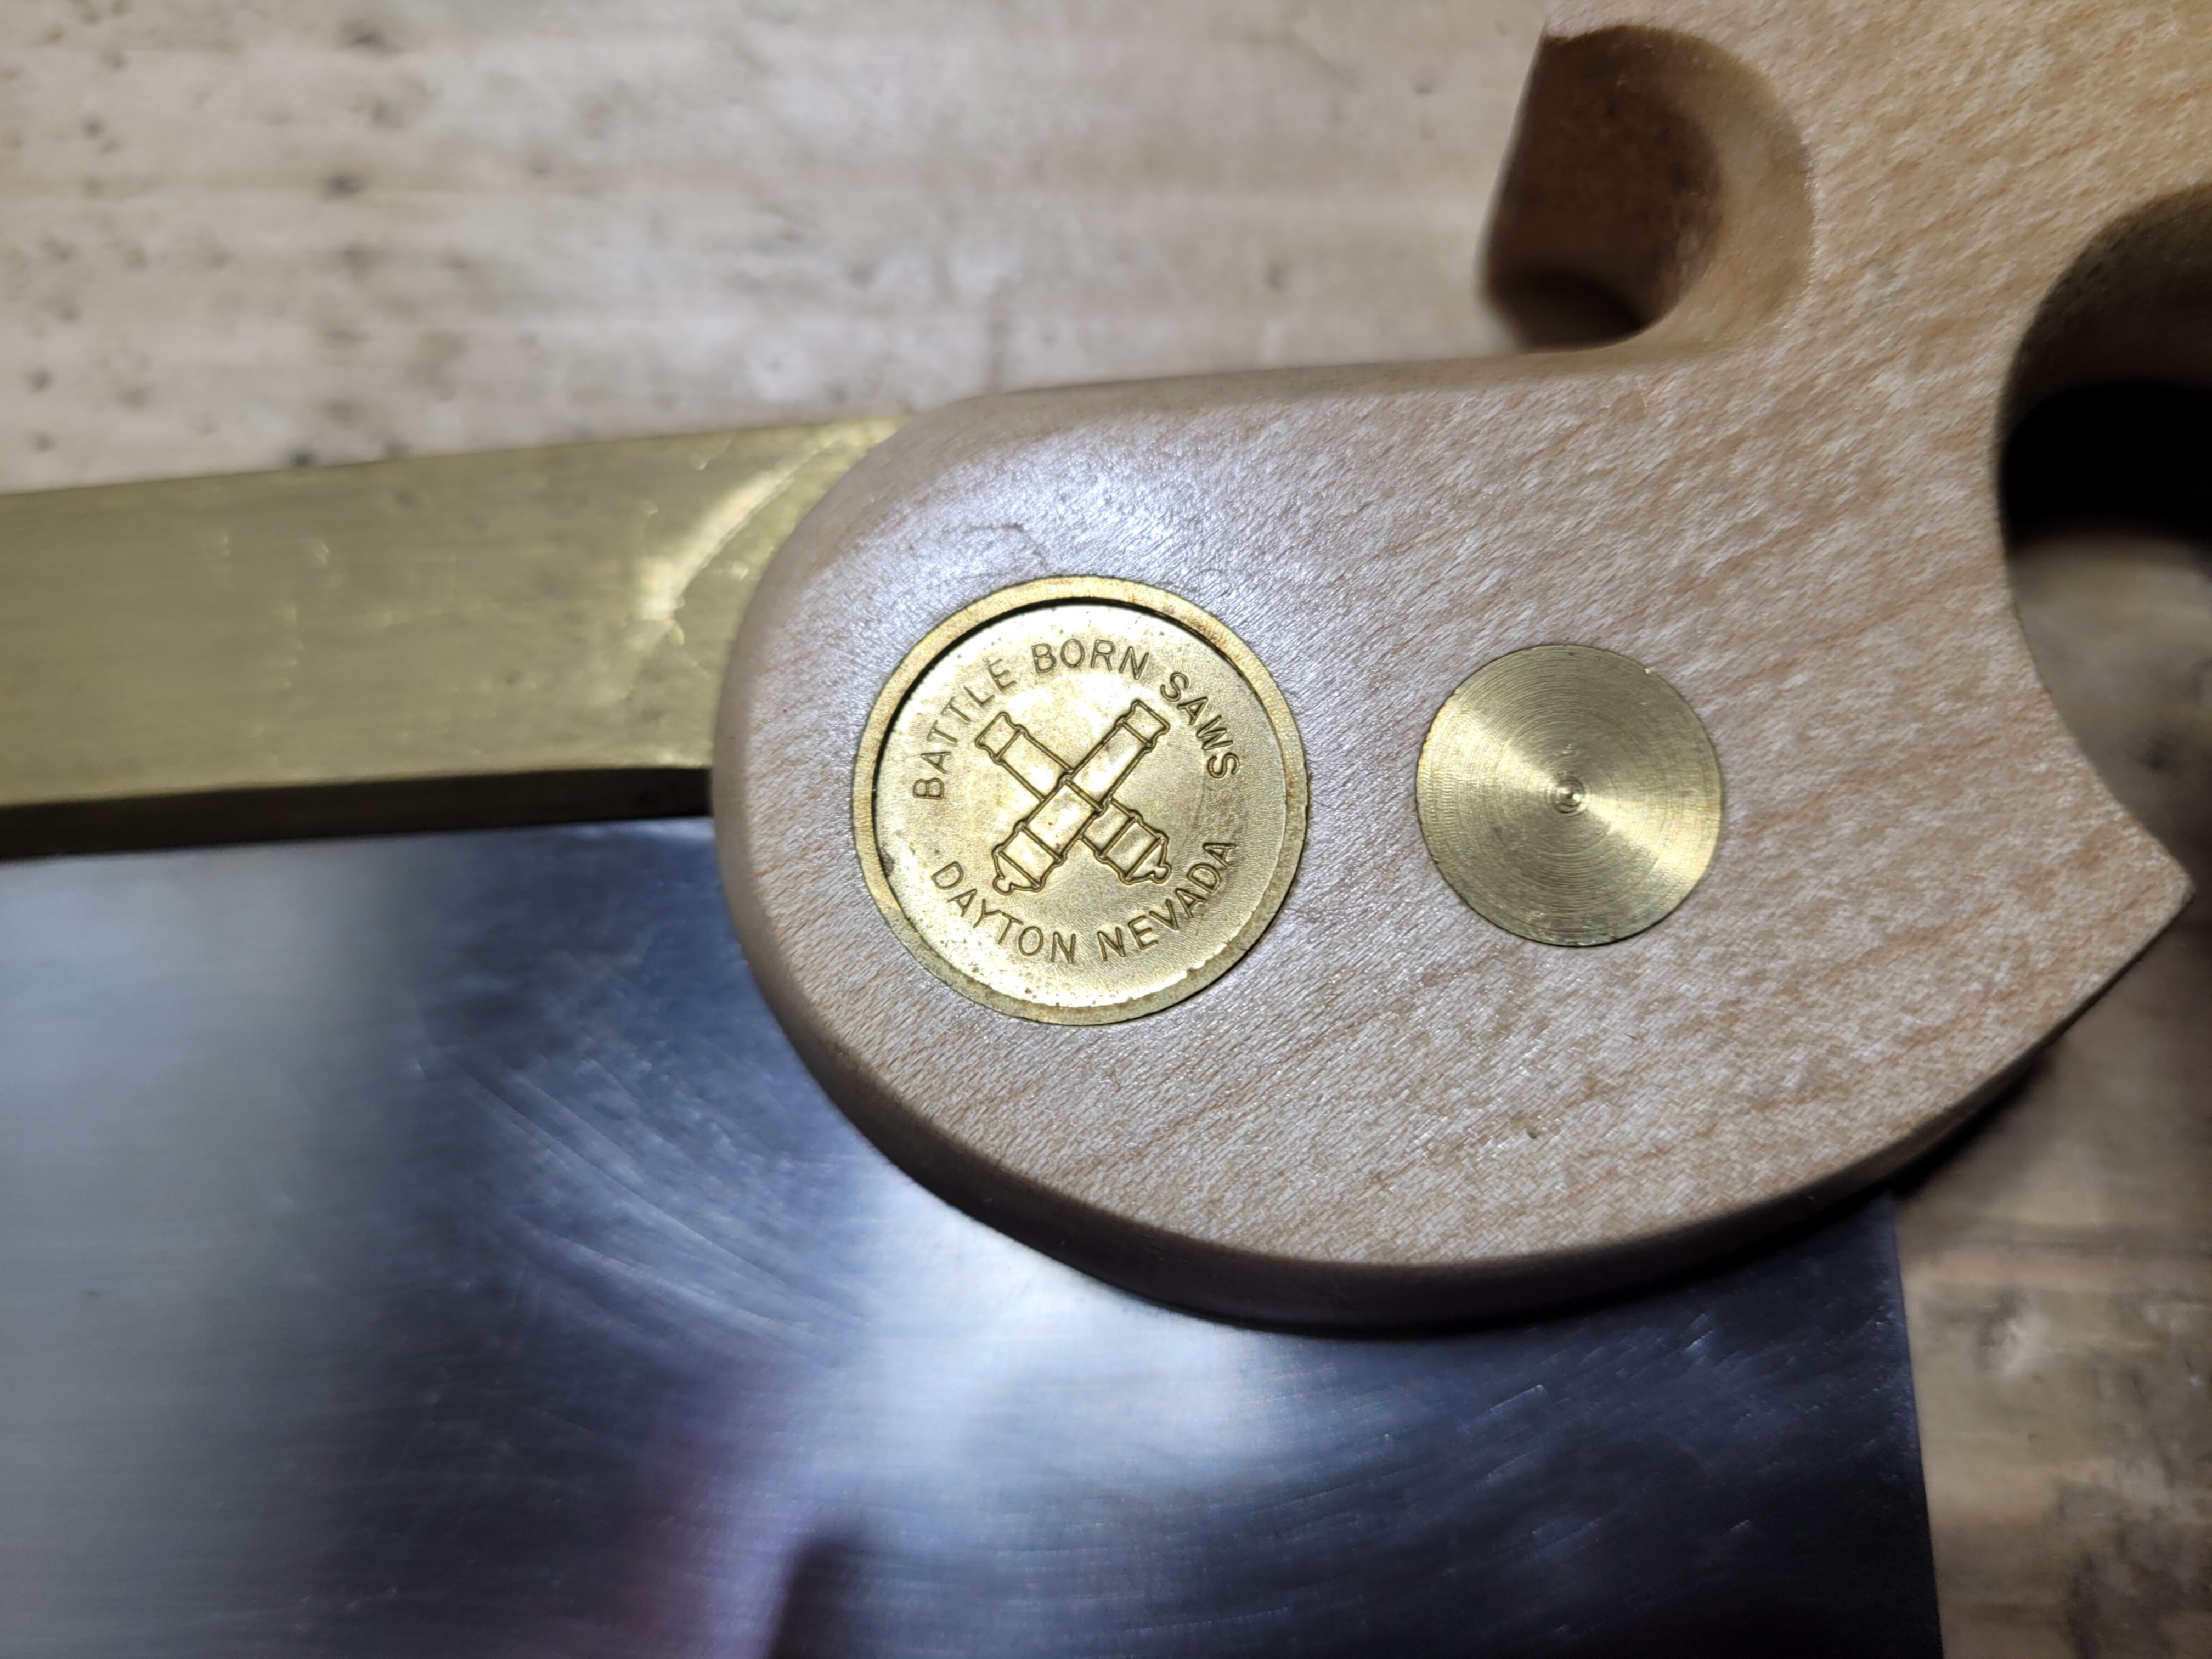
Which repeats on the medallion.
The cut leaves a lovely finish on the walnut
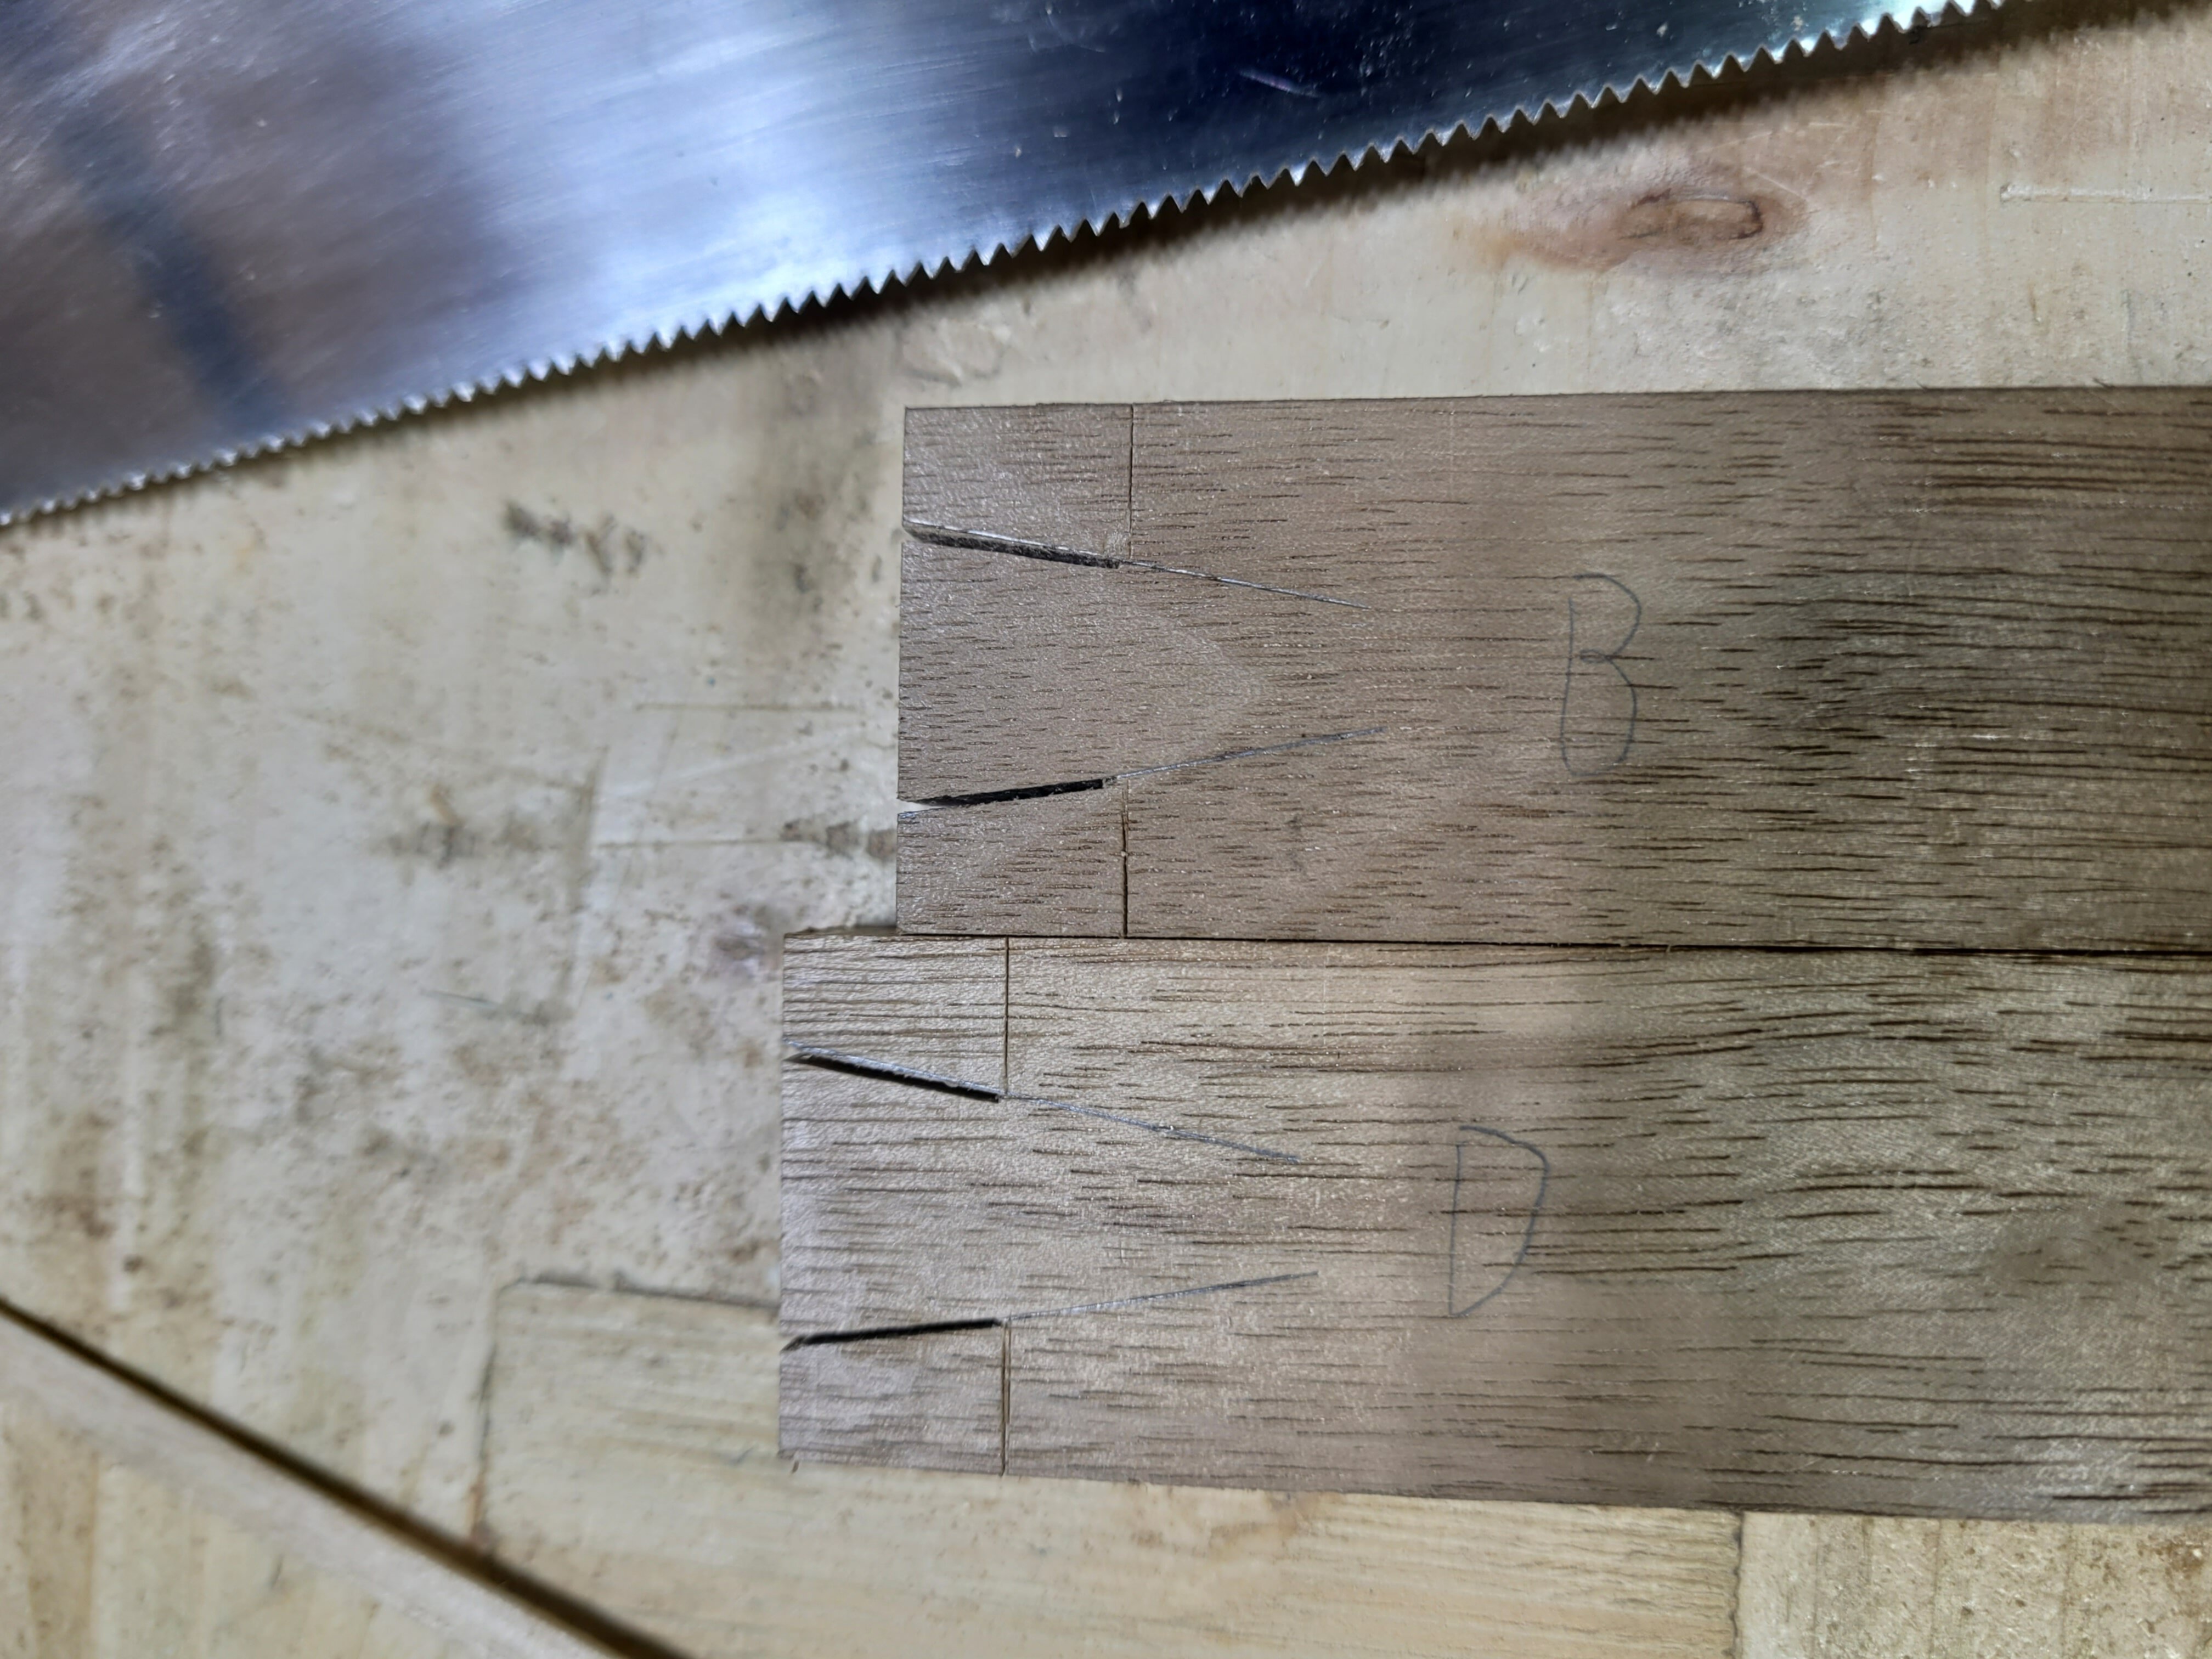
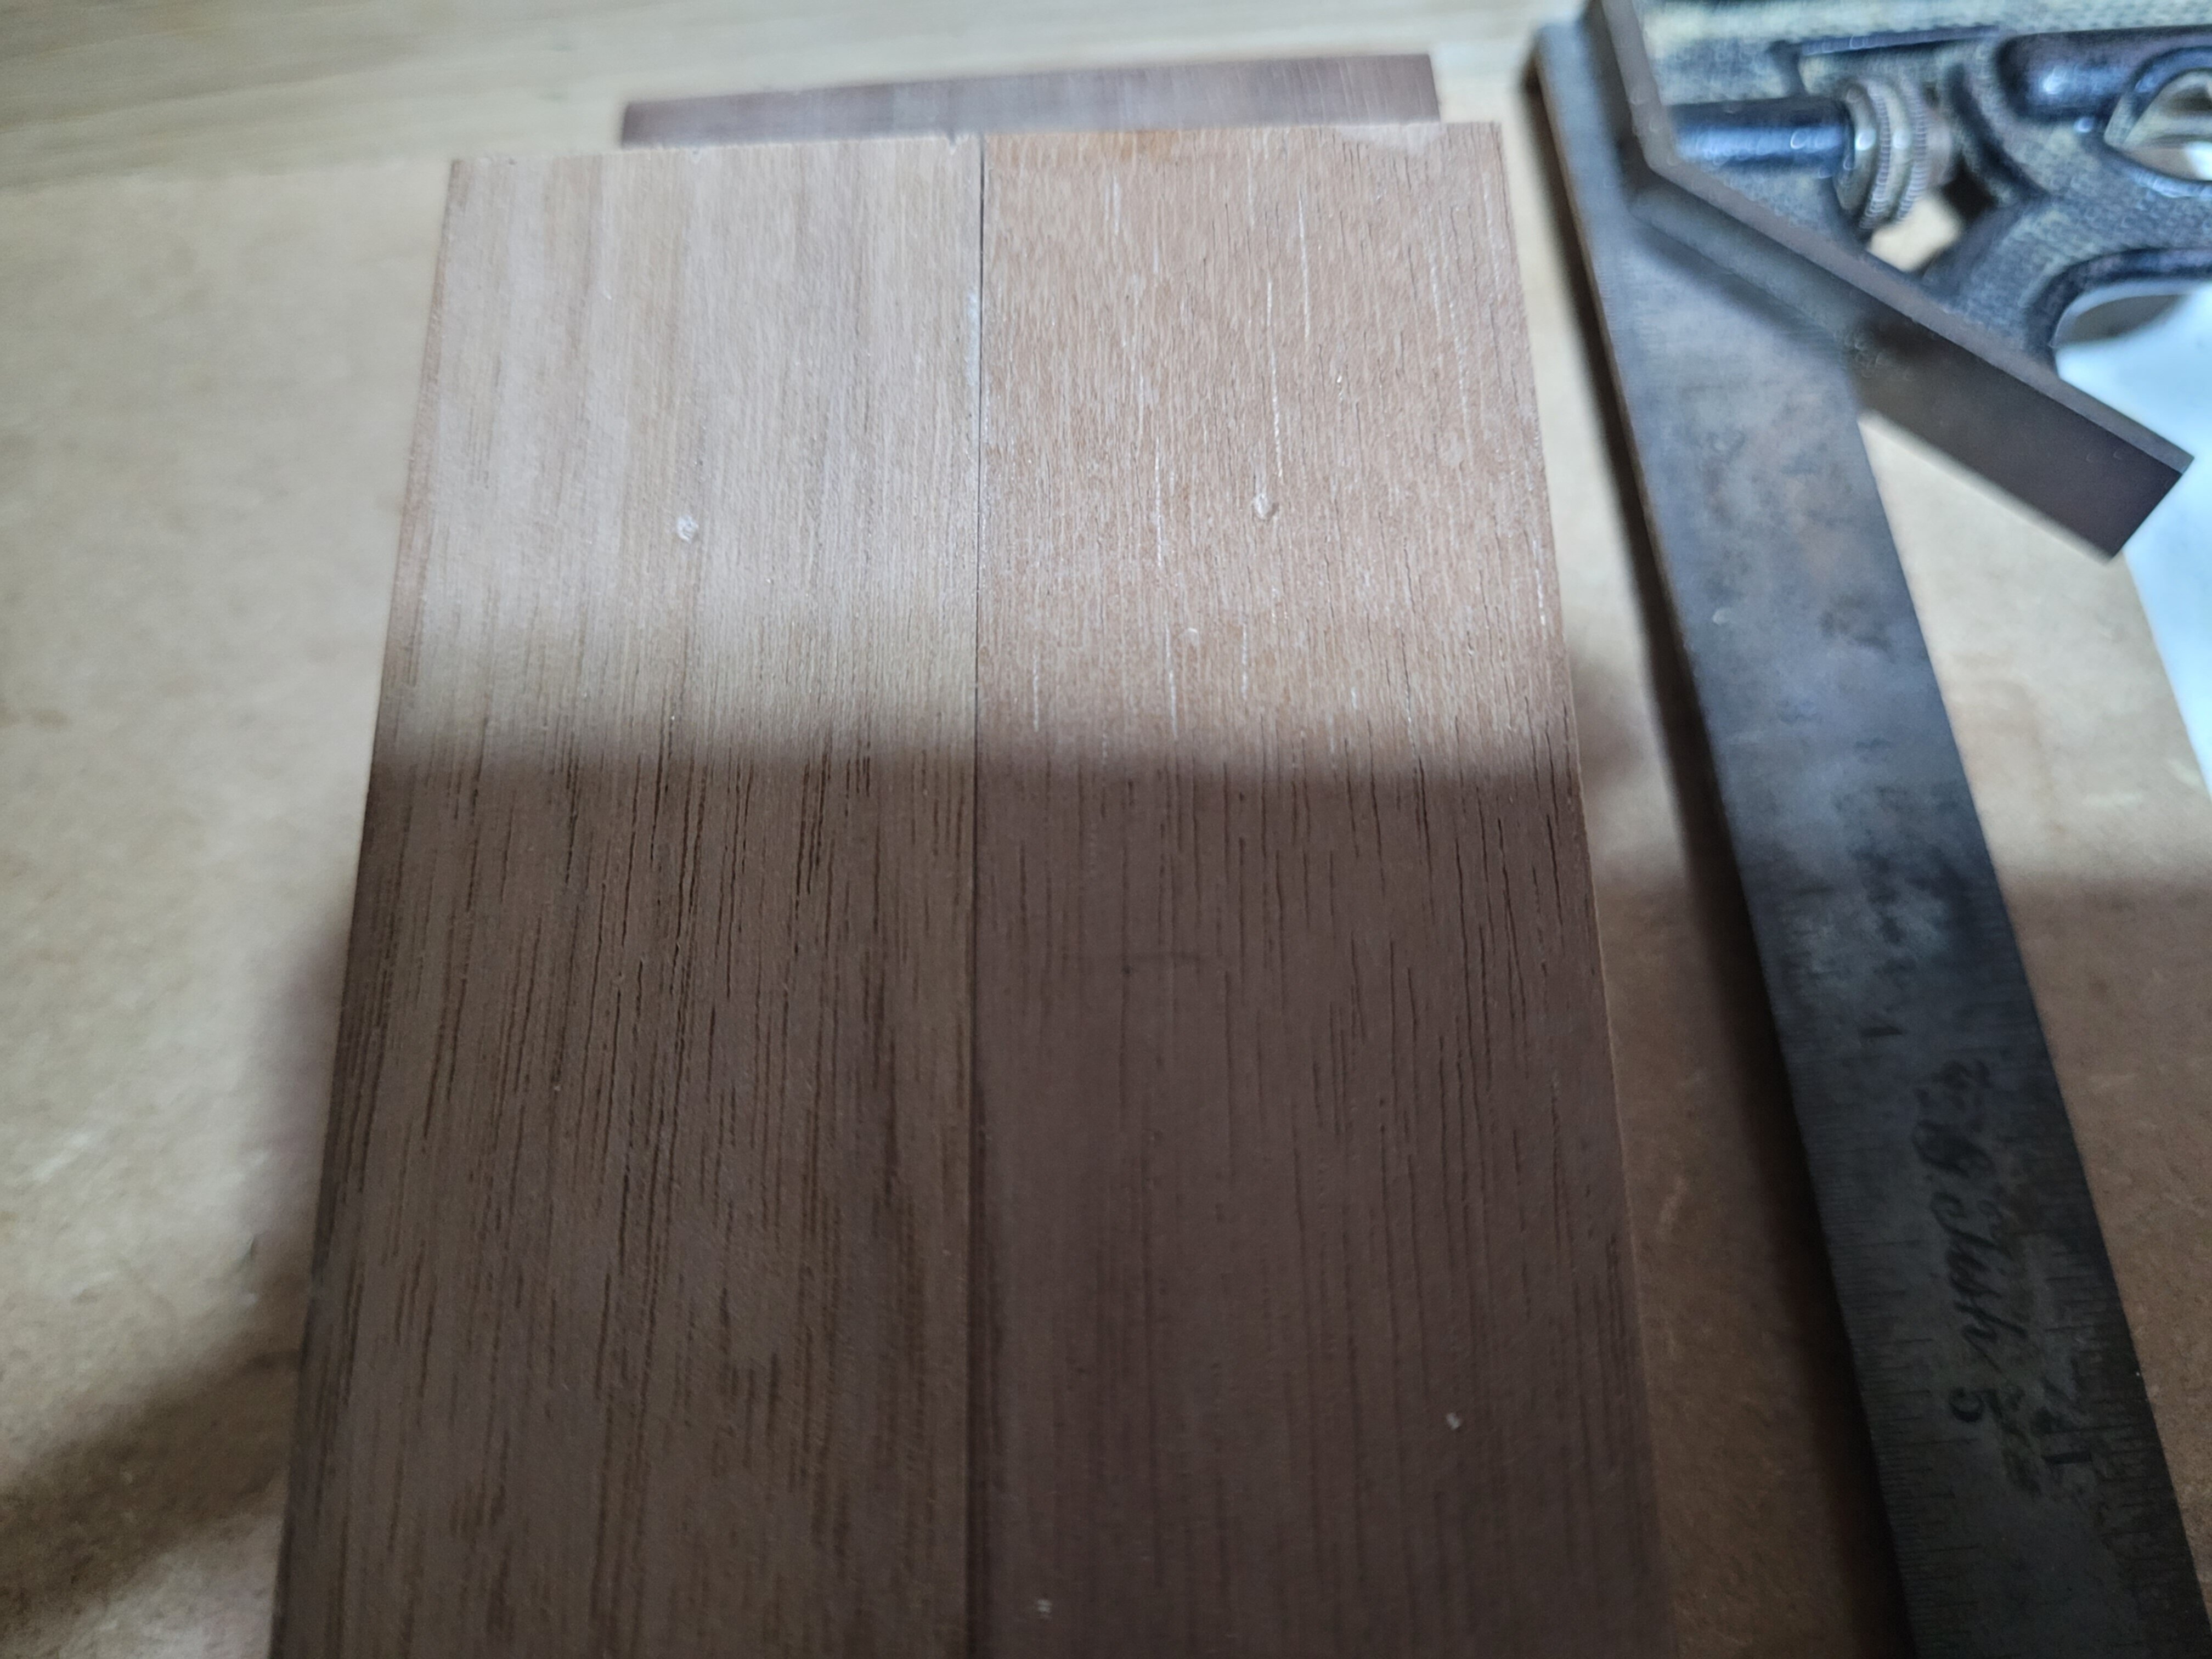
A close up of the tail cuts. That is about as good as I ever do.
Both the shoulder cuts were made with the B Square. Above one were I left a little to pare off, below one were I tried to make a single final cut. It does a good enough job that there is really no reason to leave a surface to pare.
Using the B Square to pare pin socket waste. This is how I like to hold it. When you have a good reference surface, and a nice deep knife line, this makes chopping the socket waste very easy.
Using the B Square as a saw guide. I recommend starting the cut before bringing the b square into play. Once you have established the kerf, you don’t risk knocking the saw off your line by accident.
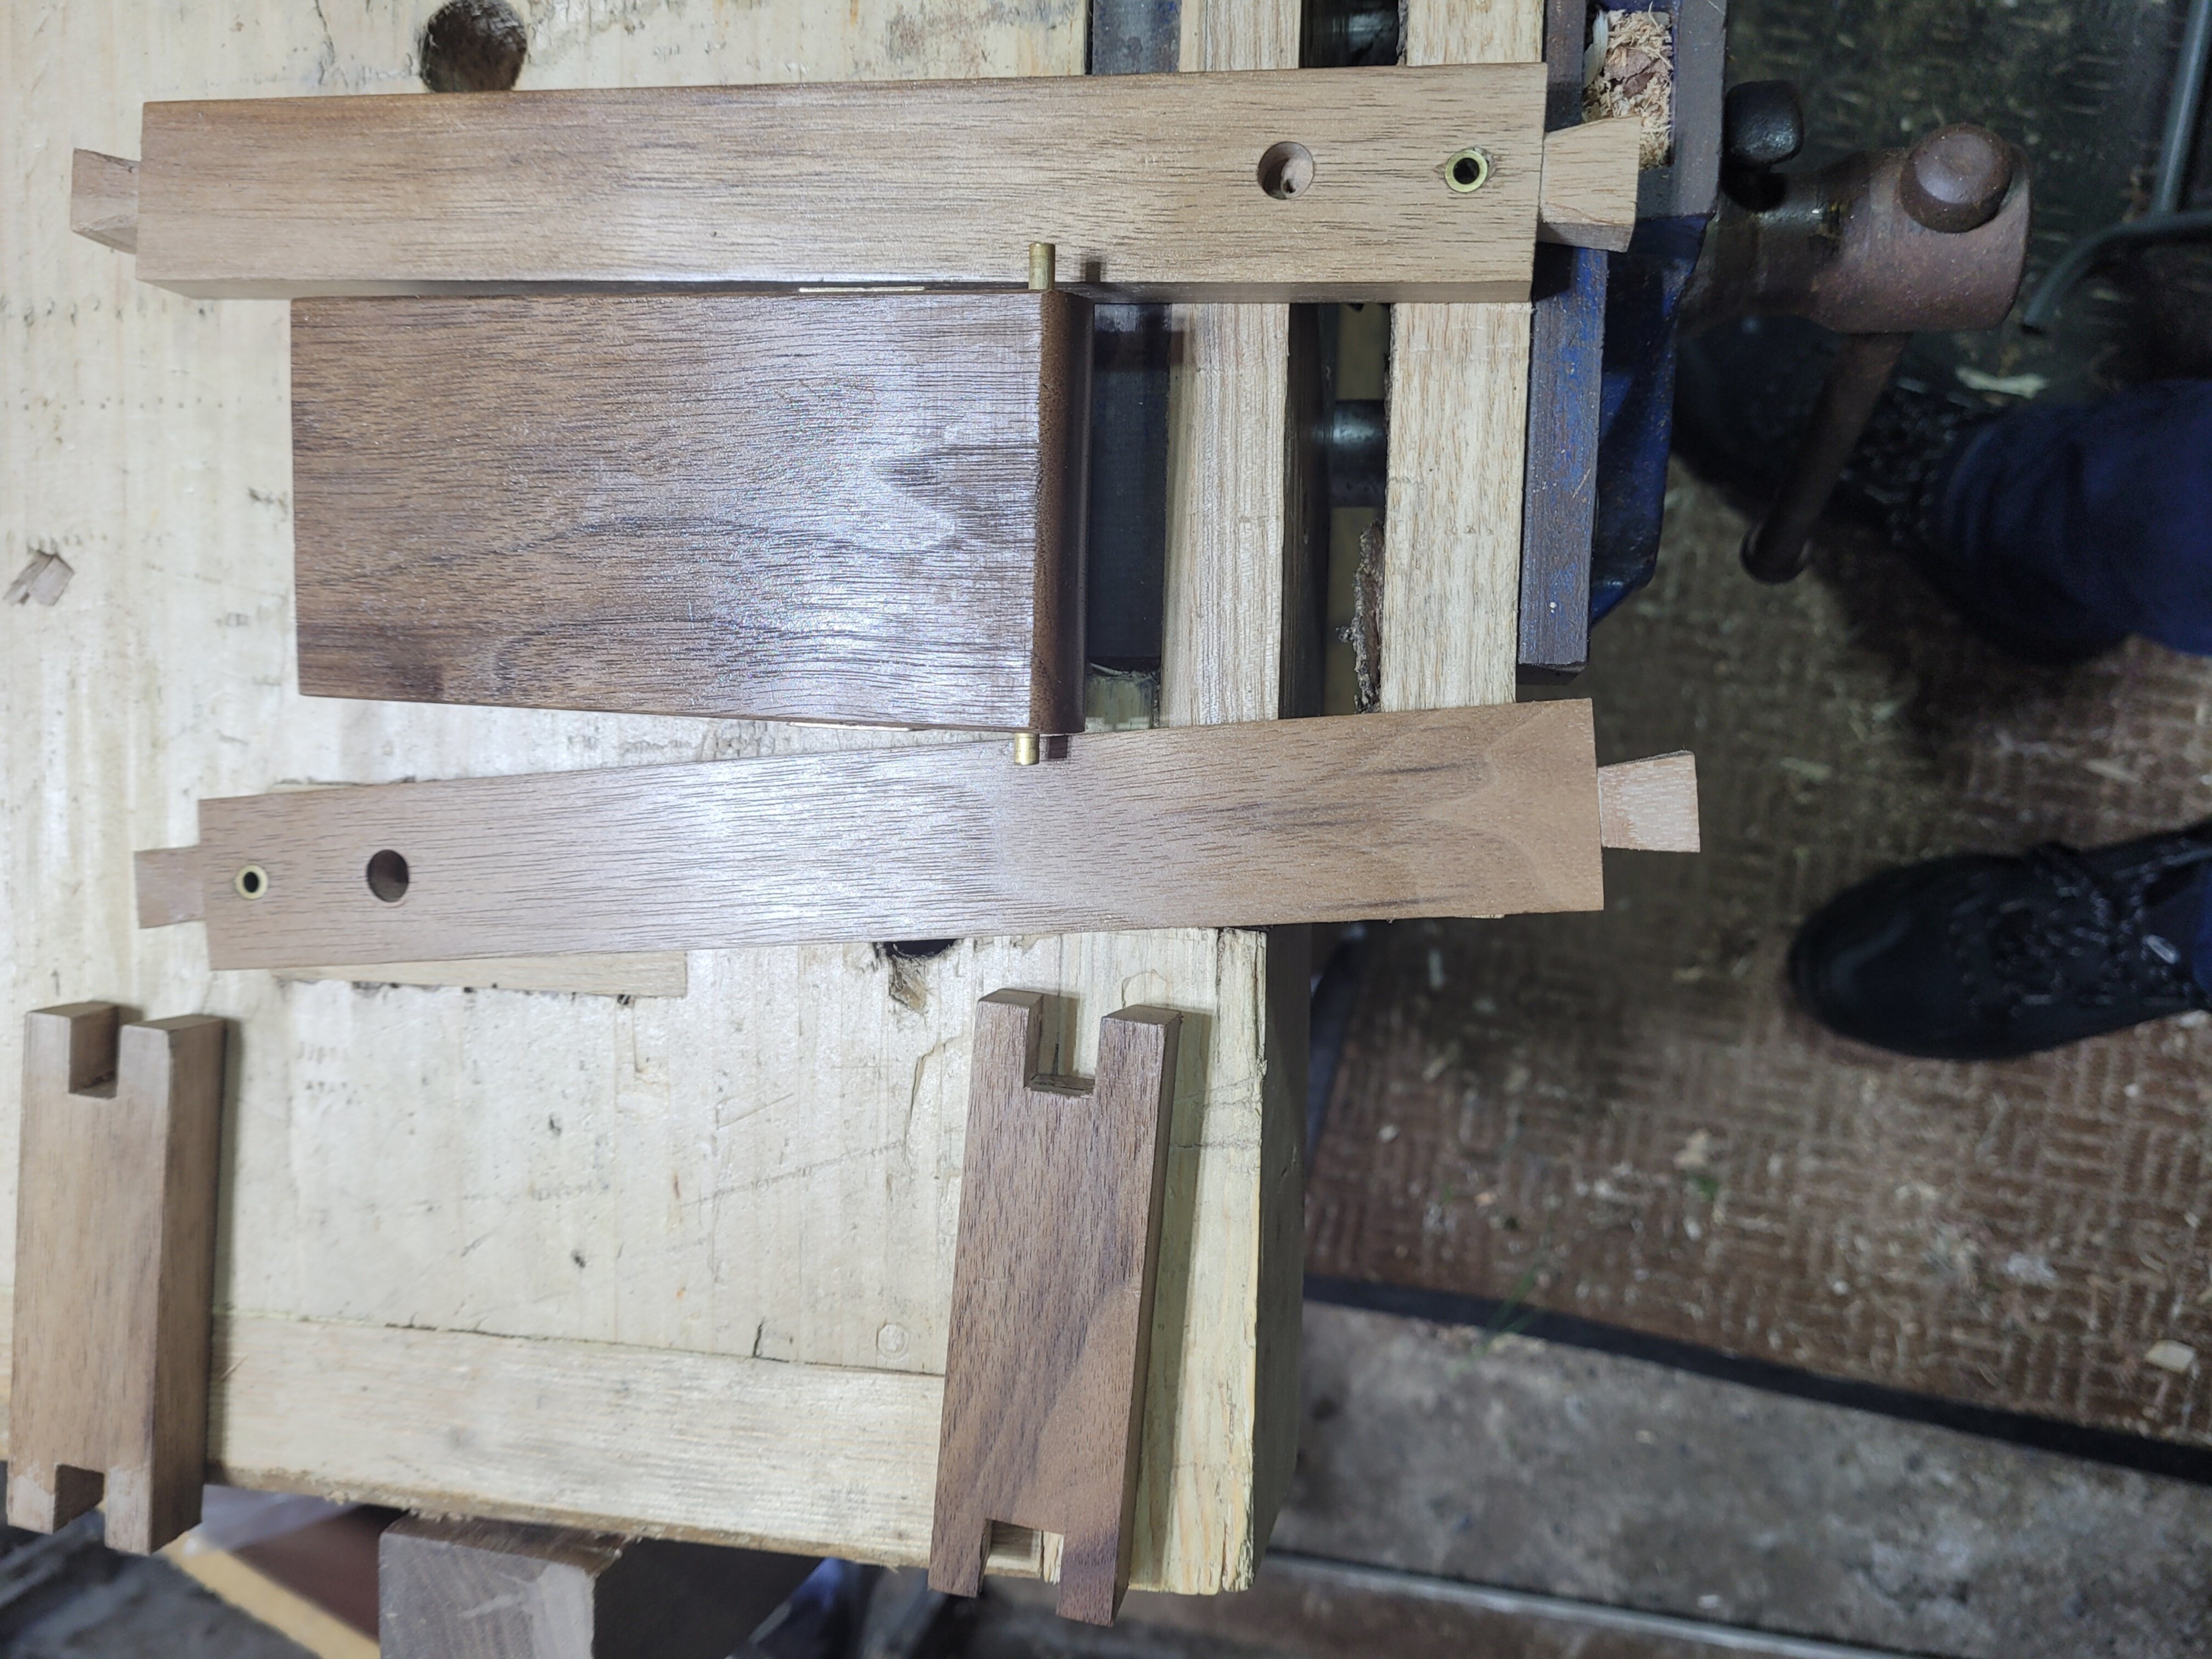
The parts ready for assembly. I pre-finished the body and the inside faces of the long sides, as once assembled, these will be hard to reach. Worth mentioning that during testing I noticed some fibres beginning to tear out on the underside where the ball catch hit. I added a steep 1mm bevel to the underside and that seemed to take care of it.
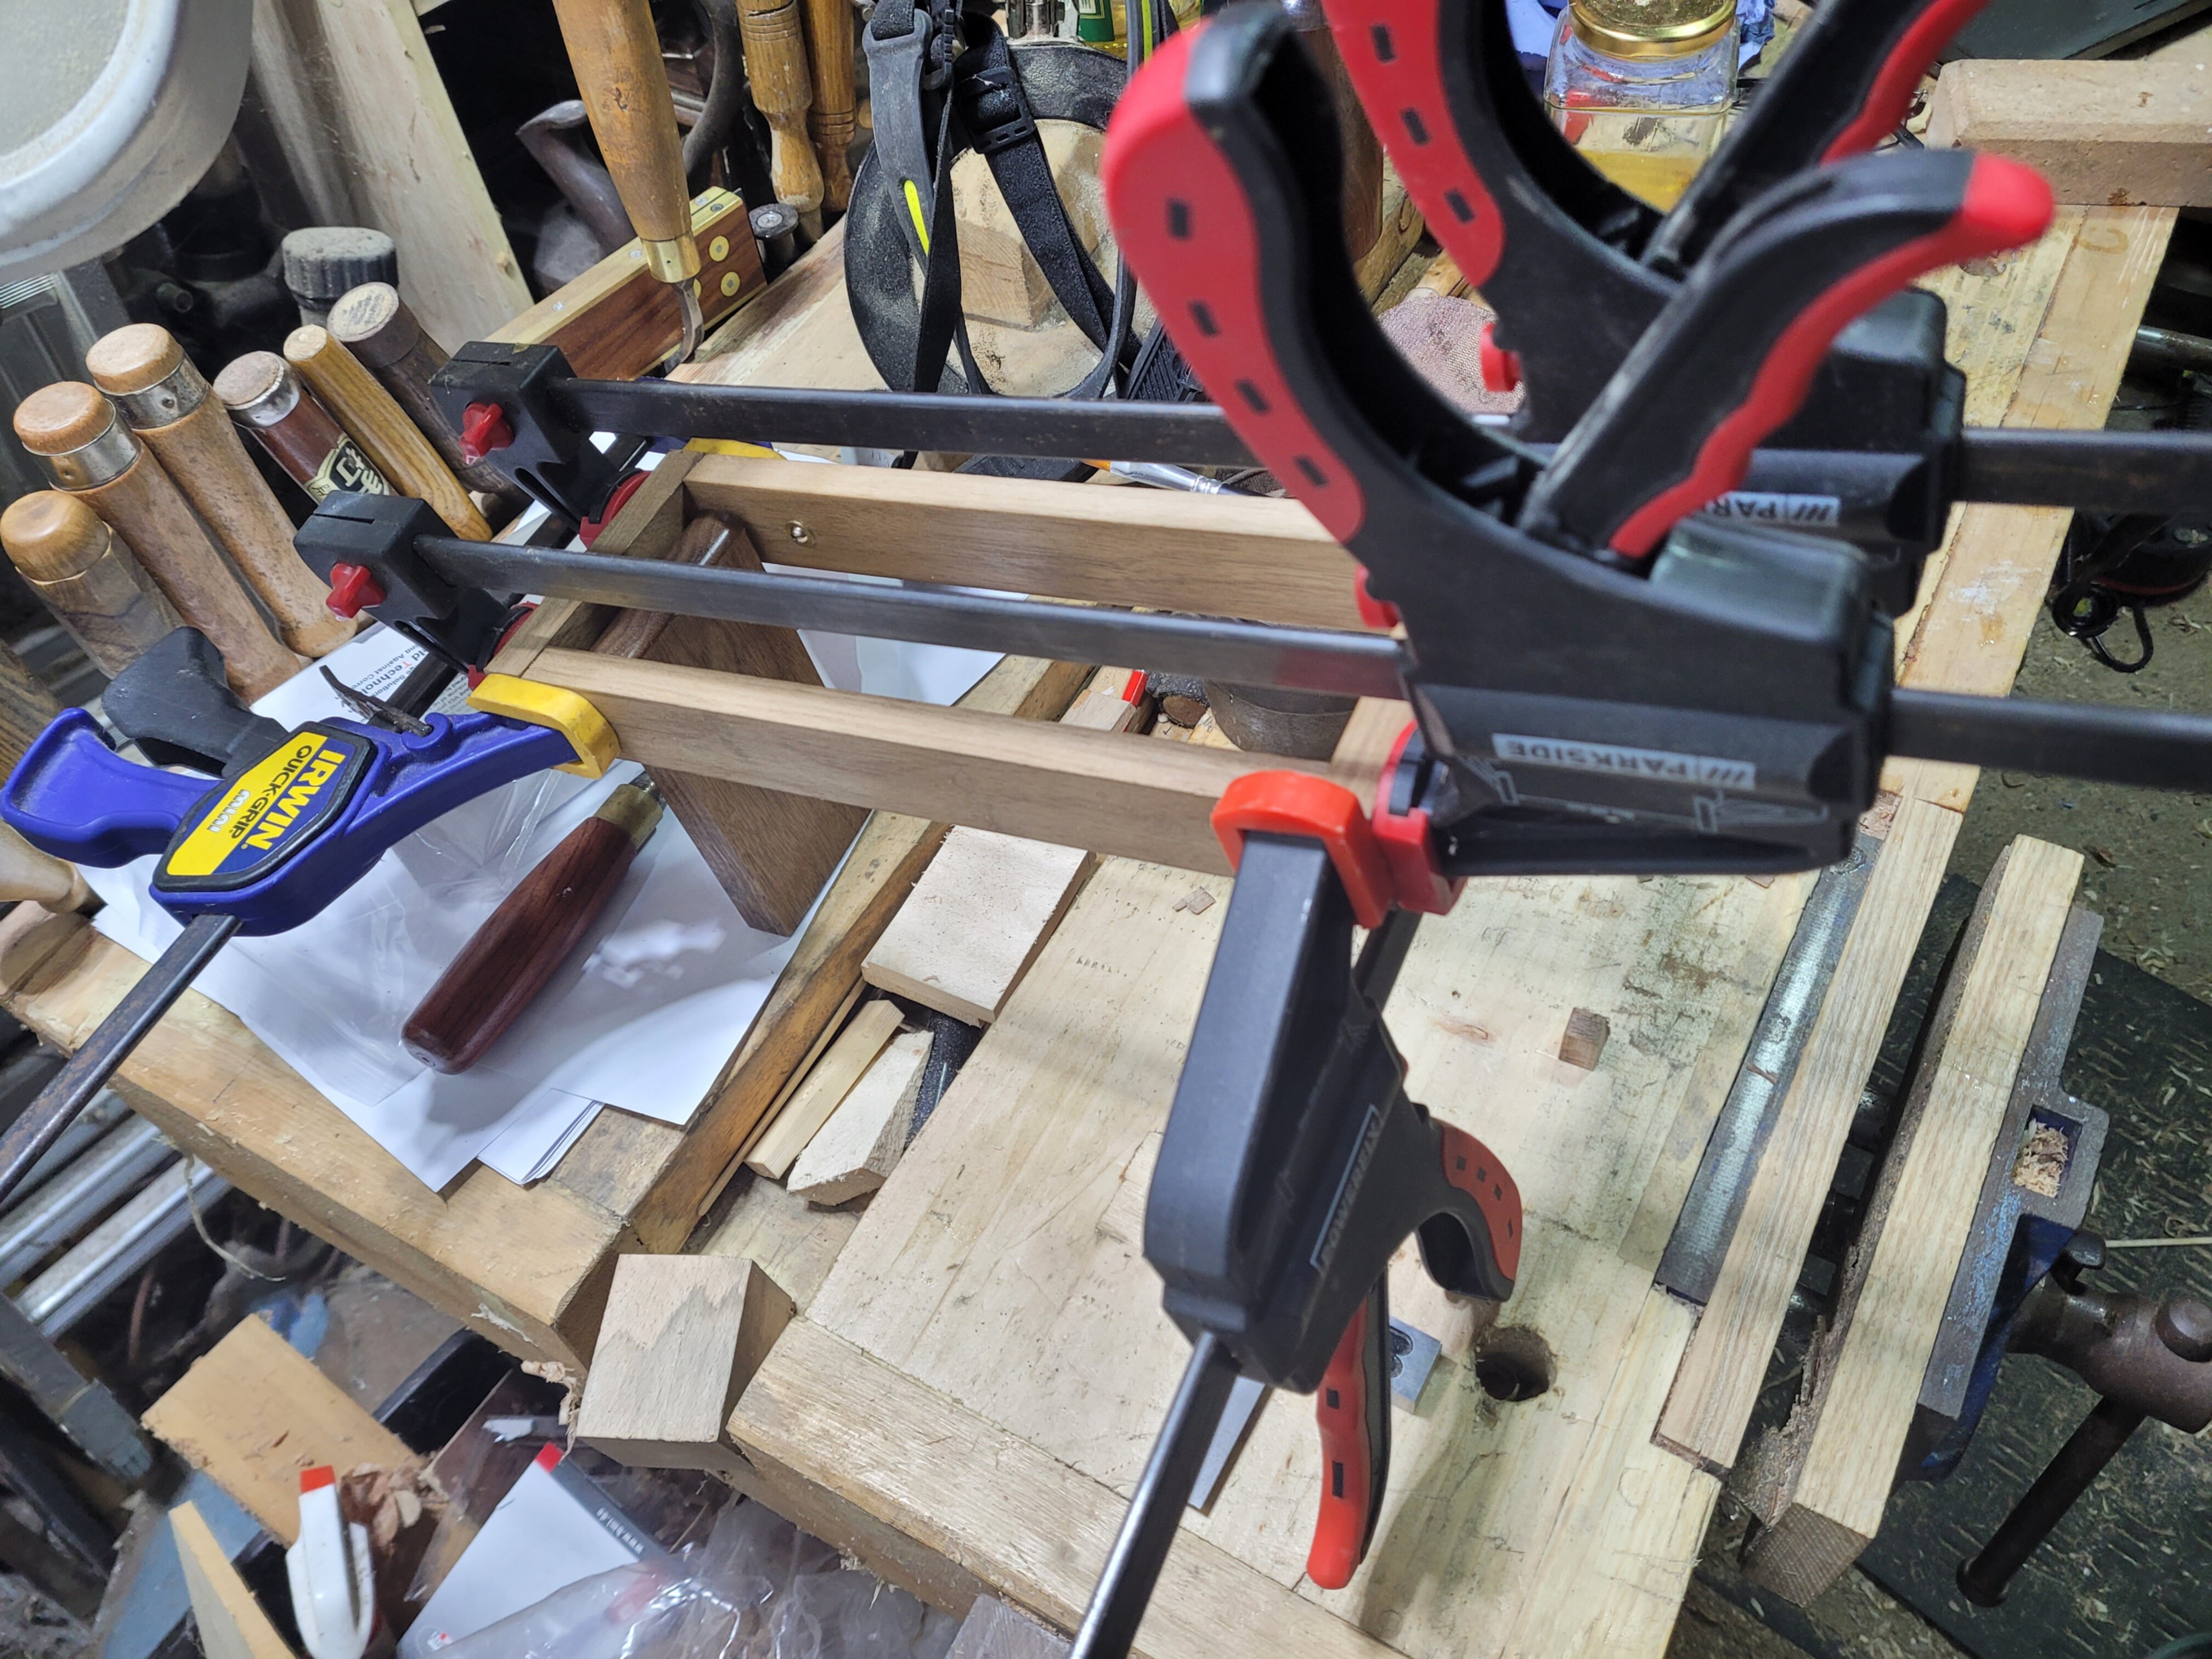
Glue up in progress.
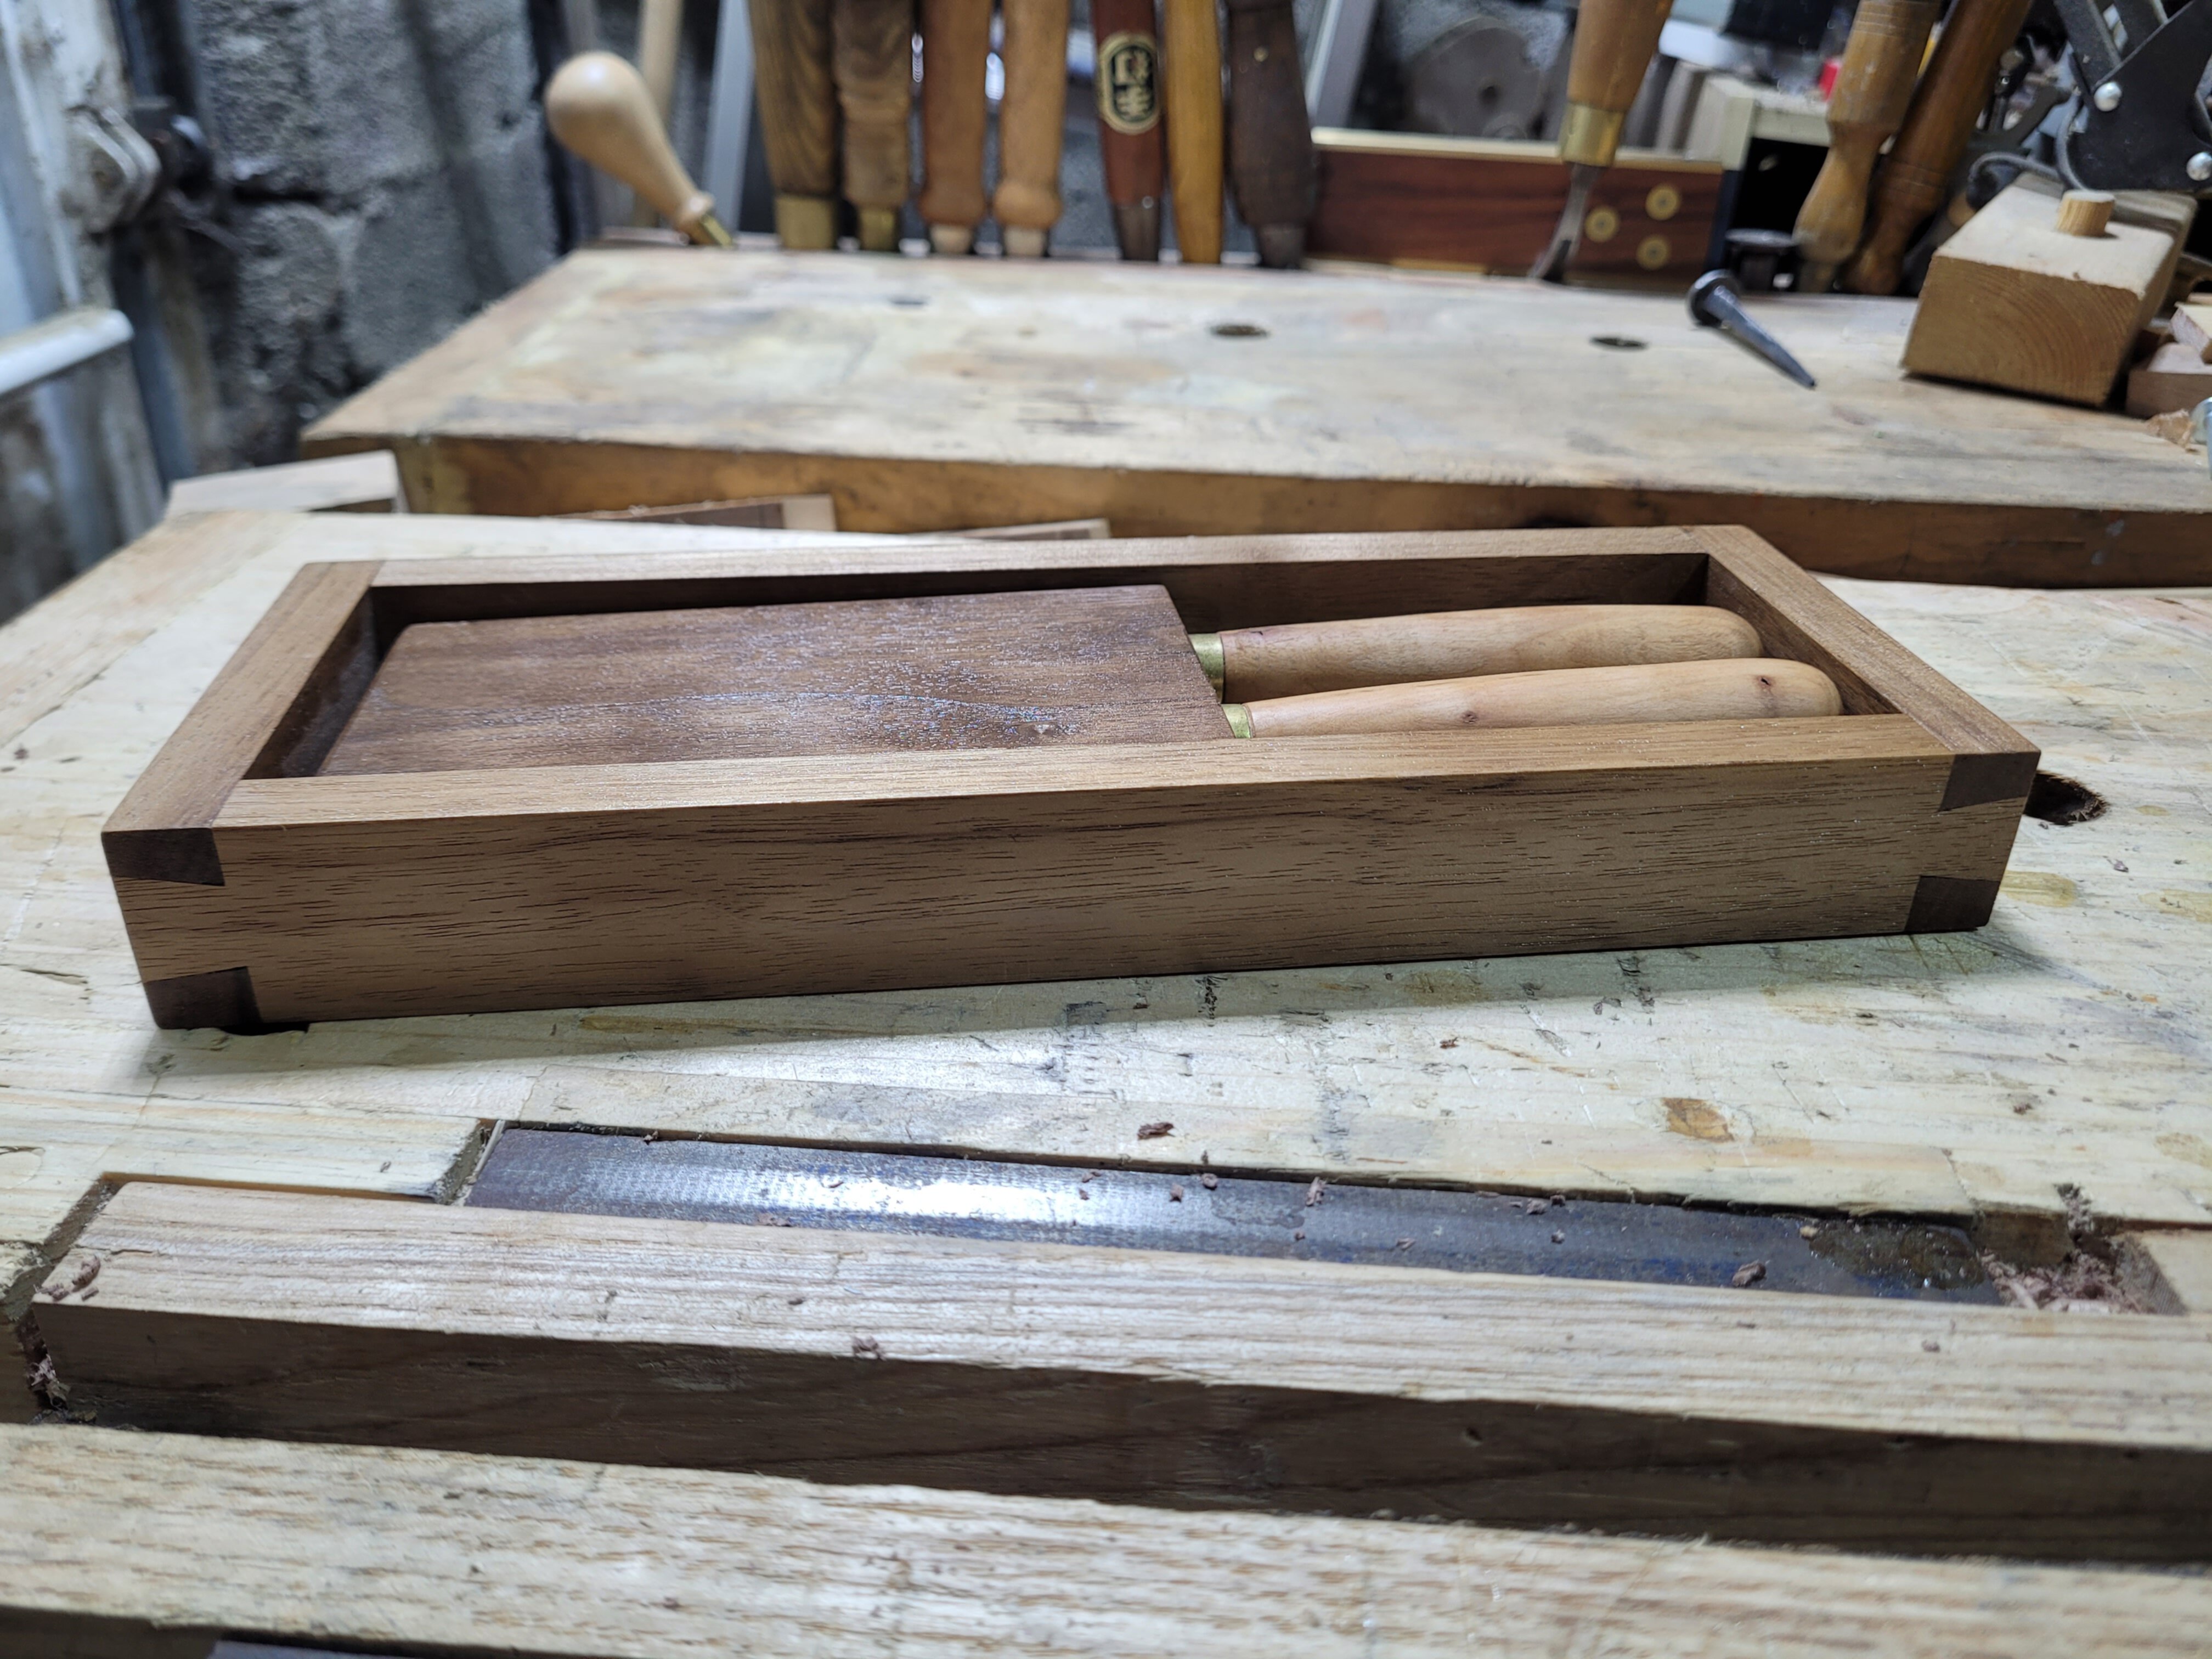
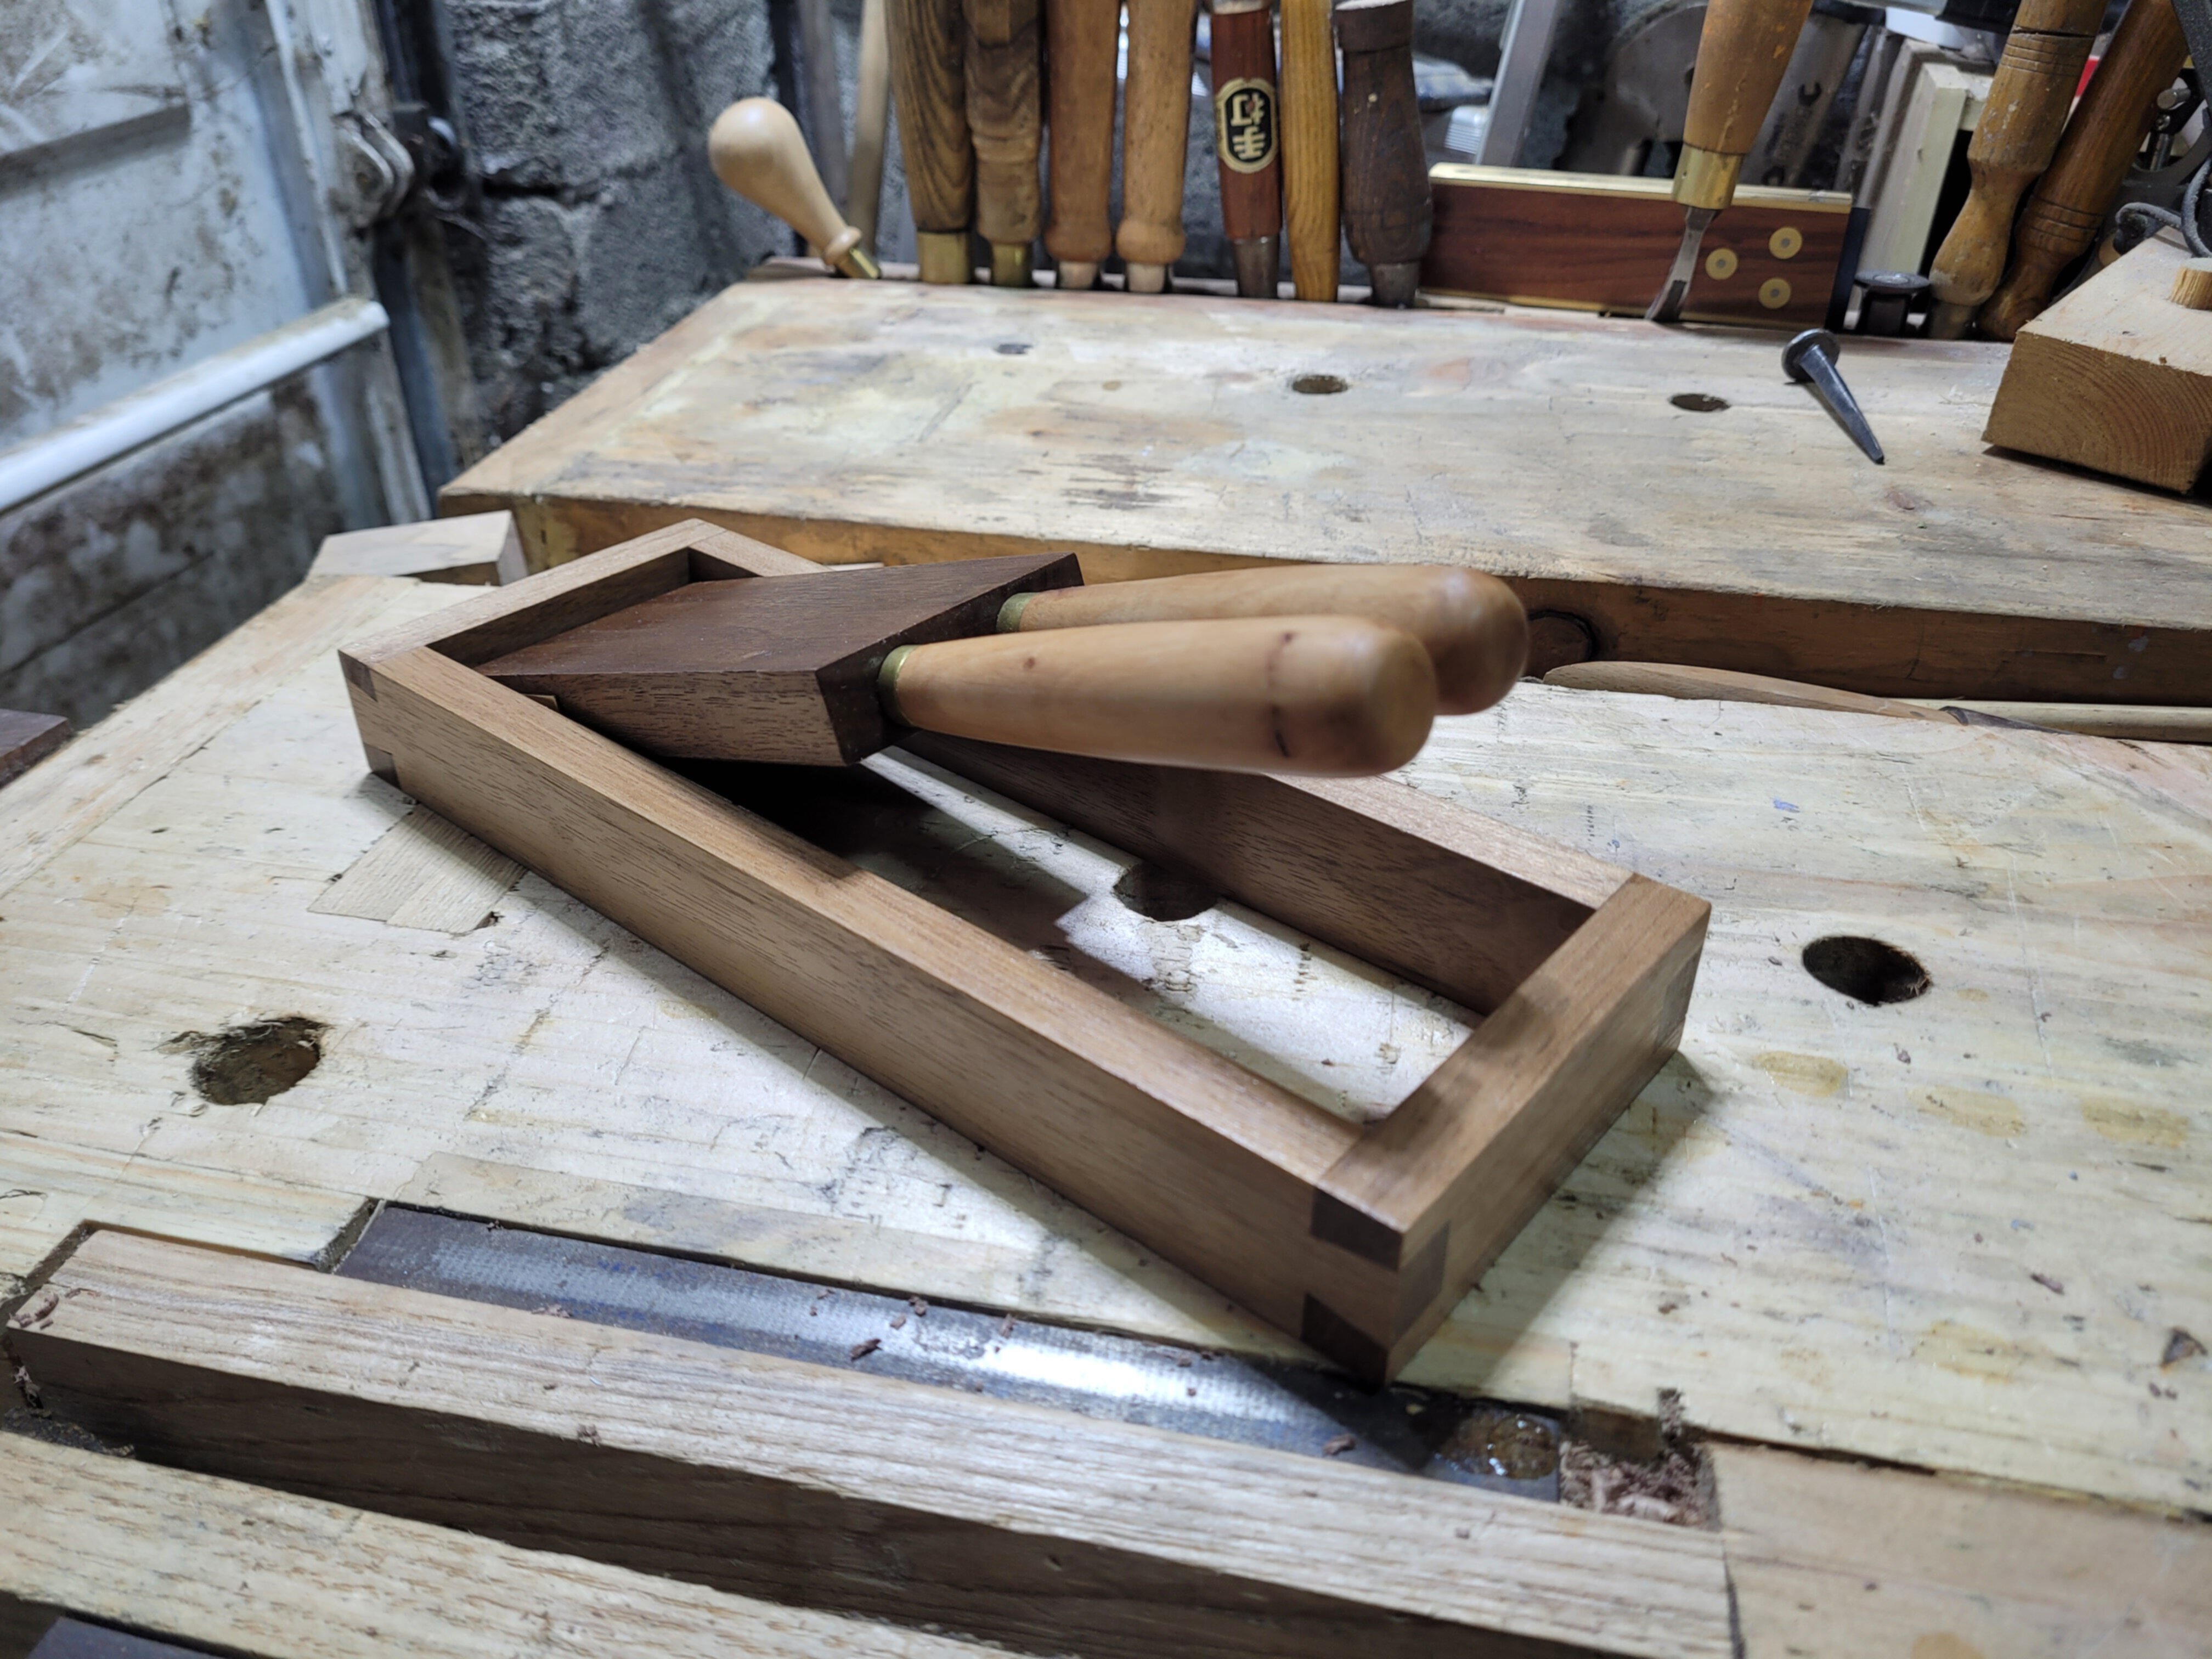
The final holder. I’m very happy with it’s looks and functionality.

In the open position. Easy to grab the chisel you want while working.
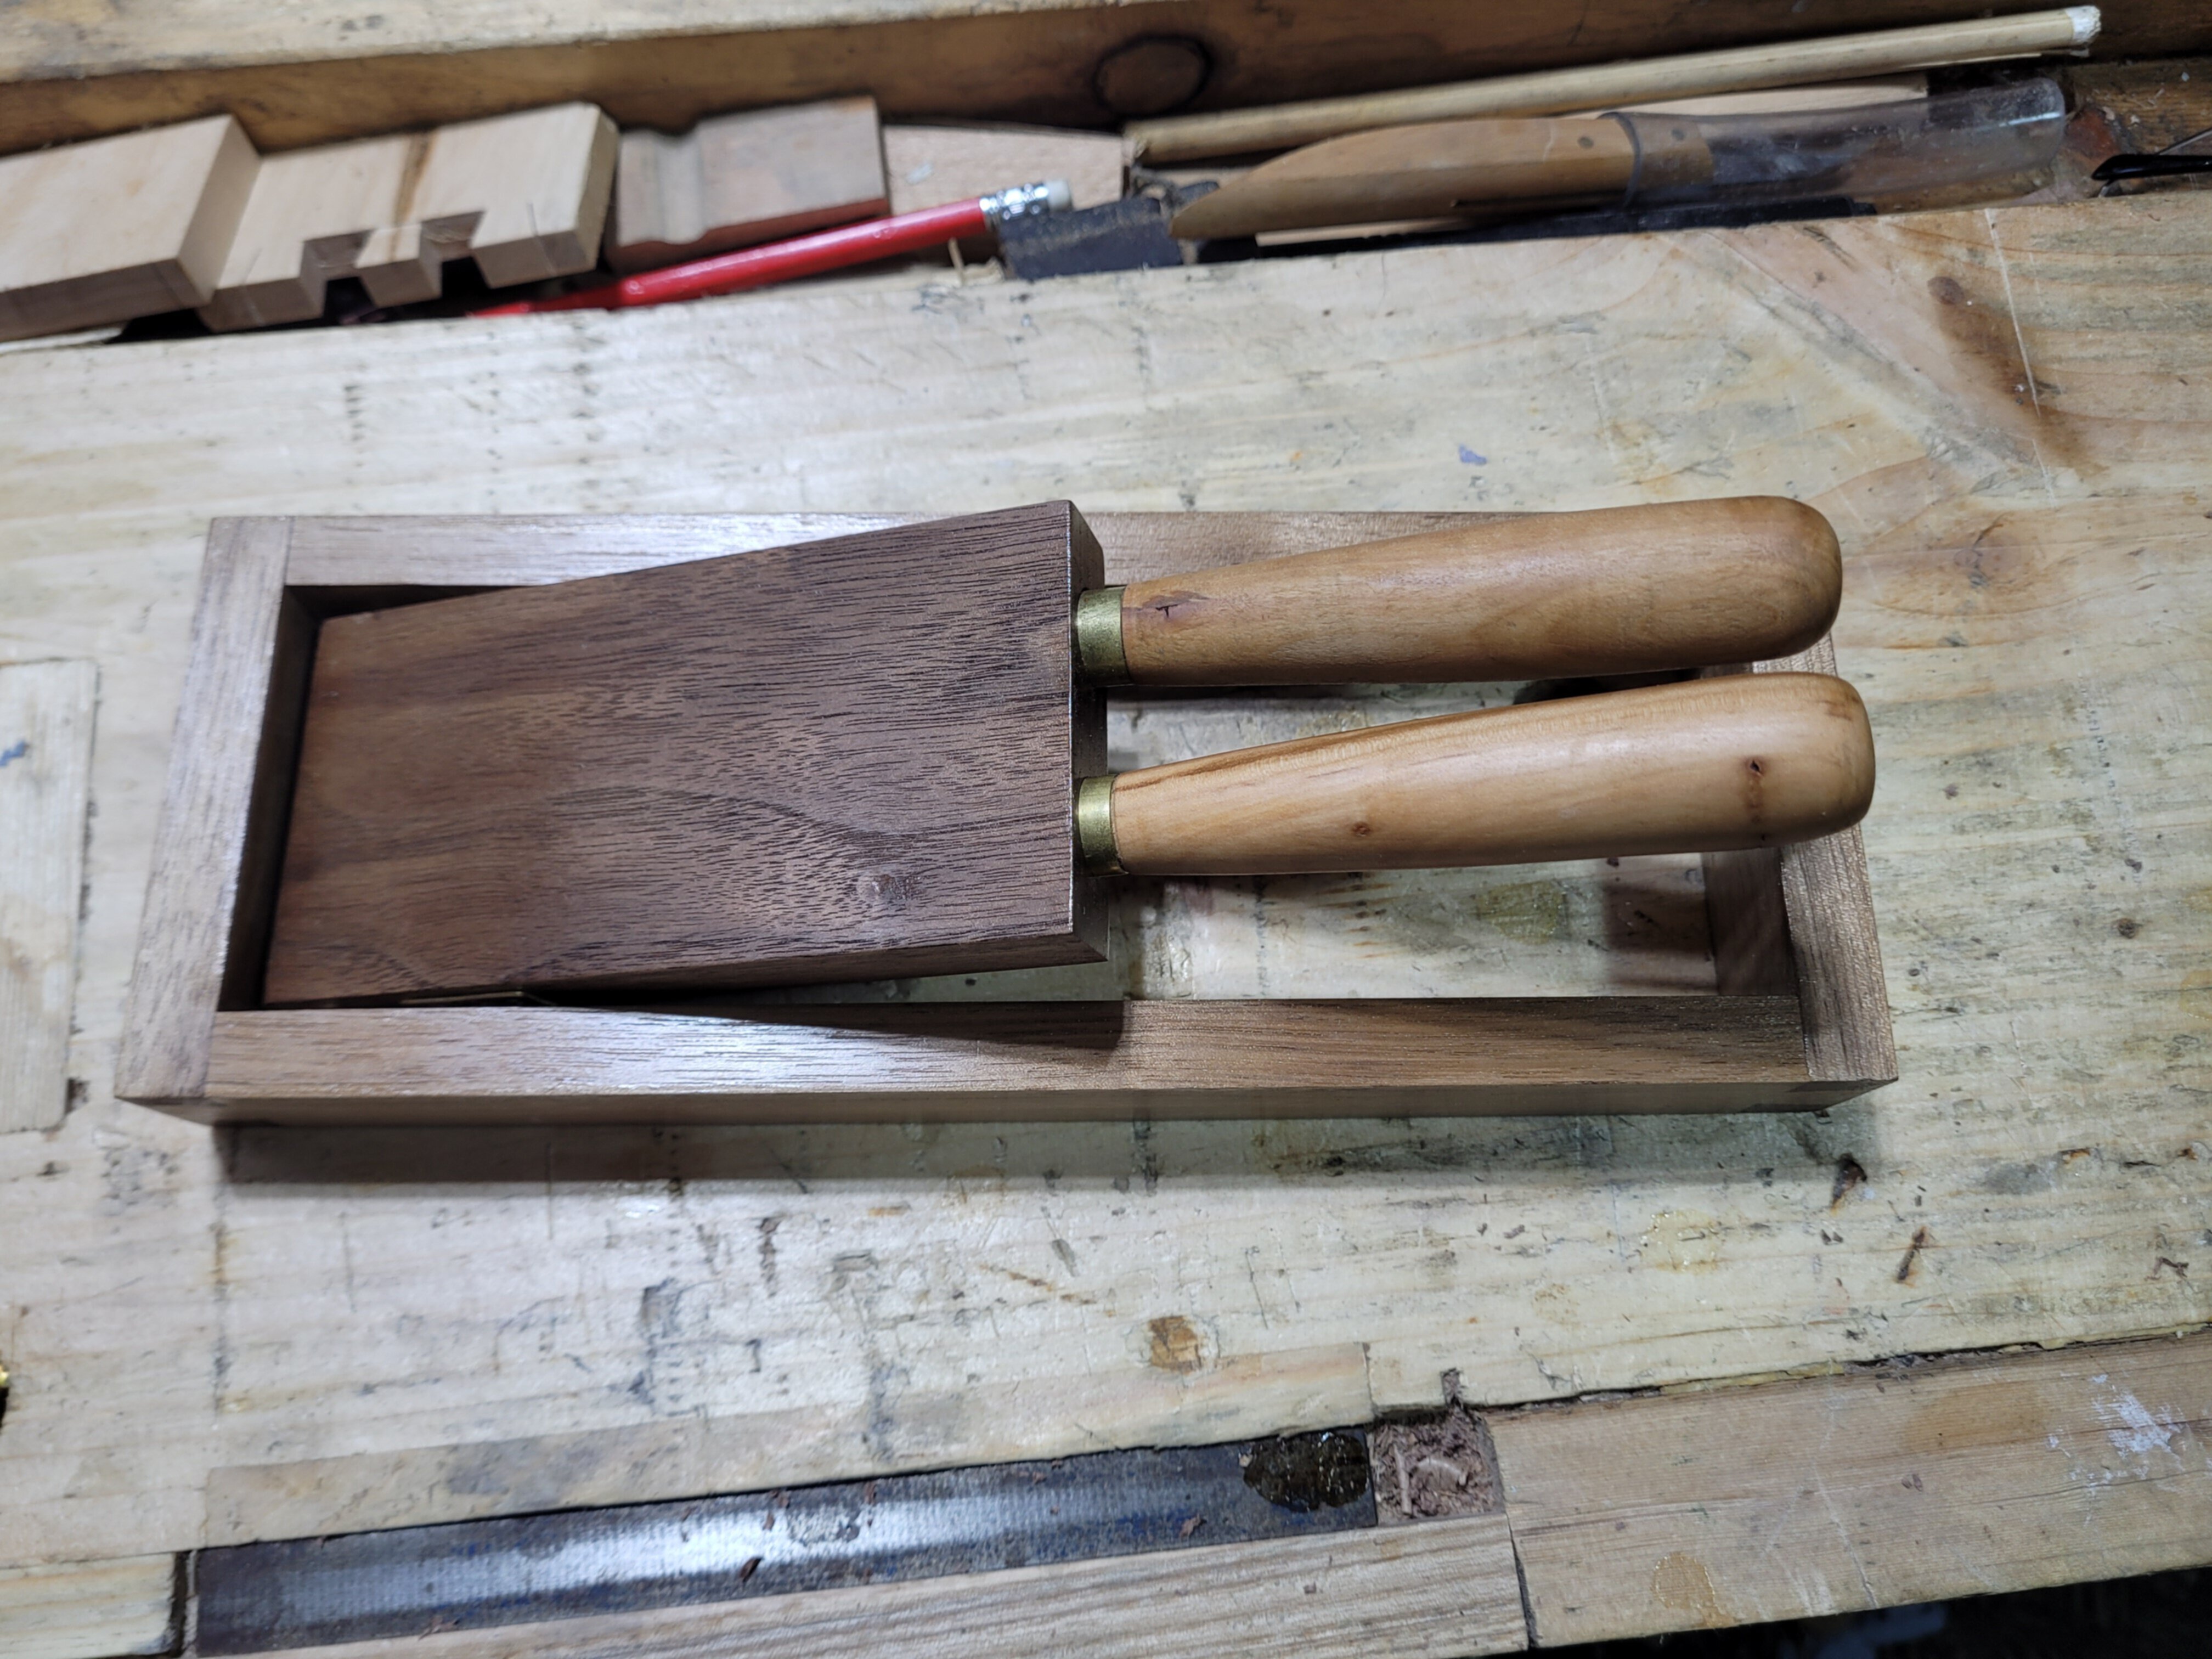
And it looks awful pretty on my bench.
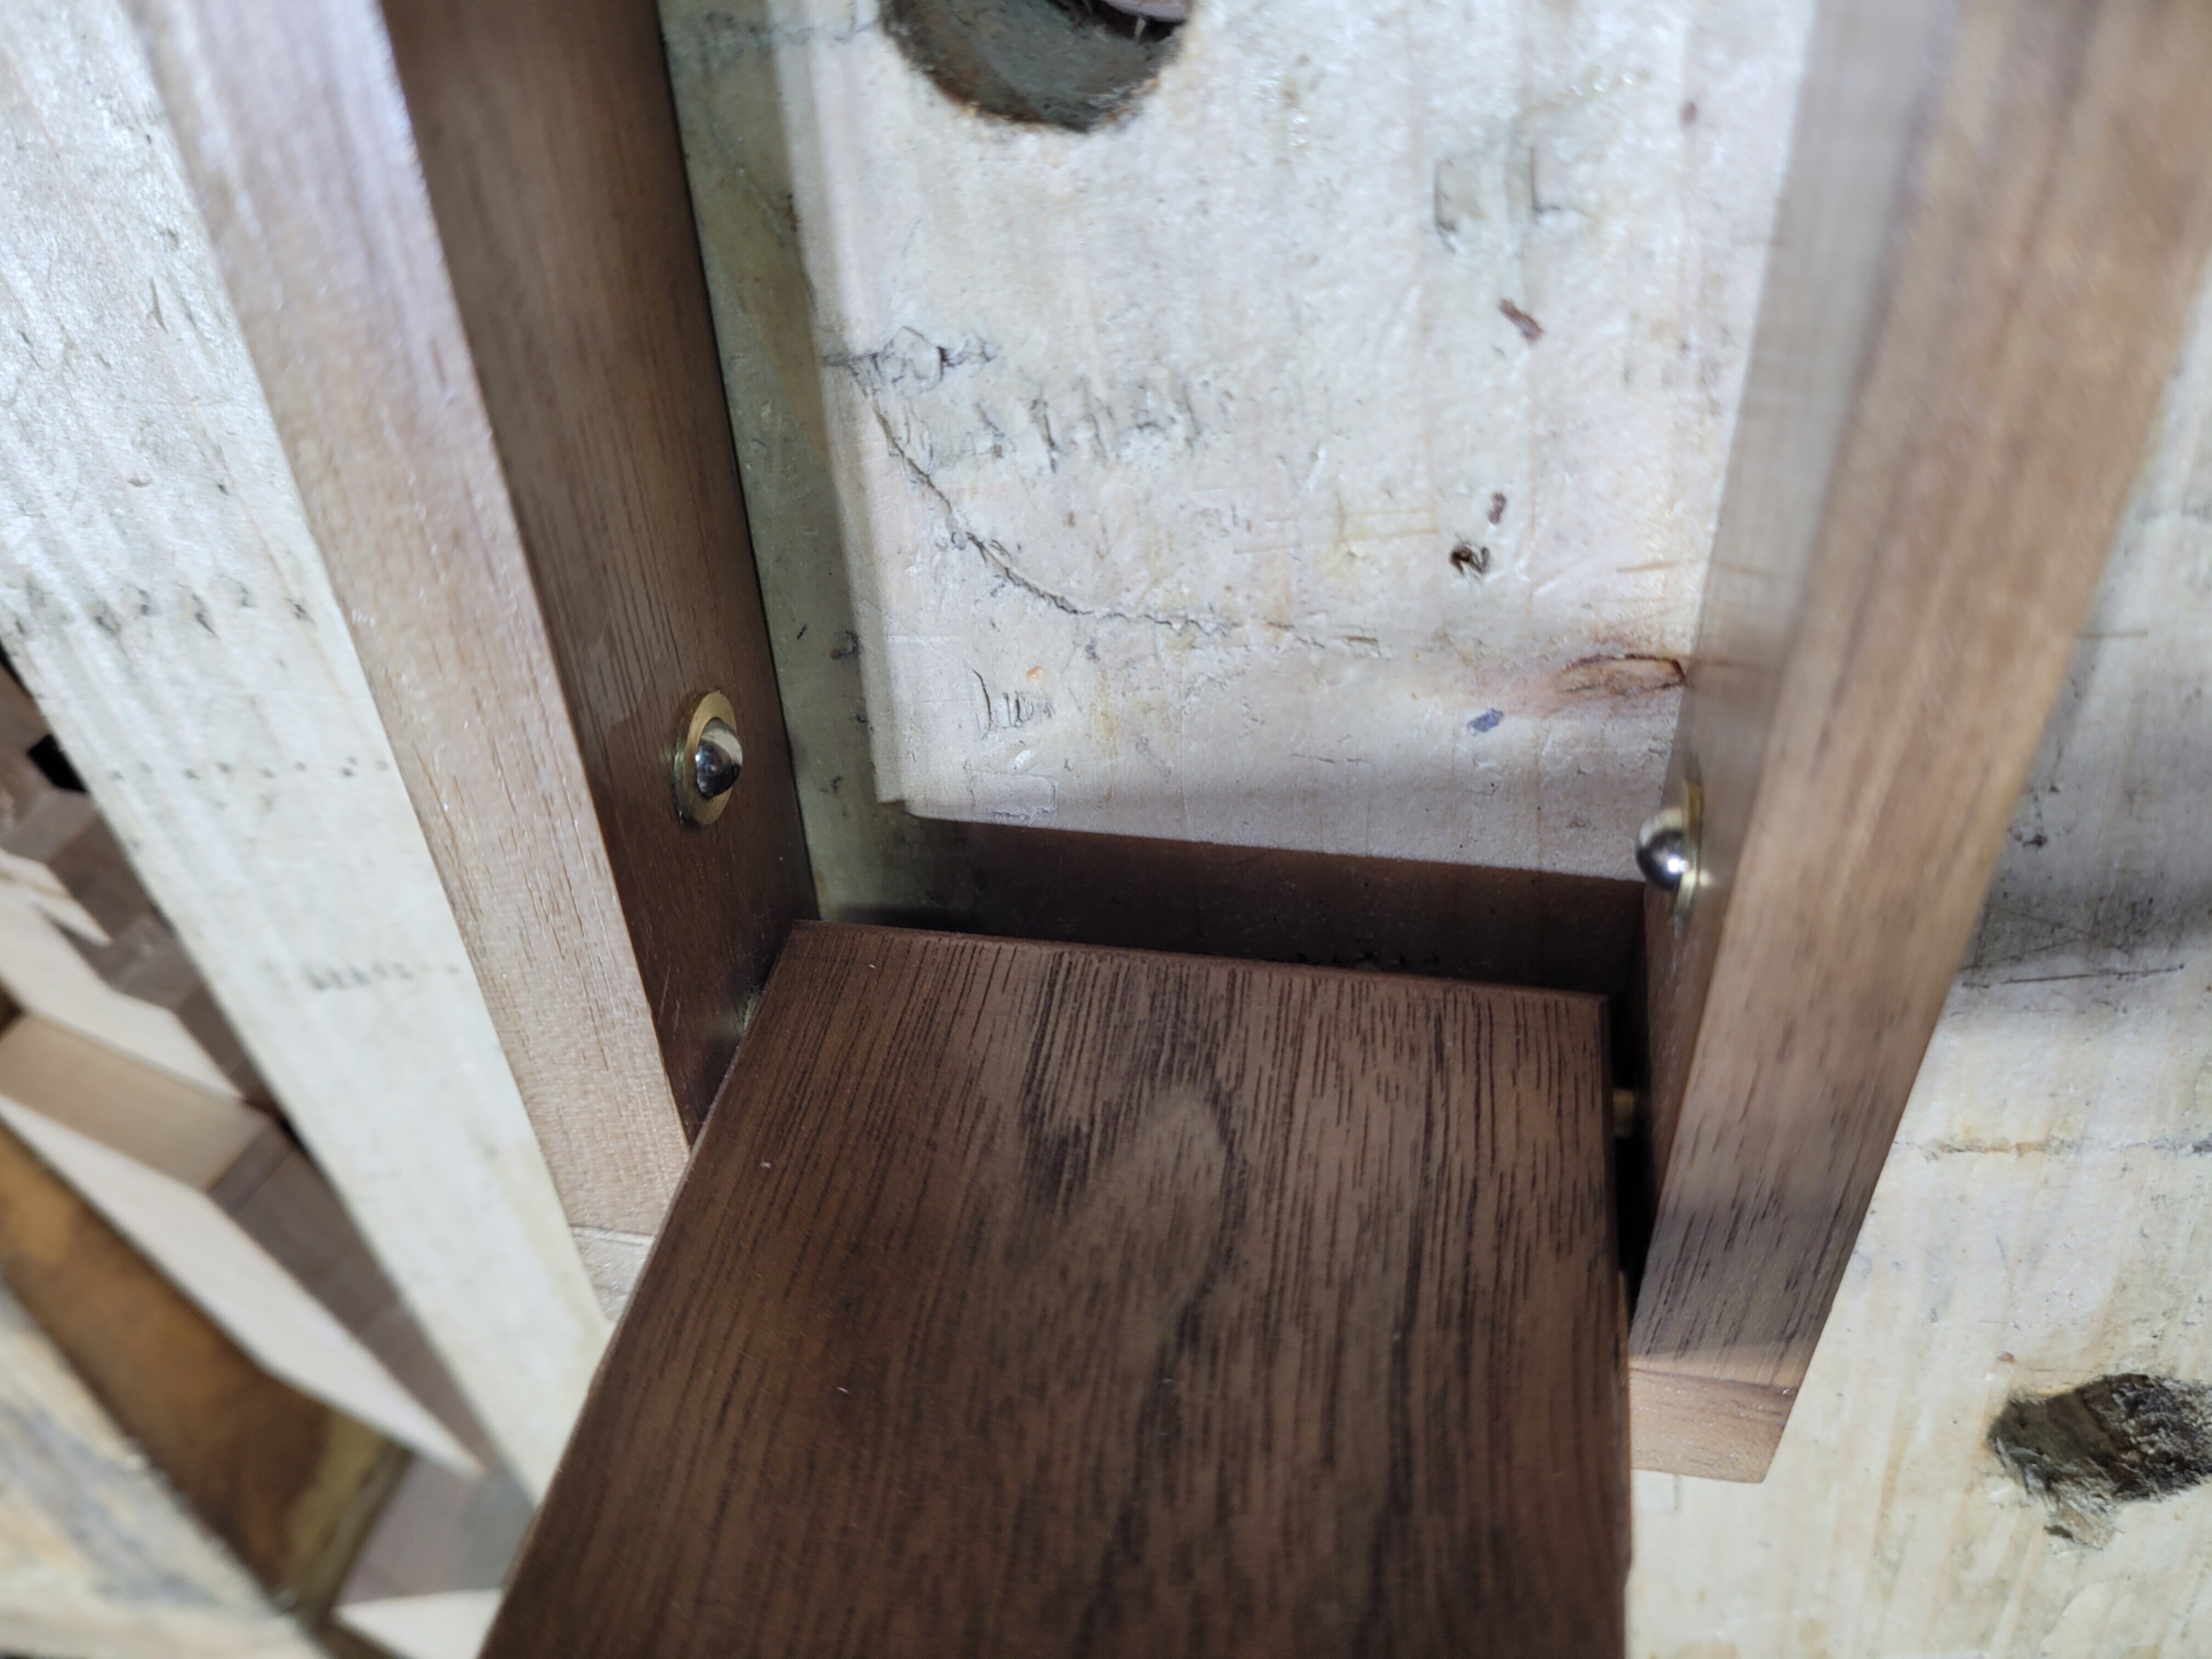
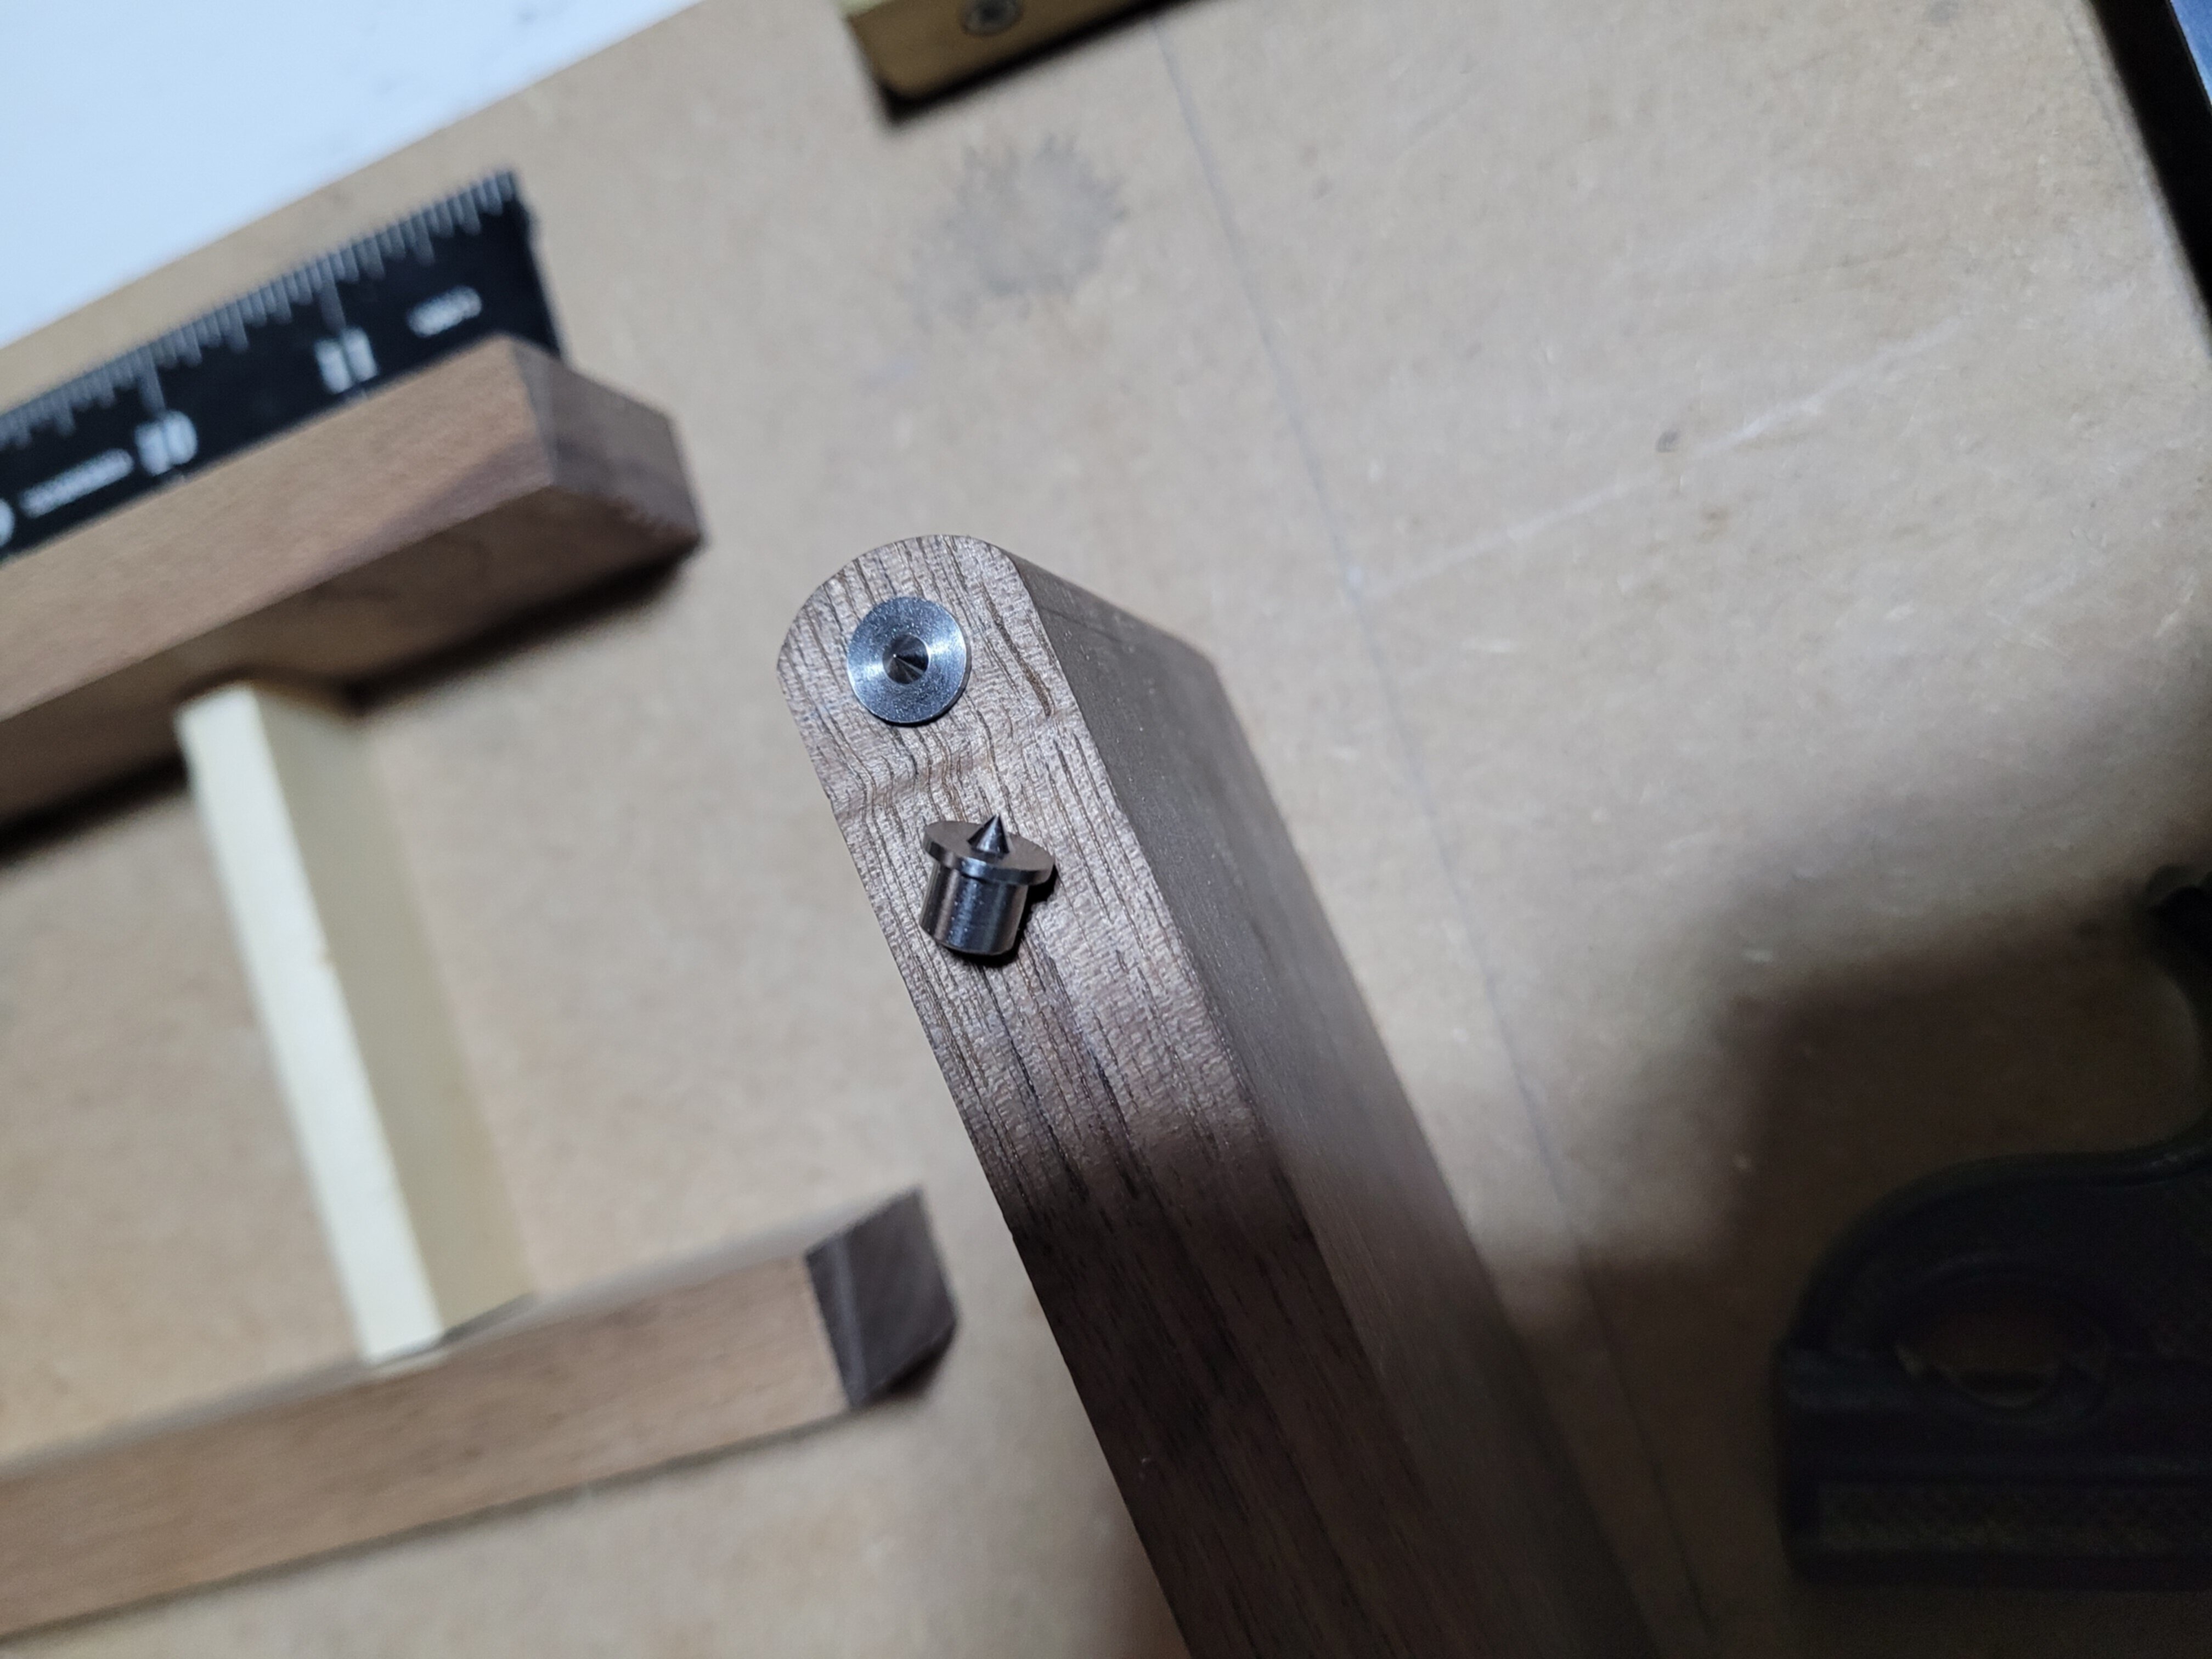
The ball catches that either hold the body up or lock it in place.
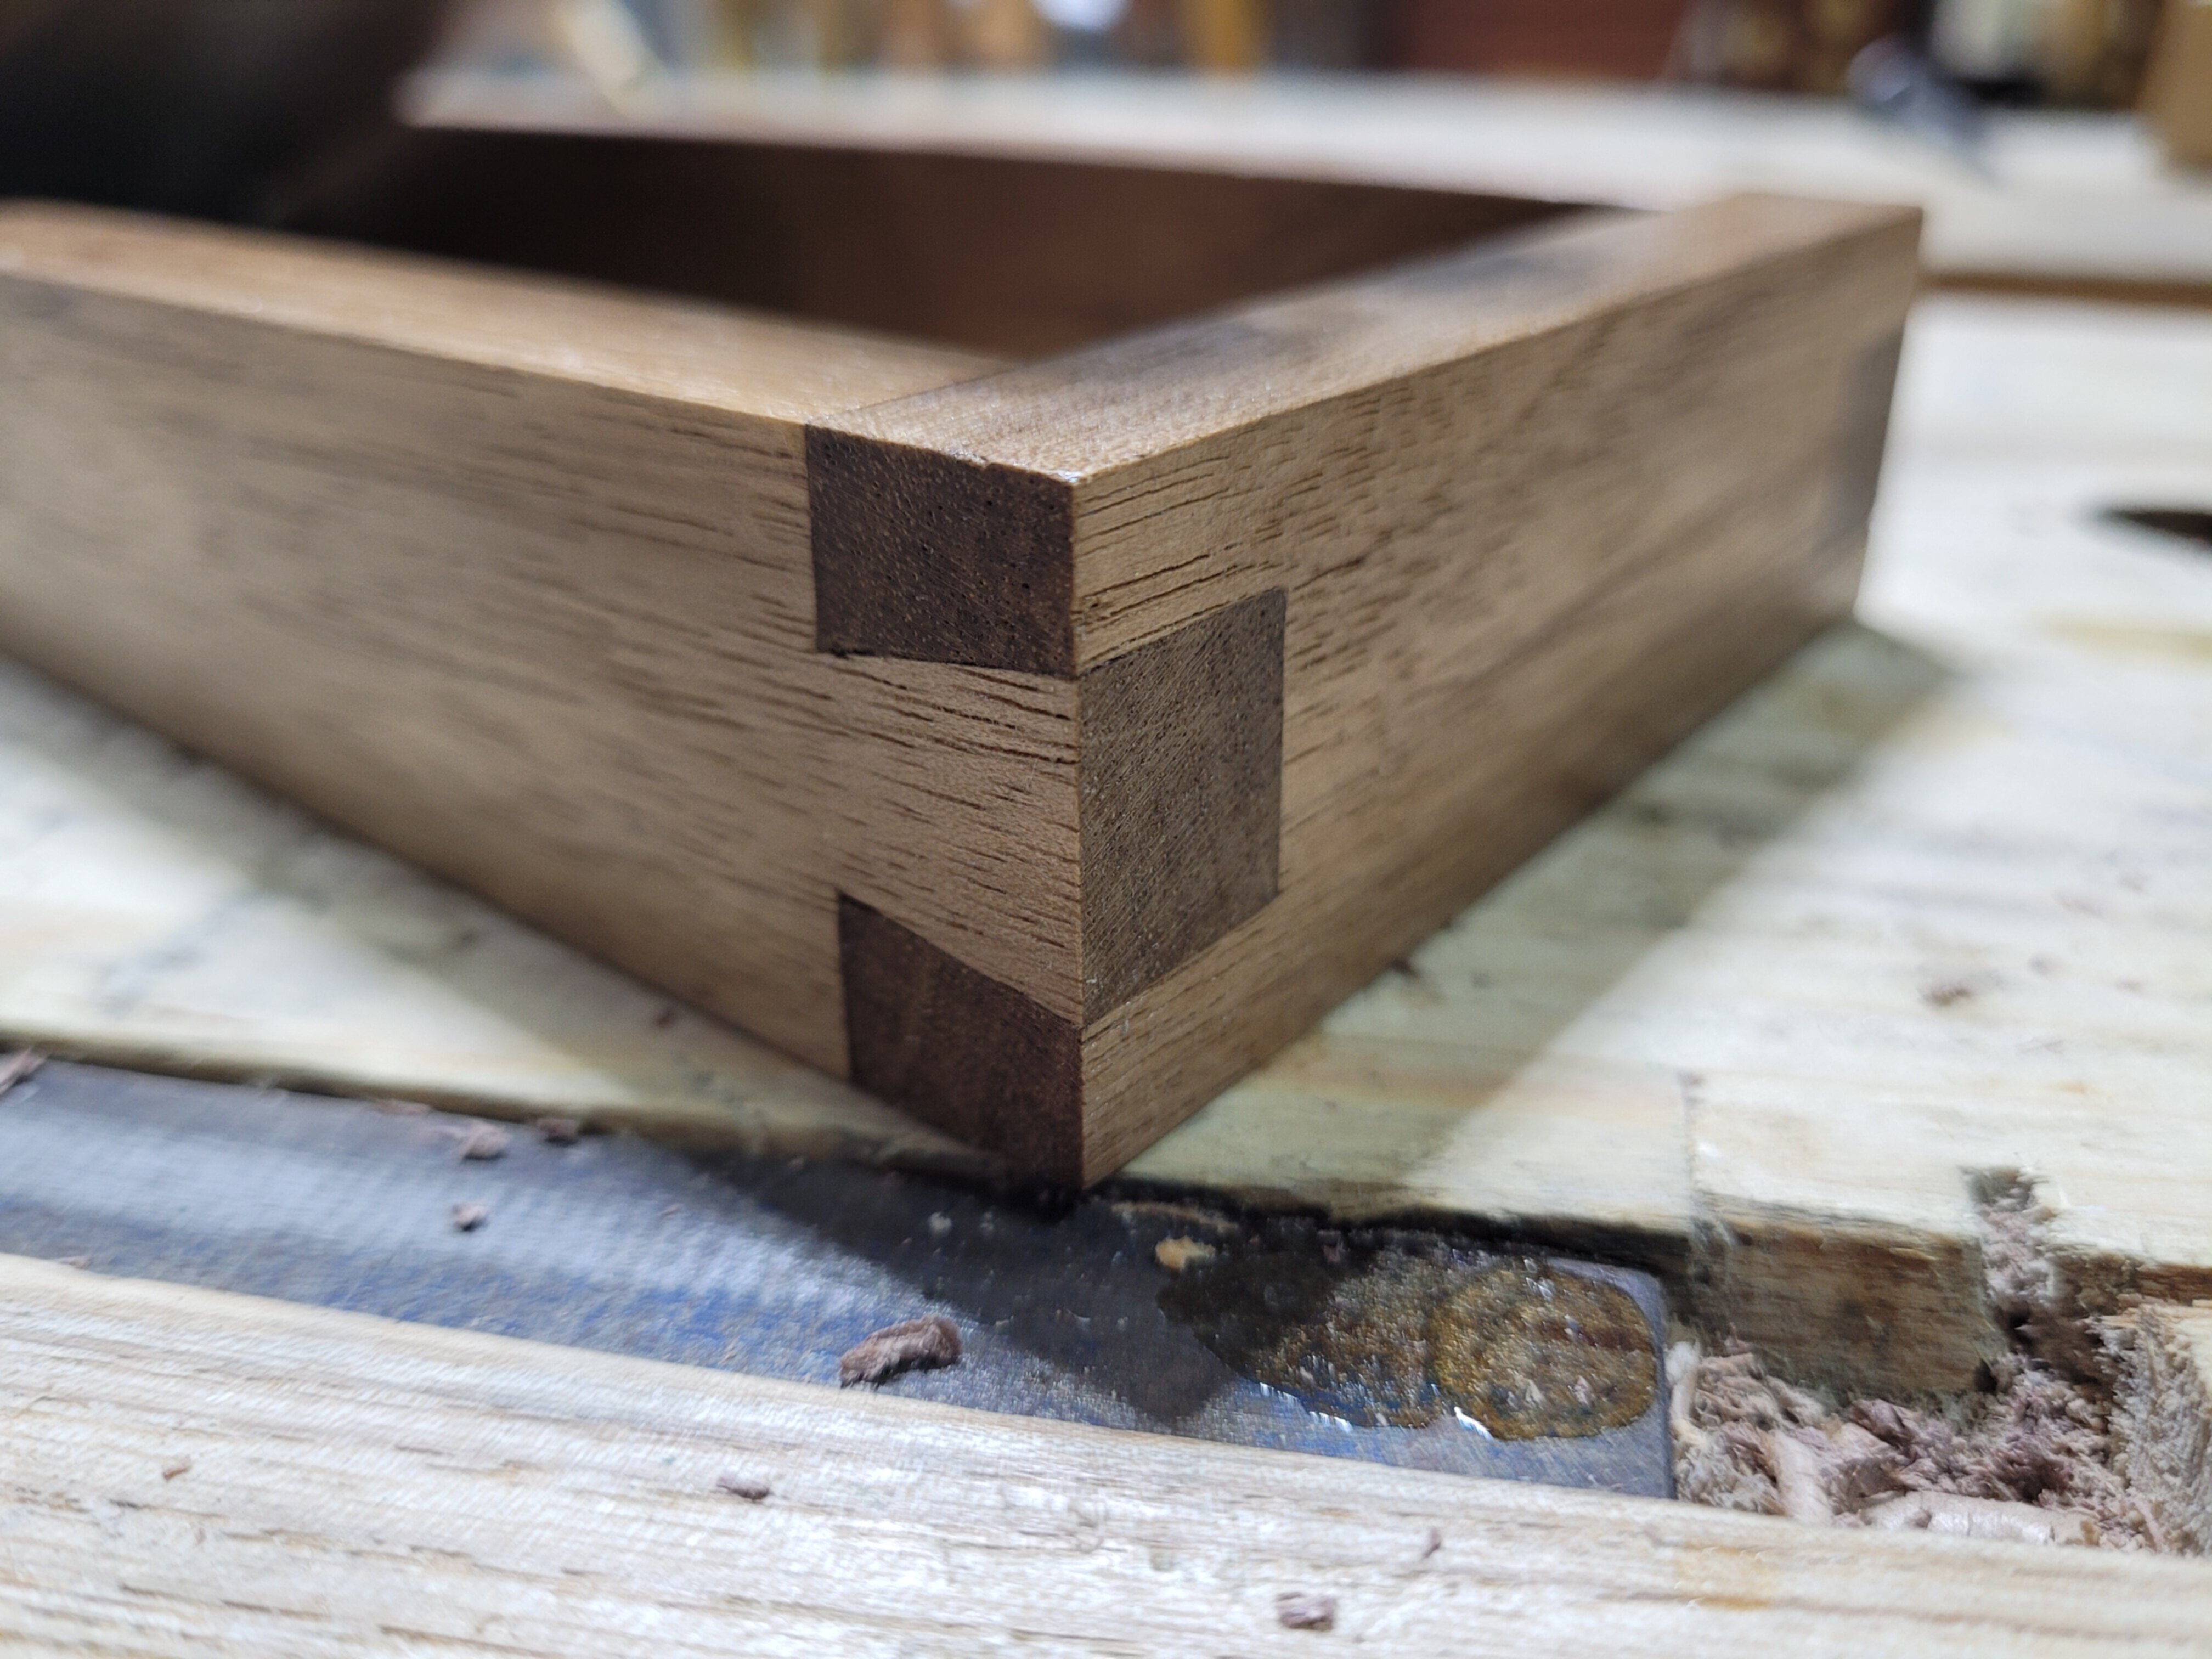
Very happy with the dovetails. Nothing wrong with a saw or square that get that result.
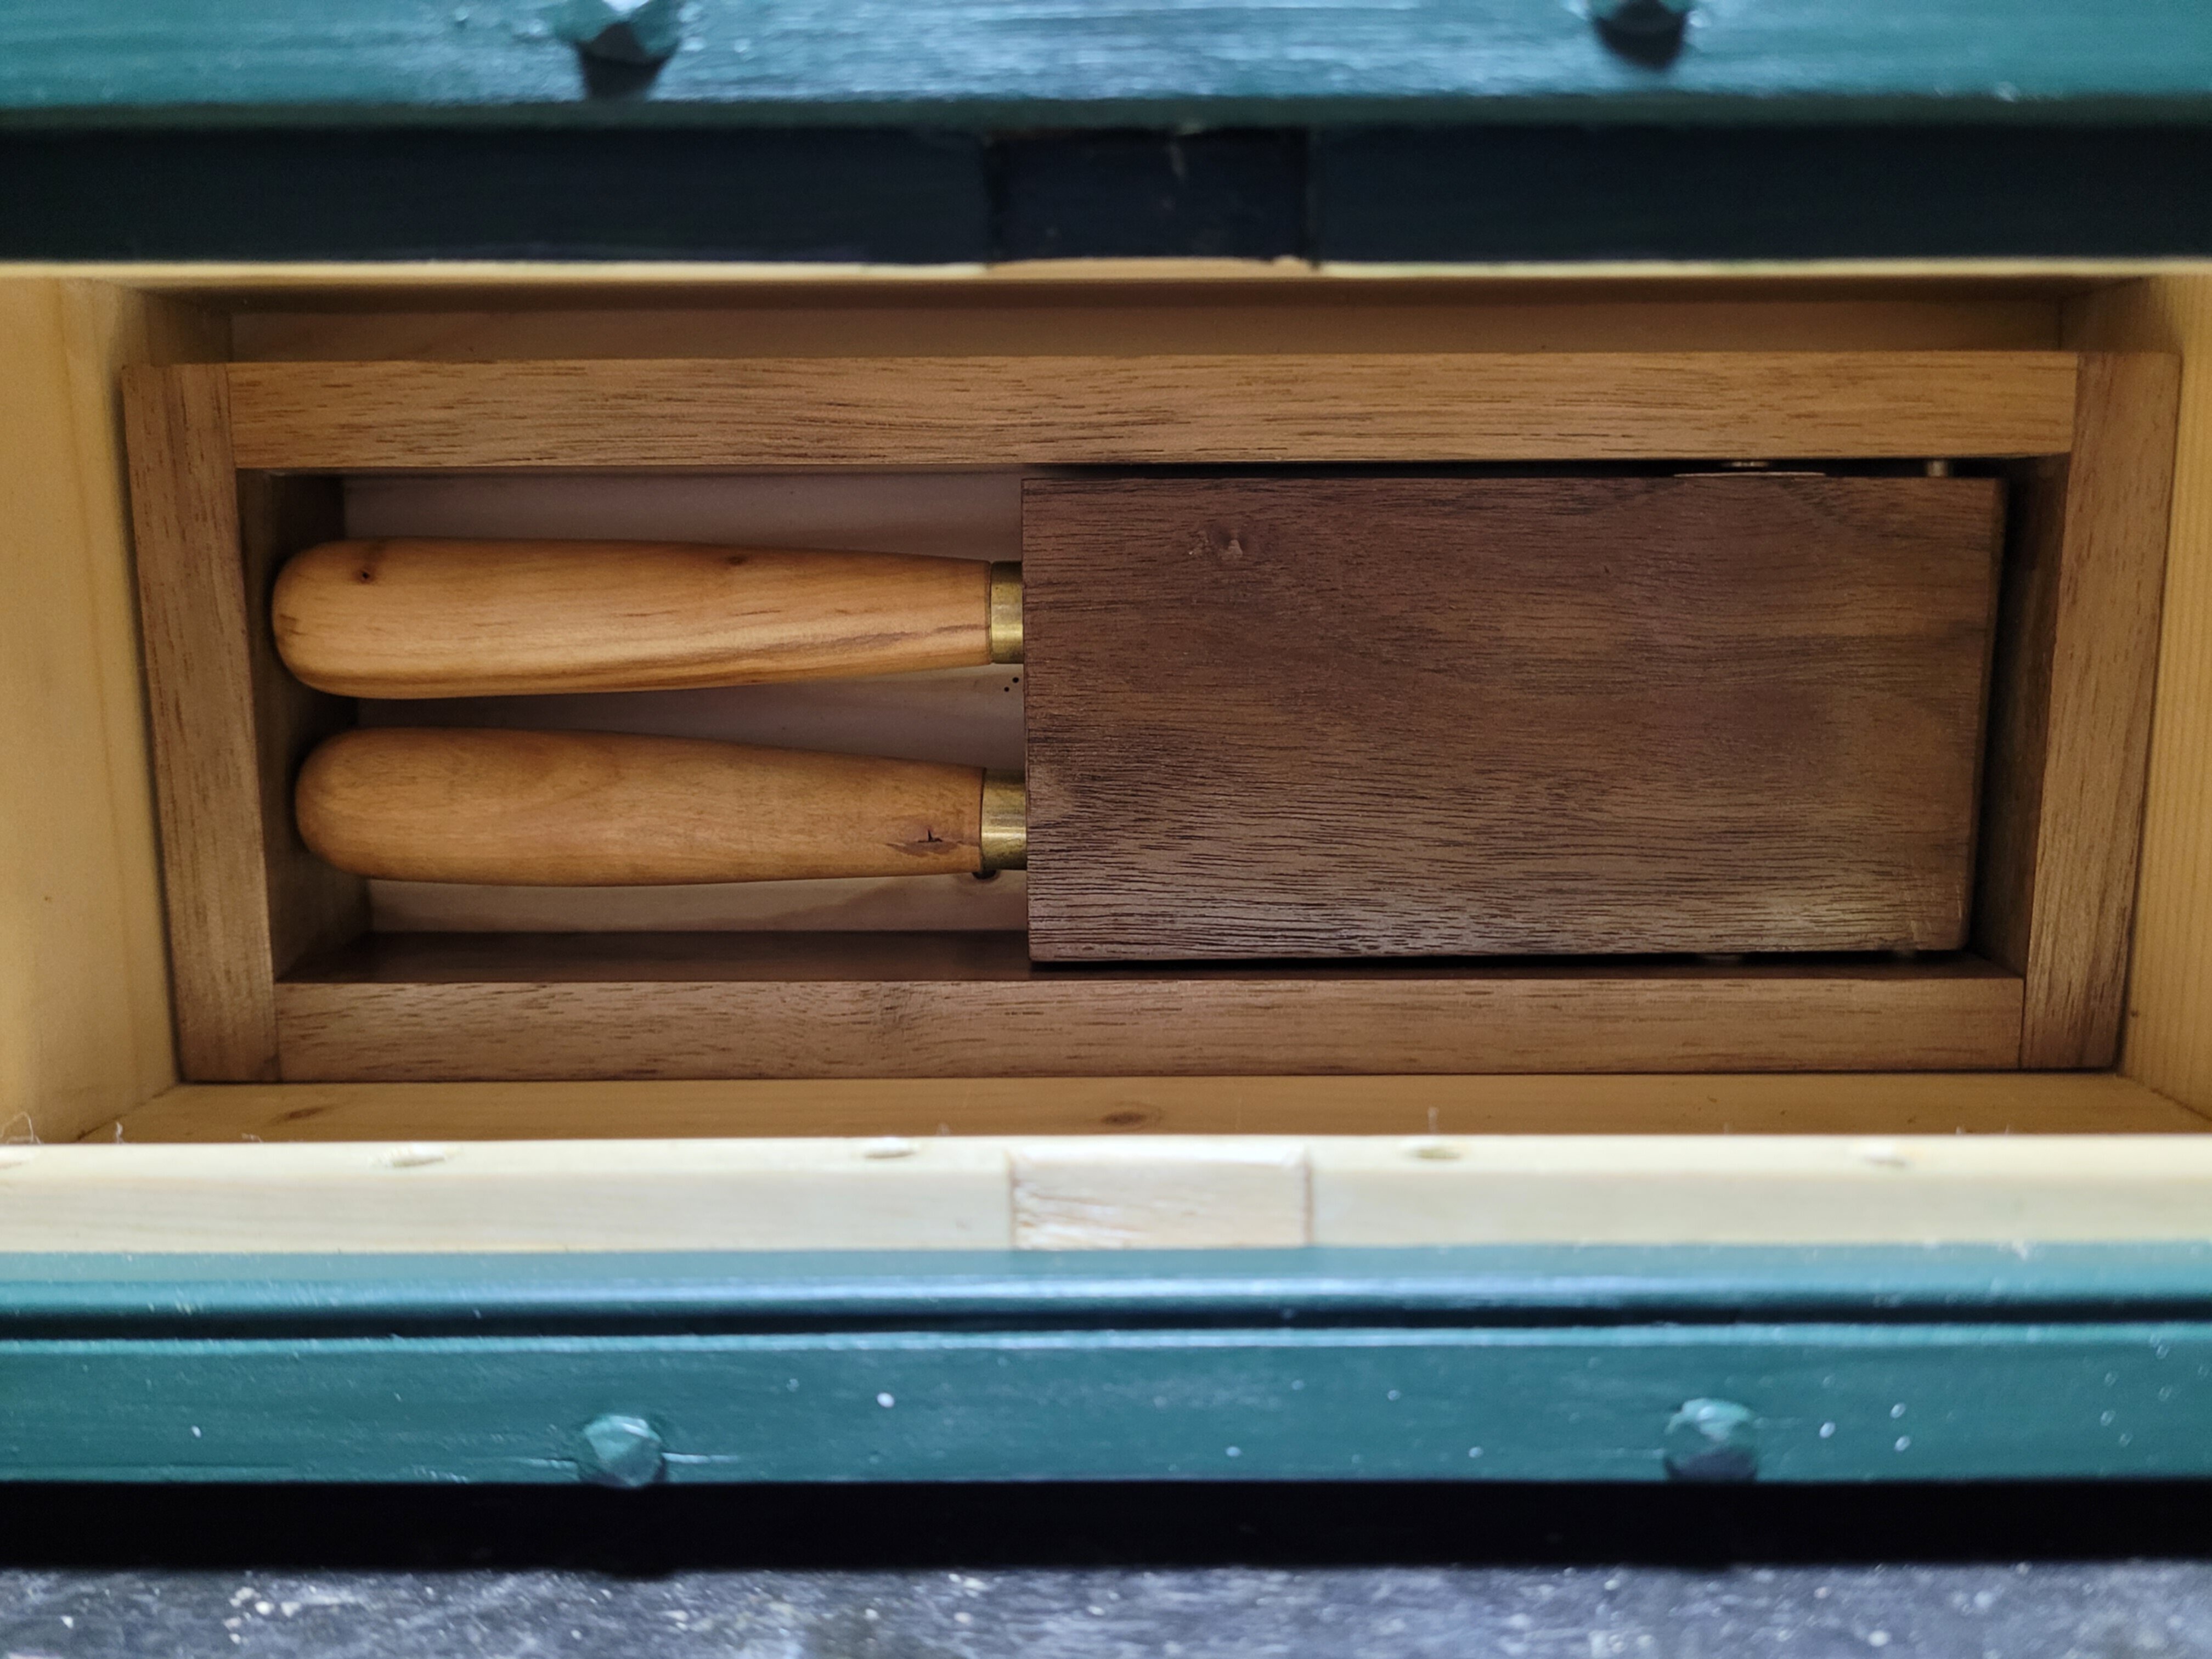
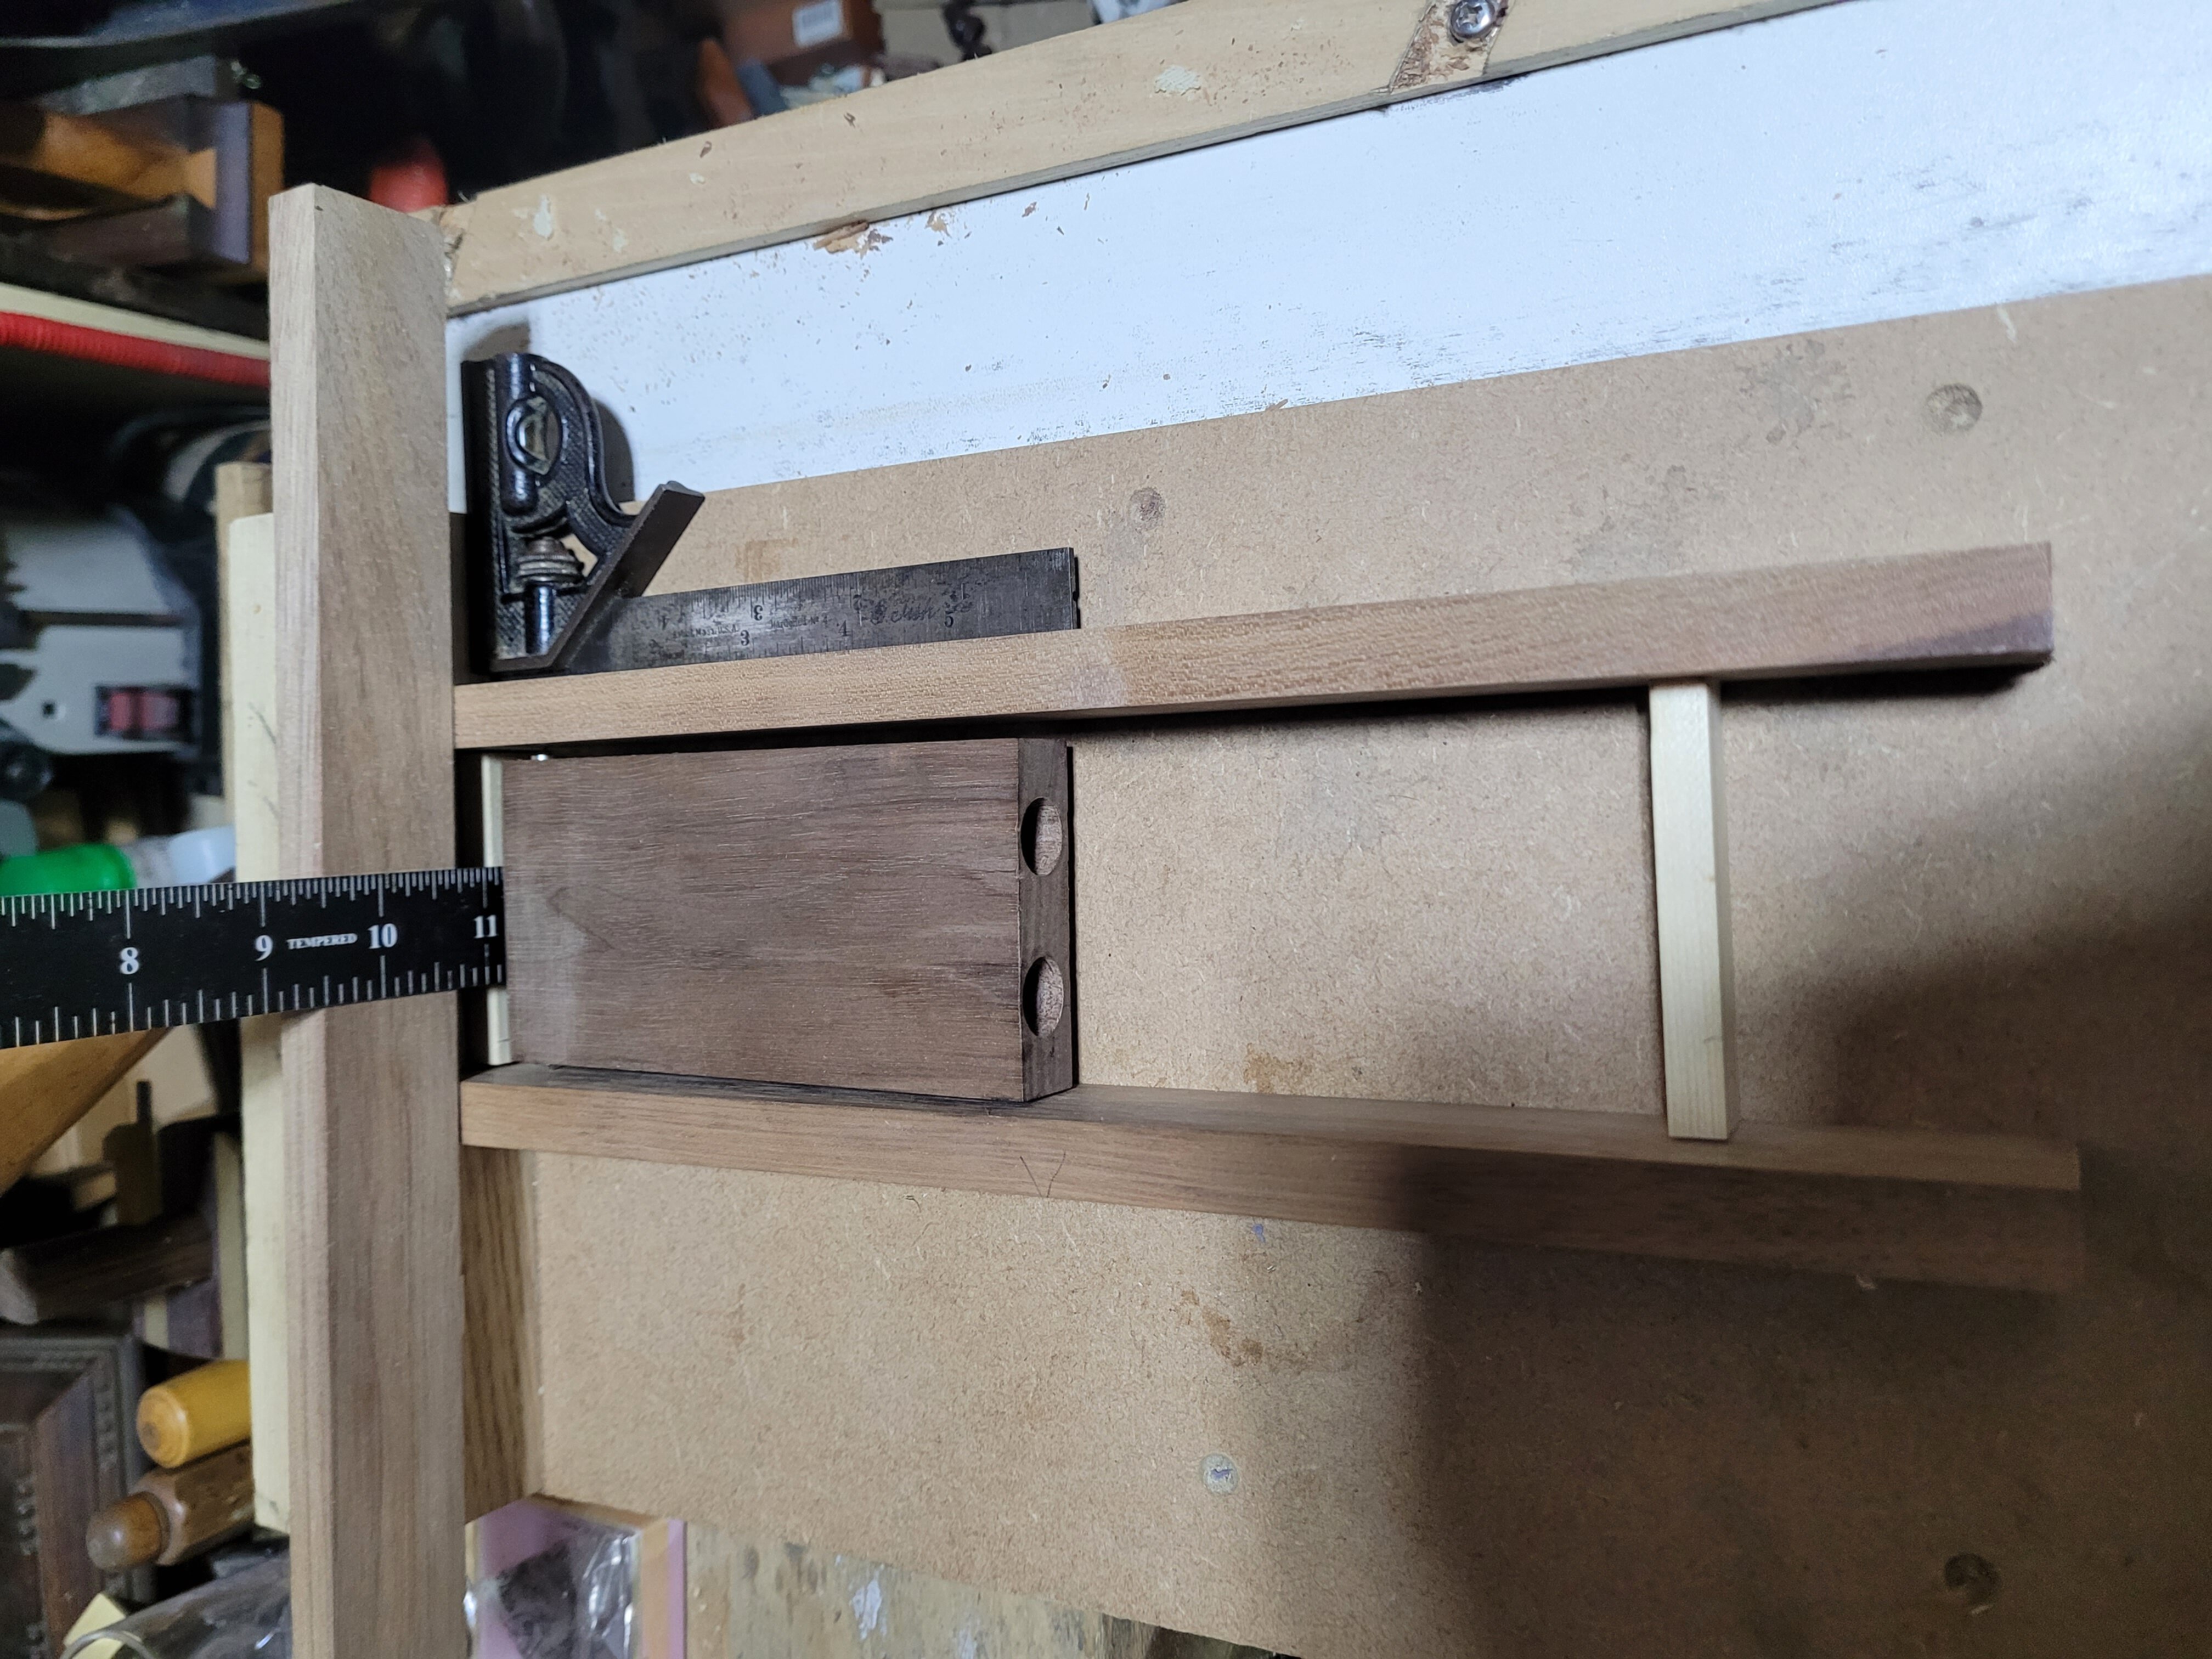
It it just fits into the lower compartment of the tool chest. The free vertical space is needed, as I have to tilt it to fit around the dust seals on the way in/out.
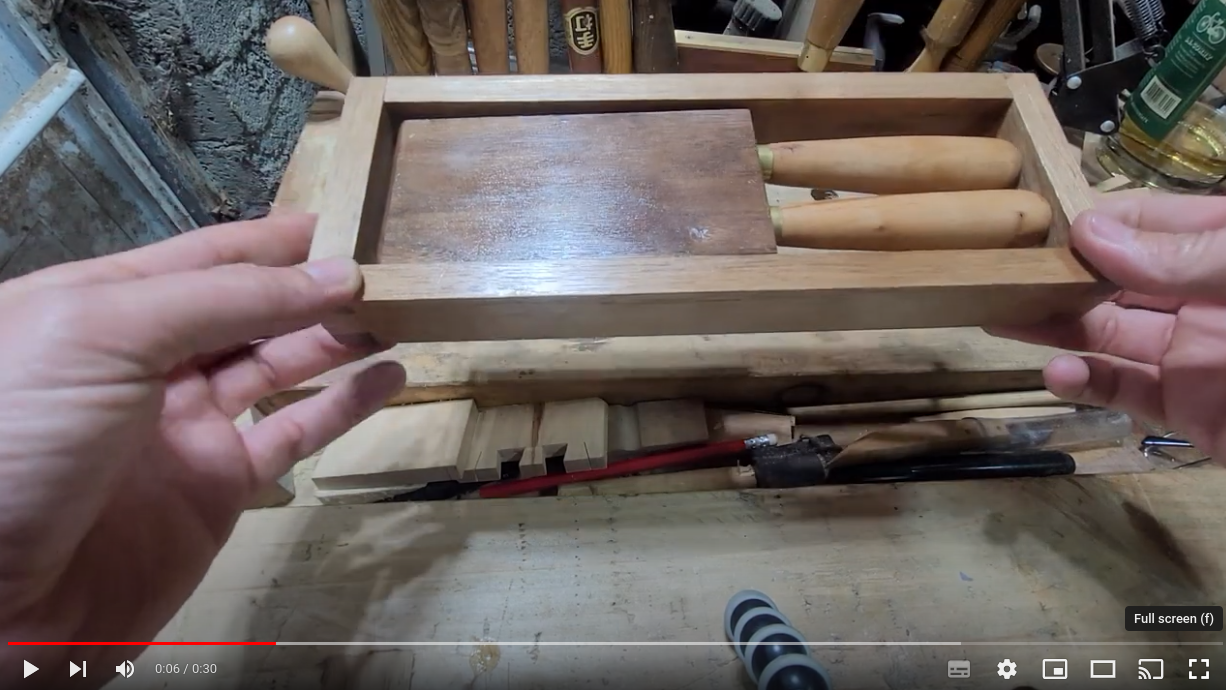
Finally here is a video of the holder. You can see how well it locks, while still opening easily.